


swallows
-
Content Count
138 -
Joined
-
Last visited
Content Type
Profiles
Forums
Calendar
Posts posted by swallows
-
-
Hi to all,
I'm searching for this kit, also a spare decal sheet would do :)
Thanks in advance.
Fabio
-
Is a Delta2 kit still available in Italy?
No, only second hand and not easy to find.
-
You have better version of Google :P I sent my message after 1 hour search.... Thanks!!!
Maybe :P
Here another good walkaround: http://www.ams.vr.it/PIER/AircWalkAround/M...%20pag%2001.htm
Good luck with the Delta kit!

-
-
If you are going to cut the flaps, do not forget to add a little section in the upper side that, when retracted, is hidden by the wing – fuselage fairing. It corresponds to the white part you see in the left main flap in the first photo of this page:
http://www.arcforums.com/forums/air/index....40&start=40
Enjoy your DC-4
Euge
Hi Euge,
thank you for your exhaustive reply, now I feel more comfortable B)
I'm enjoying very much my DC-4: it is a 20+ years old project I resurrected after the purchase of some resin engines from Dana Kopher AND after seeing your wonderful work in the DC-7C conversion I'm following since this spring, you've inspired me!
 .
.Fabio
-
Hi to all,
I'm converting an Heller DC-6 to a C-54 and after having moved the flap/aileron gap (green in the image below) a few mm closer to the fuselage I noticed that while it is parallel to the aircraft center line the panel lines on the flaps (red in the photo) are perpendicular to the trailing edge. This sounds 'strange' but probably I'm wrong, only I coundn't find a single image where I could see the answer

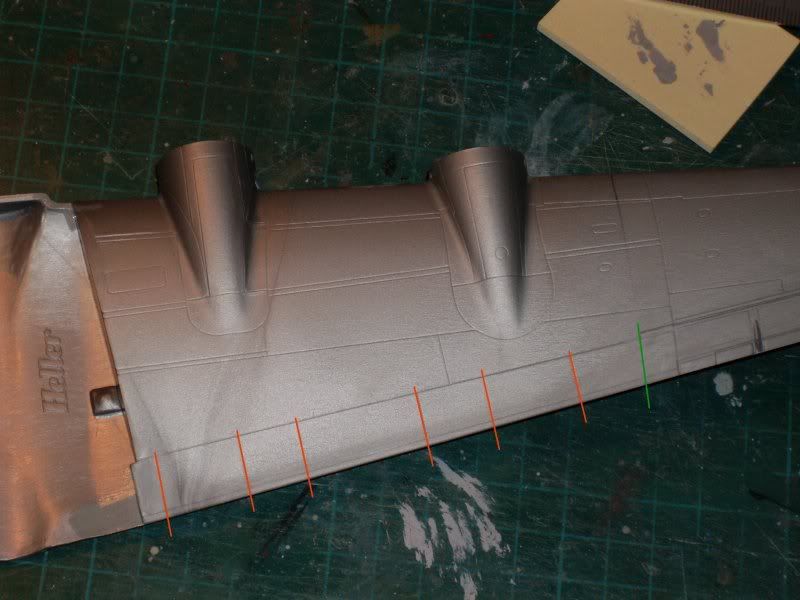
Anyone can help me, maybe there are structural drawings showing these panel lines...
Thanks a lot
Fabio
-
I think that there would be a market for the resin tanks as separate aftermarket items considering how bad the Italeri tanks are.
Could you explain better this statement please? I knew the Italeri MH-47E is not the best kit and the need to cut the smaller tanks makes it quite complicated but it's the first time I read that the bigger tanks are even wrong.
Just interested, since I planned to make the JASDF bird starting from the Revell HC3 boxing (same kit).
Thanks
Fabio
-
Hi Tony,
I received yesterday this kit: it comes in the same box as the regular S&M Viscount with a new cover pasted over the lid. Inside you get a complete Viscount kit+instructions+decals and these supplemental parts:
- wings, engines, undercarriage and some details cast in pressure injected gray resin: very good casting quality but very little detail, on par with the plastic parts
- new decal sheet, seems screen printed
- new instructions, quite succinct: there's only an exploded view stating the sections to be removed from the fuselage lenght, not even a three view...
At first sight I noted a very annoying semplification: the wheelwell is spread across the nacelles as if there was no engine inside :D
Looking at the very few images I could find there should be two separate wells per nacelle with a continuous skin covering the middle.
I can take some photos if you like.
I understand it is a very esoteric subject and in small scale, but given the price I'm not exceedingly happy with my purchase...
Cheers
Fabio
-
I would like to add a comment on cost....
Yes it is expensive, and the price of our kits continually worries me, but there is nothing you can do. It is not just the cost of producing the masters...
Yes Neil,
you are perfectly right about the costs of producing resin kits.
What *probably* Fang meant saying that this kit it's not worth $76 is that we shouldn't have already filled one forum page with mistakes and inaccuracies of the mentioned kit just after opening the box. This is a recurring story with Anigrand kits: casting quality can vary and we are more or less prepared to repair defects, but what is really annoying is they keep doing inaccurate masters. The lack of flat panels in the windscreen is a typical example: they did it before and is a time cutting measure on the part of who did the master. I can't believe it's poor research because you only have to look at ONE image to note this feature, it's only that they invest very little in the master creation.
If you add the fact that this kits come from China were labour costs are very low (and resin casting IS very labour intensive as you know) there is very little to justify this price apart from its uniqueness.
I actually have a few Anigrand kits, at least a dozen, but I quit buying them a few years ago because everytime I opened a new box I felt being cheated.

Fabio
-
Latest news from the German importer says the first release (KLM) will be available next May. Look at page 6: http://www.faller.de/xs_db/DOKUMENT_DB/www...oo_Neu_2010.pdf
Actually I don't believe it but at least the project is still going....
Fabio
-
.... It's tantalizing, but I'm concerned about structural integrity...
Once you obtained the right shape with paper you can soak the resulting duct in superglue from the outside: it will get considerably stronger and yet much thinner than copper tubing.
Fabio
-
The link to an image doesn't work. I'd like to see it because I was not aware that the Whirlwind had a torpedo bay. The HO4S-3 didn't. It carried a single torpedo on a pivoting pylon on the left side of the fuselage just ahead of the forward cabin window.
First of all thank you for the responses, my apologies for the long silence but i couldn't get to the web for a whole week...
The link to the image is here http://www.cybermodeler.net/aircraft/h-19/...iwm_has7_04.jpg
don't know what happened to the link once i posted the message, it seemed to work when editing
Also, perhaps I should say torpedo recess, not bay: as you can see the fuel tanks have been deepened and relocated to the side and the long channel is meant to accomodate a torpedo.
Now I would really like to see images or sketches of how the cabin was furnished in the hunter/killer role respectively and what looked like the underside of a sonar equipped Whirlwind.
-
Hello,
I've often read that this variant of the Whirlwind was designed to work in pairs in the AS role, more or less like the US Navy Grumman Avenger and Guardian hunter/killer. What I've never found out is if the airframes were permanently fitted for one role or another: now I see for the first time a clear image of the torpedo bay click! and there seem to be no hole in the ceiling for the sonar. This could well be the definitive answer but... who knows with restored airframes?
So, anyone could shed more light? Also, was the internal cabin equipment completely different in the two roles?
Thanks
Fabio
-
....I just had to change that component tonight!!! That is a hole cut in the door for the Safety Relief Valve.
Oh, well, so after all it is what appeared
And with the aircraft at rest is it a black hole or a black cover?
Thanks for your answer
fabio
-
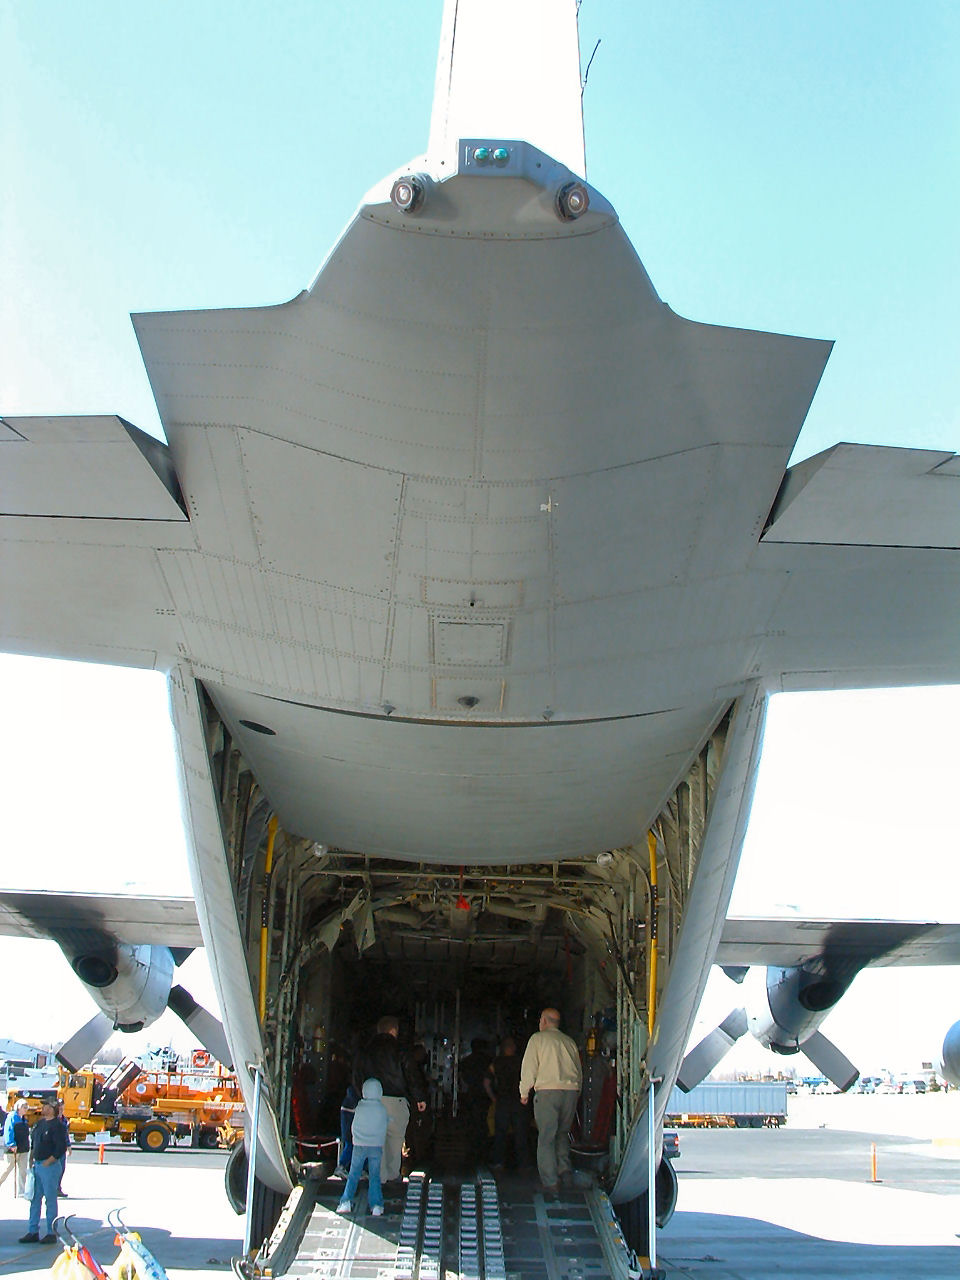
What is the round black circle in the upper corner of the rear cargo ramp? Is it a vent hole?
I searched a lot but I found no mention of this detail in walkarounds or cutaway drawings...
See this image for an example: LINK
Thanks for your help
Fabio
-
I saw these sets very briefly at Scale Model World in Telford recently. Alasdair McLean (Mr a2zee) explained that the raised strakes running along the length of the tail boom are not accurate for a British machine, hence his replacement part.
I think he has provided white metal undercarriage legs, not because there anything wrong with the kit parts but they are quite delicate and they might not take the weight of the added resin parts.
Ok, here is an explanation from the owner of ROTORcraft, see Heloman's post down the page:
http://www.scale-rotors.com/forum/topic/wh...ar910-tail-boom
By the way I finally purchased the HAS7 set and the quality is excellent, though I keep my opinion regarding the photoetched grilles.
-
You can get a Whirlwind conversion from Heritage too, he sells the parts individually (nose, floor, tail etc) depending on what you are building and which kit you are using.
Oh yes, I bought sometime ago their tropical nose for the HAR10, very adequate and at a bargain price.
If I remember well some previous comments of the man behind ROTORCRAFT, every HAS9 conversion done before didn't take into consideration the higher floor of the torpedo equipped Whirlwinds (HAS7 & HAS9). This would justify the all new products, though I still think that many parts are superfluous and have driven up the price without reason... :(
By the way, looking at the photos, the photoetched grilles seem to have a very coarse mesh making them quite useless.
Still I'd like to read the opinion of somebody who has exhamined this product in person before dismissing them, undoubtedly the choice of colour schemes is very interesting.
-
Hi,
I saw these new products on sale from the A2zee site:
http://www.a2zeemodels.co.uk/westland-whir...rade-4773-p.asp
http://www.a2zeemodels.co.uk/westland-whir...rade-4774-p.asp
I was wondering if someone on the forum has already bought them and can write any comments.
I'm quite puzzled by the need to include so many parts that are already in the Italeri kit (undercarriage, tail skid...) especially the resin crancked tail which is readily available in the current re-release: since the price is not cheap i wonder if I really need all this stuff to make an accurate model...
Fabio
-
Here some built products and my impressions for you to decide.
Very nice builds if I may say, especially the Super Sabre!
ITALERI (old ESCI) F-104 is a nice Starfighter for its age, landing gears are only for A-C and Canadian CF-104 models and wind shield is to long than it supposed to be, other than that it is beautiful. Decals are good but after market replacement suggested.I only wanted to add to what has already been said of the ESCI mould that it is by far the easiest to build: I remember a friend of mine (we were 13 y.o.) building AND painting one in ONE day with excellent results (without superglue and acrylics!). I built a pair in 2004 for a club display and had again maximum enjoyment, I only noticed that the wingtip tanks are notably undersized: if you put alongside an Hasegawa or Revell kit you can see a big difference.
Regards
Fabio
-
Hi,
I have the same problem: stating the paint manufacturer's specs is fine but of little use for us modellers... Anyone has built the kit and can give an advice on suitable metallics?
TIA
Fabio
-
Now speaking about the beautiful Italian Kits F-86K conversion set, it was reissued lately but is reported sold out again.
......
What's in the box of this set reissue:
V.P.
Hi HomeBe,
thank you for your effort, looking at the set however two questions spring to my mind:
1) the instructions say that you can build an aircraft from the initial production batch (with small -D wings) though on the fuselage side there is a big scoop intake each side, which (if I'm not mistaken) identifies the ex-Armée de l'Air airframes lately acquired by the Italian Air Force: so if you want to make an early -K you have to remove these scoops and carve yourself the underlying intake.
2) the kit also provides additional parts to make a late -K in the form of wingtips extensions. Ok, but the late -K wings where identical to the F-40 ones so they should also have the 6-3 chord extension which you can get only with some additional surgery (not everyone's fun) or buying an Hasegawa JASDF boxing only for the wings.
Just my thoughts...
Bye
Fabio
-
Model Alliance sheet (MA489035) for the Airfix 1:48 Lynx. Did I miss this announcement or is this a typo?
If it's not a typo we're all missing this announcement... But who knows?
Anyway it's not unusual for them to release decals where there's not a kit readily available (Squirrel, A109 Power, Sentinel R1 come to my mind). Perhaps they have a good customer base of pure decal collectors...

Fabio
-
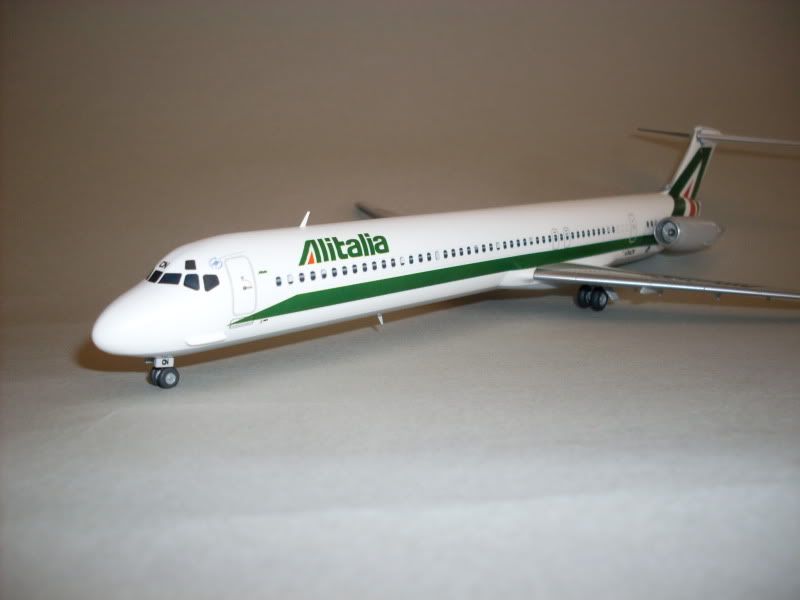
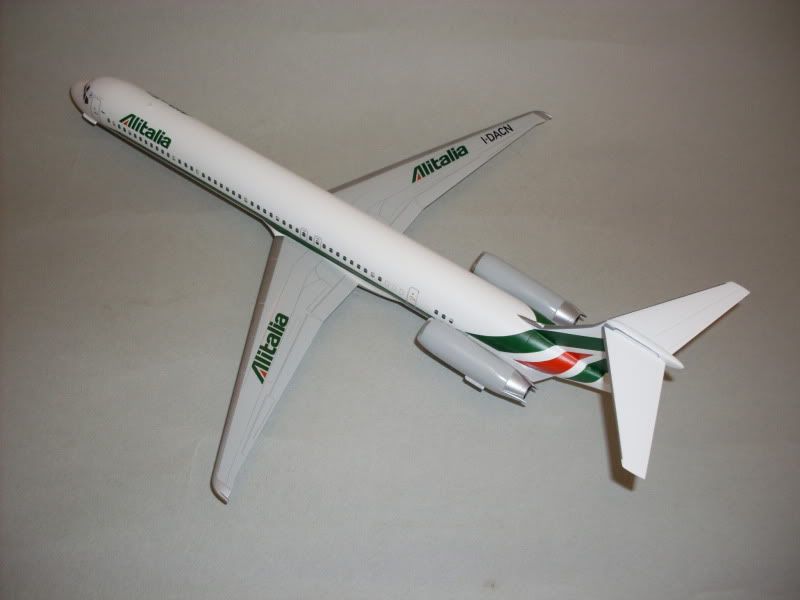
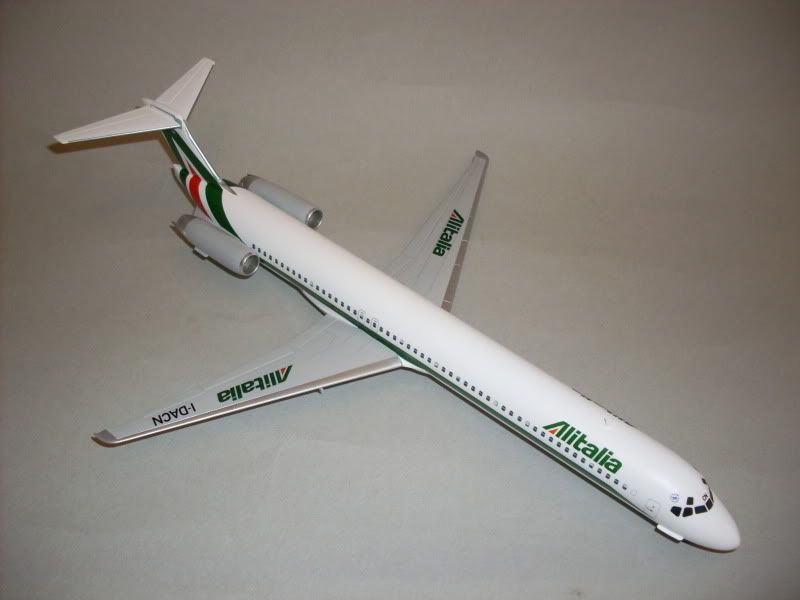
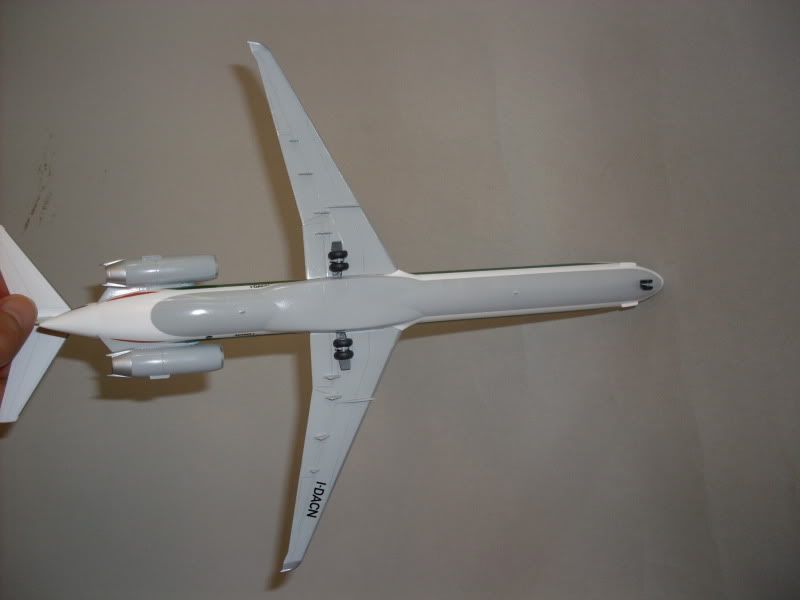
Well done Swallows! Very nice MD-80 and nice colourscheme. And finished just in time!
Maybe you can try some very subtile weathering next time, it makes the model come alive.
Hi TheFlyingDutchman,
thank you for your appreciation. Regarding the weathering you are right, though you should take into account that on the Minicraft MD80 the surface detail is nearly non-existent so you can't easily apply a wash like on recent Revell kits. Anyway I wanted to depict I-DACN juts after the repaint in October 2006 so there would have been very little dirt around.
Bye
Fabio
-
Here is my one and only model for the group build. Sorry for the photo quality but had to makedo with my daughter's digicamera...

Revell 737-800 RyanAir
in Airliner Modeling
Posted
Sorry but my dutch is quite weak..
The Ebay sheet is for US only.
Thanks anyway for your help