


Tiger27
-
Content Count
567 -
Joined
-
Last visited
Content Type
Profiles
Forums
Calendar
Posts posted by Tiger27
-
-
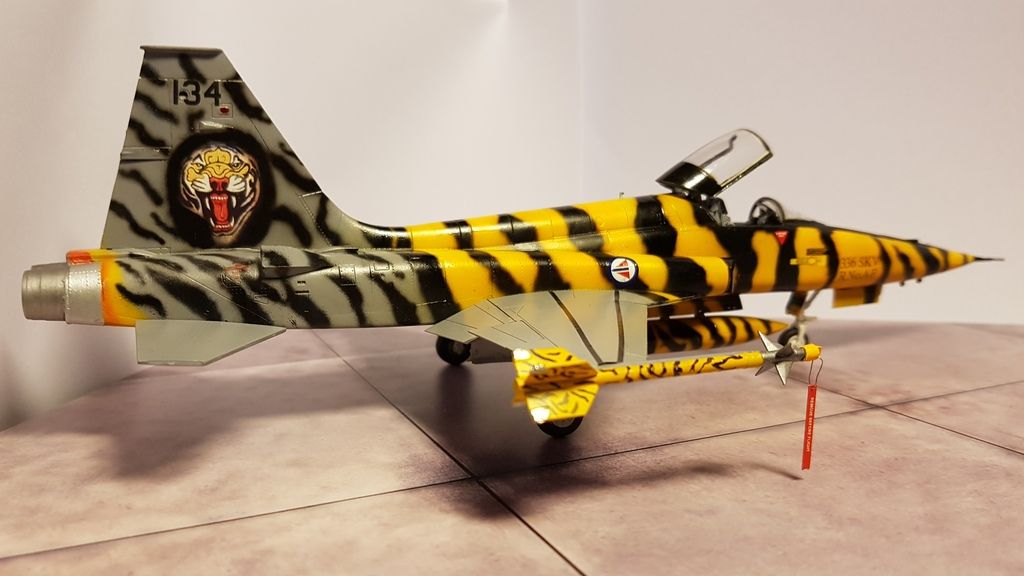
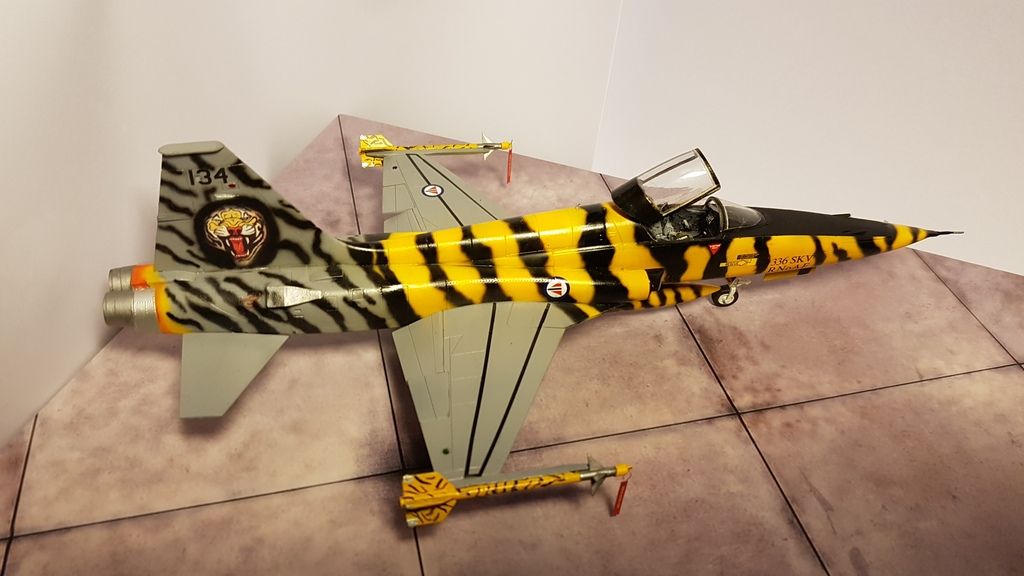
Yea the stripes are freehand by airbrush :)
-
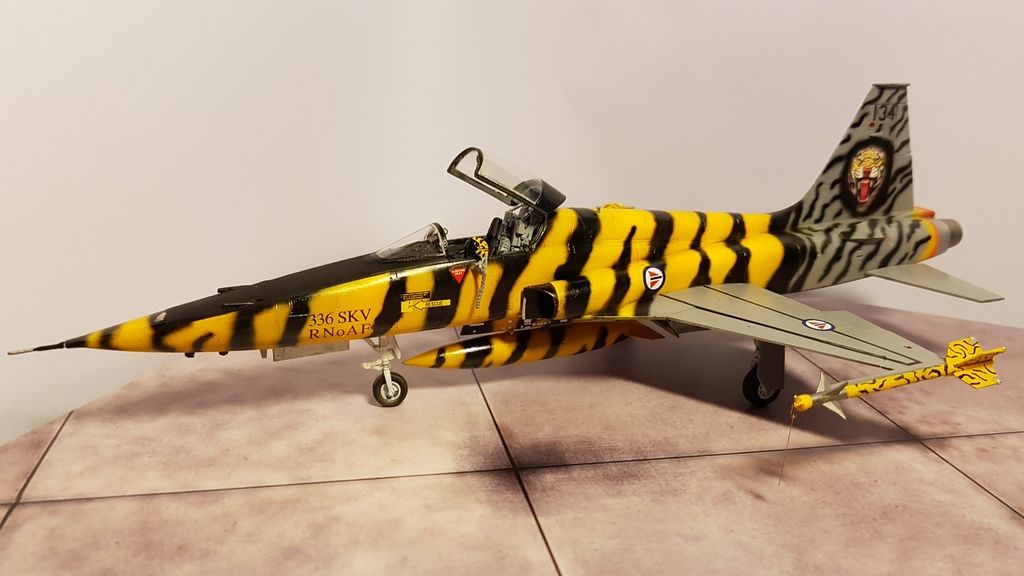
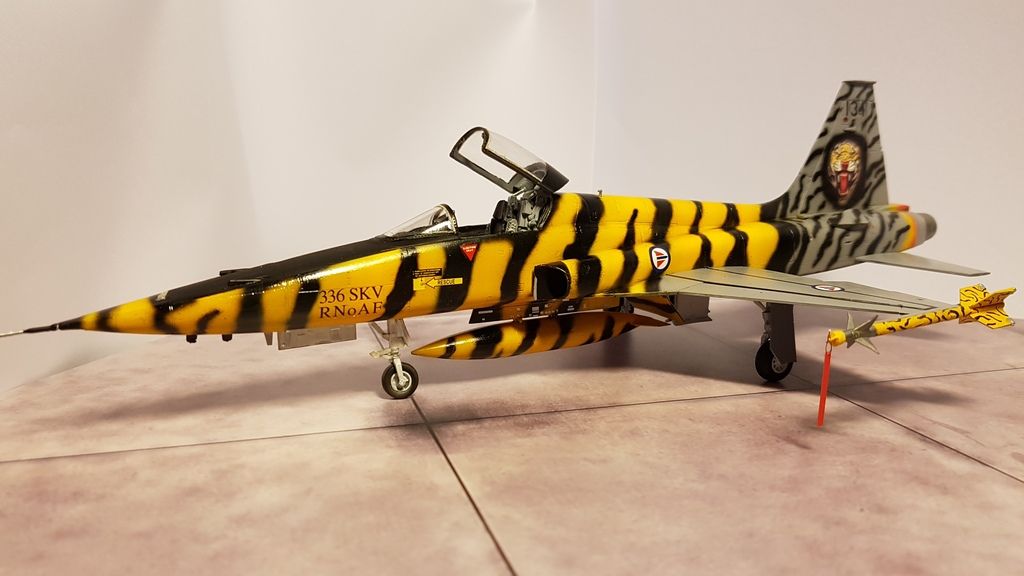
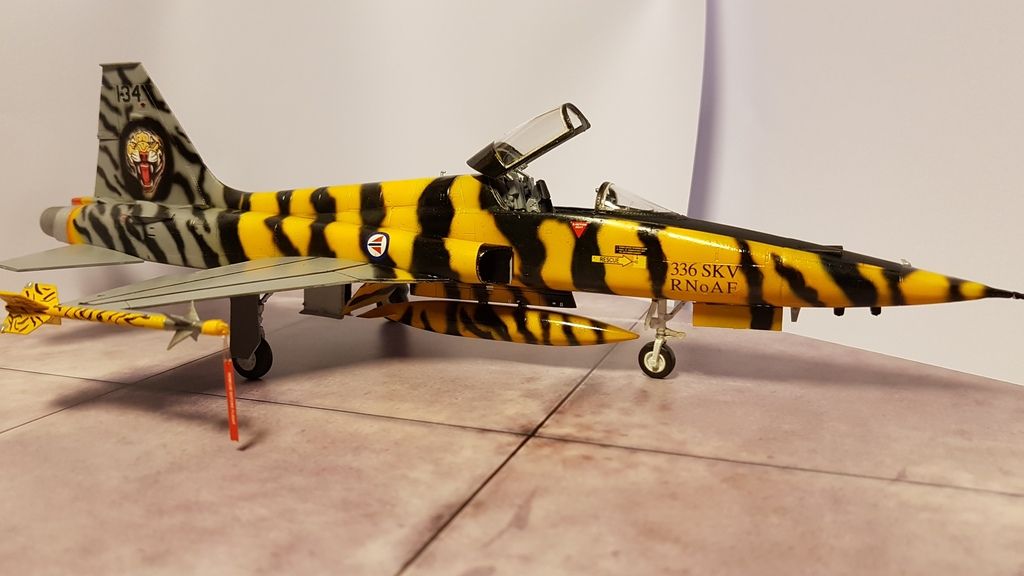
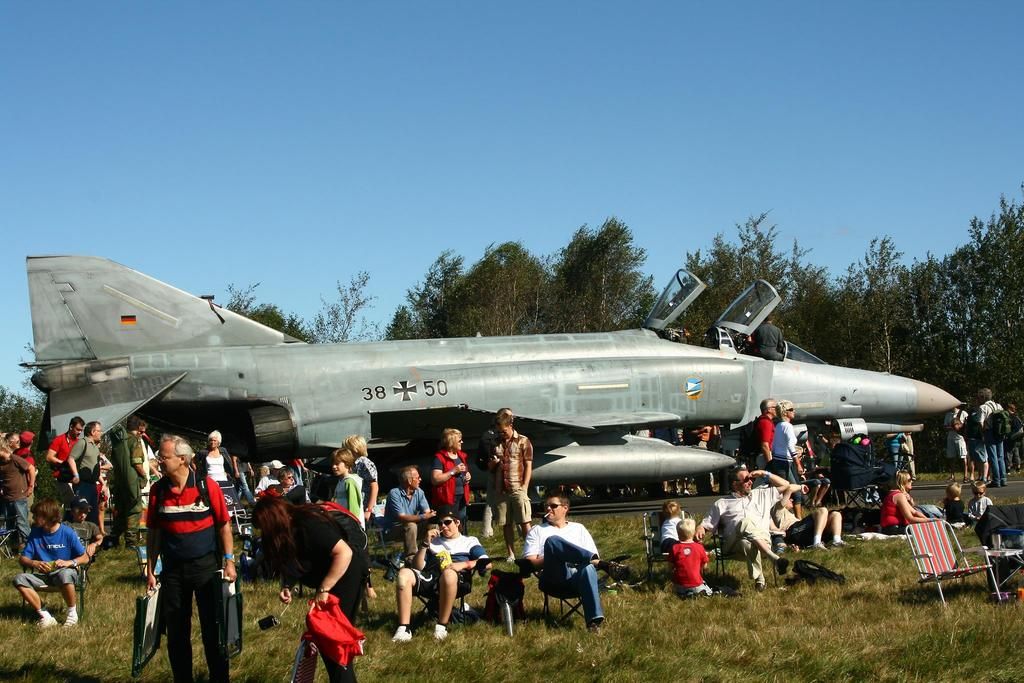
This is by far the most colorfull F-5A Freedom Fighter that ever served in the Norwegian airforce.She was repainted for the NATO Tigermeet back in 1997 and retained the colorsceeme ever since. Today this jet recides at the RNoAF Museum in Bodø, NorwayScale 1/48thKit: KineticExtras : Eduard photoetch, scratch, needles,pins, jammydog tape, Resin cocpit (Wolfpack).Decals , KAR-Decals (longe since discontinued). Vingtor and the scratch box.Paints from Games Workshop, Gunze and Vallejo
-
Hi guys
I'm looking for Airdocs AIRM3201 - 1/32 LUFTWAFFE F-4F PHANTOM II PART 1 - NORM 90J AIR DEFENCE CAMOUFLAGE
If anyone has a spare or one for sale please let me know. I've been trawling varius online modelshops and also keep Ebay under close survalance.
Also the "iron cross" and JG74 parts would help out alot.
-
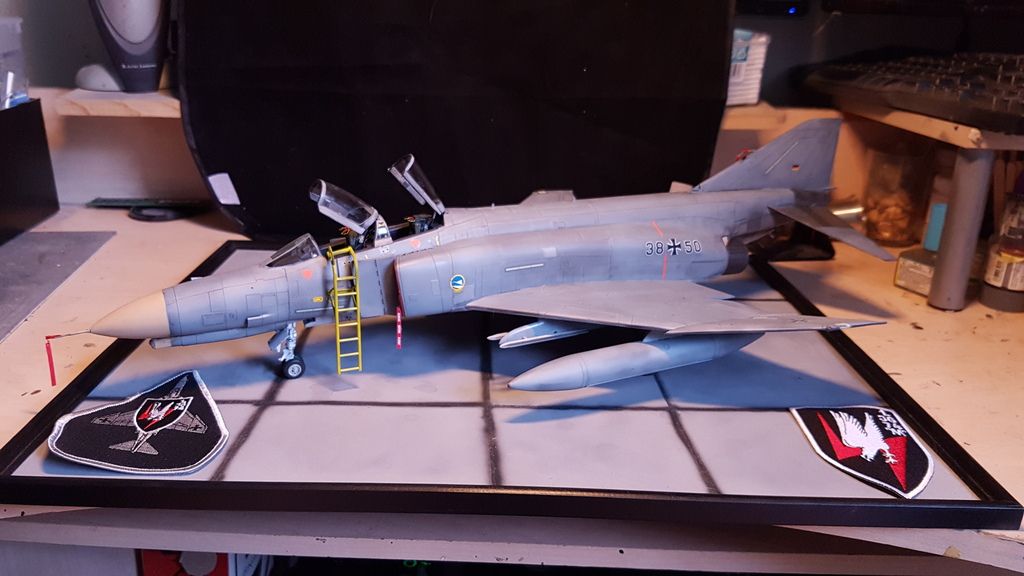
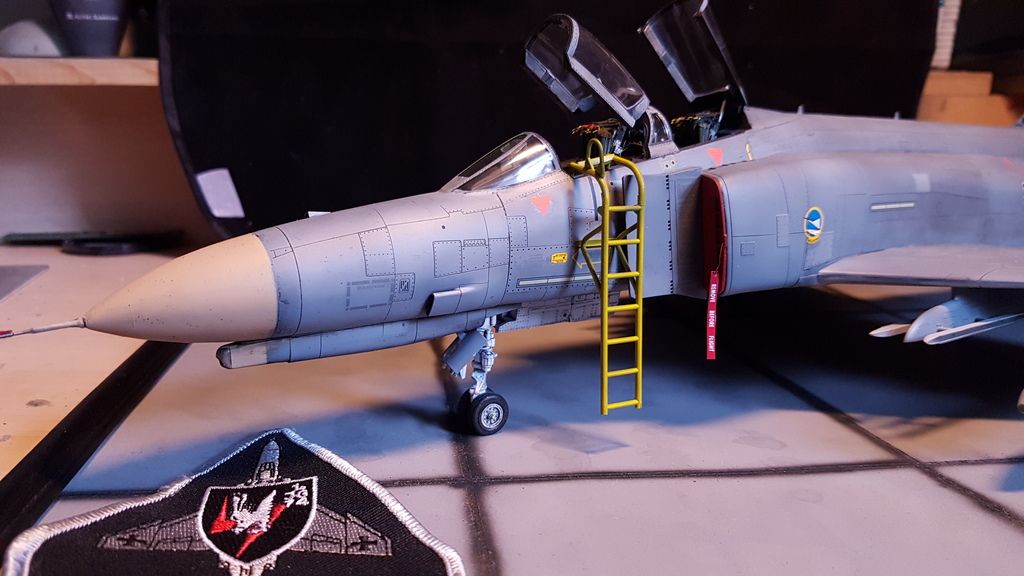
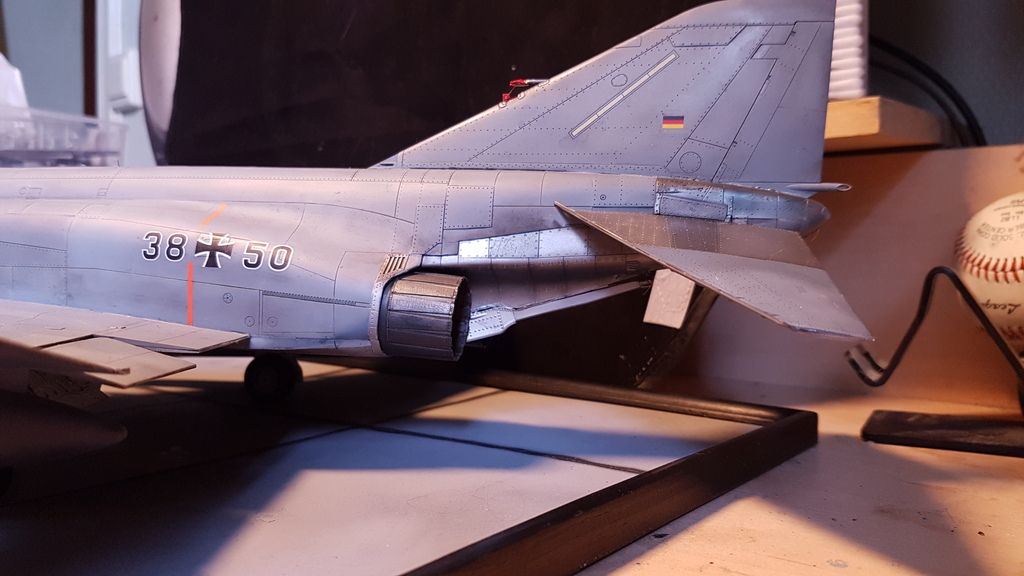
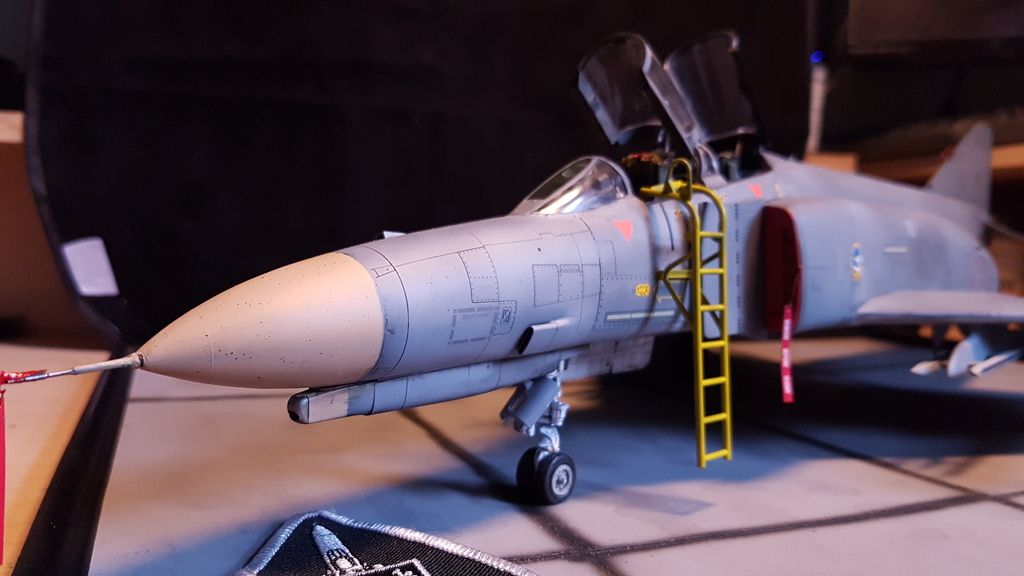
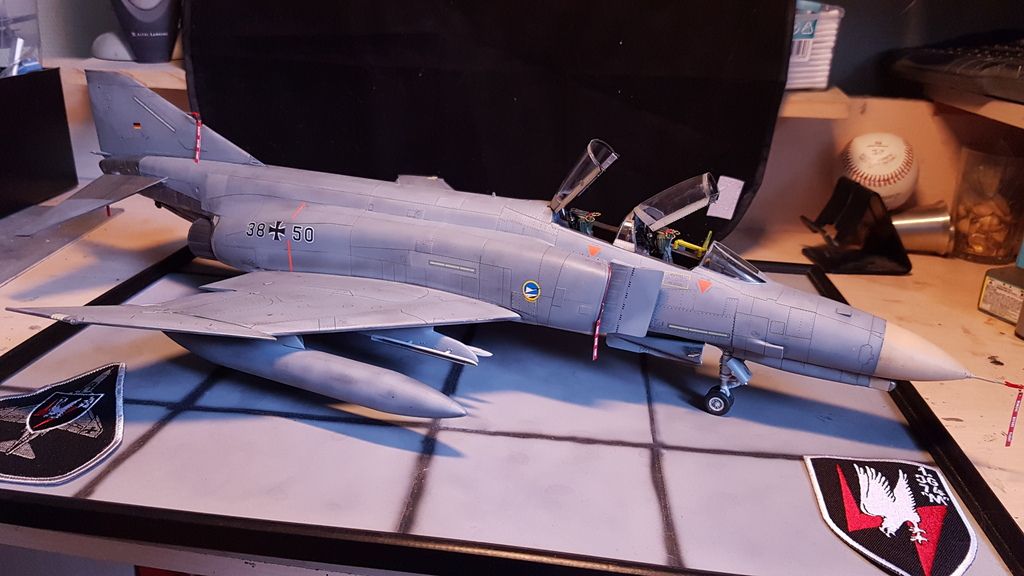
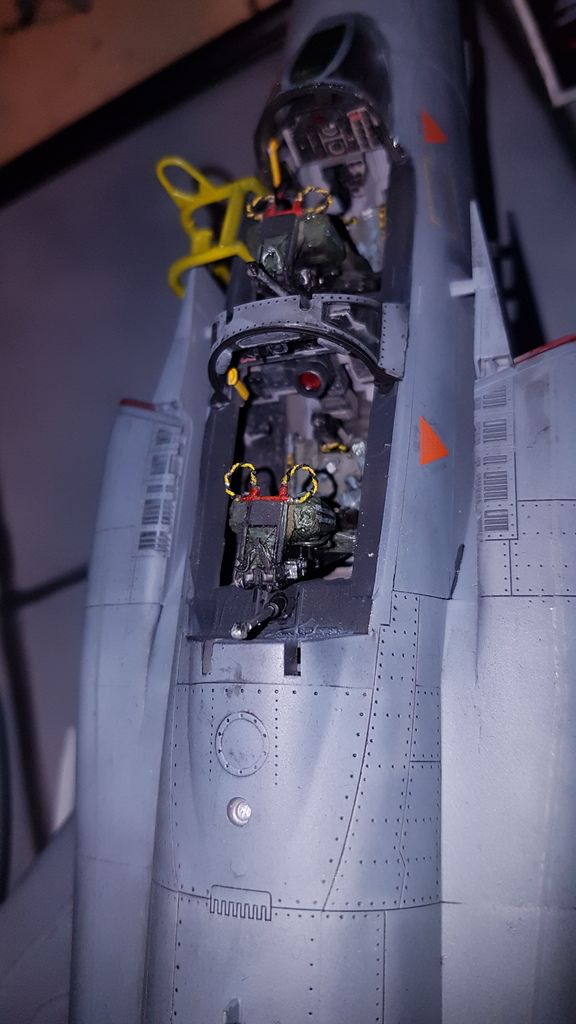
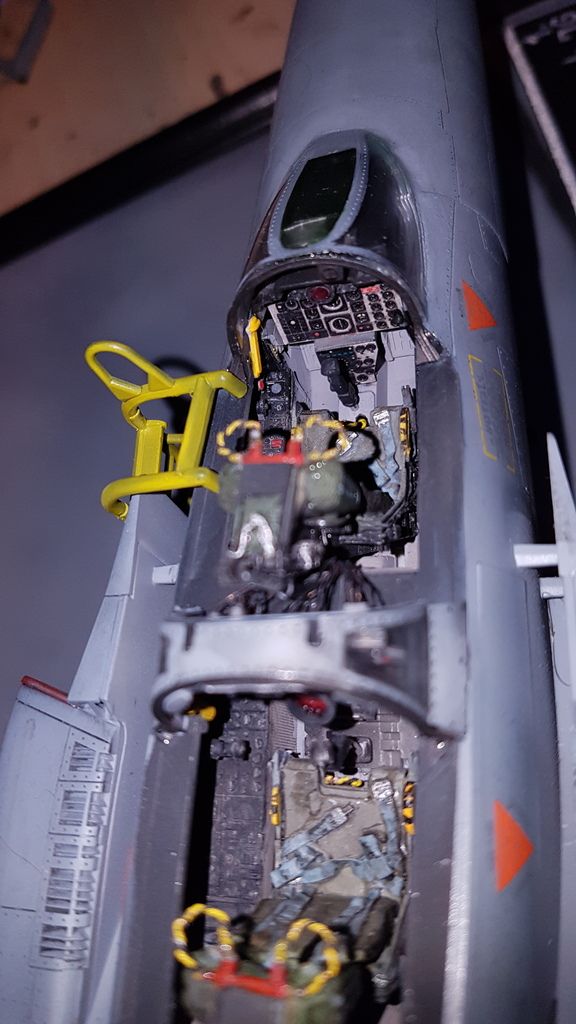
McDonell/Douglas F-4F ICE Phantom II , JG74 Bundesweer/Luftwaffe 2007.
Tamiya 1/32nd scale kit. Eduard Brassin engines, Eduard photoetch, Quickboost Ejection seats and airscoop covers, Ejectionseat handles from fusewire.
Own mix paints using Tamiya and Gunze acryllics, AK Metallics for the engine and rear fuslage.
And the real jet (not my pic)
-
please delete
-
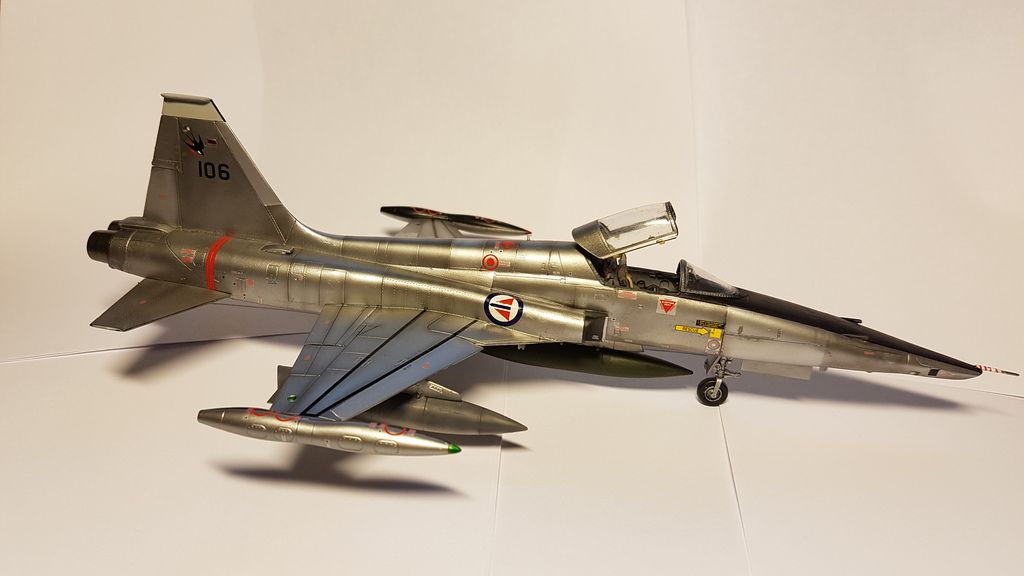
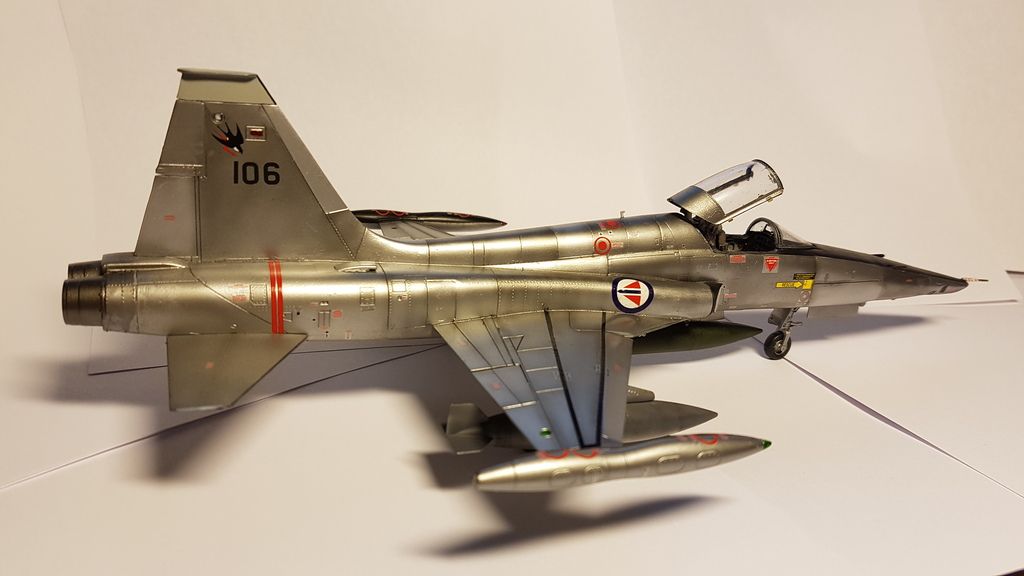
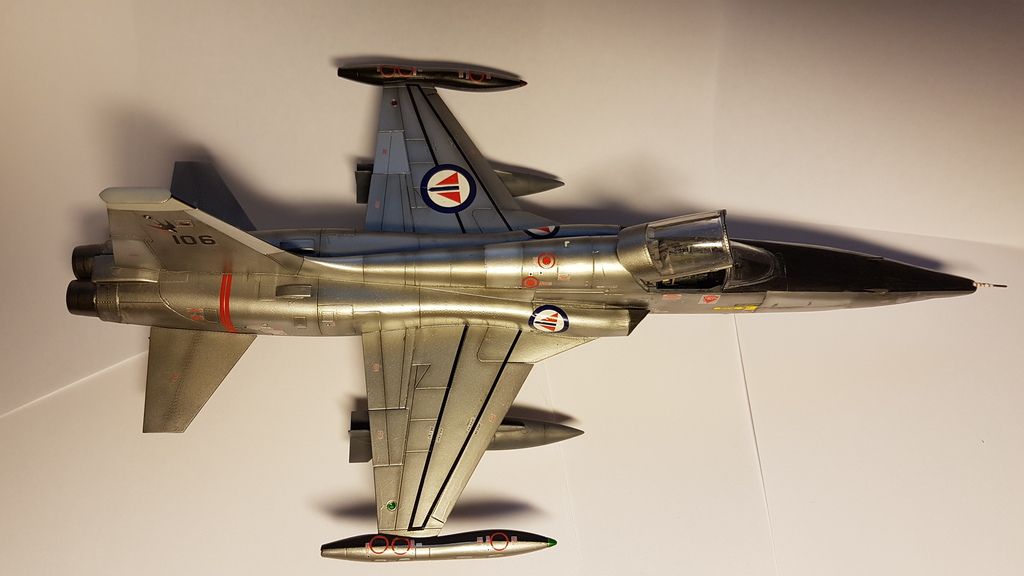
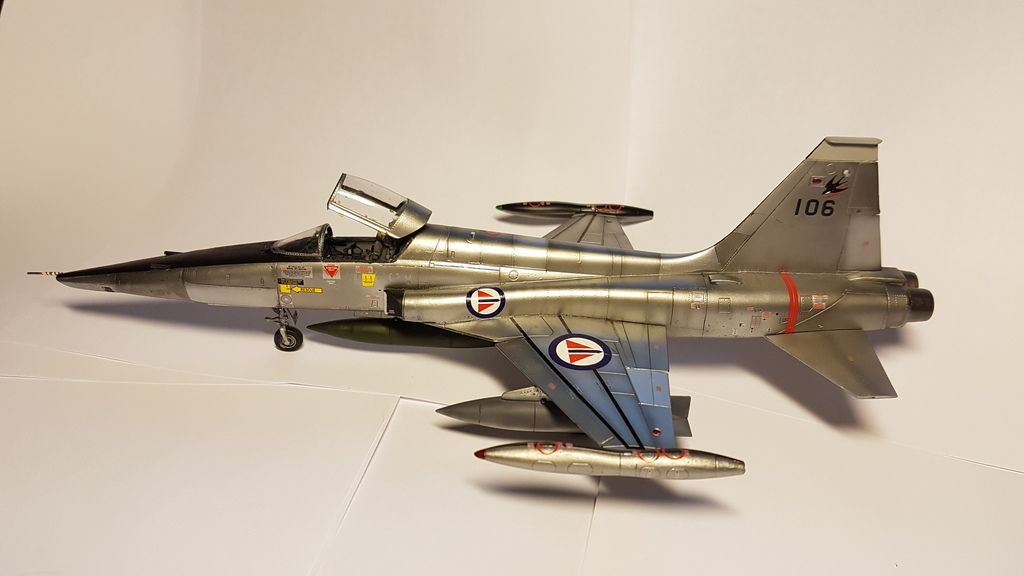
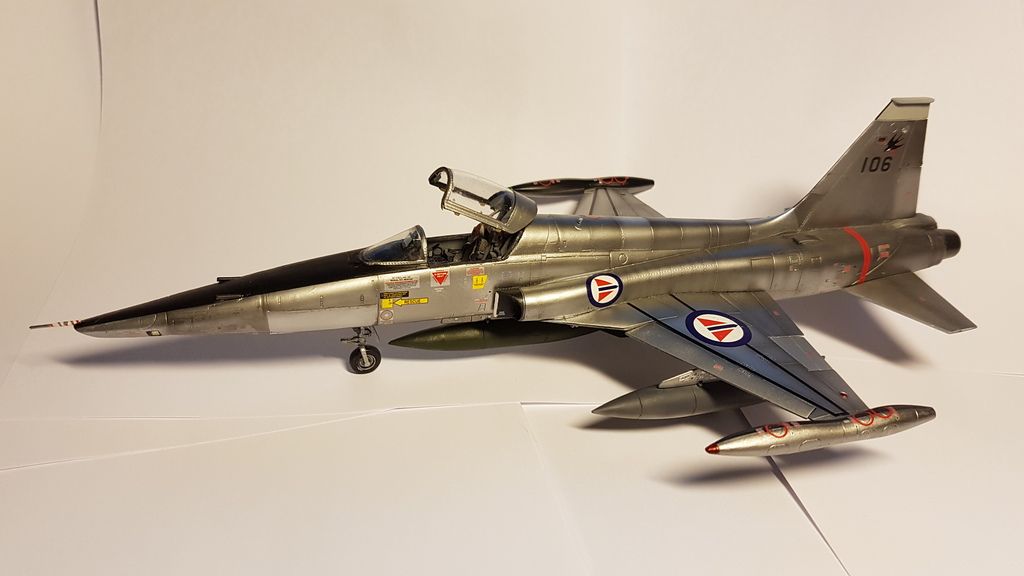
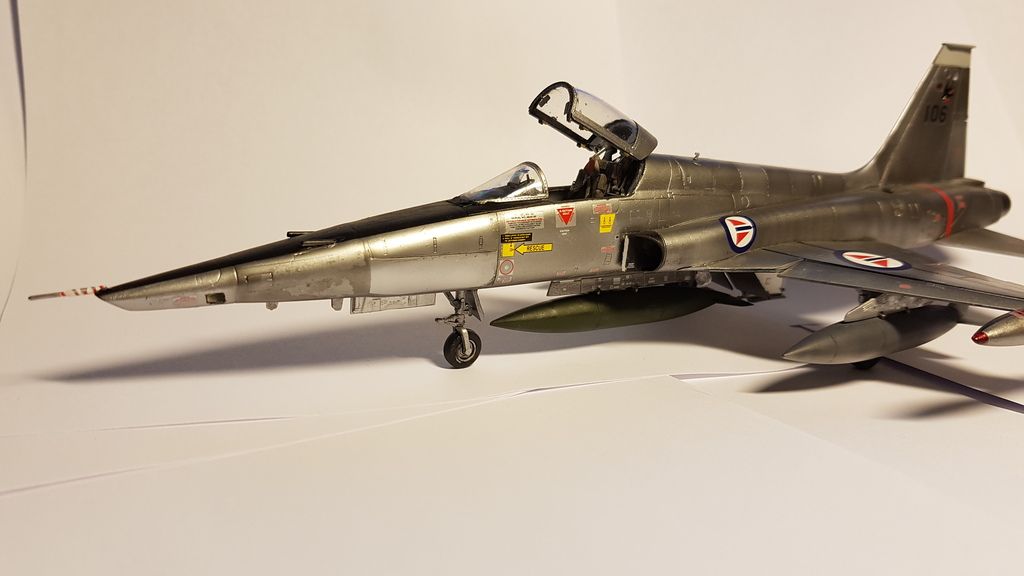
I'm calling this one finished and done.
'48th scale Kinetic F-5a , aftermarket RF-5 modifications and decals from the one and only Vingtor.
AK and Alclad metalizers varius other colors from the usual sources.
So, this is my RF-5A, Royal Norwegian Air Force 336 recce wing. Rygge AFB , Norway, late 1970's
-
The canopy for my F-14D in '48th has got a huge crack in it, anyone have a spare ?
-
That is a very impressive Flogger, it looks superb, love the camo, great job on the painting.
Ouch, that'a blunder ;) thanks for the tip ;)
Lovely build, inspired me to drag mine back to the bench again.
Ian.
--- Coool :) It's a nice modell, I*m gettin a cupple more, wanna du a Czech one and something alittle more exotic ;)
---
Very nice!
I'm close to the painting stage on mine. Can you take a closeup photo of the tail? I would like to see how you did the little scoop on the right side.
Were there any problems getting the canopy to stay open?
I'l see what I can do. I'm outta town a cupple of weeks for work
No problem on gettin the canopy to stay up, amazing what a little superglue and some plastic rod can do ;)
-
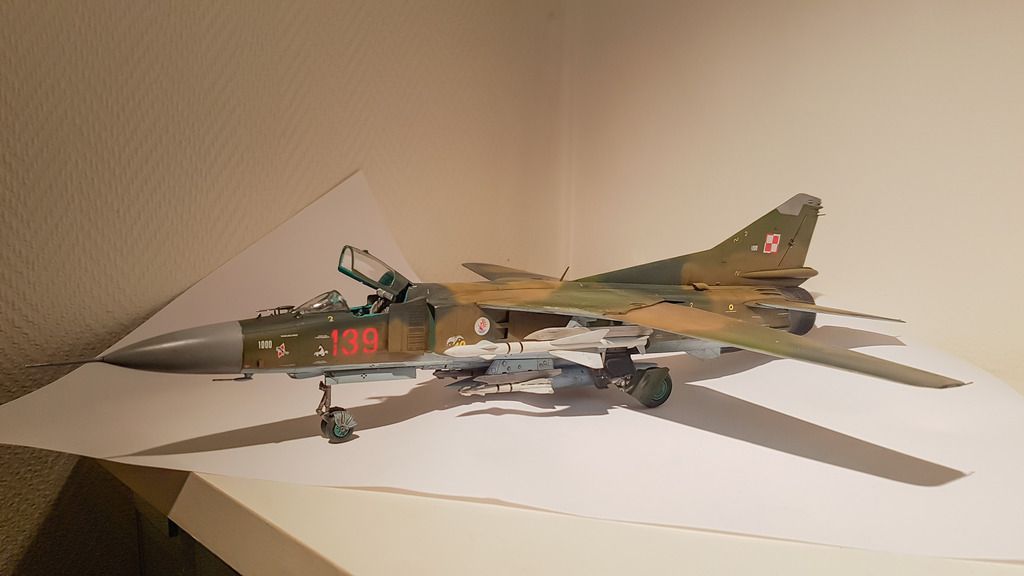
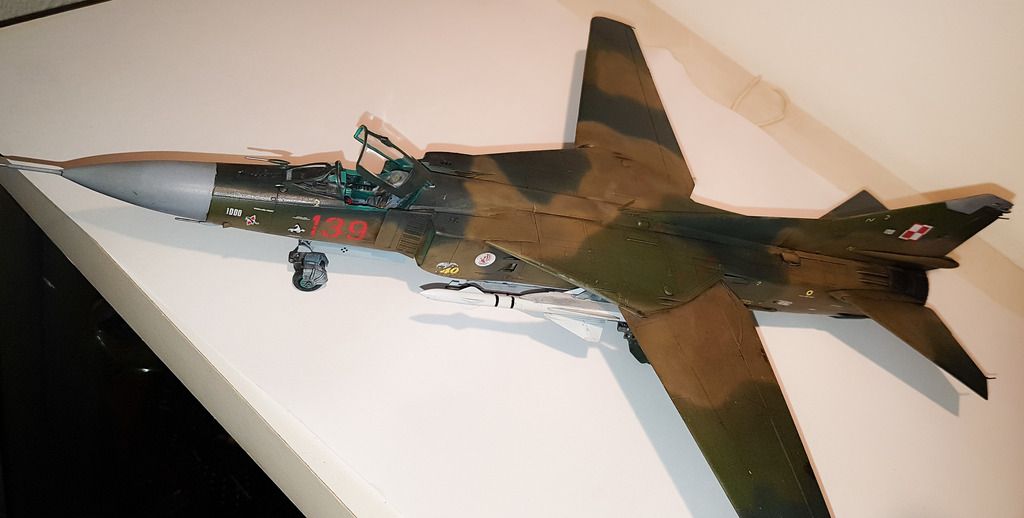
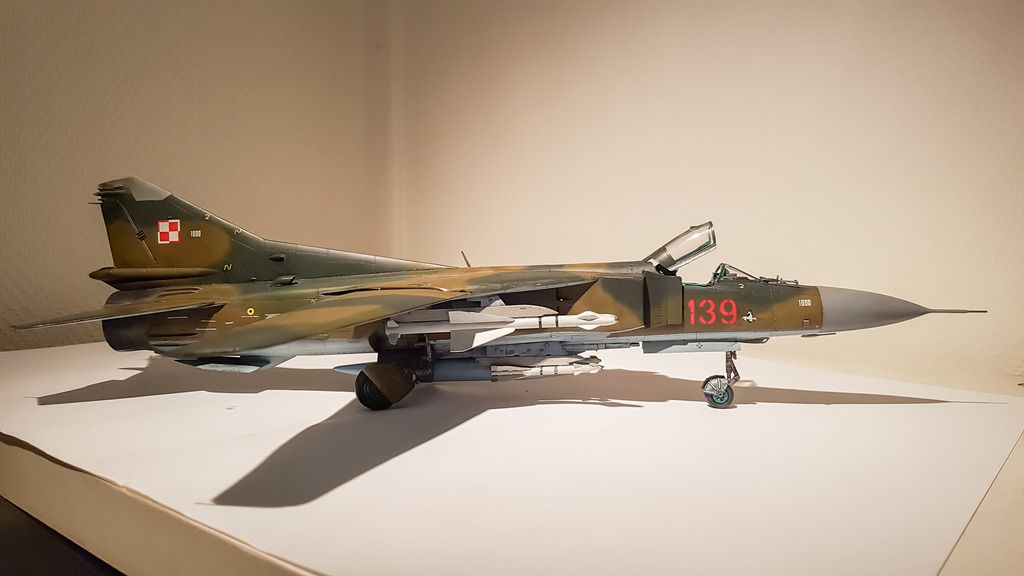
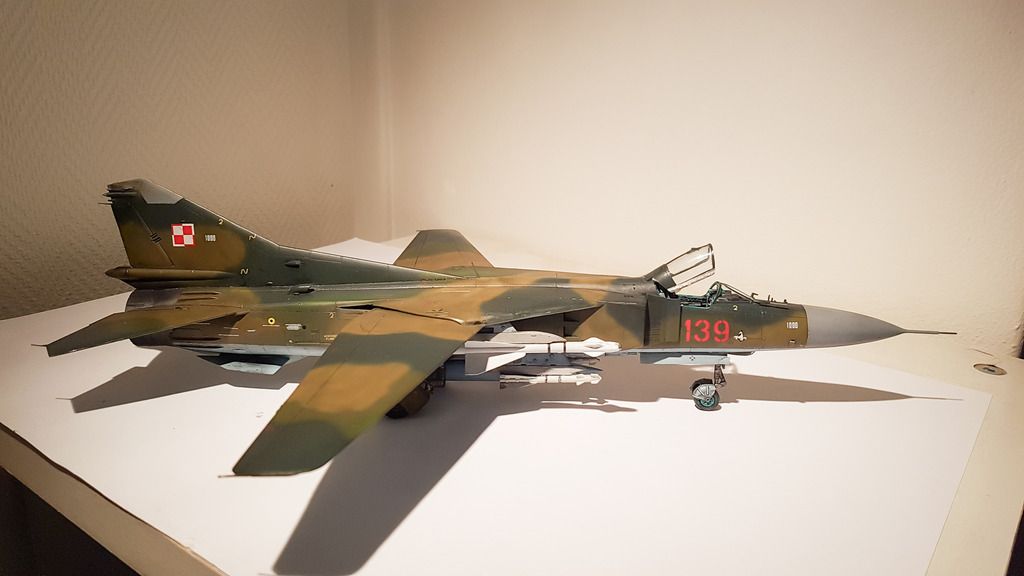
Finally got one done after a "dry spell" of a cupple of months
Mig-23 MF, Trumpeteer 1/48th scale. Polish air force , 1992.
This thing built up quite nice, not to much hassle and the parts fit was relativly good. Not to much to cry about at all.
I just might do another one , this time from Czech airforce.
Built OOB, no extras what so ever. Paints from Vallejo, Akan, Ak metalizer and Gunze.
-
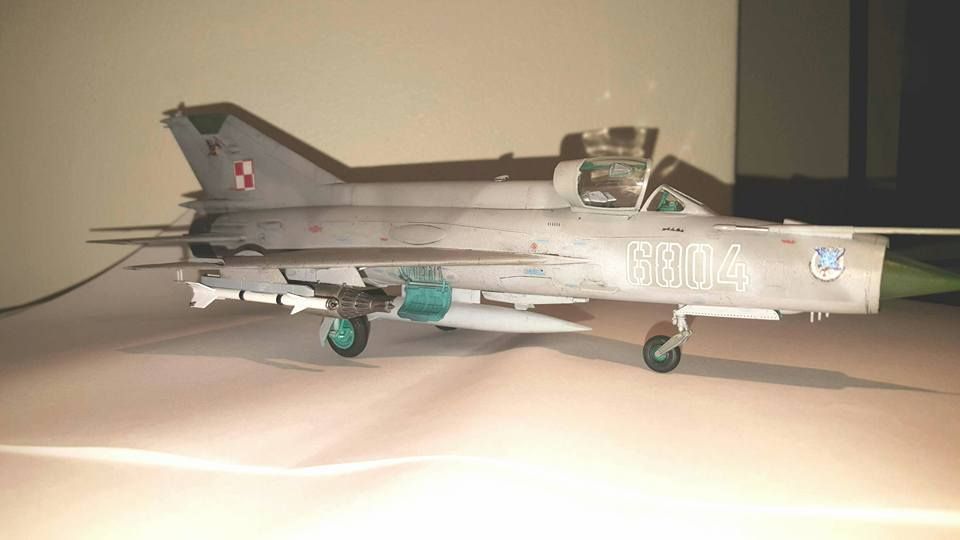
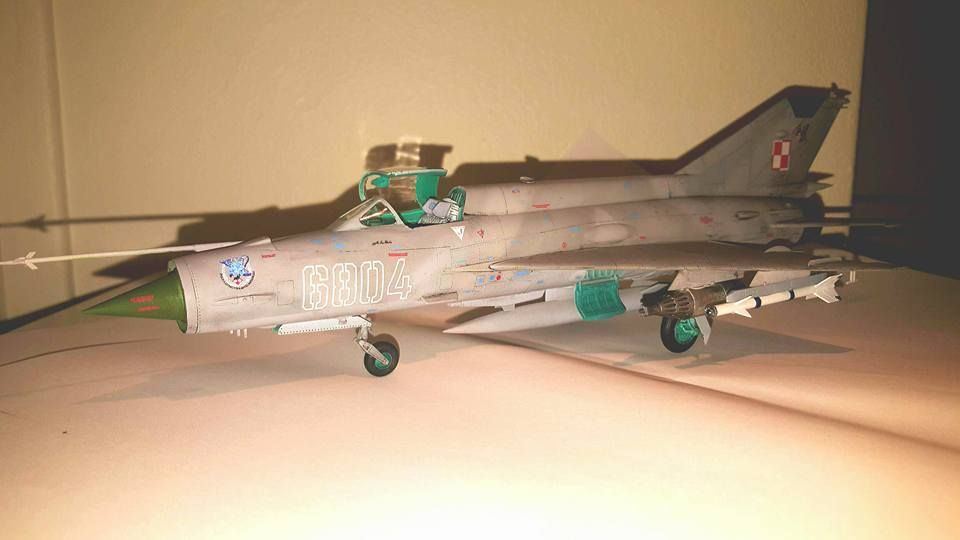
Finished build nr 2 for 2015
Trumpeter Mig-21 MF 1/48th , Polish Airforce
This is the brand new Mig-21 MF from Trumpeter , highly enjoyable build, the decals are fine, although a PITA to fit all of them. there are over 100.
No major fit issues, virtually no flash or ejectorpin marks I could find. There are alot of decal options for this kit in the box and as for the aftermarket out there aswell. There is a decent assortment of weapons in the box and also the details are very nice indeed. The decals for the cocpit is a waste, I just painted the thing and it looked better.
Paints from Gunze, Akan and games workshop. Wash and flatcoat from AK
-
We don't have a local distributor. I had to get this one off ebay to get it at all.
There is one store that get's KittyHawk modells, but they are no distributor as such.
-
I've been thinkin about it, but I don't have any Equipment for vaccuforming I'm afread.
-
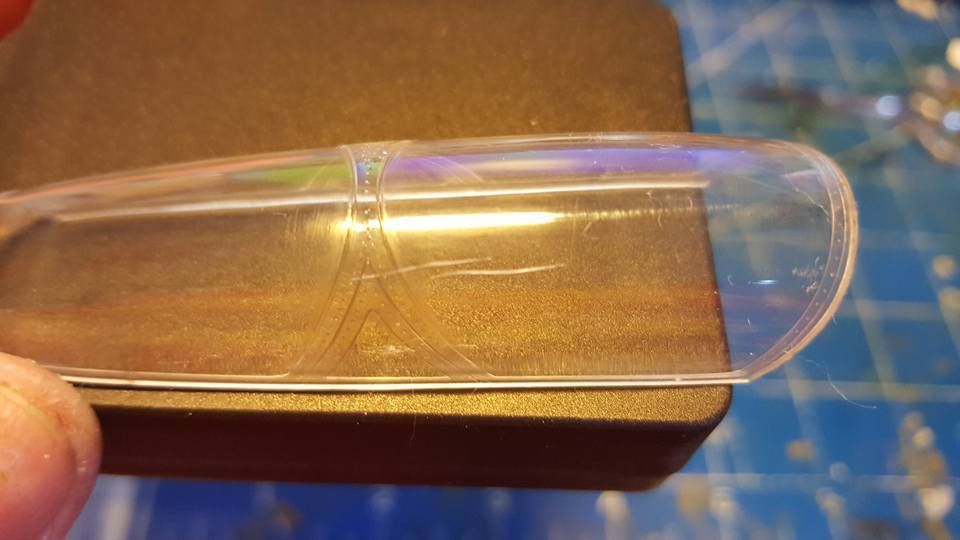
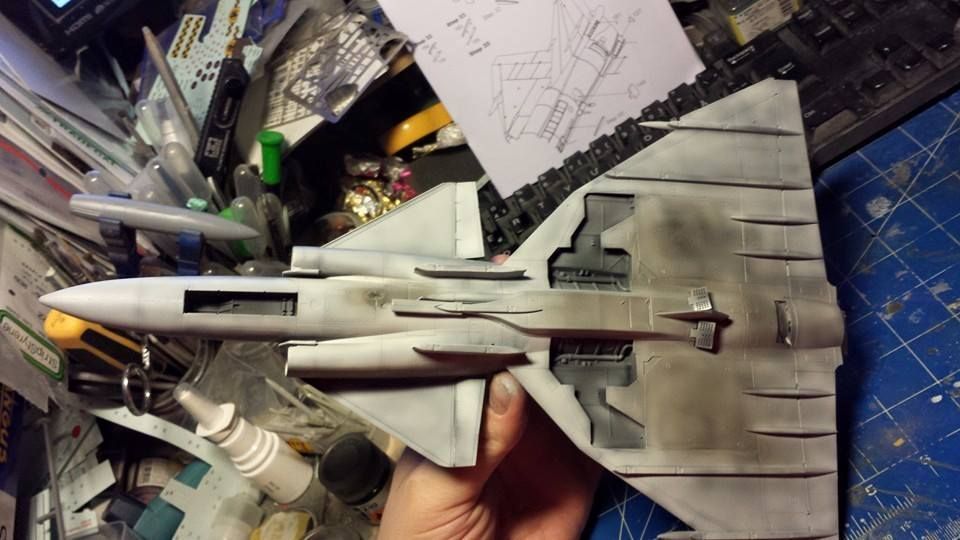
So I got the very nice lookin Gripen from KittyHawk, however the exitement was short lived .
I noticed this crack in the canopy
the outside surface feels smooth so I cant just fill it with future like I normally would.
What you see in this picture is just a small portion of it , there is a simular crack on the other side. The front windshield is just fine though so it's just the rear part.
I've emailed KittyHawk but from what people tell me i should not keep my hopes up for a response.
So what do I do next. I don't wanna bin a 50 dollar modell and having a cracked canopy is not optimal to say the least. I found aftermarket for the singleseater Gripen, but this is the two seat B/D modell.
Anyone out there happen to get a dubble set of glass in their kit, or have a Italeri Gripen canopy, I plan to have the canopy open so the fit does not need to be perfect.
-
And some more pics :)
-
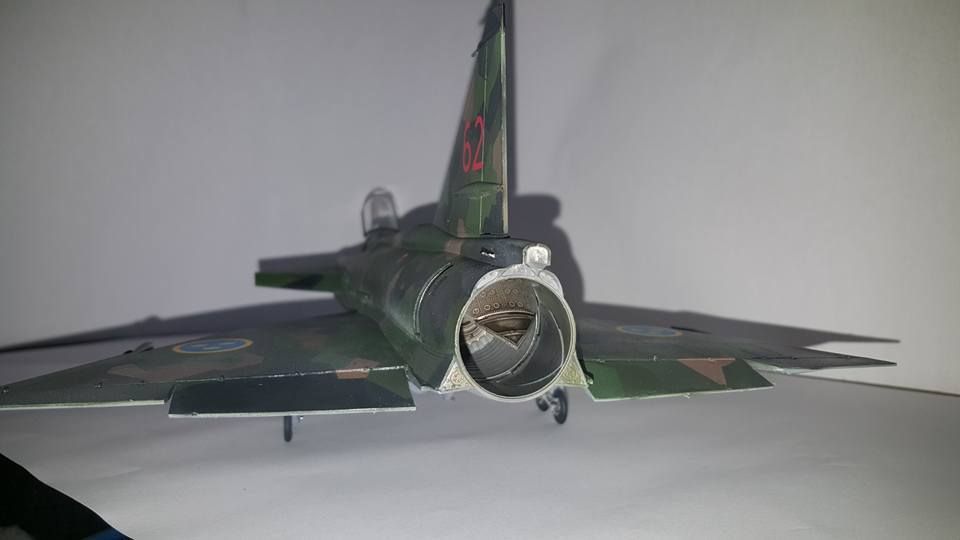
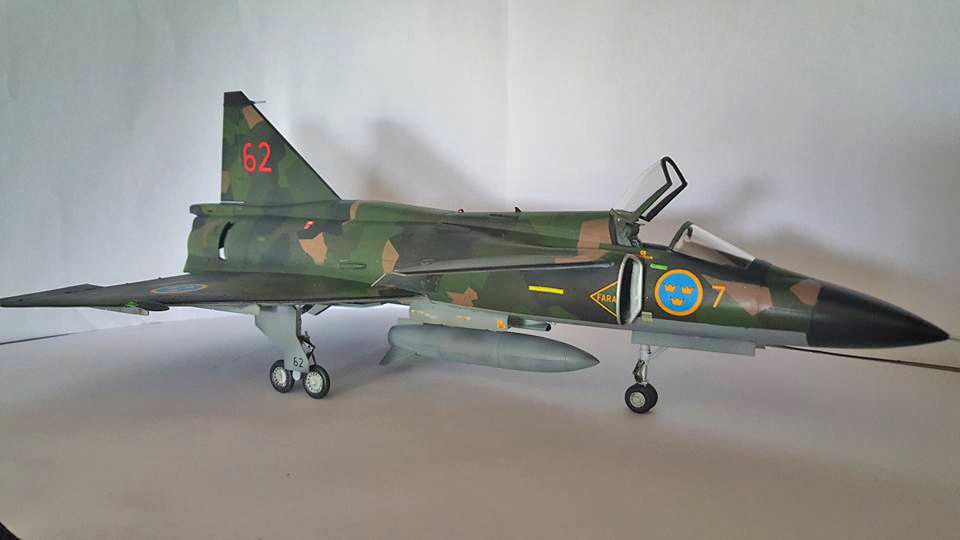
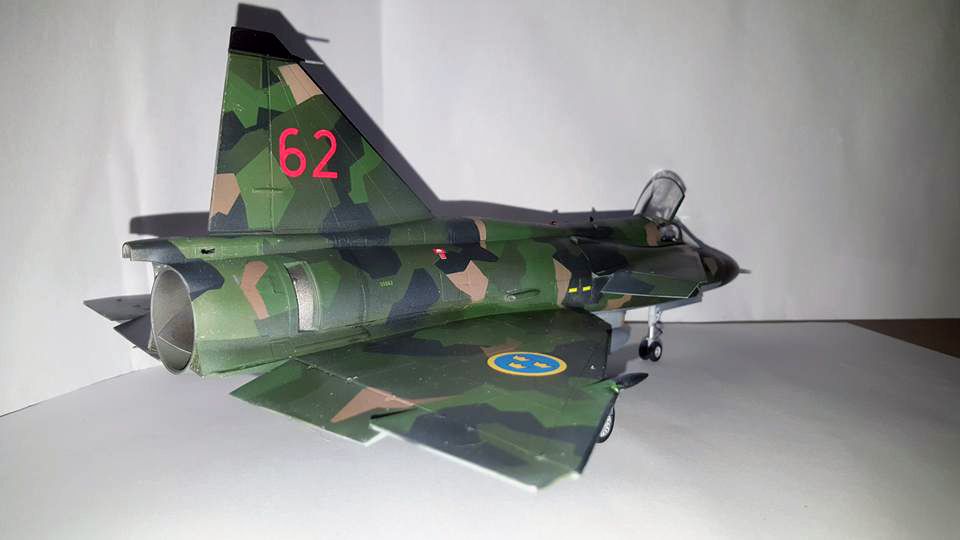
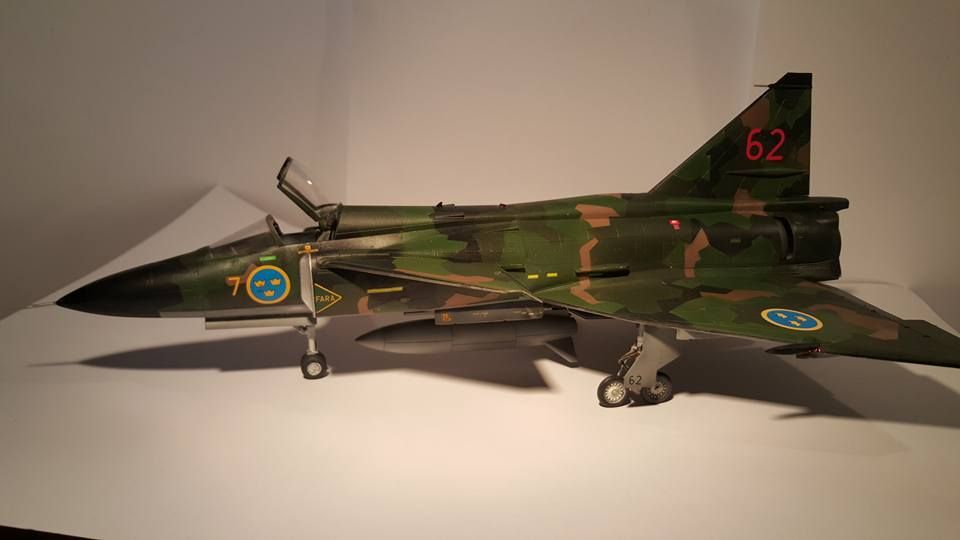
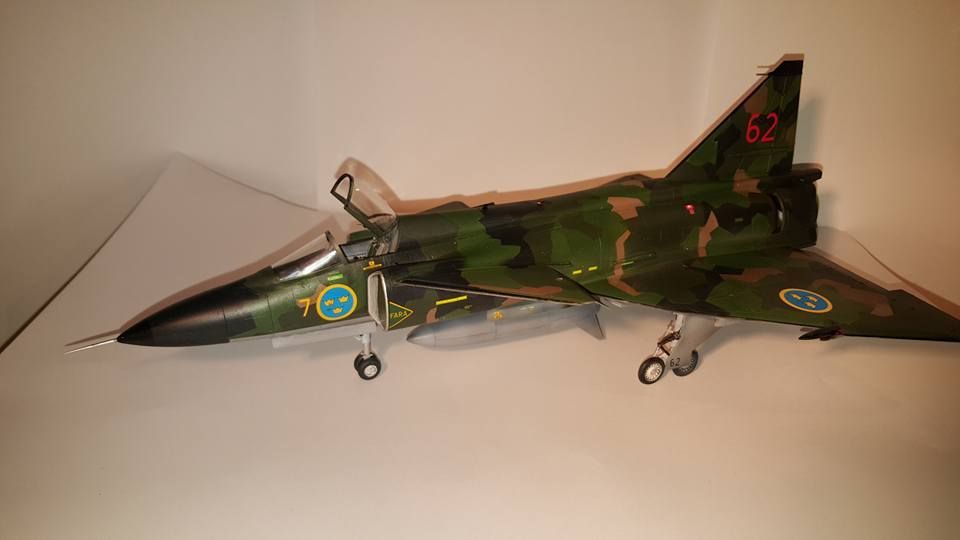
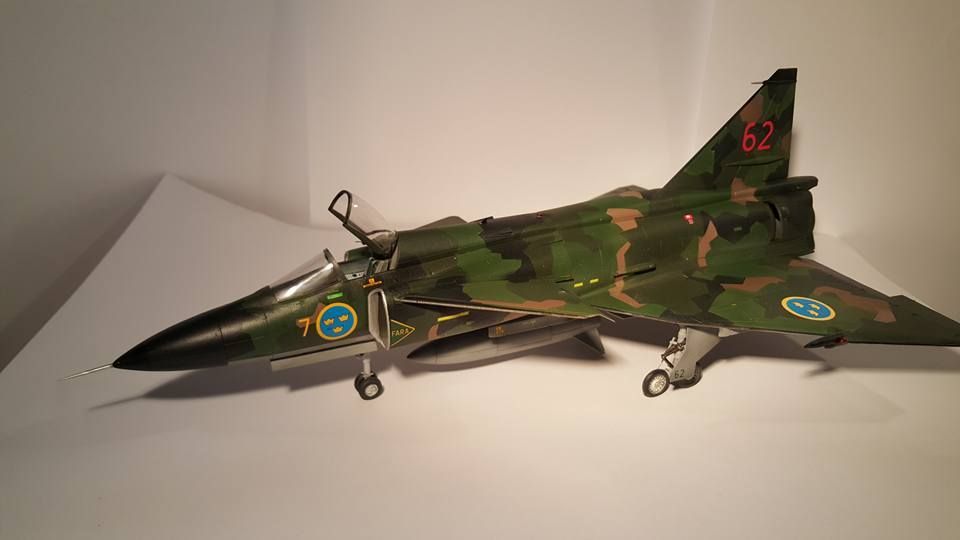
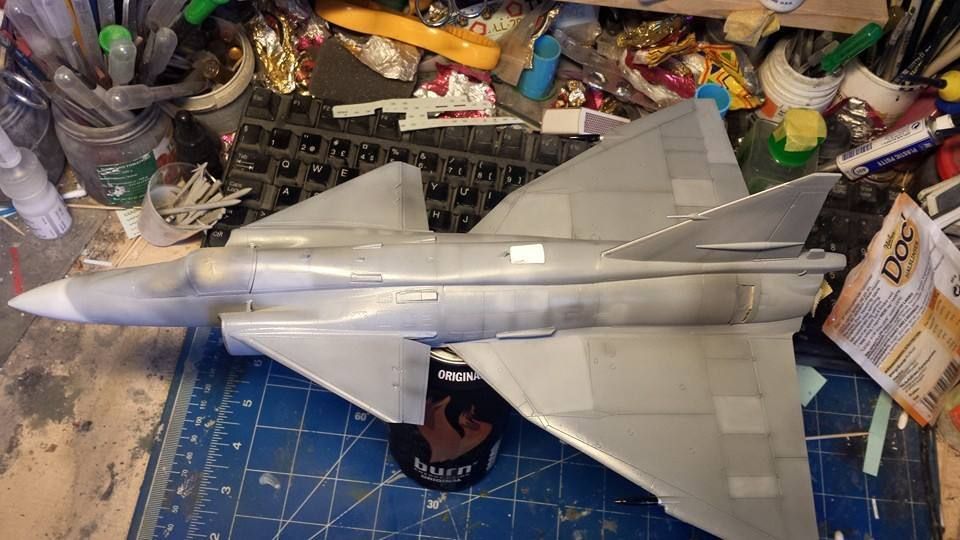
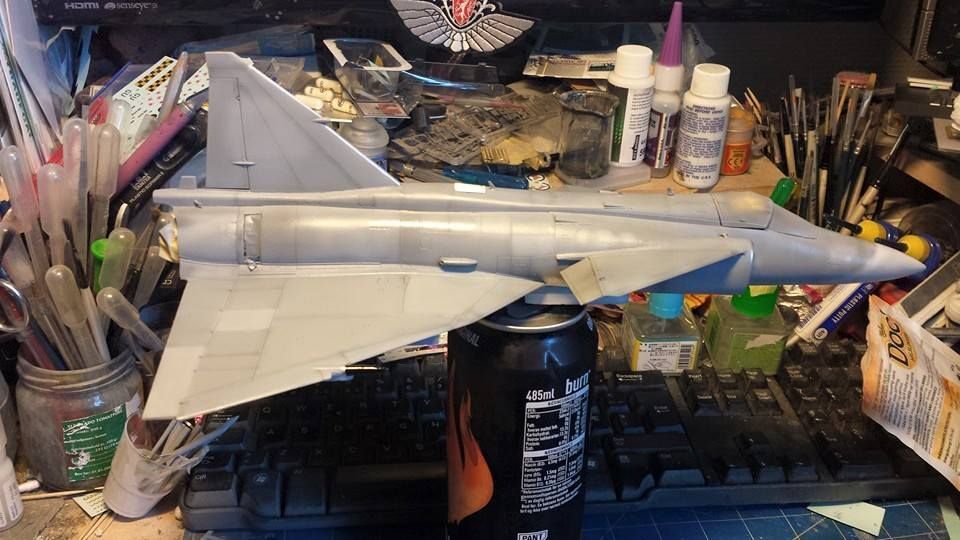
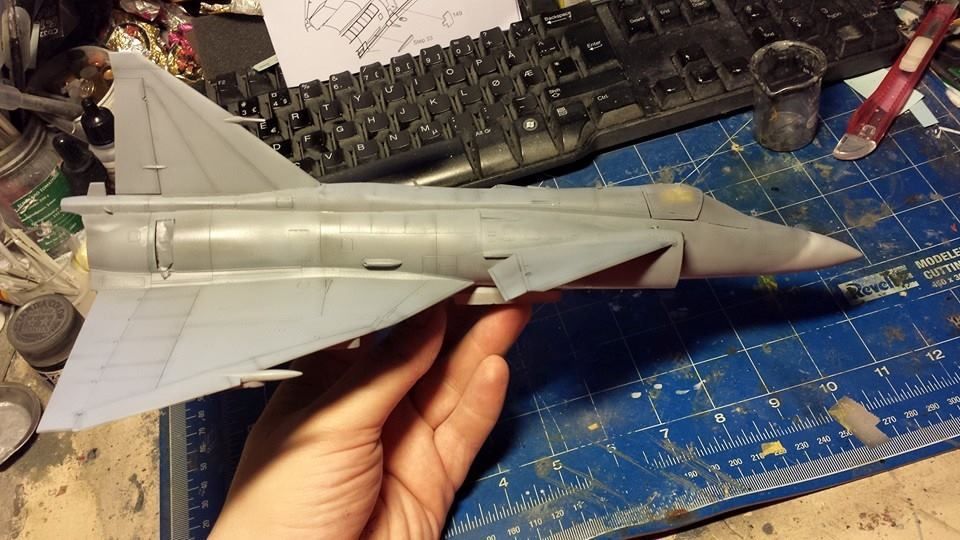
1/48 , Special Hobby AJ-37 Viggen , F7 Saatenes Airbase sometime in the 90's.
So I'm at it again, this is my second Viggen, I have made one JA-37 but this time it's the Attack/fighterbomber version. AJ-37 short for Attak och Jakt, in swedish translates to Attack and Hunt , and transcribed to make some sense in English would be figher and attack variant. Oh, enough trying to figure out the swedish language although beeing very close to my native Norwegian, still has its' idiosyncresies. (to a Norwegian ,Swedish sounds just wierd)
This modell from Special hobby is more or less the same as the offering from Tarangus. However there are enough differences so you can't make a JA-37 out of the box from this kit..
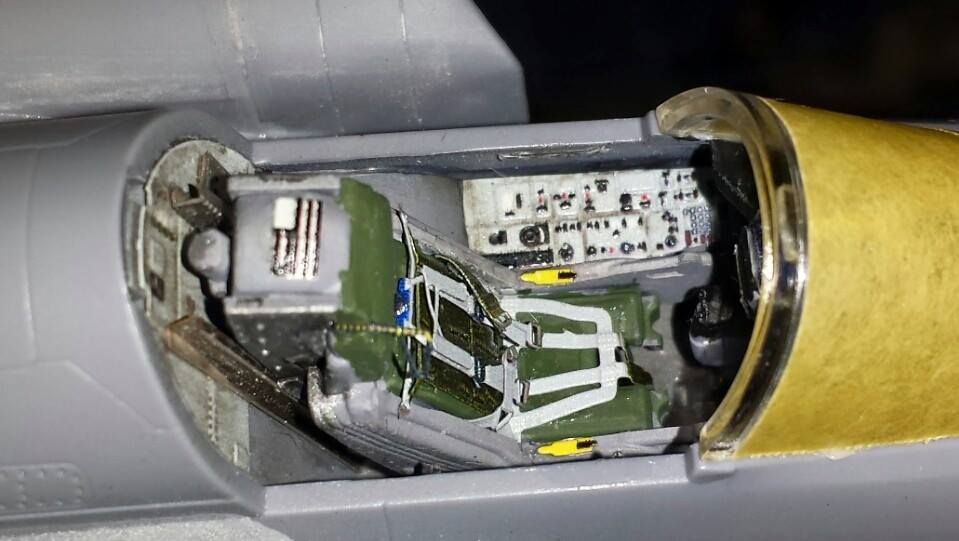
Now the basic construction is fearly easy, PE for the cocpit is included and you don't really need any more than that to make the 'pit look busy. When it comes to "the tools of war" it's up to the modeller. If your' making your avrage day of training flight line jet , the Viggen rearly had any stores other than a fuel tank. No captive missiles or training ordinance was ever carried exept for live fire exercises. And as I'm doing a mid- 90's variant of the jet it was relativly clean and not to weatherd at all.
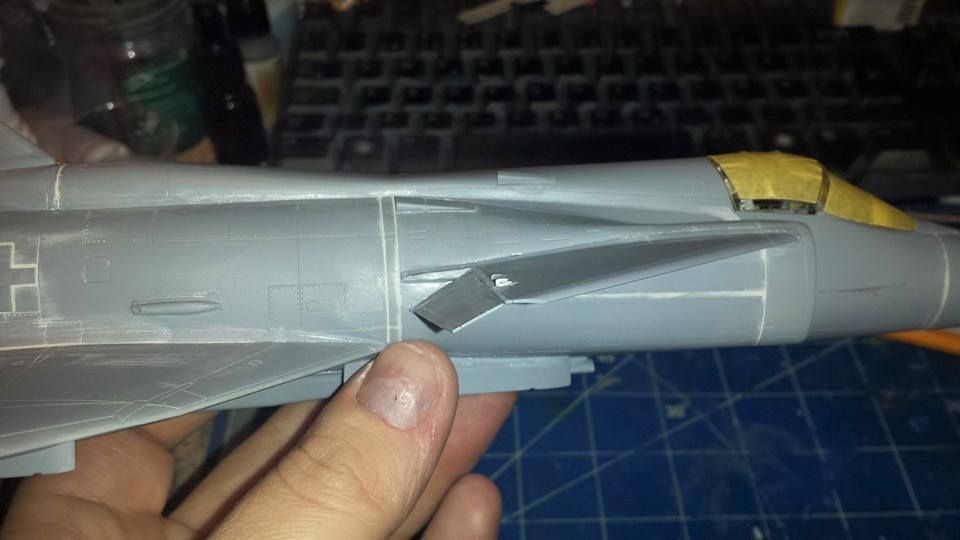
Very little modification is needed for the build, but be sure to check online refrences. However there is one major one that needs to be adressed. When the JA-37 was made it got a new and more powerfull engine, this caused the fuslage of the JA-37 to be extended a good 10 cm (4 inches). Now this translates down in scale to a few millimeters, but as it is fearly prominent on the AJ' so I chose to cut the modell down a size. Also I've cut off and repositoned the cannard flaps aswell as the elevators on the delta, these usually "sagged" when the plane was powerd down and the canard flaps was dropped when the landing gear was deployed.
There are provitions to do this as the parts that make up the front and rear fuselage has a gap that otherwise needs to be filled and sanded.. This gap is made for the Tarangus JA-37. The instructions does not say anything about it and the part needed for the JA-37 extention is not provided in the kit, so you can actually save yourself a fair bit of sanding and also get a correct lenght on your AJ.
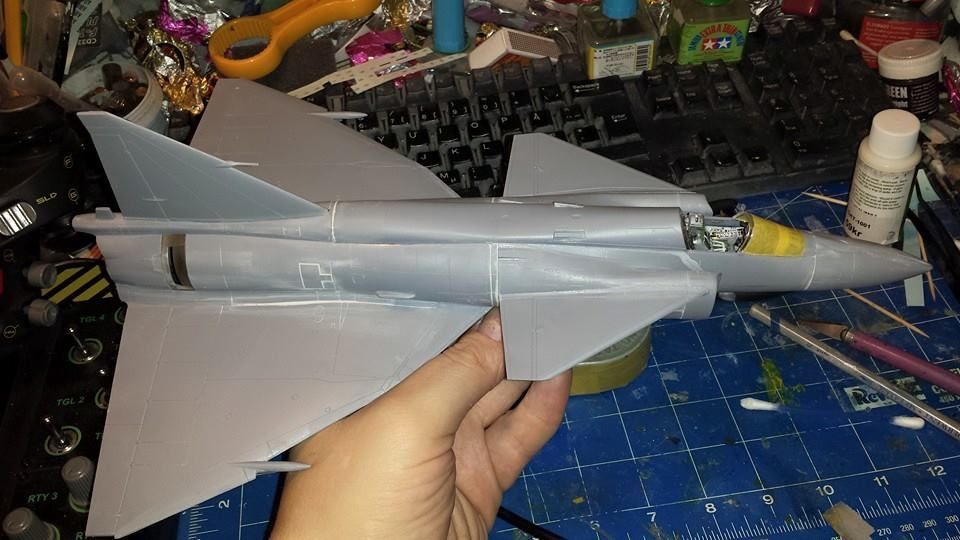
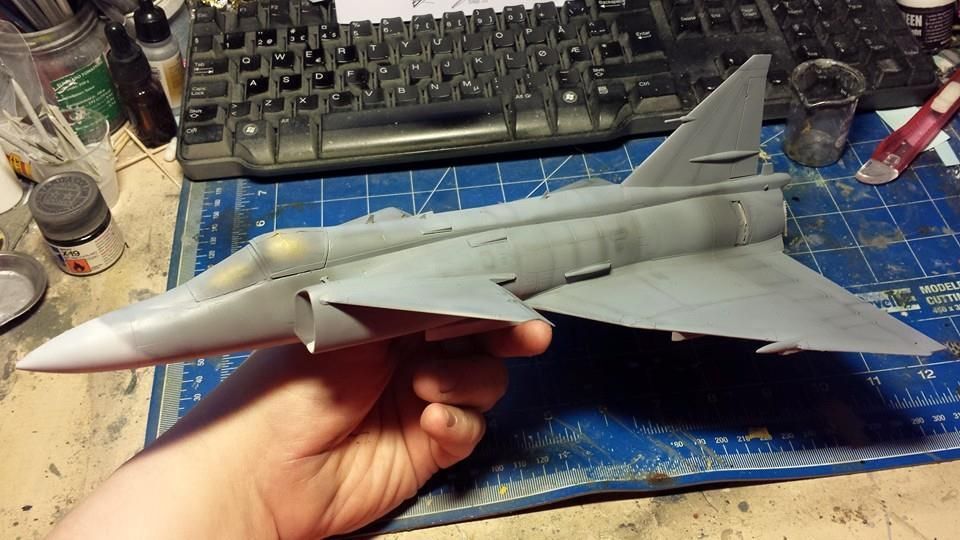
Now for the "fun" part. Beeing a fighterbomber the AJ-37 retained the 4 color splinter camuflage that most Viggens got duriing the early days of service, later most JA-37s' was painted in a Gray sceeme, but the AJ was always "green". Now creating this sceeme is next to freakin impossible. Lucky there are some commertial options. Aztec has made a very nice set of masks for the JA-37.. Now as the AJ is a littlebit shorter than the Jacktviggen some sligth modifications of the masks in that area has to be made. No big task though. On the other hand what is a real PITA is actually paintng this modell. The masks make it alot easyer, but still , it's a helluva job. I've spent 5-6 hours every night for 5 strait nights to get the damn thing done.
I found the best way to paint this sucker is to start at one end and working your way, color for color, "patch" for "patch". After giving the modell a layer of Tamiya primer I sanded this down to a smooth surface and went to work. For this build I've used Tamya paint thinned with Tamiya Laquerthinner, this gives the paint a close to enamel hardness aswell as a decent drying time, as in not hitting the modell dry, but still not taking more than a 10-15 minute drying time.
this masking and painting really puts your patience on trial.. there are a huge number of masks to apply and paint, just take your time and go slow. To keep a relative momentum I chose to work more than one place. Laying down the color areas for one color from the trailing wing area on both wings , then starting the nose and workng my way back. Make sure always start at one end and making your way from there. . Othervise there is no way in hell you'l get this to work. Never ever lay down one color, try to fix all the masks for that color over the entire modell, and so the next and try to fit the masks , that will not work, trust me.
Once the main sceeme is finally done make sure to be carefull when taking the masks off. there will be some errors that need to be corrected, when you see one, deal with it before ripping of the next mask. This will save you the headacke of remaskning with tape and correcting. also try to get the masks off as whole as possible, if you need to correct it's easyer to reapply the mask before correcting (hope I'm making sense here)
The rest of the modell was completed in pritty much the same way as any other. Decals are very ok to work with and although there are quit a few they go on fearly easy.
-
Thanks dude :)
I wanted to brake up the monotone grey and thus this is a nice way to to just that. And it's also quite common to se jets, espessially well worn jets , with some variations in the panels
-
You really have a nice subtle variation with the grey scheme. Sorry to hear about the decals. Sometimes it takes a lot a patience and perseverance to make it to this stage and keep going! I'd say you are doing a heck of a job with the problems you describe. Keep at it!
It just tok some time and alotta microsol , but eventually I got i sorted.
I posted the finished modell in the gallery , It turned out really nice :)
-
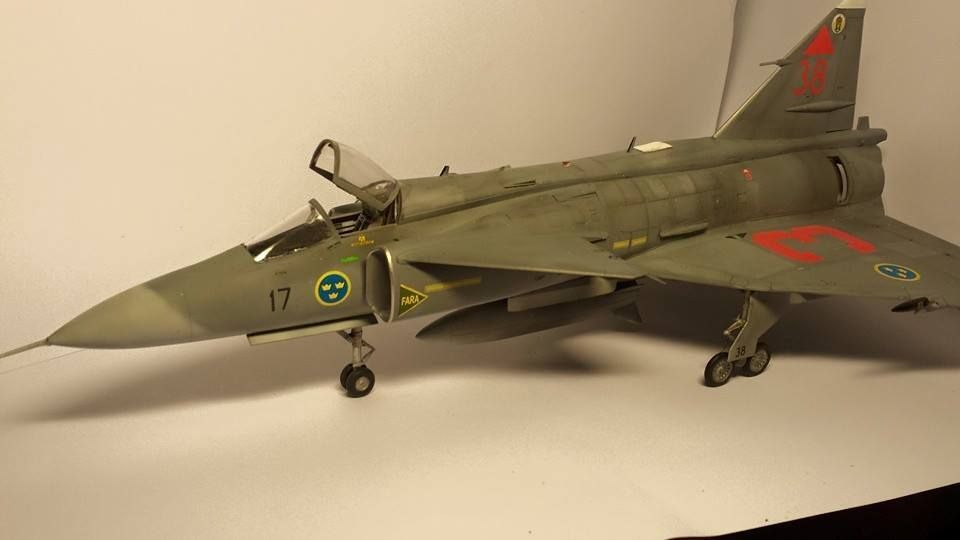
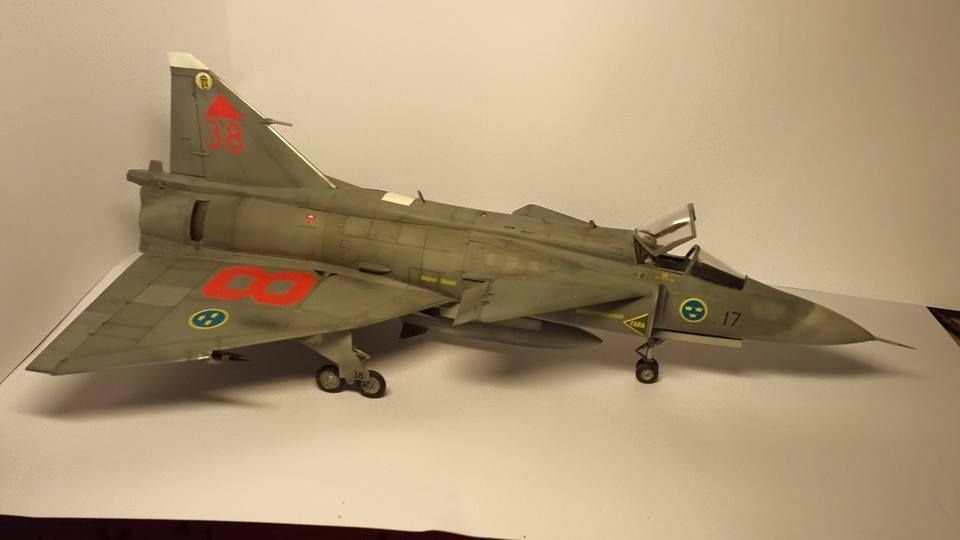
Just finished this one. tarangus SAAB JA-37Di Viggen
-
Been working on this all day today and she's done.
The SAAB Viggen is an awsome plane and finally a decent kit is avaleble. Tarangus has as far as I'm concerned done a good job on this kit. It's not a shake and bake kit, not by a long shot. So I'd never recomend it for a modeller without some experiance.
So what have I done with this one.
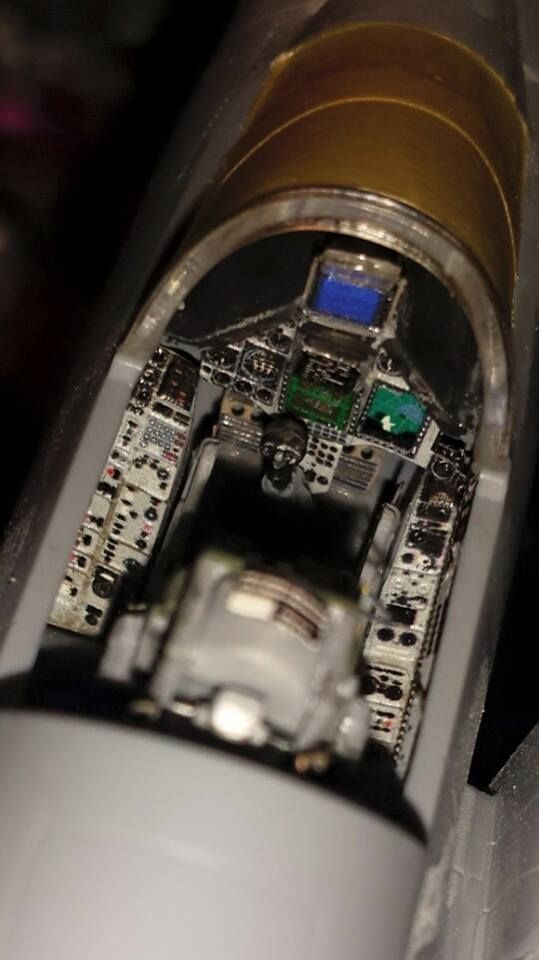
I got a PE cocpit upgrade for this and I'd highly recomend it to everyone that conciders doing a Tarangus Viggen. It takes the kit to a whole new level
As I got the Di - upgrade I had to ad some features and details. I've scratchbuilt 4 antennaes and the RWR, not the most challangeing scratch building I ever done. and also some minor upgrades in the cocpit. Also the cannard flaps has to be repositioned in the down position for a jet that's parked.
I used Gunze for the main colors and varius from Tamiya, Vallejo , Citadel/games workshop for the rest.
After spending a cupple of hours looking at Viggens from the last days of service I found that , 1: they where not armed to often, and 2: they looked filthy. with that in mind I had to go to a weathering extreme for a 48'th scale modern jet. Plenty of dirt and also miscolored panels.
Weathering was done by airbrush effects and washes from MiG. Some decal details from the TwoBobs sceet was also used for this build.
I modelled this as a jet from F17 at Roenneby AB in southern sweden.
-
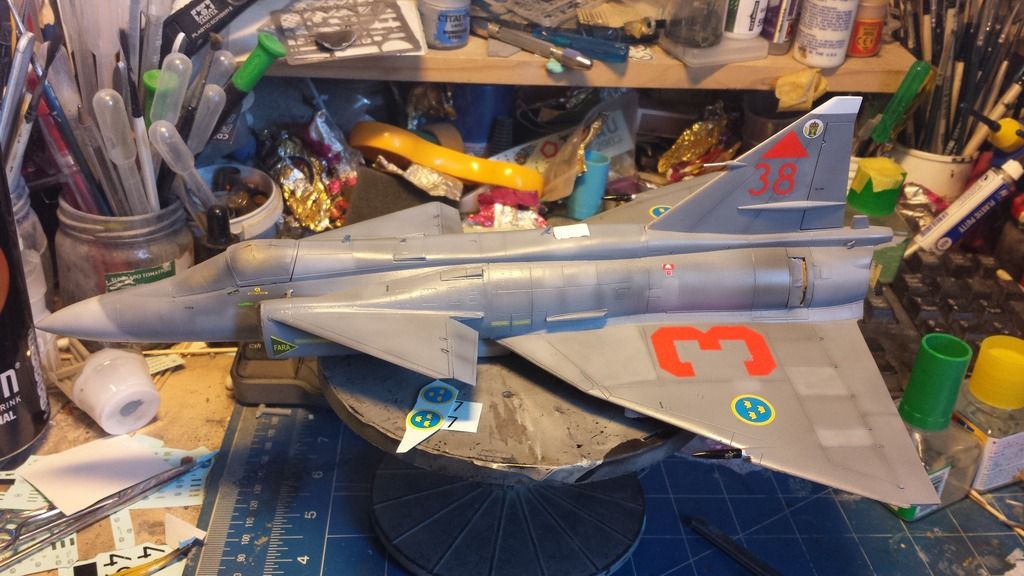
Working the decals.. man.. I'm not gonna give Tarangus a thumbs up for these.. They curl up the wrong way and I'm having a helluva time gettin them to sit right. they are also very "stiff" soI'm using gunze mr mark soft in order for them to lay down like they are supposed to
-
All set for the decals. I did some more shade on selected panels to brake up the monotone gray , now it looks better as far as I'm concerned.
This will be 17-38 from F17. I originally wanted to do one from F4 as they have a cool pendant on the tail, but I did't have all the markings I needed so F17 is my 2'nd choise
-
You can really see all the work you've done on the pit! It looks good! The IP really stands out against the white consoles. Did you use a pearlescent white paint for the control panels? Your exterior weathering is equally impressive. Looking forward to more progress.
Yea that IP turned out really nice , it's PE from Maestro modell, it's just like a zoom set you get from Eduard, and they actually made this for Maestro/Rebellhobby/Tarangus (same owners I beleve). So you can imagine the quality. I really dont see the use for a resin cocpit when using this set. It's really,really nice.
-
Great seeing another Viggen on the table! :D/>
Mighty fine work I´d say :D/> Putting on the decals before weathering is a little thing to consider tho....They get weathered as much as the fuselage :D/>
Thumbs up tho and keep up the good work!
Cheers dude :)
yea it's just some basic airbrush effects, next up is the decals before I start the fun part with washes and stuff.
I'm curius though, I use your exelent build as inspiration for this one, but I cant for the bare life of me find refrances on arnement. Every single Di pic I've found thus far has been either "naked" or with a ACMI pod of some sort , and on those the pylons did't match with the ones on your jet. To me it looks like you've used LAU-128 but I cant find a single pic with those on a real jet. a Viggen witn slammers and 'vinders looks menacing to say the least. just way cool.
also I got the Two Bobs decal sceet today, but no shoot, there is no Di on there, I'm lookin at 37 394 /17 - 47 from F-17 at Rønneby, but the decals represent a jet from '92 and that don't match to well with a Di or does it ? I donno :)
-
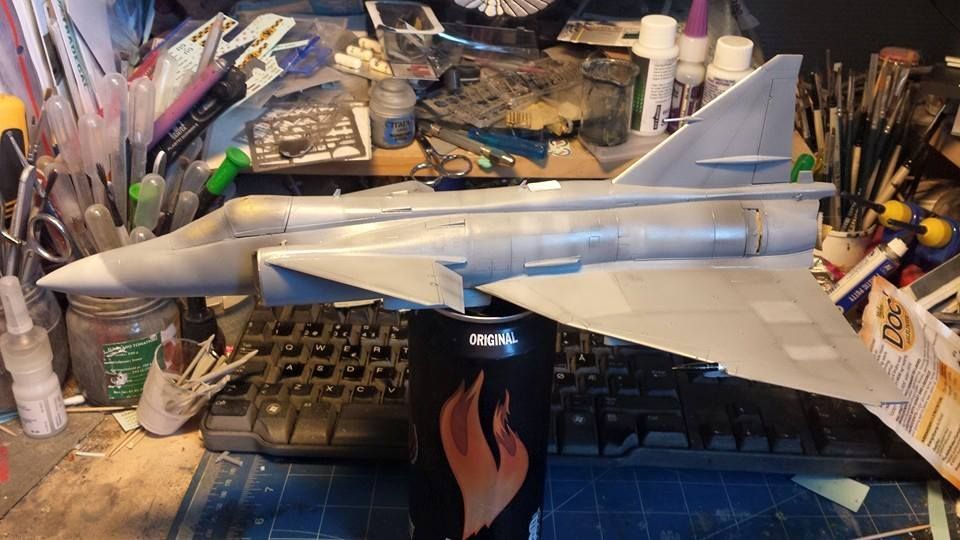
got my vitts arround to make a building thread on this one.
Cocpit more or less ready. Let's close it up and get ready for paint. still some work before we can start the paiting process , but we're gettin there.
This will be a gray Viggen btw. I have two more in my stash and atleast one of them will be in camo. However I think the gray ones look way better espesially those with dayglow numbers on the wings and tail. I have some 2Bobs decals on the way so I will use them naturally. But other than decals , PE cocpit and some missiles from the spares box, this will be an OOB build.
This is by no means a shake and bake kit. I've had some fit issues with both the radome,wings and airintakes. However the plastic is relatively easy to work with so they are fixable. The worst part is on the airintake sides and in the radome area where there is some difference in hight on the plastic.. that took a while to get right, some superglue, sanding and rescribeling fixed that up nicely, but it took like forever.
I found that the canard flaps is always dropped as long as the landing gear is down so I did just that. this would have been alot easyer if I did it before I placed them on the jet though.
Also the -37 in this config's got two vortex generators on the canards , not just one. so I made some aproximations using some evergreen.
Now lets put on some antennaes , struts and check for cracks that need filling.
Been working stady and got some detaling and the base paintwork done. Although the Viggen is a gray jet , just painting the thing gray and call it a night would not make for a good result. So I've decided to take it a cupple of steps further. Weathering this thing is really fun. Just gotta make sure I dont' overdo it. the airbrush effects are almost done. Now it's down to washes , and drybrushing to get the rest.


F-5A Freedom Fighter, The Norwegian Tiger
in The Display Case
Posted
Thats' just tits !
Did you print the decals ? and do you have any more of them ???
And more pix please :)