


nickdanger
-
Content Count
475 -
Joined
-
Last visited
Content Type
Profiles
Forums
Calendar
Posts posted by nickdanger
-
-
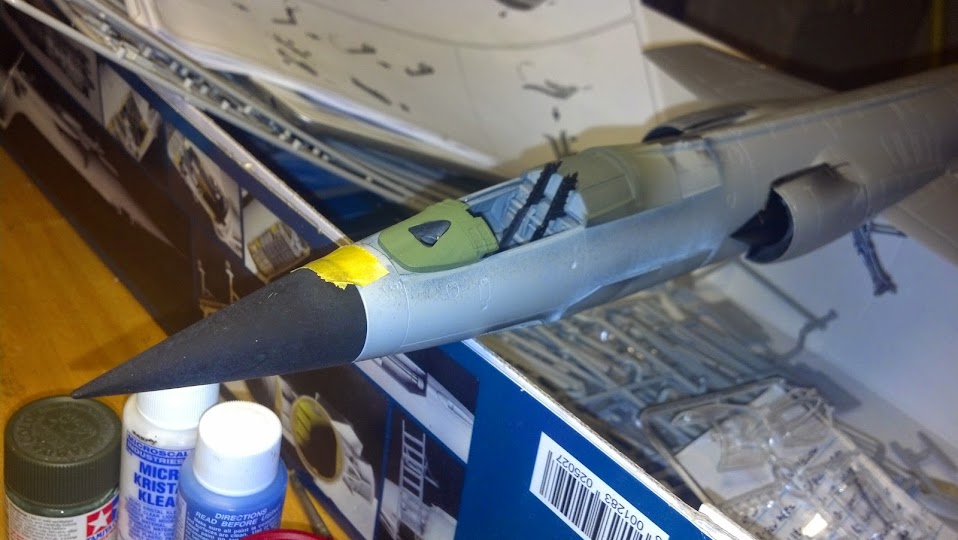
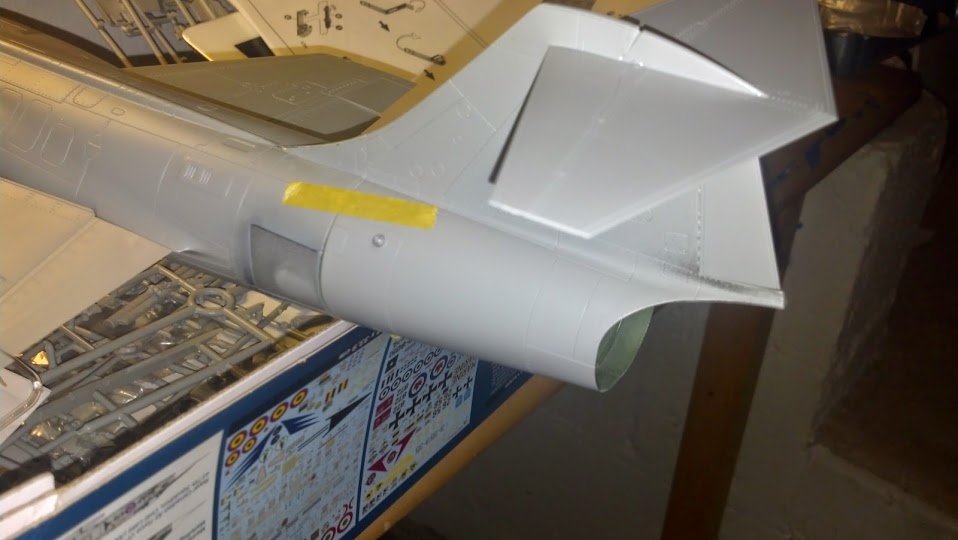
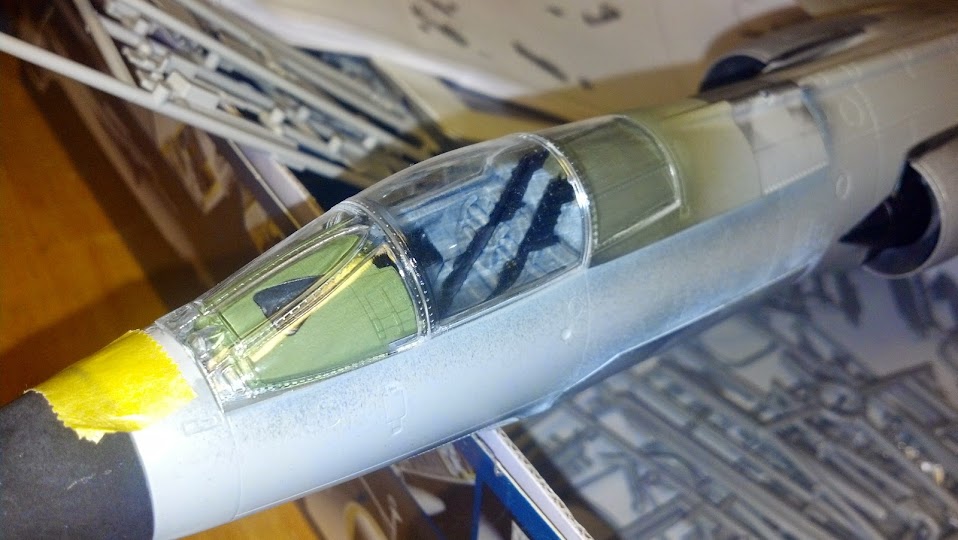
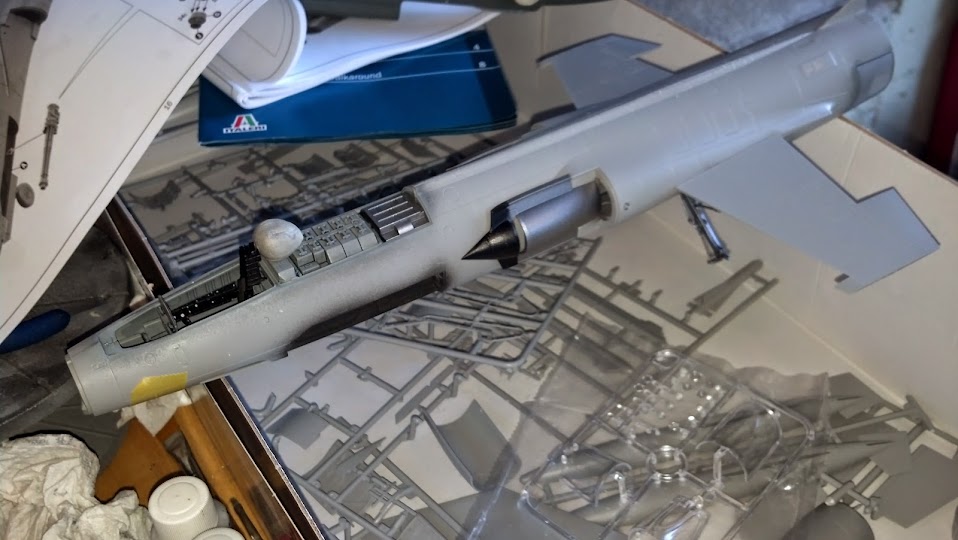
Wings are on, canopies are masked:
Tail section is cemented on:
Just need to add the nose cone, tape off the front landing gear bay, mask the landing and formation lights and I should be good to paint.
Looking forward to putting some color on that plane.
-
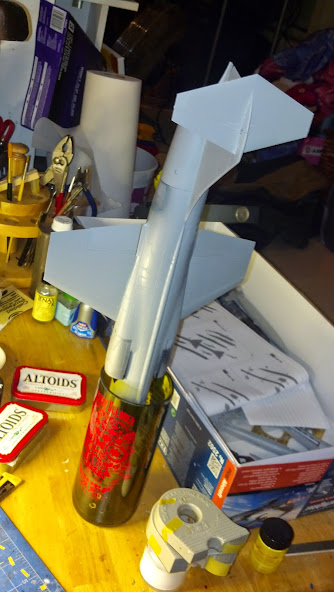
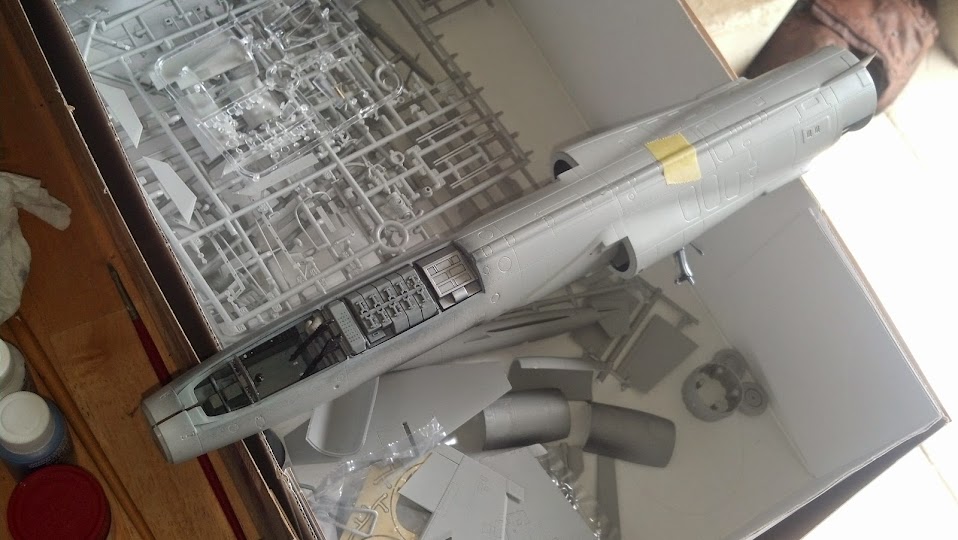
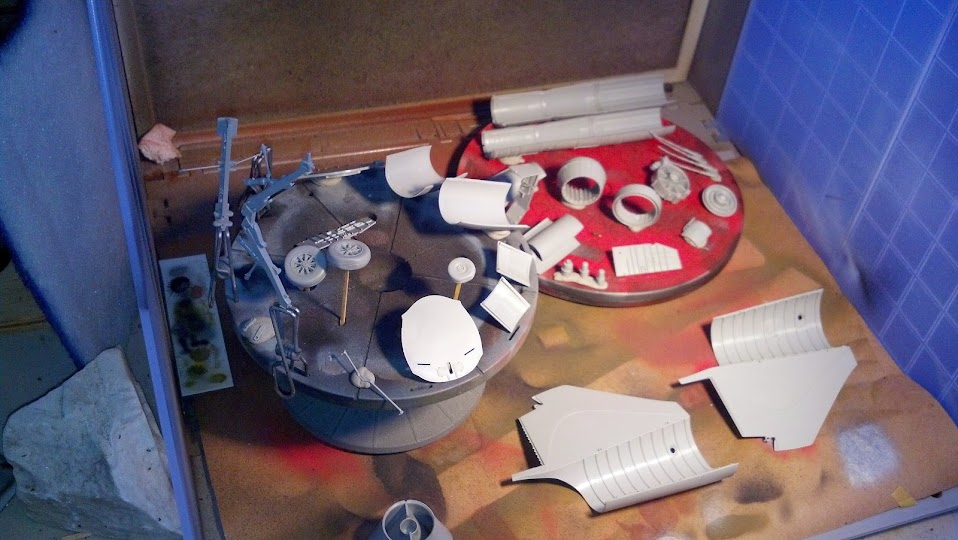
Test fittings continue:
Turns out that this is a BIG MODEL. Hope I'll be able to paint it in my little portable spraybooth....gonna be tricky.
-
I've done a few HB kits and i think that they're a great value. Thought that the 1/48 Warthog was a great kit.
-
I switched over to CO2 a few years ago from compressor and loved it. The only issue is that refills were expensive. Like $80 every couple months if you use it regularly.
A couple of my coworkers are big divers and i was complaining to them about the expense and I asked offhand how much it cost to fill a scuba tank..."I dunno $5?" I immediately switched over to compressed air.since I live in Hawaii there are tons of dive shops and so it's super cheap and convenient. I can bring in an empty and have it refilled in minutes.
If you take it to a dive shop they'll check the tank out to make sure that its not rusty and going to explode. You have to have it inspected yearly and maintained once every couple years.
The benefits of never having to bleed lines and no compressor humming away is well worth the initial upfront costs. Might wind up costing you about $300 since you'll need special fittings and work done, but I would never go back.
-
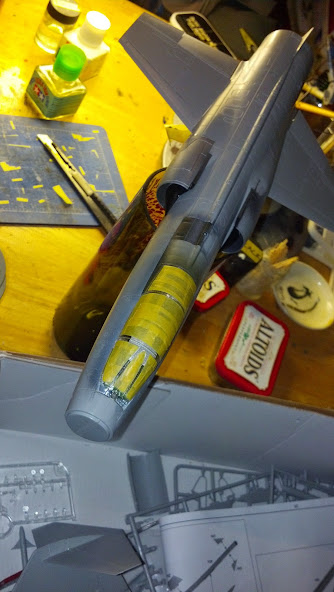
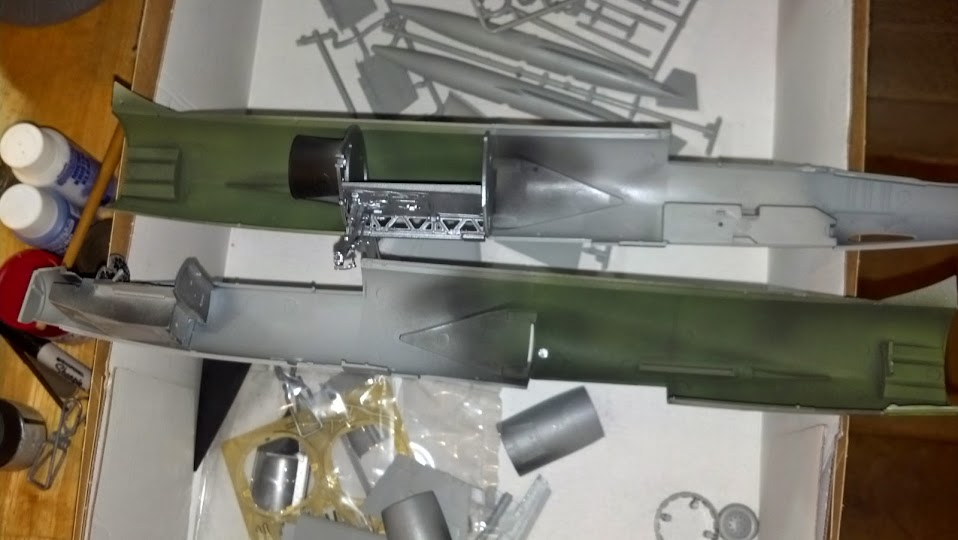
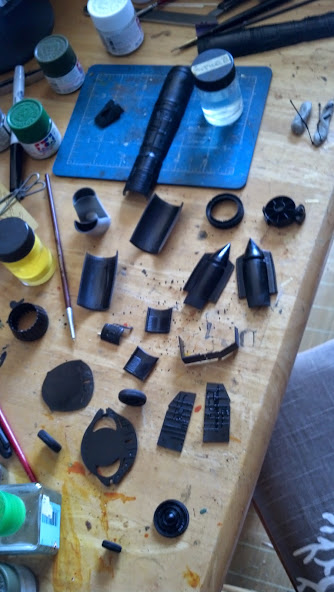
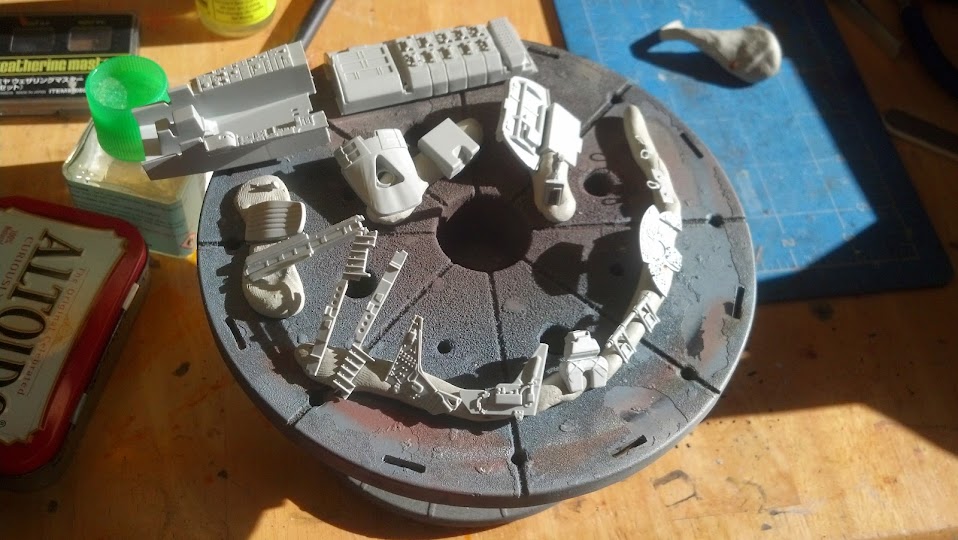
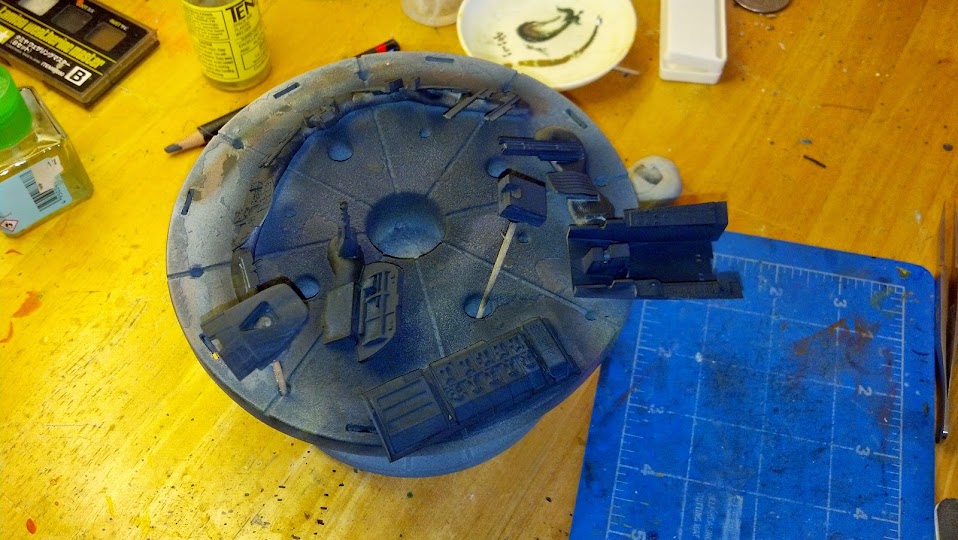
Prepping the next batch of parts for black then future then alclad.

-
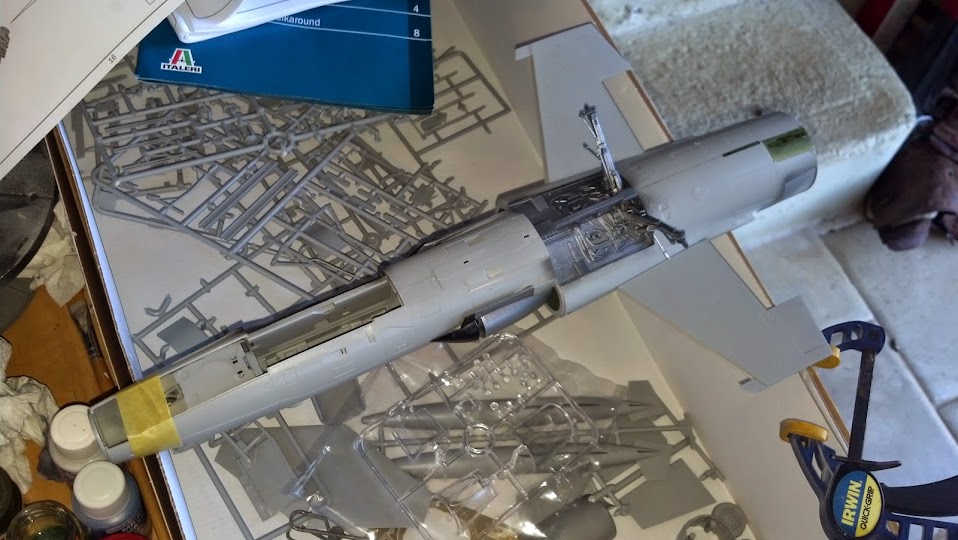
Test fitting before closing her up:
Quick shadow wash with thinned Payne's Gray:
One last test fit:
The shadow wash helped the engine and I think I will keep it separate.

The kit comes with dollies for the tail section and the engine. I think I'll still fix the tail section to the main fuselage but make both dollies.
Closed up! Wings are just dry fit at this point.
-
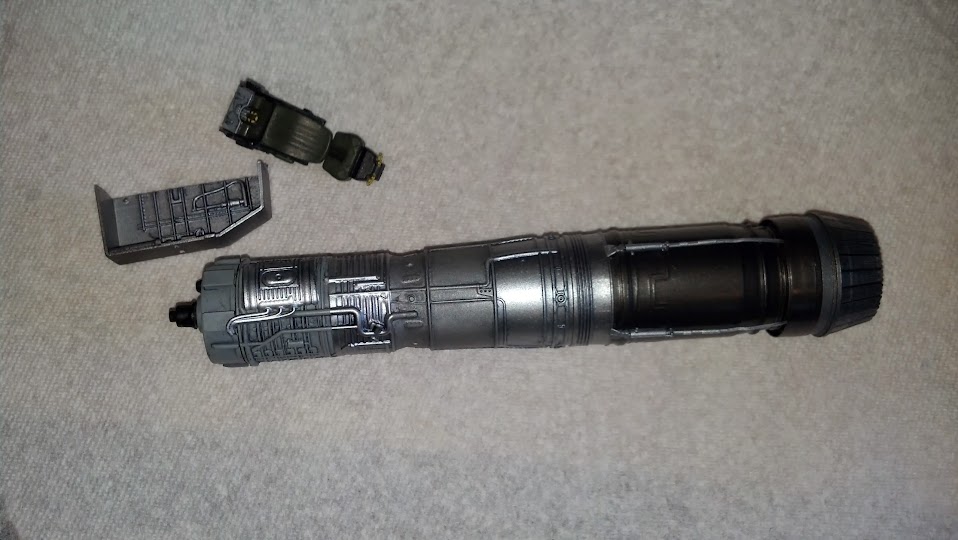
It'll be hidden but couldn't resist building out the J79. Didn't worry too much about proper colors, just sorta went for it.

Will do a quick dirty wash but nothing over the top.
-
First go 'round with Alclad. Prepping w/black:
Glossing w/Future:
Nice and metallic now:
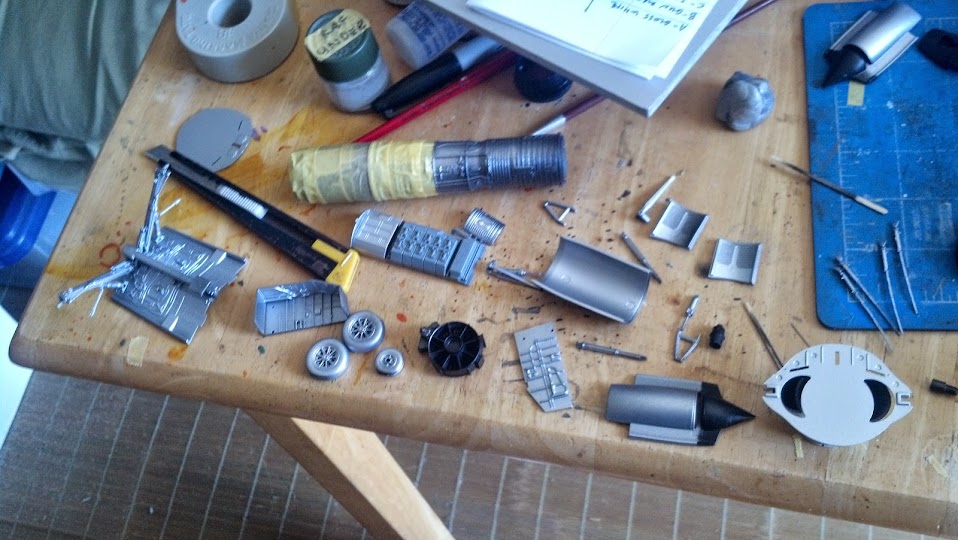
So glad I'm not going for a bare metal paint scheme. Love Alclad in small doses but a 1/32 plane would be tricky.
-
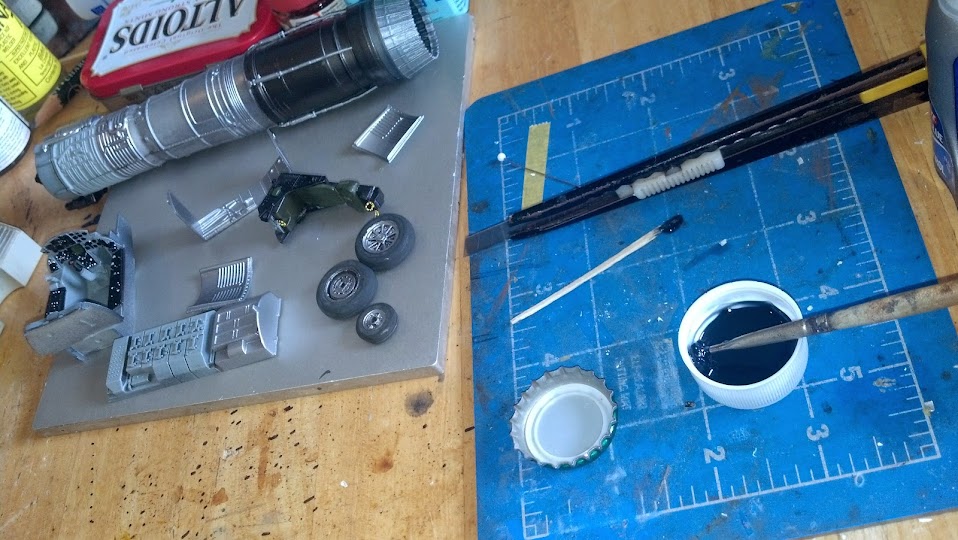
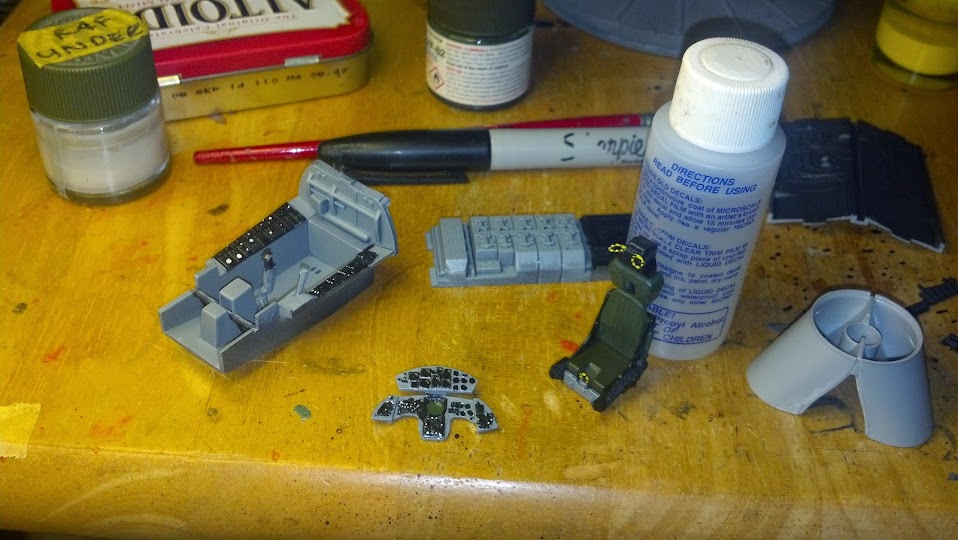
Cockpit progress:
-
I like the ICM kits for the price. If you can score them for $10 on eBay and get some nice decals aftermarket, you can make a pretty nice kit.

Once you know that the ICM plastic is super flexible and that chances are there is inevitably some warpage and that the engine doesn't fit without removing the tops of the cylinders....
-
Finally finished my Great War GB project and can move on to the jet age.
Cockpit prep
OK. Black base painting/preshading isn't too exciting but gotta start somewhere
-
I made that kit a few years ago. I thought it was OK. The Revell plastic is waaay superior to ICM's and the decals are nice. When i think about ICM decals....shudder.
-
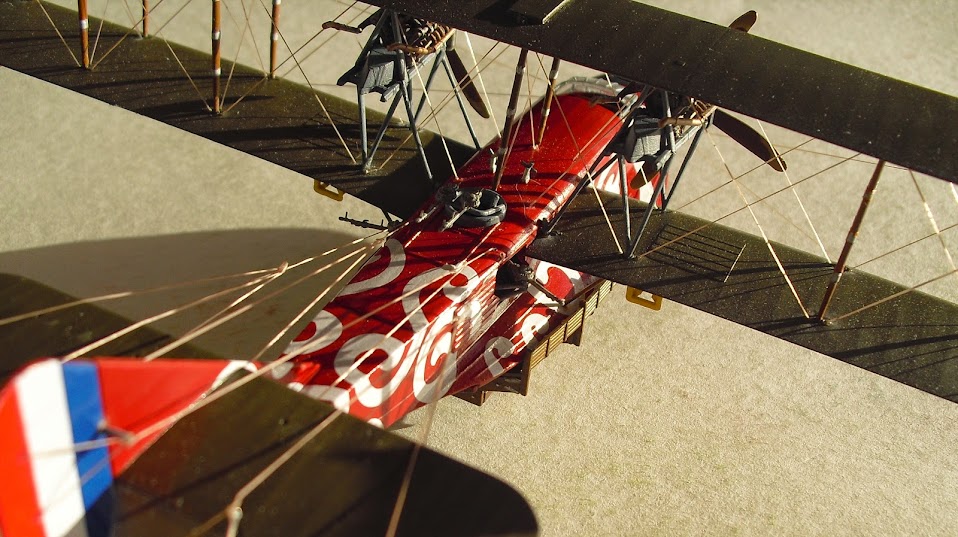
@dnl42 - Well I started the project with a spool of EZ-Line that I figured would last me the rest of my modeling life. Juuuuuust managed to finish the model with some line left on the spool. Was touch and go by the end.
I was being a little wasteful to keep from having to think too hard: lots of excess got cut off from the undersides of the wings.
-
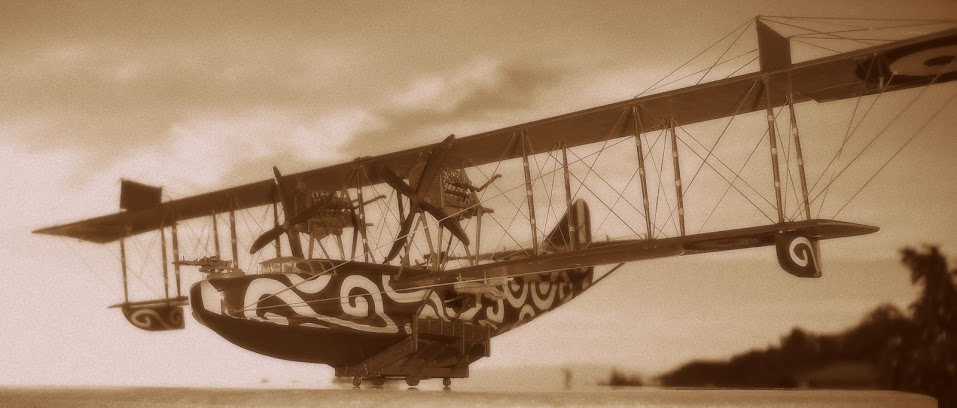
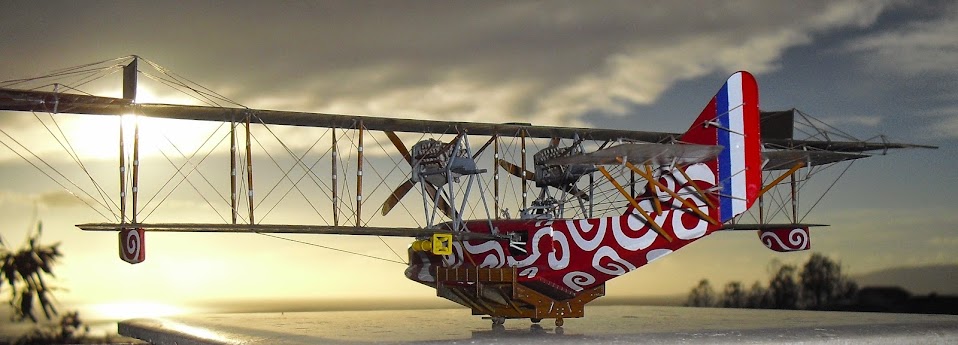
Roden 1/72 Felixstowe F2A


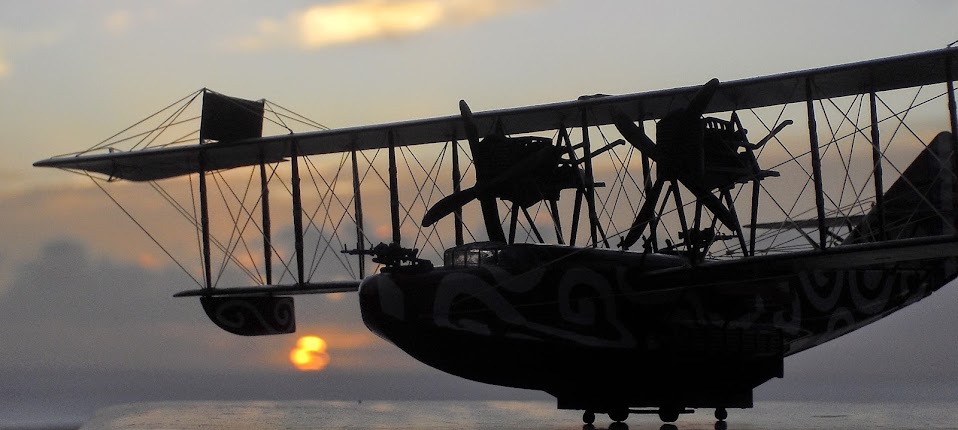
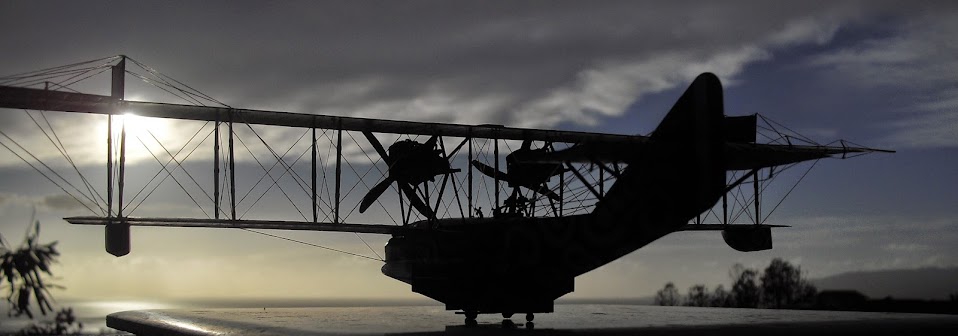
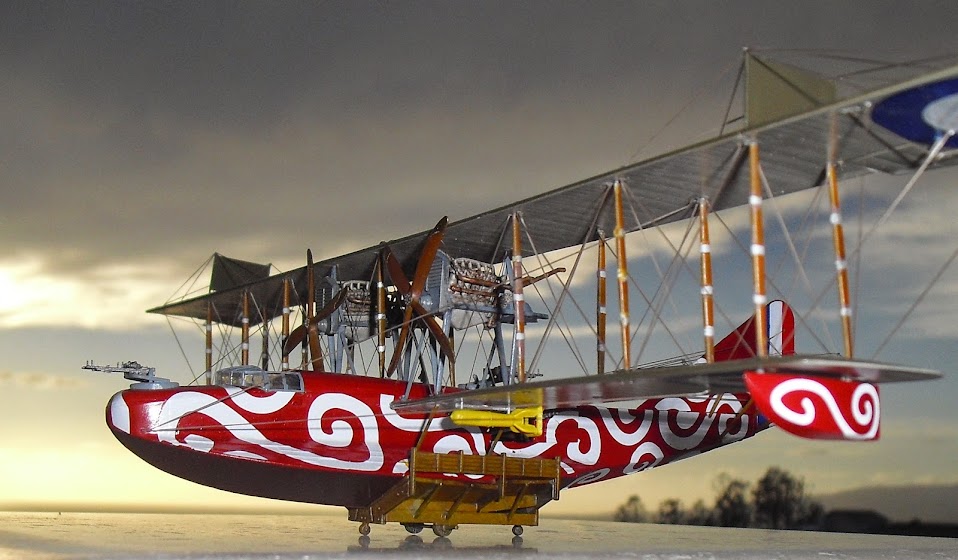
Hardest. Model. I've. Ever. Done.
Glad it's finished. Would never have done it w/o the social pressure of a group build. On to the Starfish GB entry !
-
-
Oh yeah, forgot about the bombs.

-
Added the supports for the tail before hitting the riging:

Little tricky to combine the four control lines from the elevator control horns, but managed alright:

Last rigging lines! Drag cables from the wings to the nose:
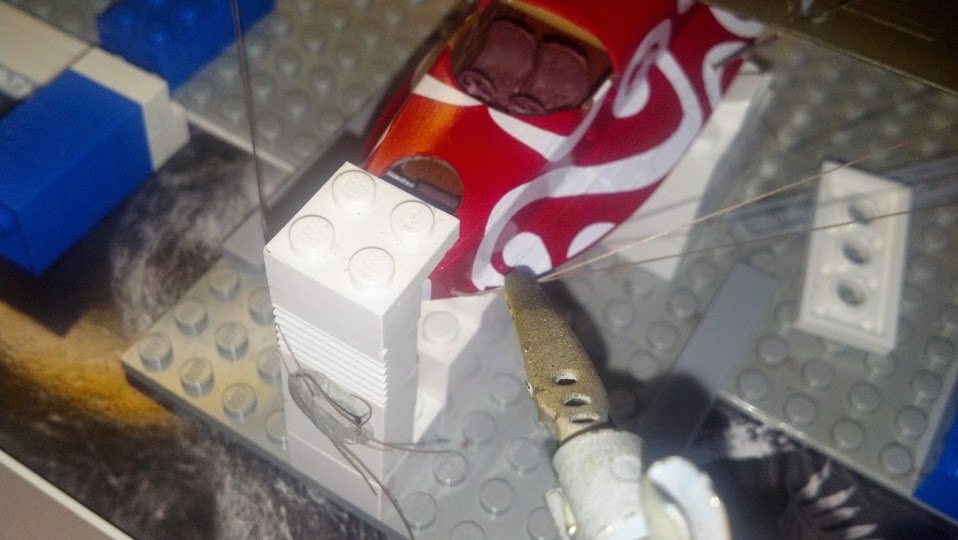
Rigging complete !

Final installations left to complete:
- fuel pumps
- gun platforms
- instrument panel
- windscreen
- fuel pumps
-
Control lines for the tail assembly are on but not yet rigged.

Just need to steel myself for a fairly tricky operation:

-
-
Found a great resource for F2A rigging. Scans of the original manuals !
-
My house is neither large, safe, or non-dusty. Fortunately my office is! And since I work at a museum, I have access to all kinds of plexiglas, shelves, lights, and other display aids.
-
I only have one shelf queen. This will be the perfect motivator for me to finish my stalled Millennium Falcon that has not seen any work done on it since the original burst of activity SEVEN YEARS AGO !!!!!

-
Finally ! All of the wing rigging is on. Control horns are properly installed.


Now there really is light at the end of the tunnel.
A fair number of little pieces to add, and of course the tail assembly with a little bit of rigging there as well. But no more than a few hours if all goes as planned.
-
Grrrrrrr.
Realized that I installed the underside aileron control horns backwards (they're supposed to lean forward).
Had to uninstall and redo.
Got the top horns and those weird panels (have no idea what they are called) that rise from the top of the upper wing installed.:


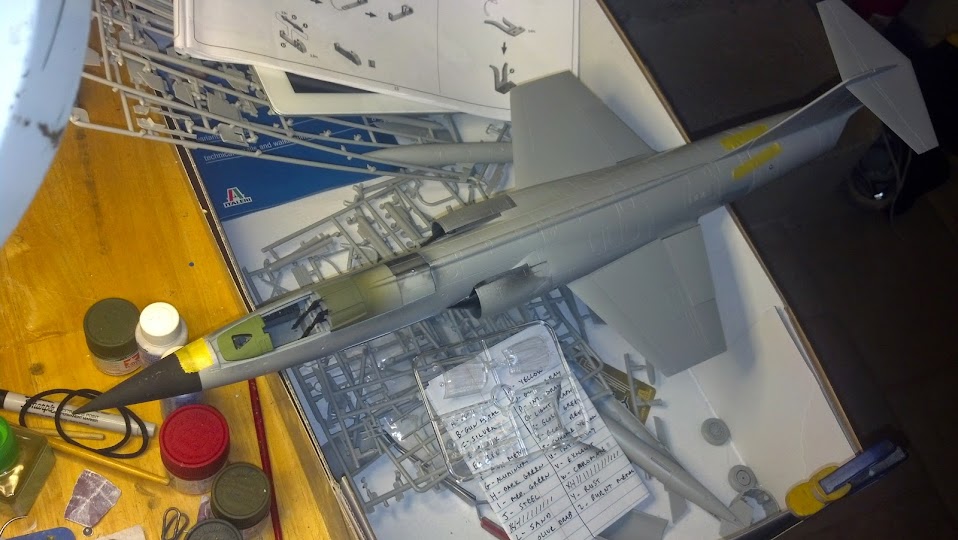
Italeri 1/32 Starfighter
in The StarFish Group Build (Ended)
Posted · Edited by nickdanger
Preshading has begun:
As you can see tight fit in the little spray booth. Think I'll leave the nose cone off to guard against accidents.