


pg265
-
Content Count
161 -
Joined
-
Last visited
Content Type
Profiles
Forums
Calendar
Posts posted by pg265
-
-
Hi
Thanks 😉
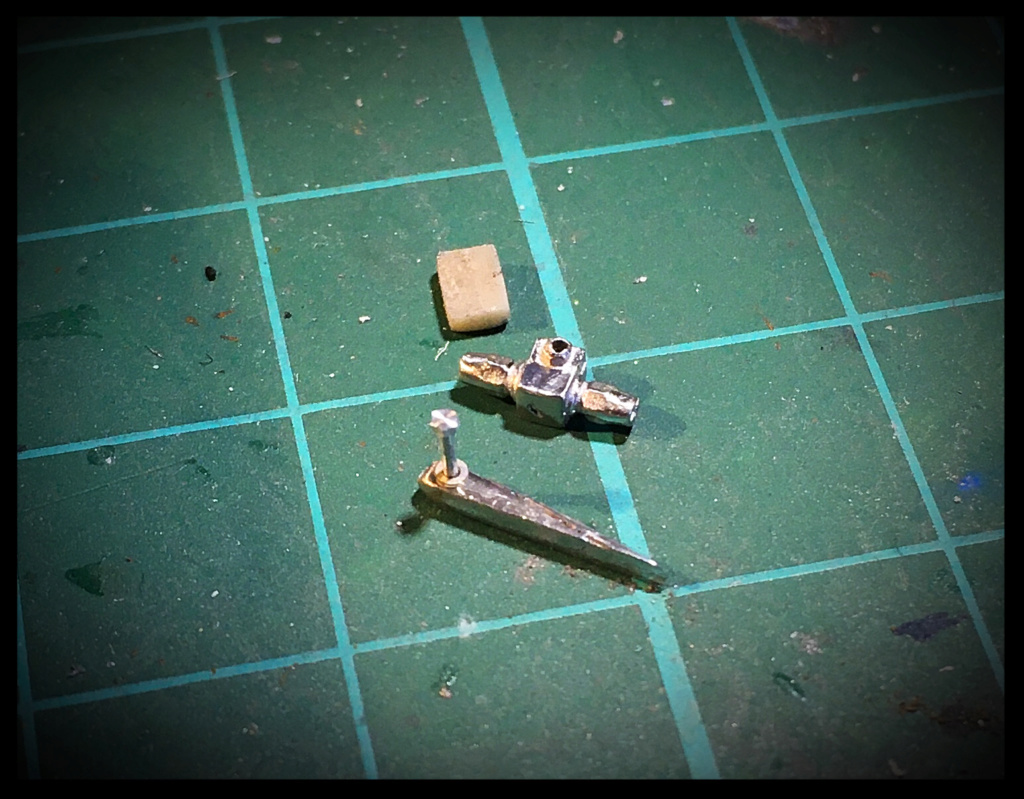
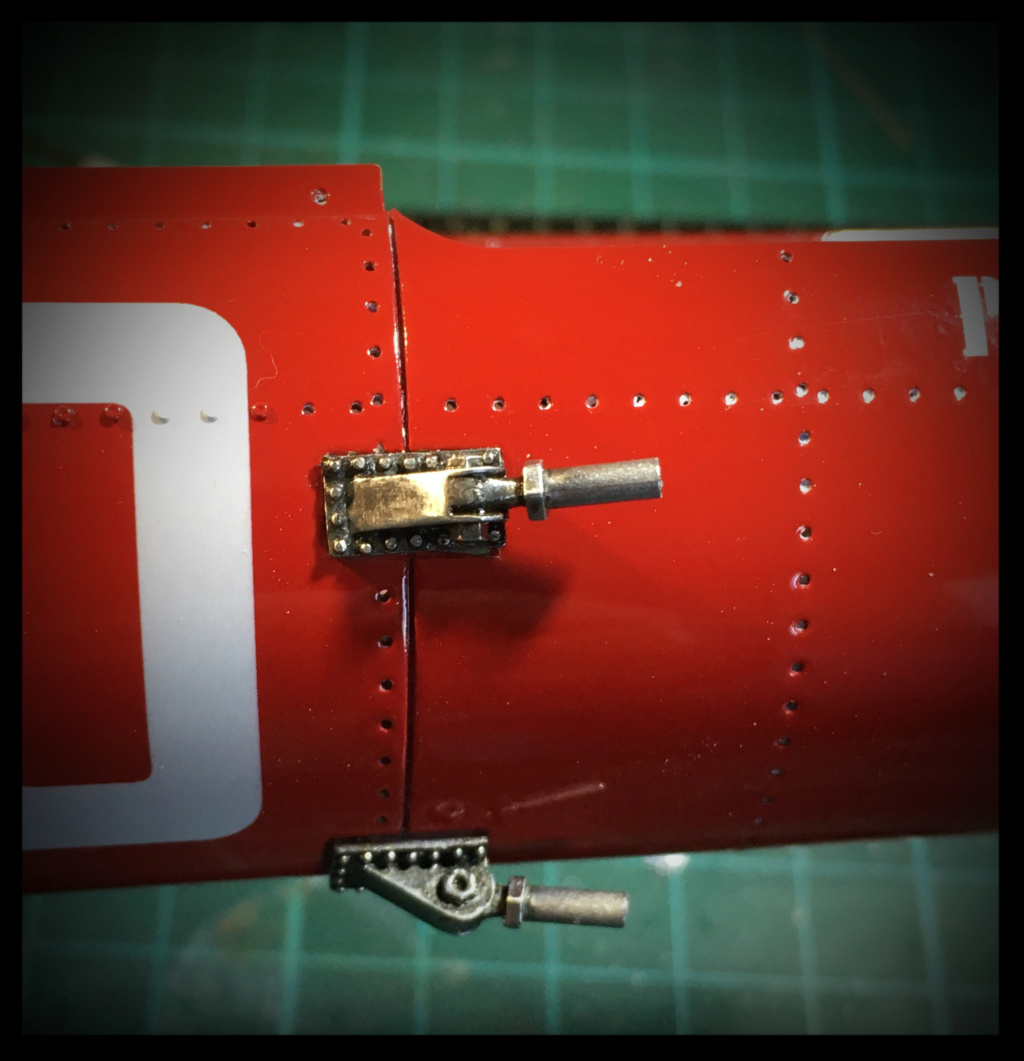
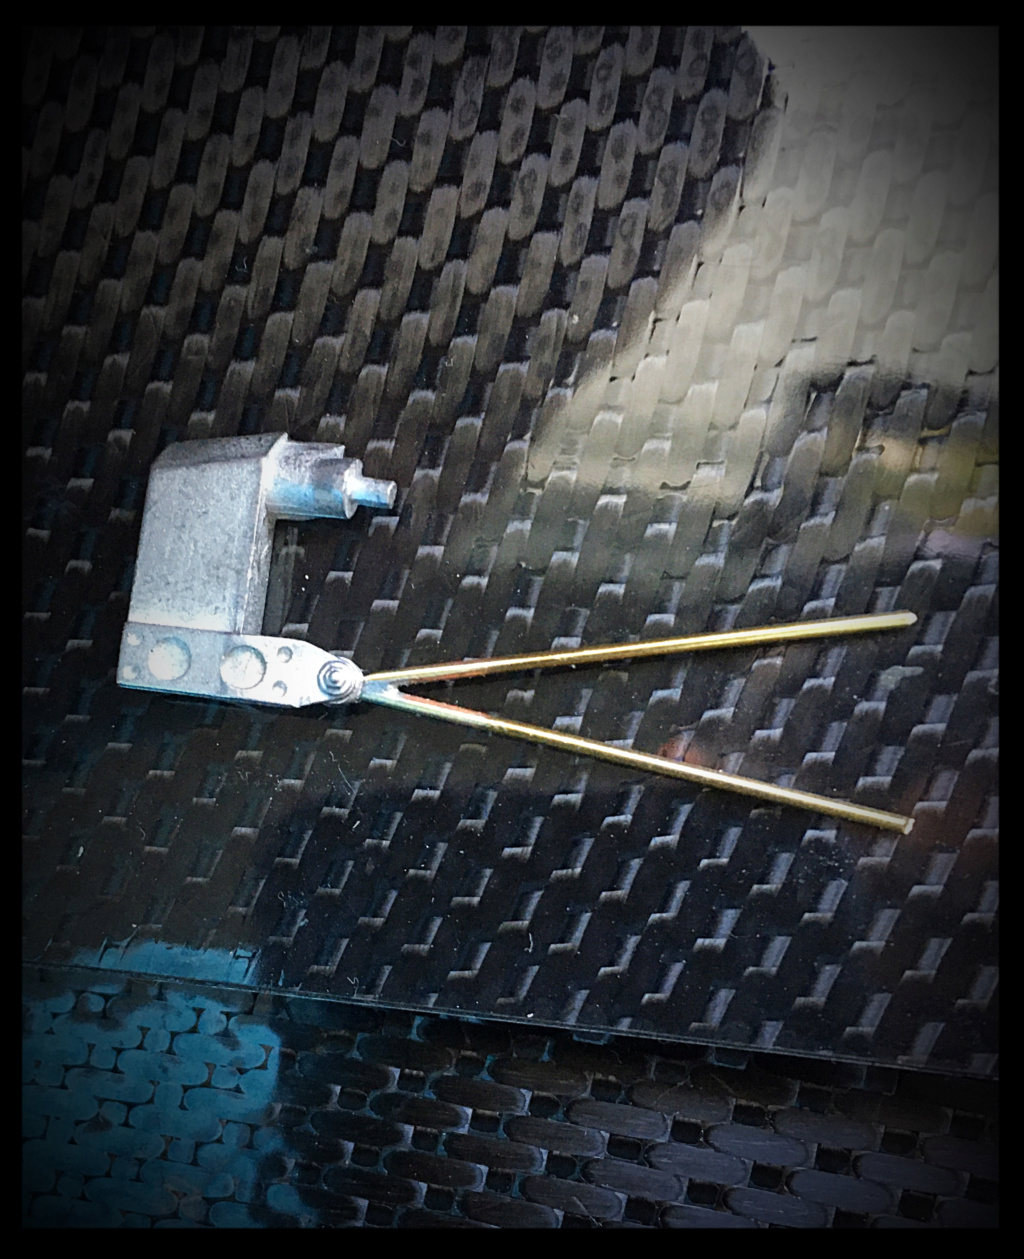
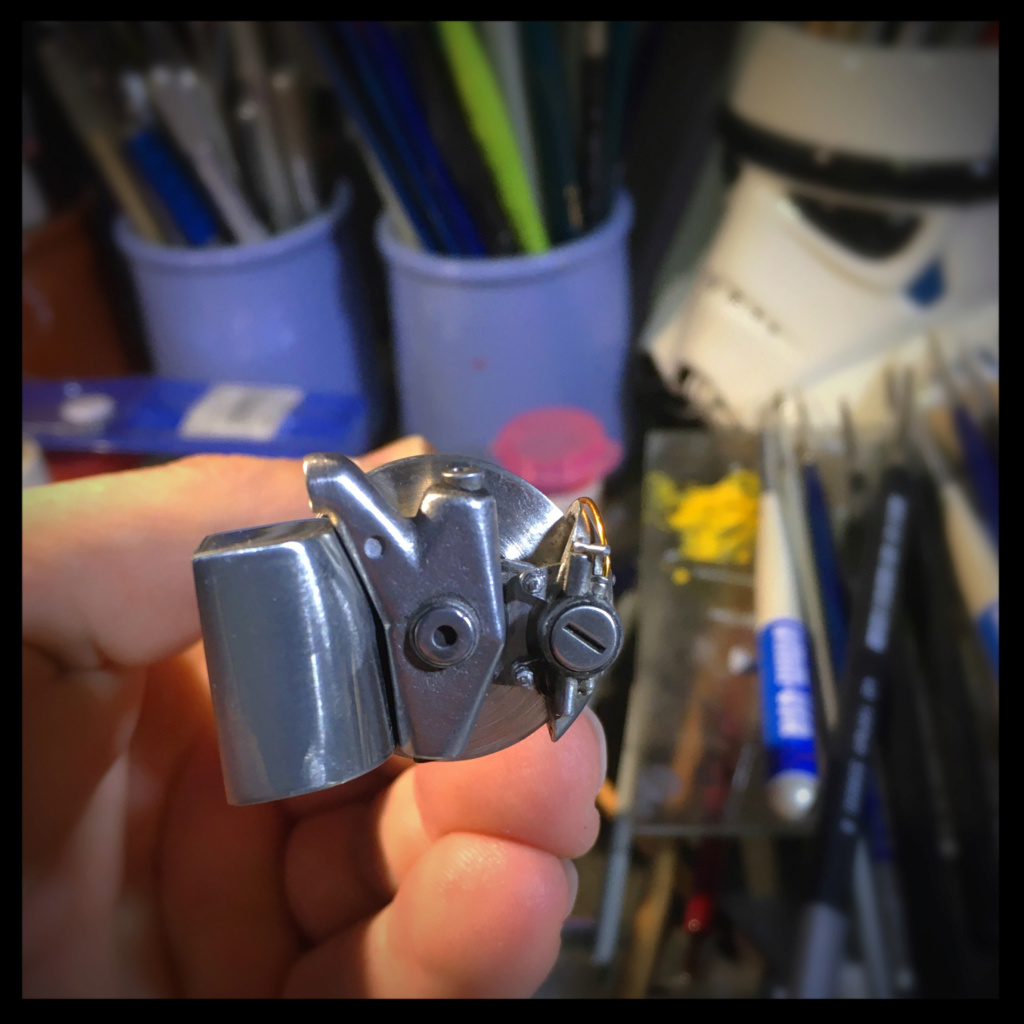
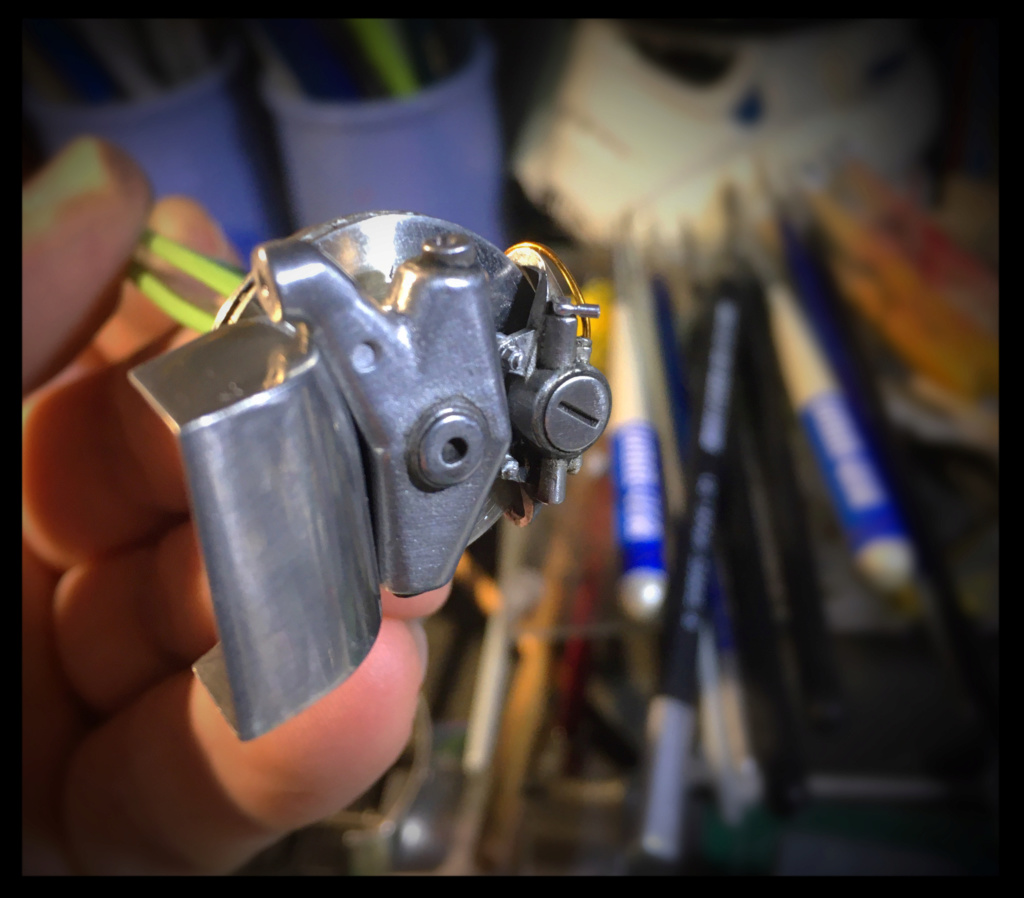
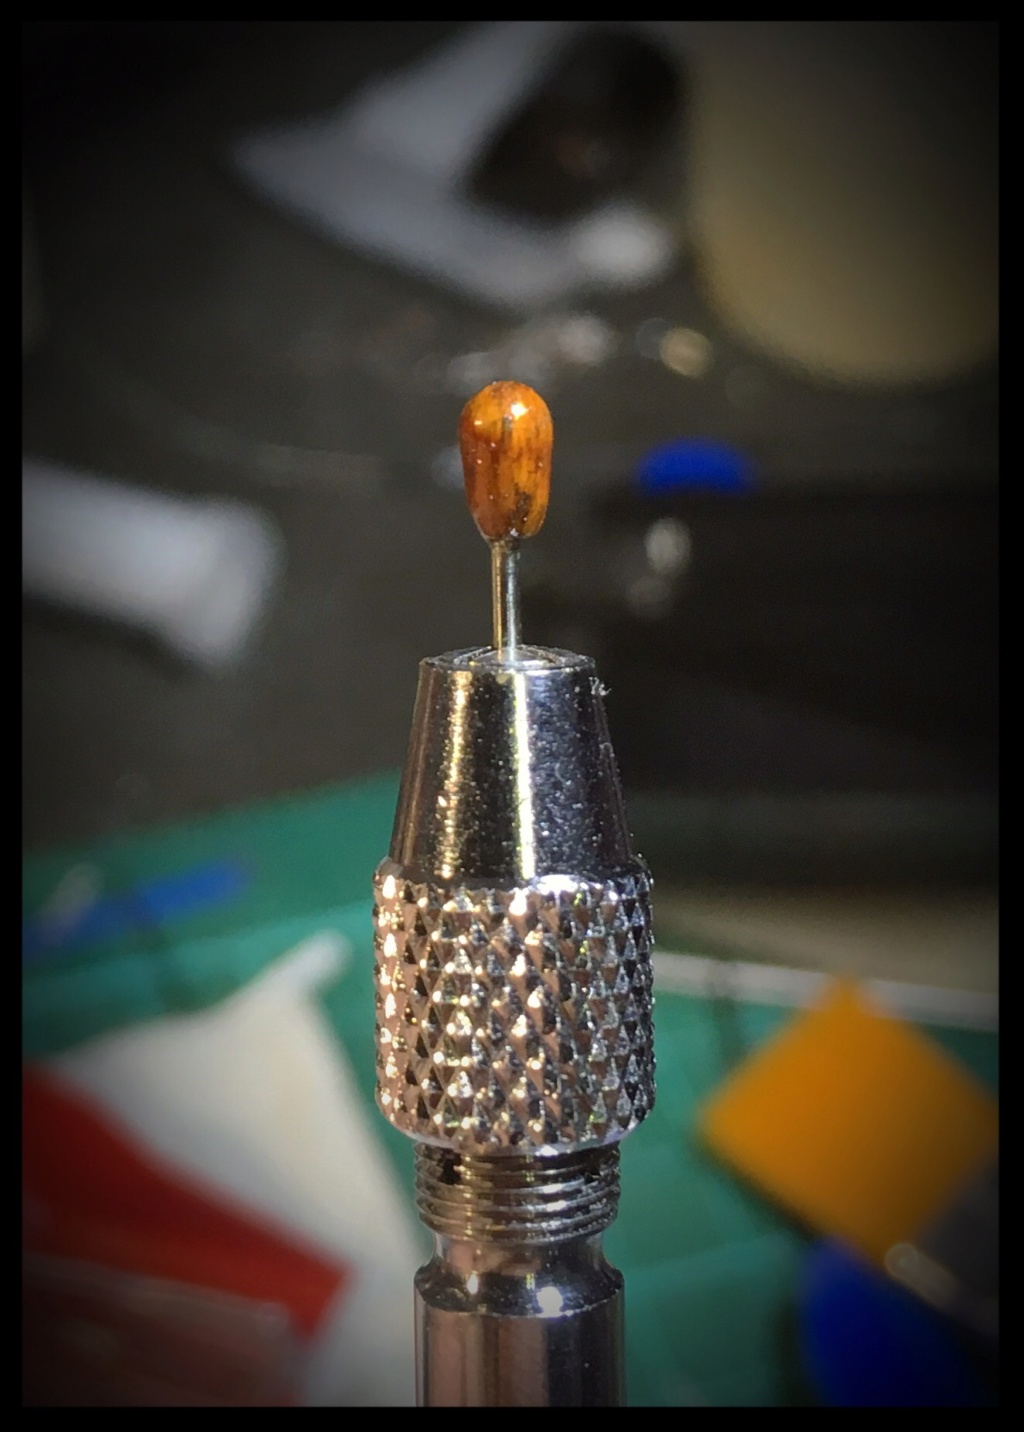
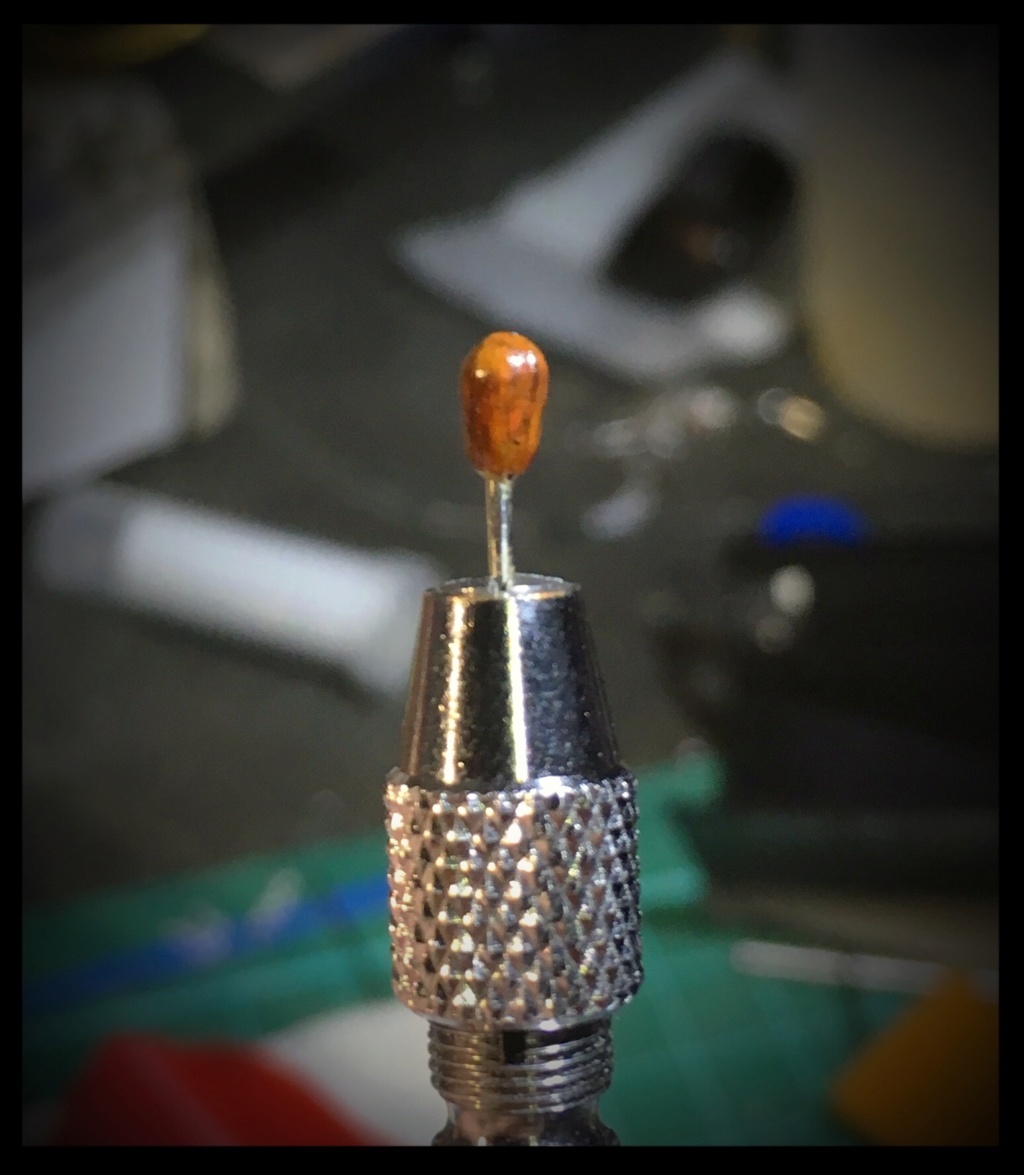
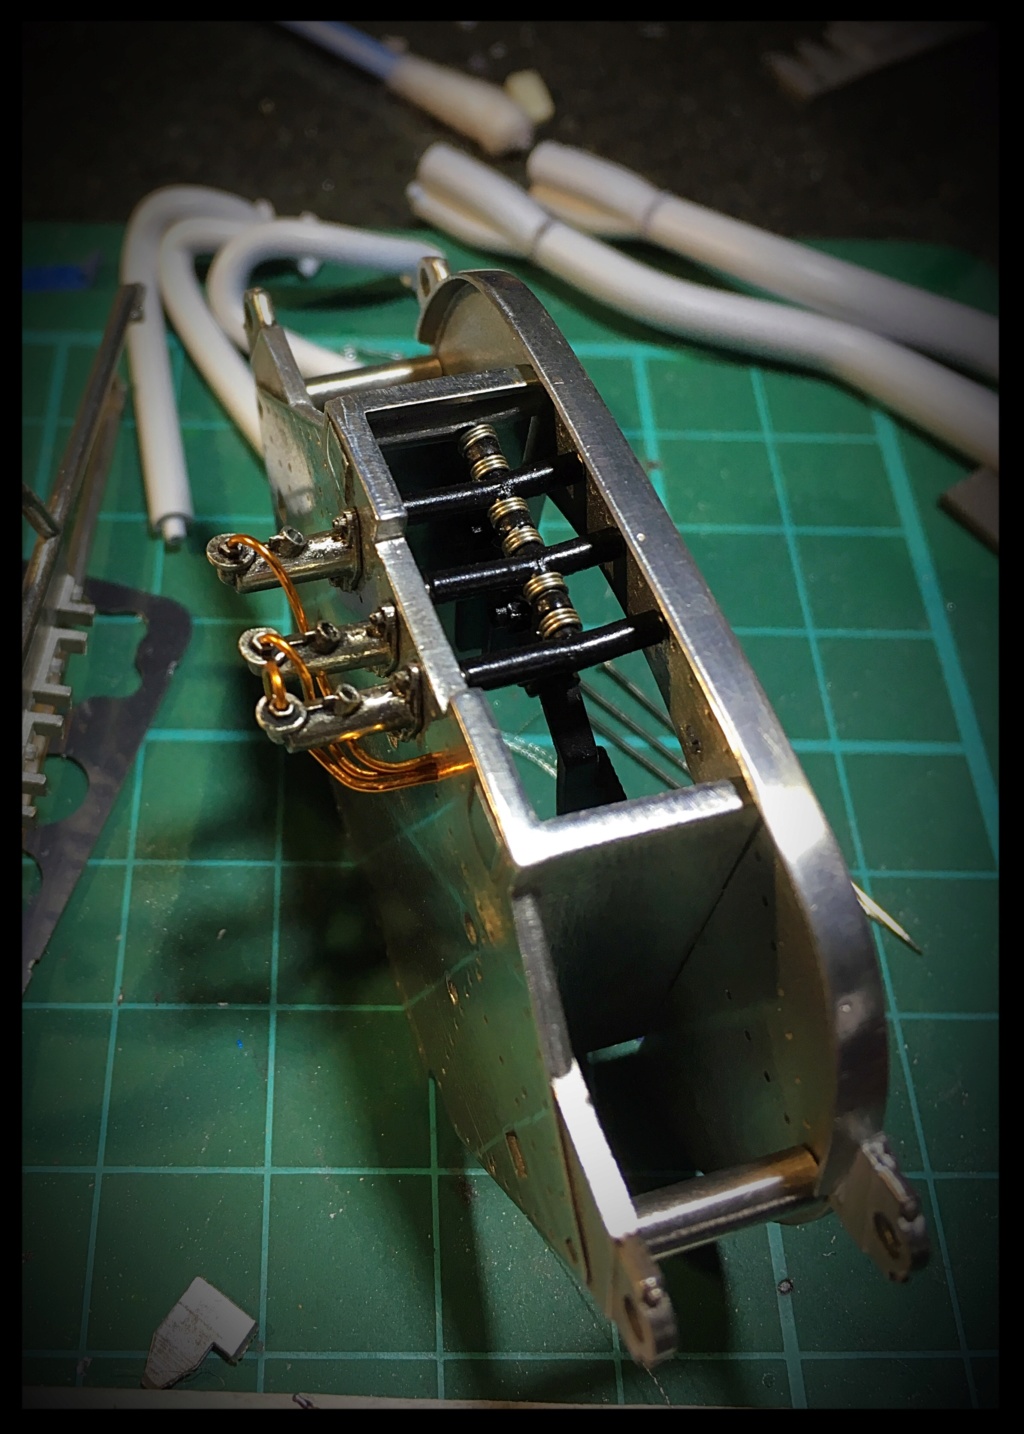
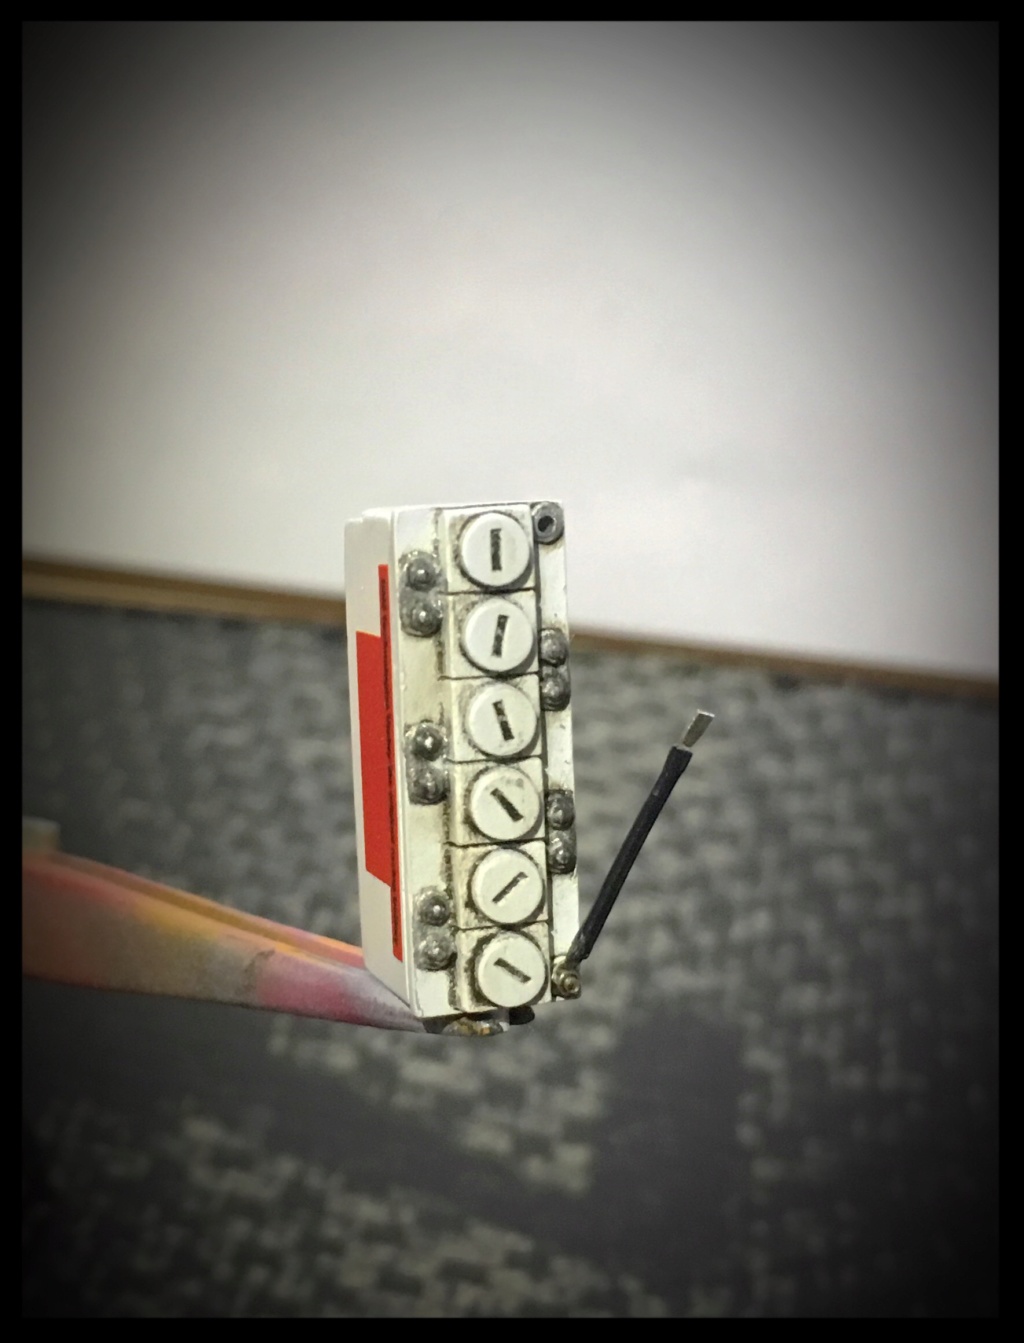
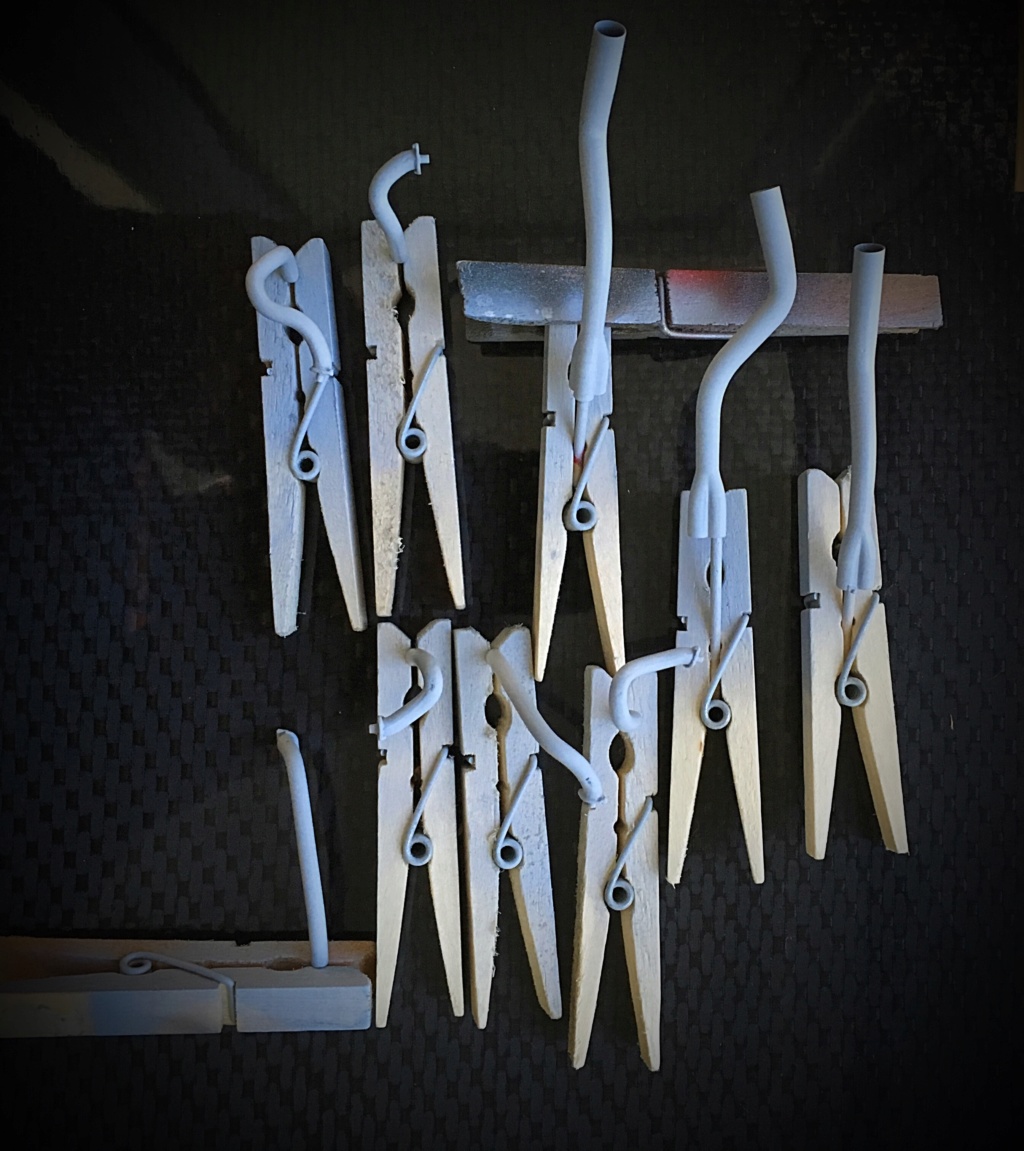
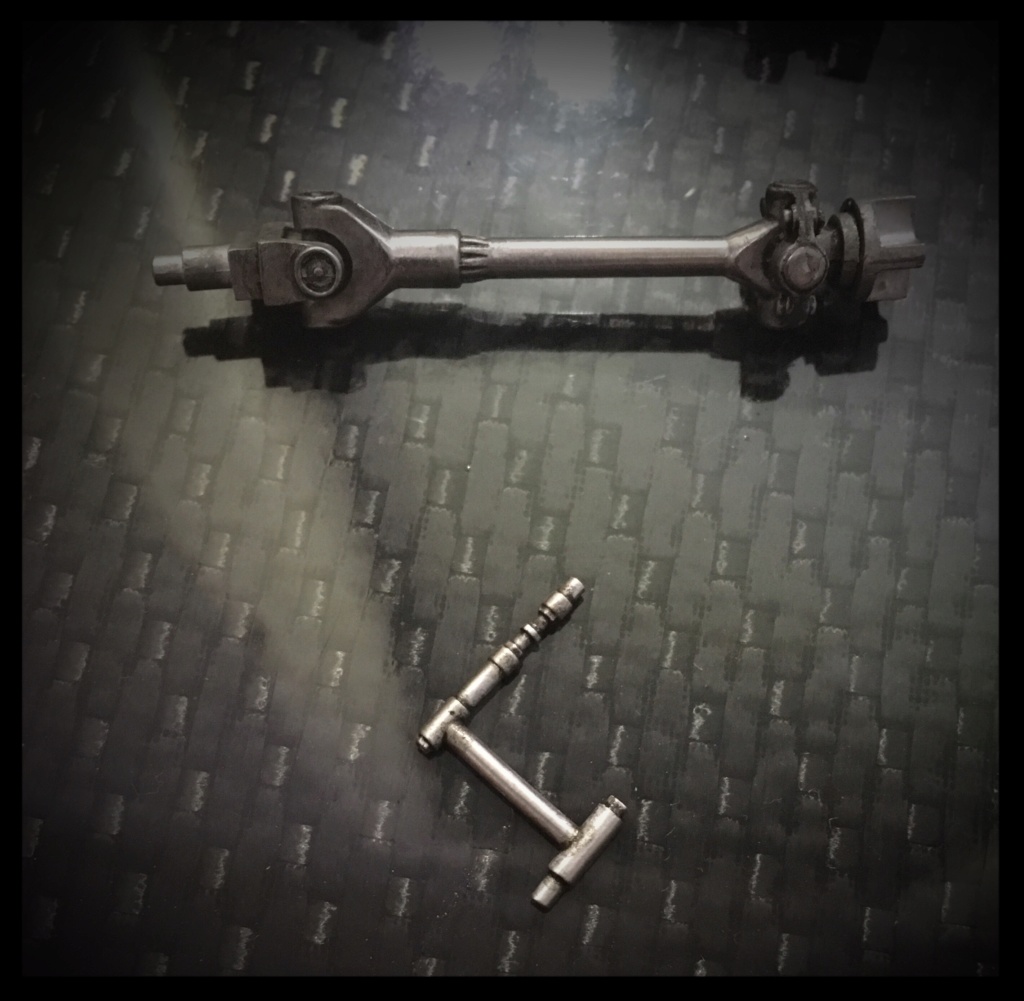
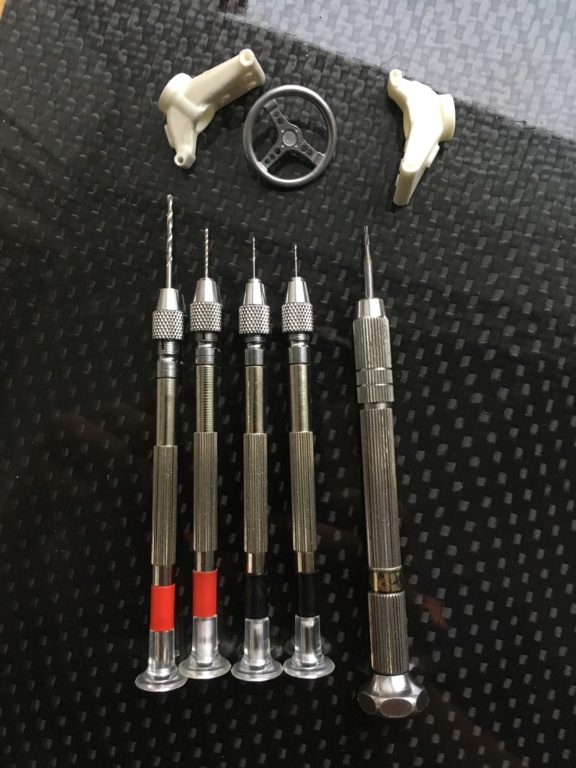
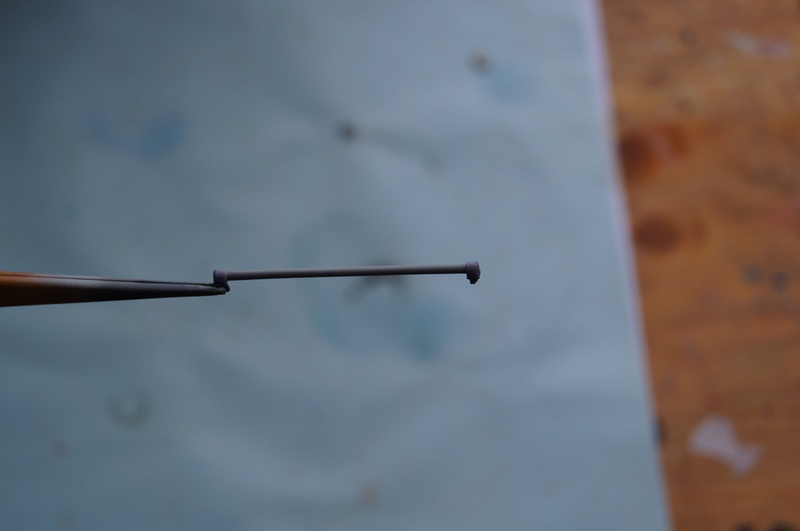
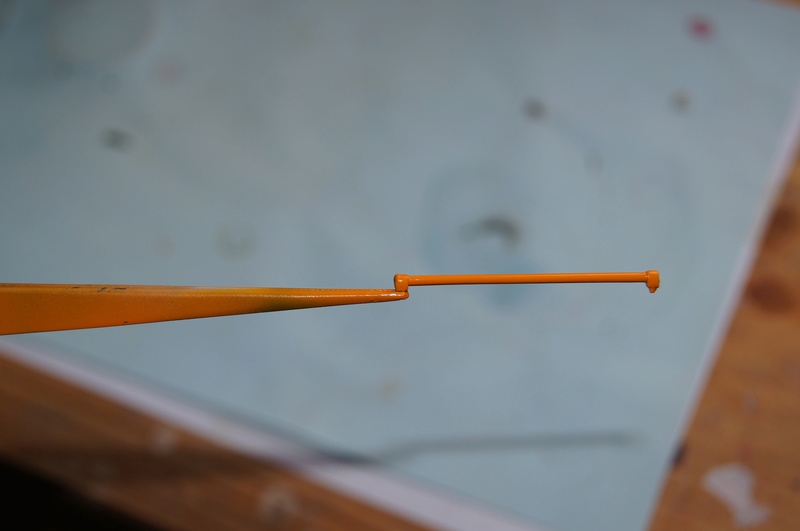
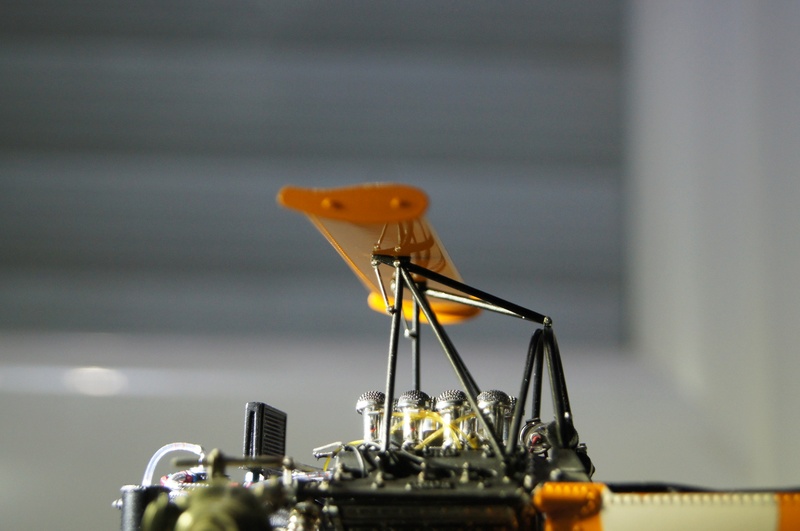
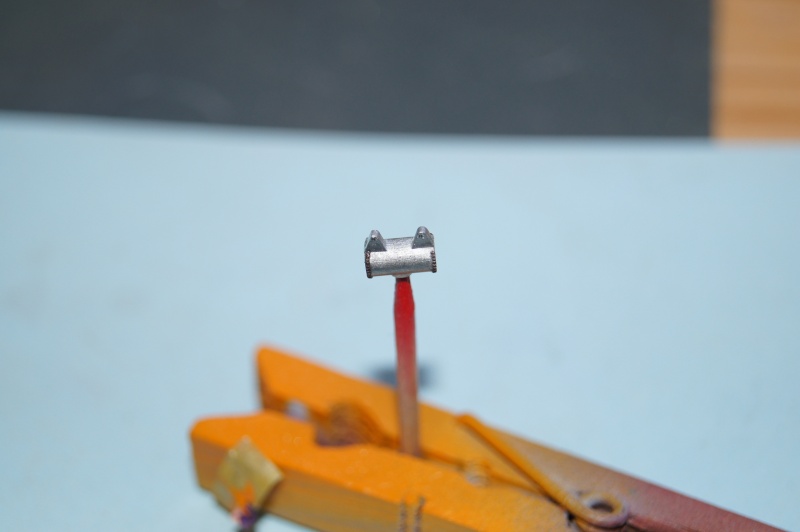
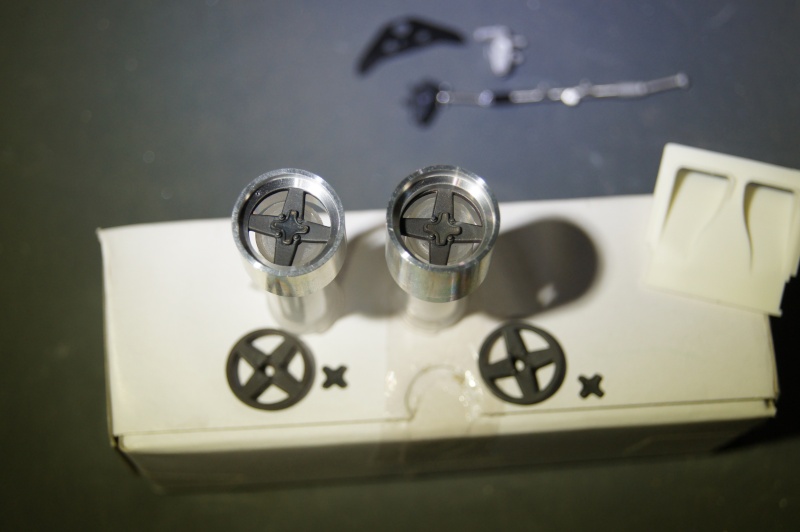
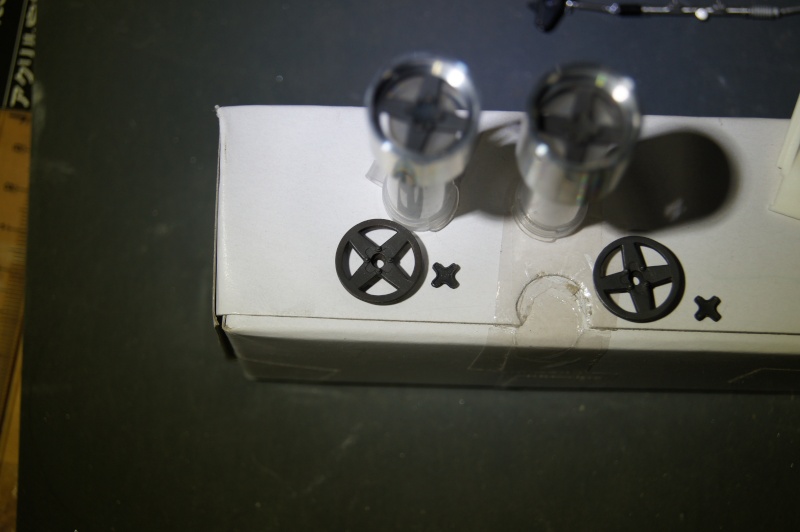
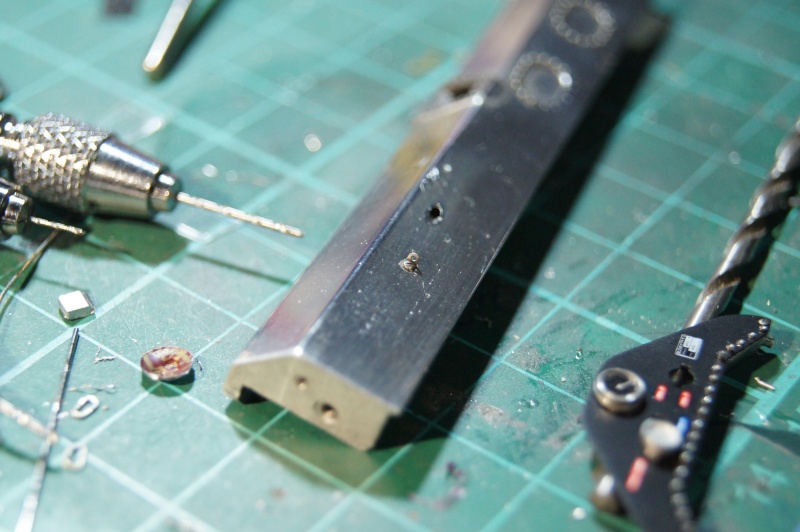
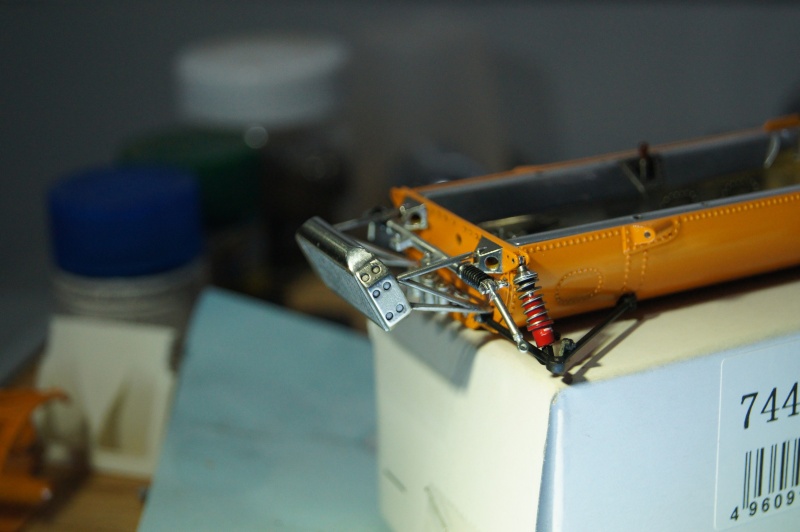
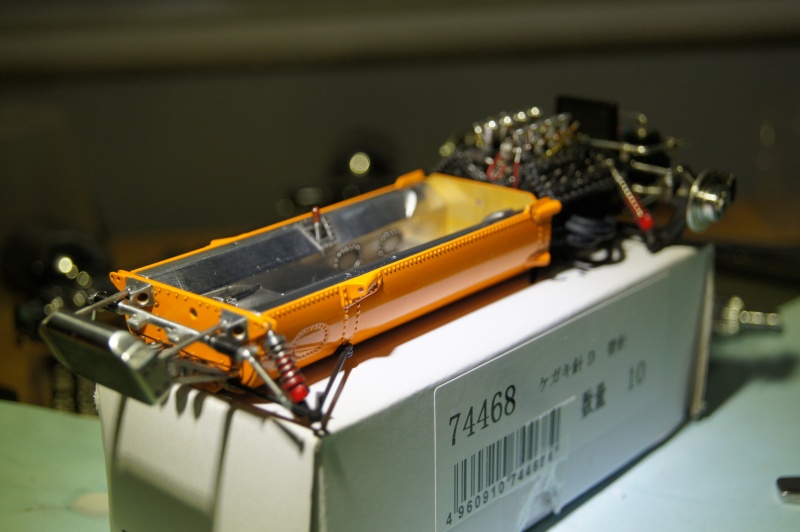
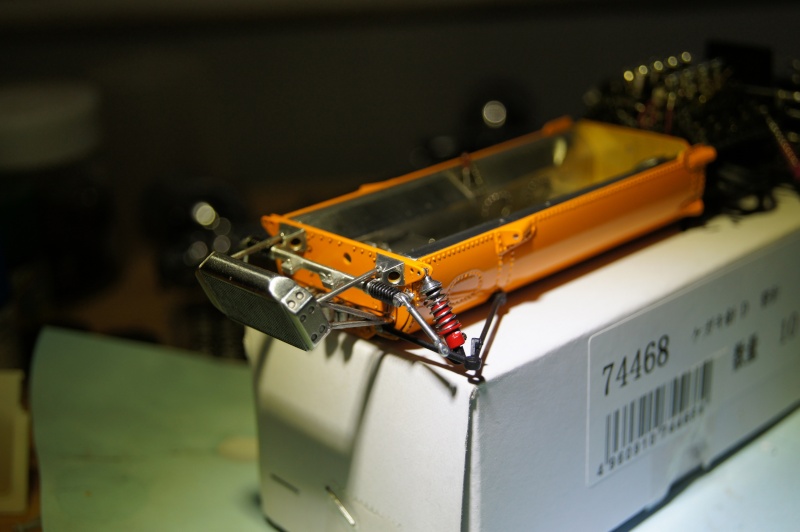
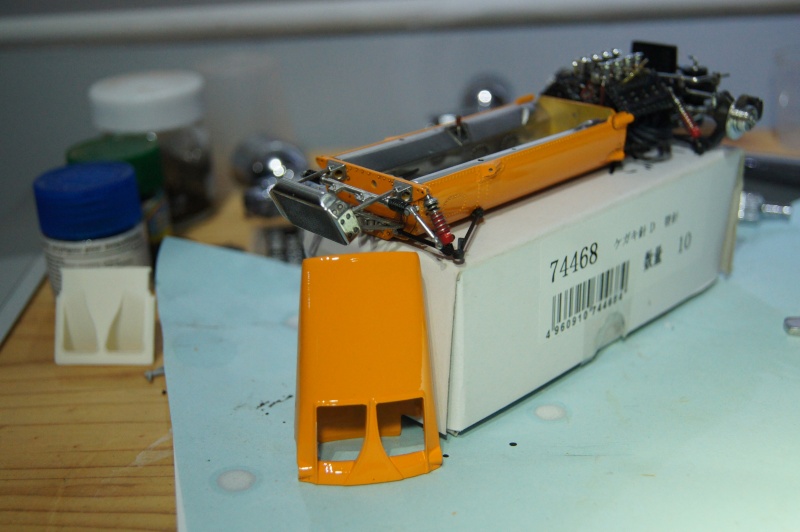
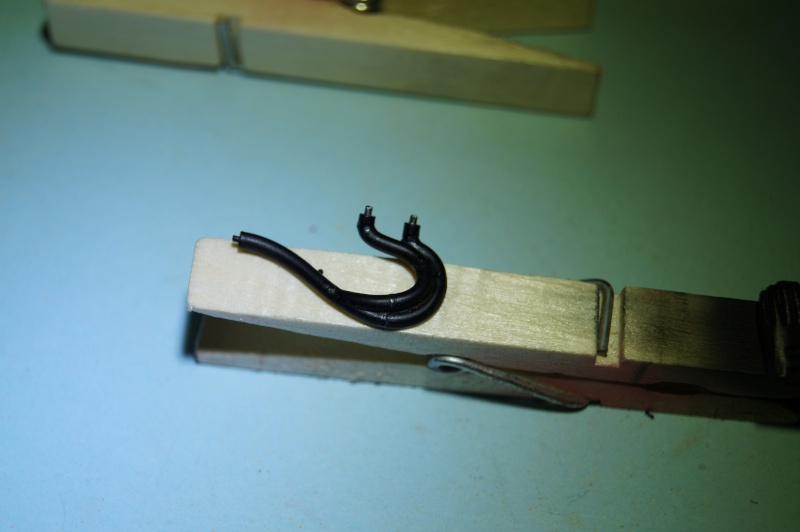
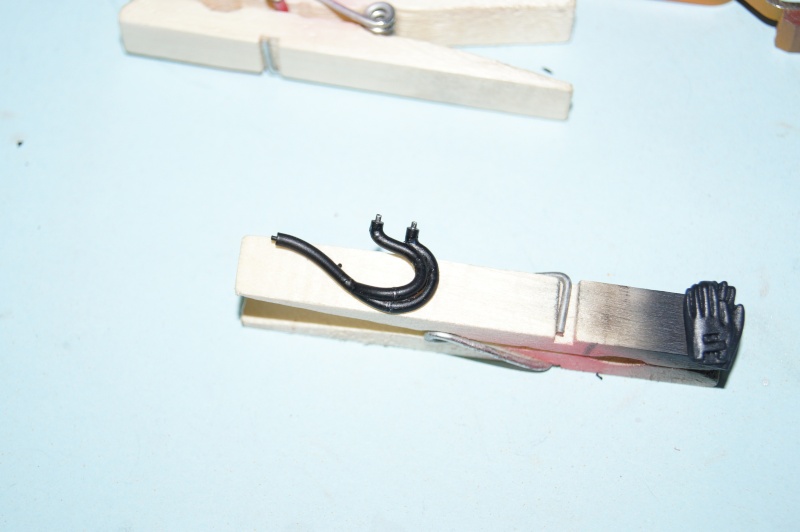
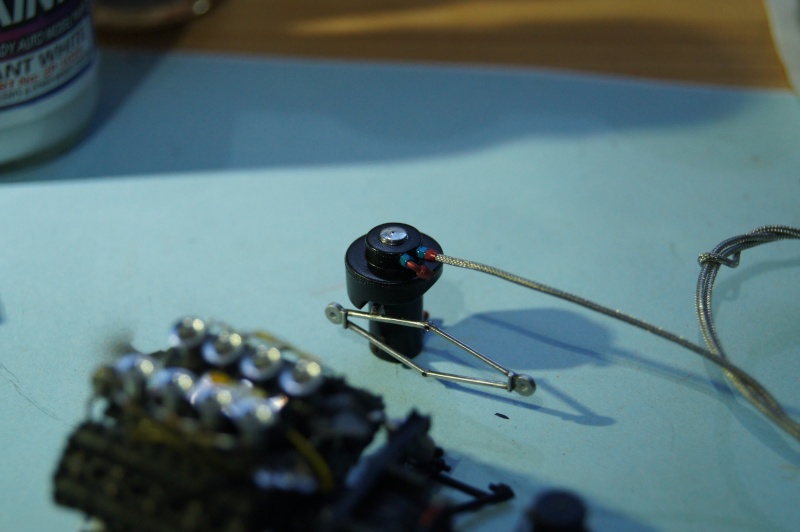
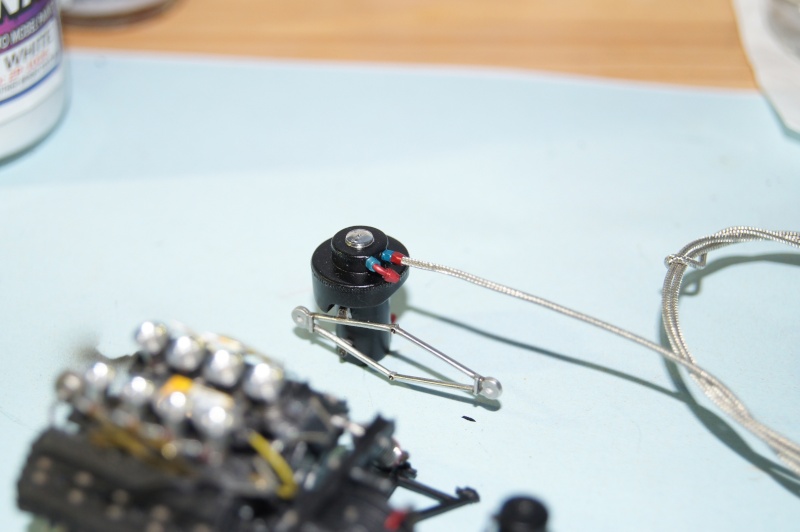
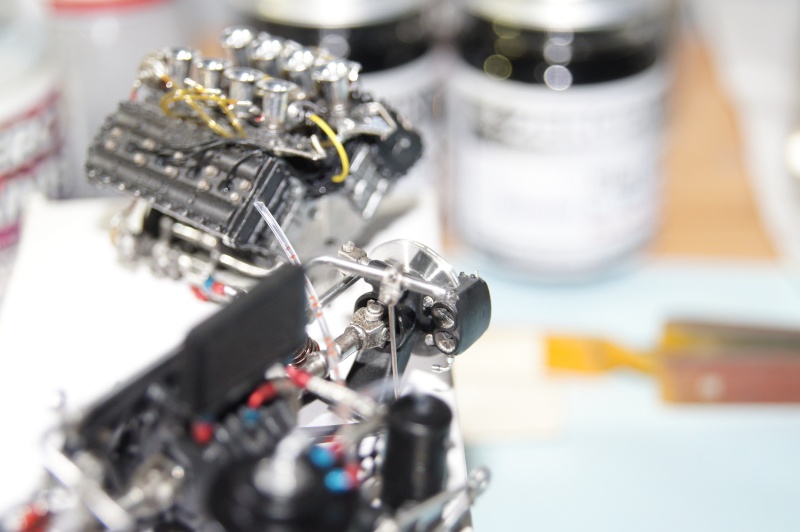
I decided to make the fuel cells connection faucet. It's made of white metal and a spare / modified distributor.

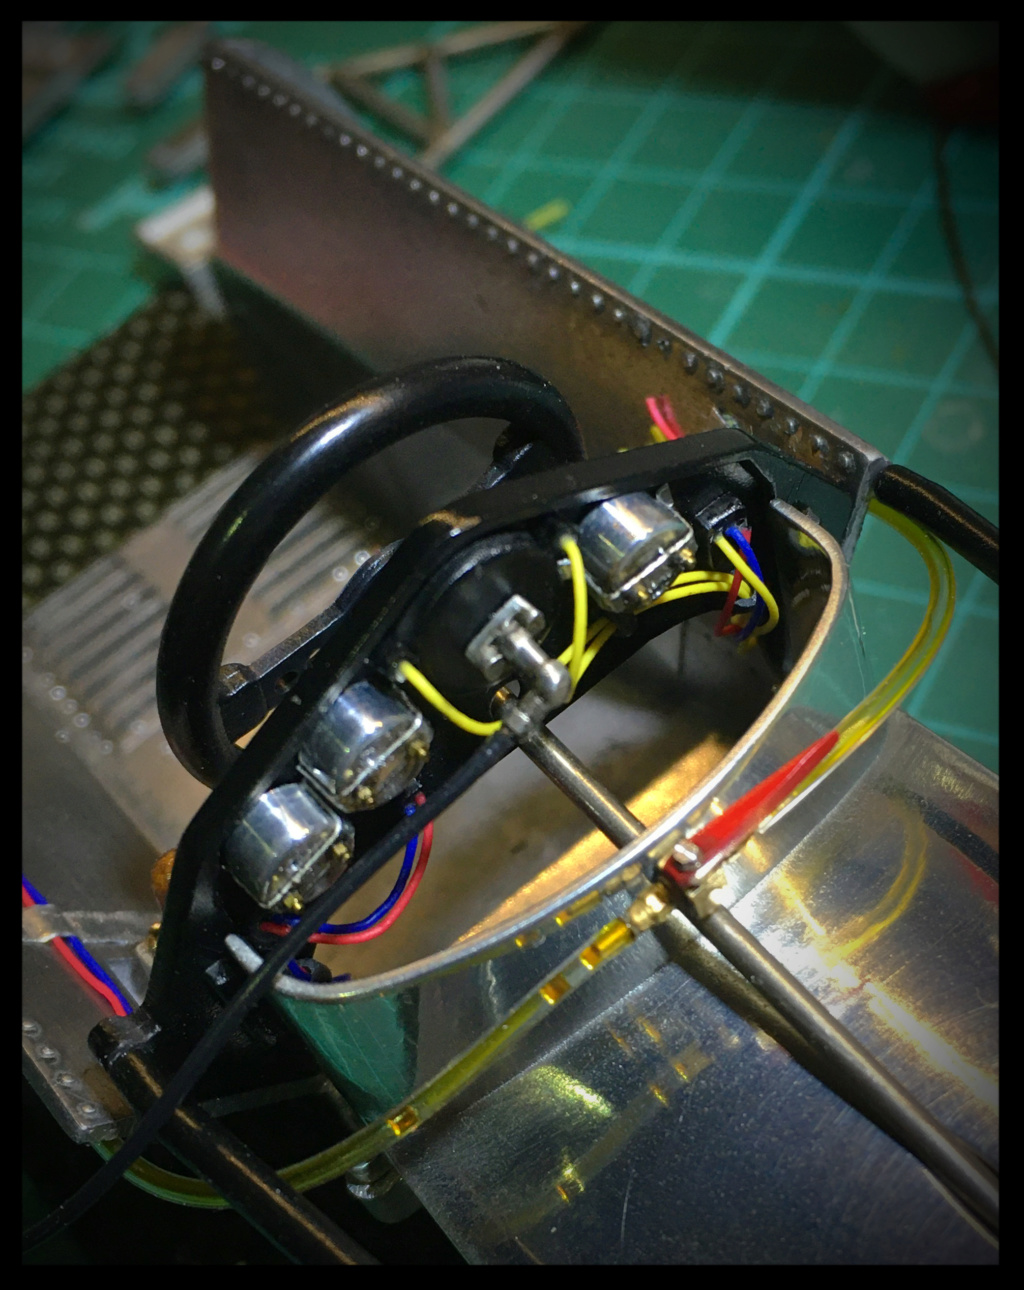
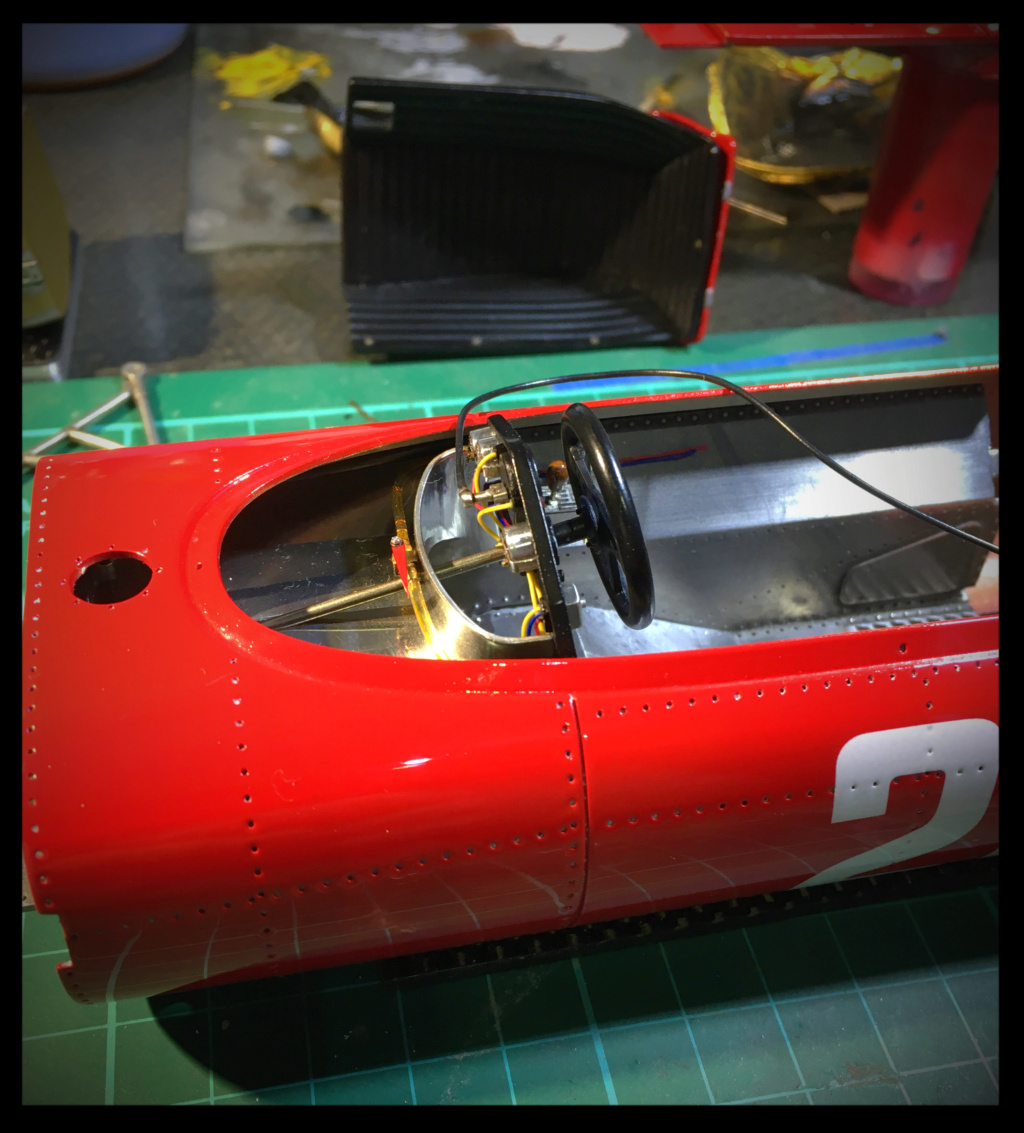
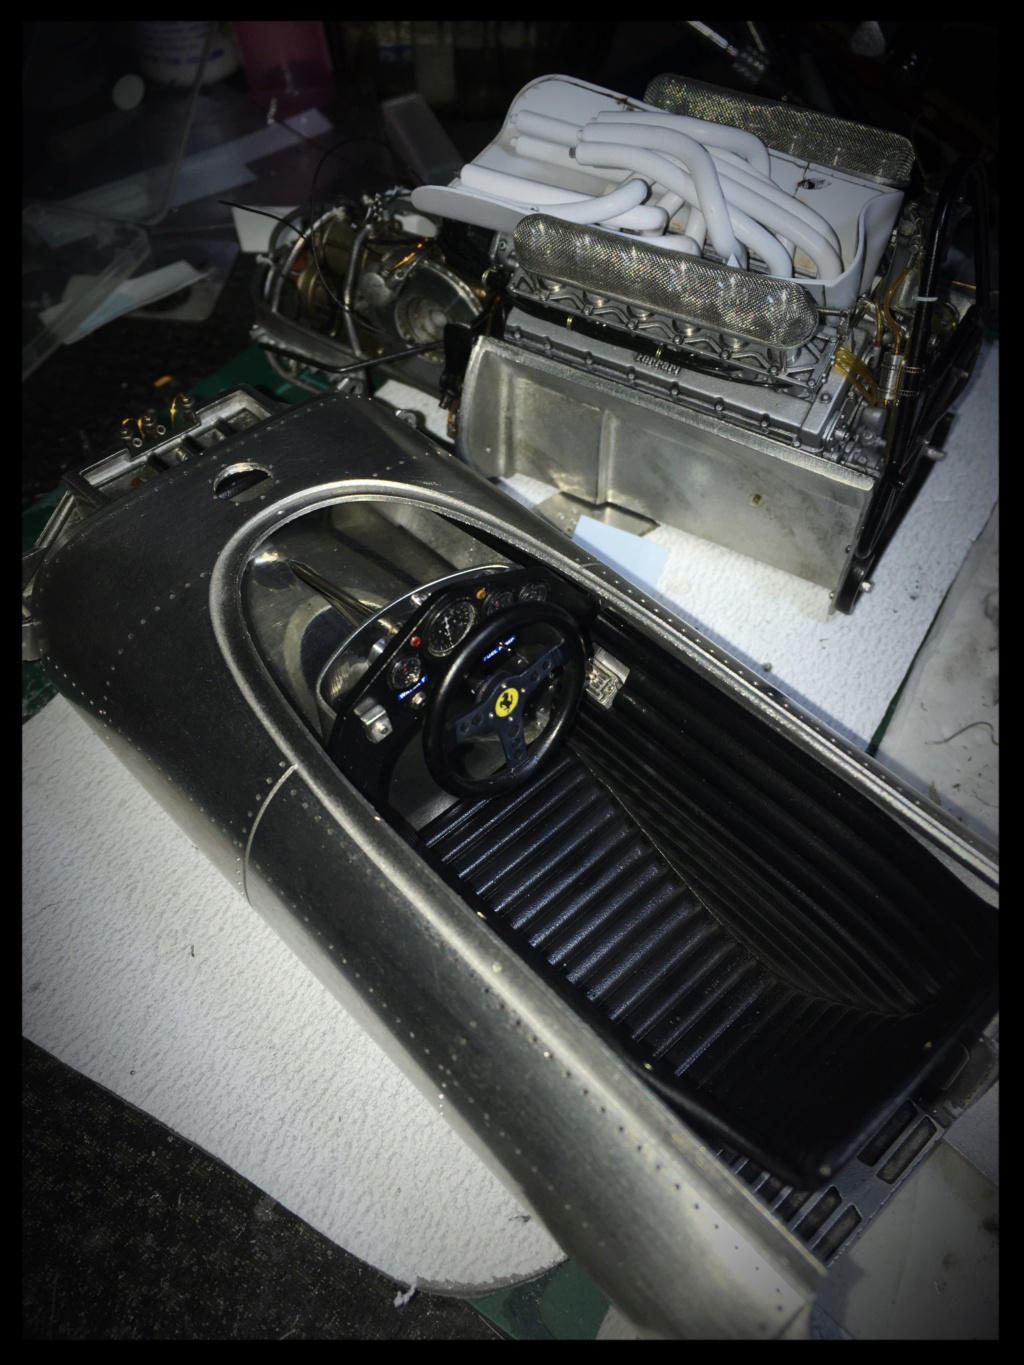
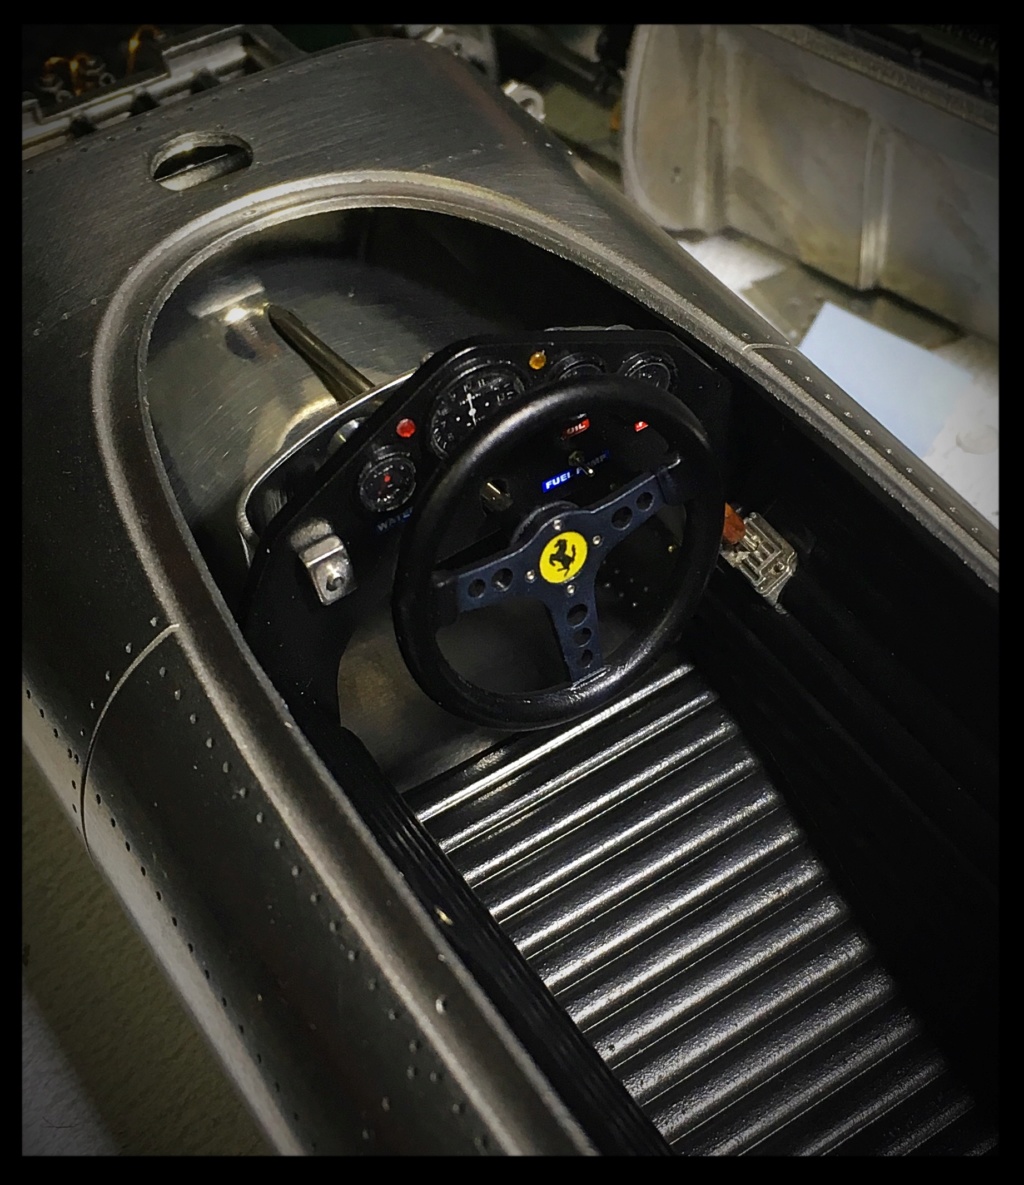
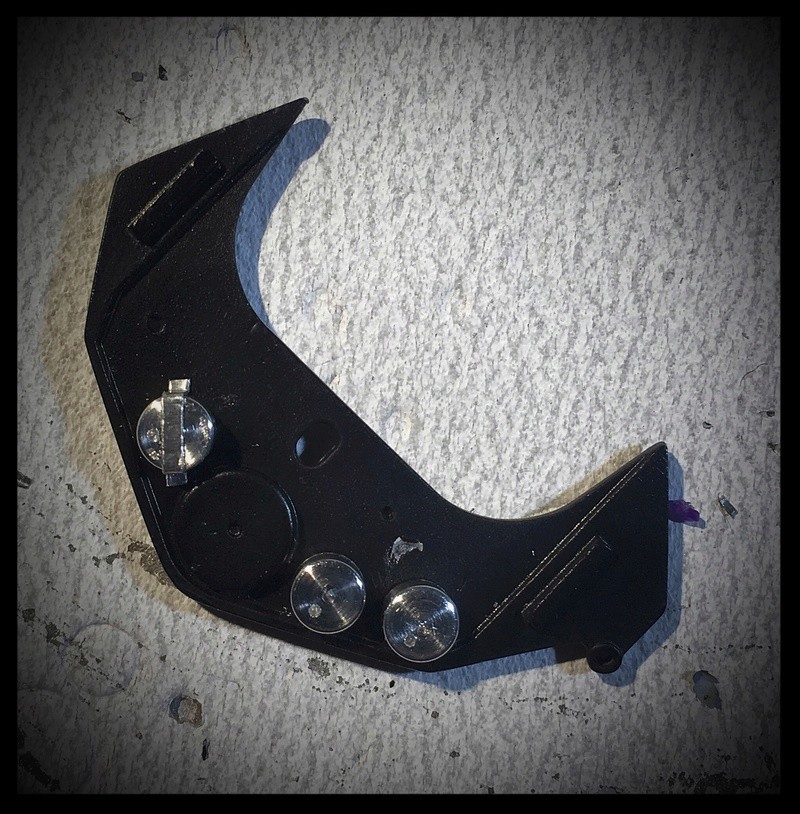
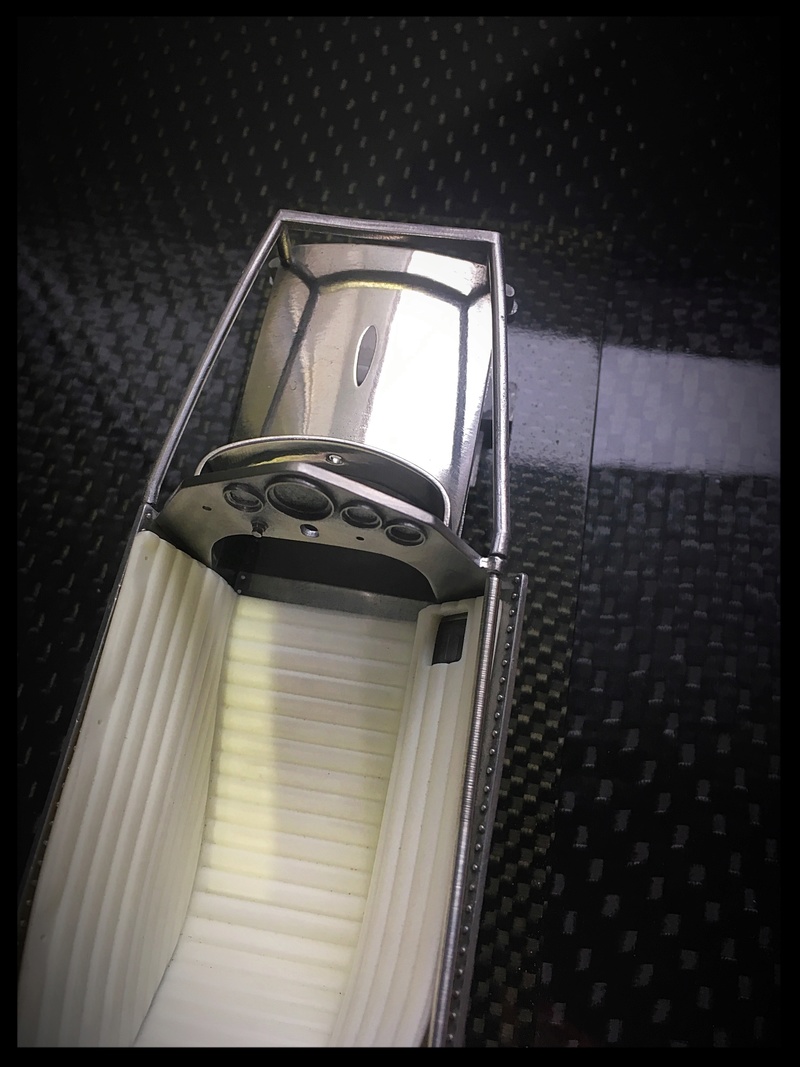
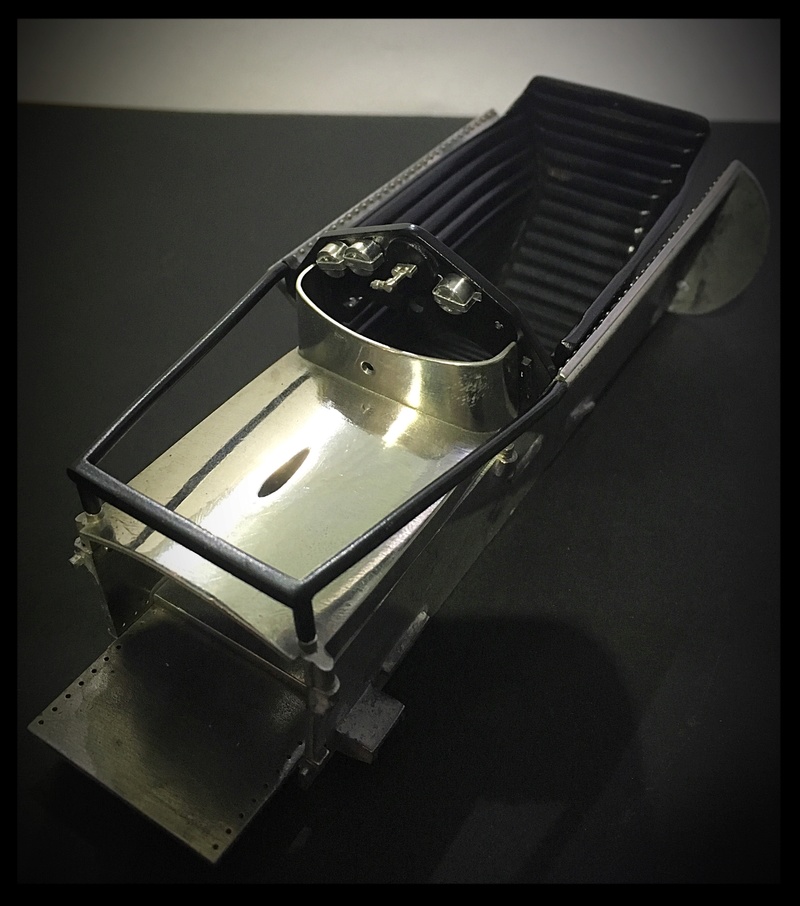
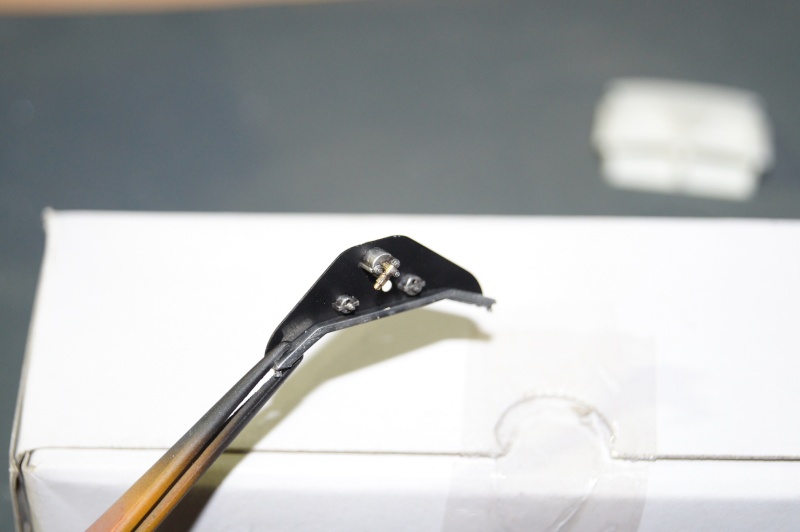
Working on the dashboard.
installed

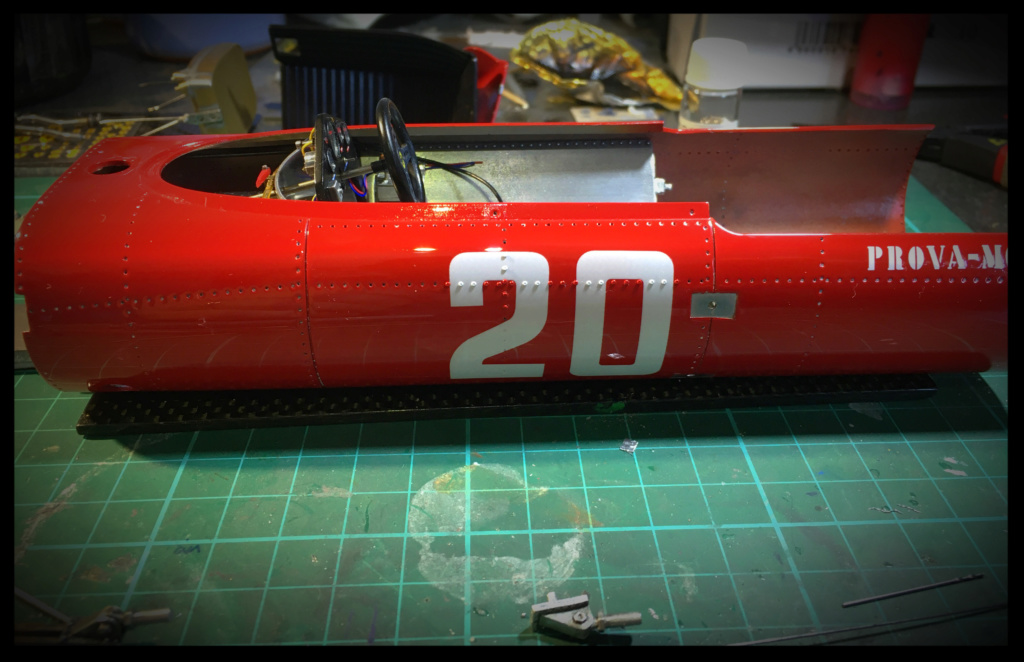
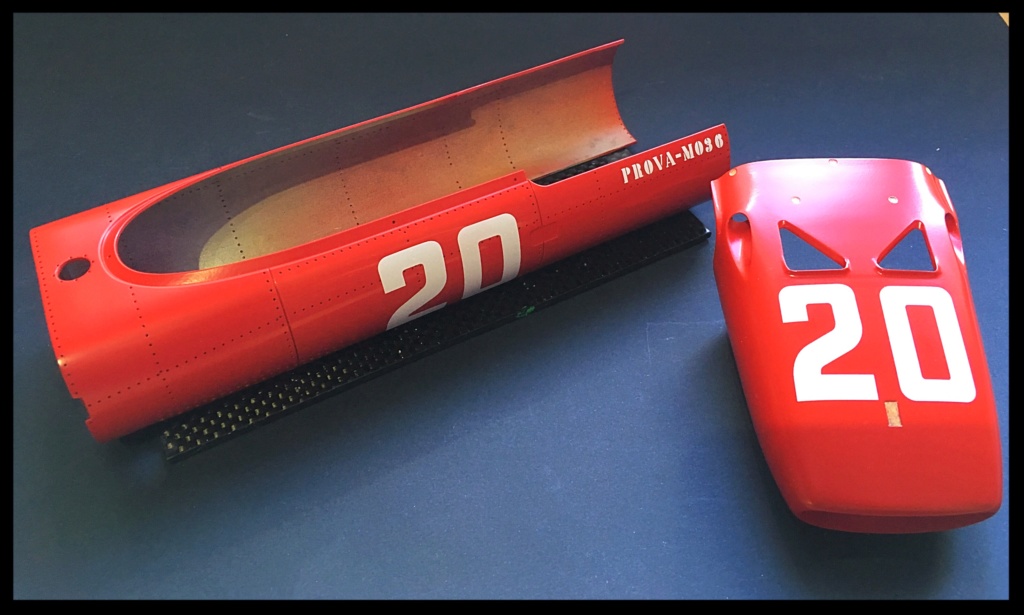
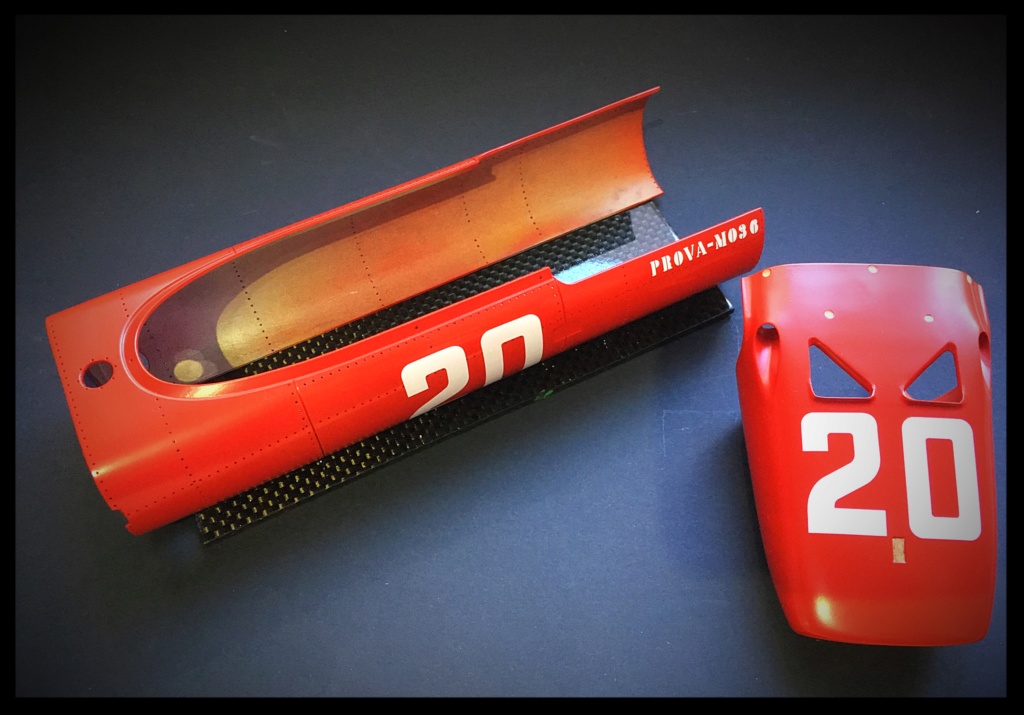
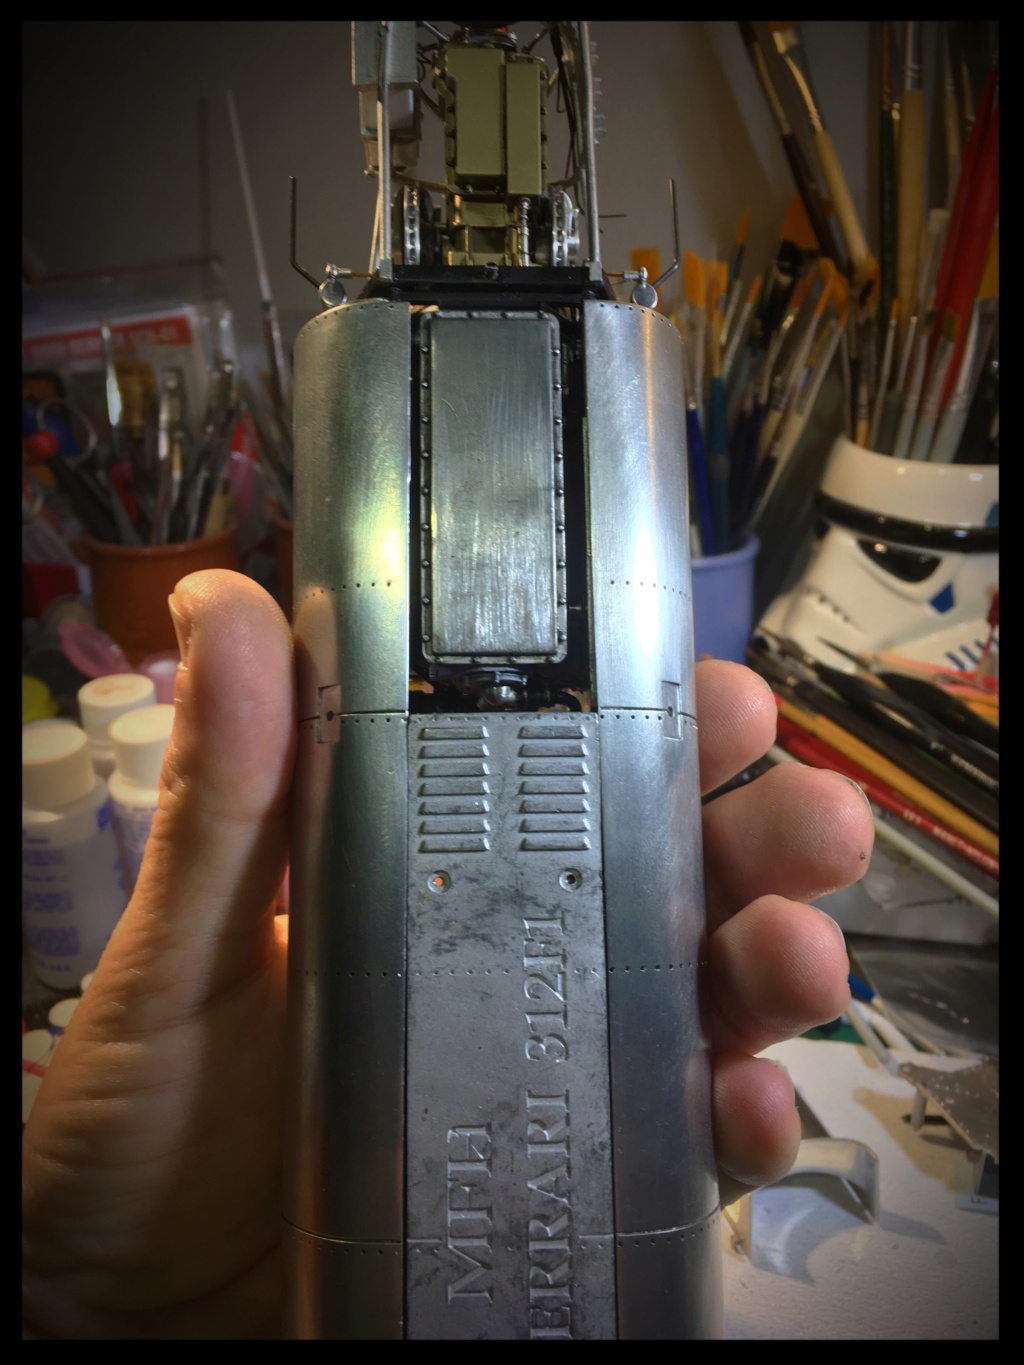
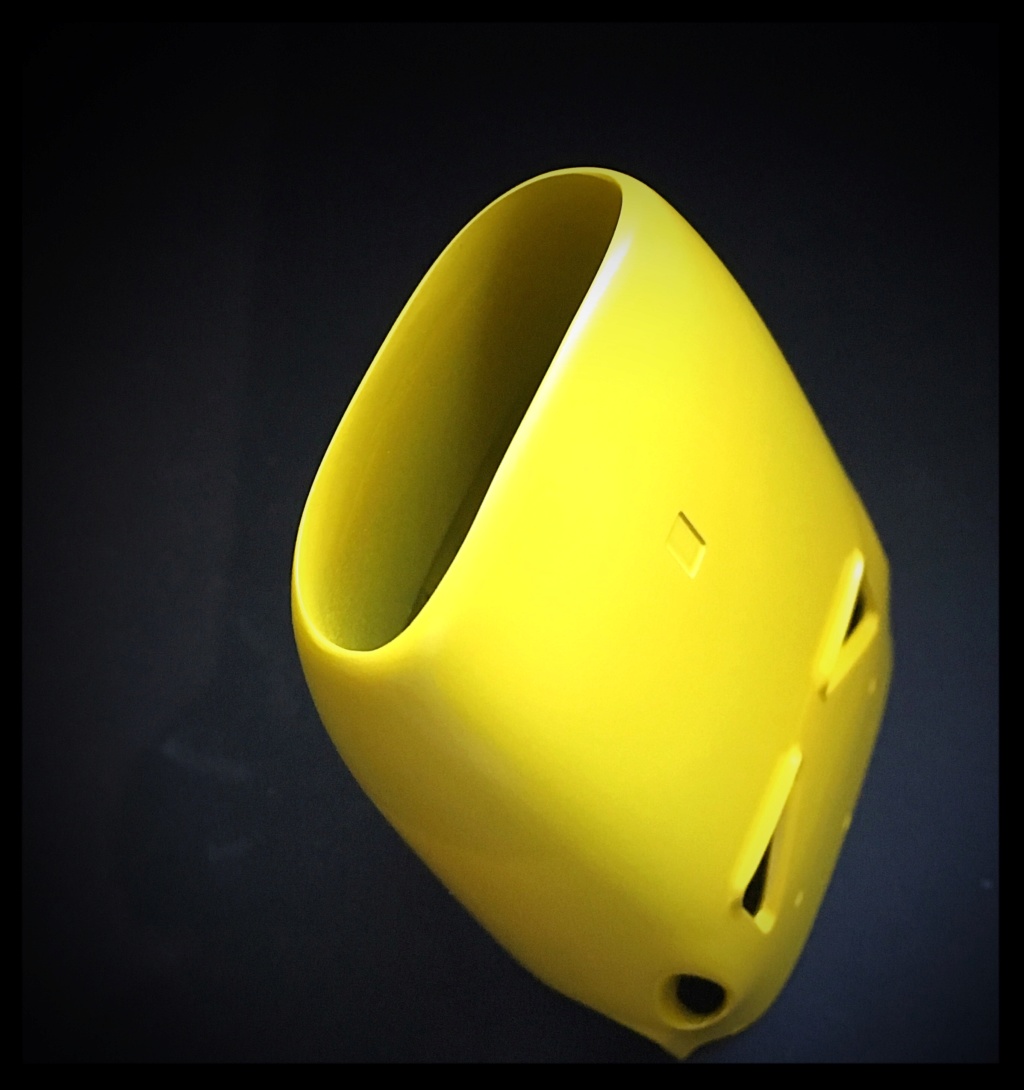
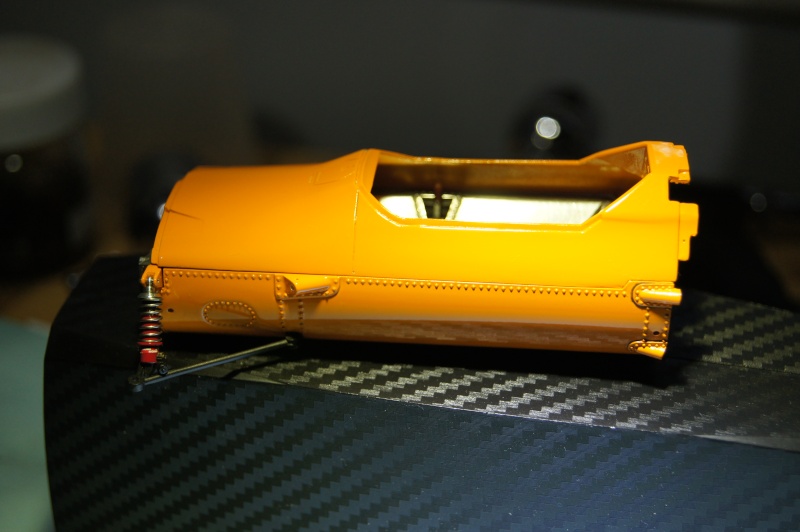
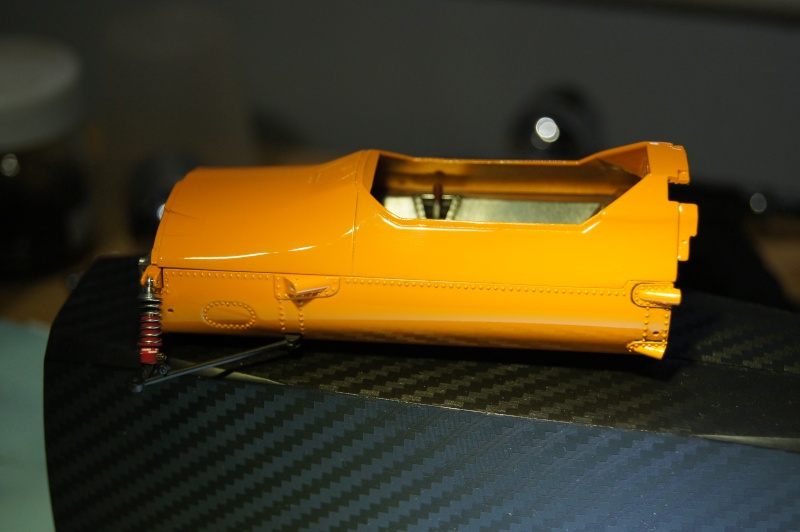
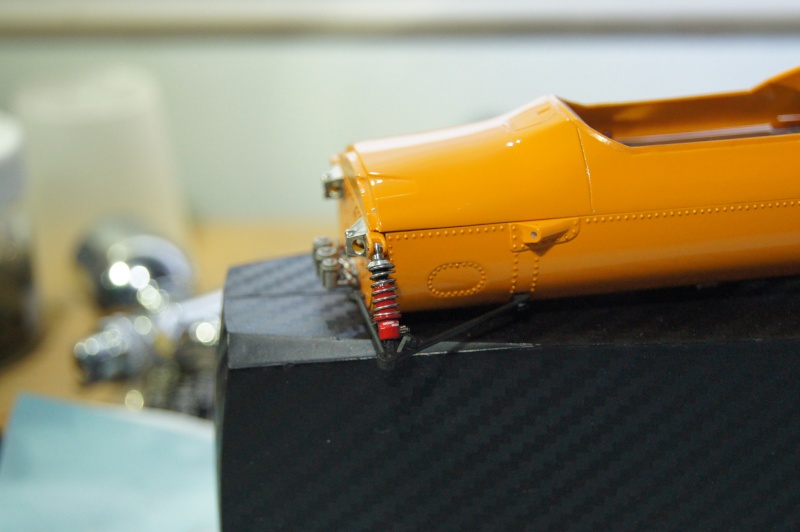
the lower body part is now done and weathered
All the body parts are now fully dry. White dust is coming from the varnish dust while reopening the rivet holes.
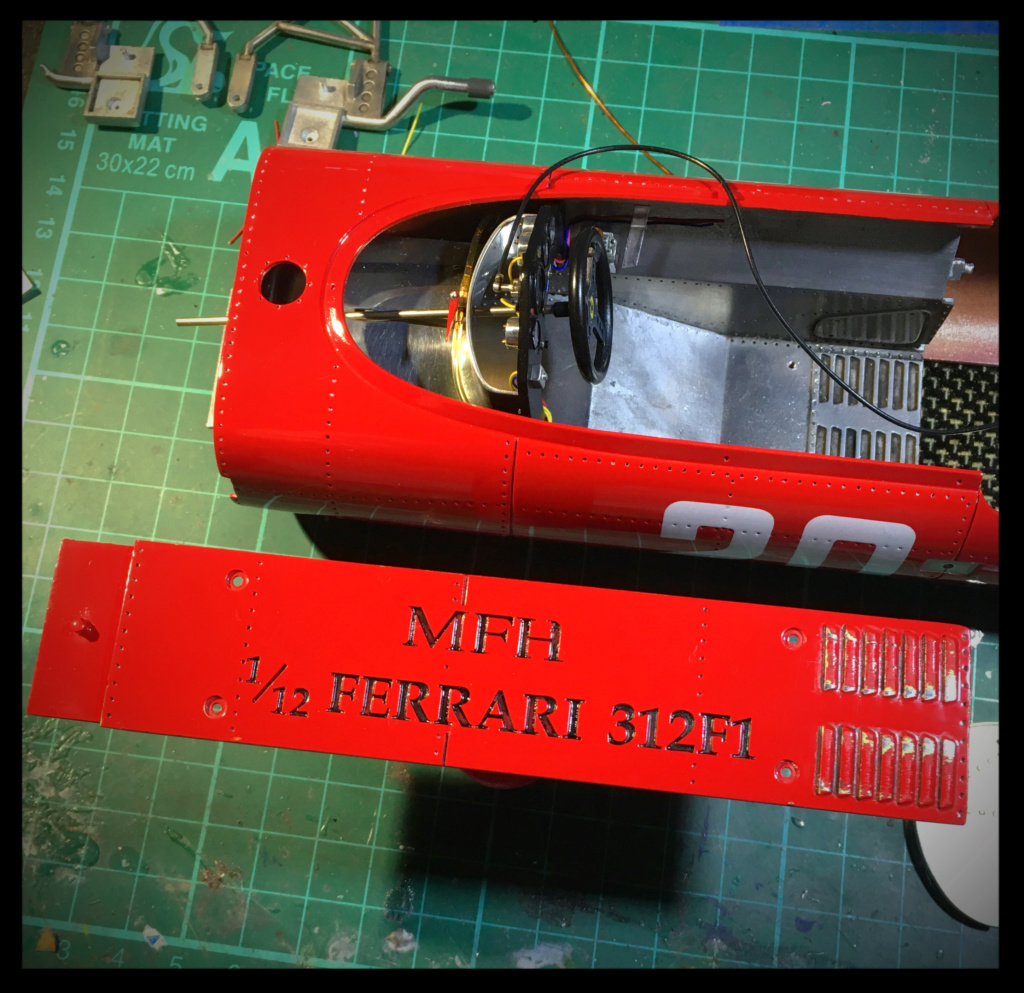
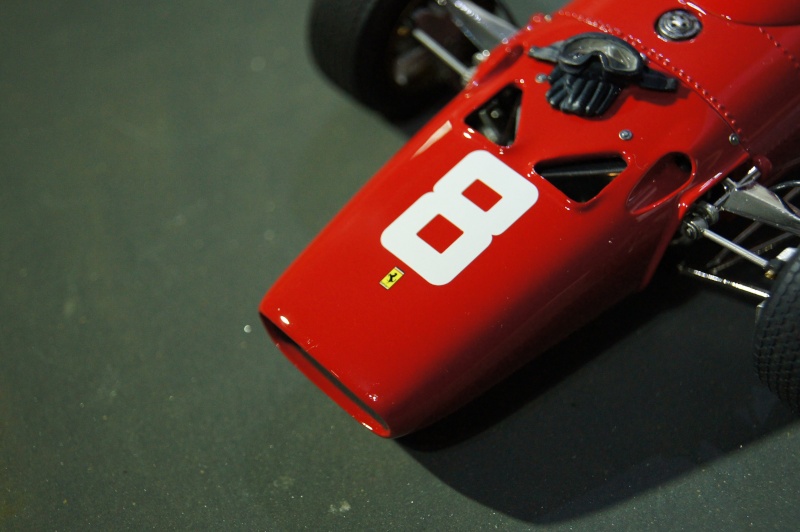
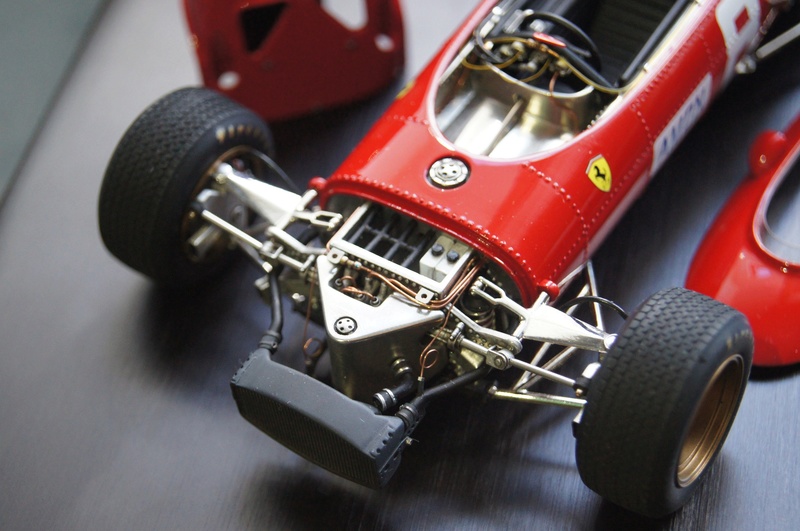
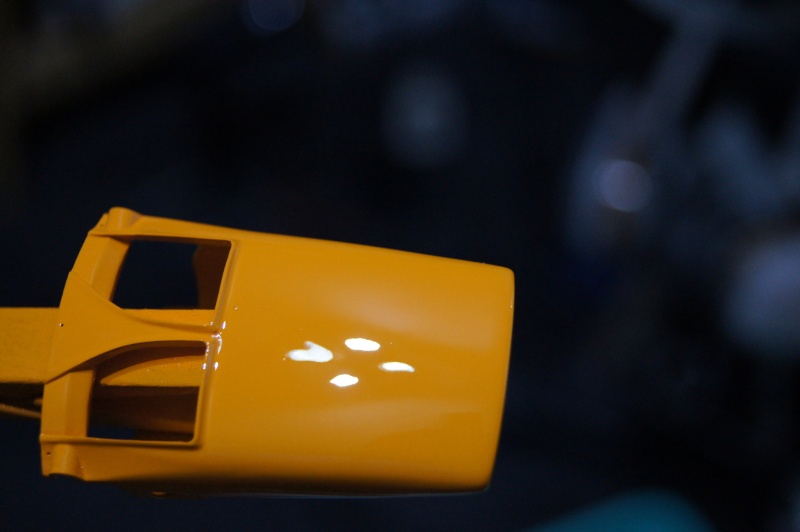
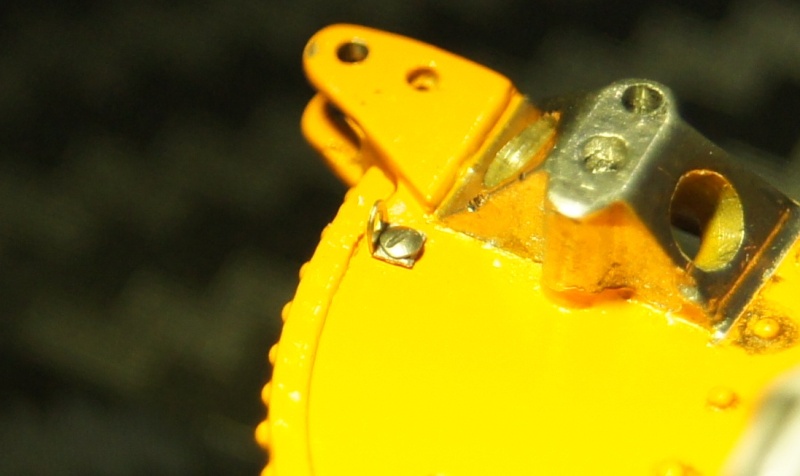
The CAVALLINO is installed on the nose and the original decal is replaced by an "enamelled" badge from an old MFH reference.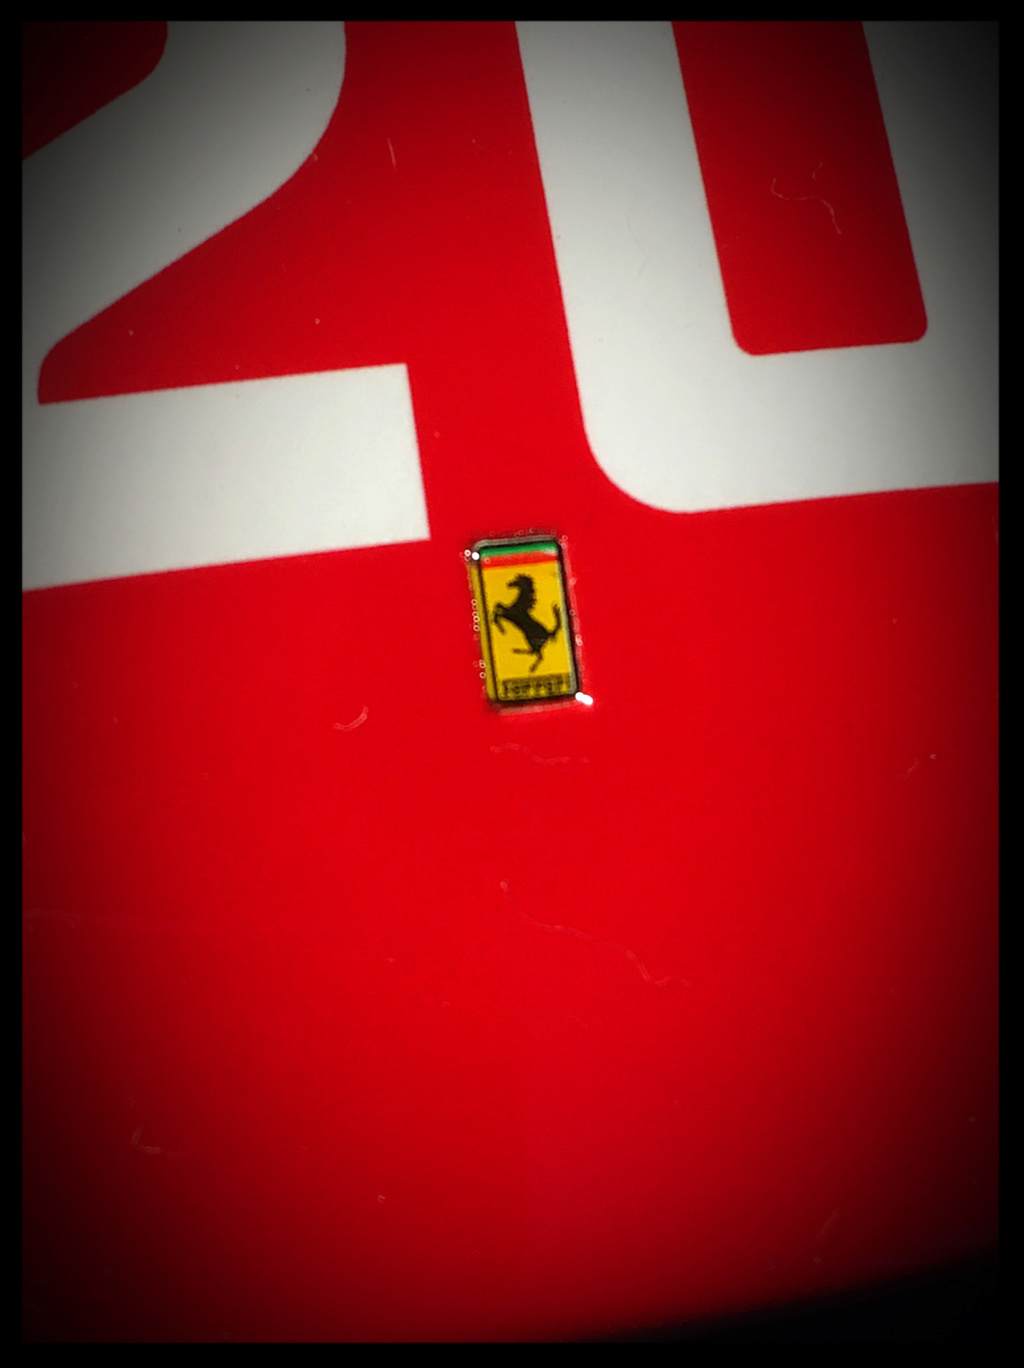

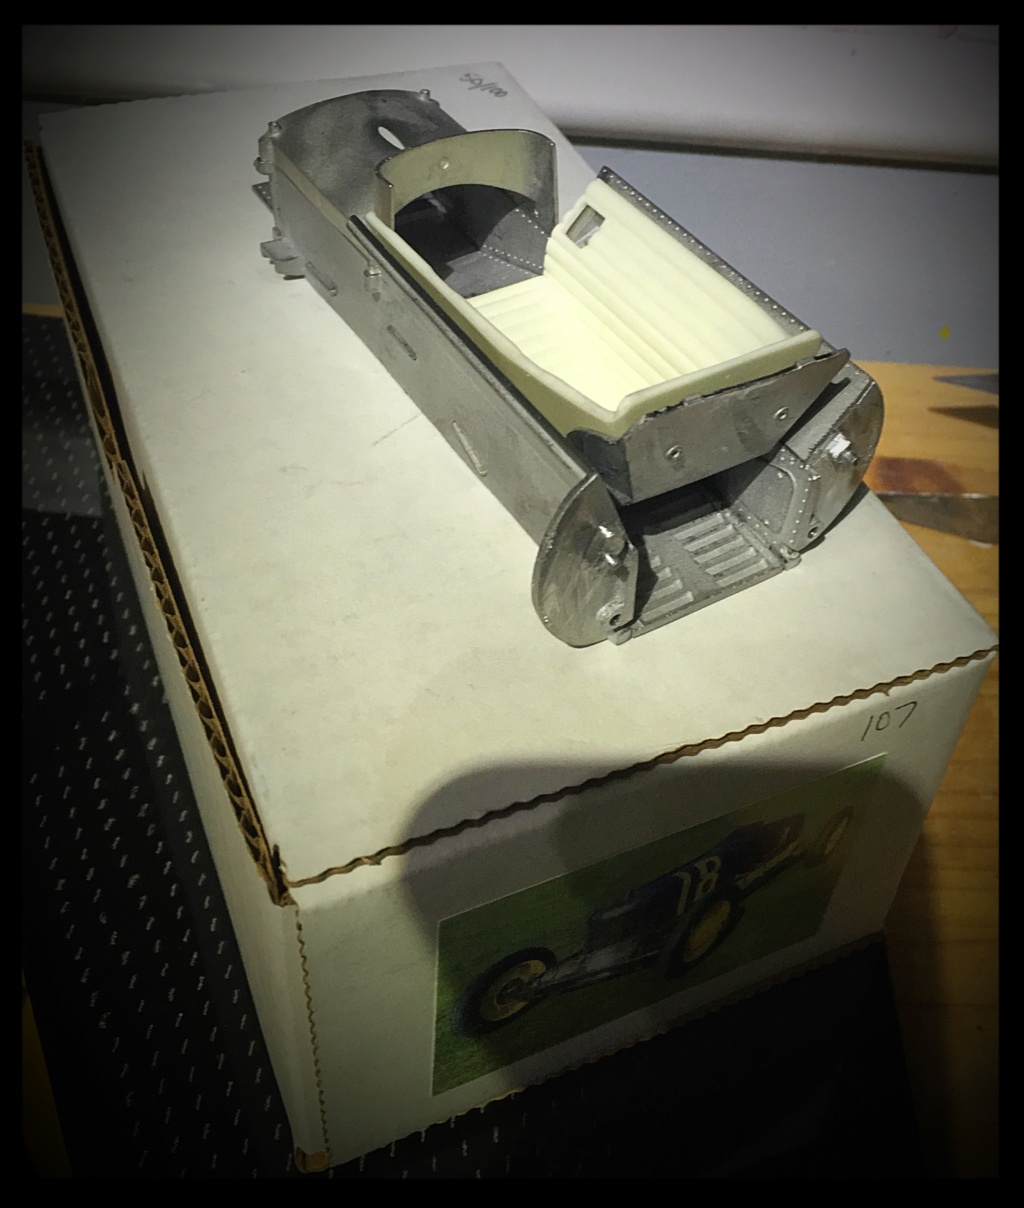
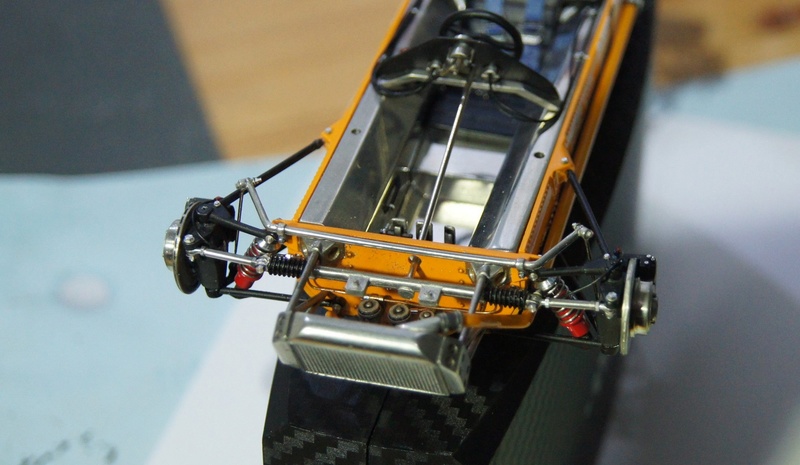
Fit test of the front area.
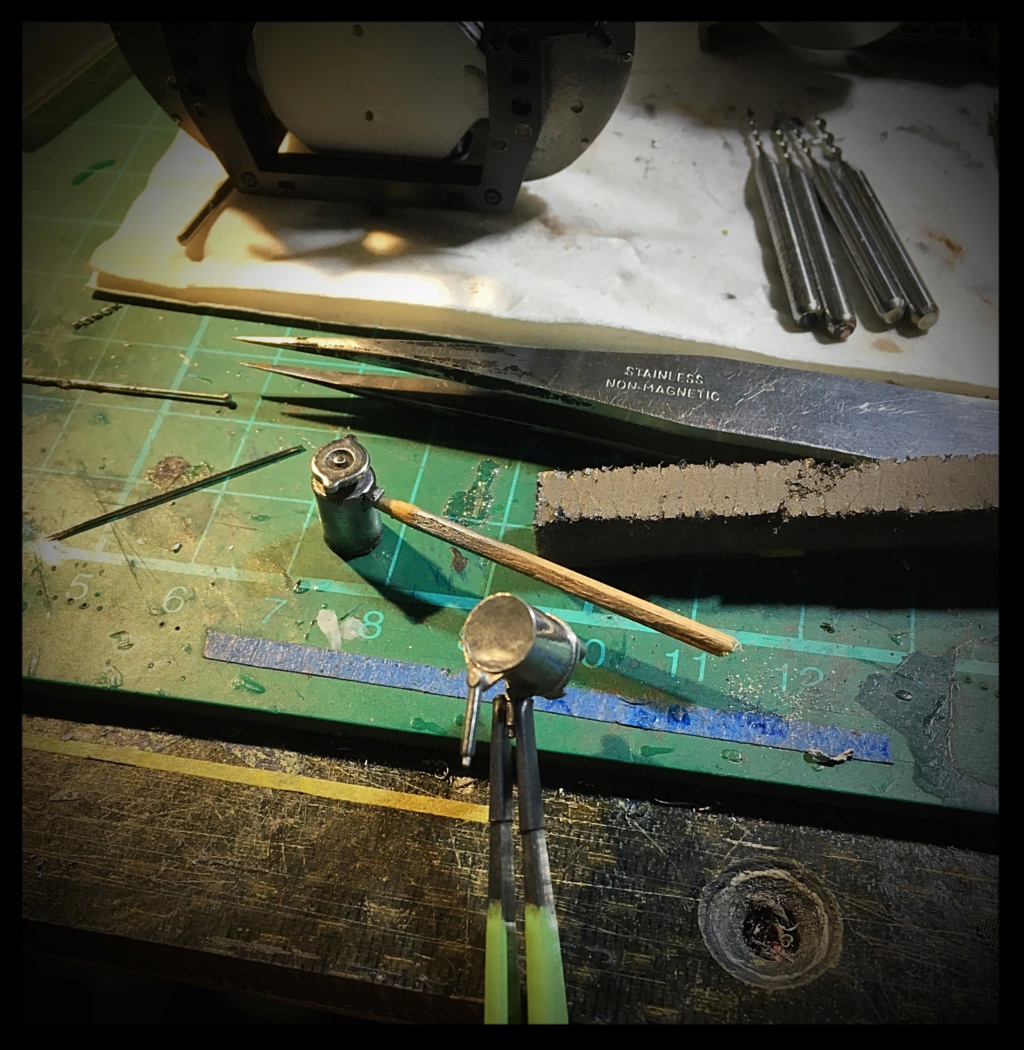
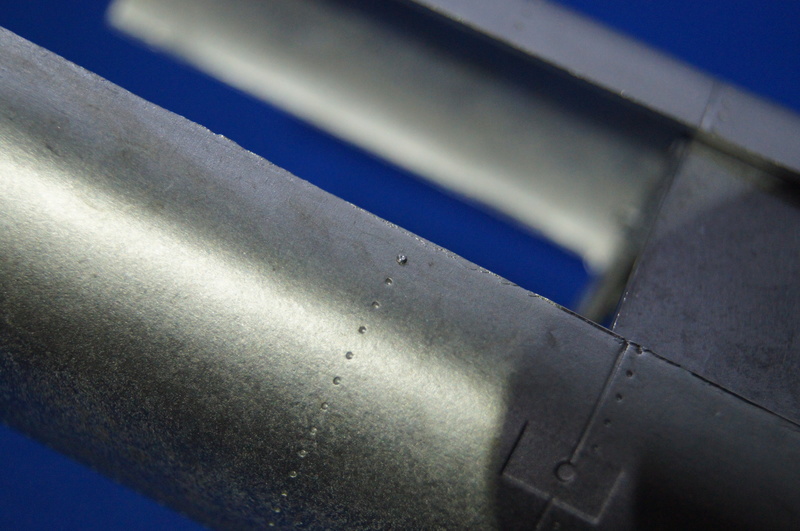
Starting the riveting process...

Ainsi que sur les platines d'ancrage des tirants de suspension:
More soon.
Pascal
-
Hi,
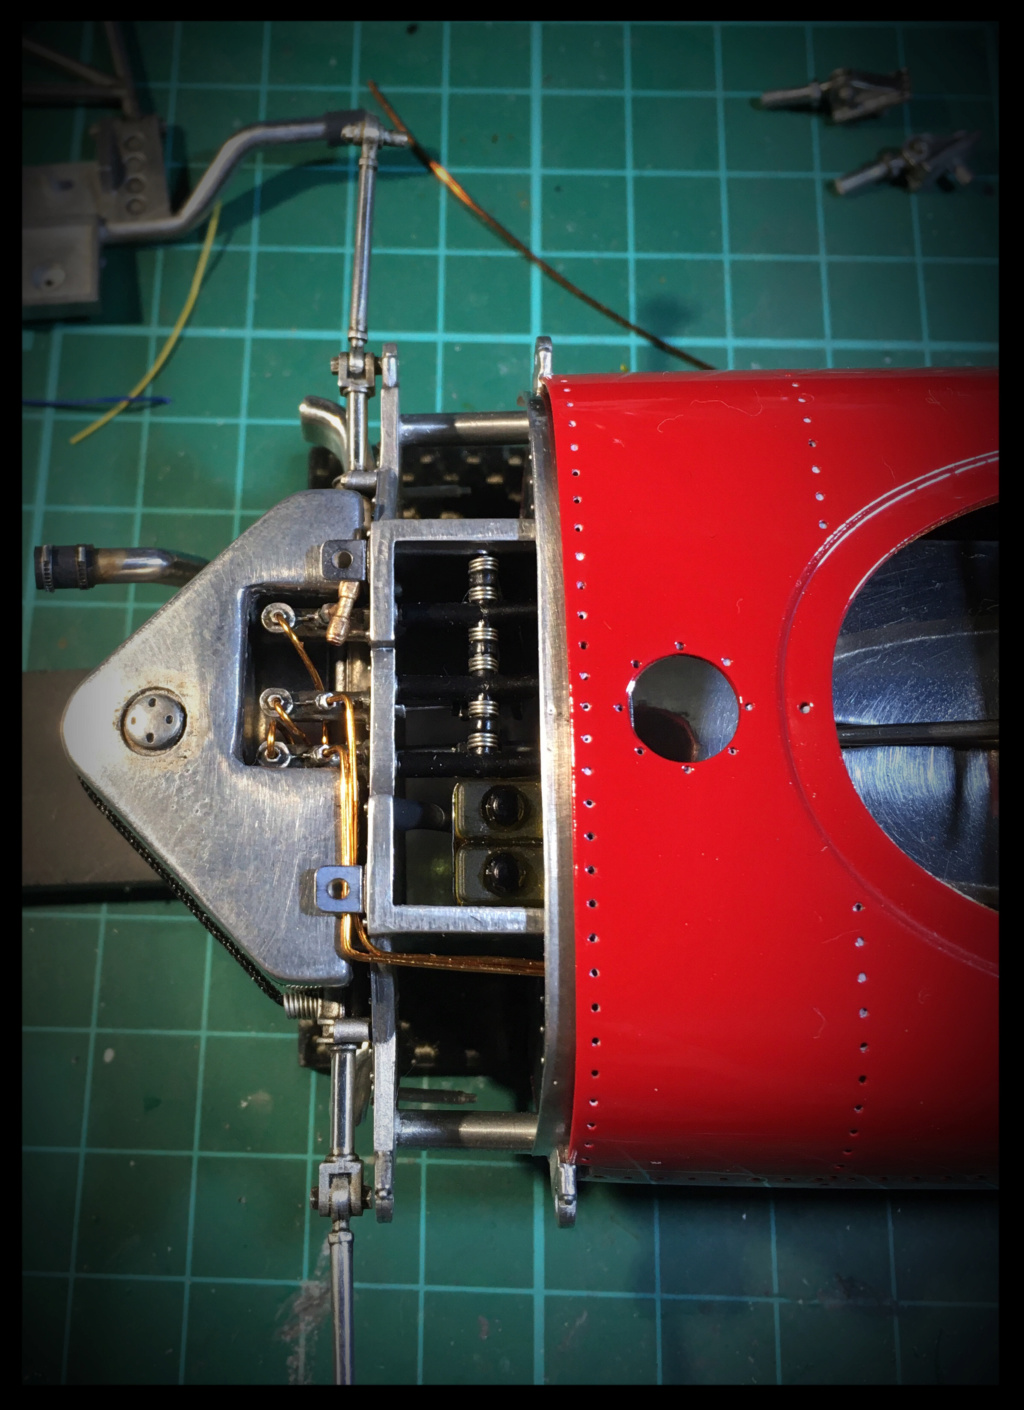
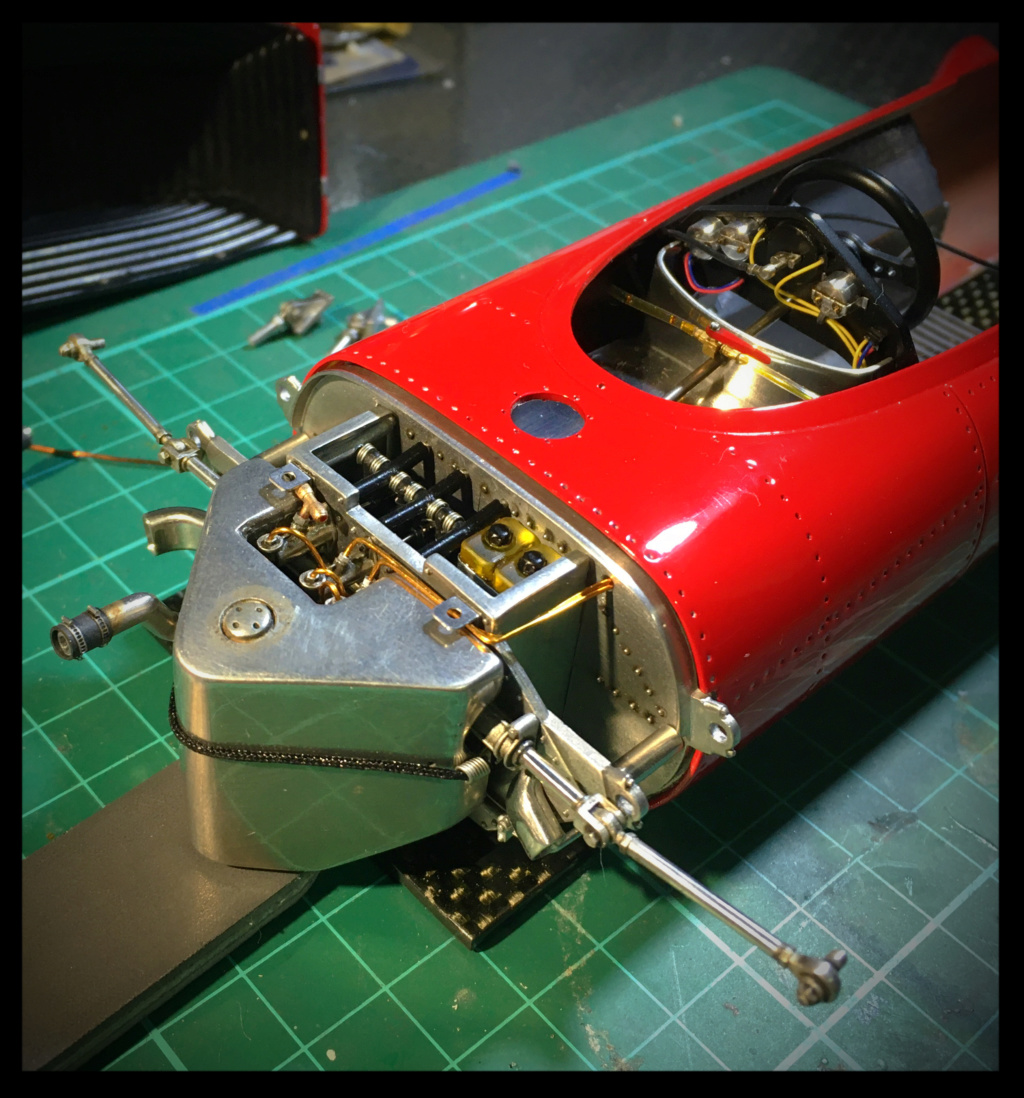
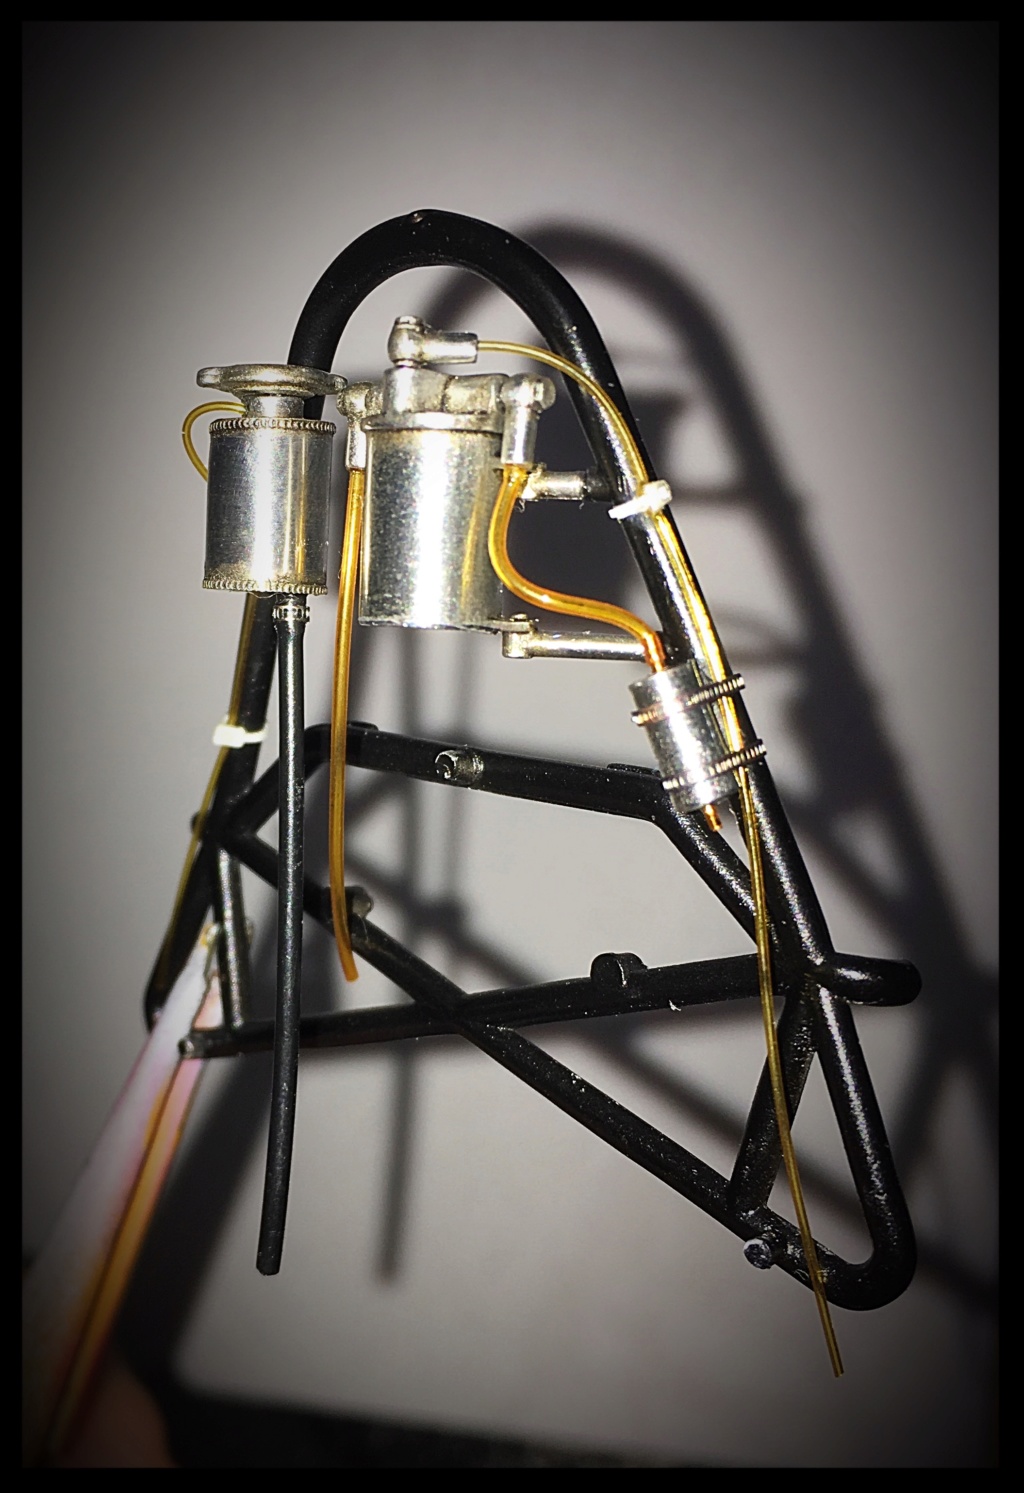
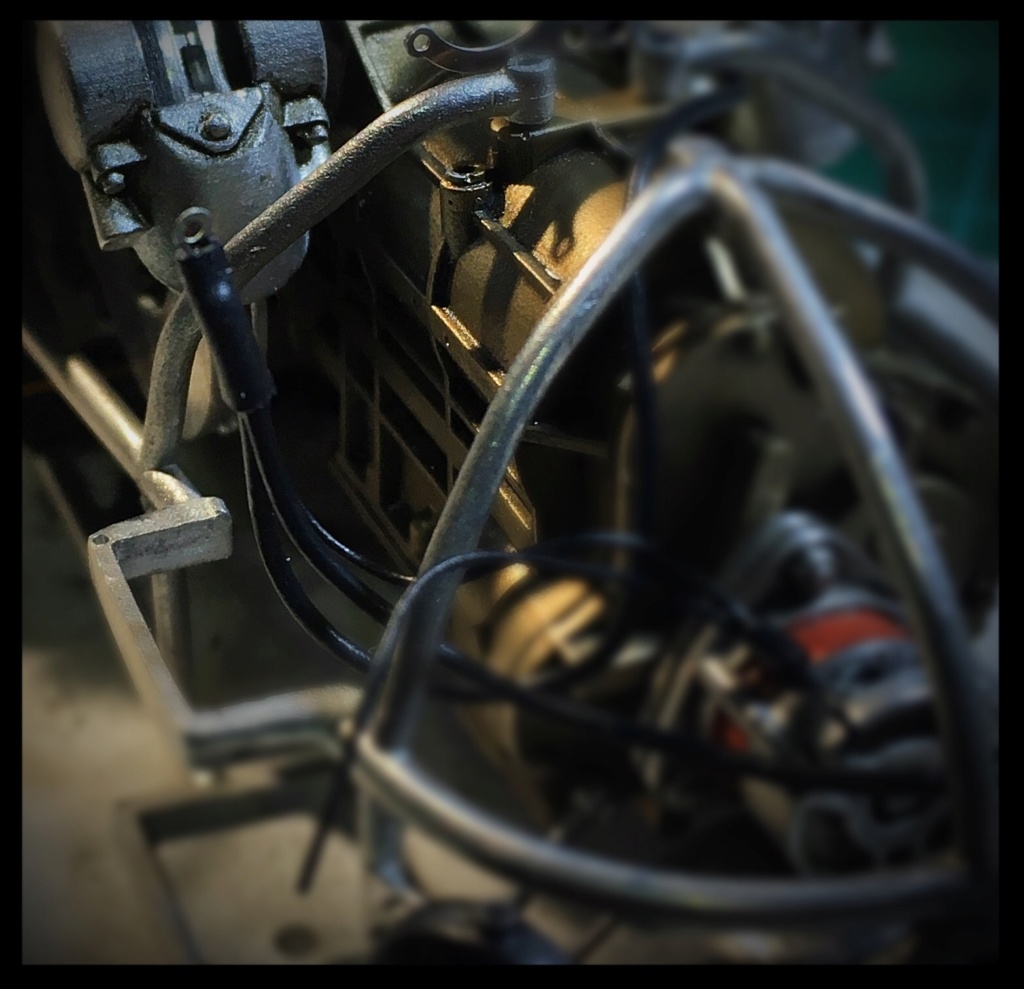
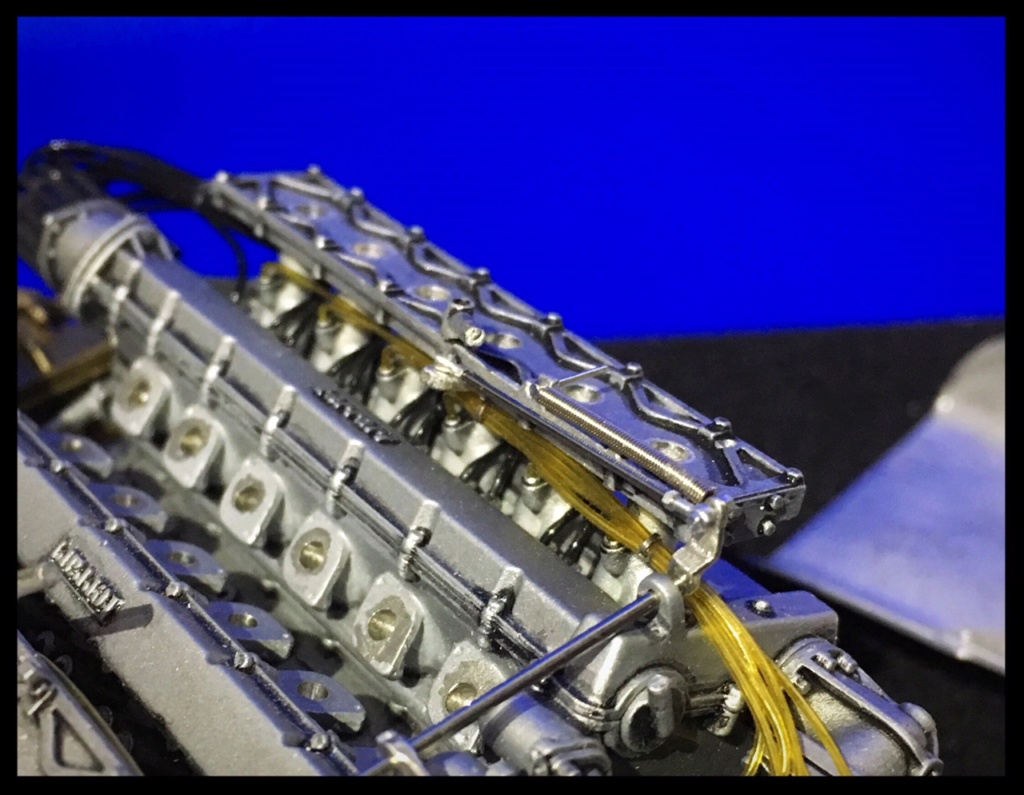
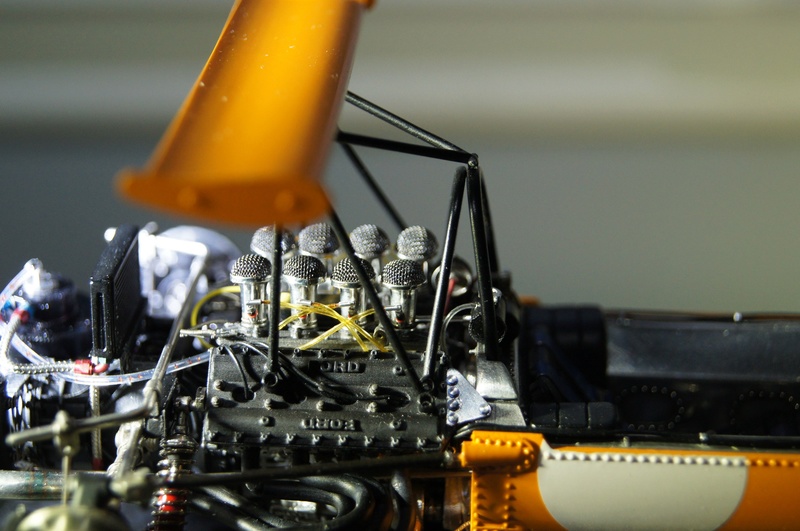
I finally managed to finish the ignition coils system, after a last modification.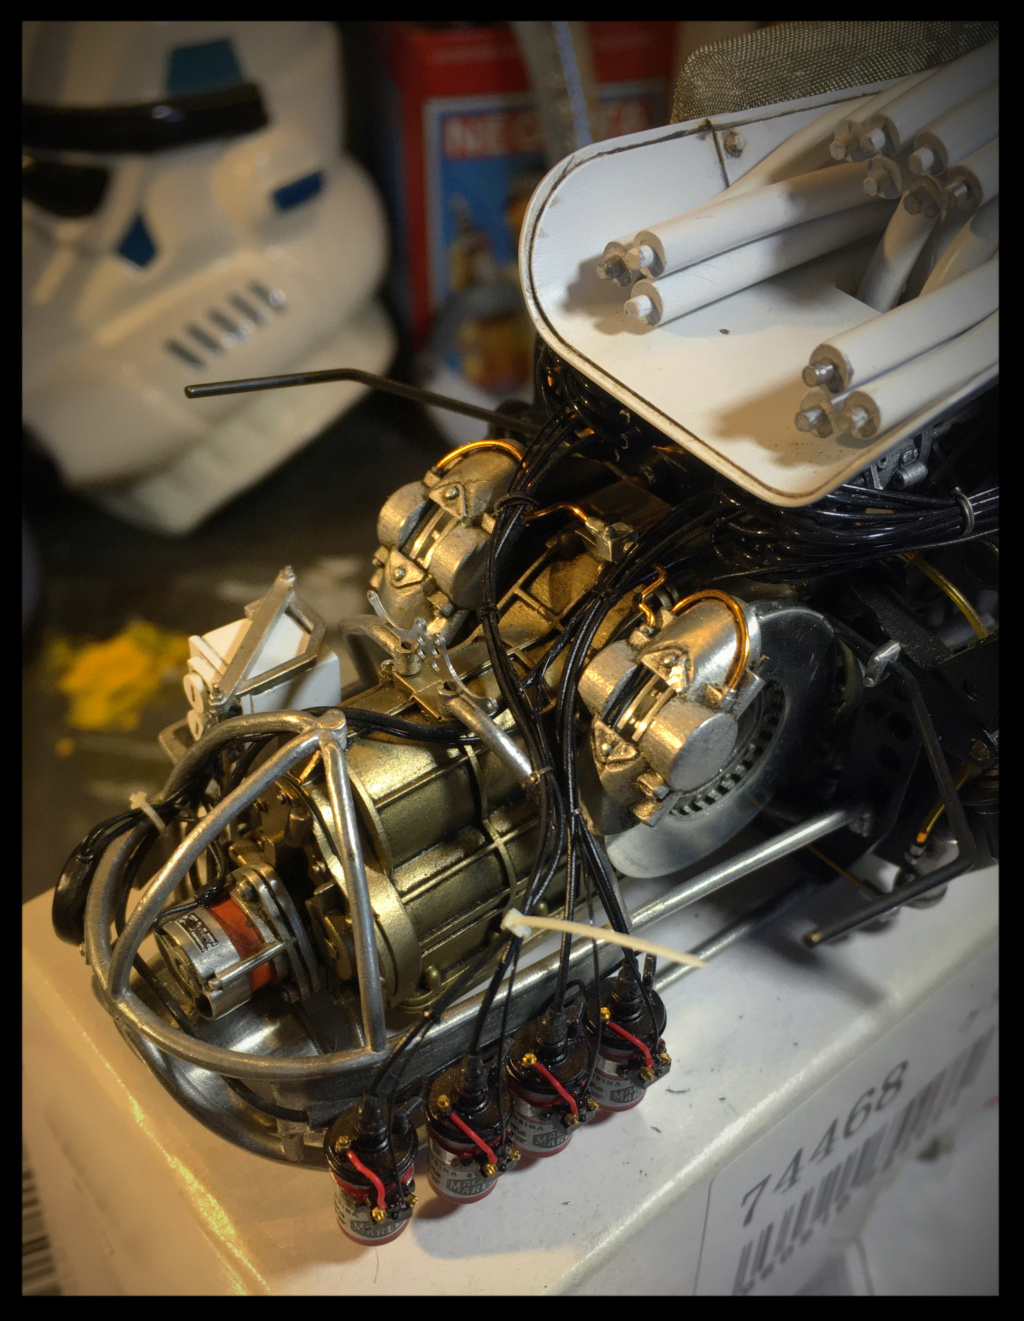
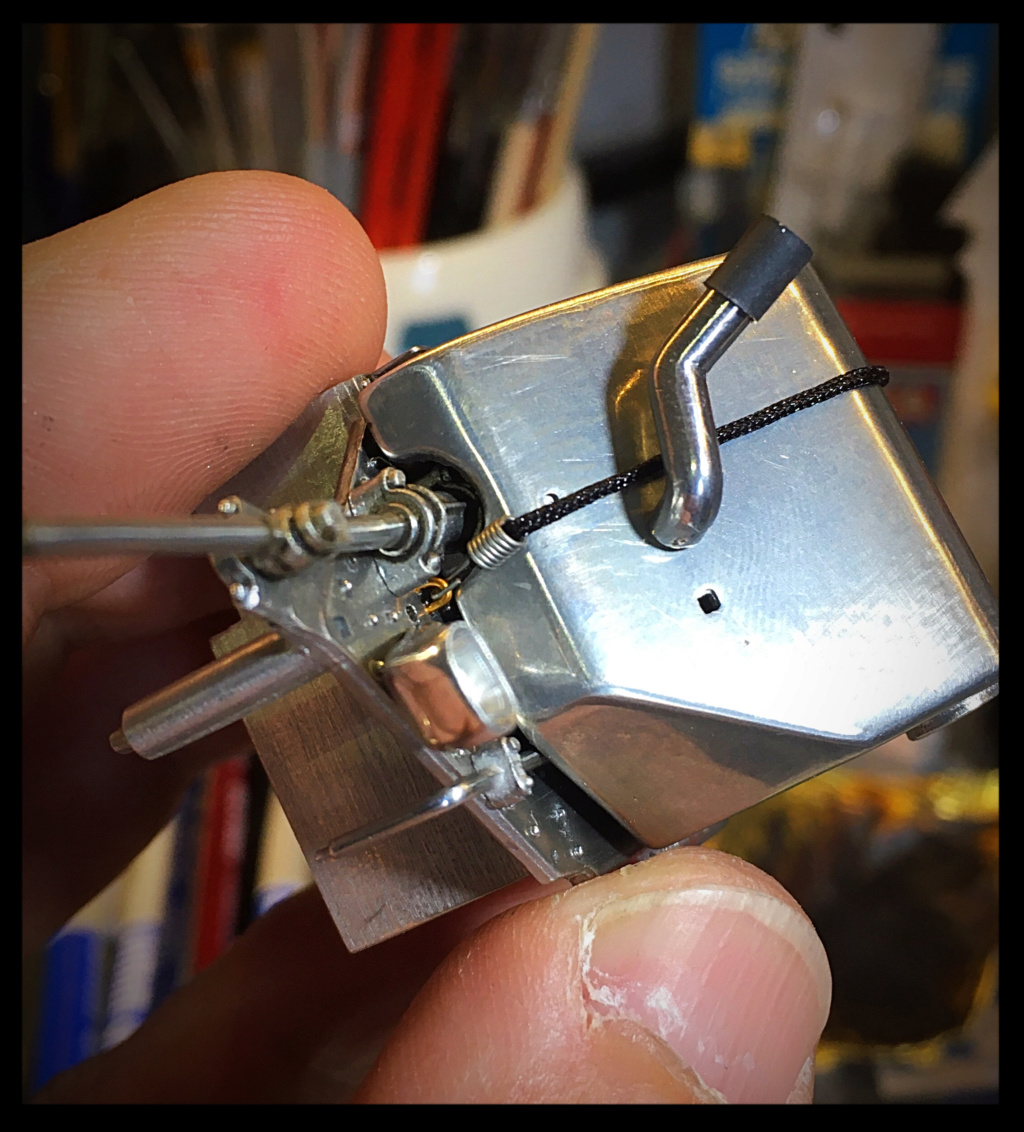
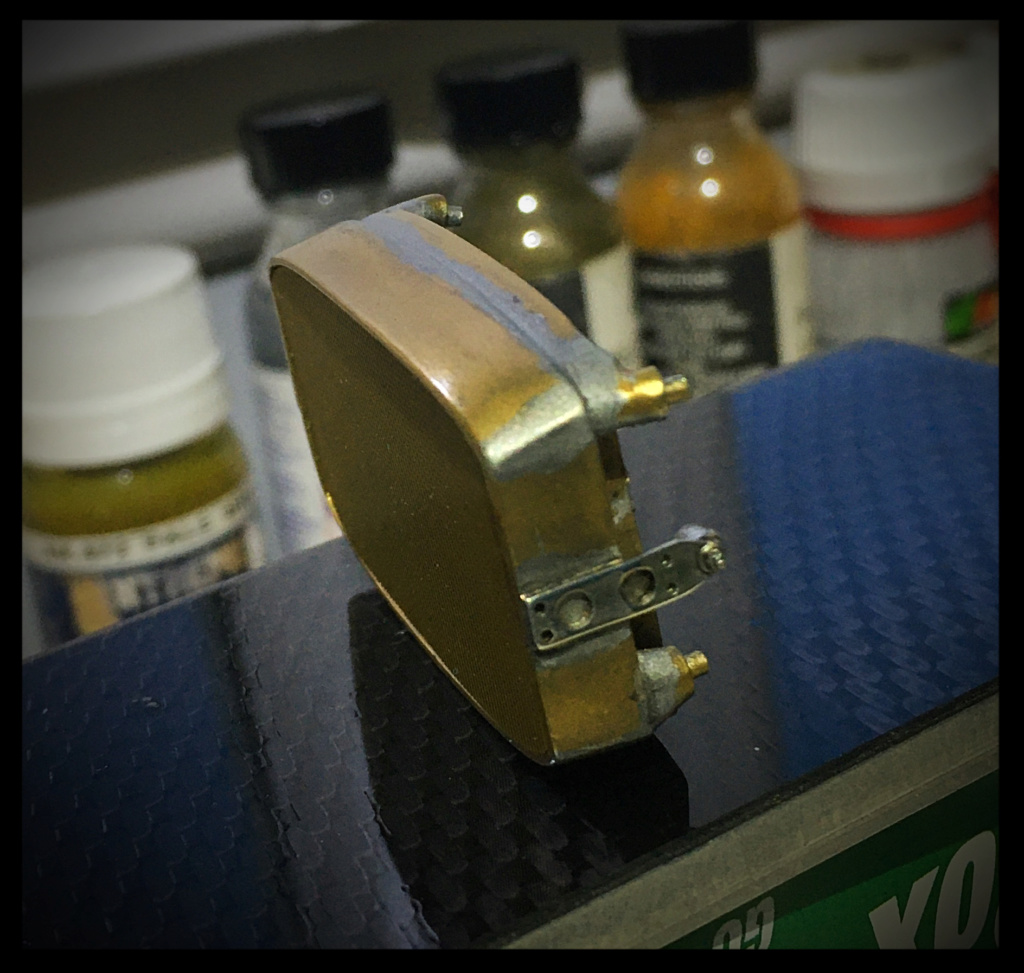
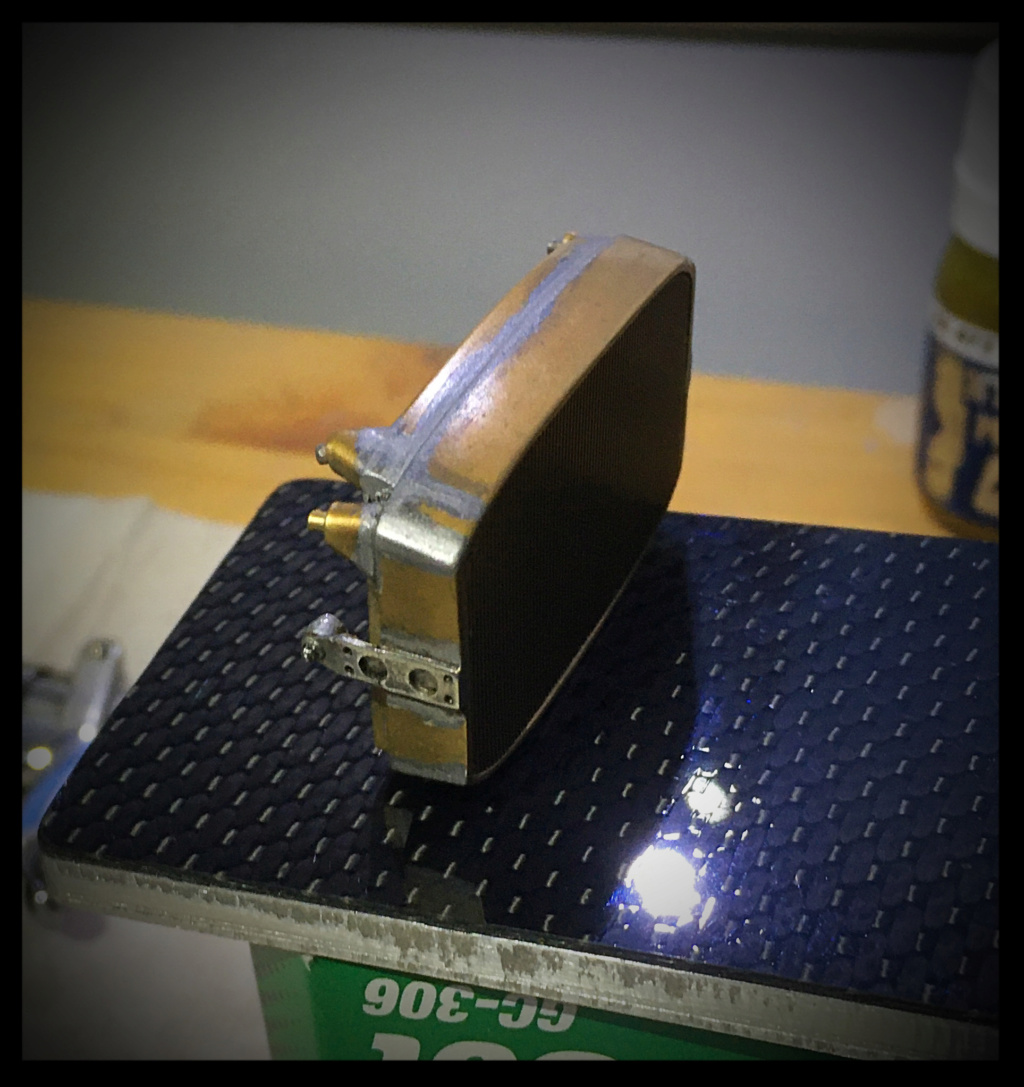
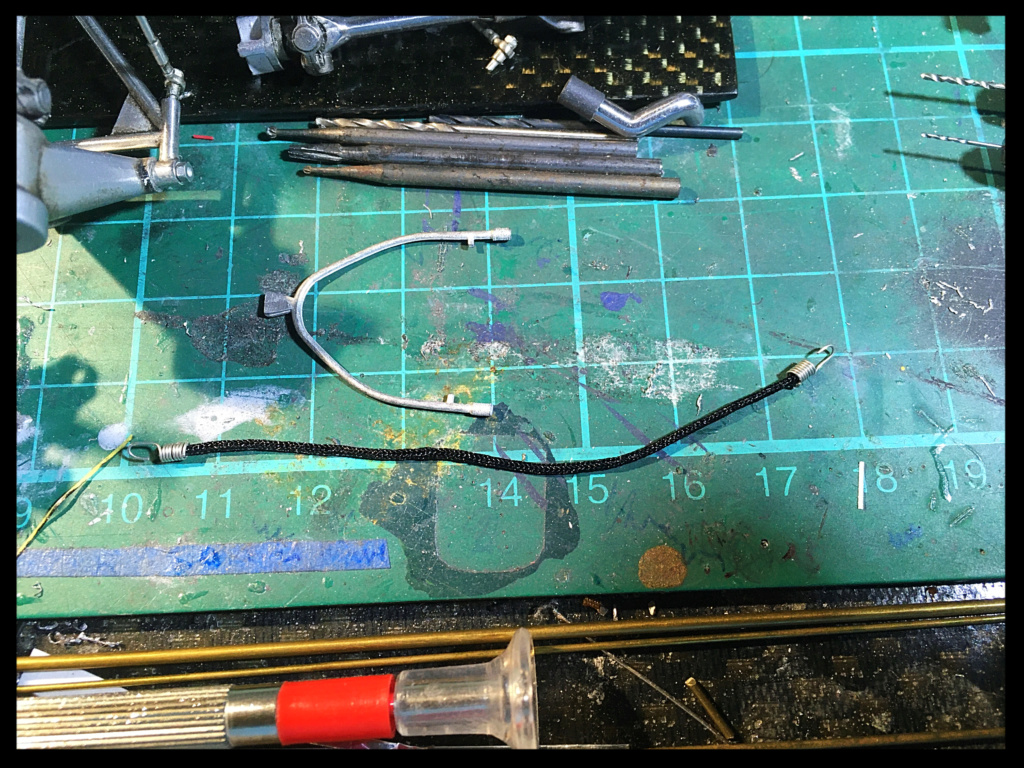
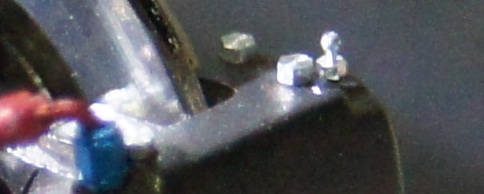
Small brass bridges of 0.5 were installed on each side of the water / oil tank to hold the "bungee cord" in place after having stretched it.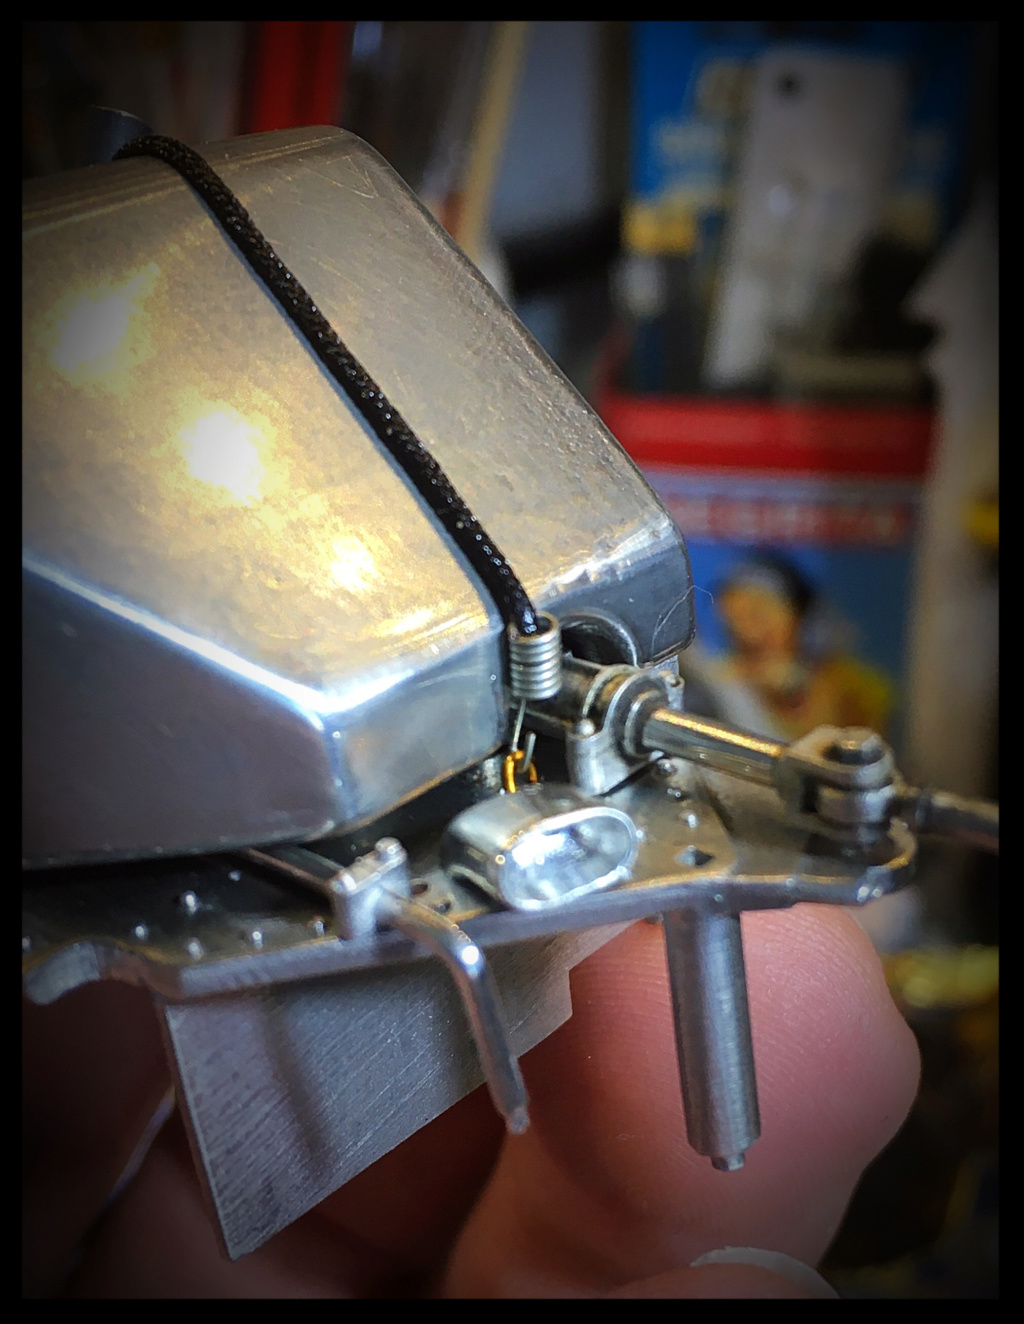
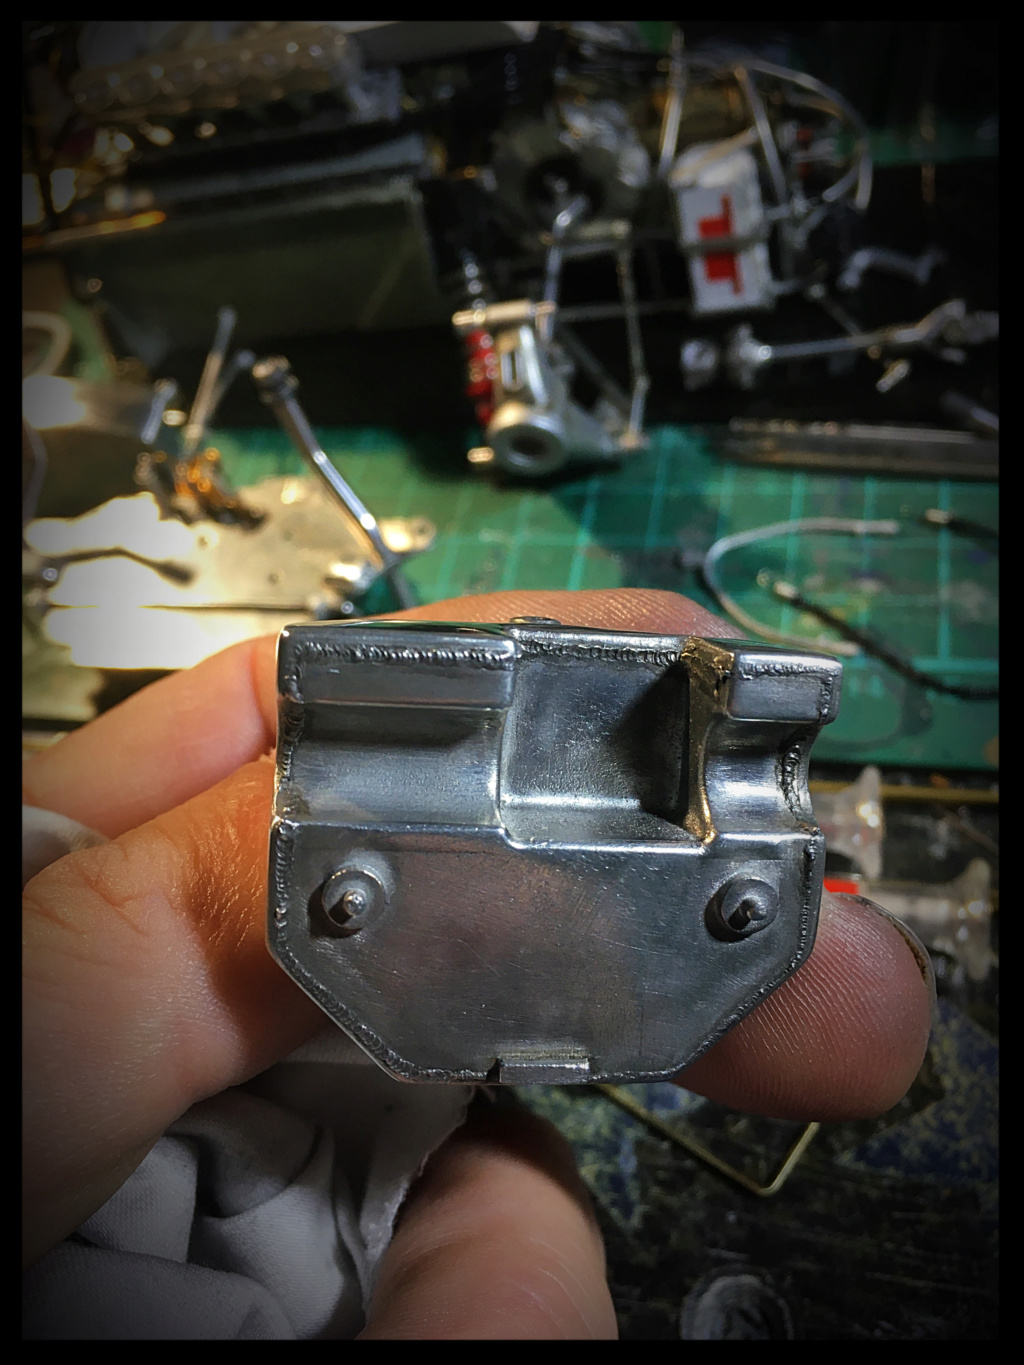
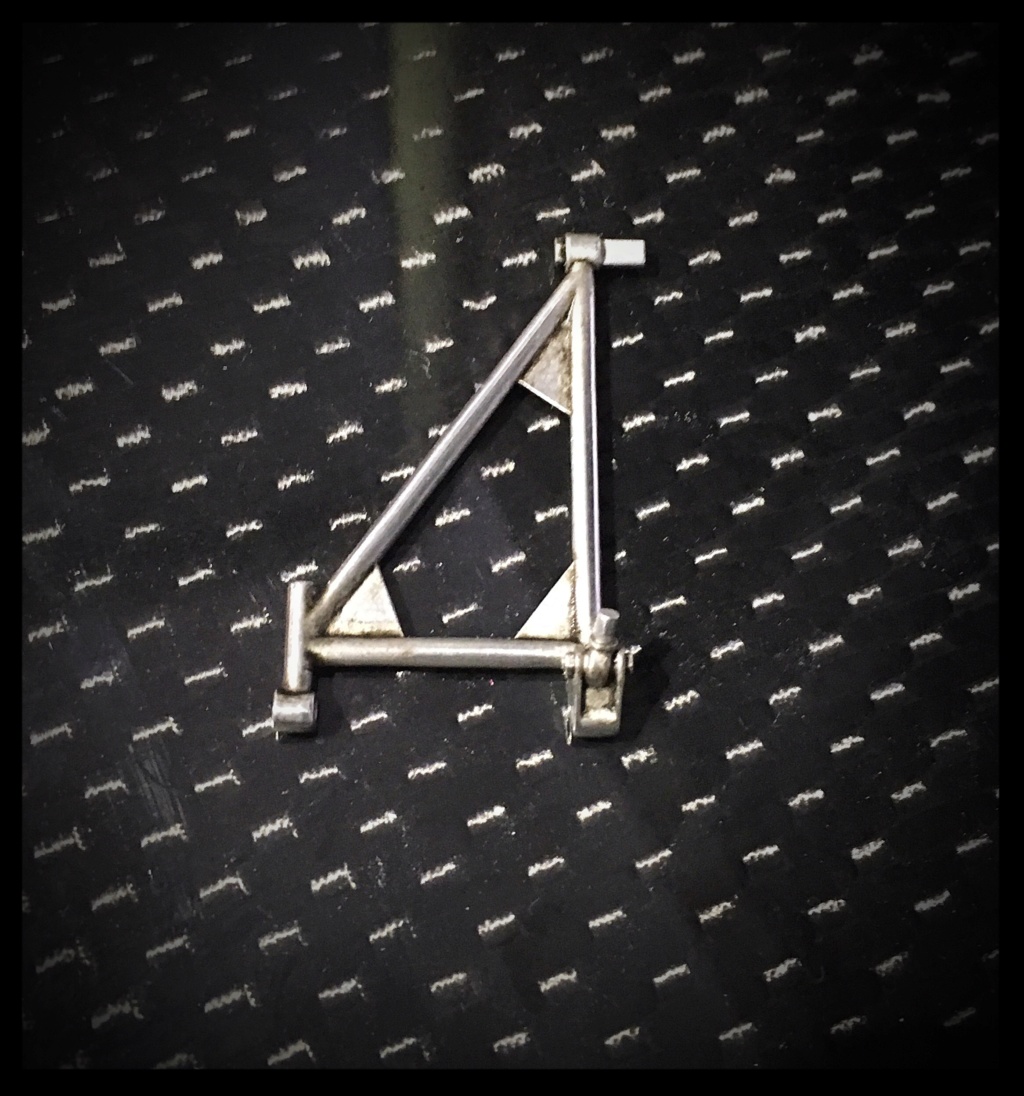
There was a problem with the length of the radiator supports, I redid them in brass of 0.8 which I brazed with silver solder.
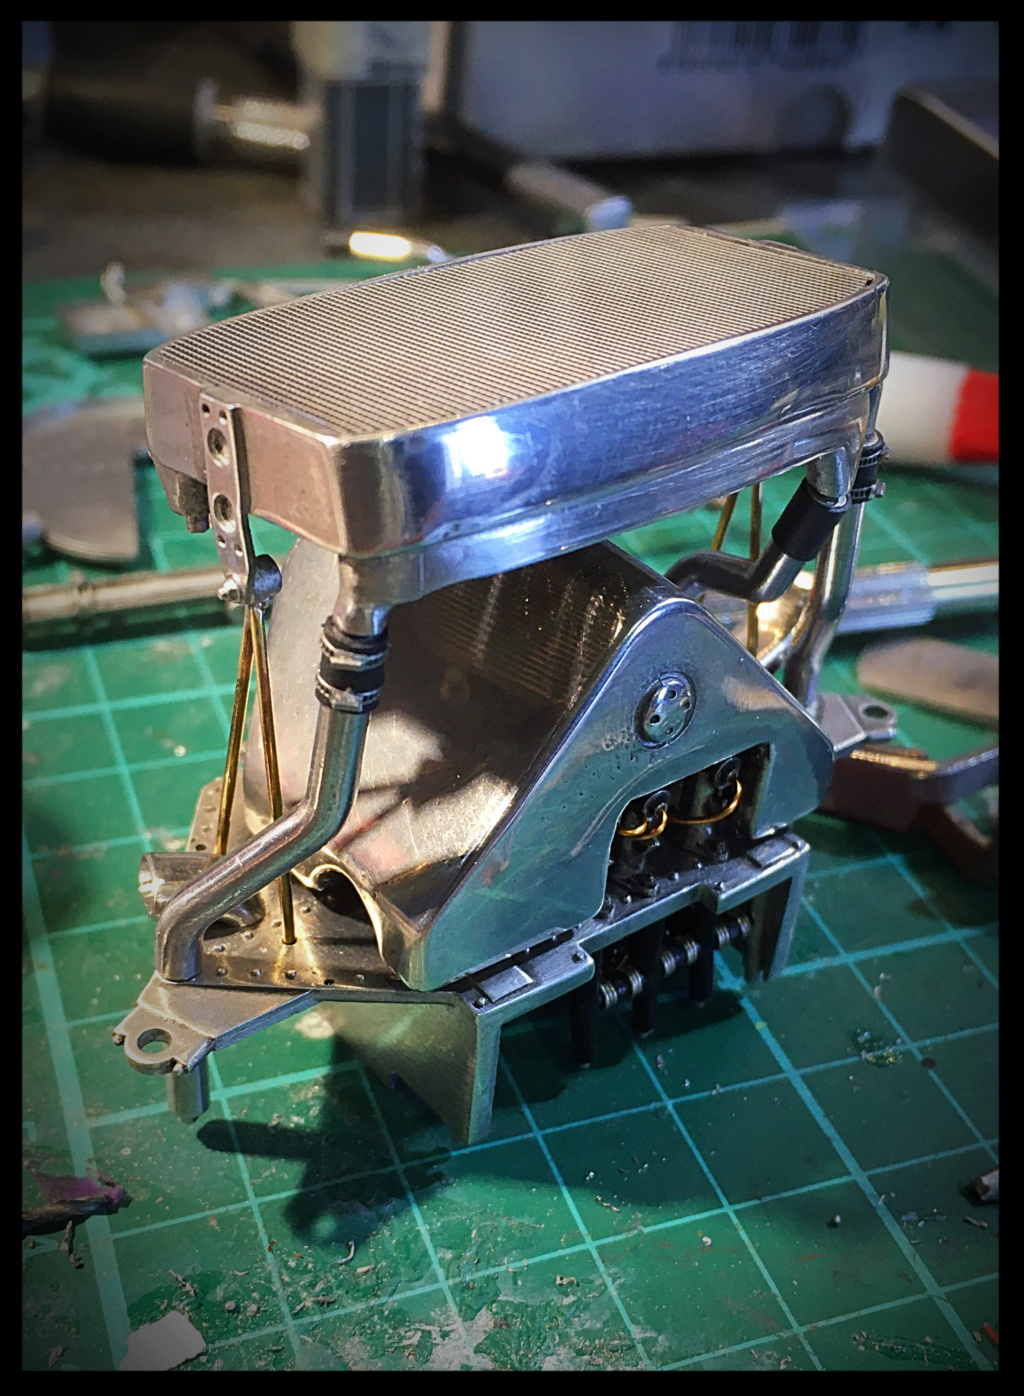
It was also time to paint the radiator(s): No more beautiful polished metal appearance and place for brass.
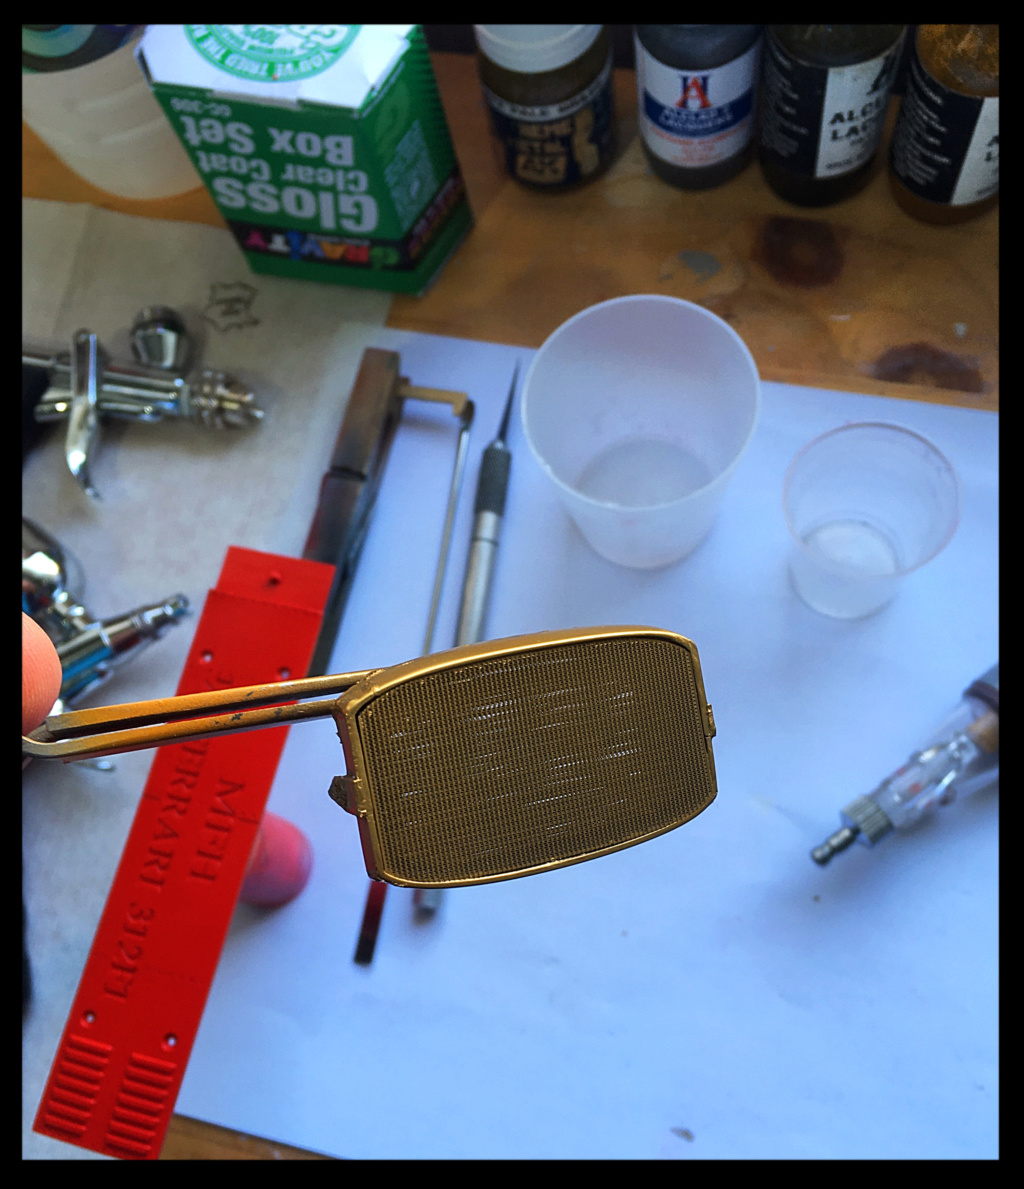
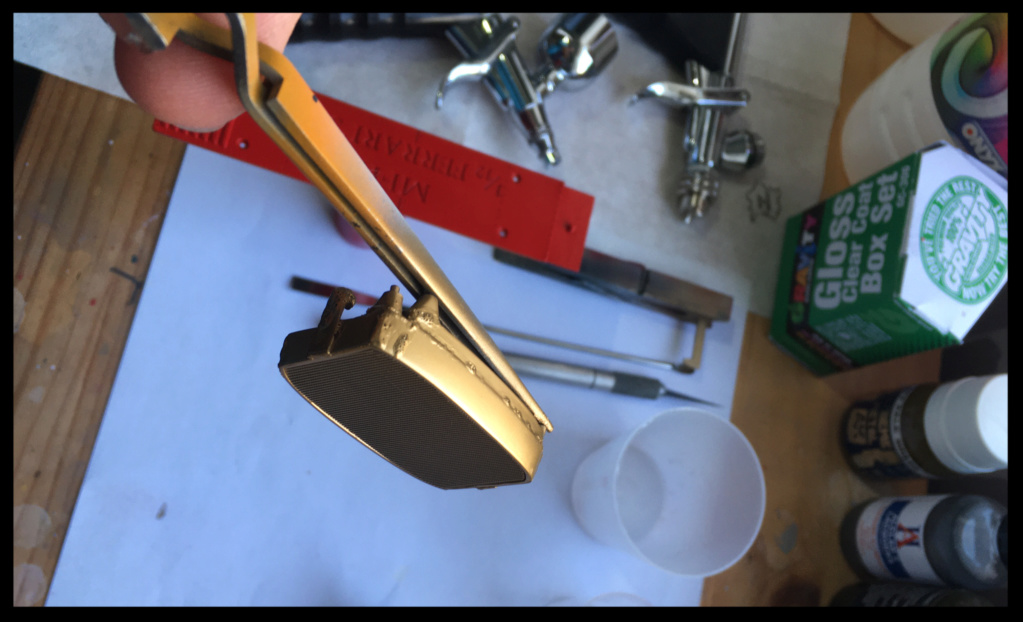
... And decided to represent the welded appearance of brass radiators.
Metalcote Alu, oils ...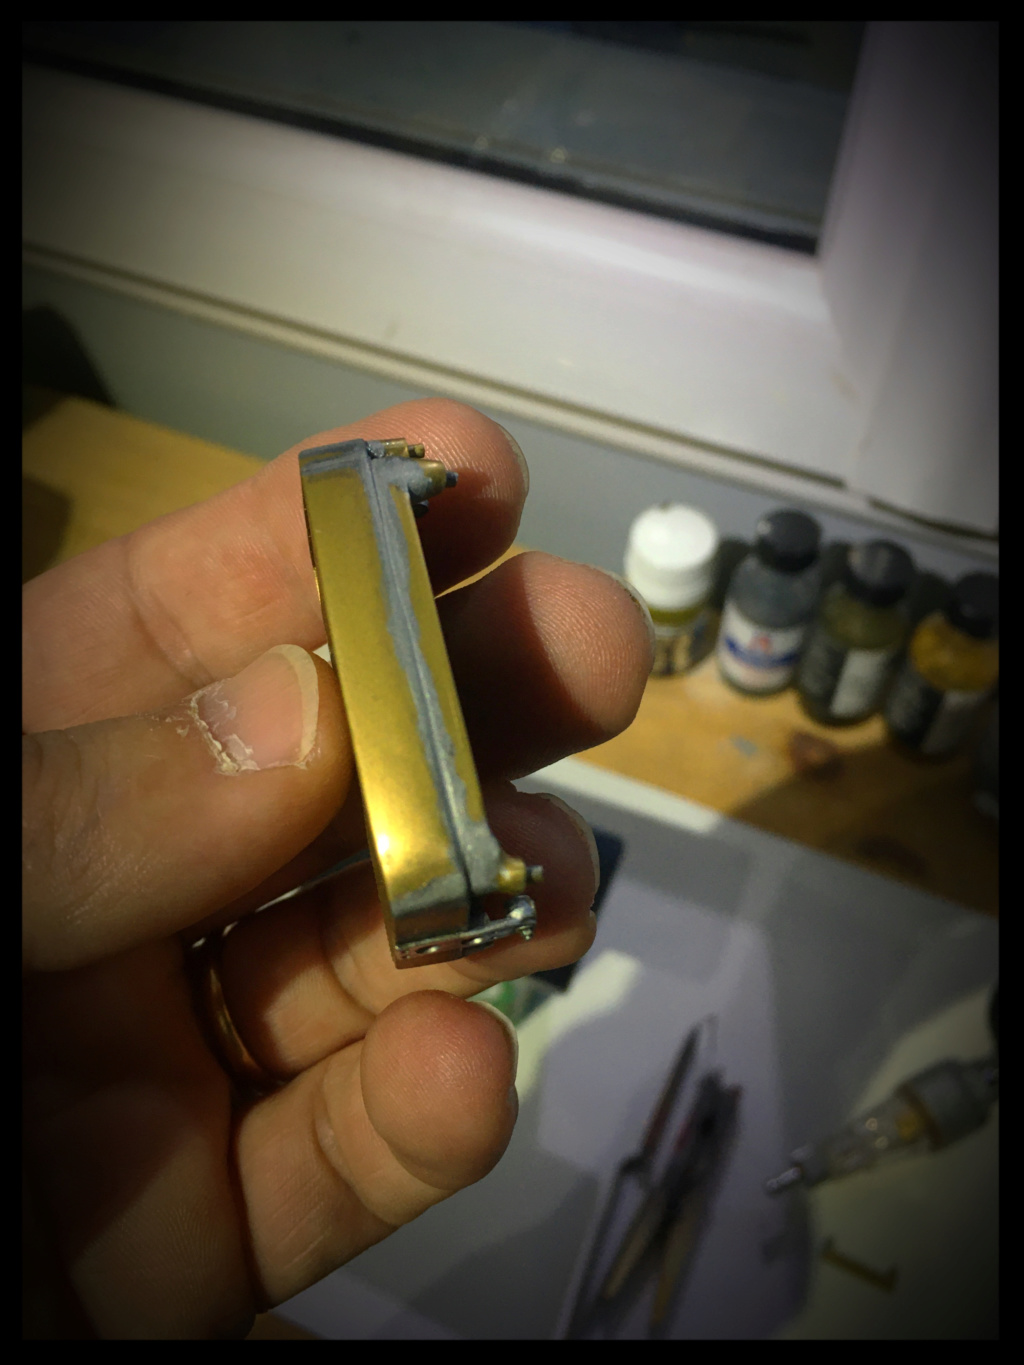
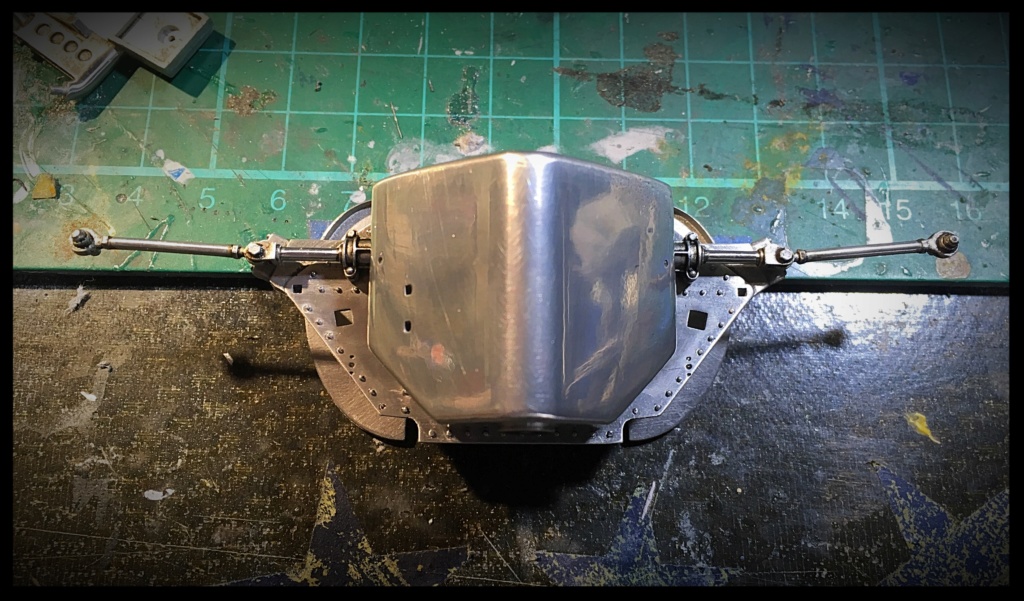
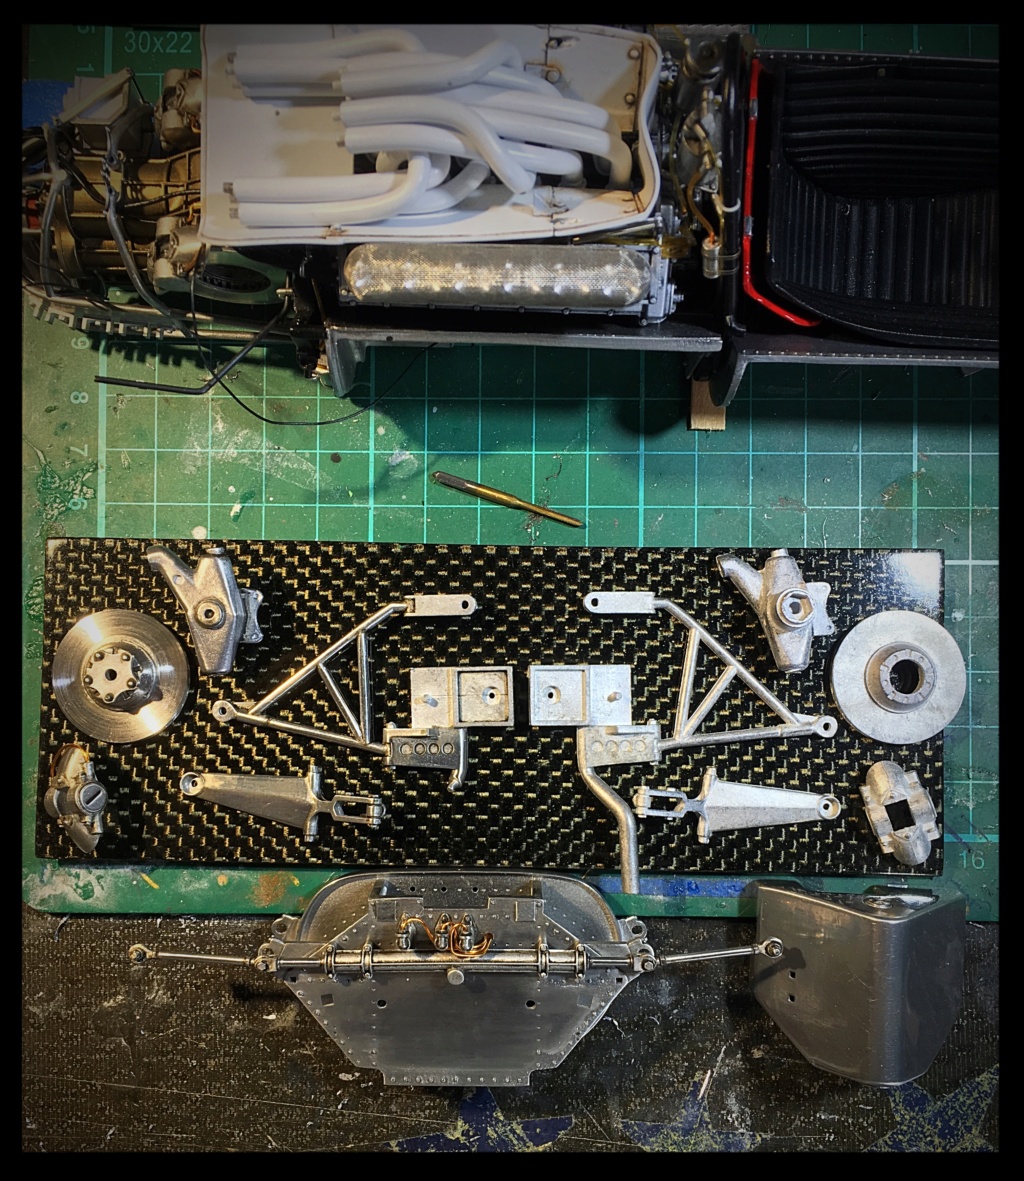
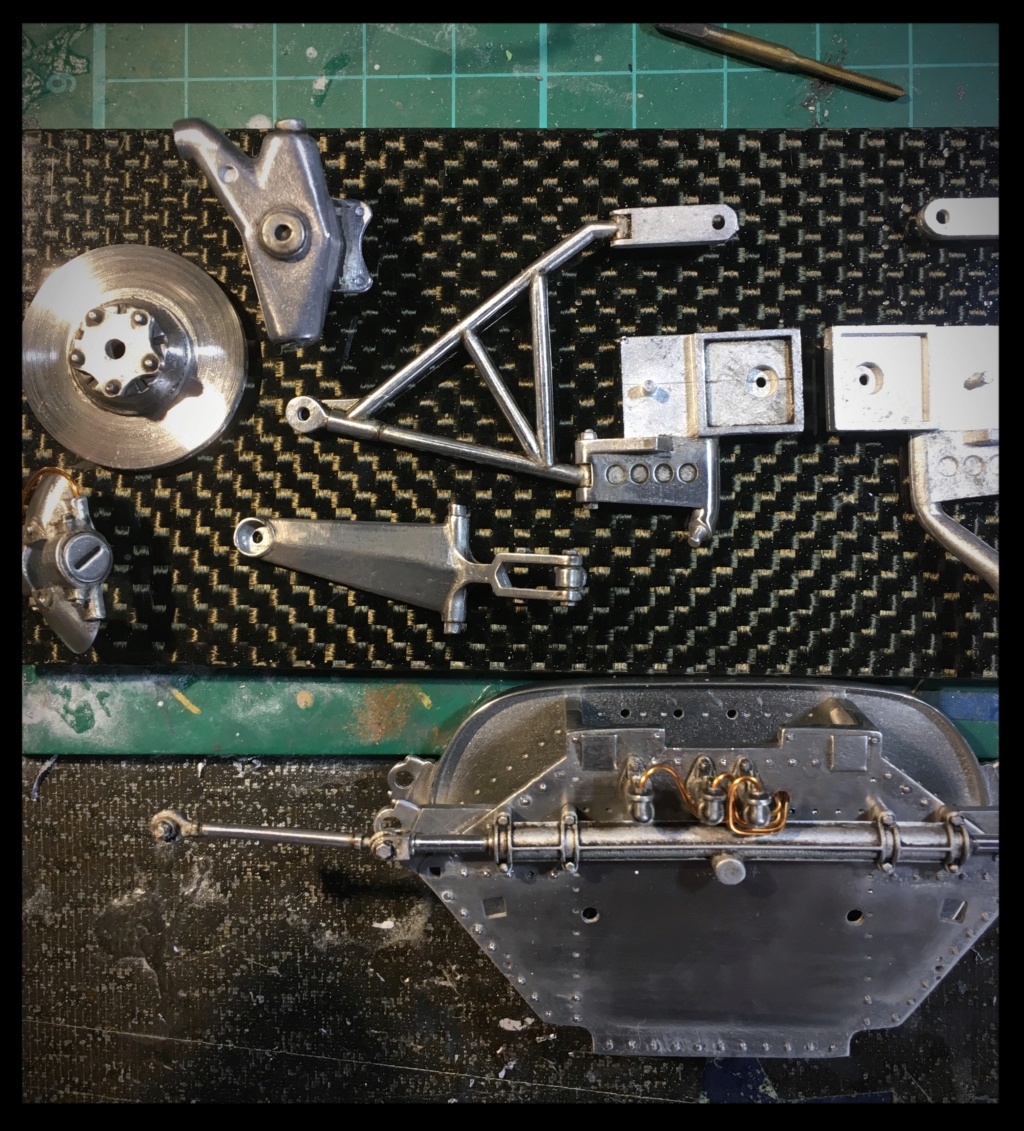
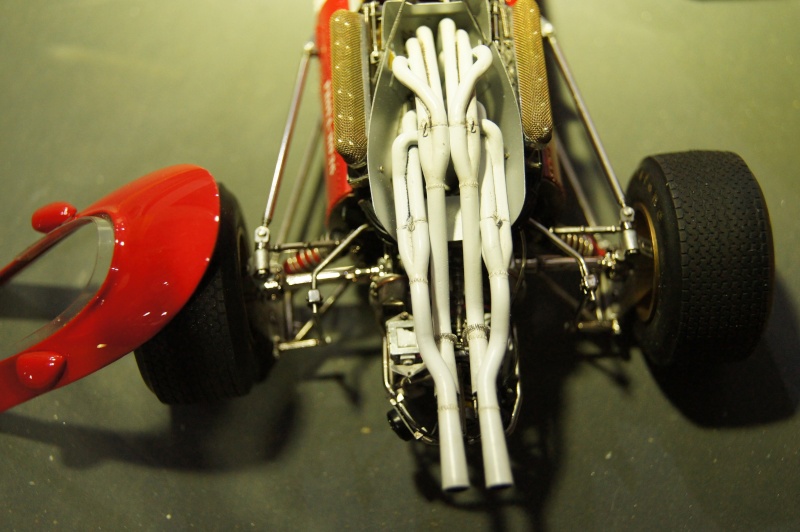
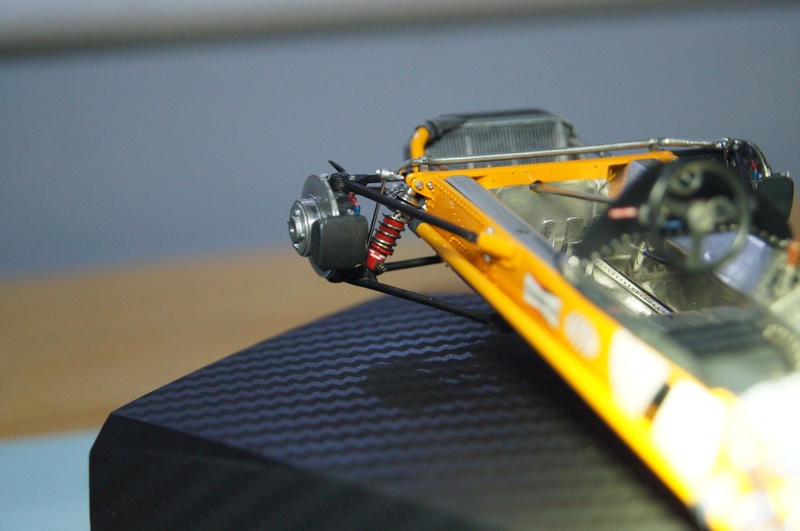
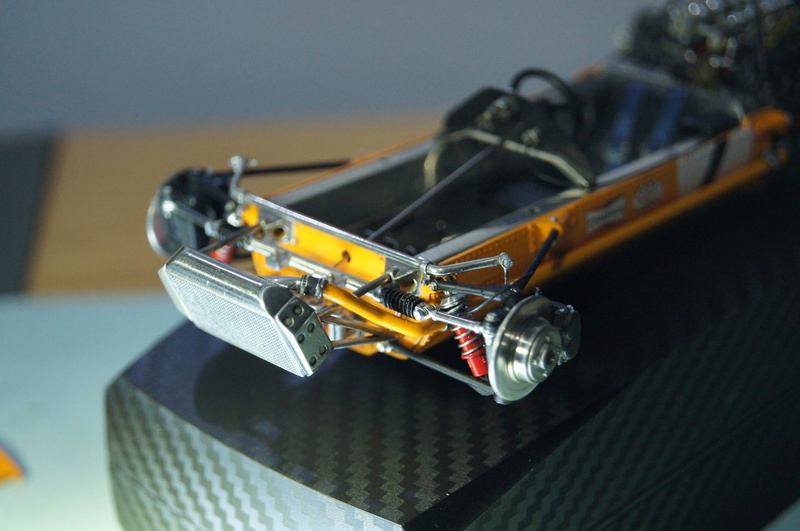
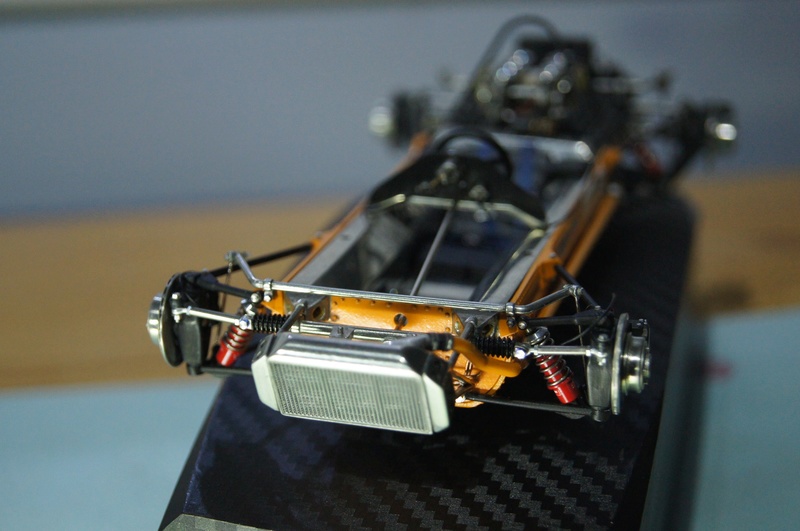
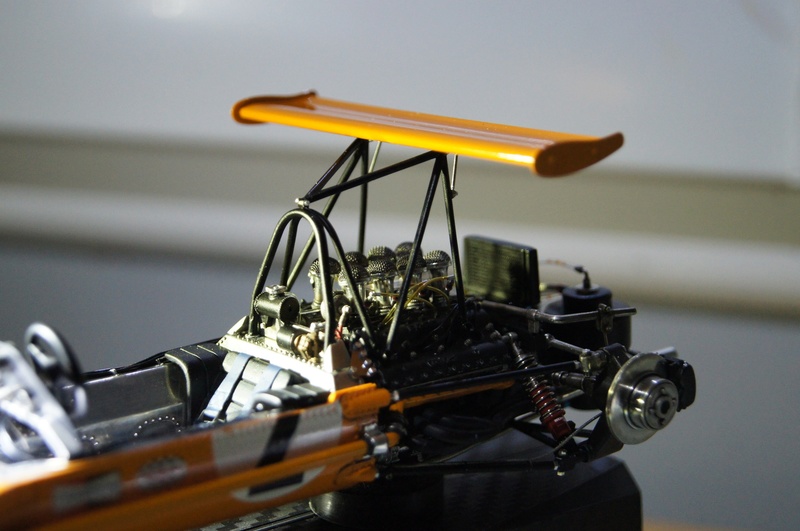
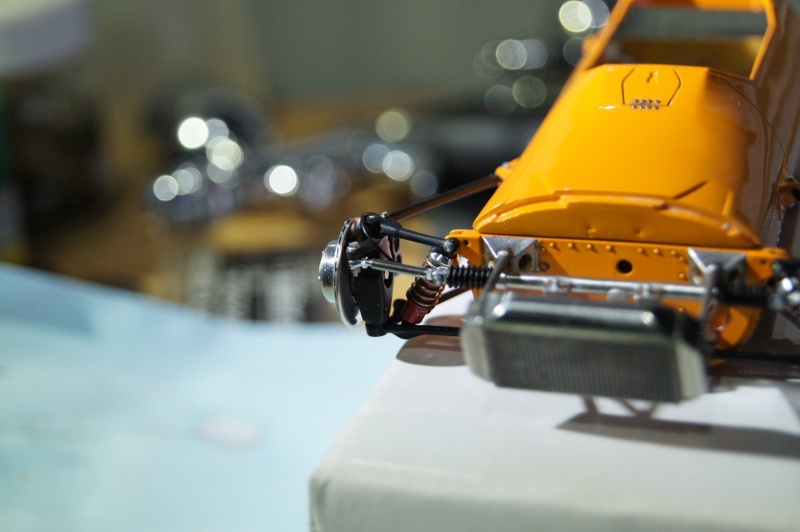
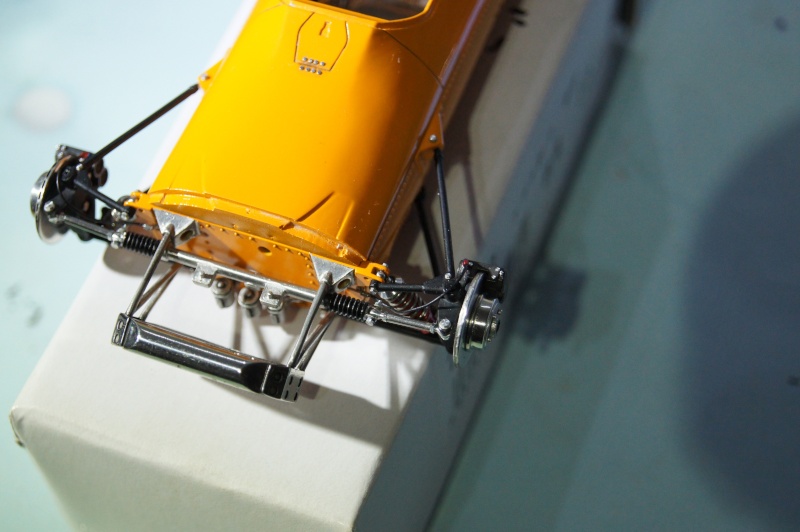
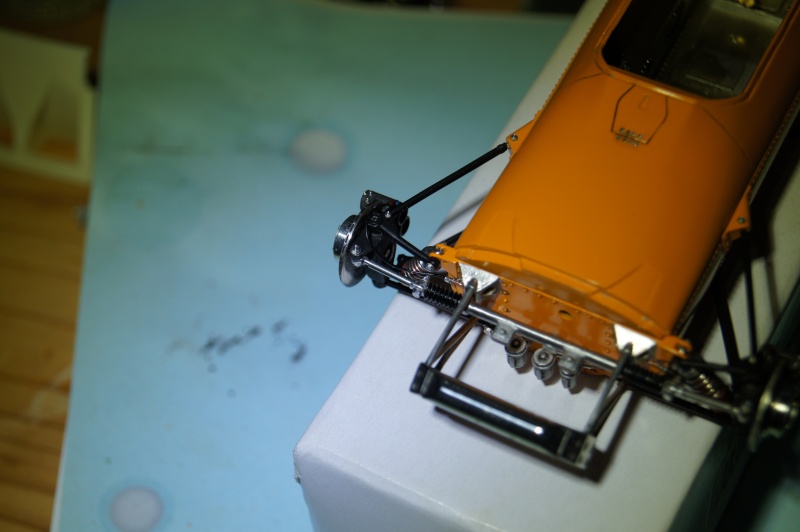
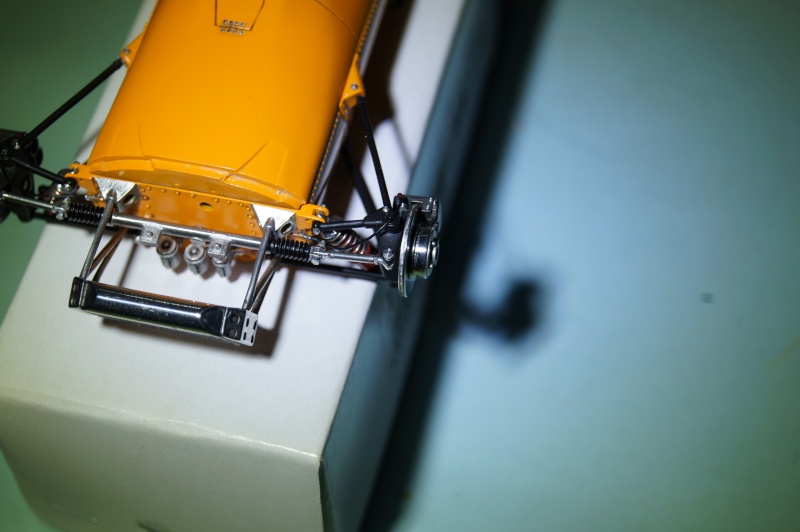
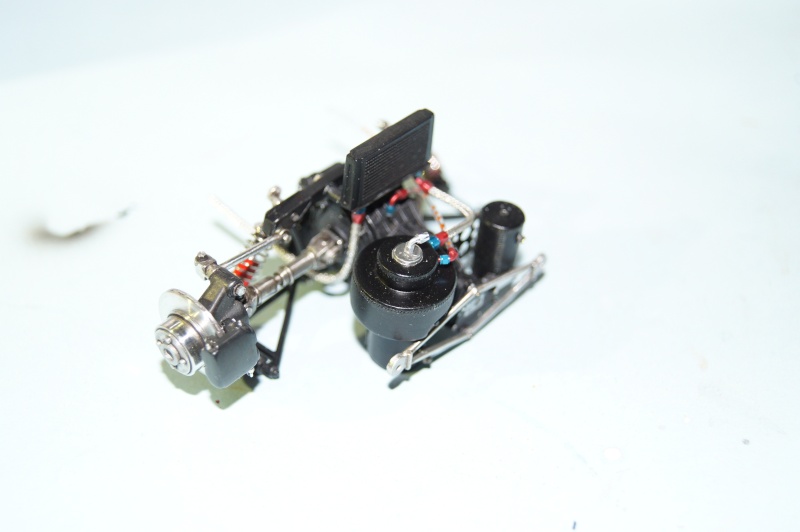
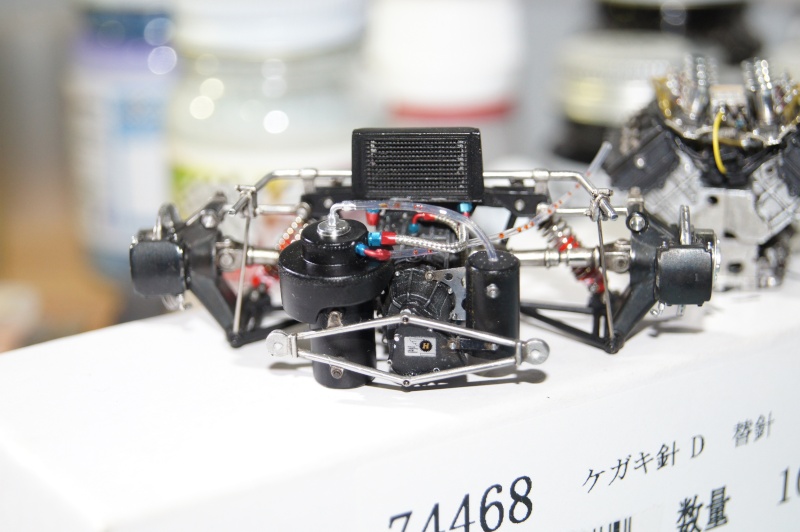
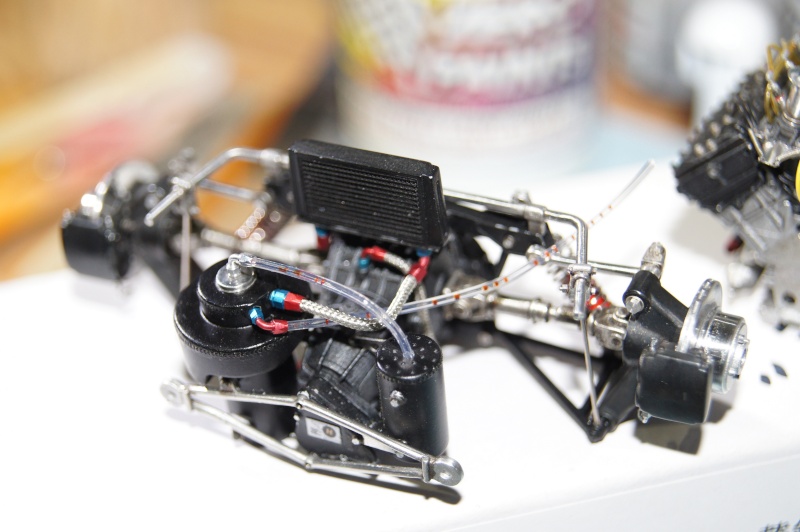
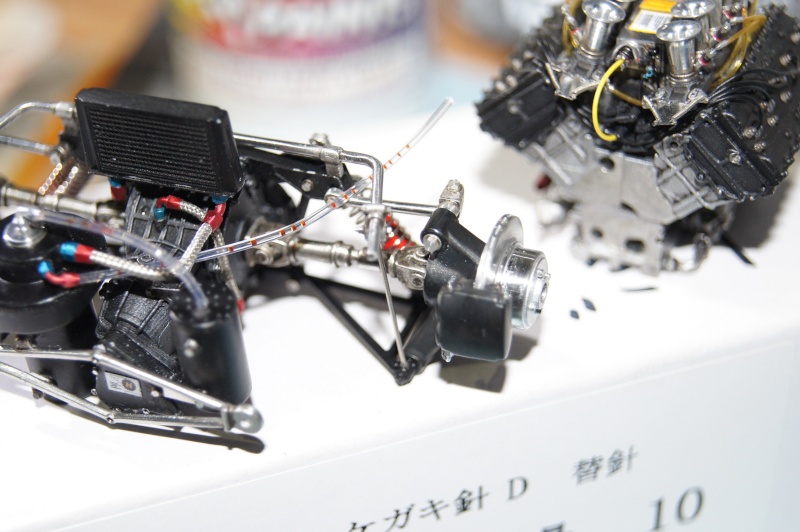
A blank assembly of the various components of the rear axle and the exhausts to confirm that we are going in the right direction
It only remains to connect the lines to the master cylinder of the front brakes, this is done for the clutch and the rear.
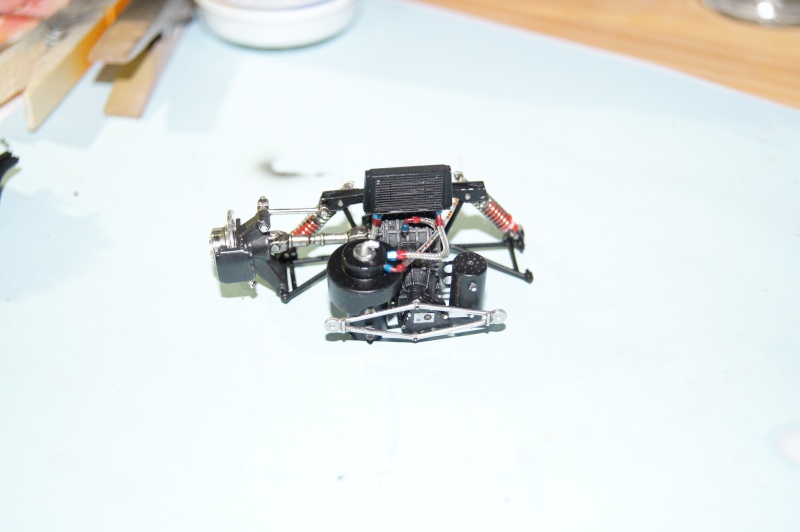
Just have to finalize the assembly of the elements
I touched up the varnish and painted the underside of the hull.
Voili voilou.
More soon.
Pascal
-
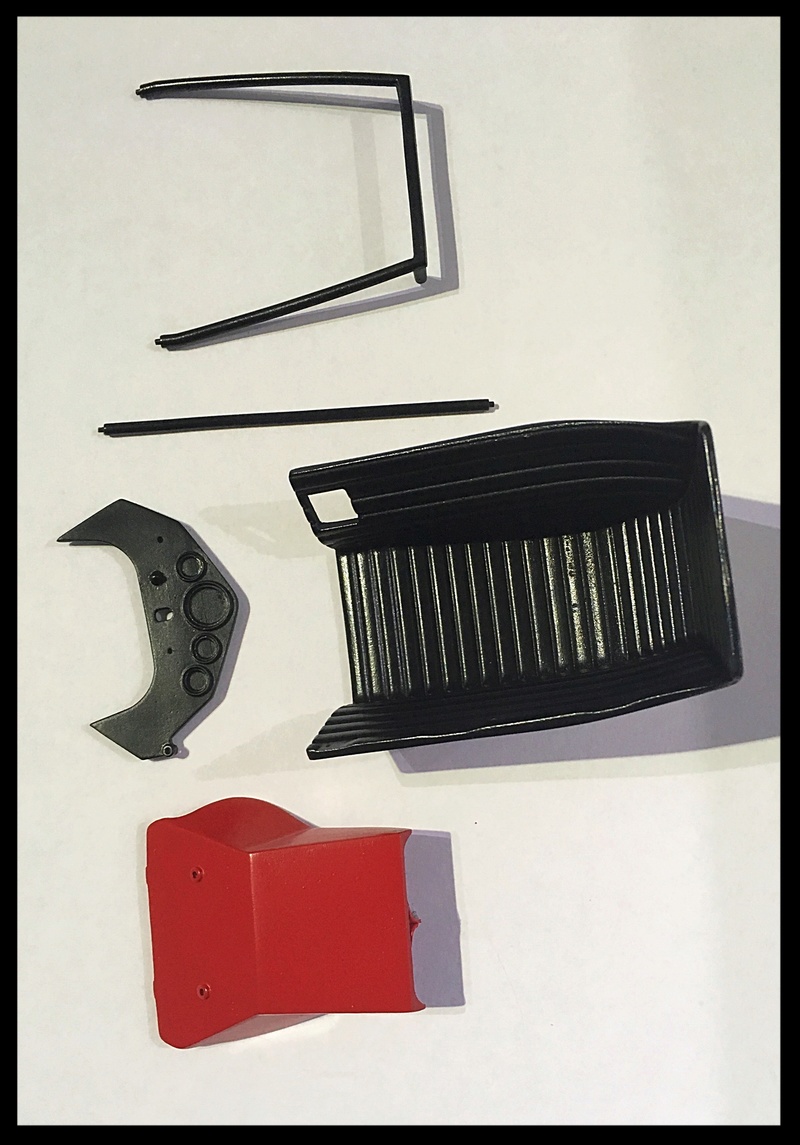
Hi,
Still progression both on the rear and front.
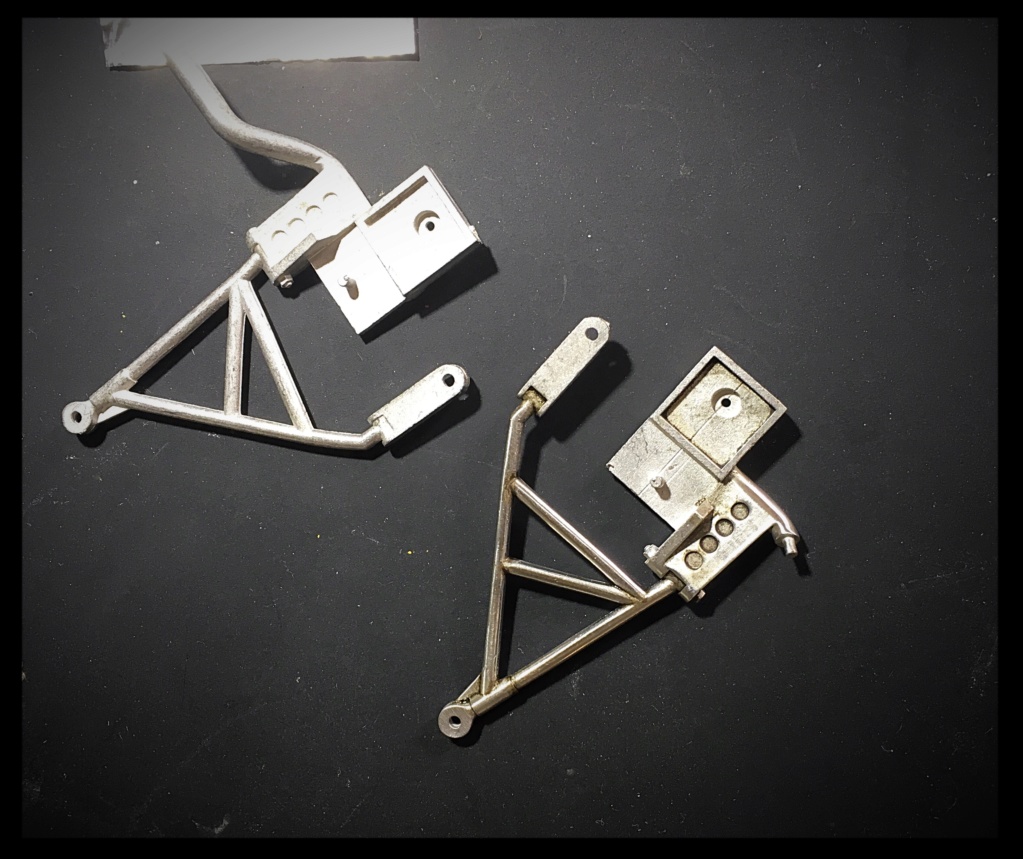
Difference between before and after work on white metal parts.
The small bucket doesn’t belong to the 312F1...but to a Tipo 500.
I wanted to install thin aluminum sheet on the structure.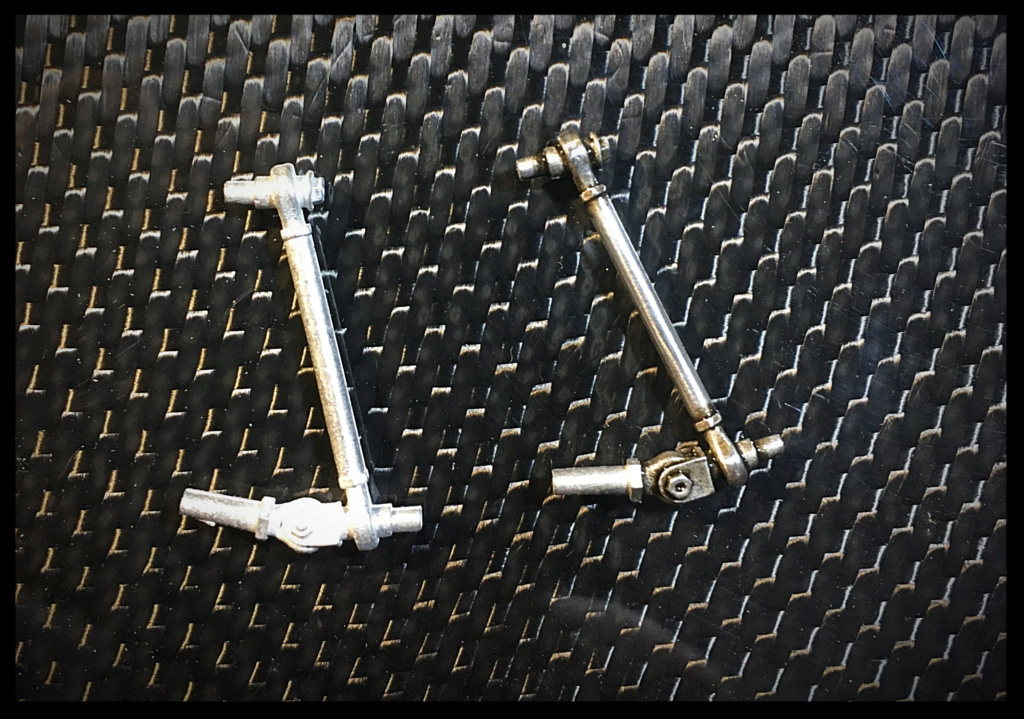

Pascal
-
Hi,
Thanks;)
Few progress and improvements.
I wanted to rebuild the anti roll bar with brass, but the original is good and almost hidden behind the tank...
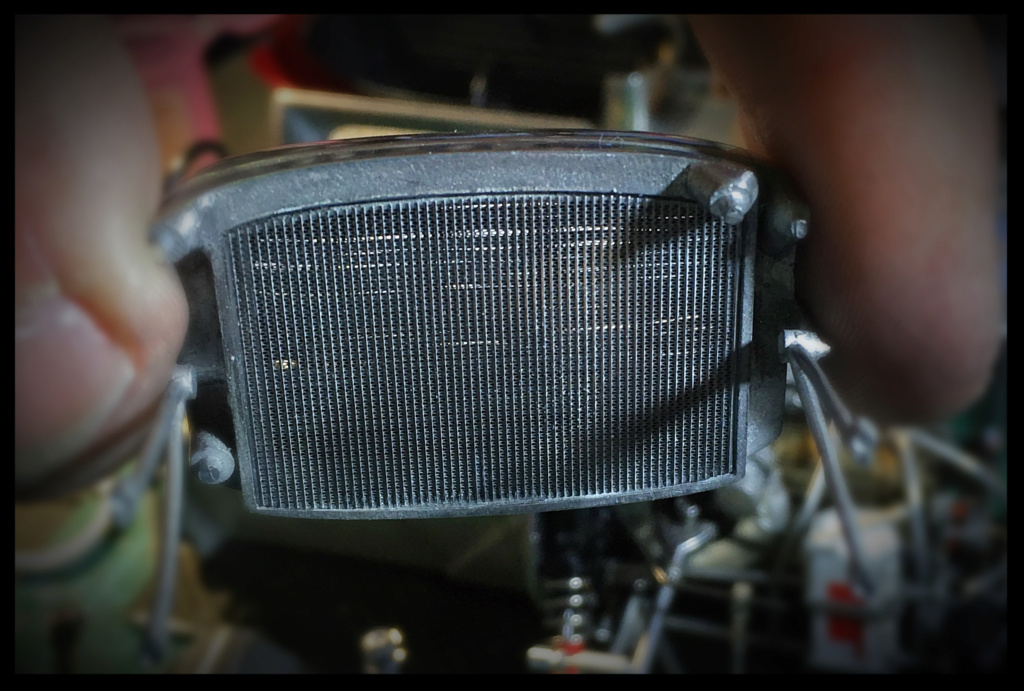
The grills are installed on the radiator and the simulated inside tubing is still visible.
A new Sandow will replace the white metal part.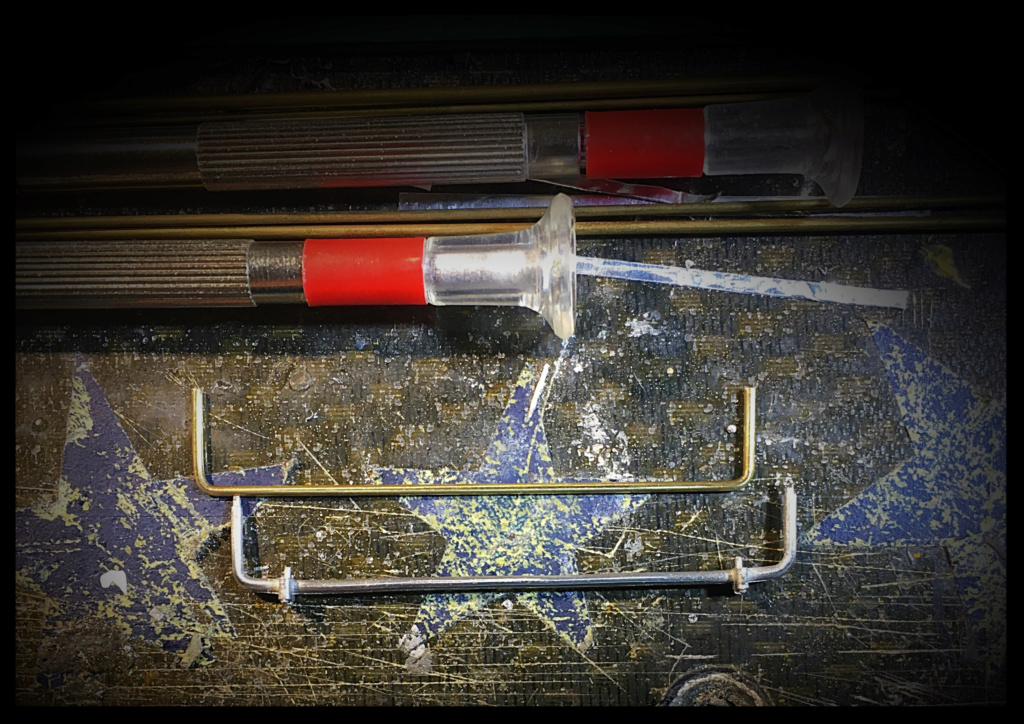

Pascal
-
Hi Mates,
The envy gradually returns...
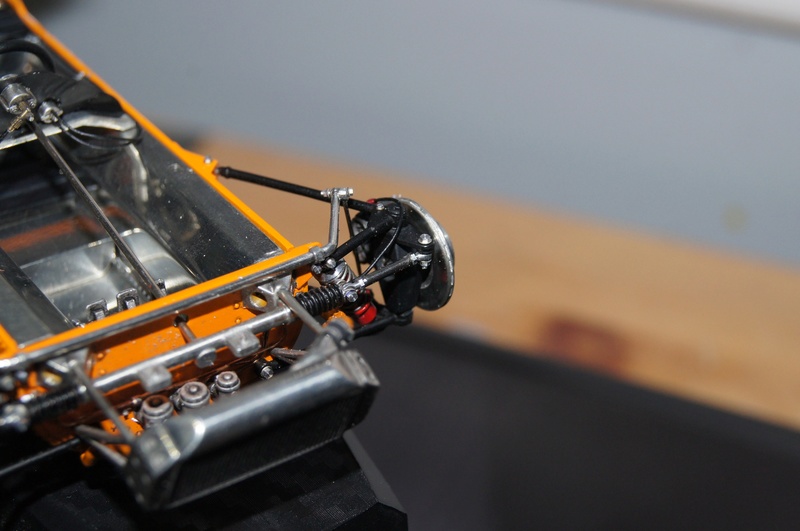
Preparation of the front parts.
Difference between parts done and TBD.
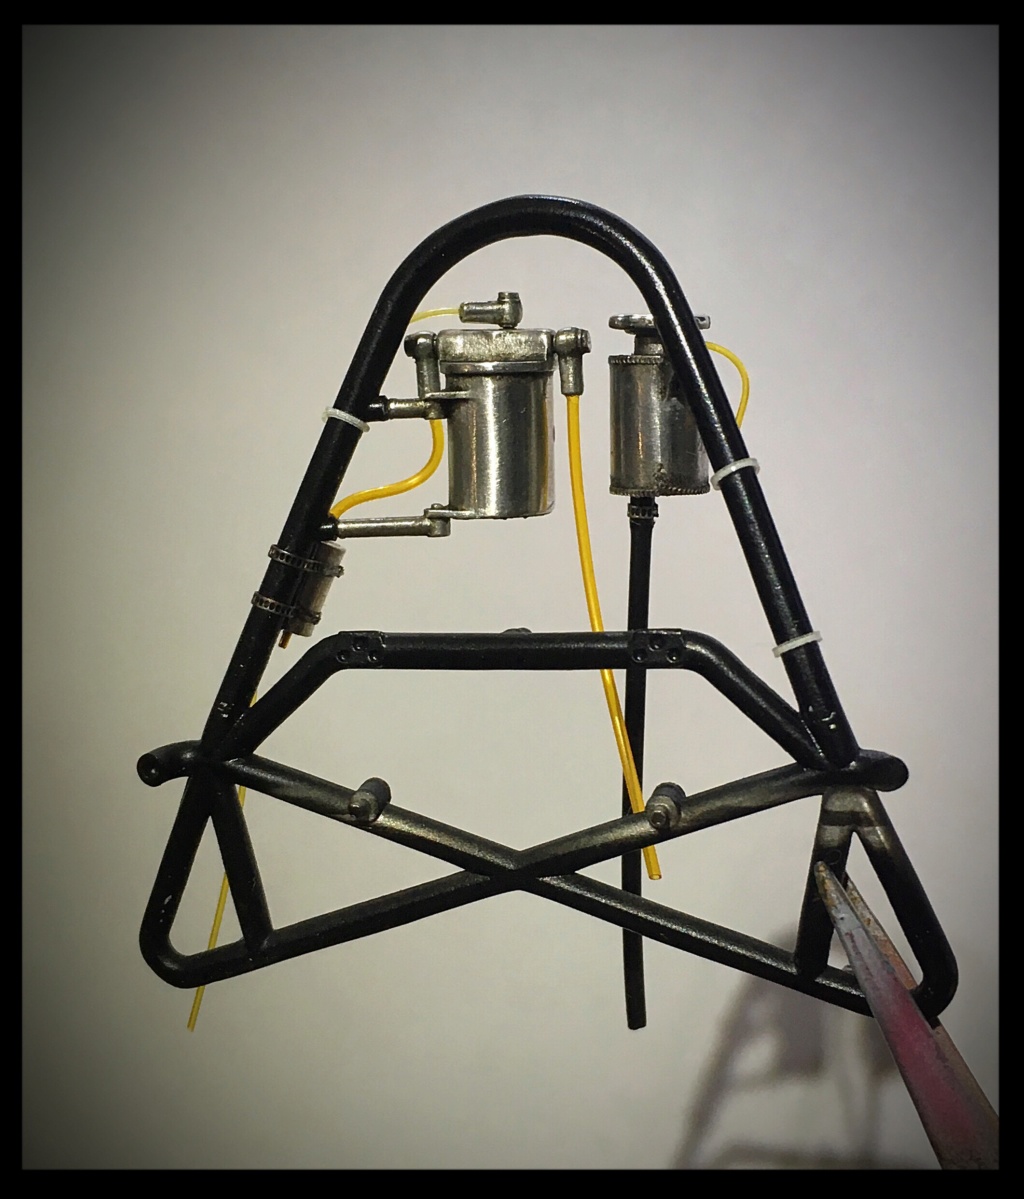
Tanks temporarily installed:
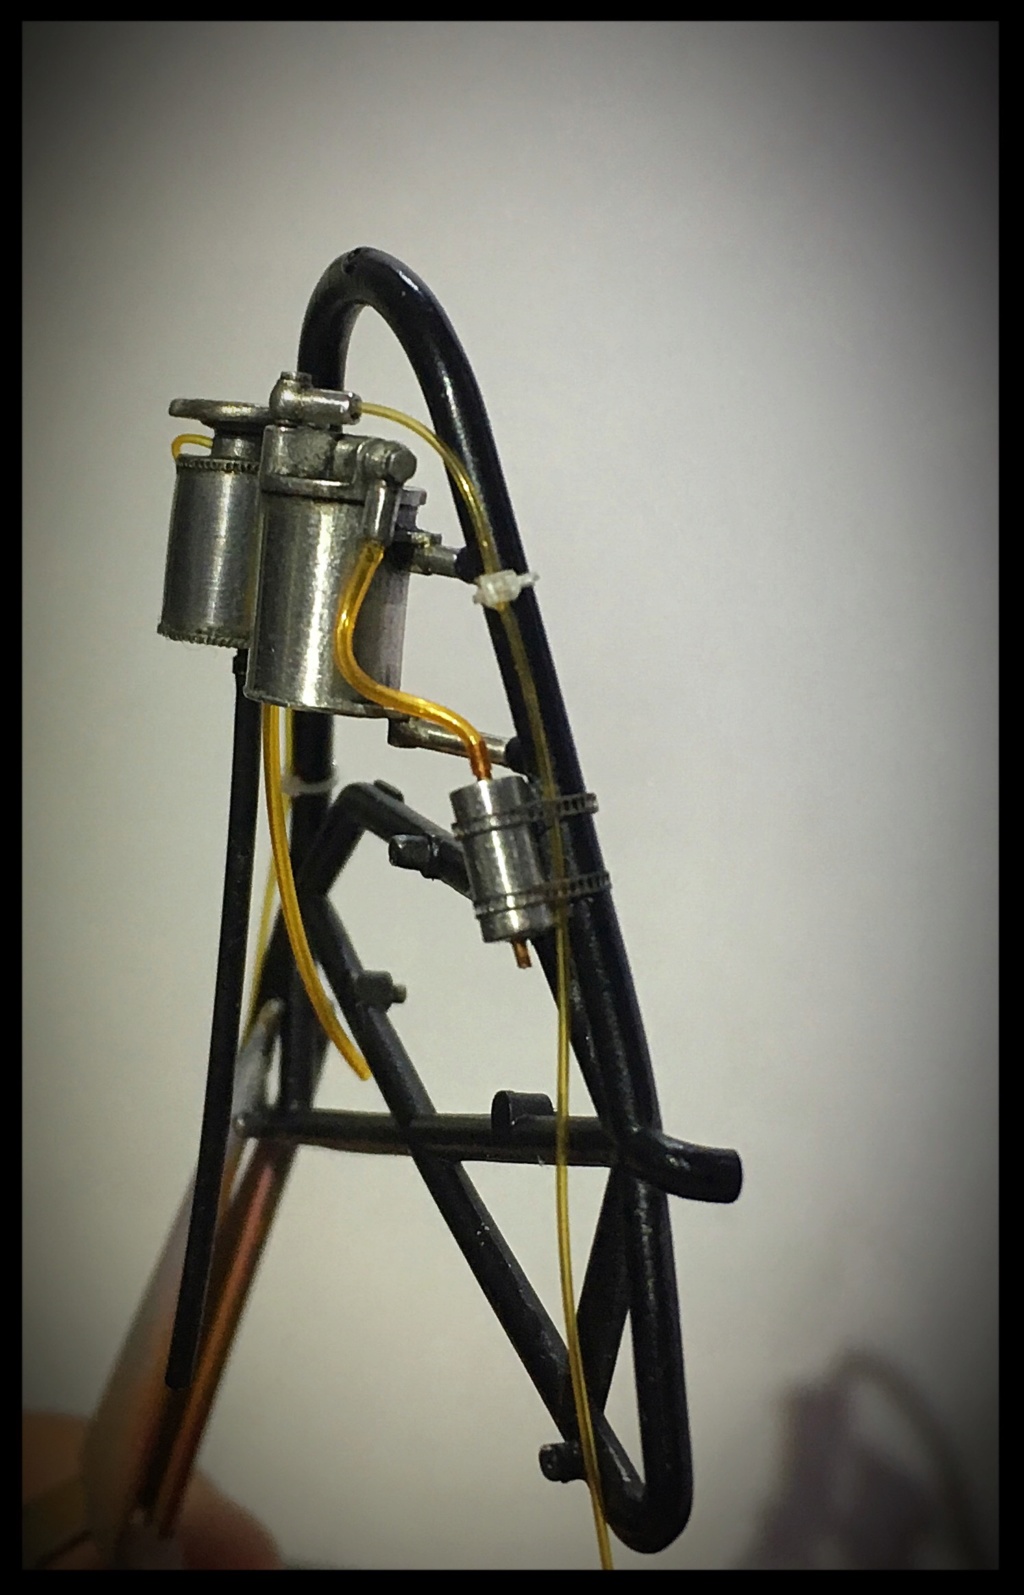
A bit closer
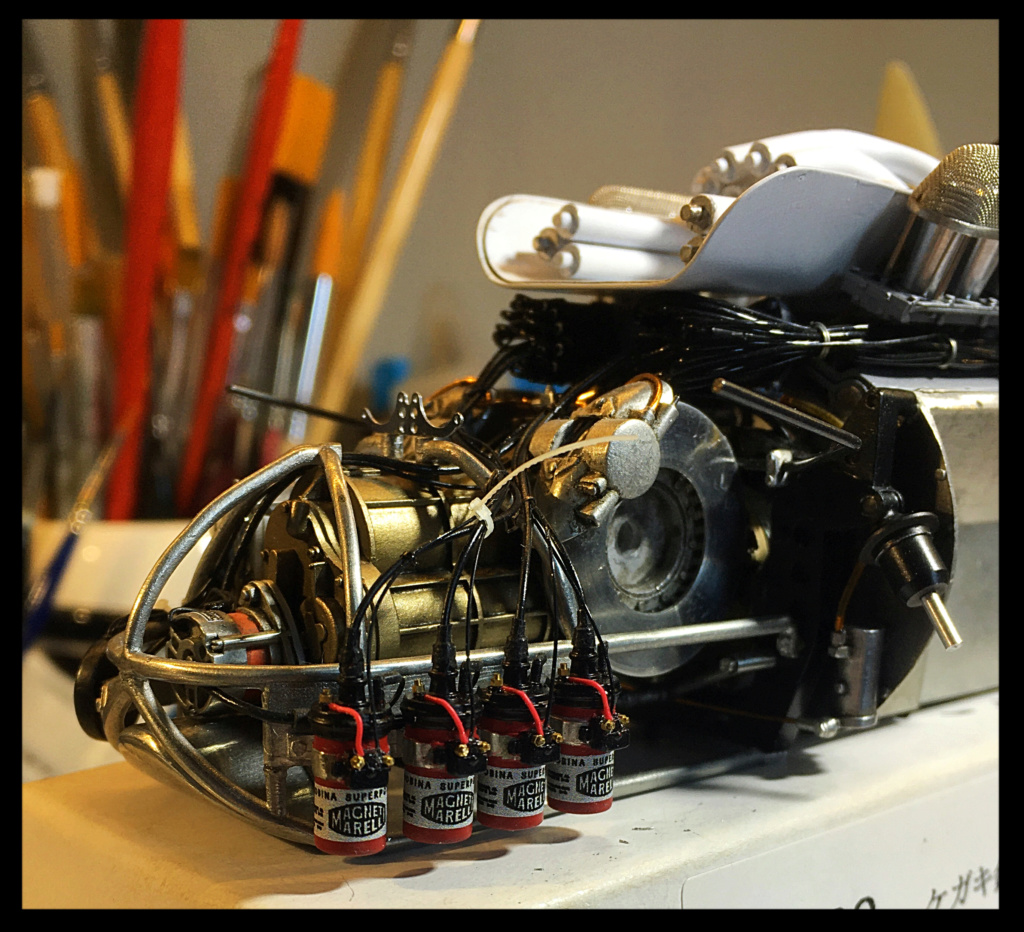
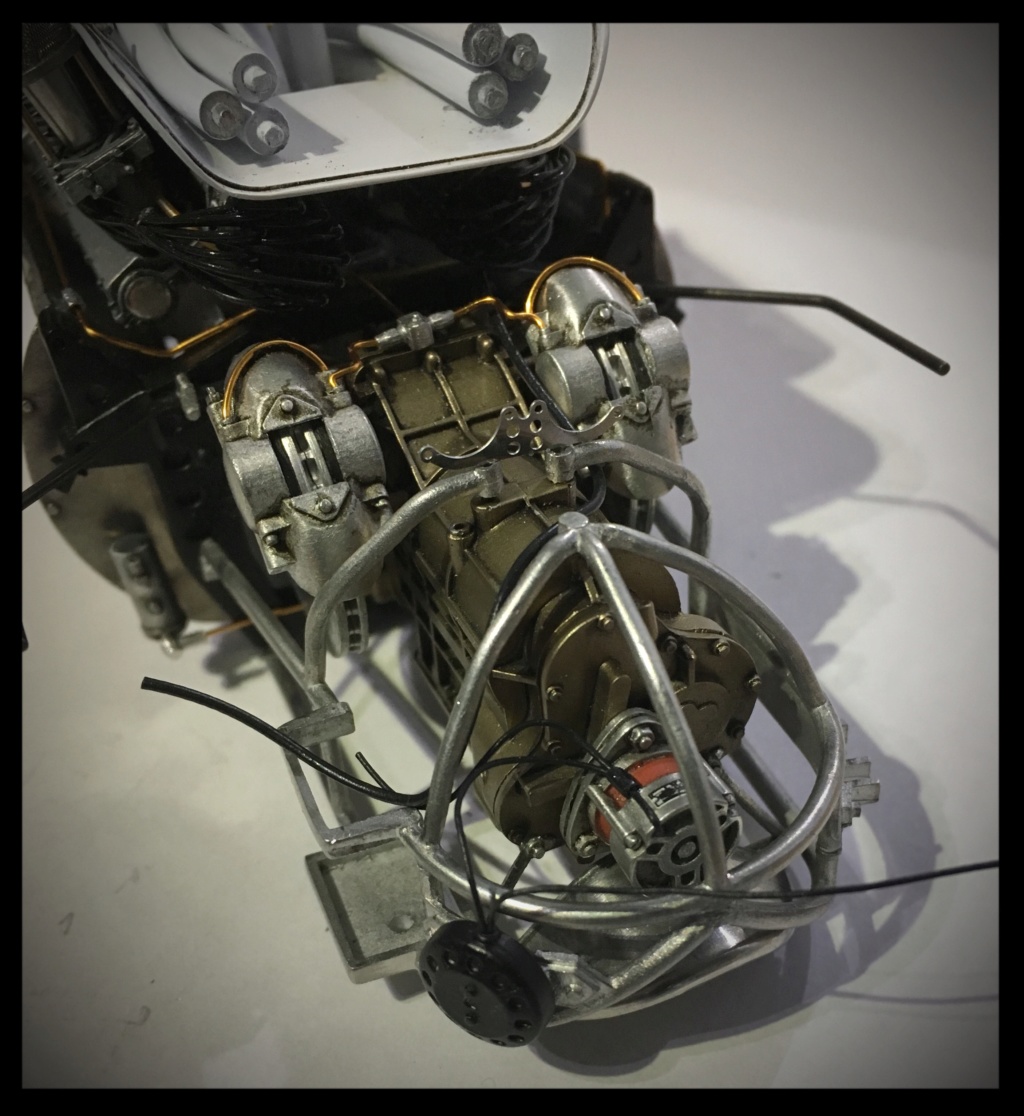
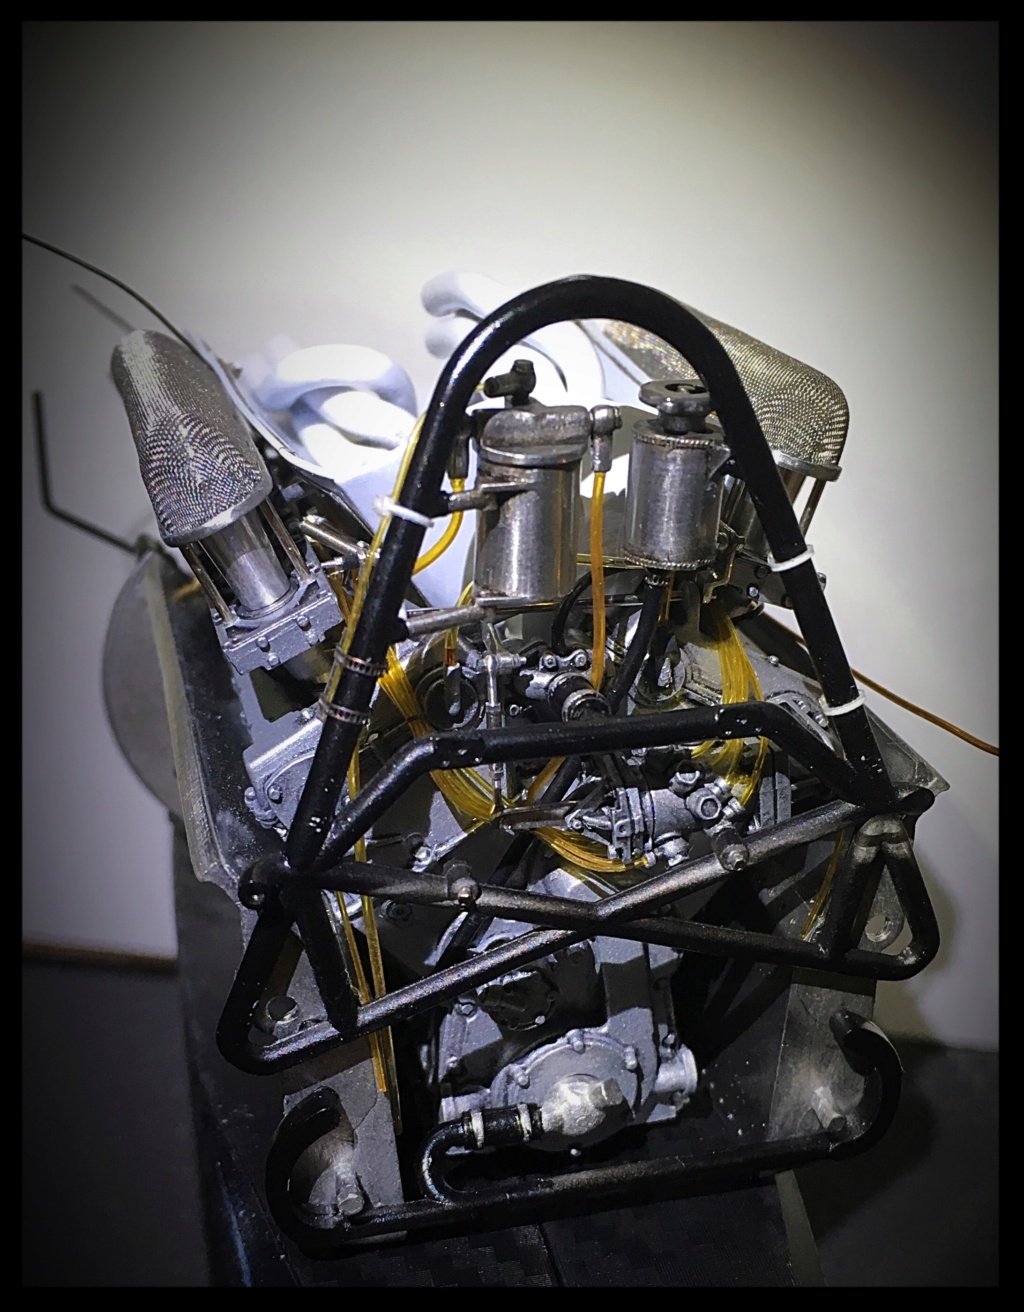
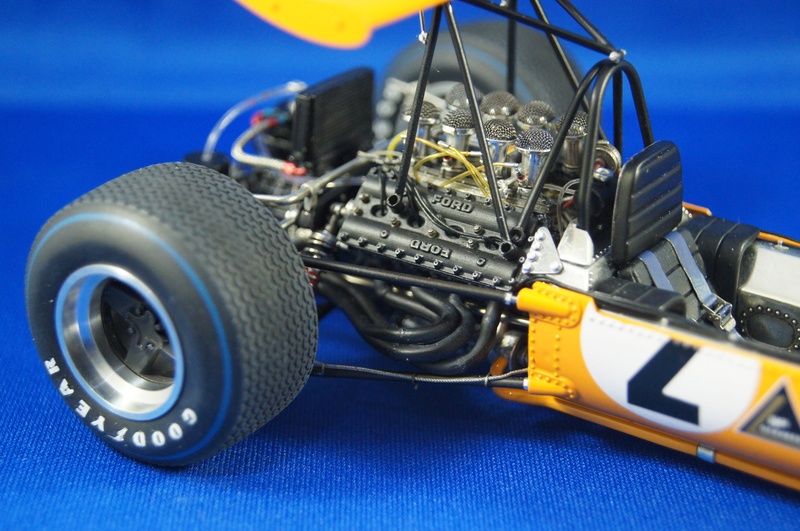
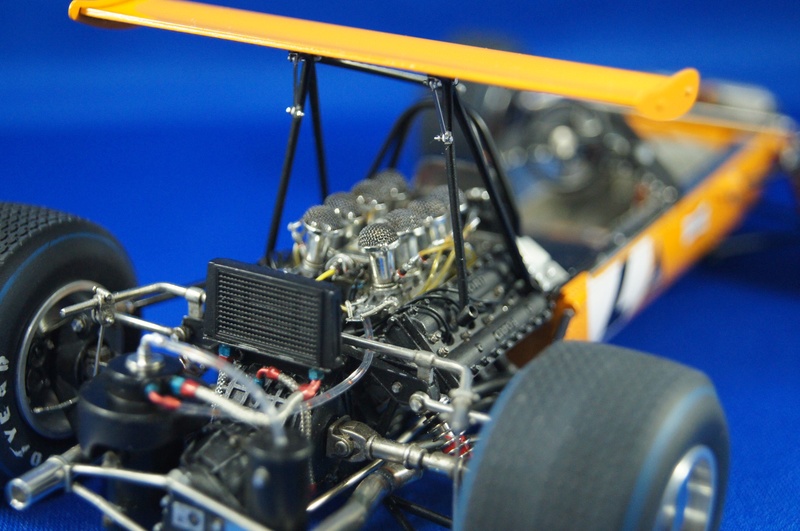
Coils and ignition system done:


Exhaust Test fit:
Pascal -
Hi,
Just for fun:
DFV Cosworth piston and rod.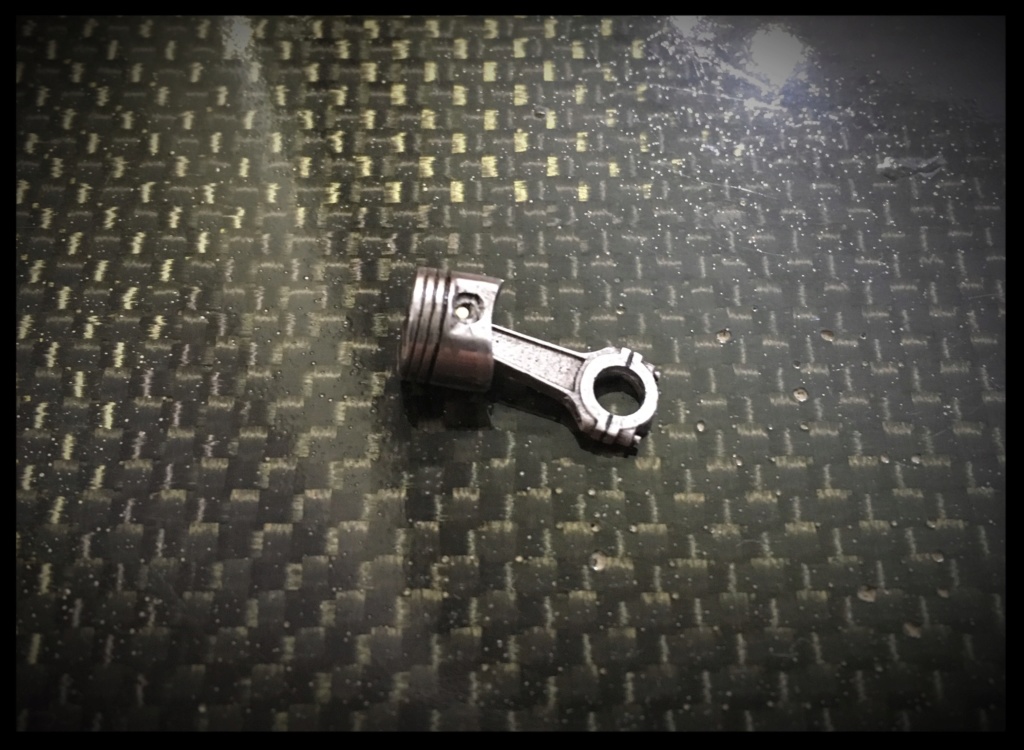
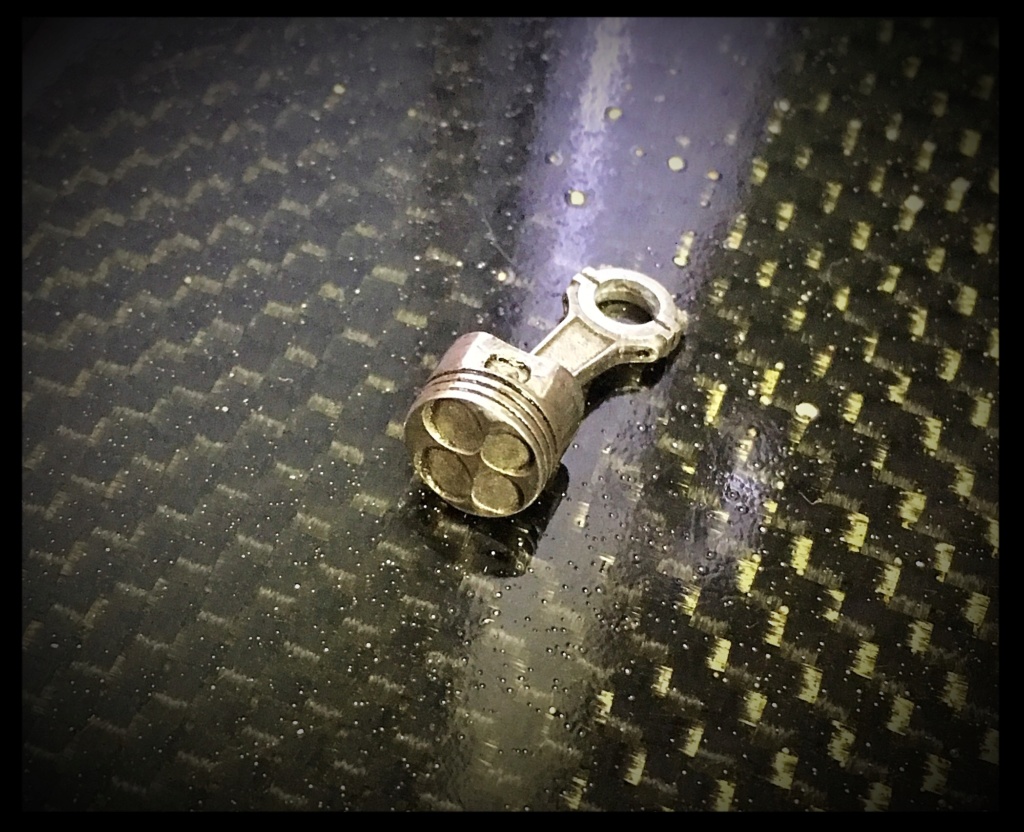
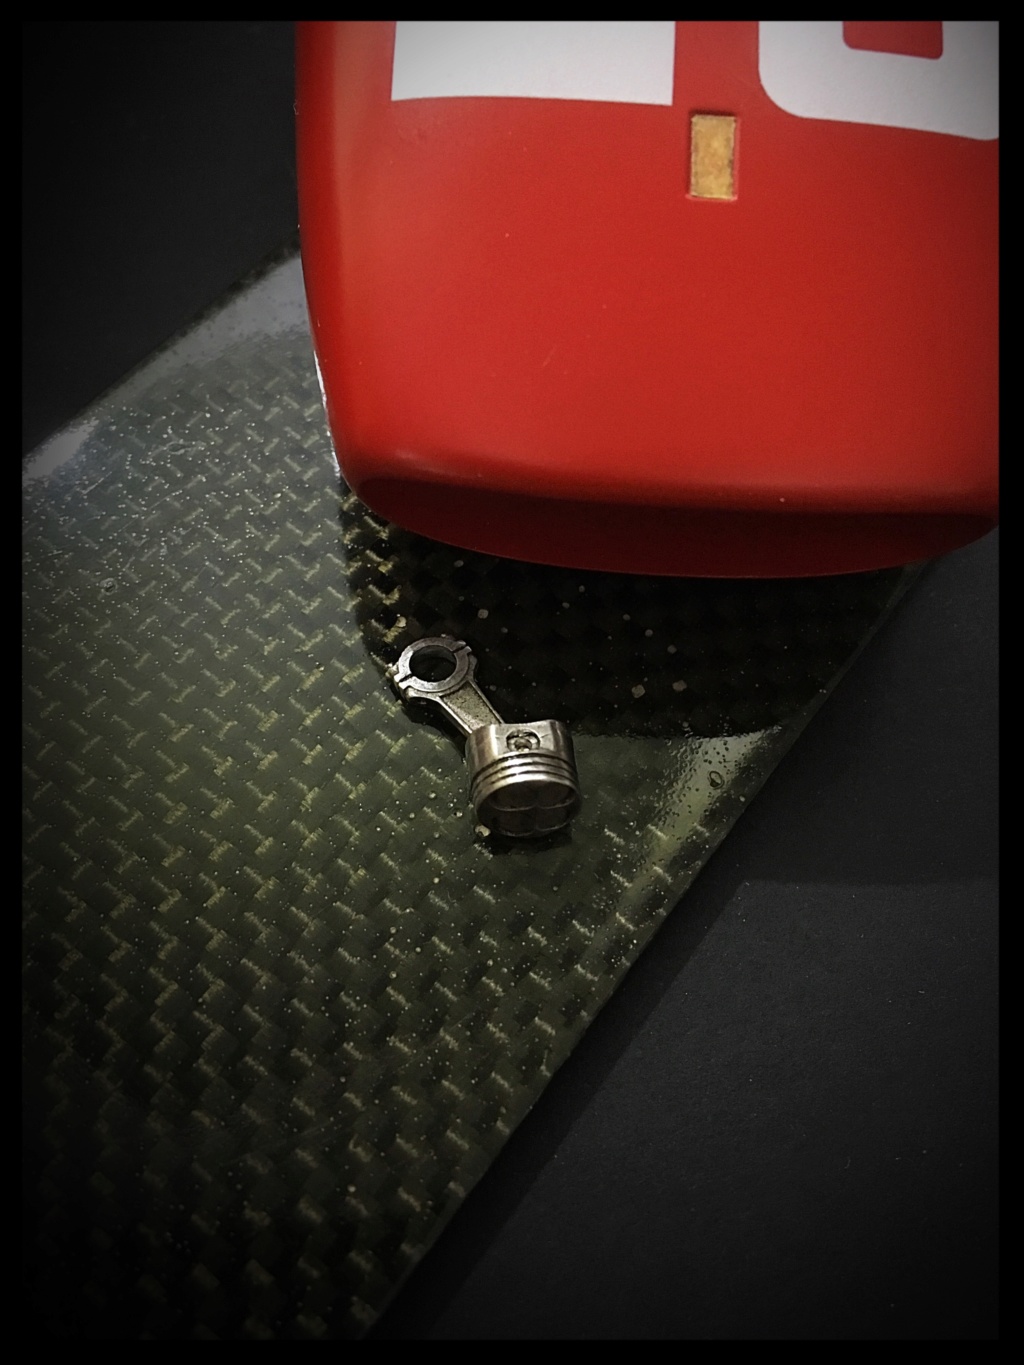
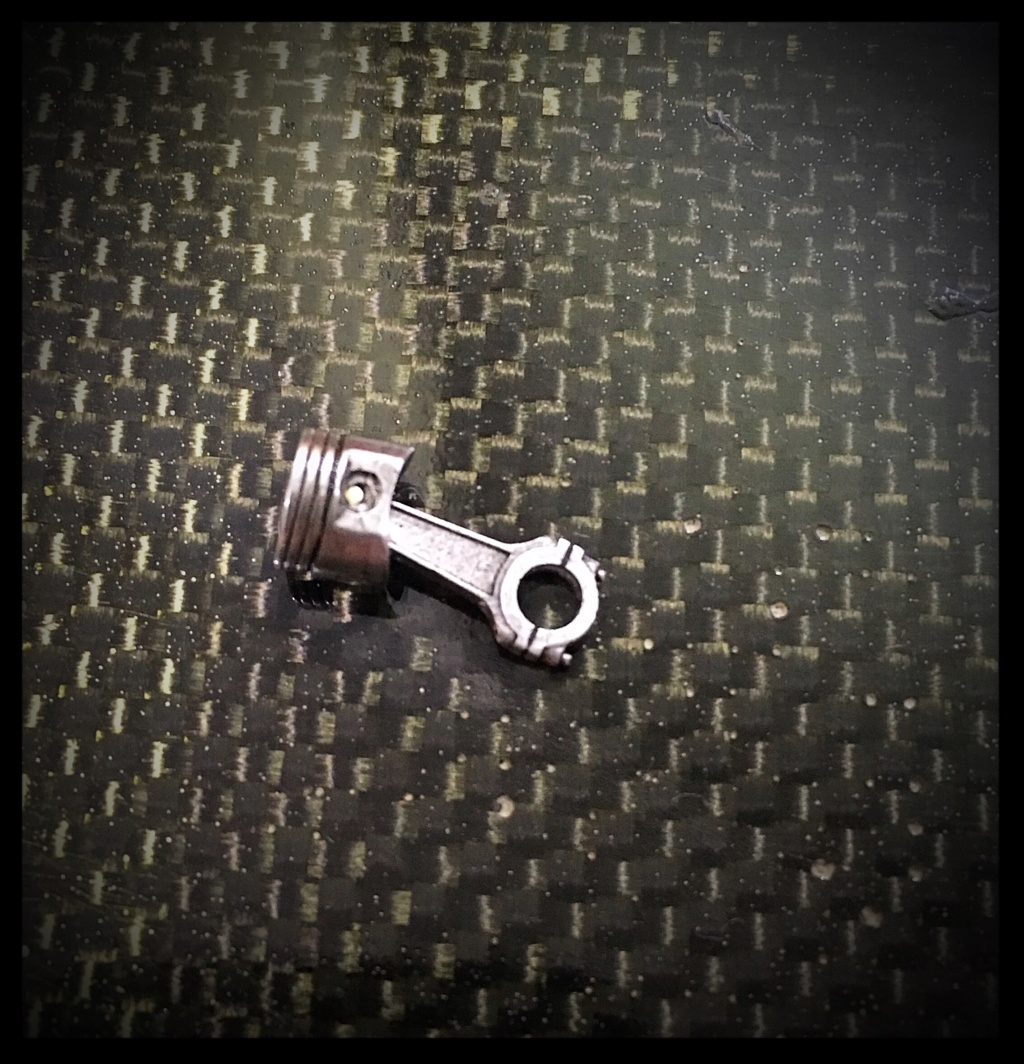
Voilà.
Pascal
-
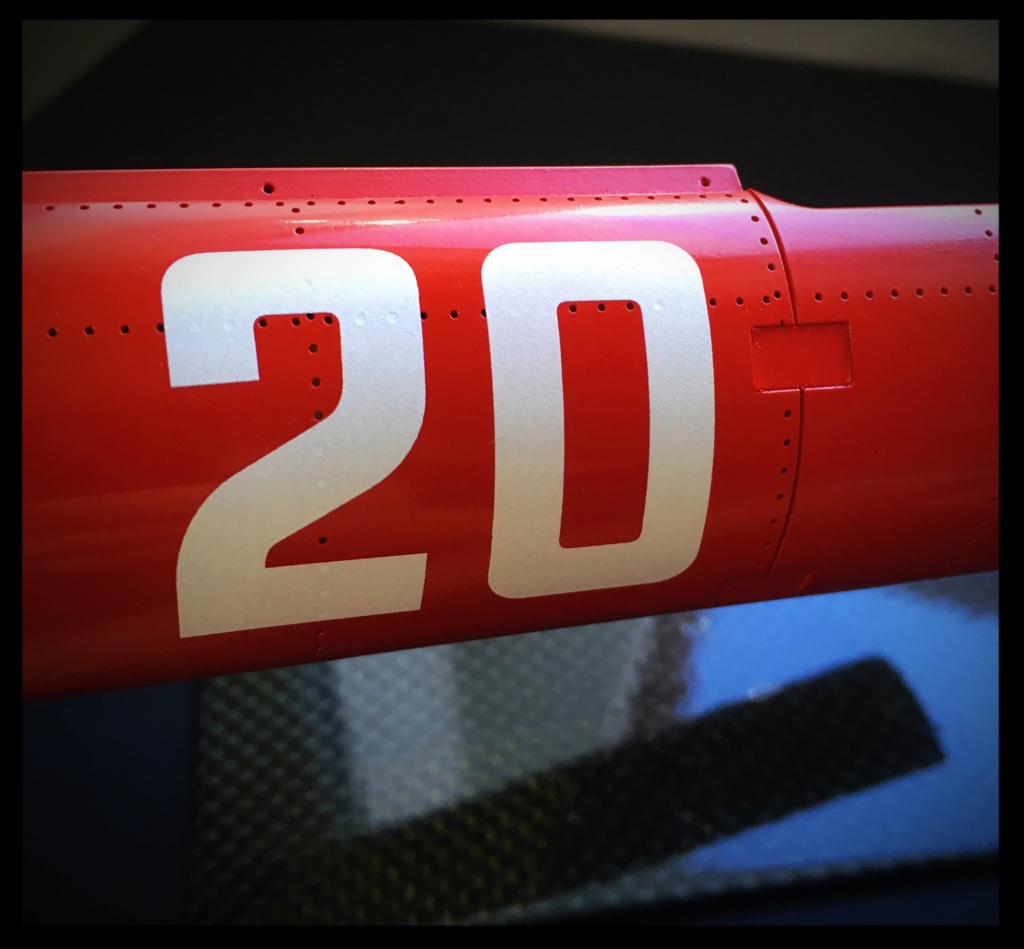
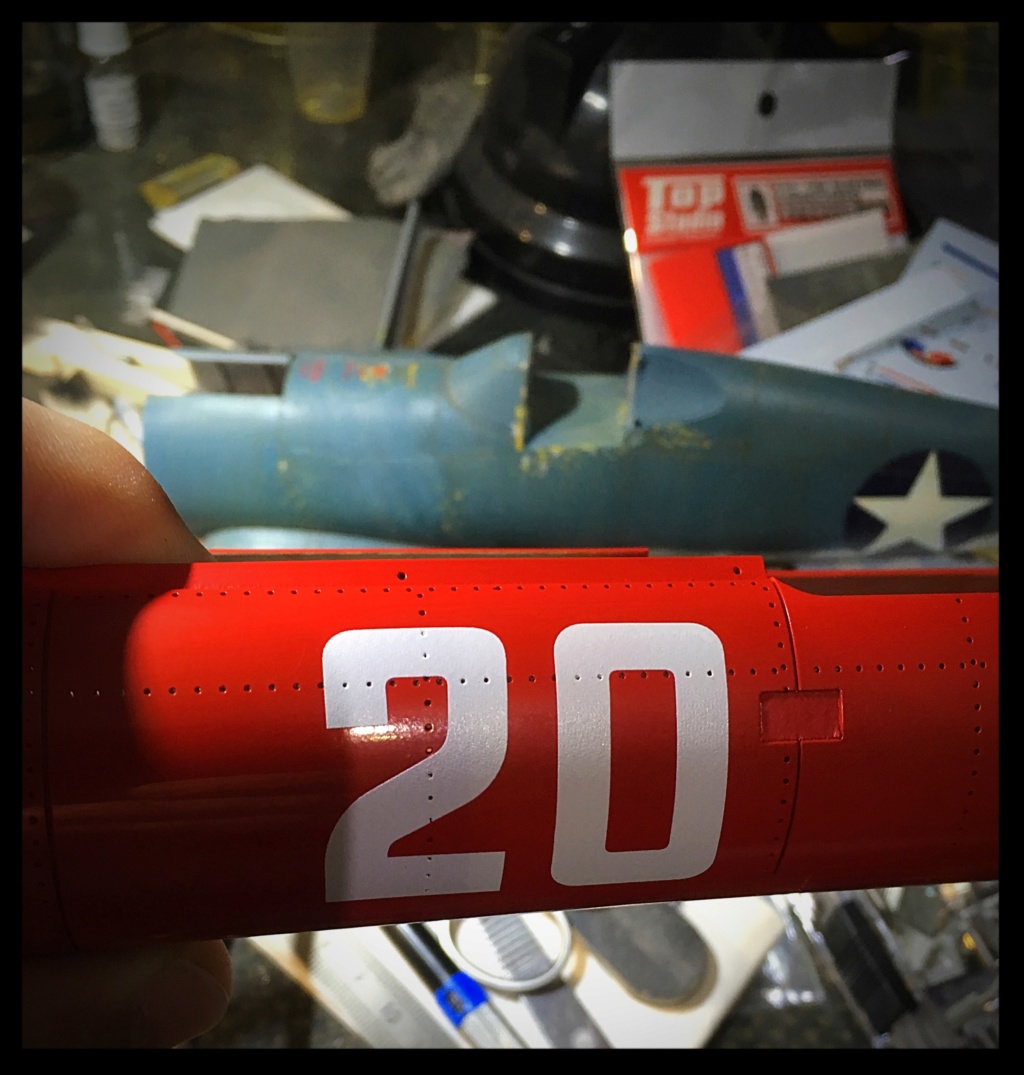
Hi,
Decals session
Once dry they are cleaned as well as the surrounding area.
Then holes are done in the decals.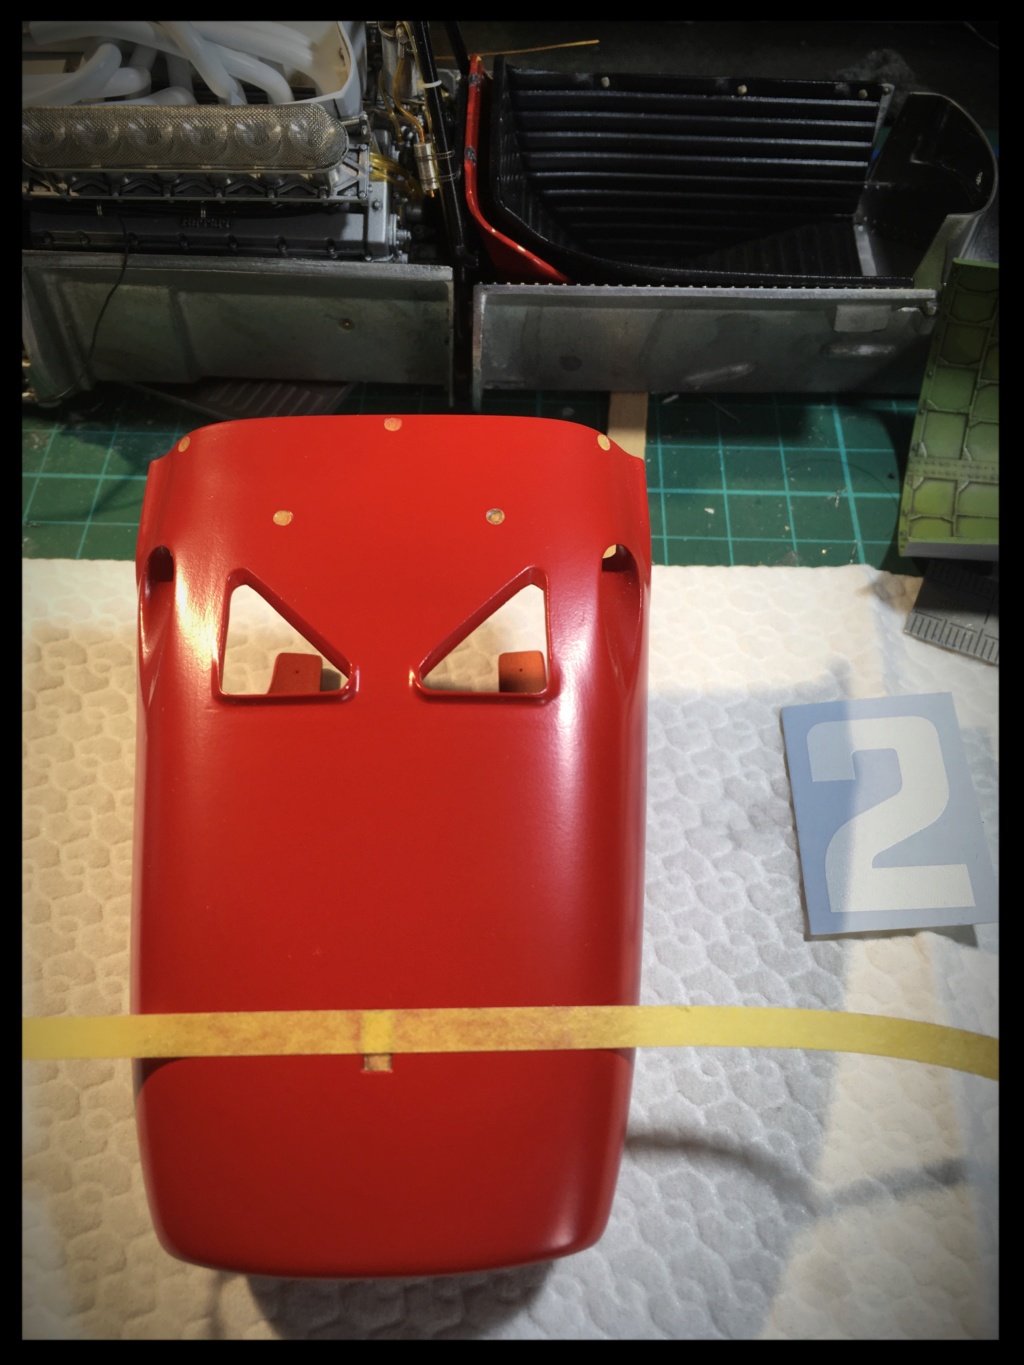
More soon.
Pascal
-
Good evening everybody,
It’s been quite a long time since my last post...Sorry.
Aircrafts can’t wait!
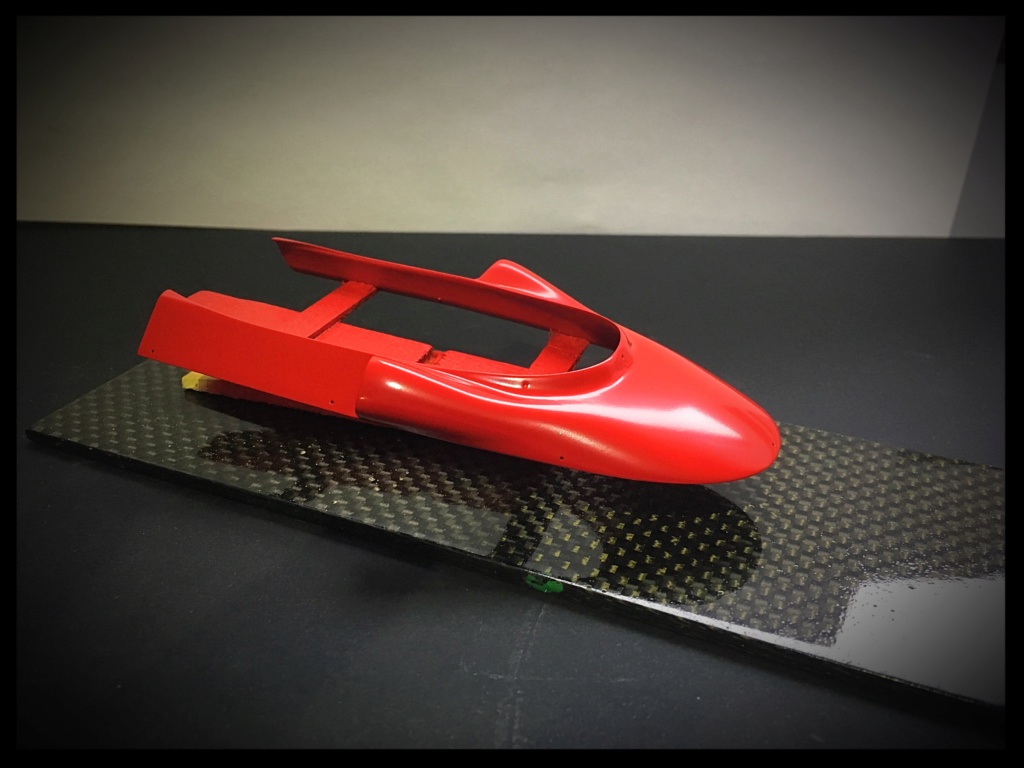
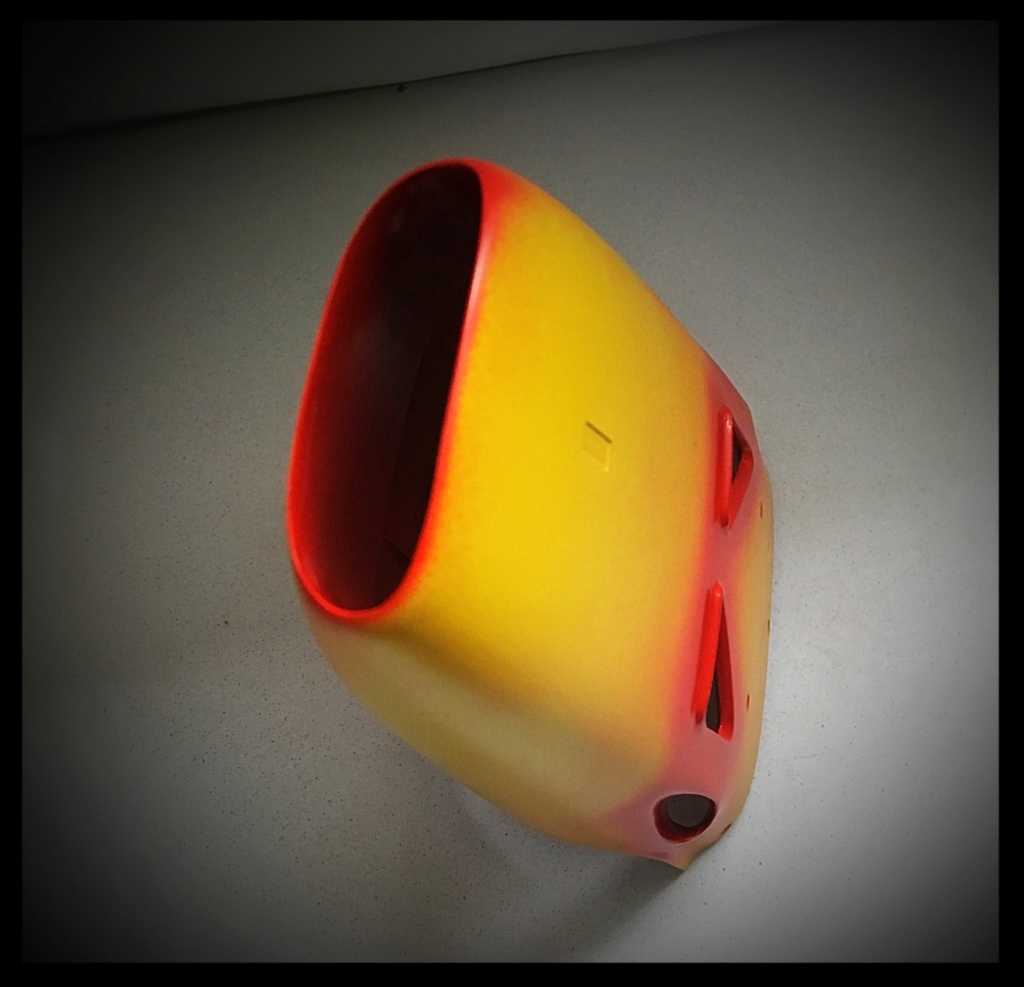
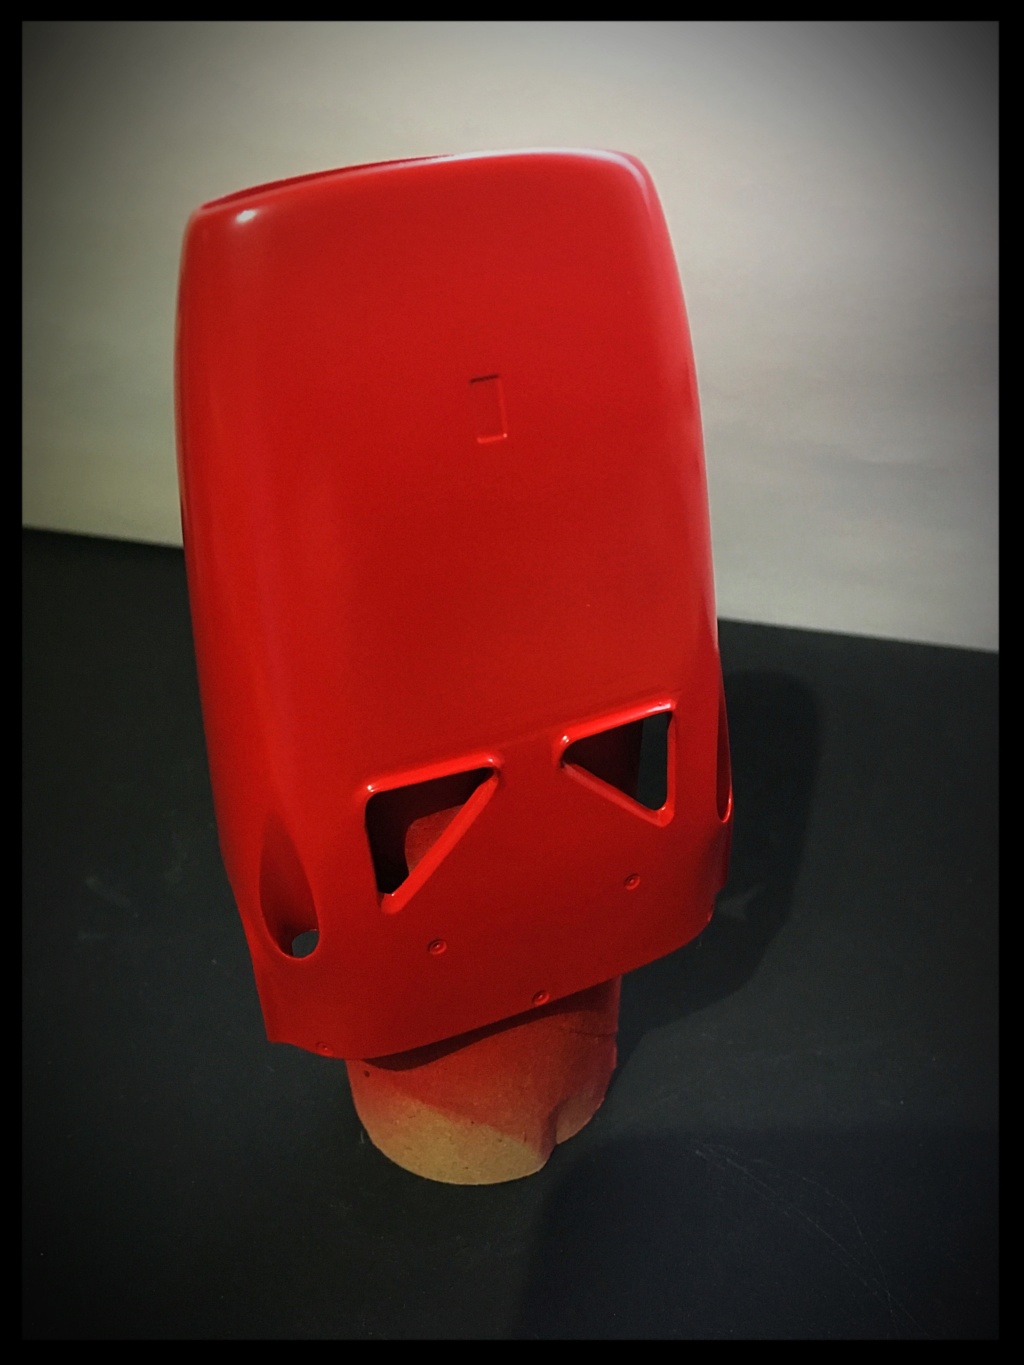
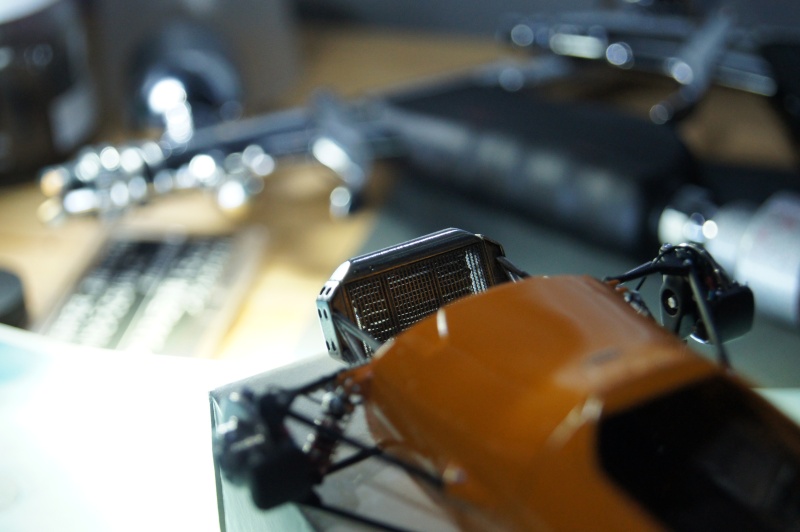
Few progress on the Red Roaring Beauty!
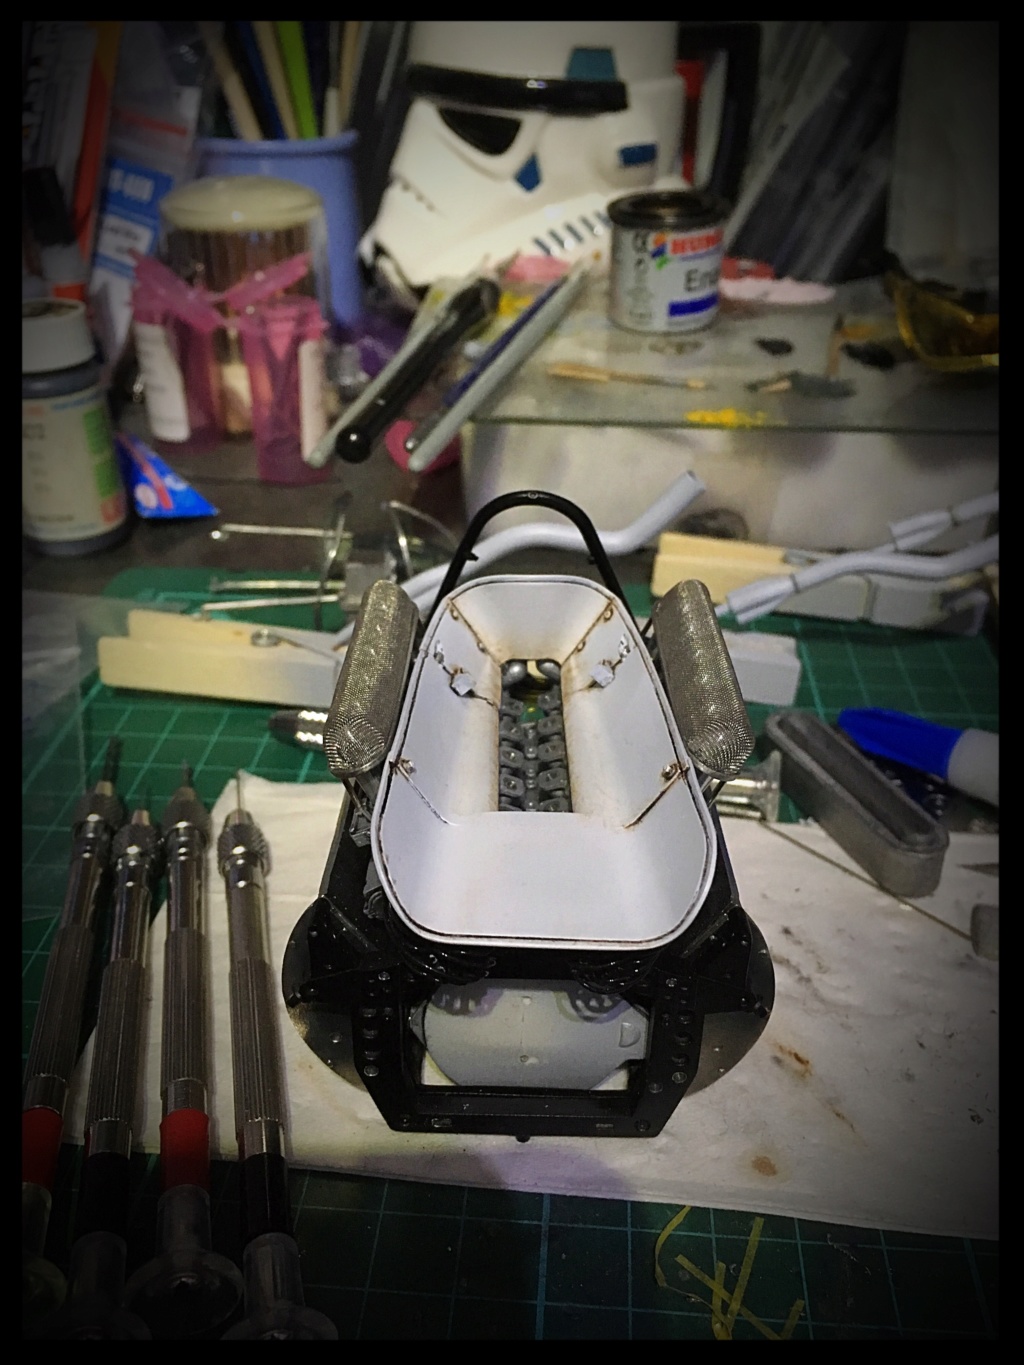
Riveting the bathtub and the bulkhead is now done.
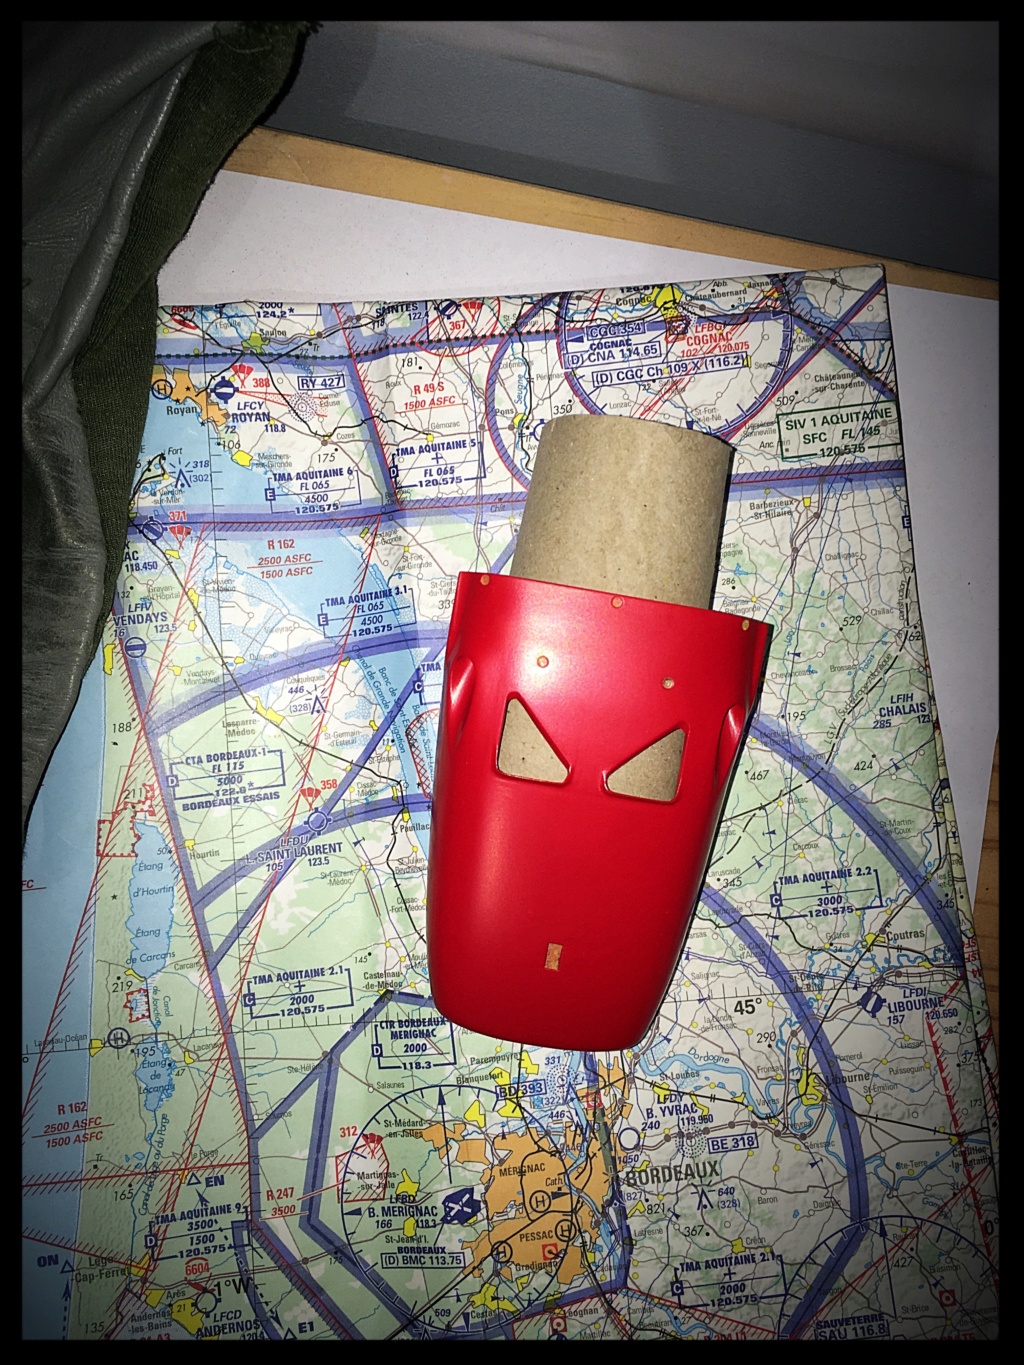
The wooden shifter knob is clear coated and test fitting is mandatory for the engine/cockpit/body subassembly.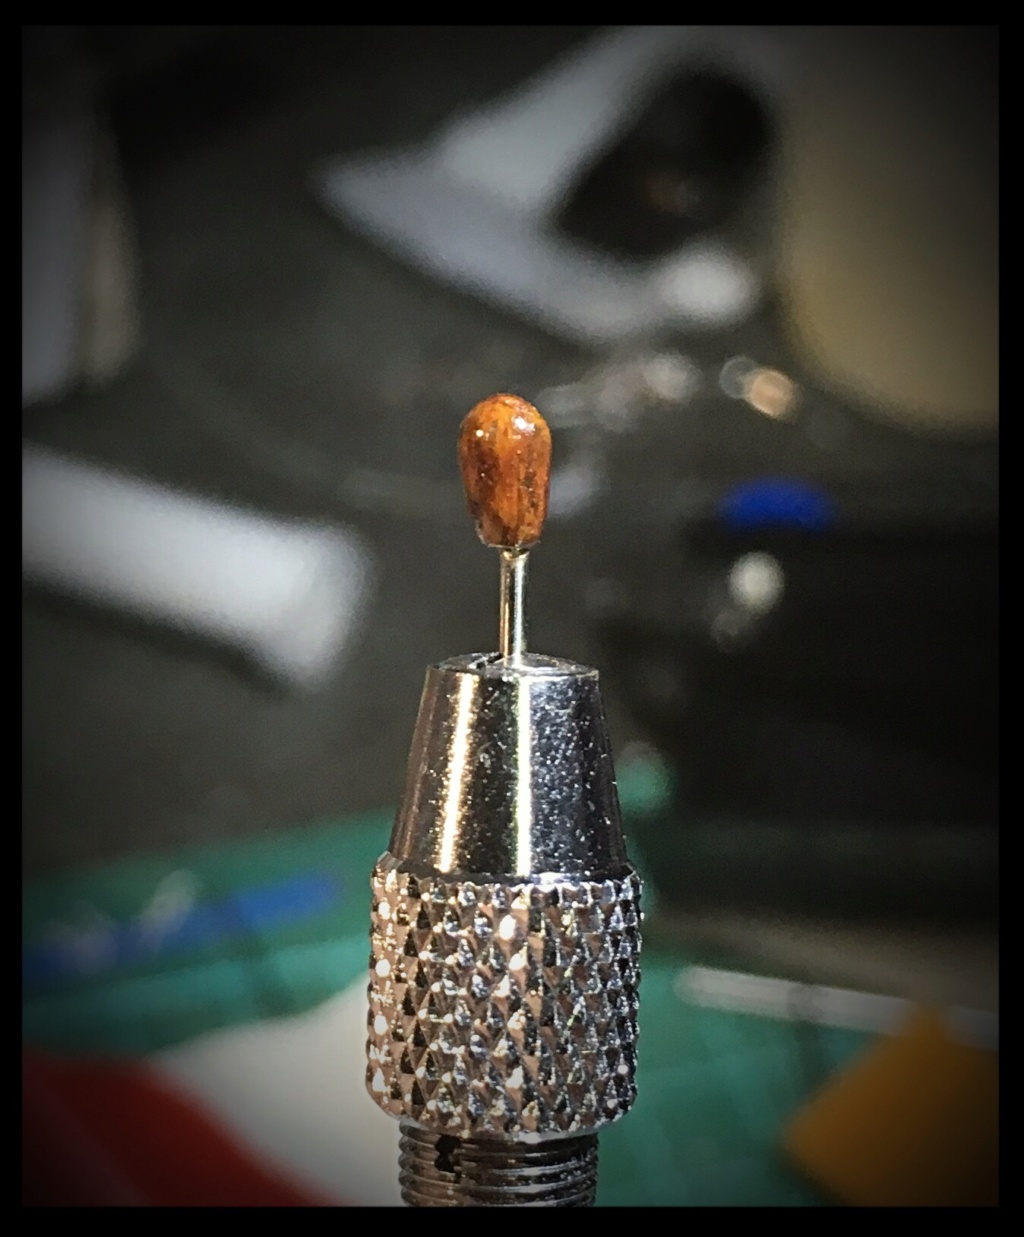

The fitting holes and the front Ferrari logo area are masked.
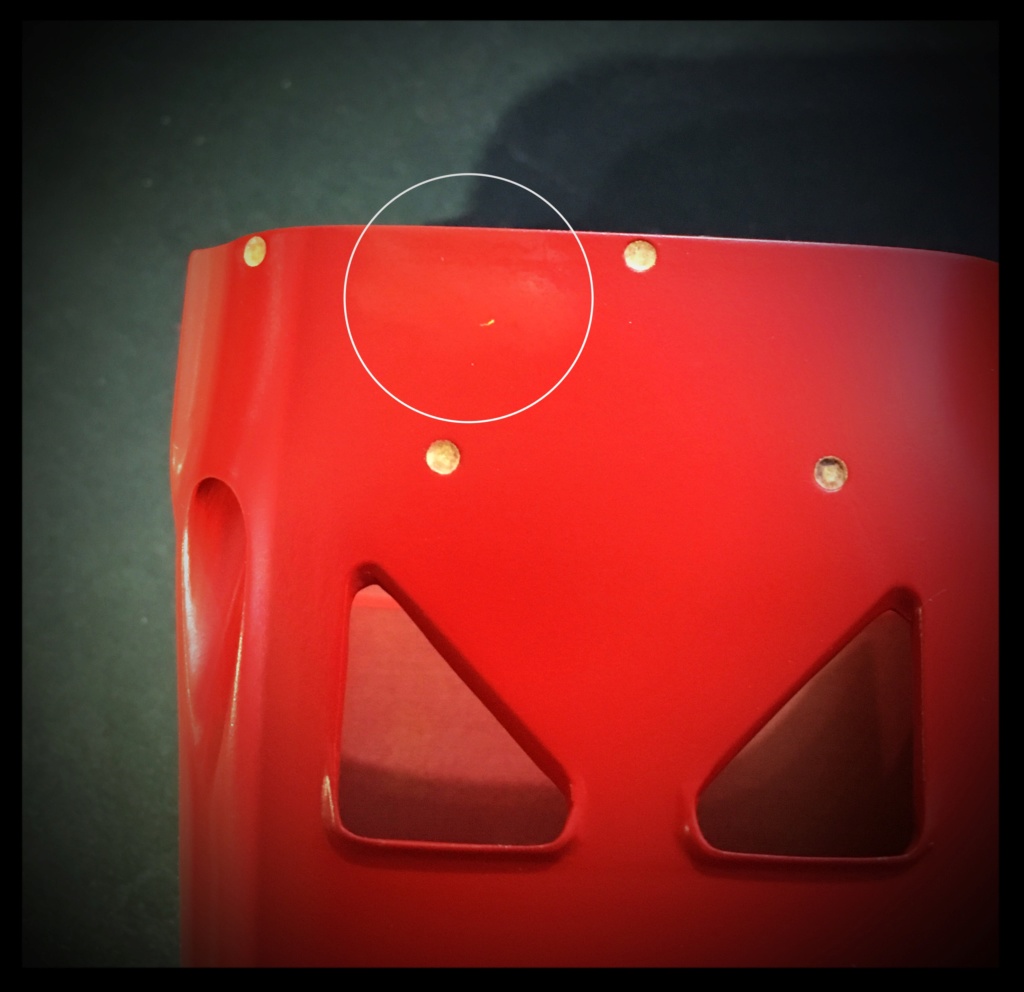
I had a little « spot » on the Red, so I sanded it and made a touch up.
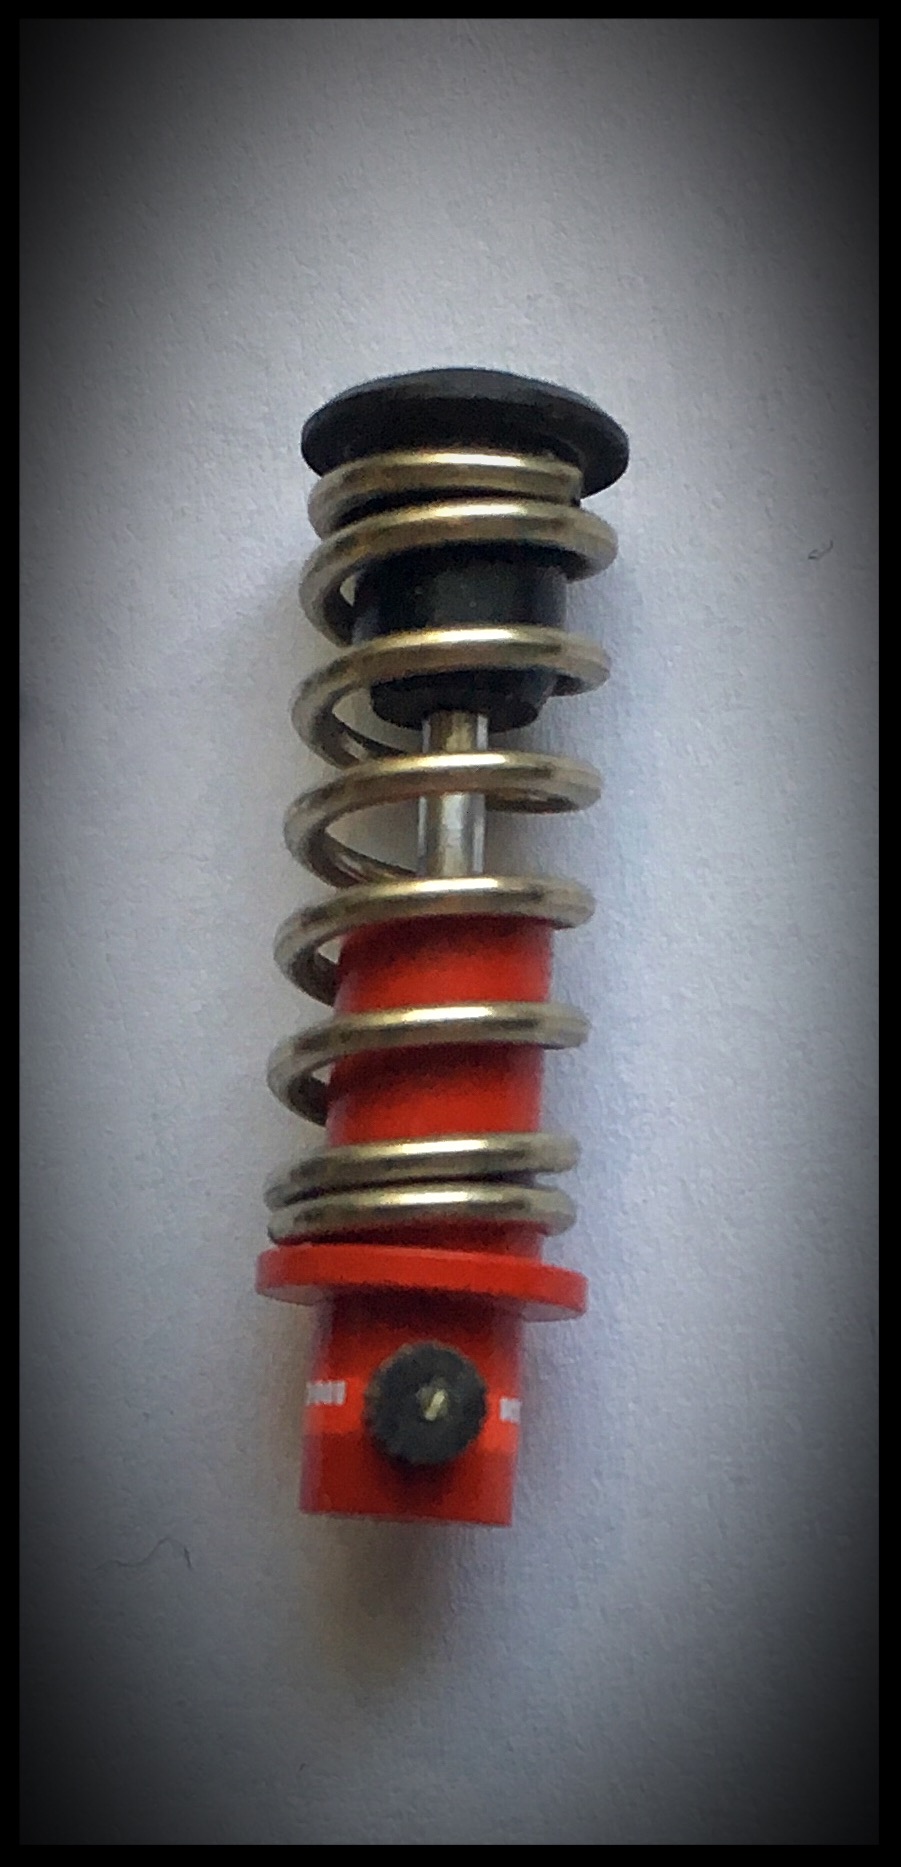
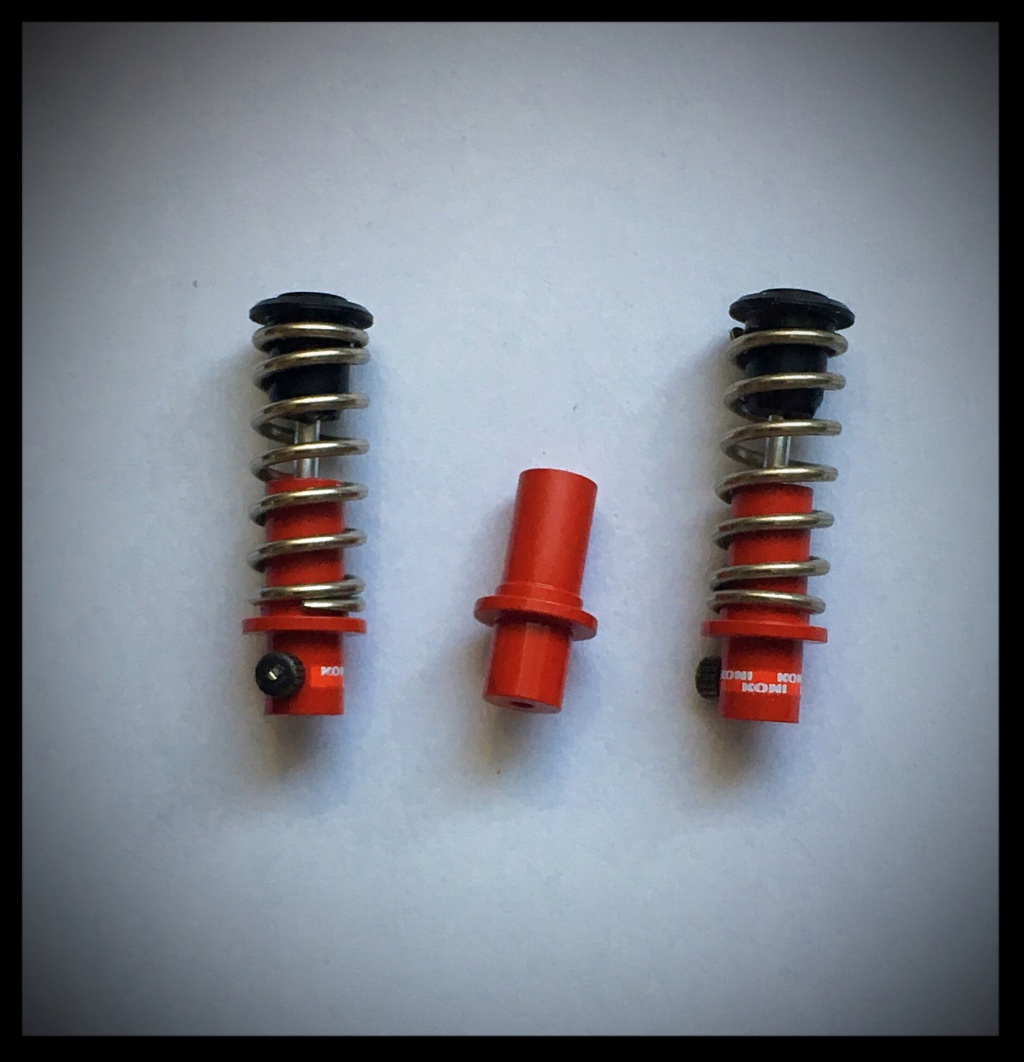
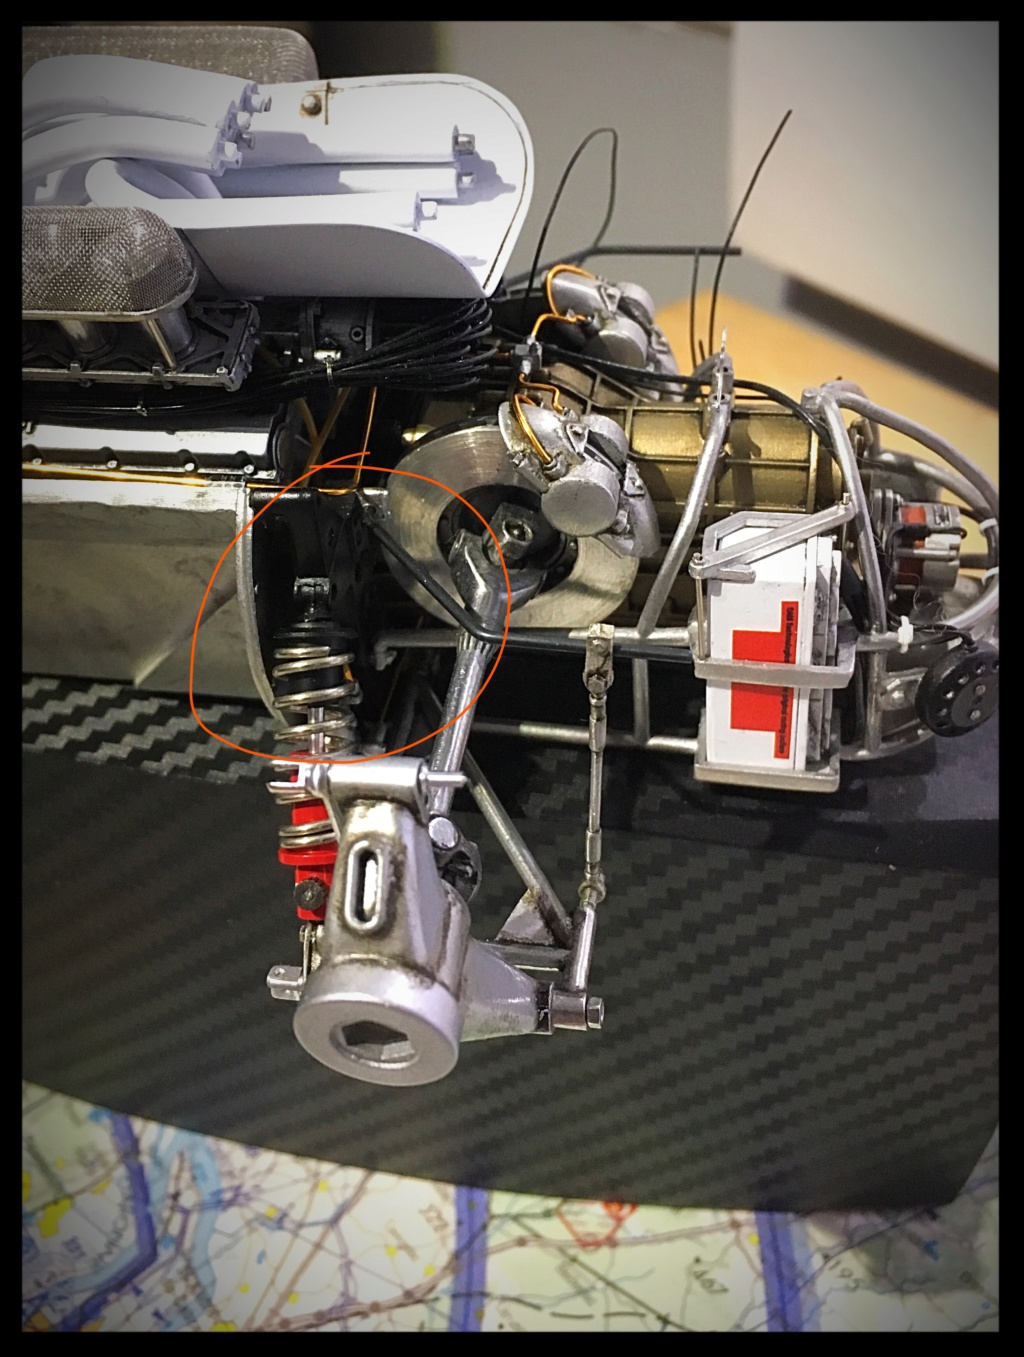
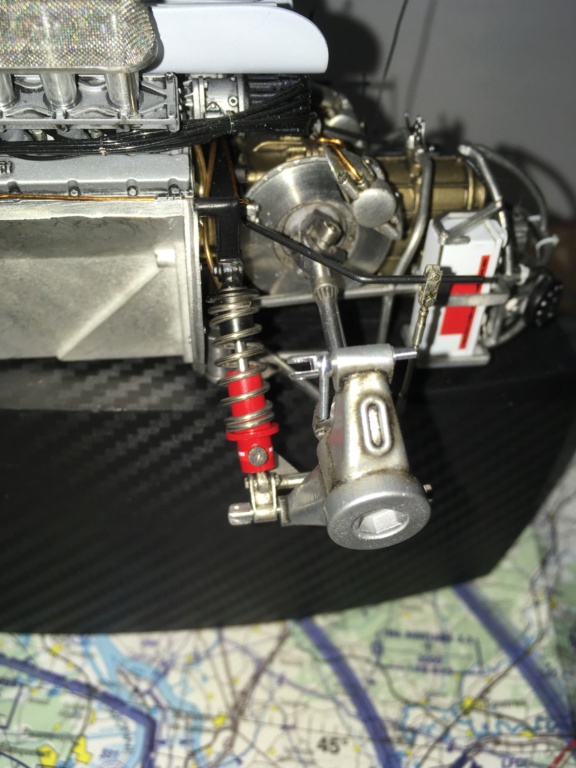
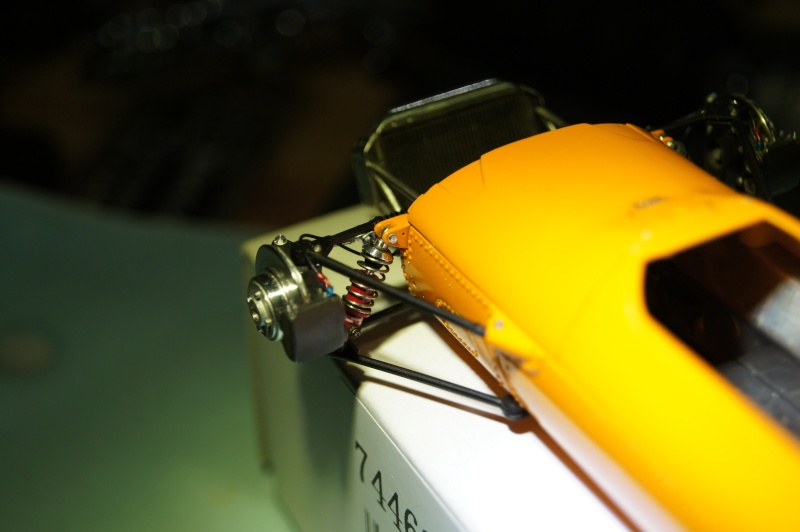
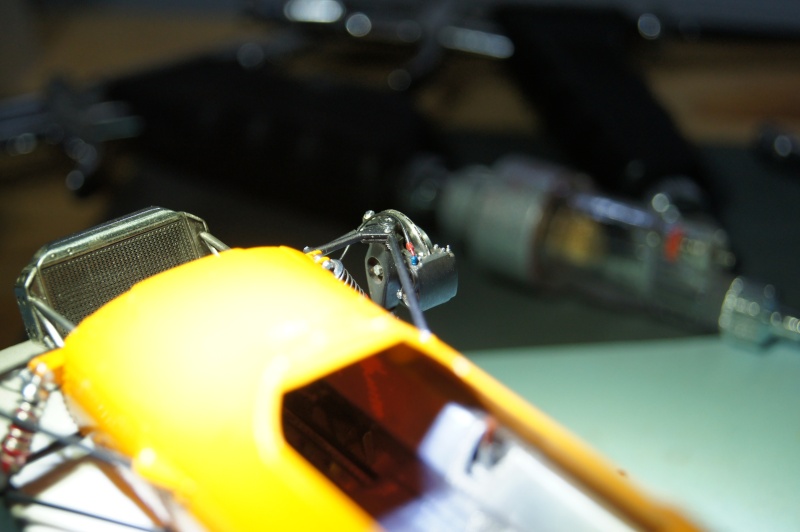
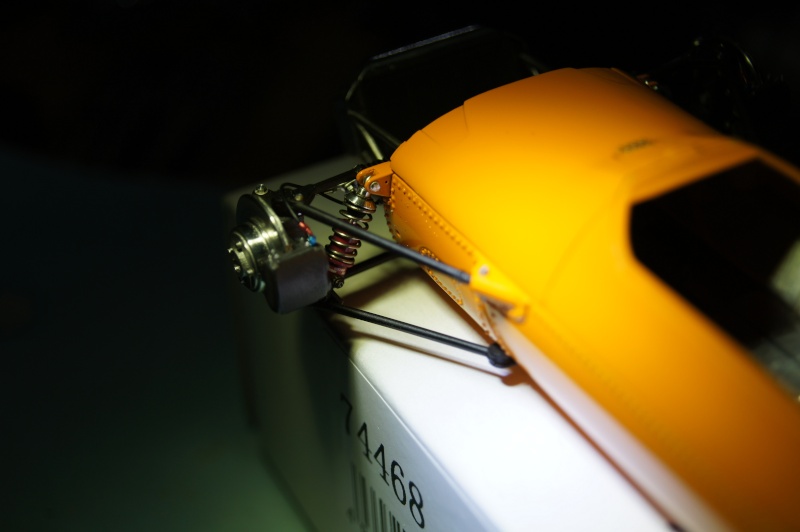
The dampers looked to simple for my taste.
I used modified F1 Specialties brass electronic connectors and chemically burnished them, then put a center adjustment screw and finally install the knob on the damper.
A Koni decal add a nice looking detail.
Aaaaannd, there is a new kid in town!
0.3 flat pattern: tested today and happy with the result😉voilà.
More soon.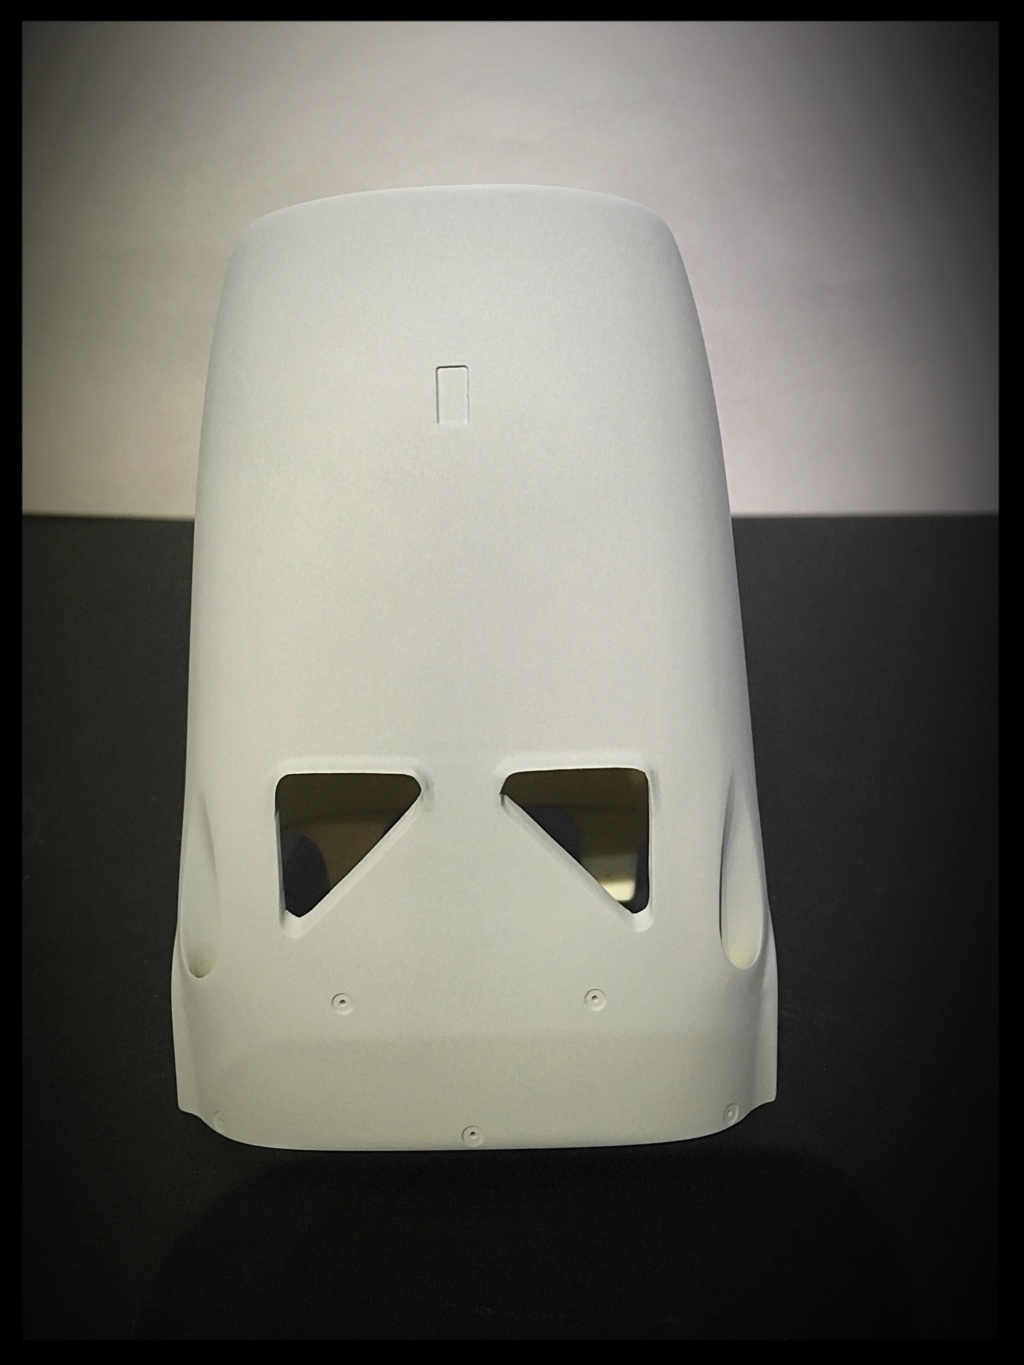

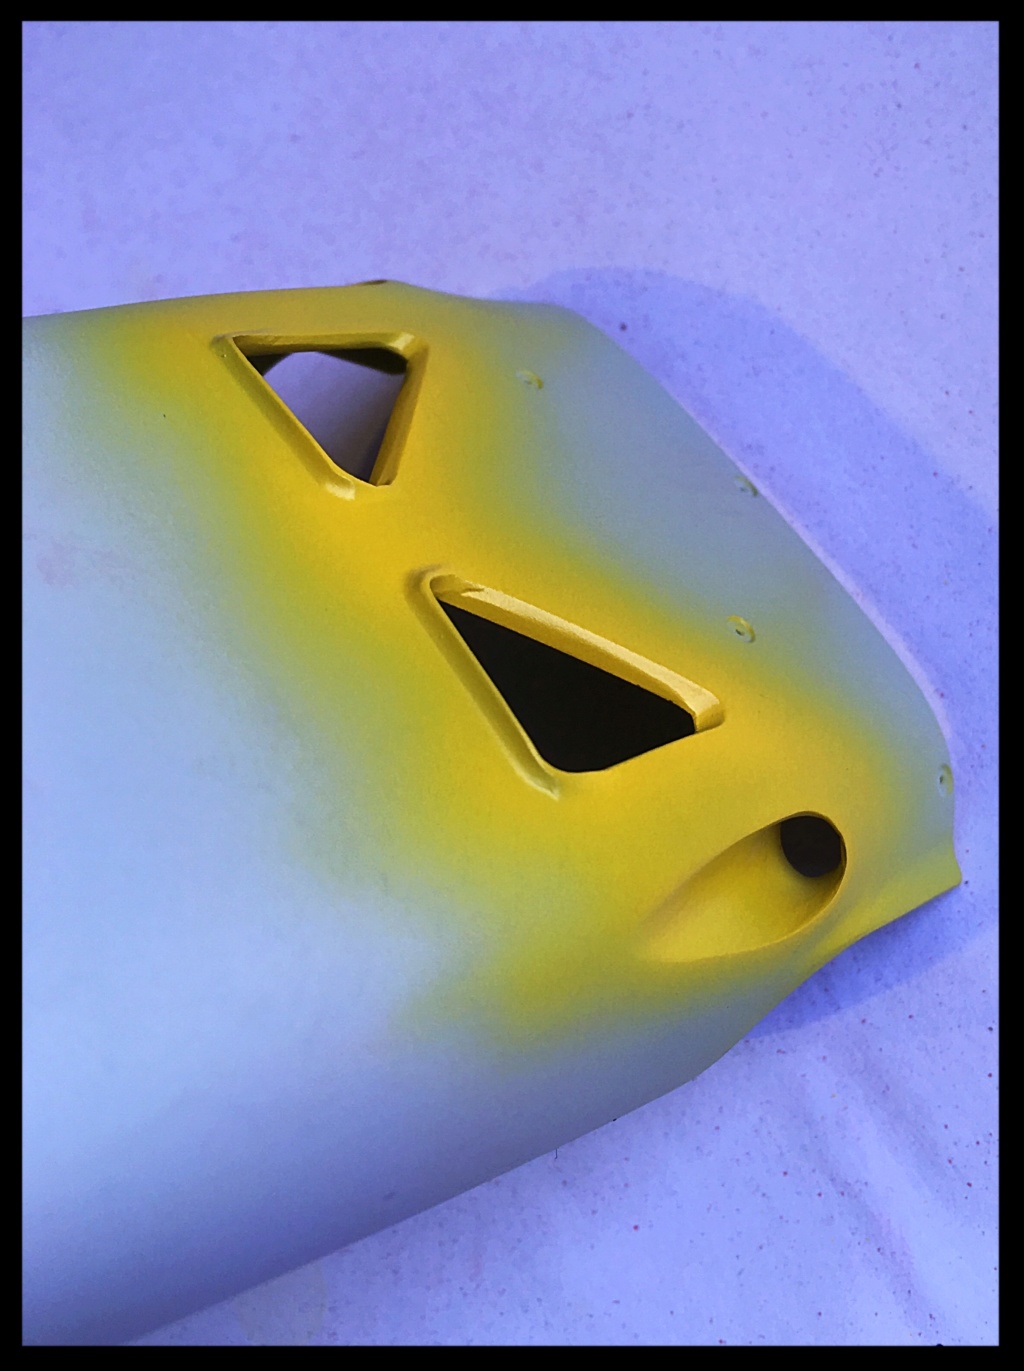
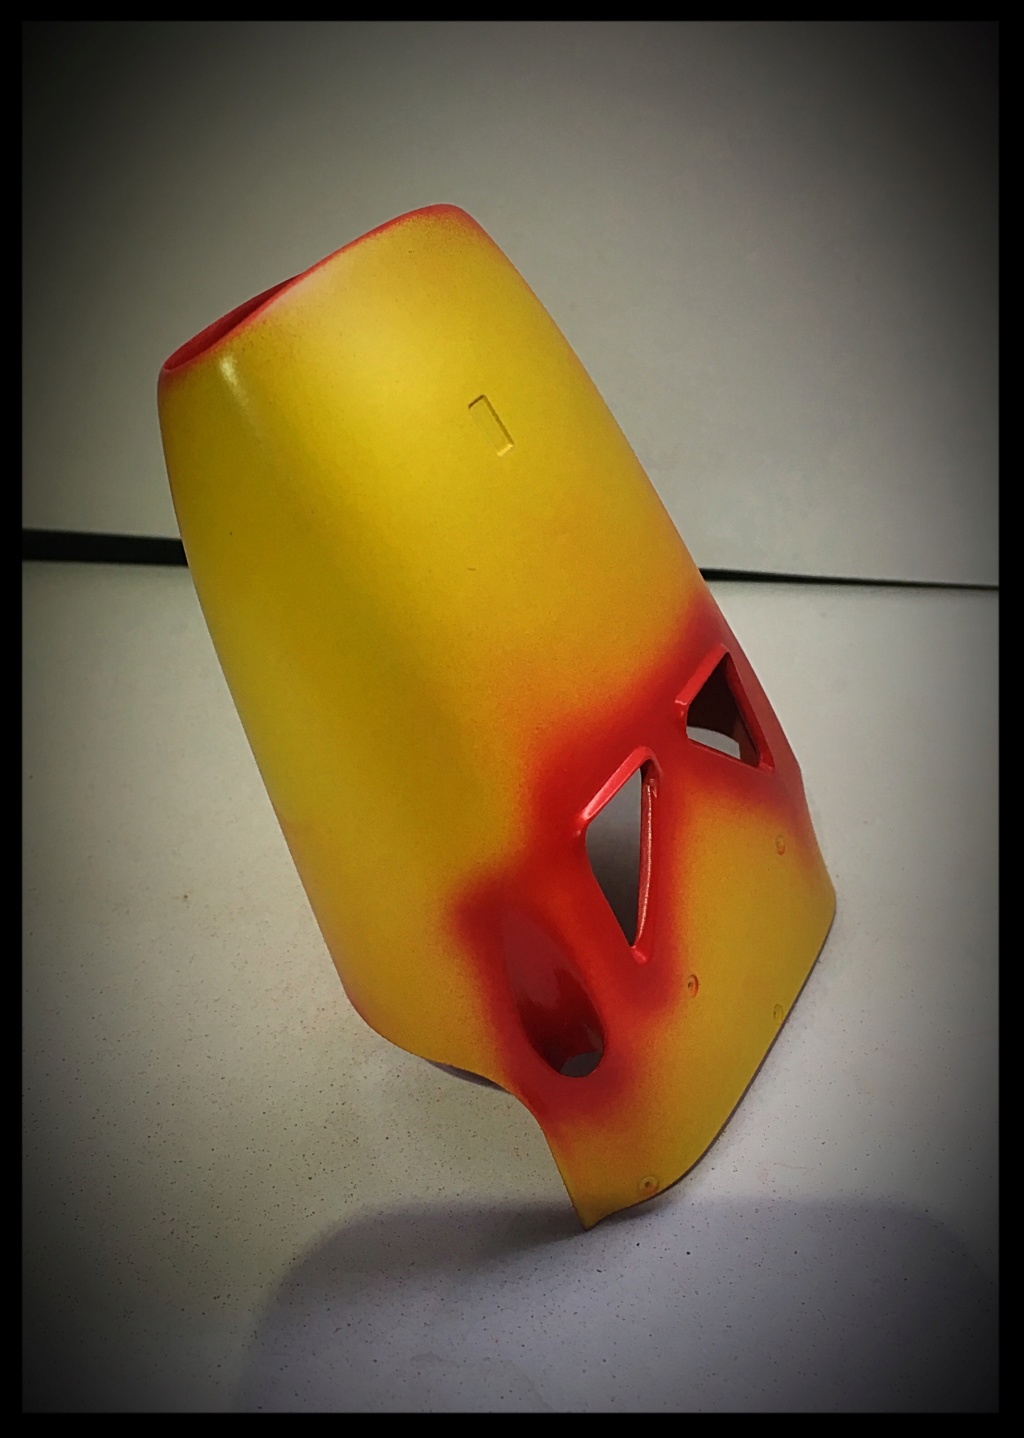


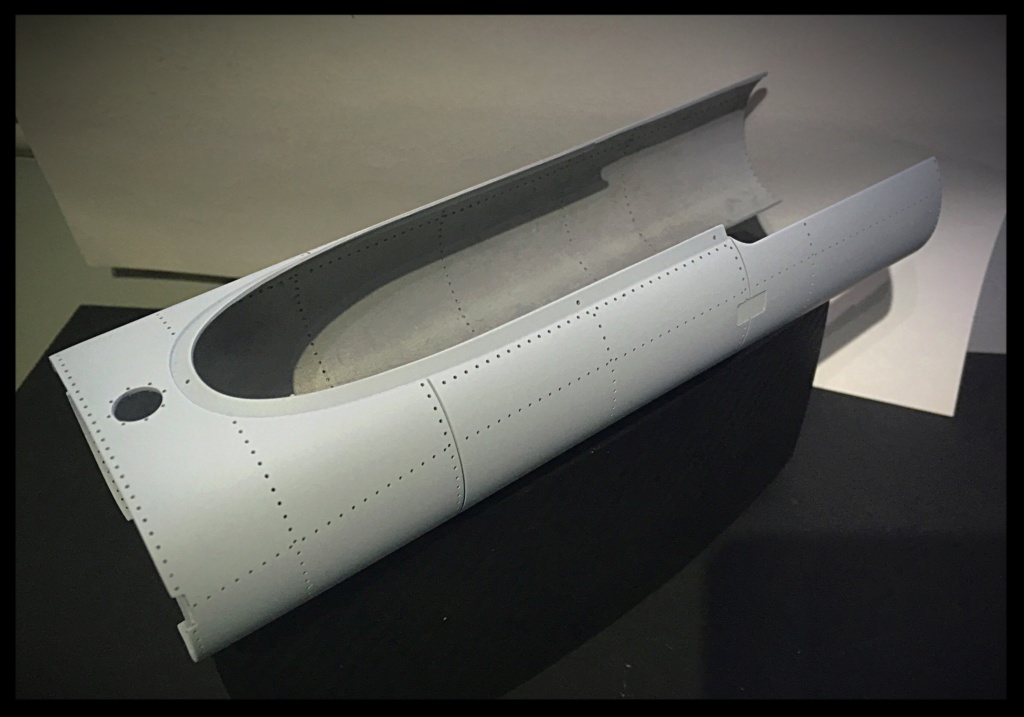
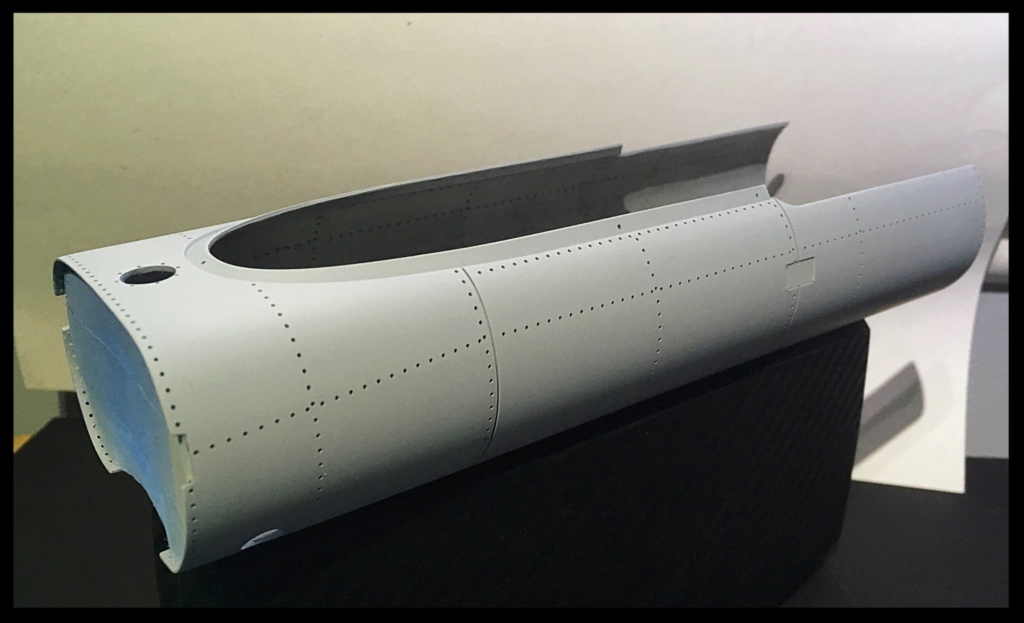
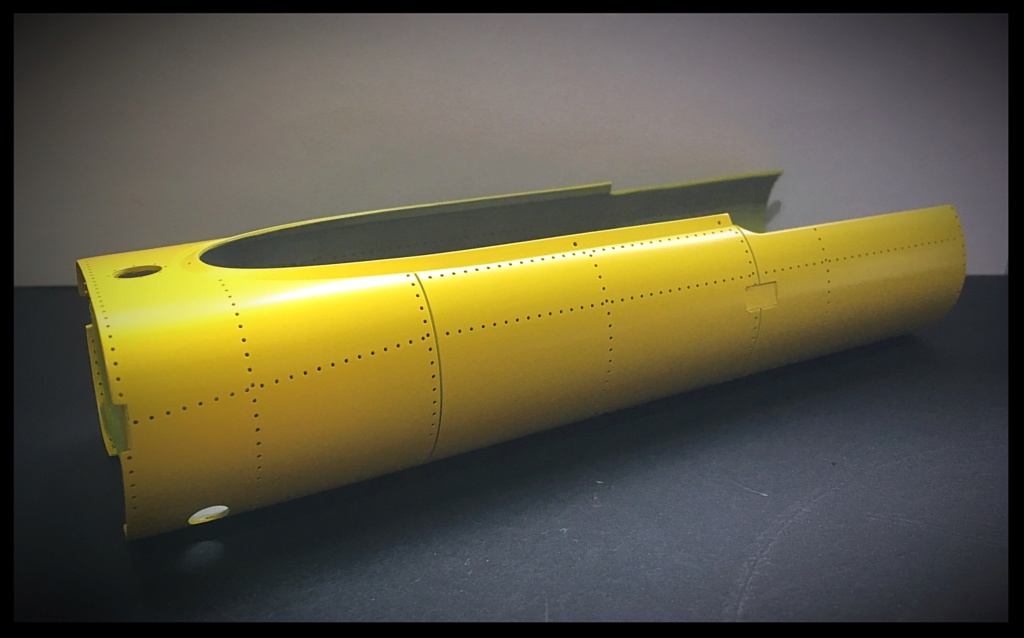
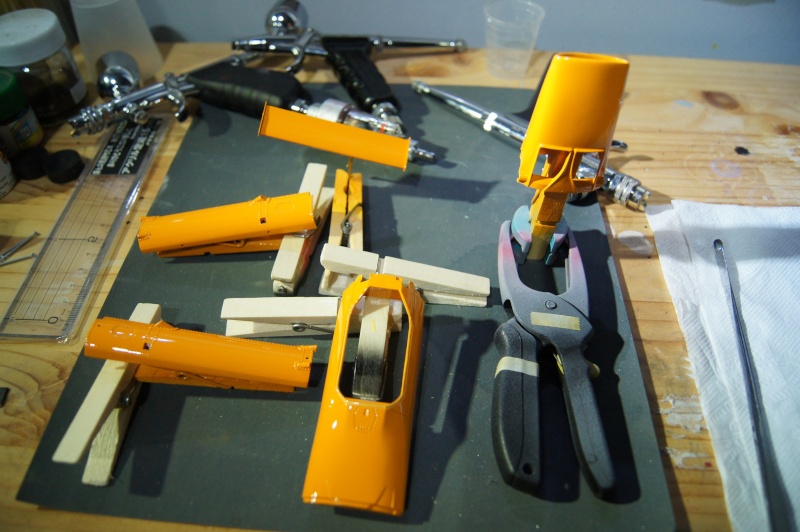
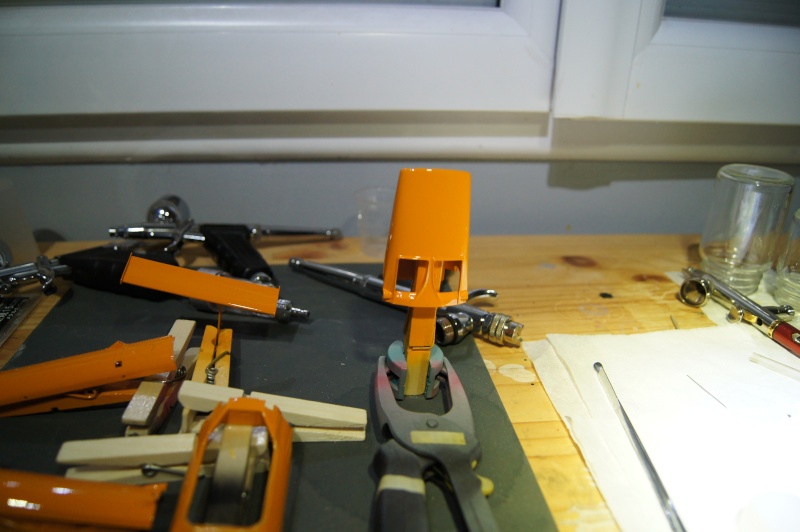
A last sanding session on the metal body, then:
- Primer,
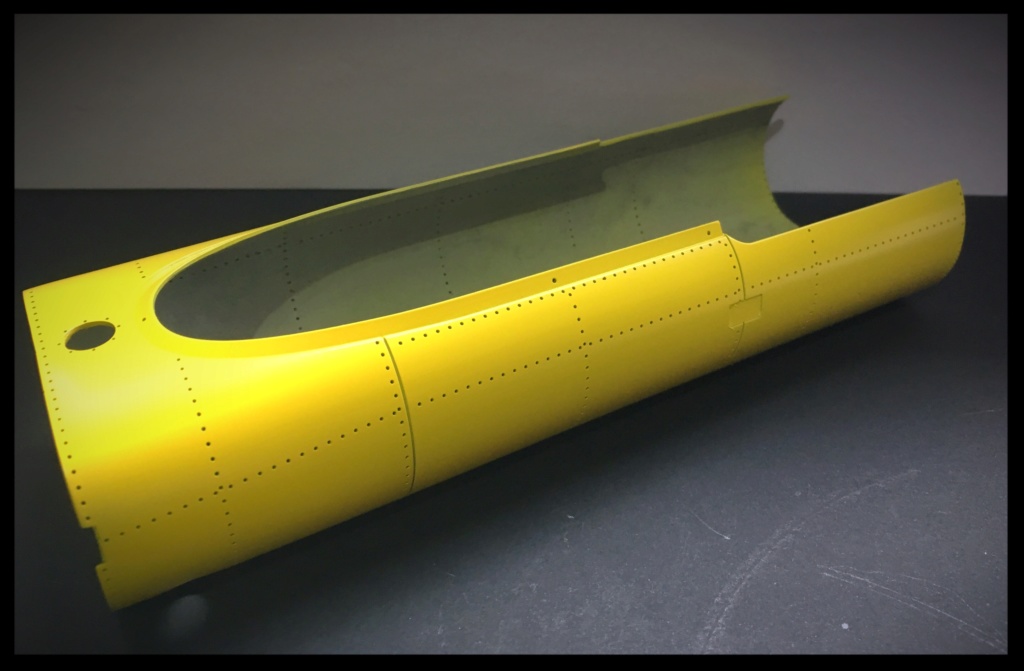
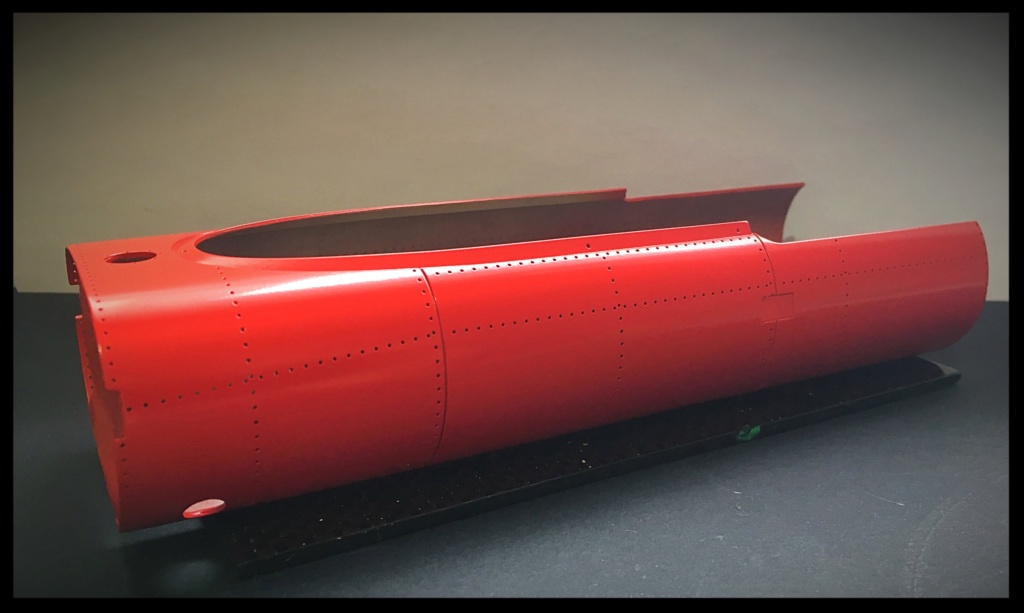
- Giallo Modena,
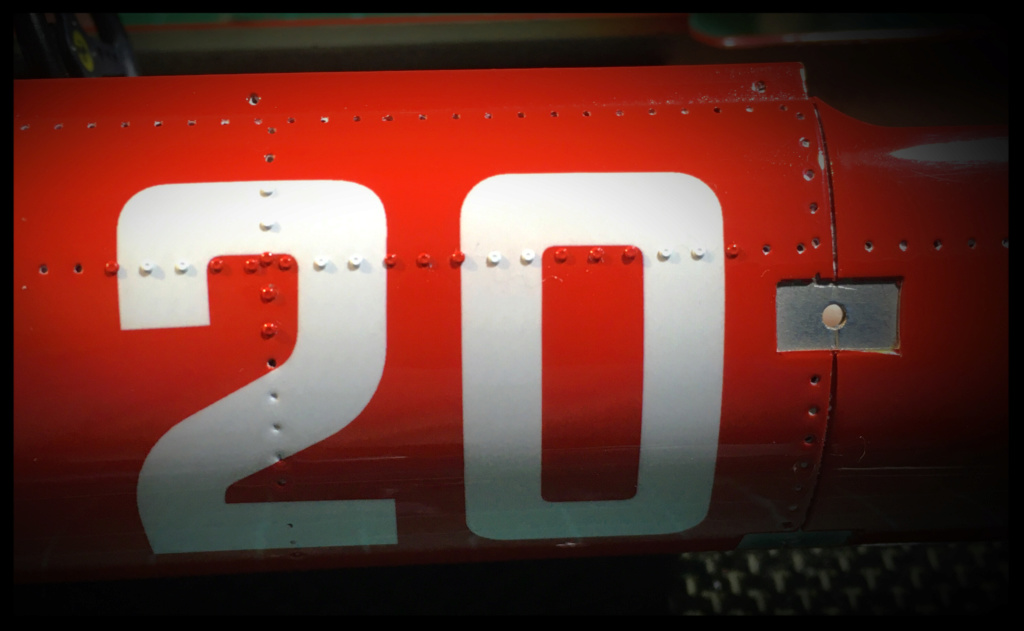
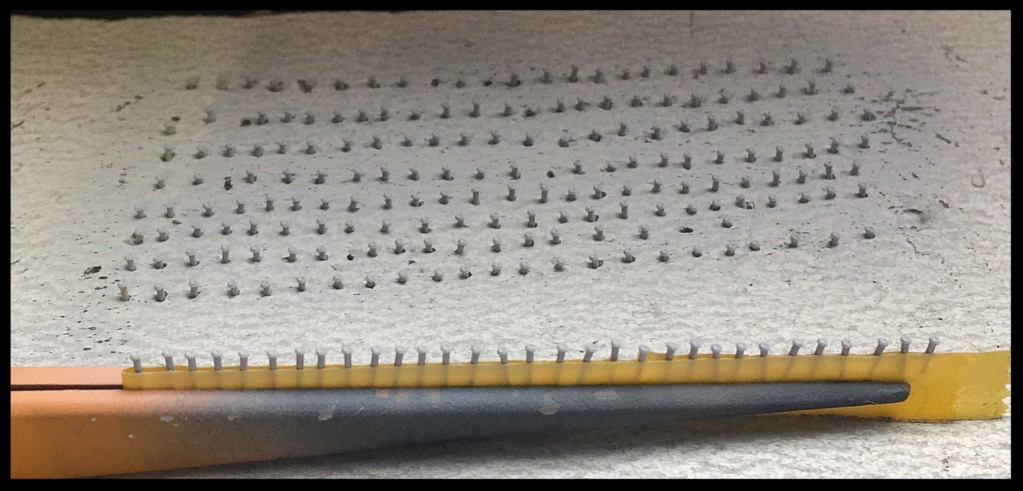
- Rosso Corsa.Also started to spray primer on the first 200 metal rivets.
400 left to do... before GM&RC.
Few of them will be White.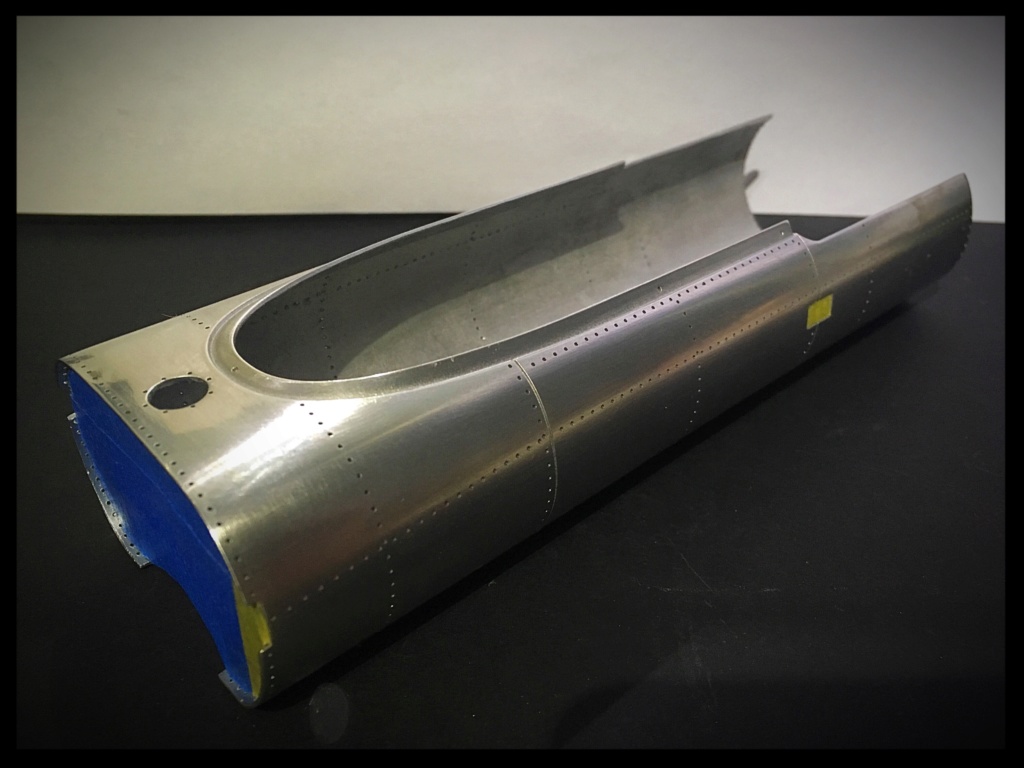

Voilà.
More soon.
Pascal
-
On 2/11/2019 at 5:42 PM, eclipseone said:
very nice!
What kind of glue are you using for the white metal?
Hi,
Thank you.
I use CA glue and low temp solder.
Pascal
-
Hi,
Thank you very much Modelers!
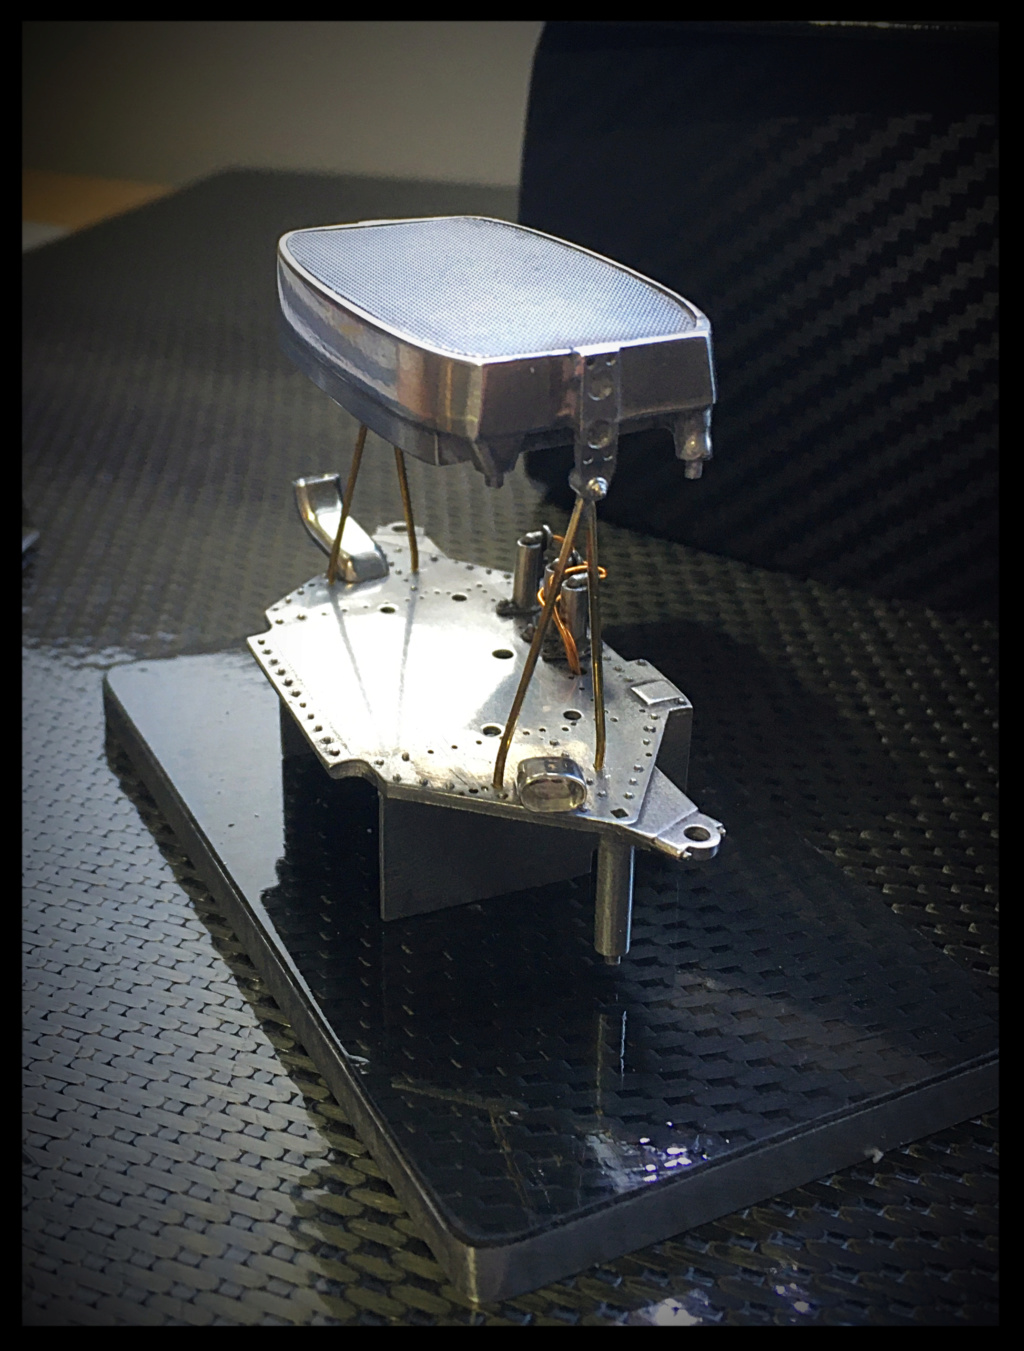
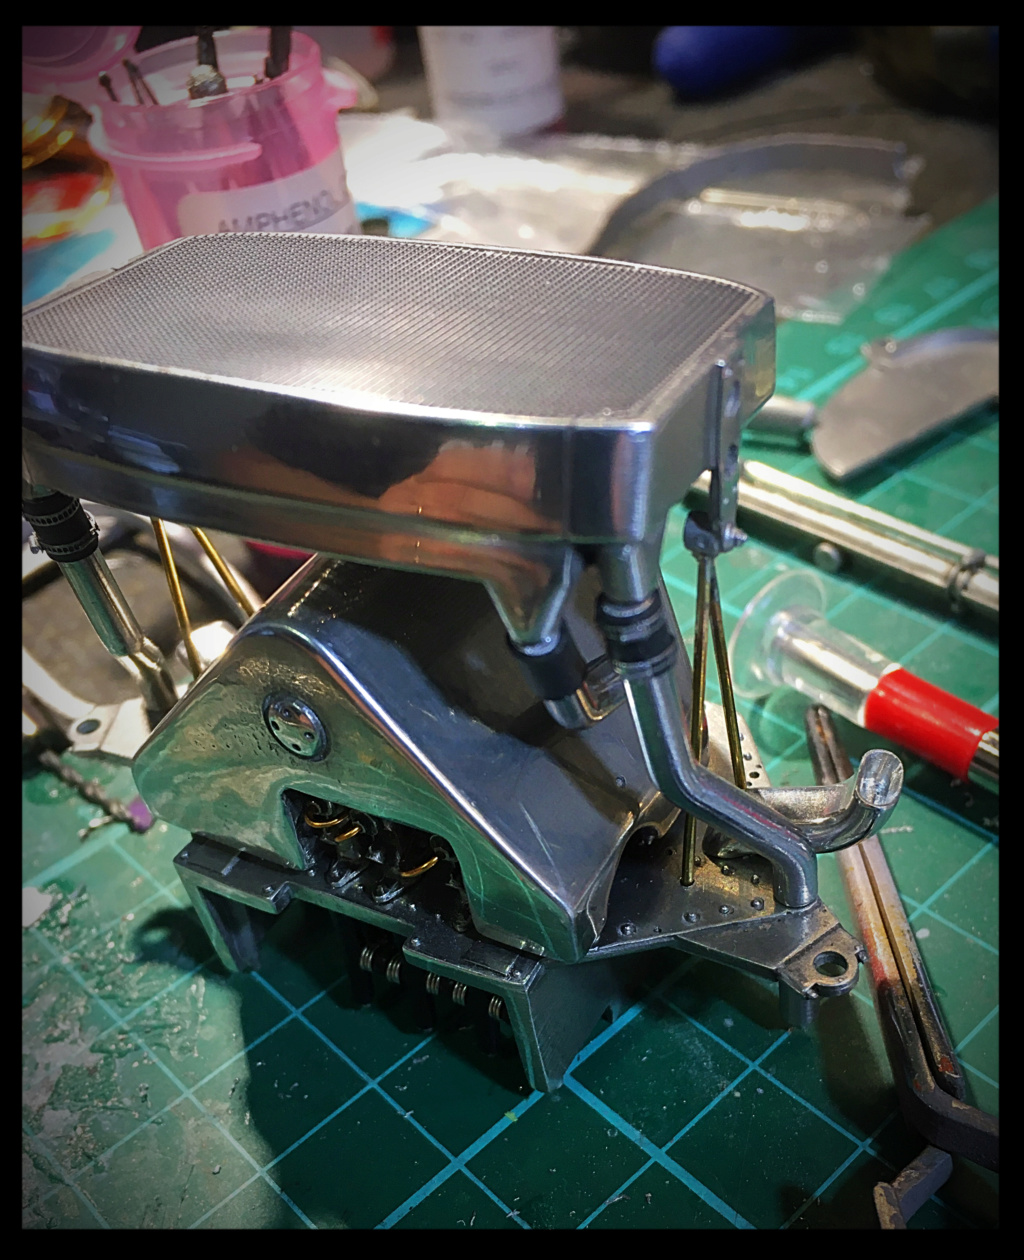
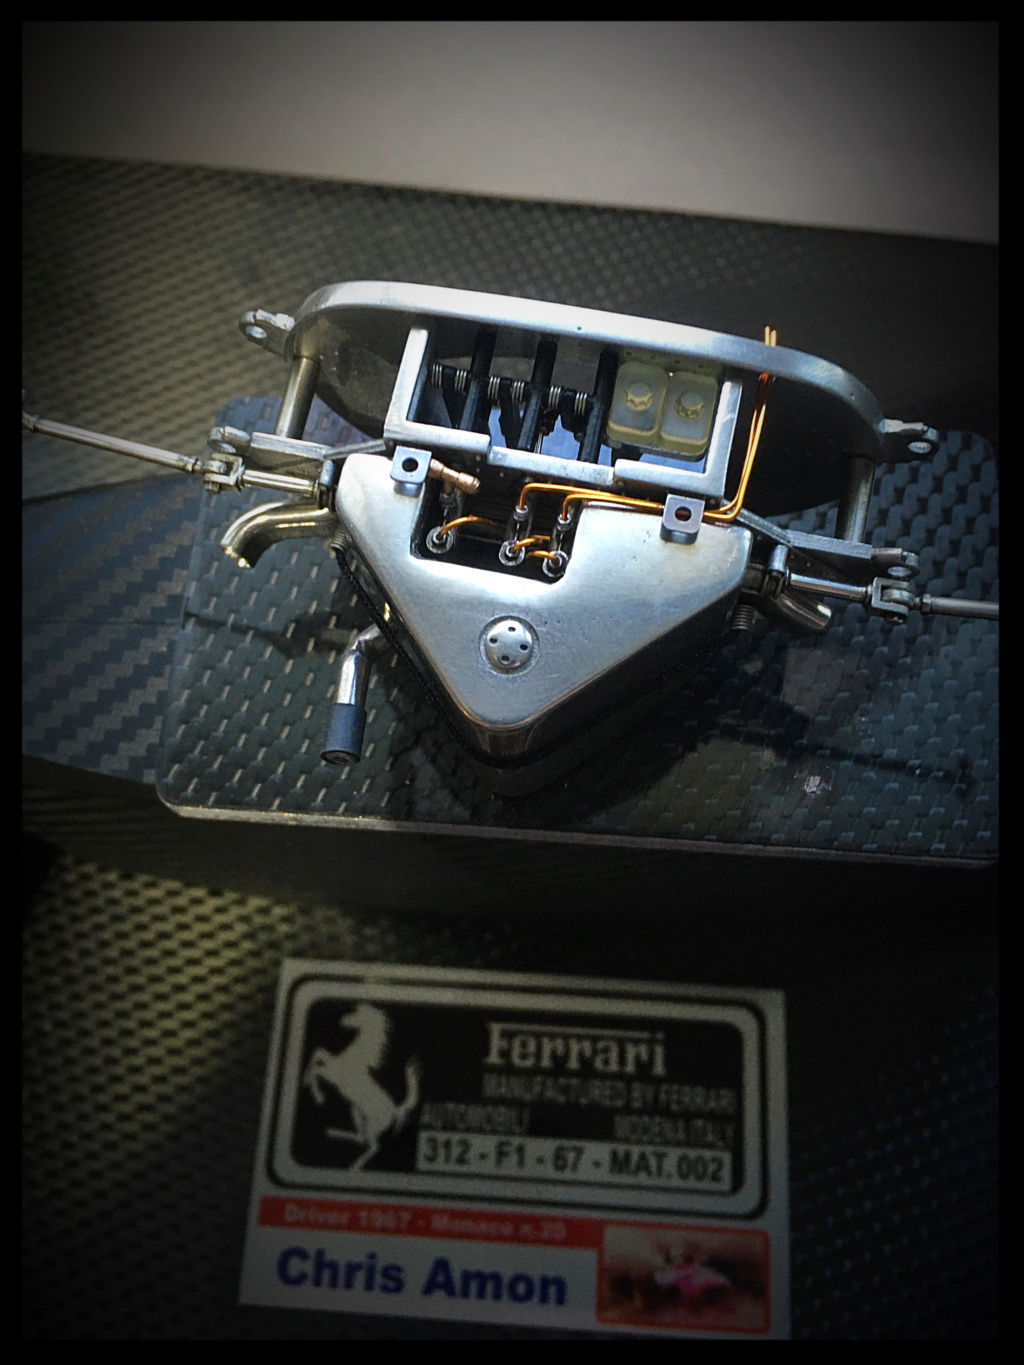
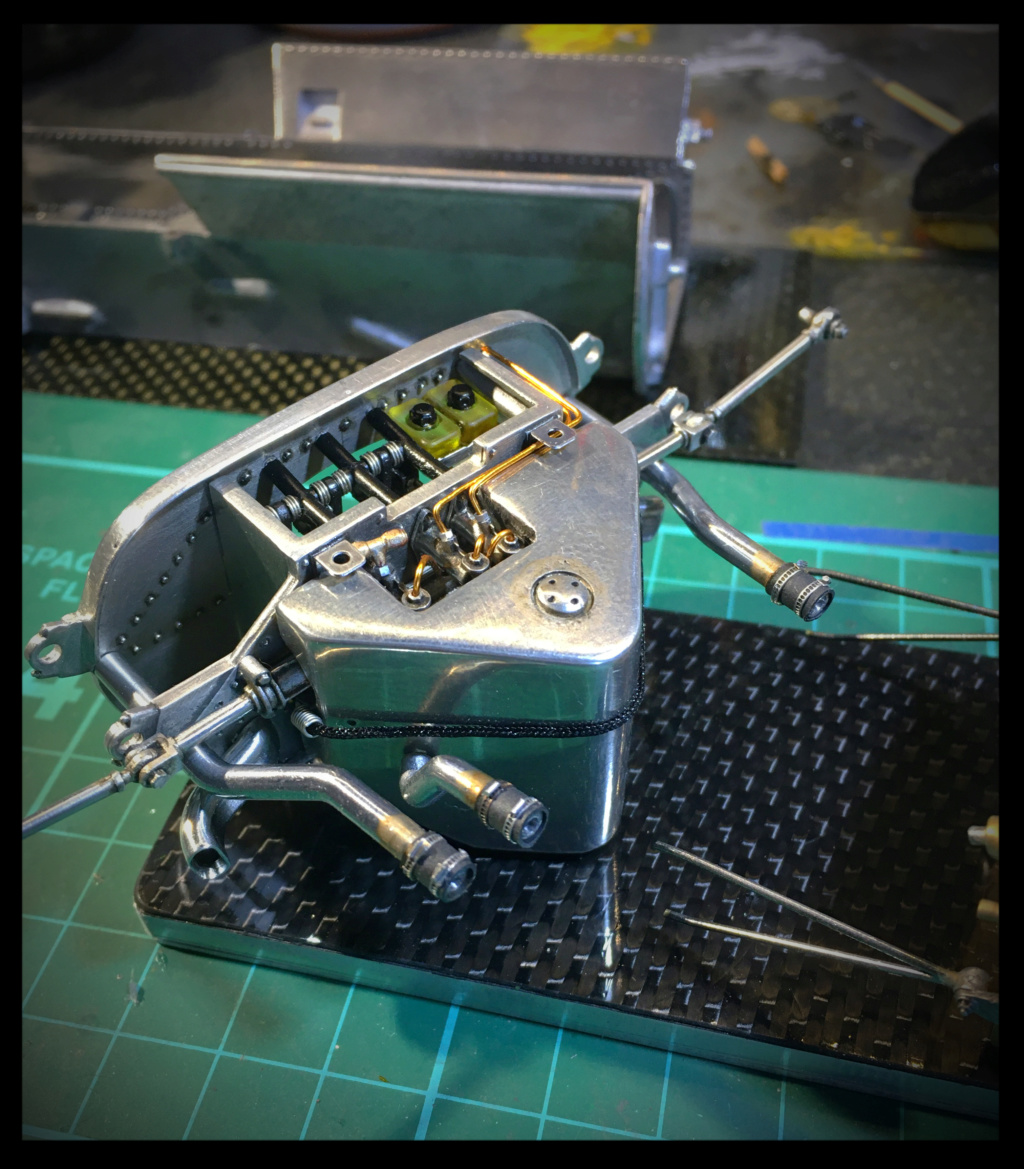
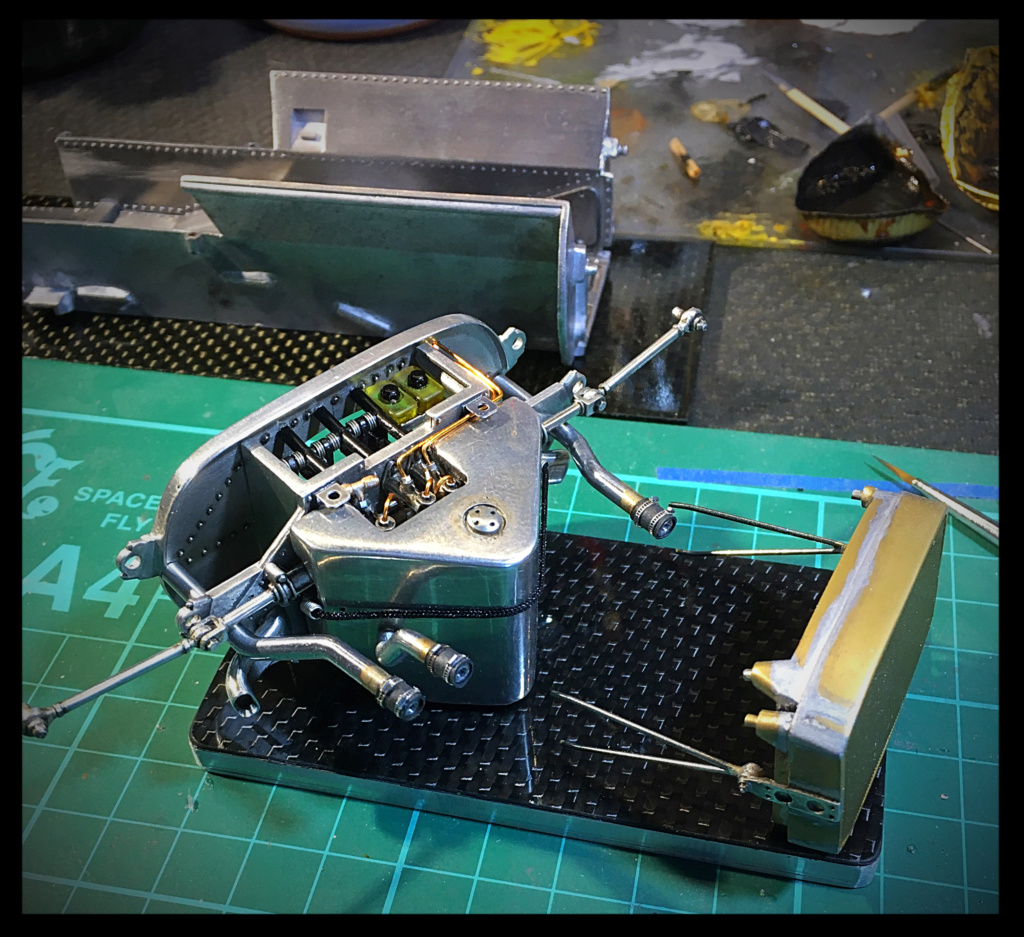
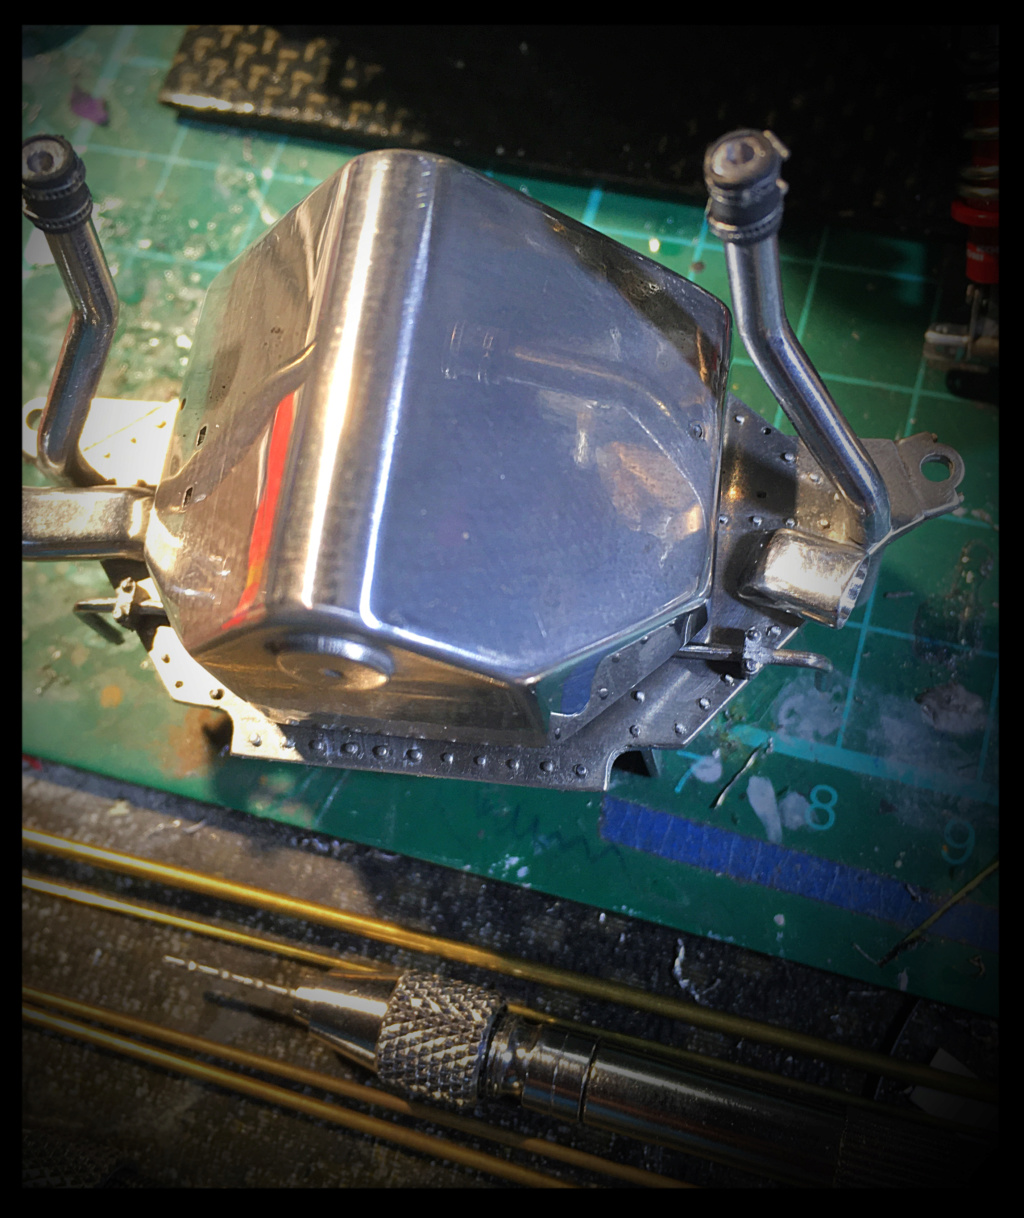
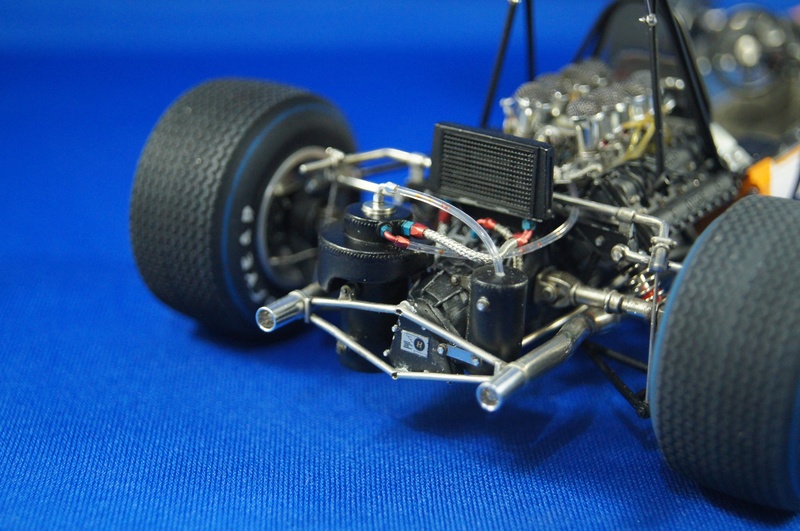
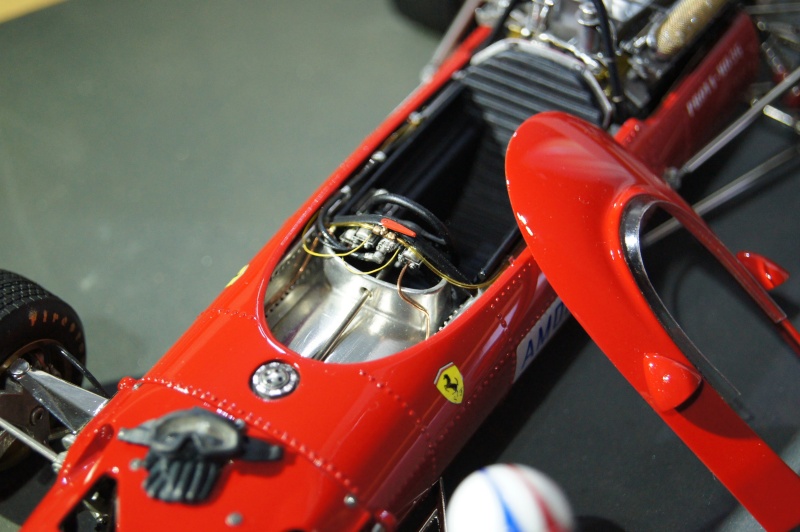
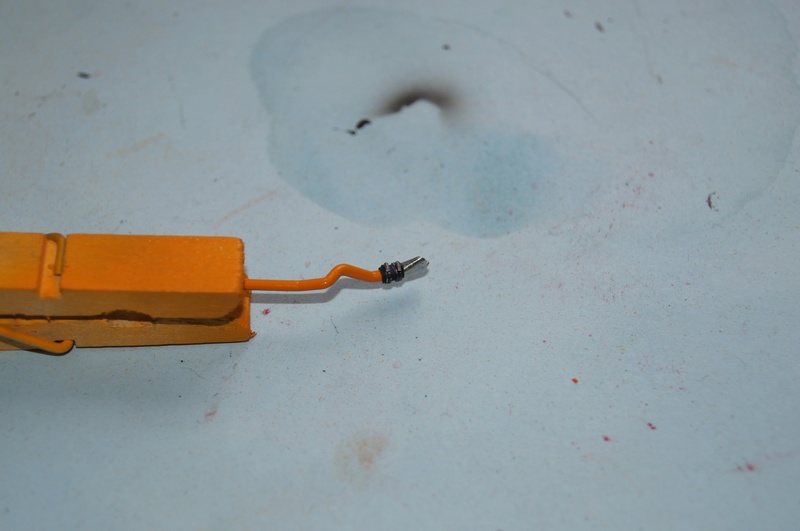
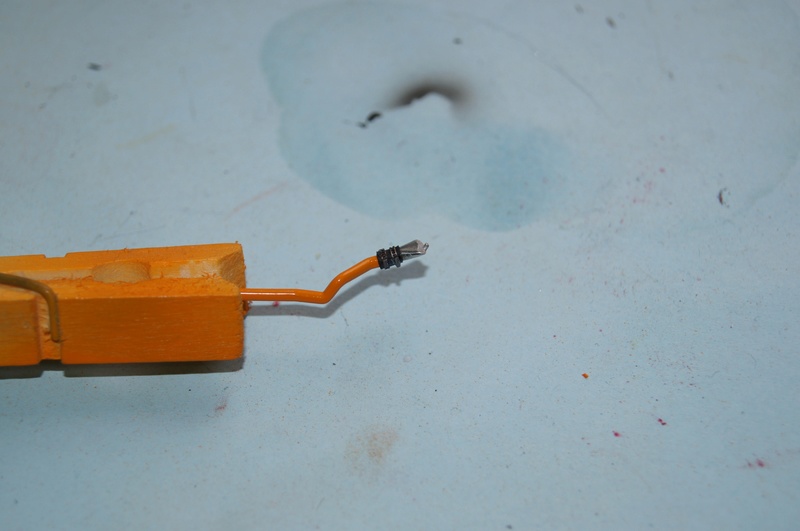
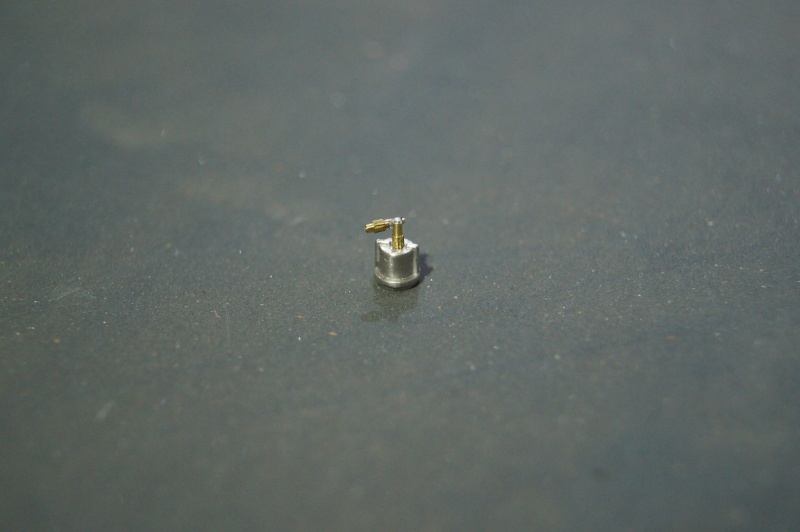
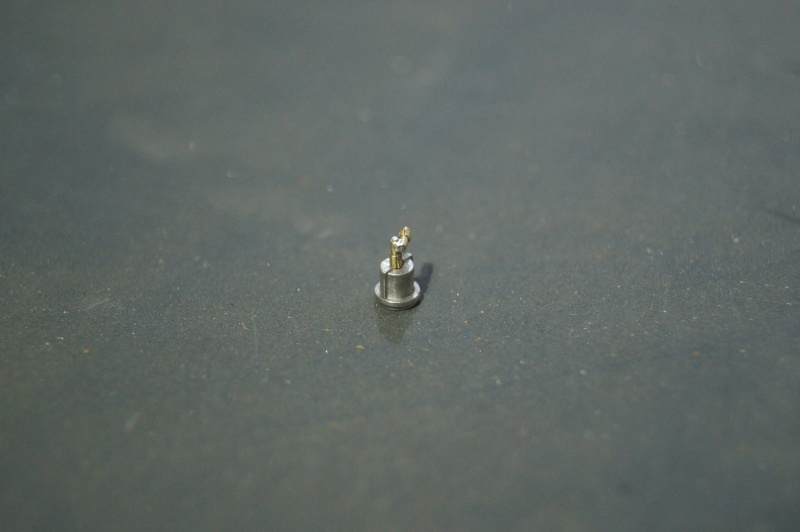
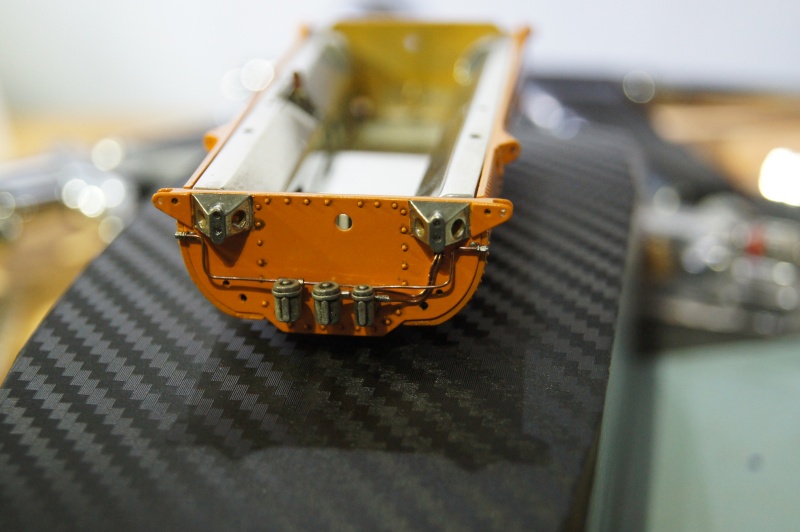
I worked a bit on the small metal tanks and others parts that need to be cleaned and polished.[br]Fuel filter/distributor and water expansion tank.
I also made a quick test of the pedals on the front bulkhead.

Test fit of the rear structure and tank of the Red Roaring Beauty.
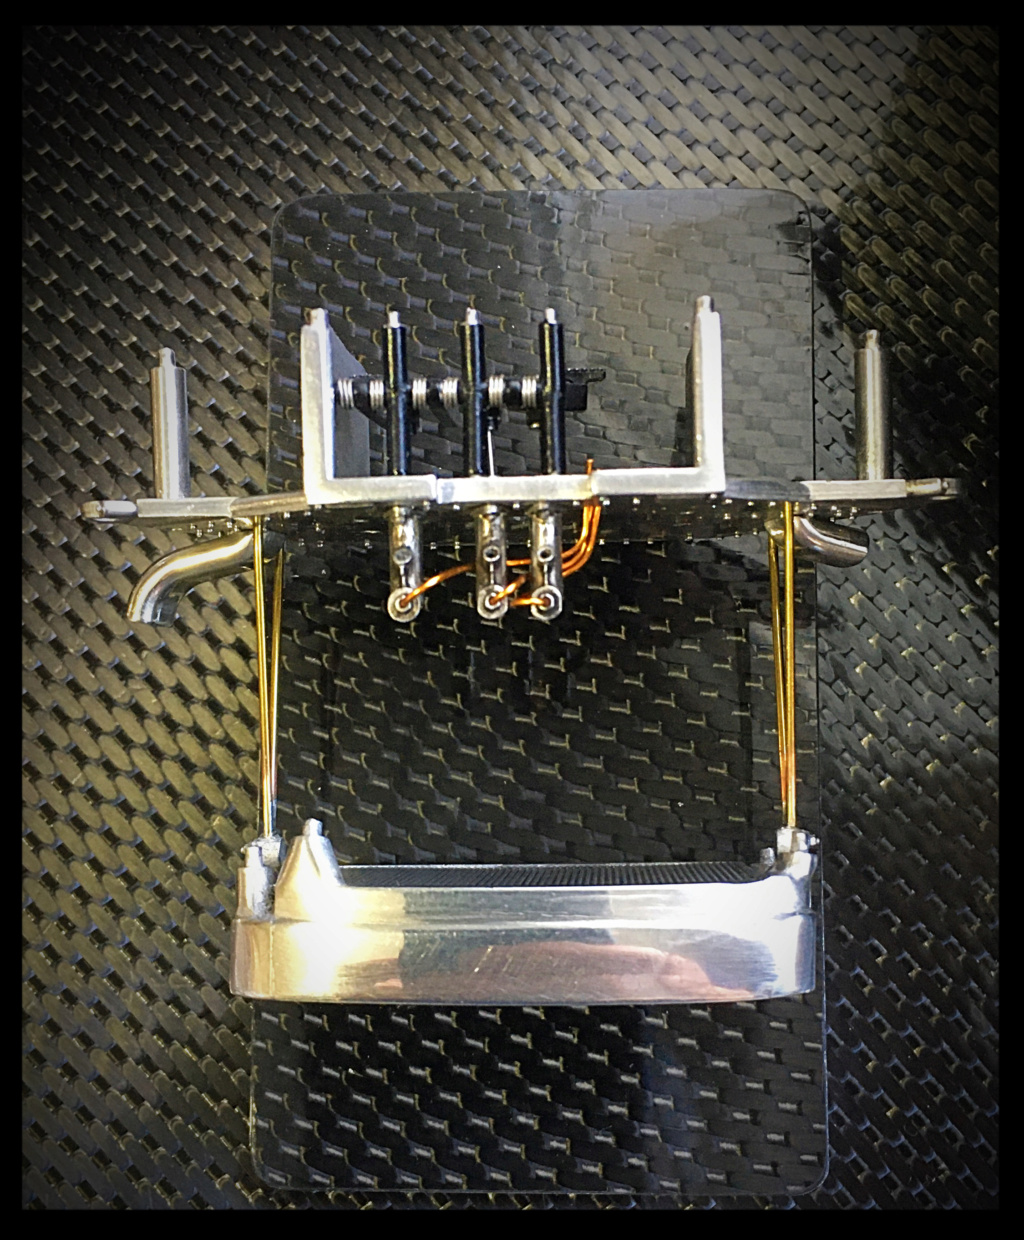
Battery and coils prepaired, masked and primed.
Starting to connecting brakes and fuel pipes.
Engine pan scratched.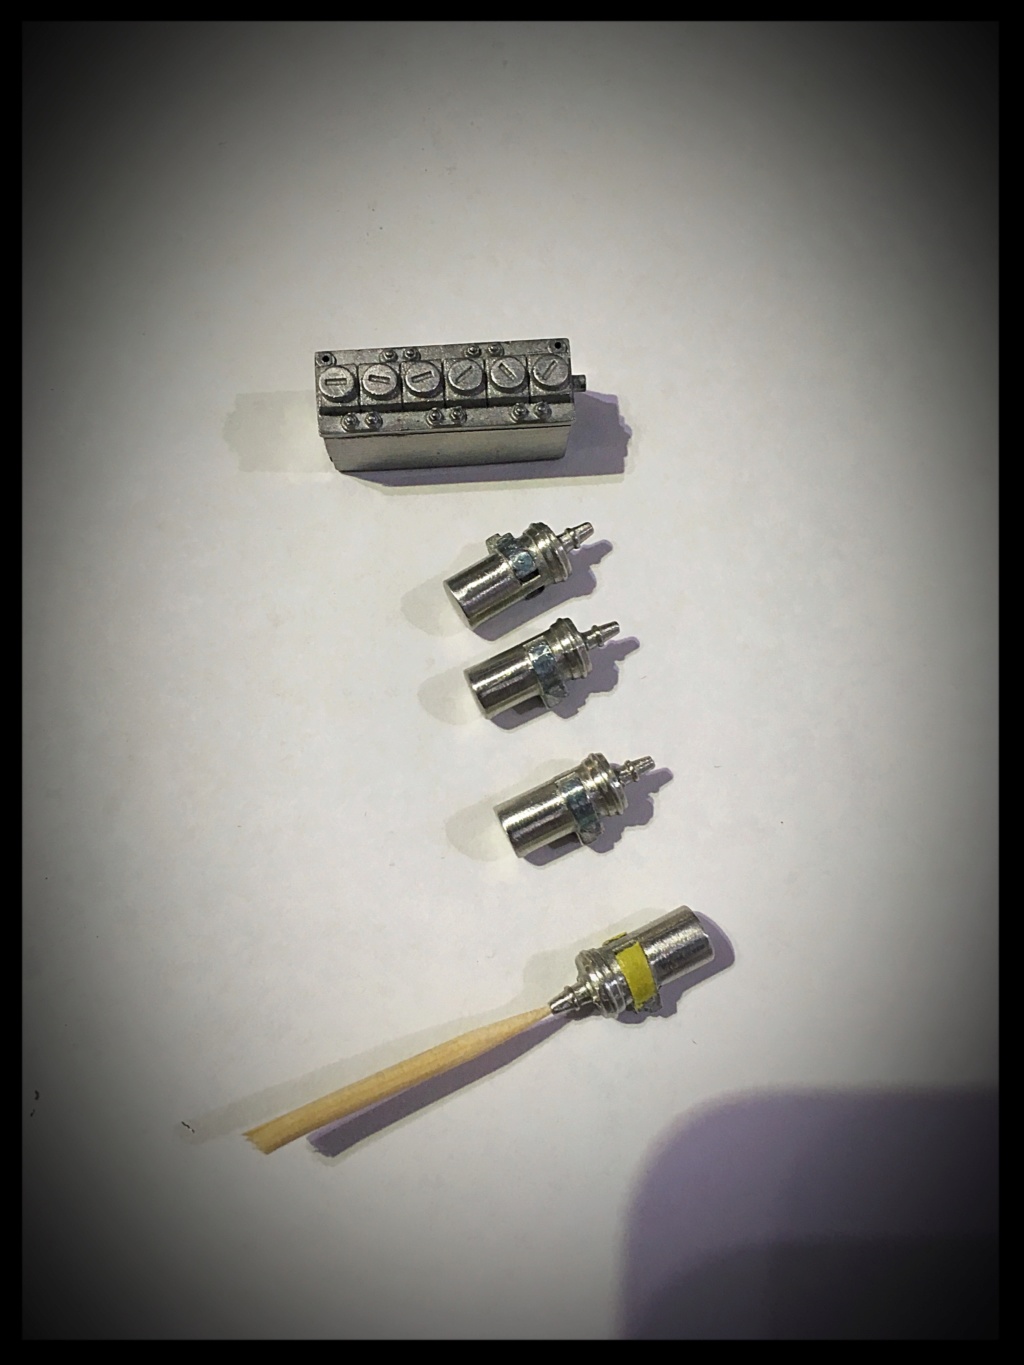
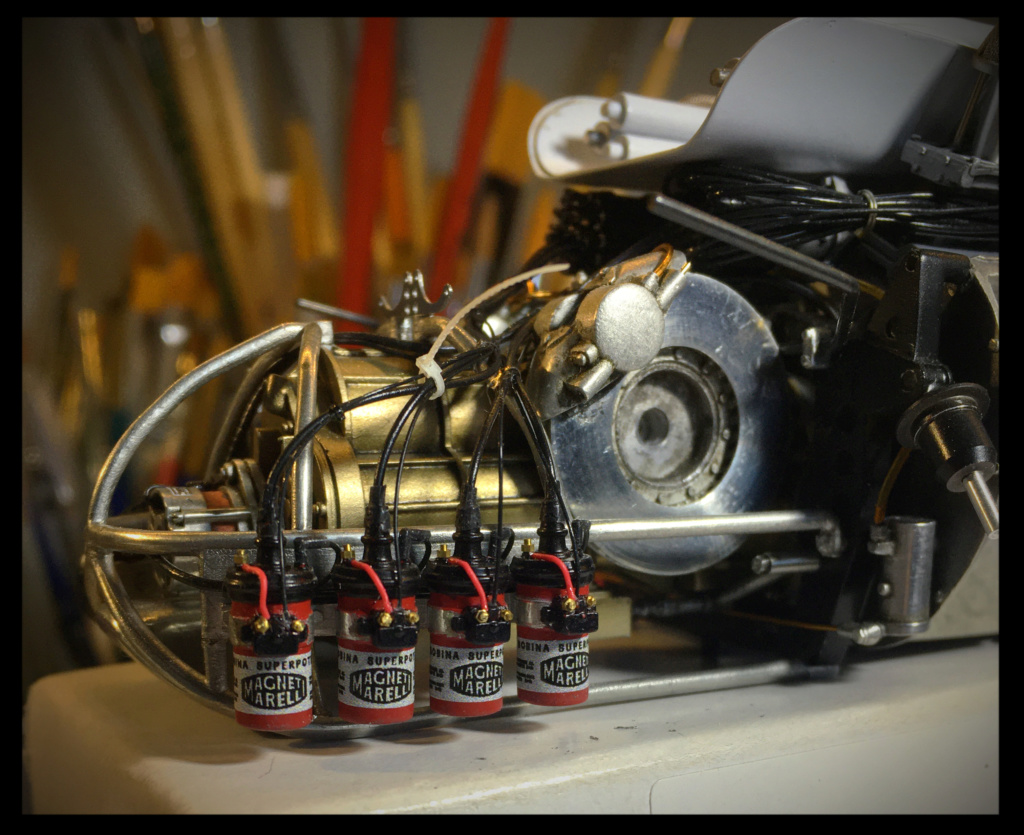
Alfa Rosso ZP on the coils: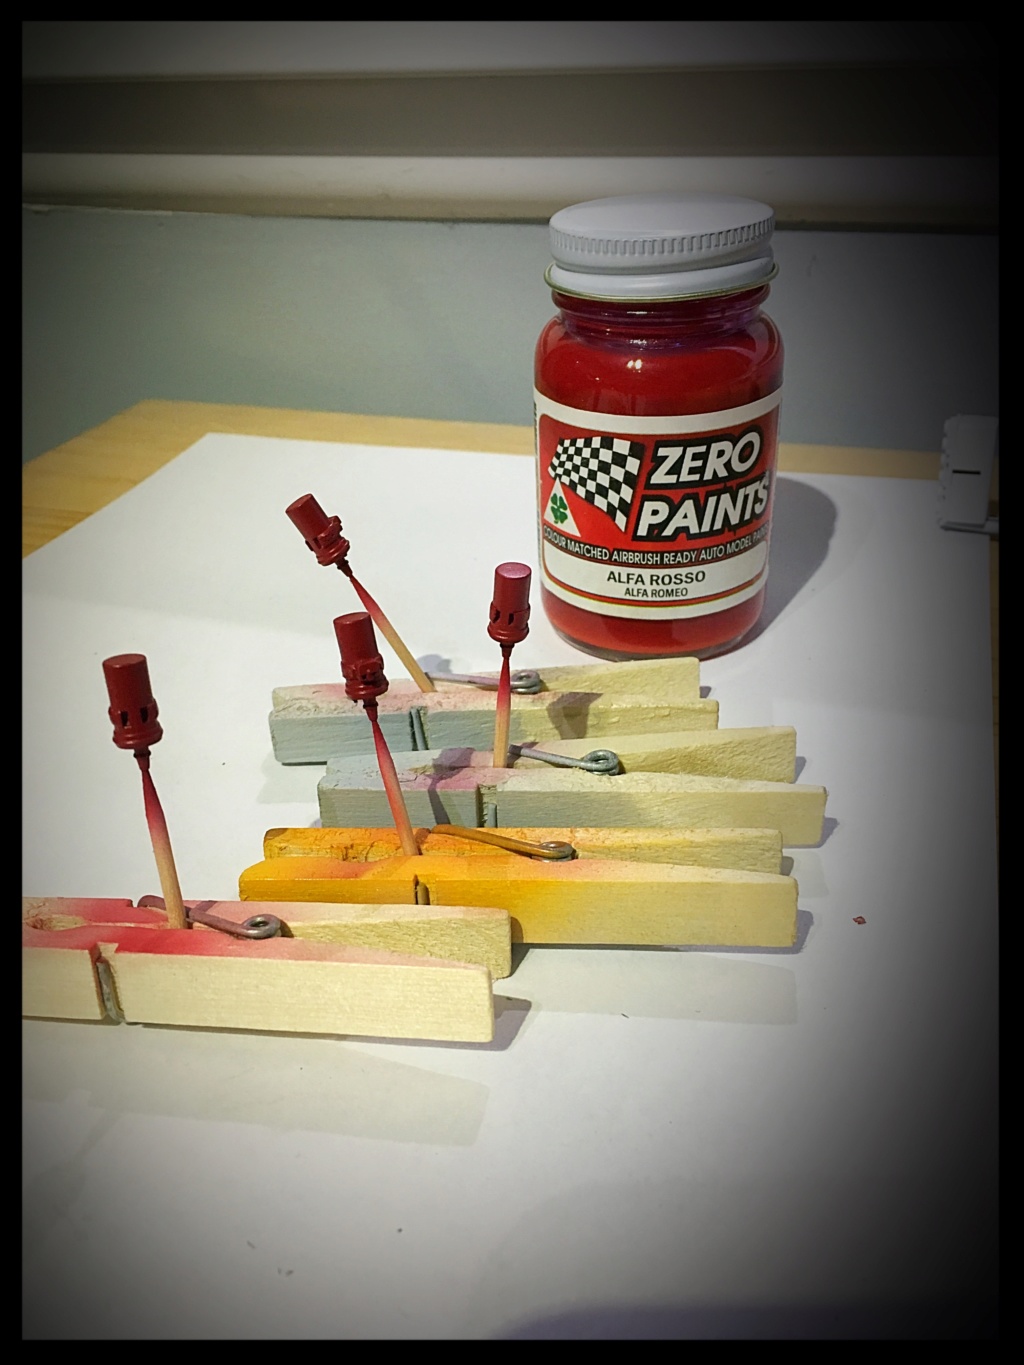
... And white (Titanium White GC) for the battery
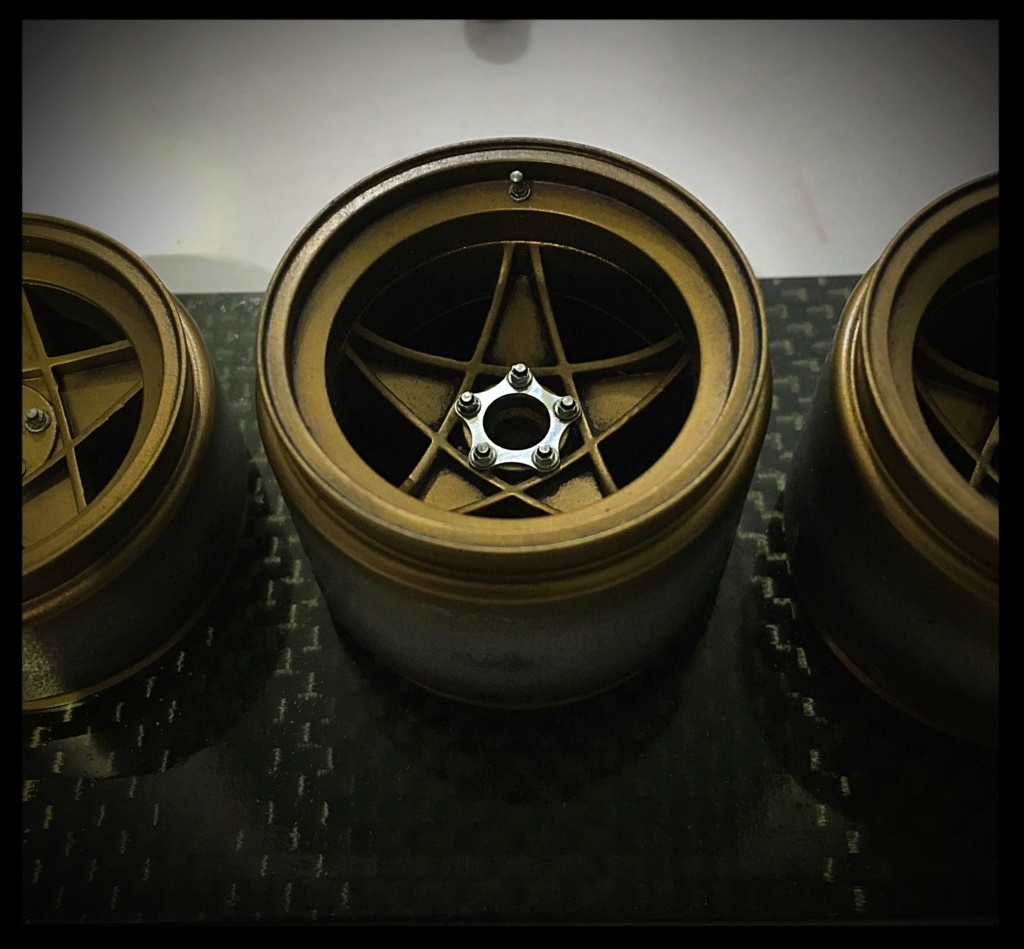
Machined bolting and washers have been installed on the wheels.
An old « T » connector is modified and used to complete the front wheels brakes master cylinder.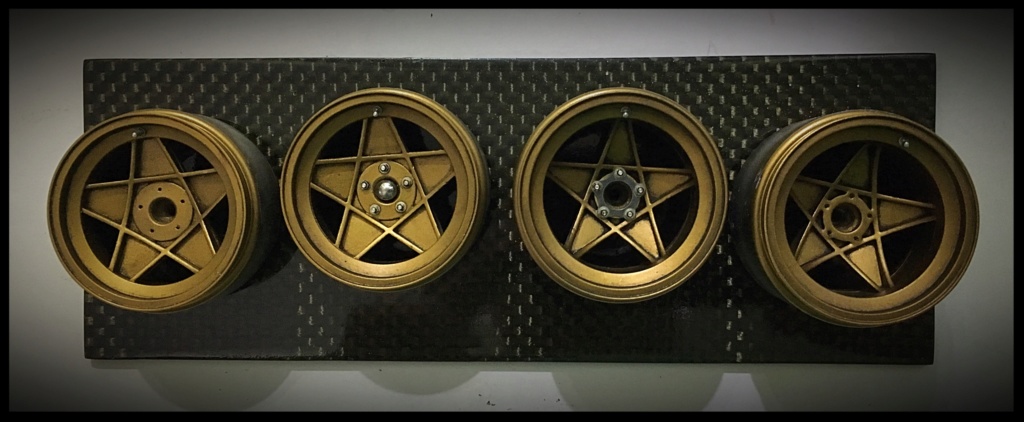


Tanks and tubes installed on the roll bar with serflex & Ty-Raps:
Wires ready and waiting for the battery:[br][br]

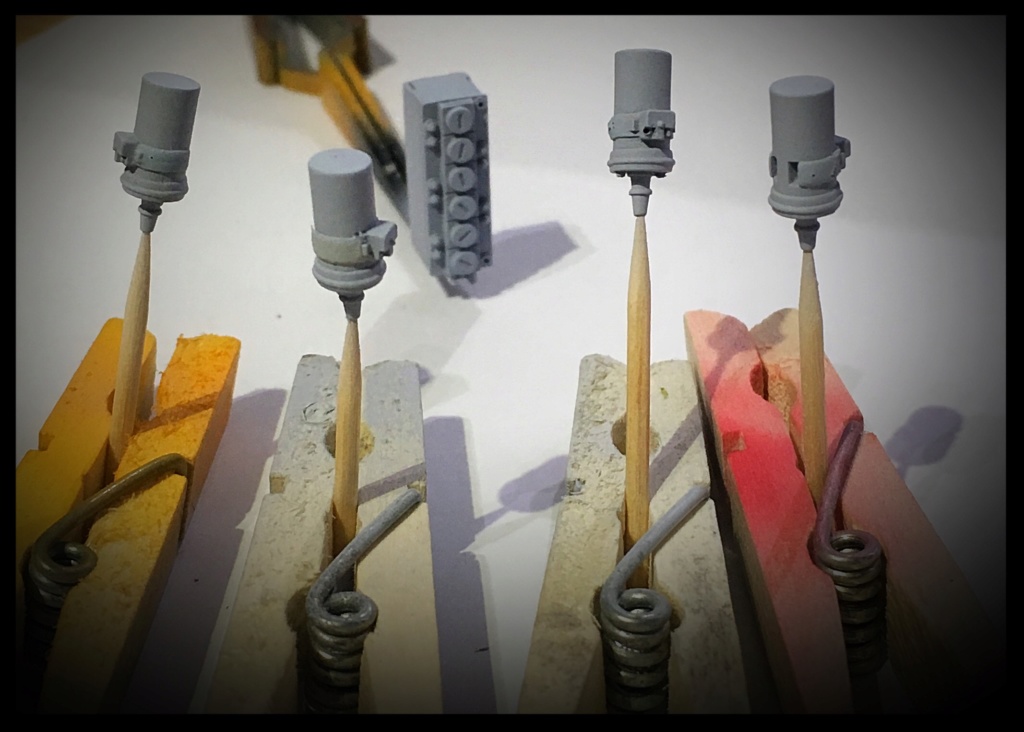
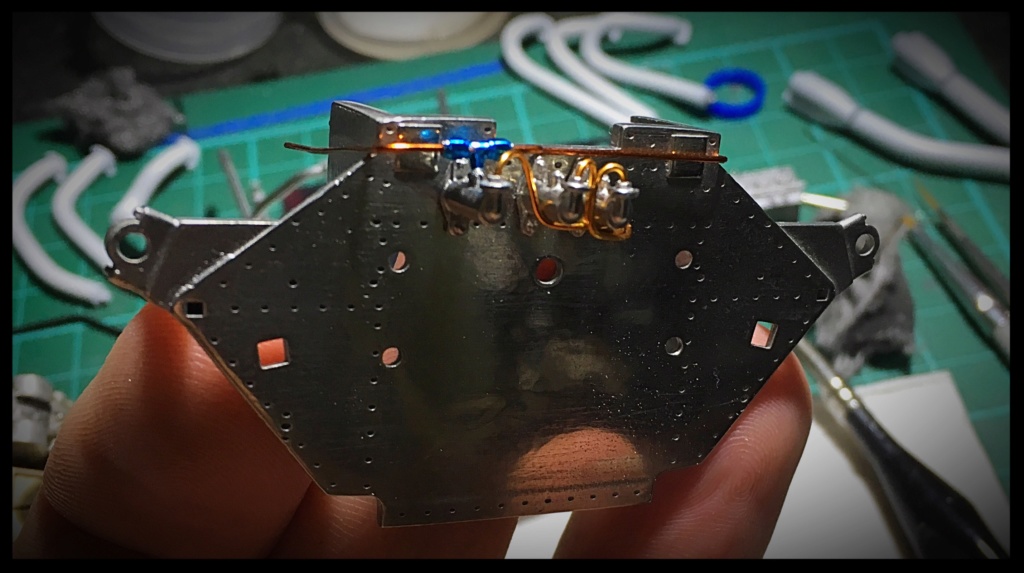
Started to work on the coils:

Hi,[br][br]Thanks a lot Mate![br][br]Sanding, welding, riveting...[br]
 [br]
[br]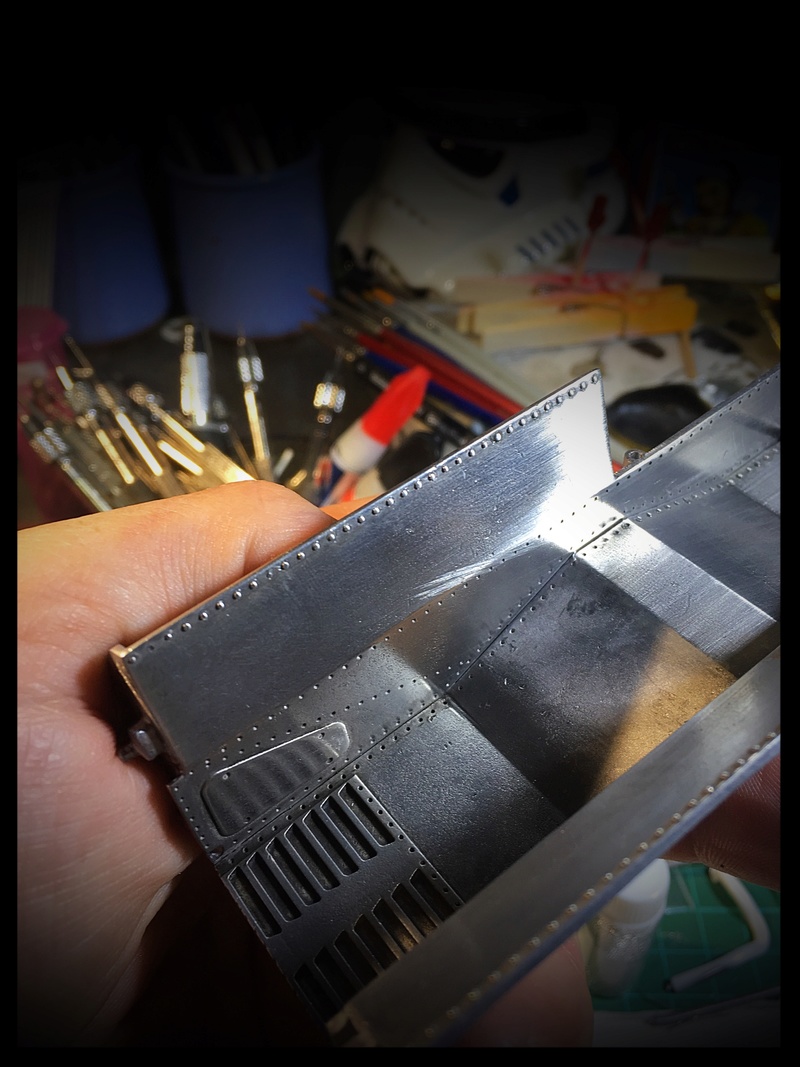 [br]
[br]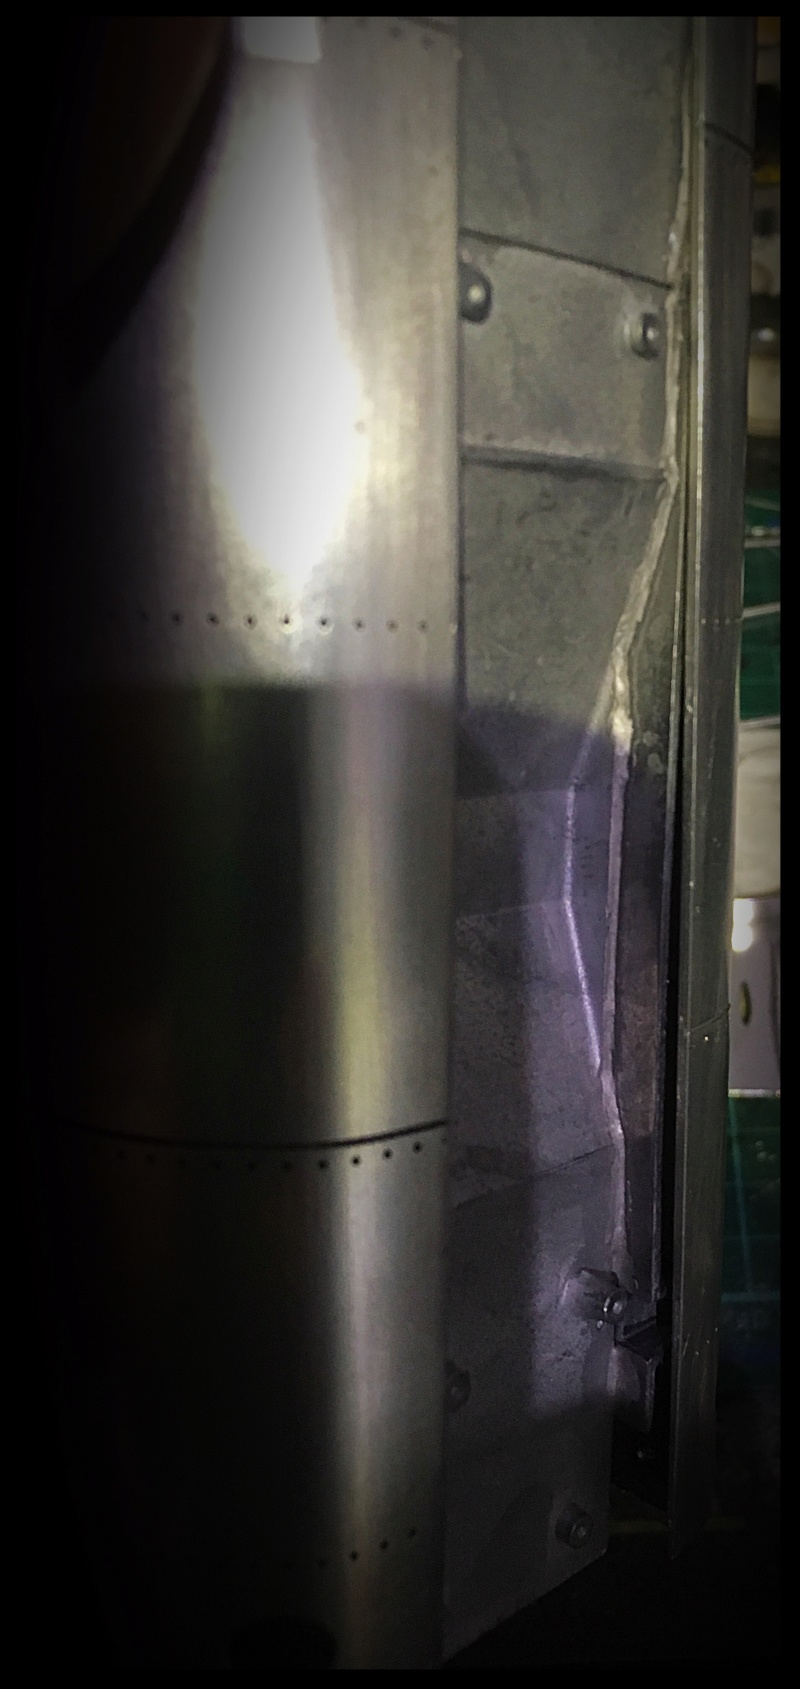 [br]
[br]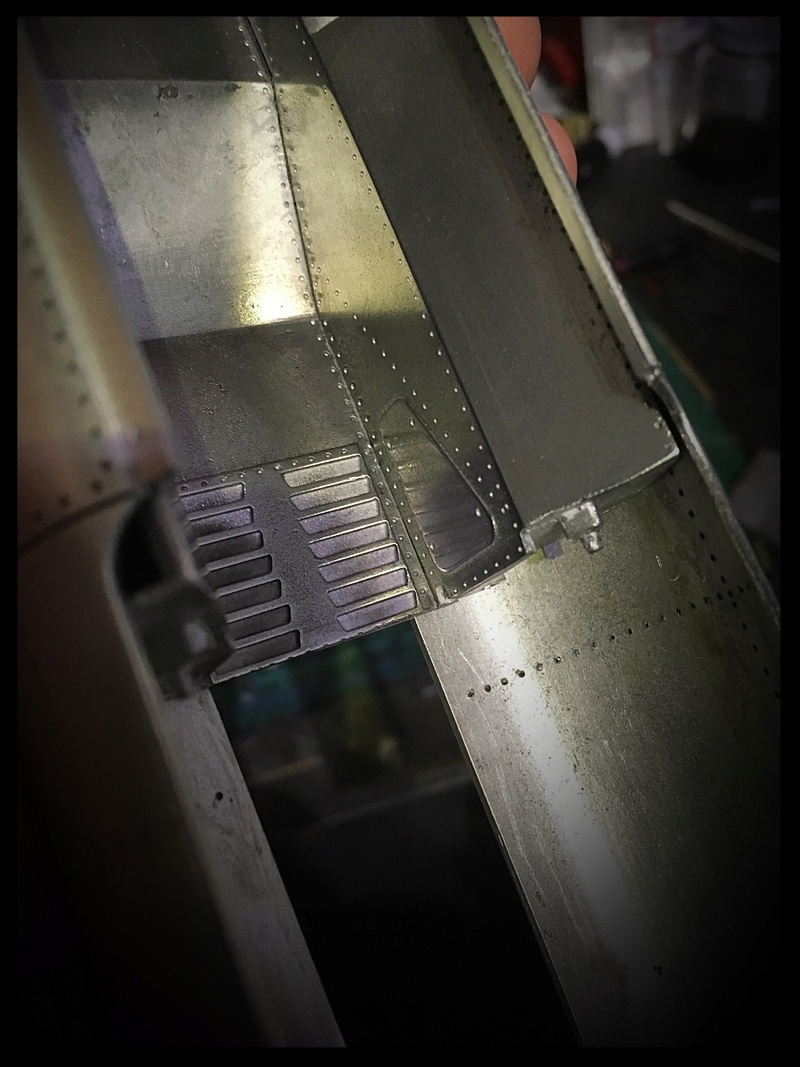 [br]
[br]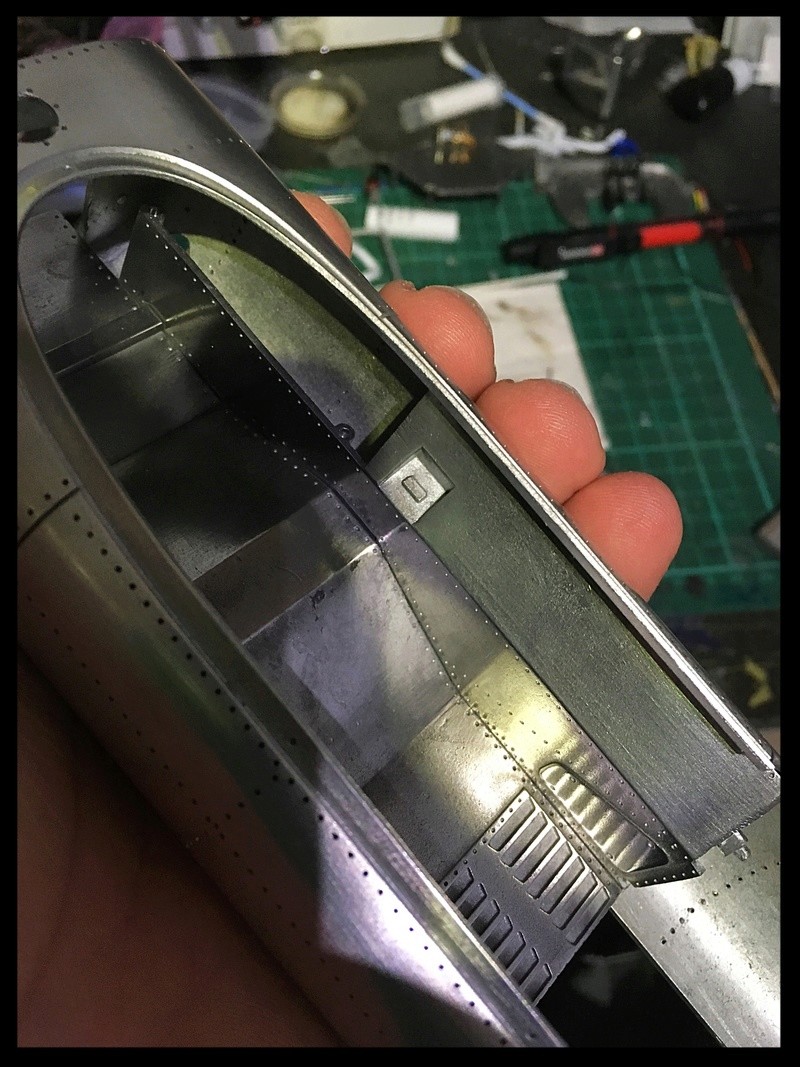 [br]
[br]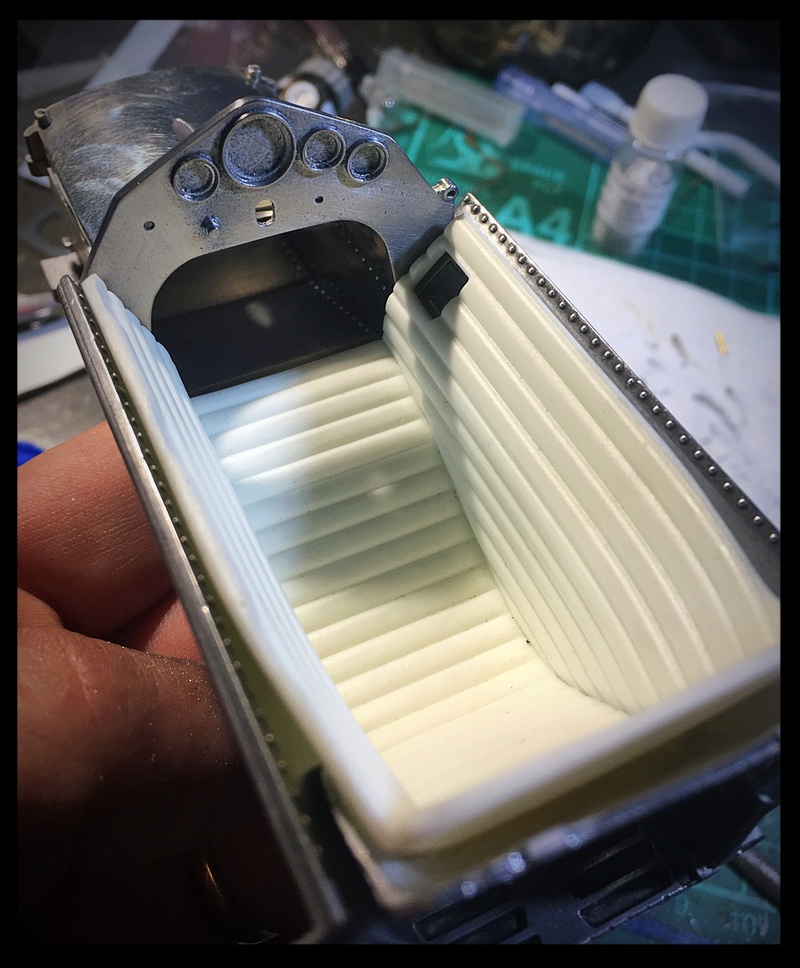 [br]
[br]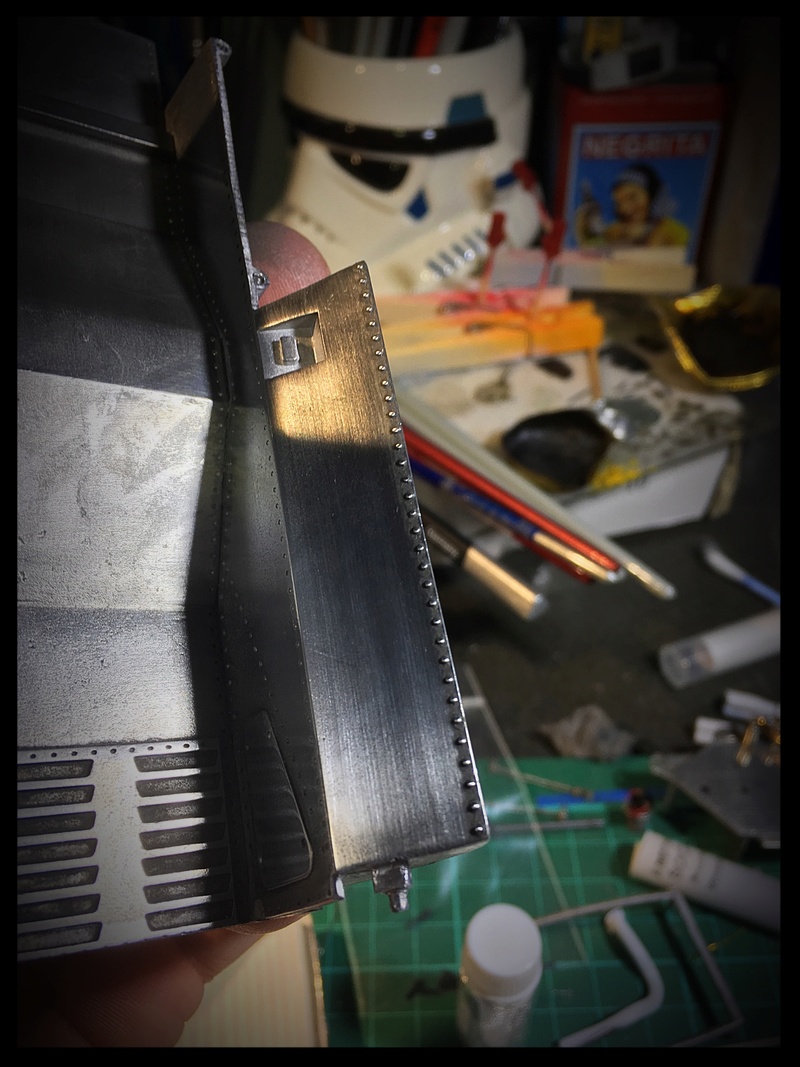 [br]
[br] [br][br]Few
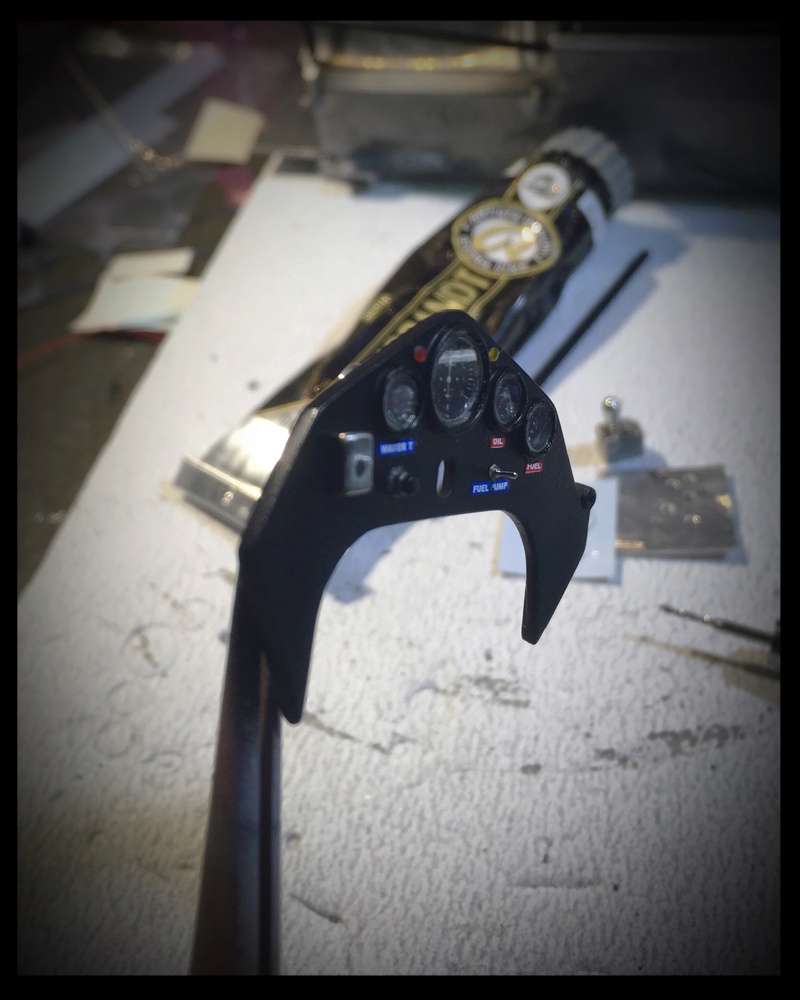
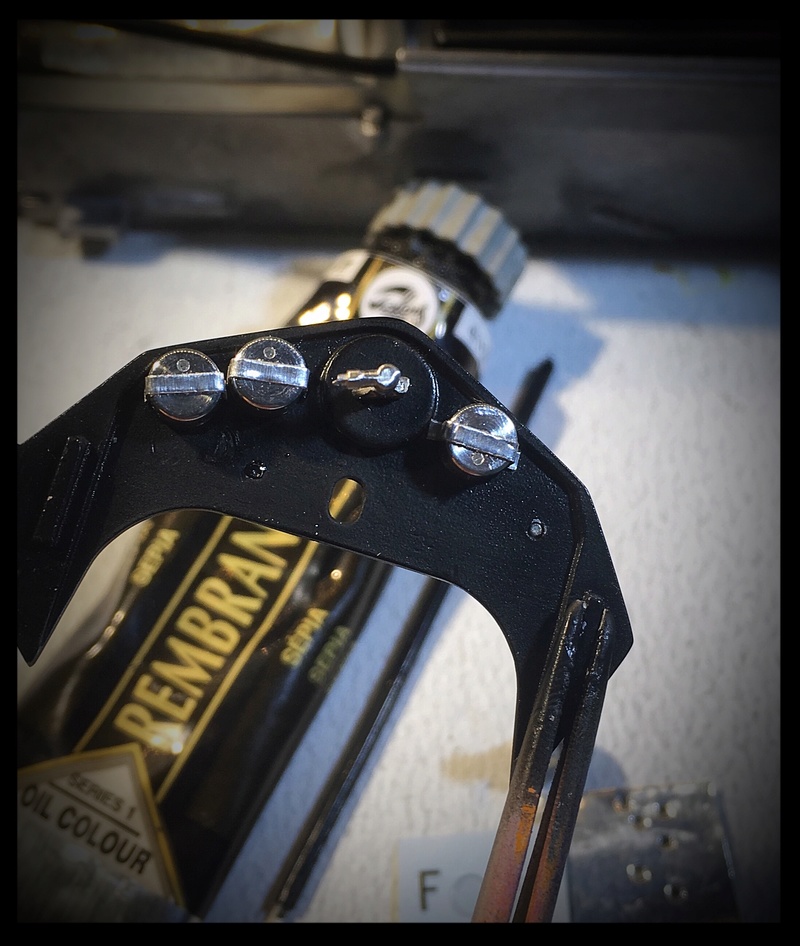
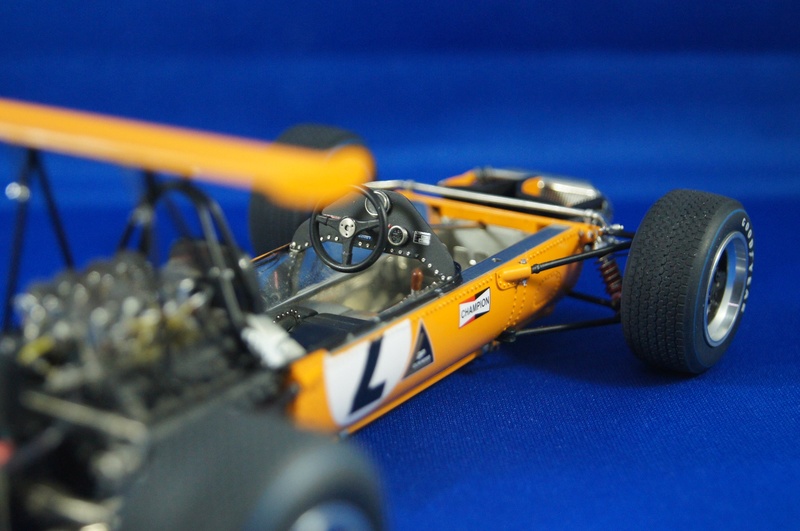
And, at least, progress in the “office” area:
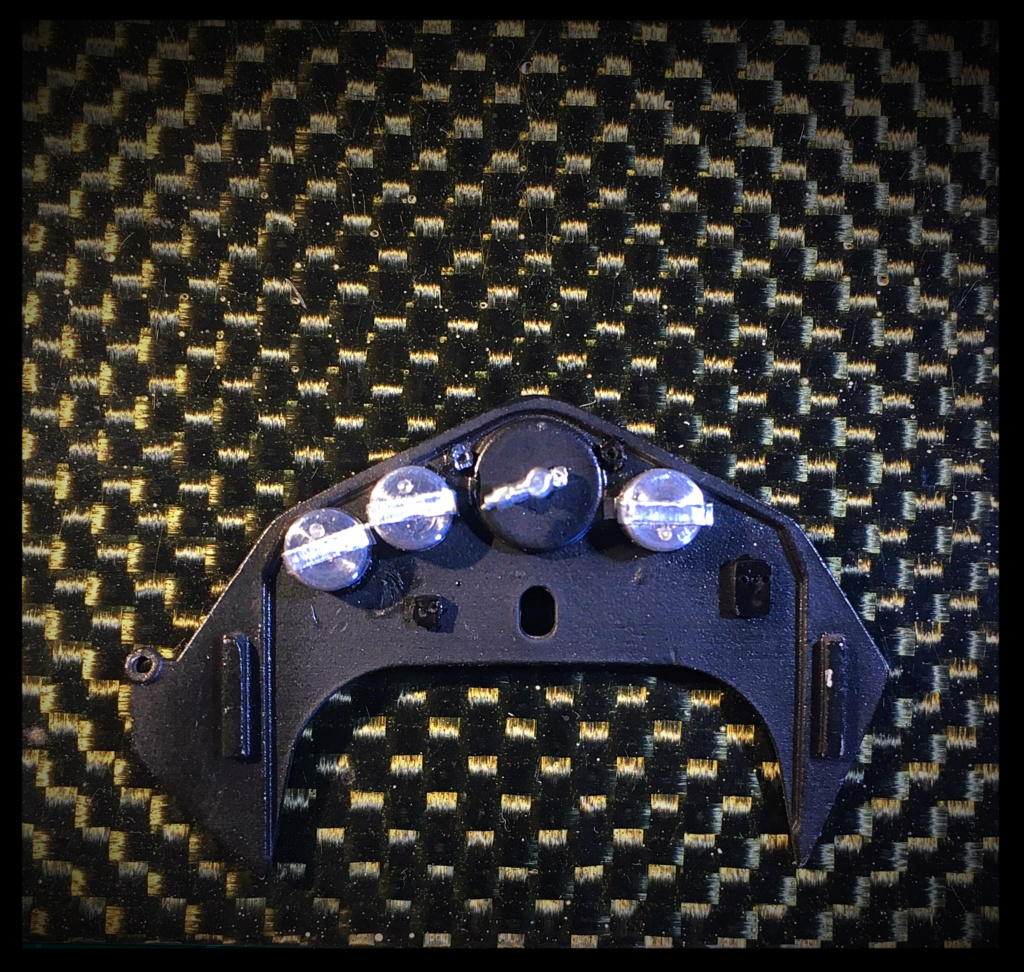
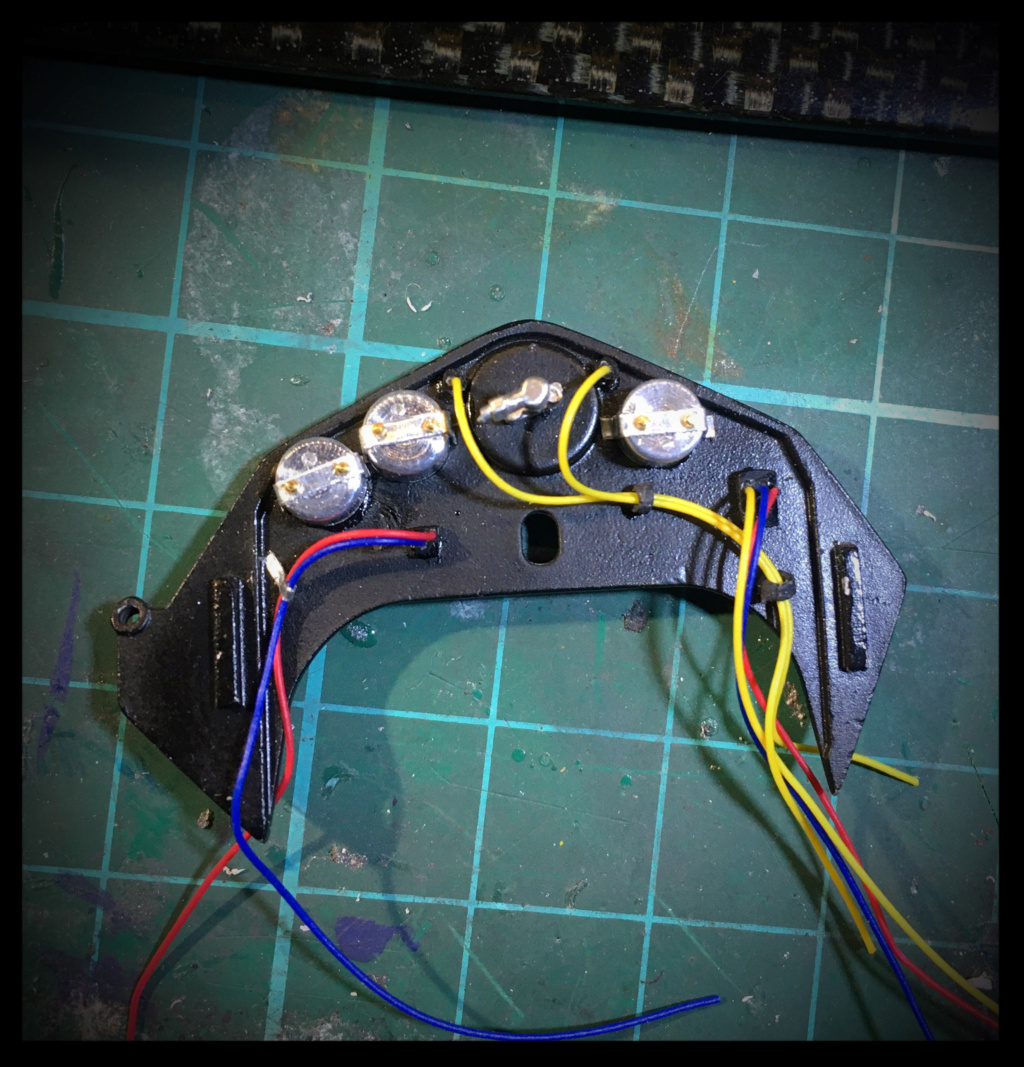
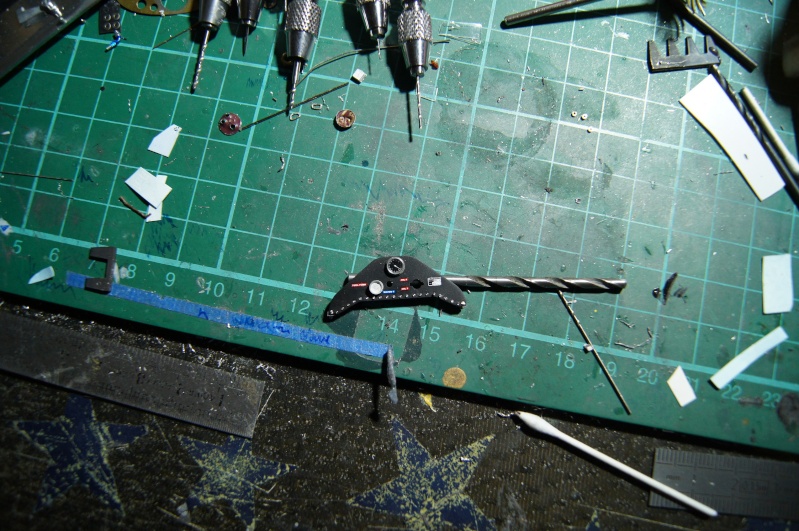
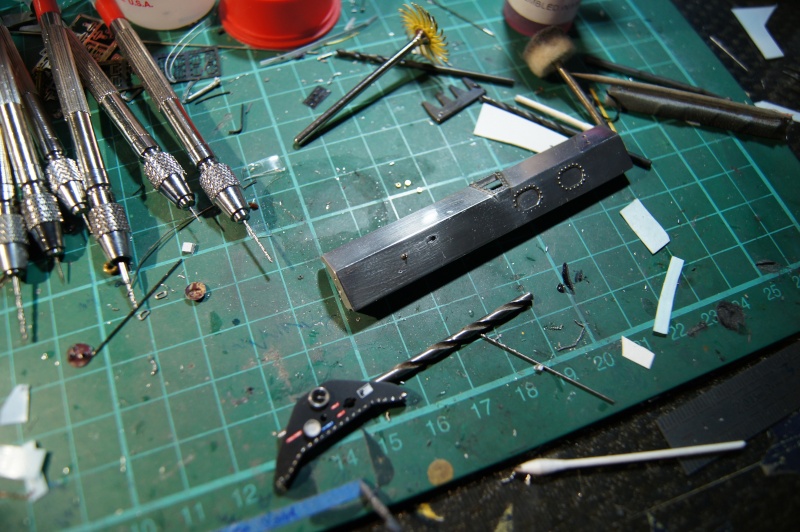
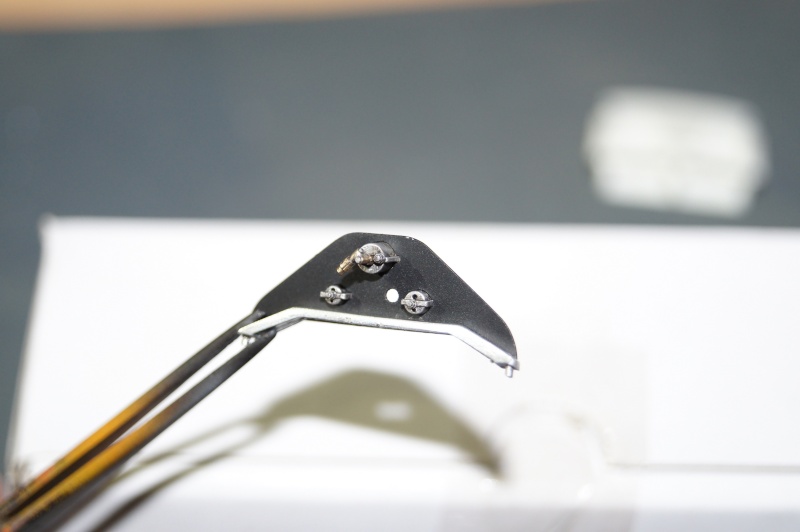
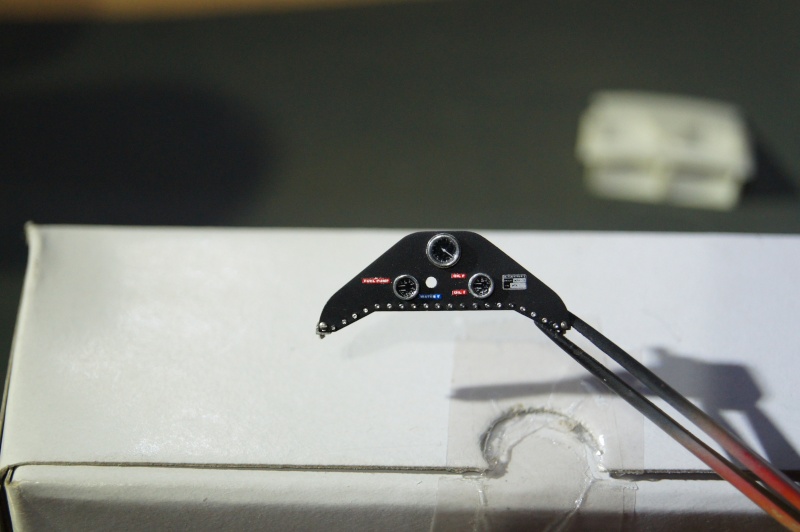
Paint session, dashboard session and gear lever/selector.
I was not that happy with the instruments, so I turned new ones and made brackets from aluminium foil.
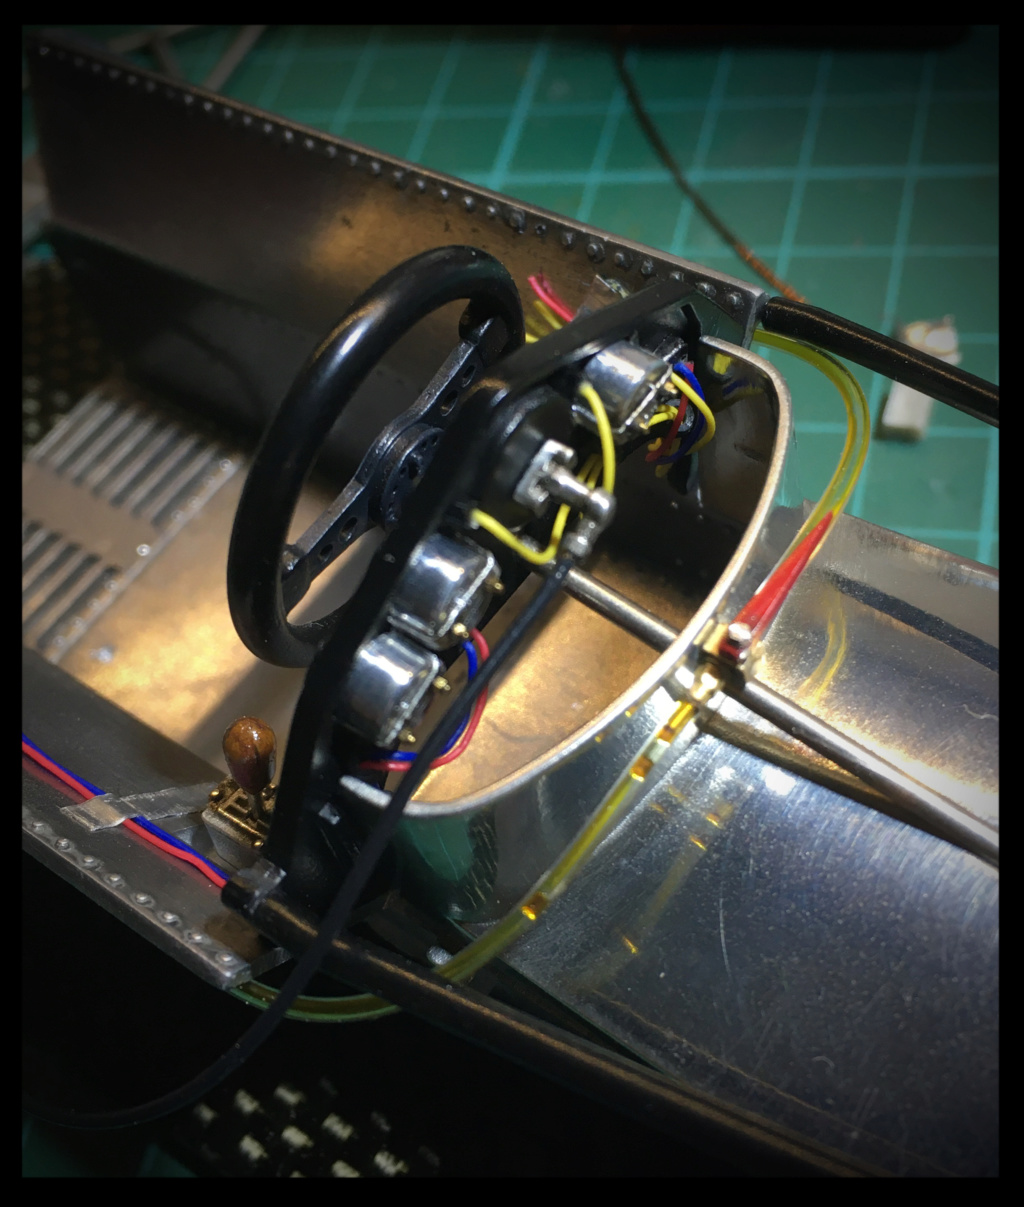
Then test fitting.

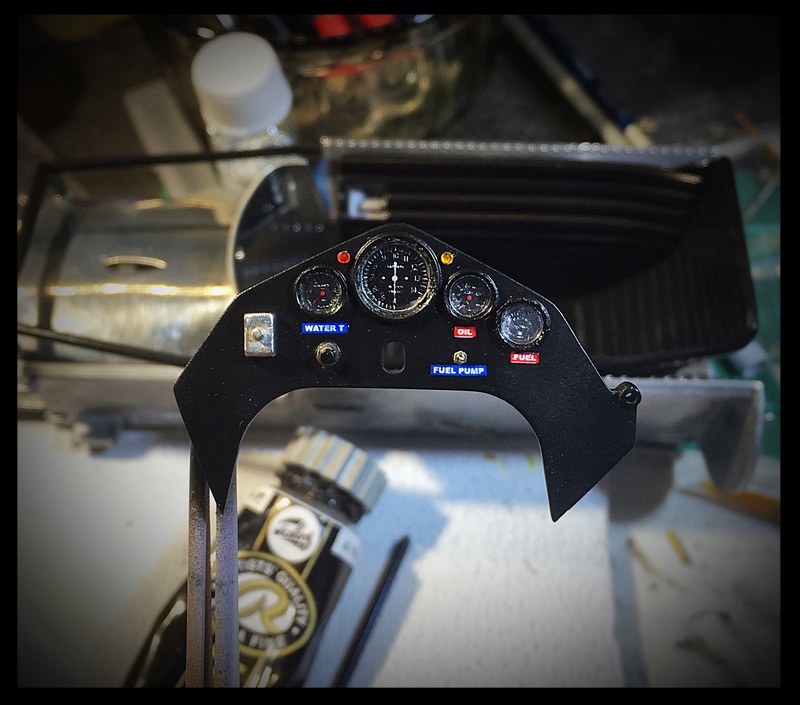

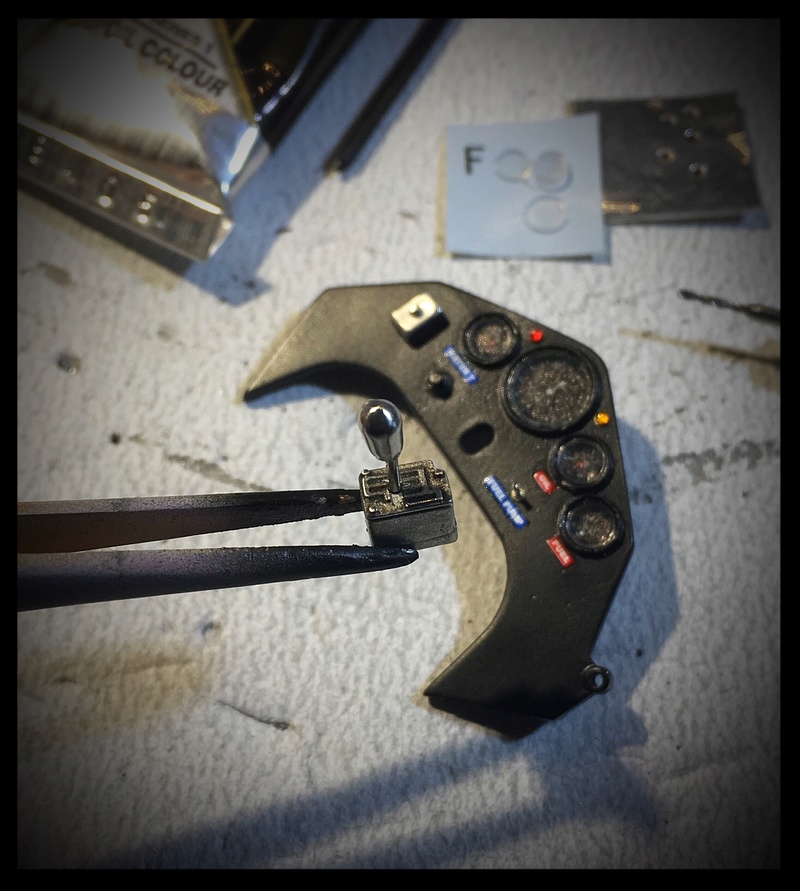
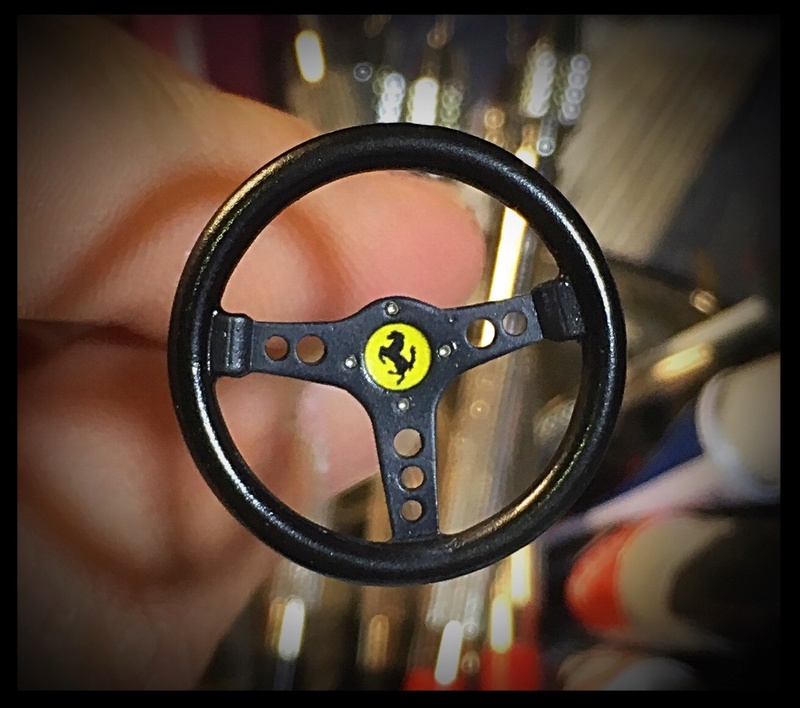
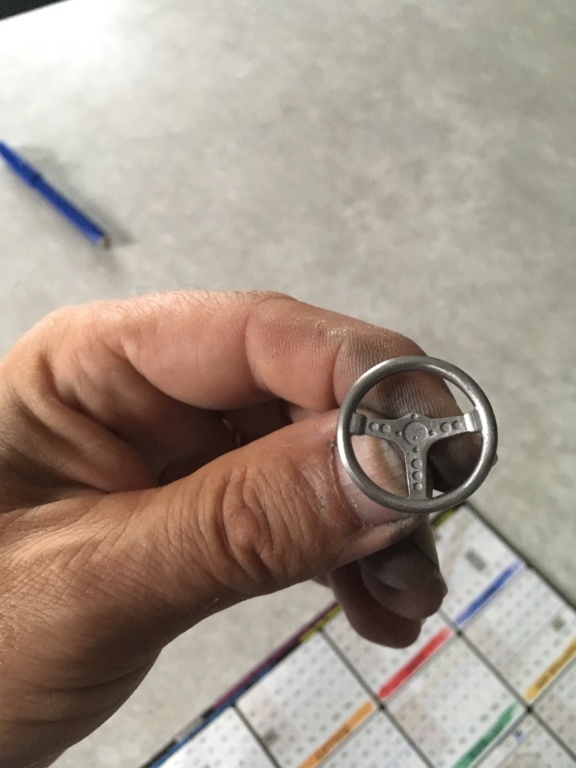
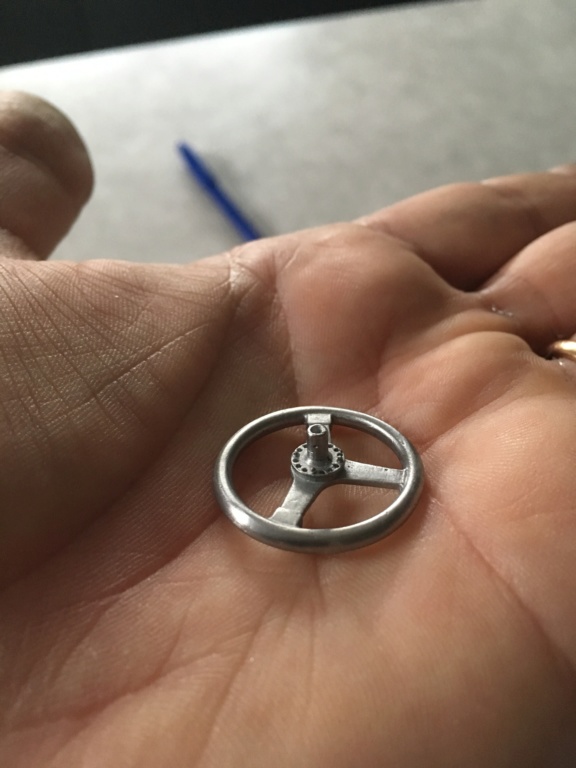
Oils and screws added on the steering wheel and, of course, the Cavallino Rampante!
Voilà.
More soon.Pascal
-
Hi,
I really apologize for very Laaaaaaaaate reply!!☺️
Thanks so much for all your kind comments and for being so patient following this WIP!
Pascal
-
Hi,
😂🤣
Better to have metal to depict metal... sometimes.🙄
Pascal
-
Hi,
Beautiful details and great paint job!
Pascal
-
Hi ,
It’s been a long time since my last post...
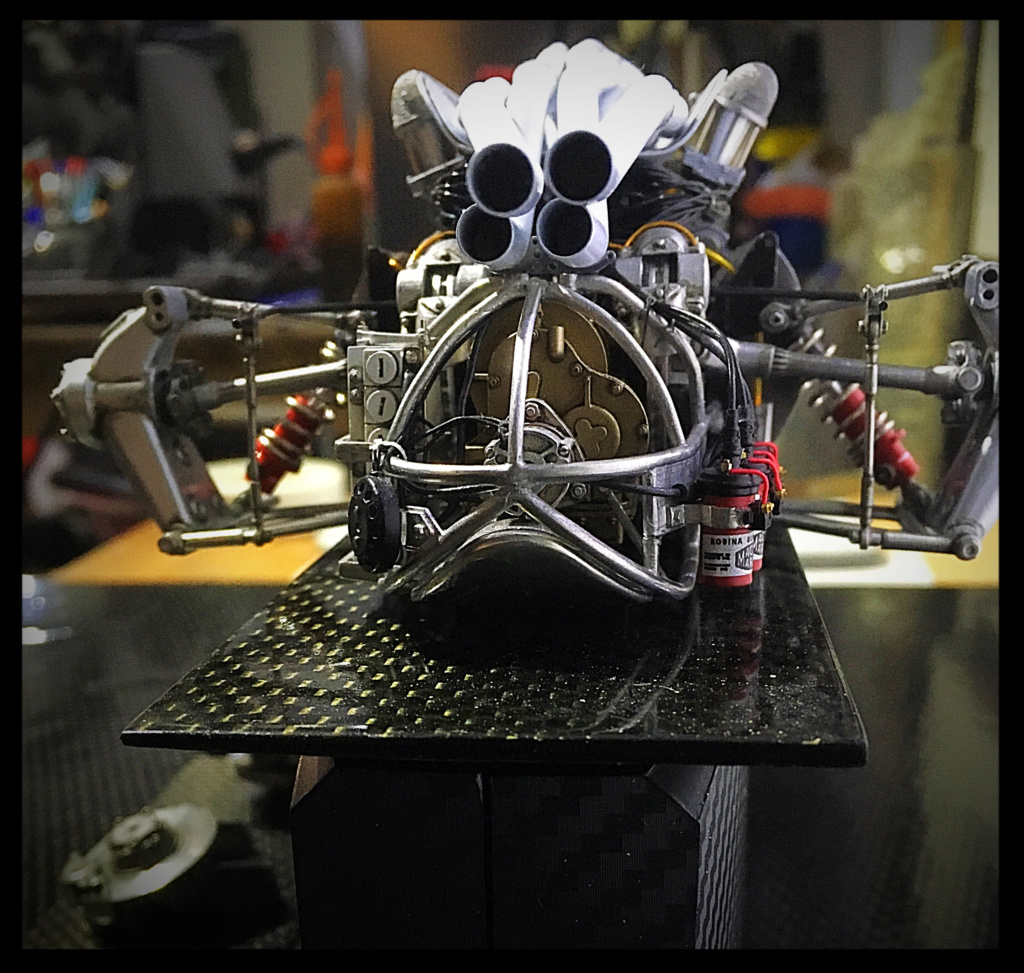
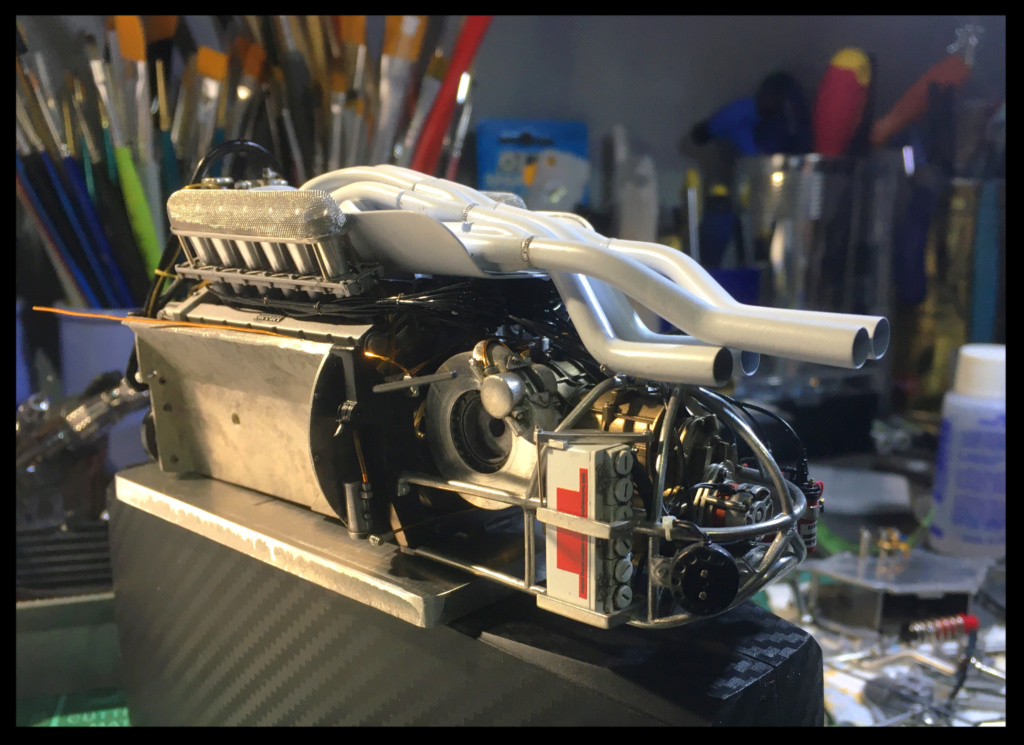
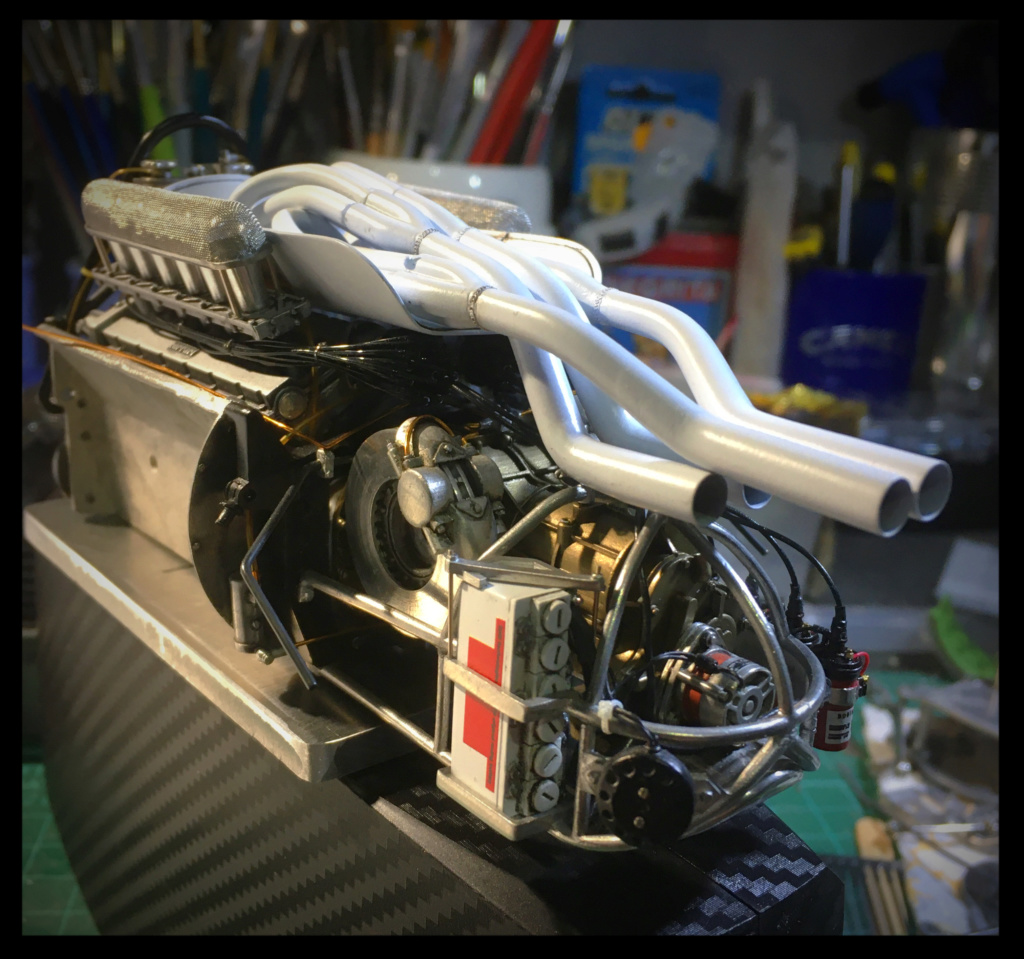
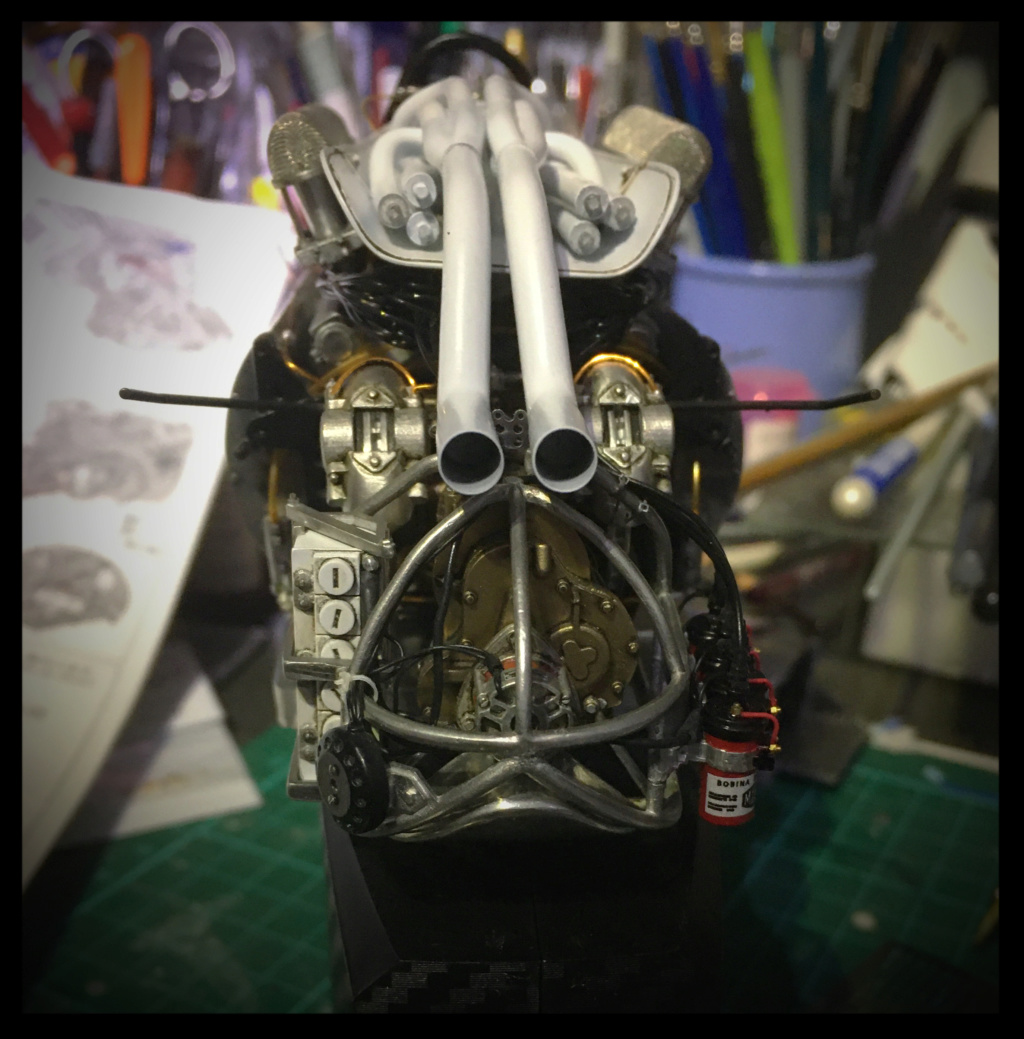
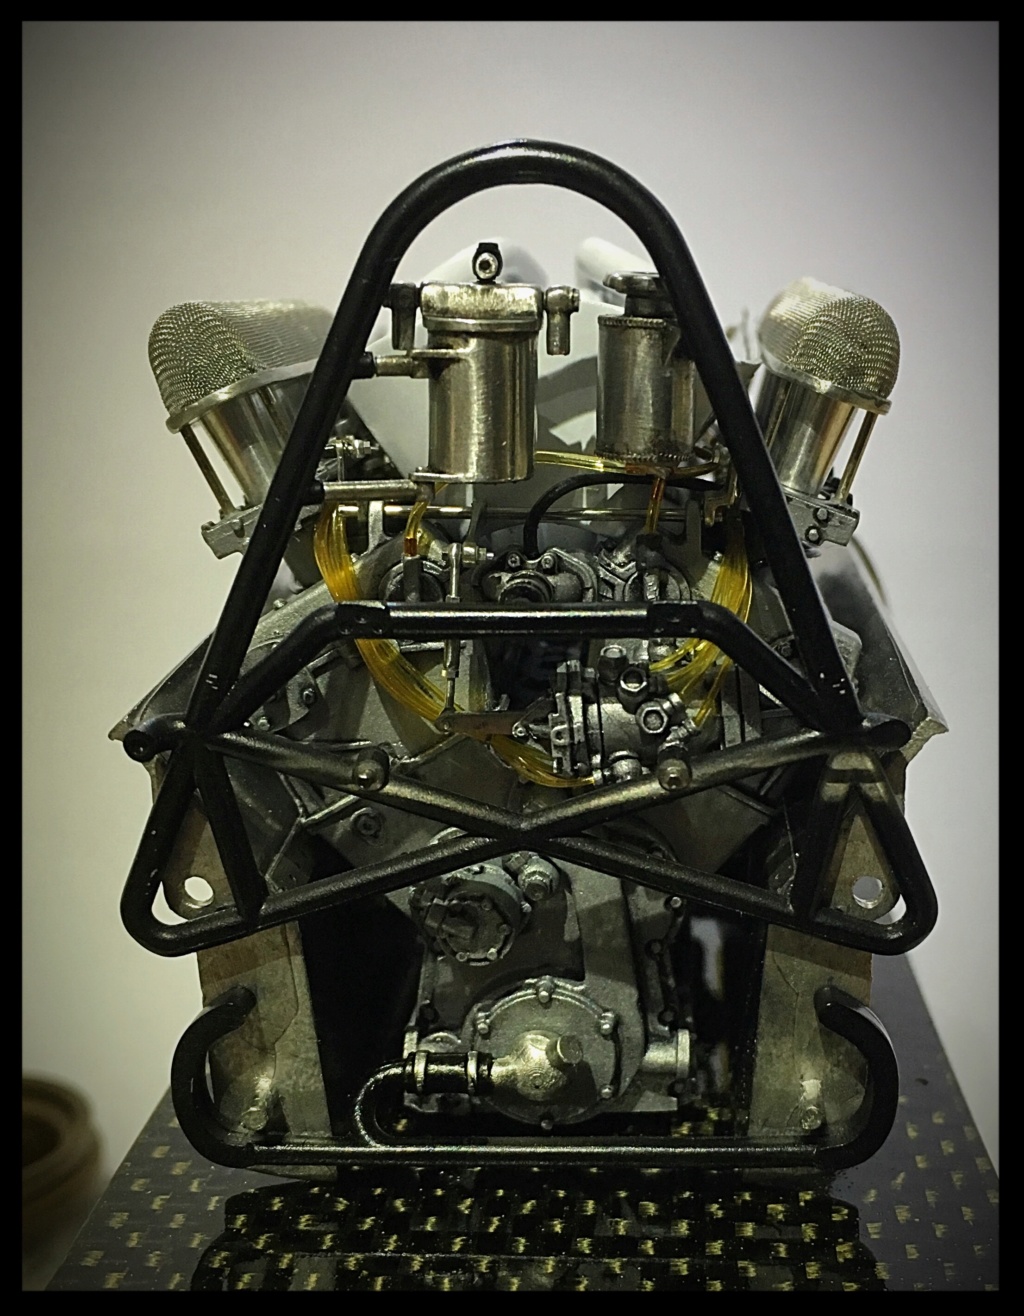
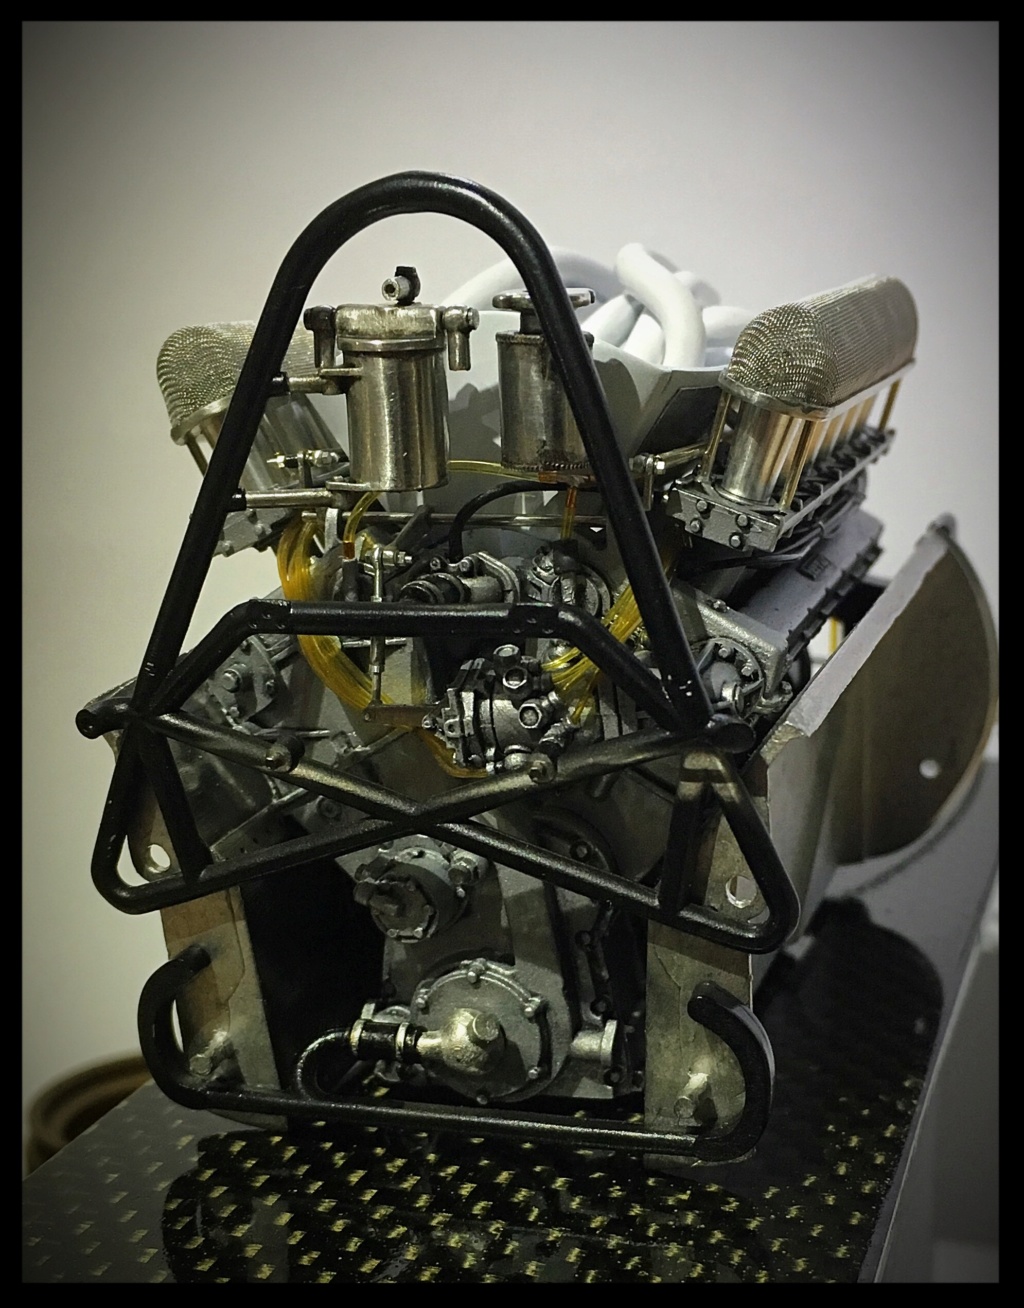
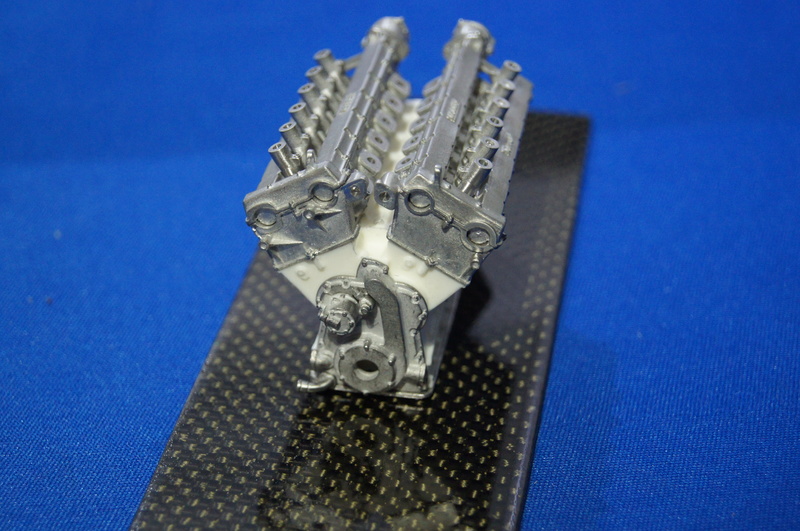
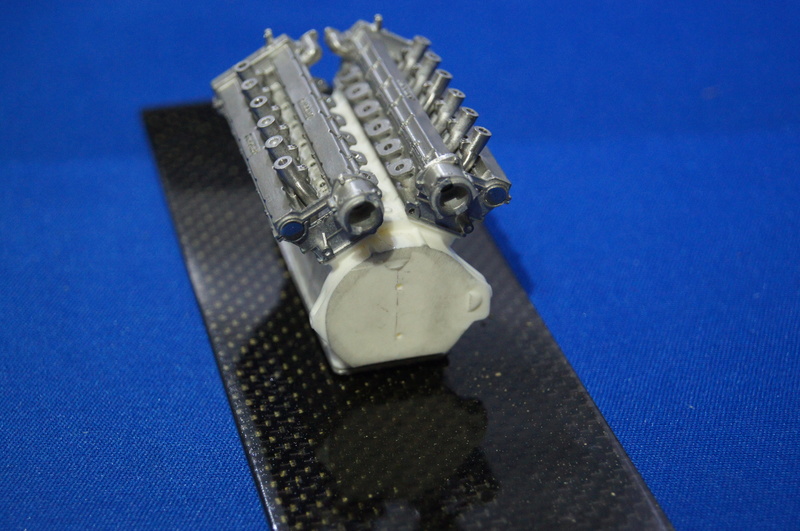
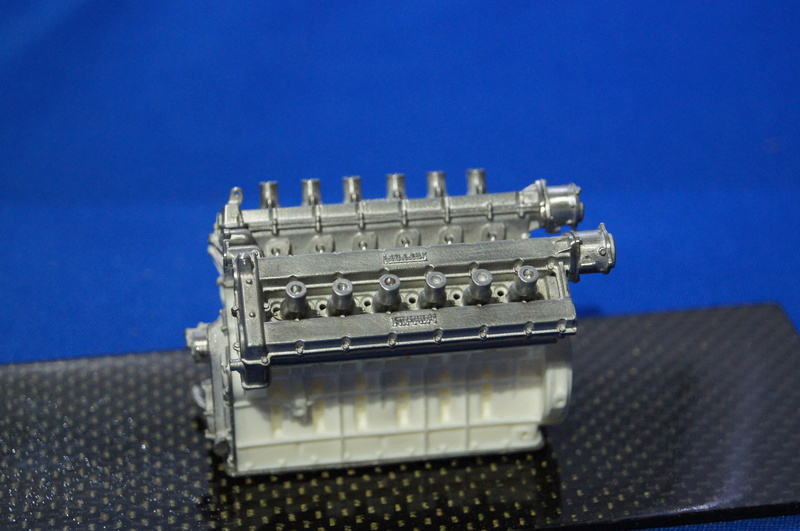
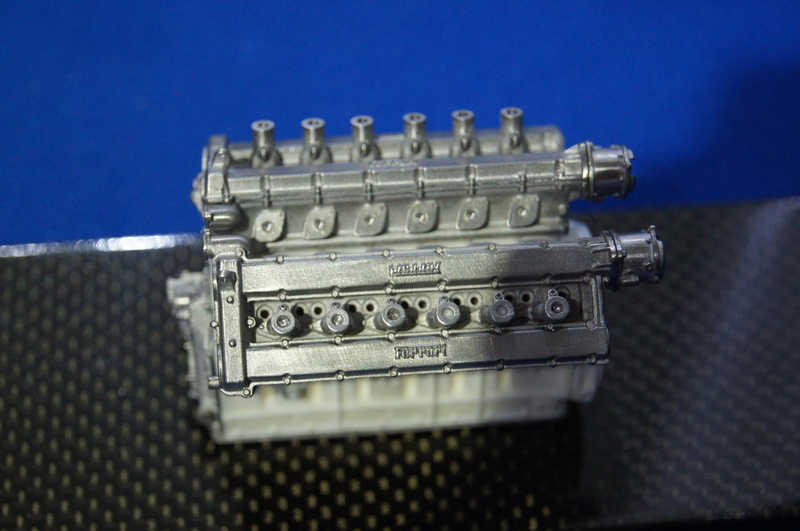
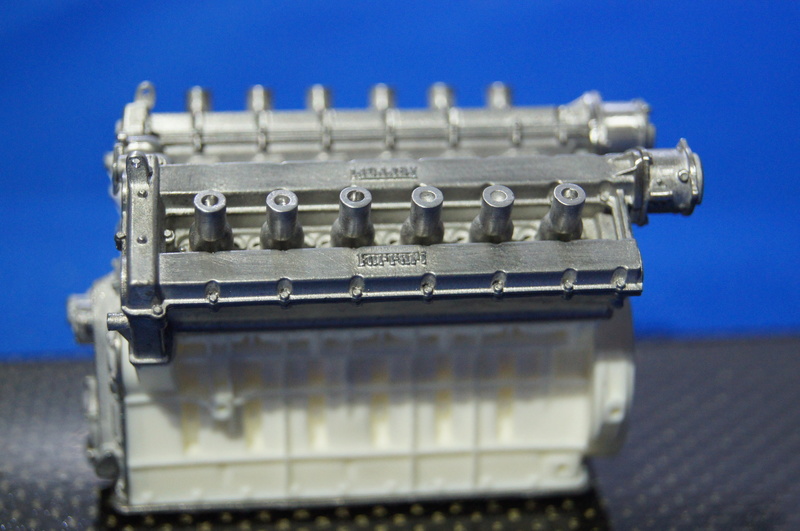
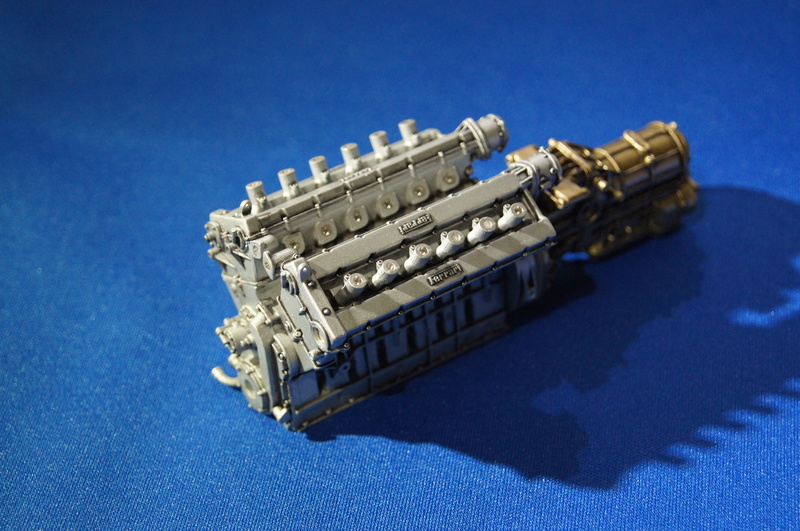
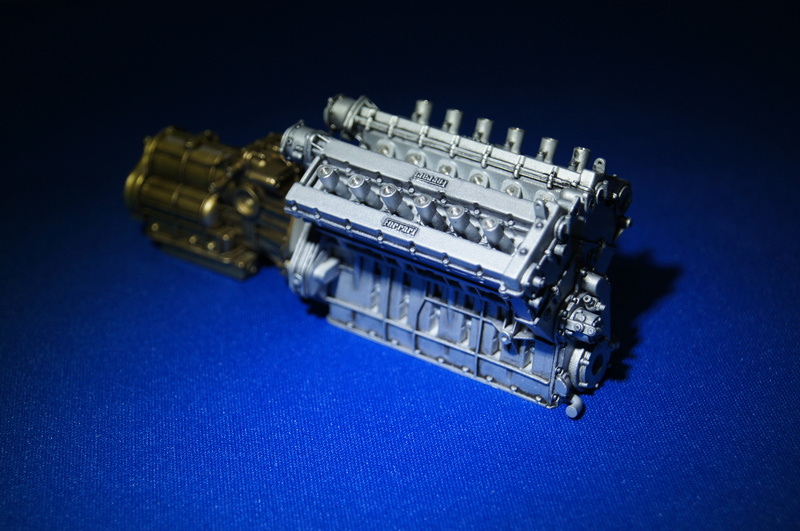
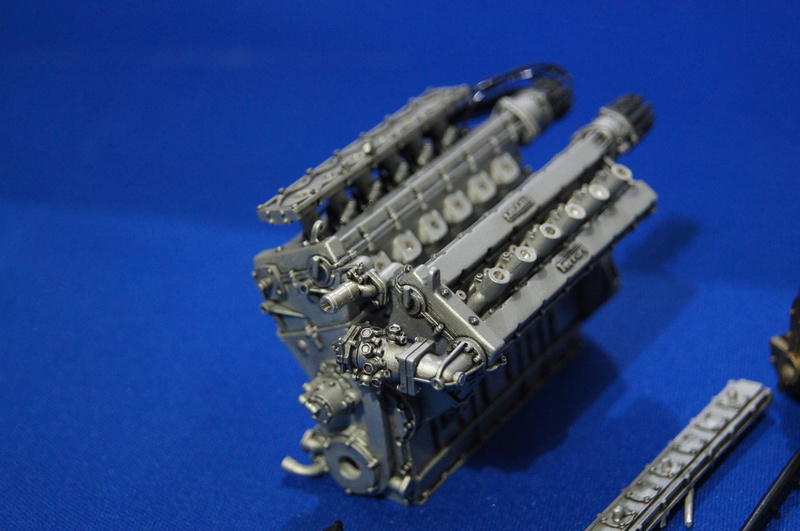
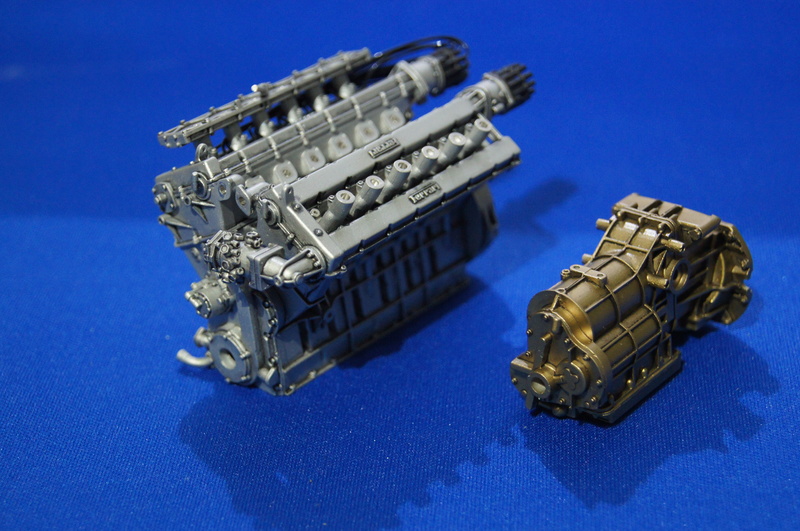
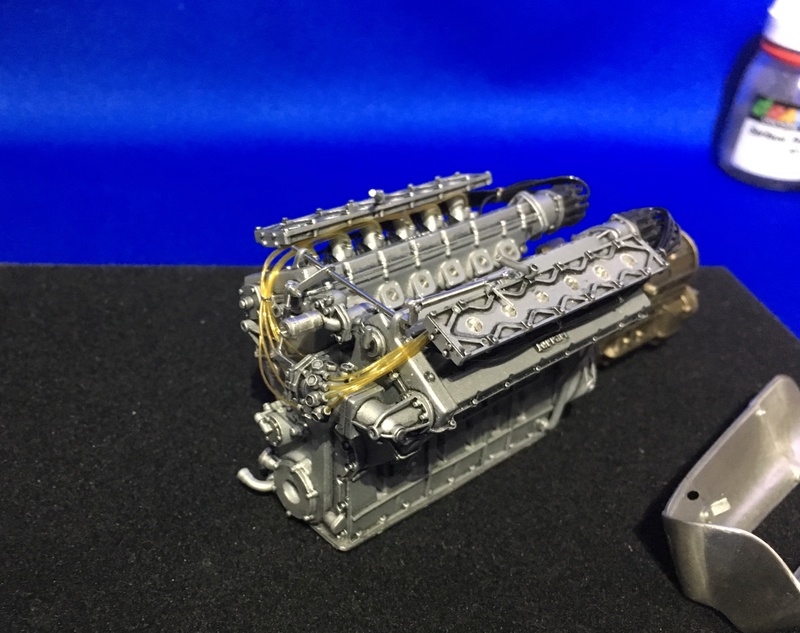
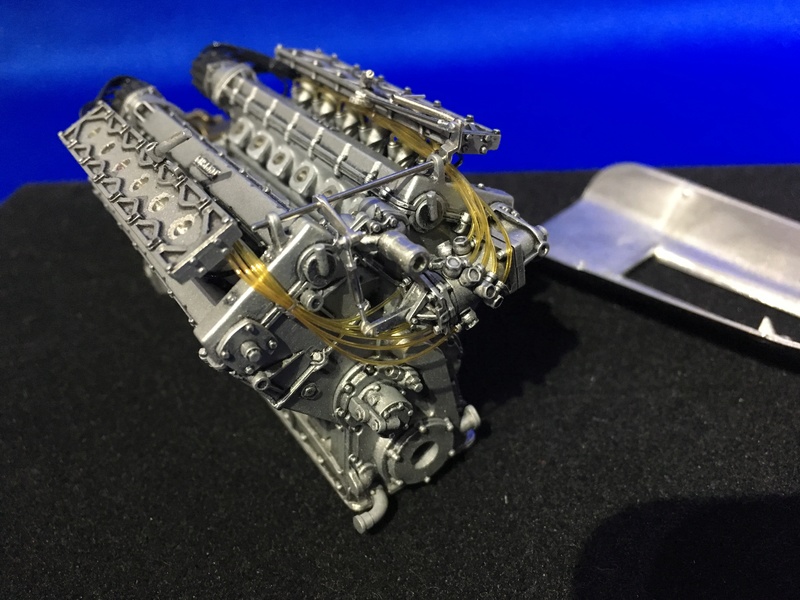
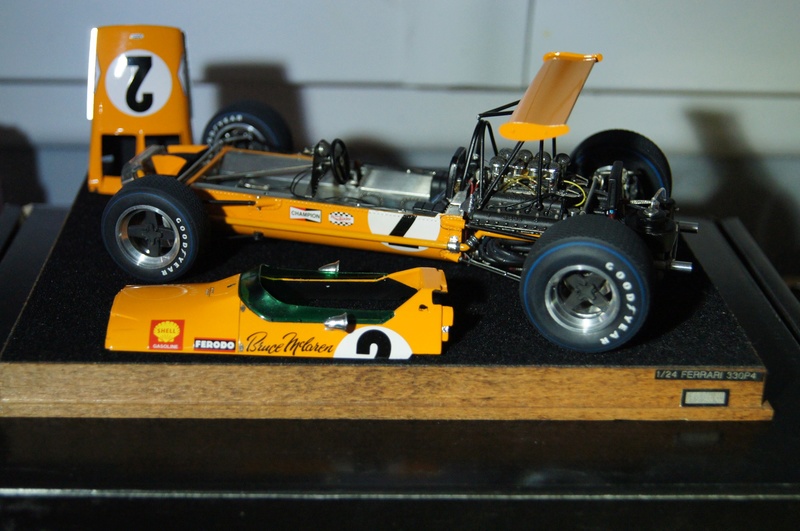
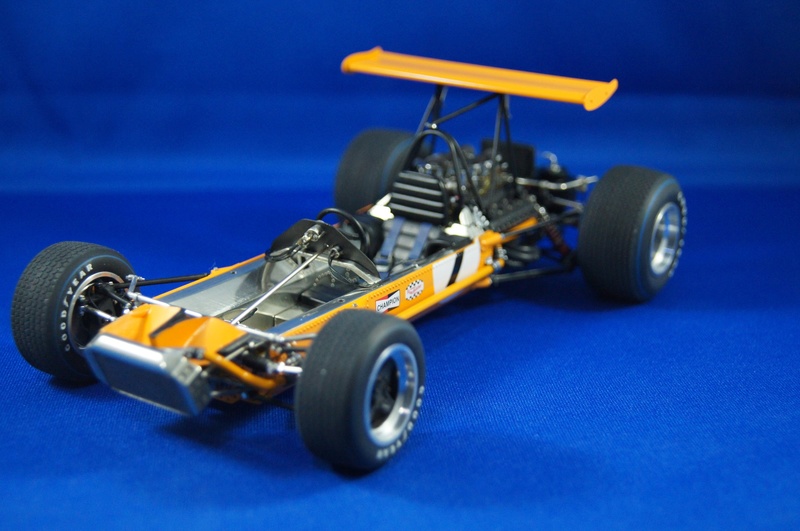
A new Formula 1, from 1967 (Great year!)
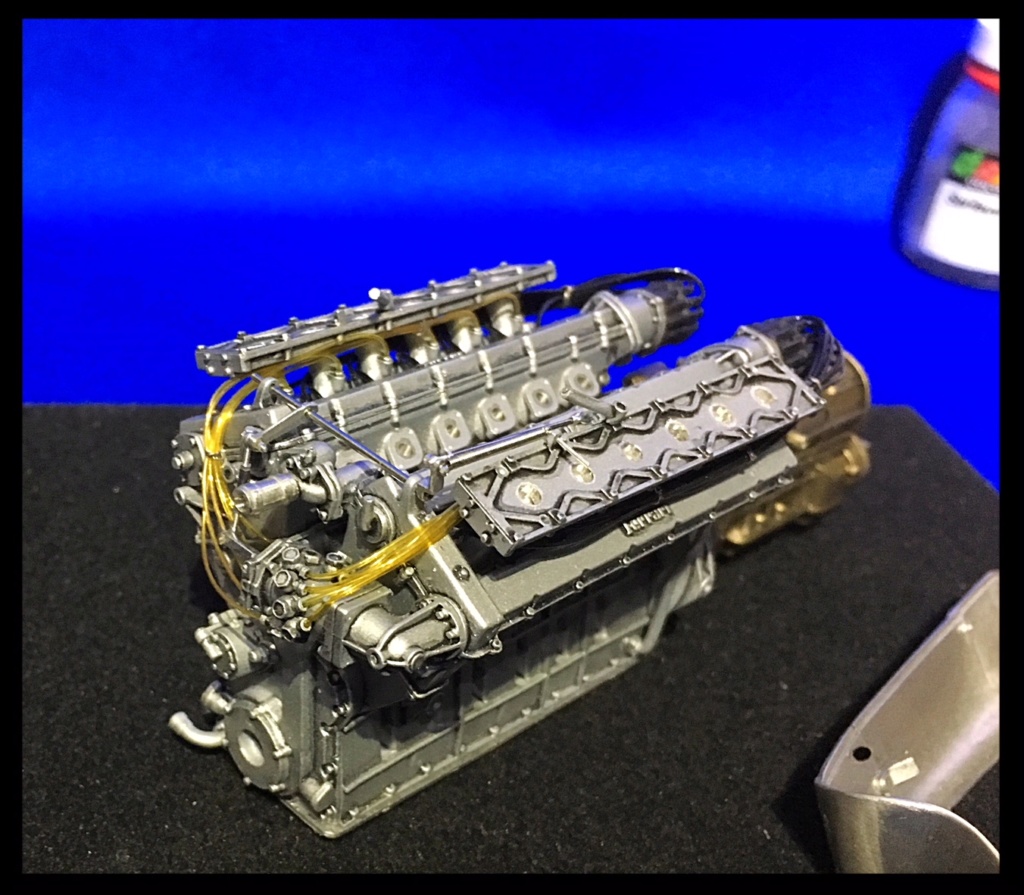
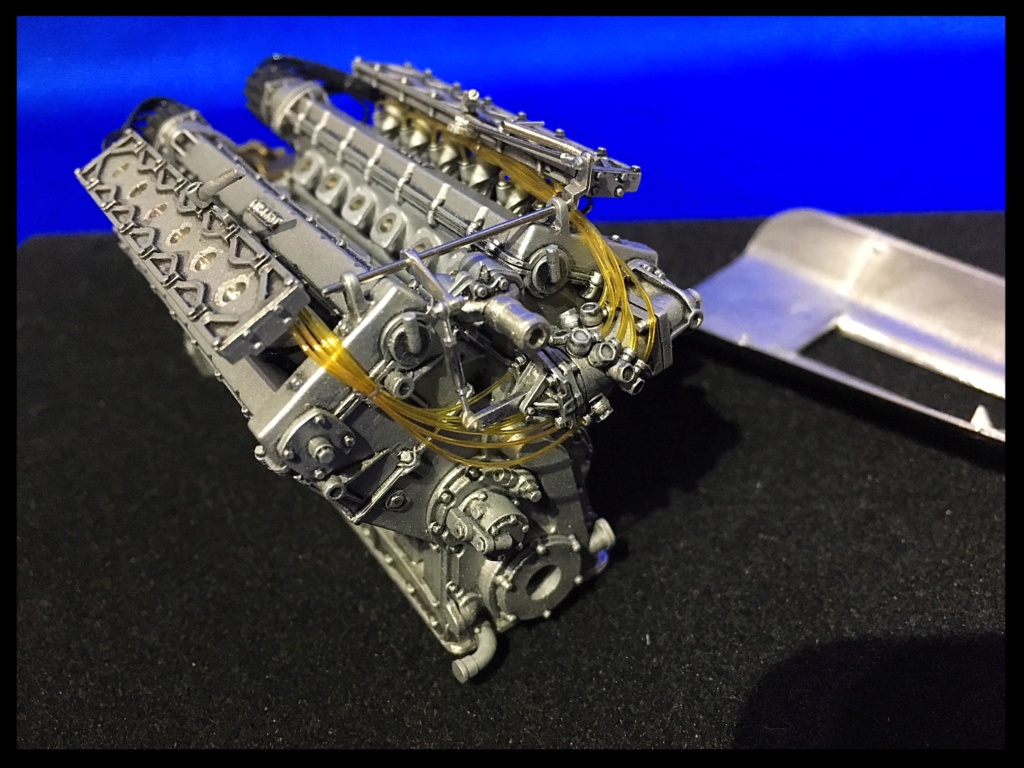
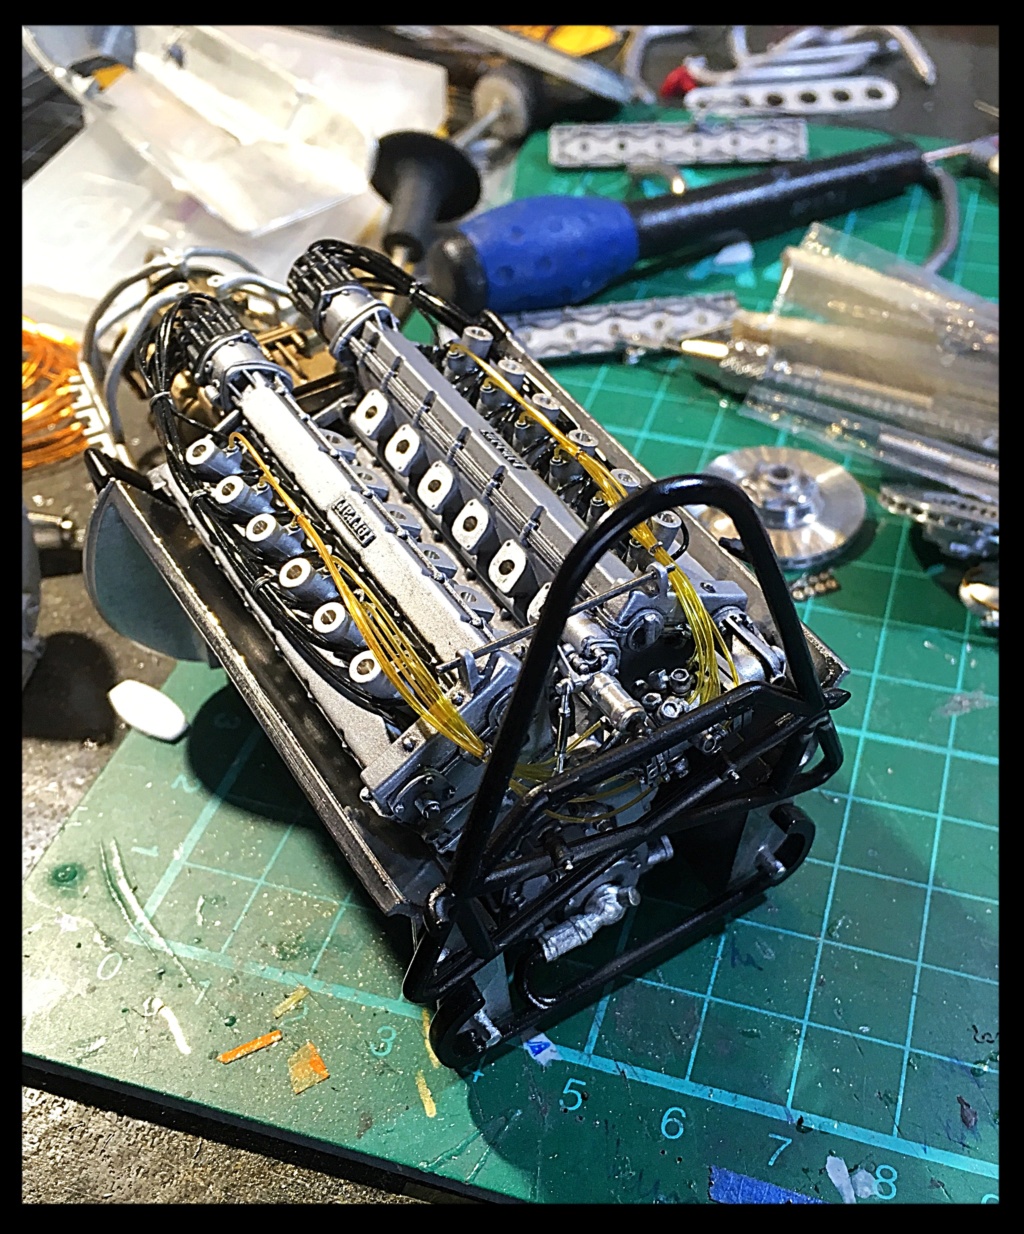
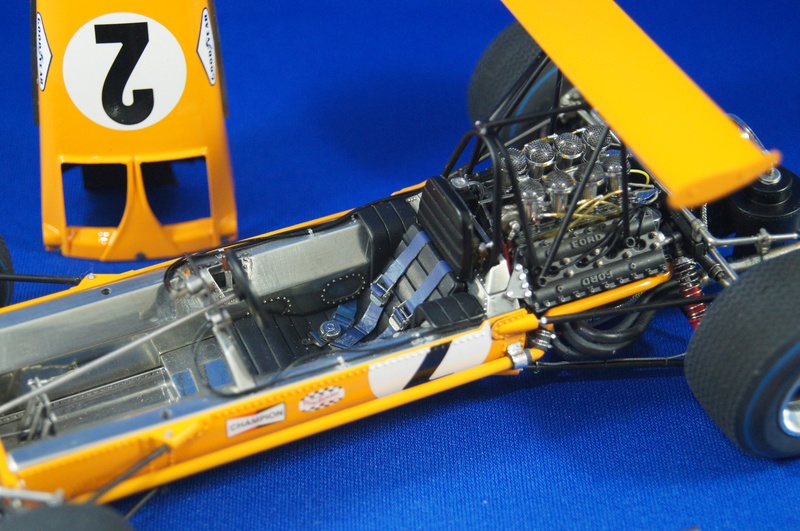
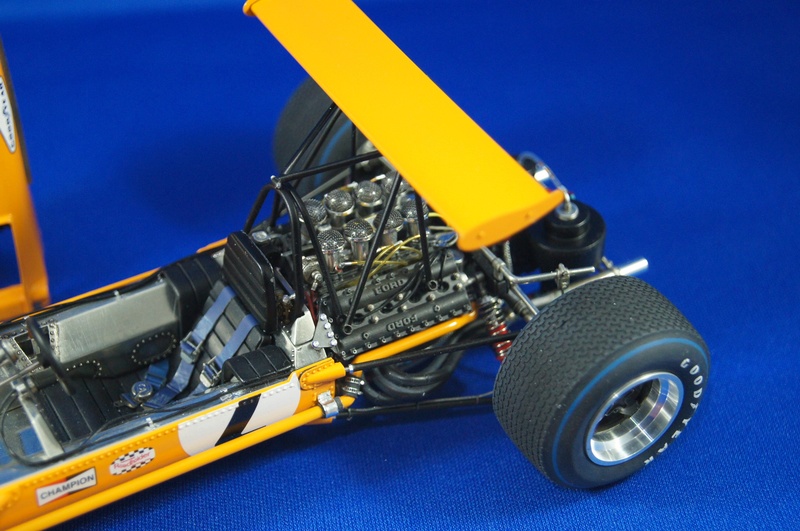
Here are few pics of the engine.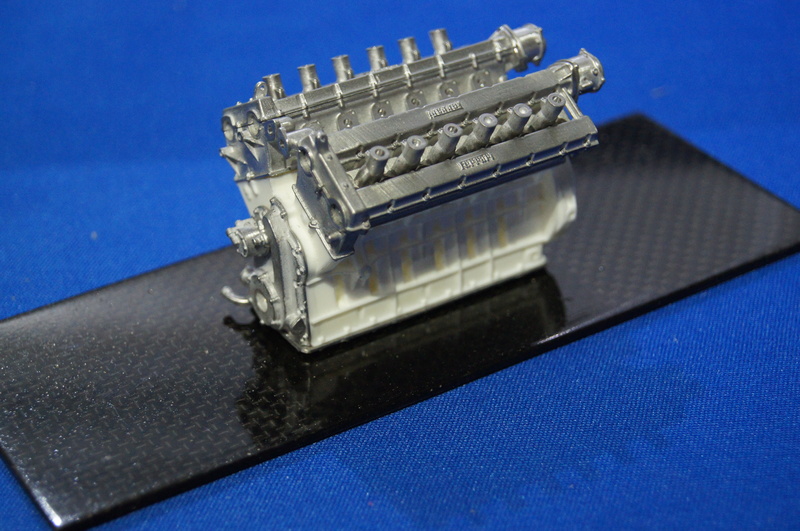
 [br
[br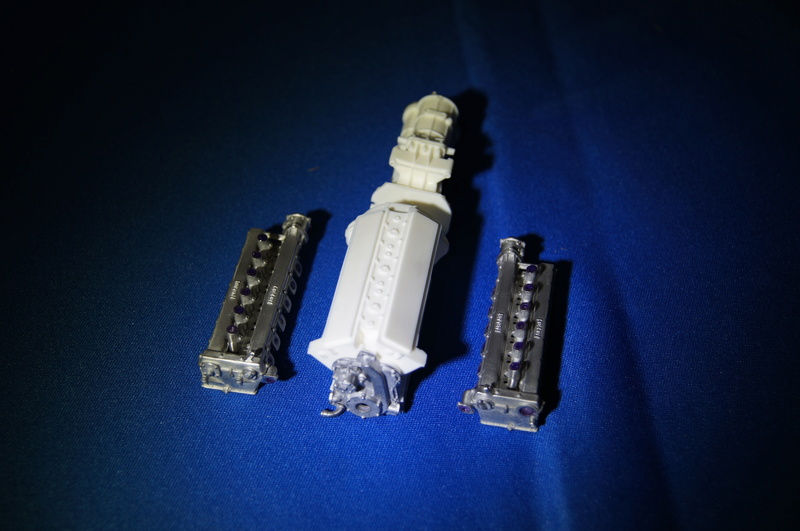


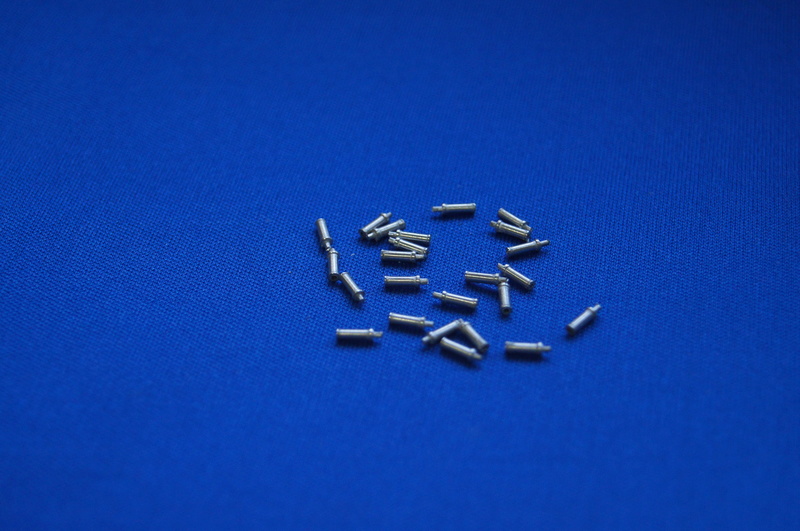

I was not that happy with the kit throttle linkage... So I decided to build new ones with machined parts from RBMotion.

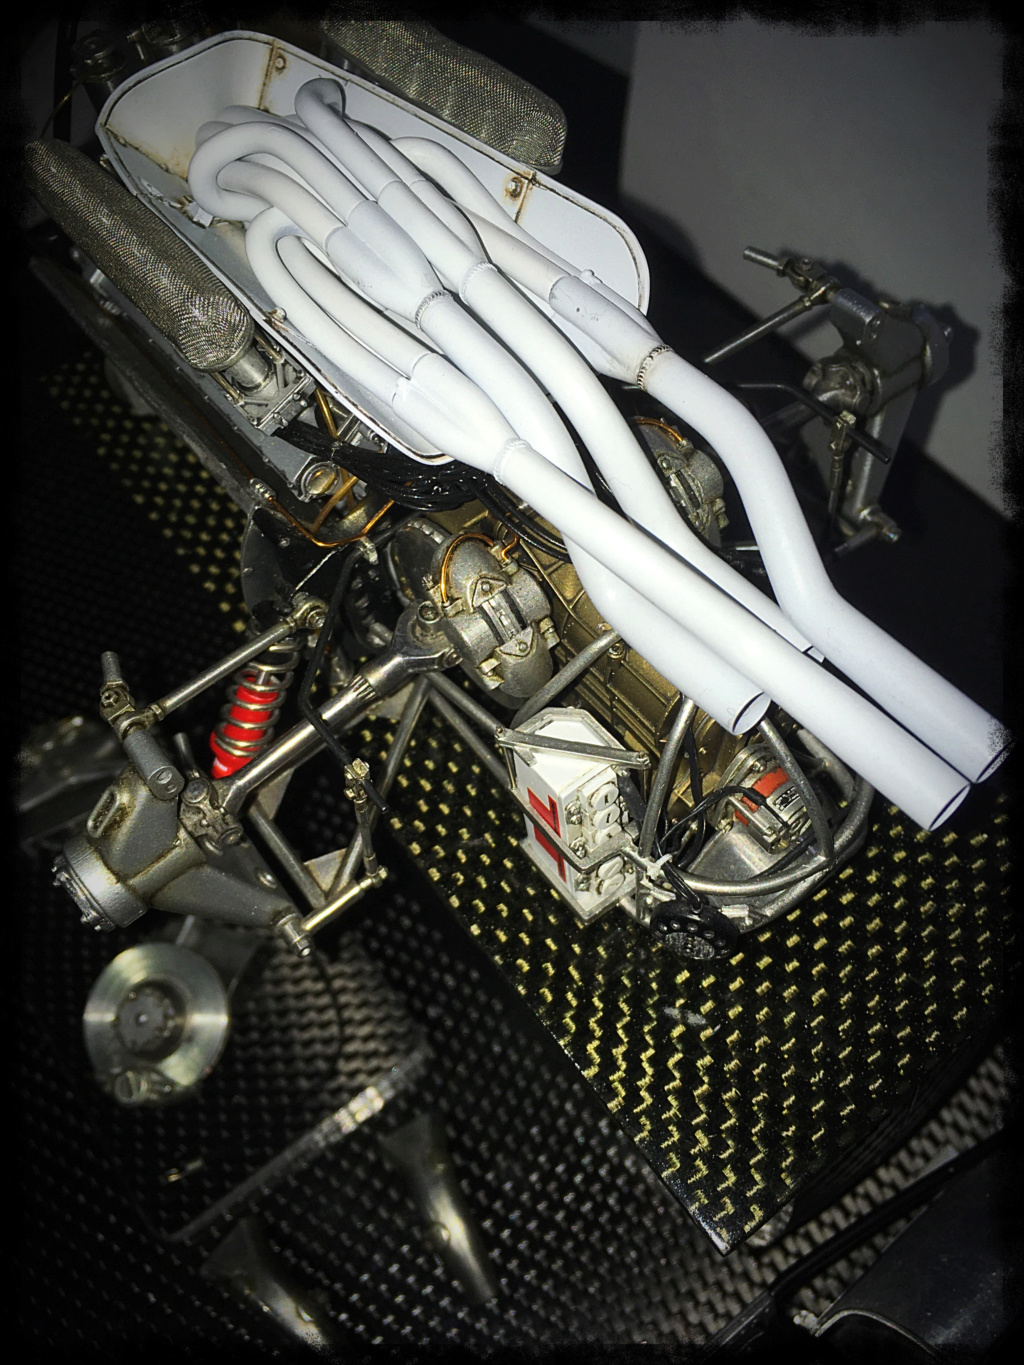
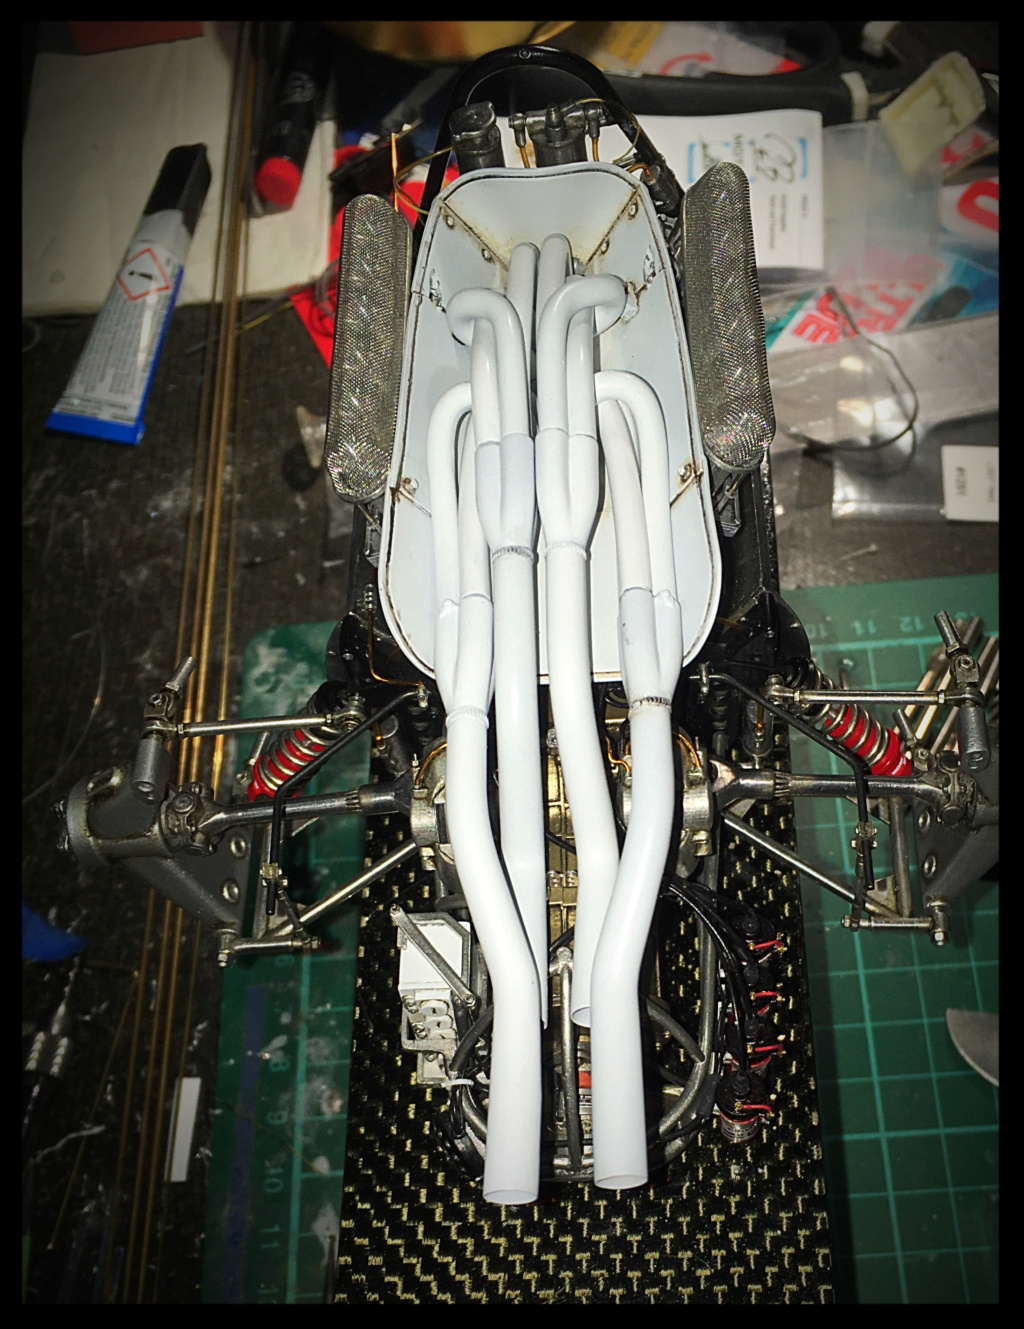
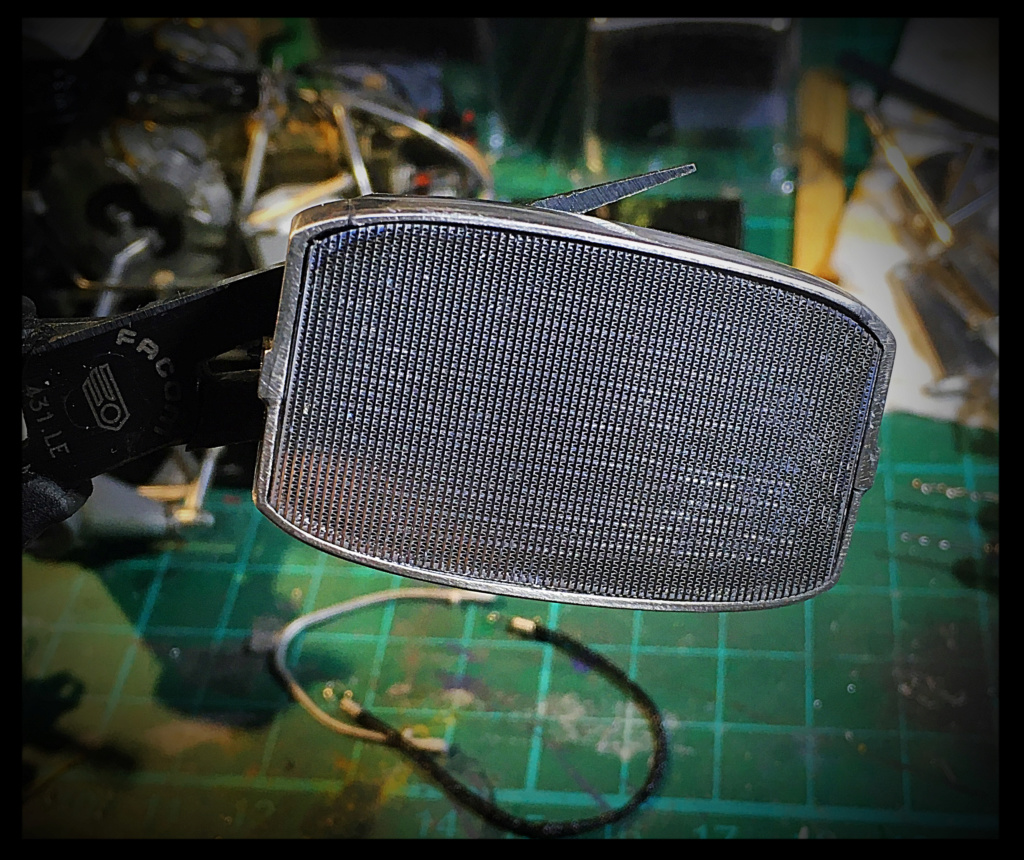
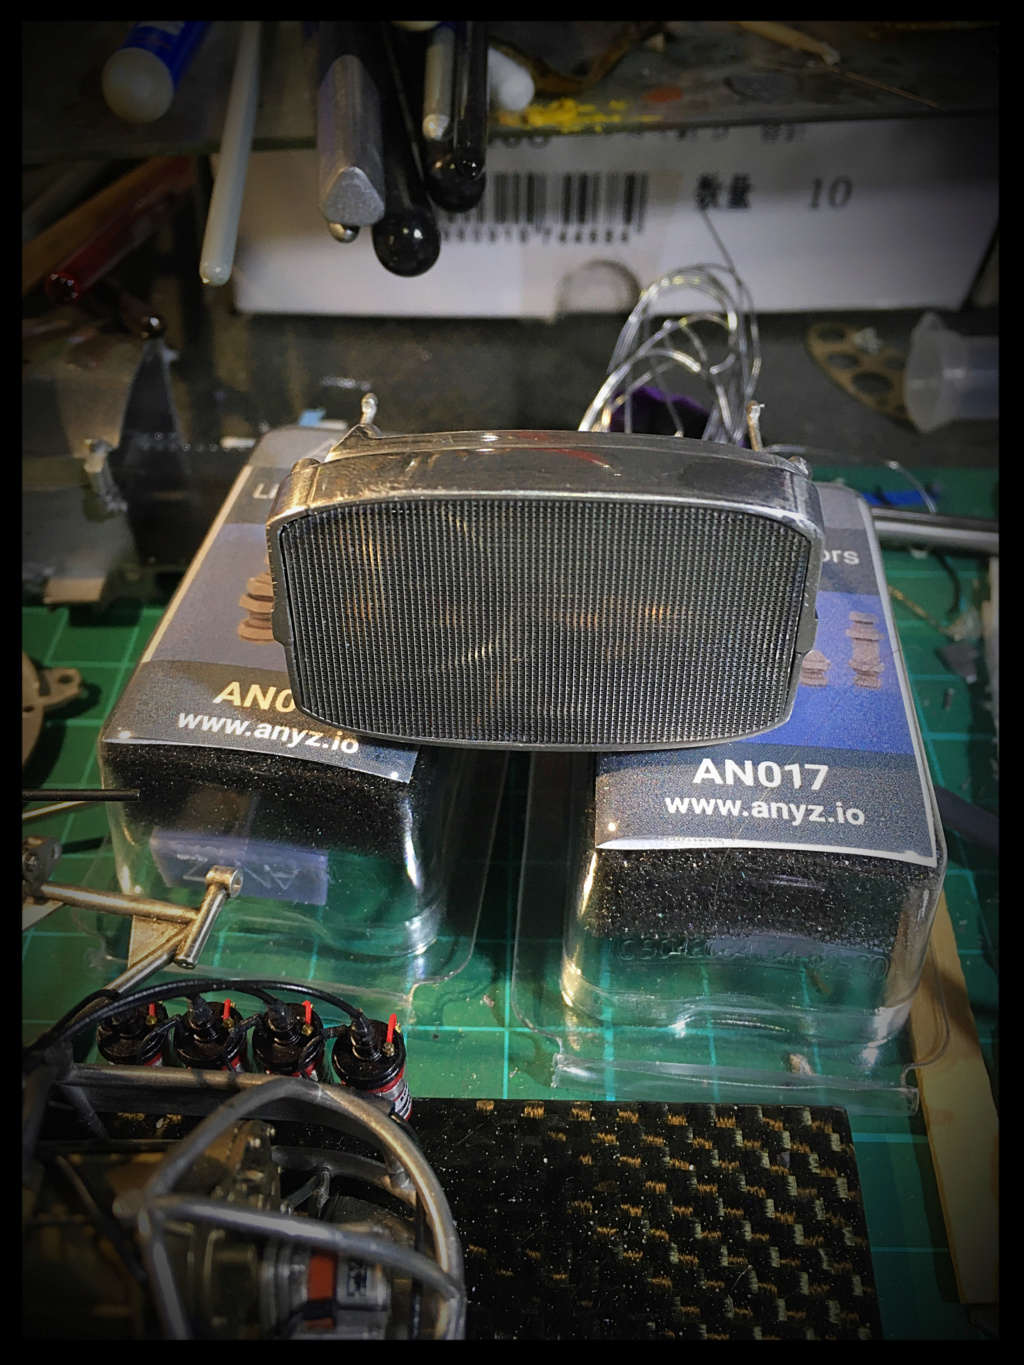
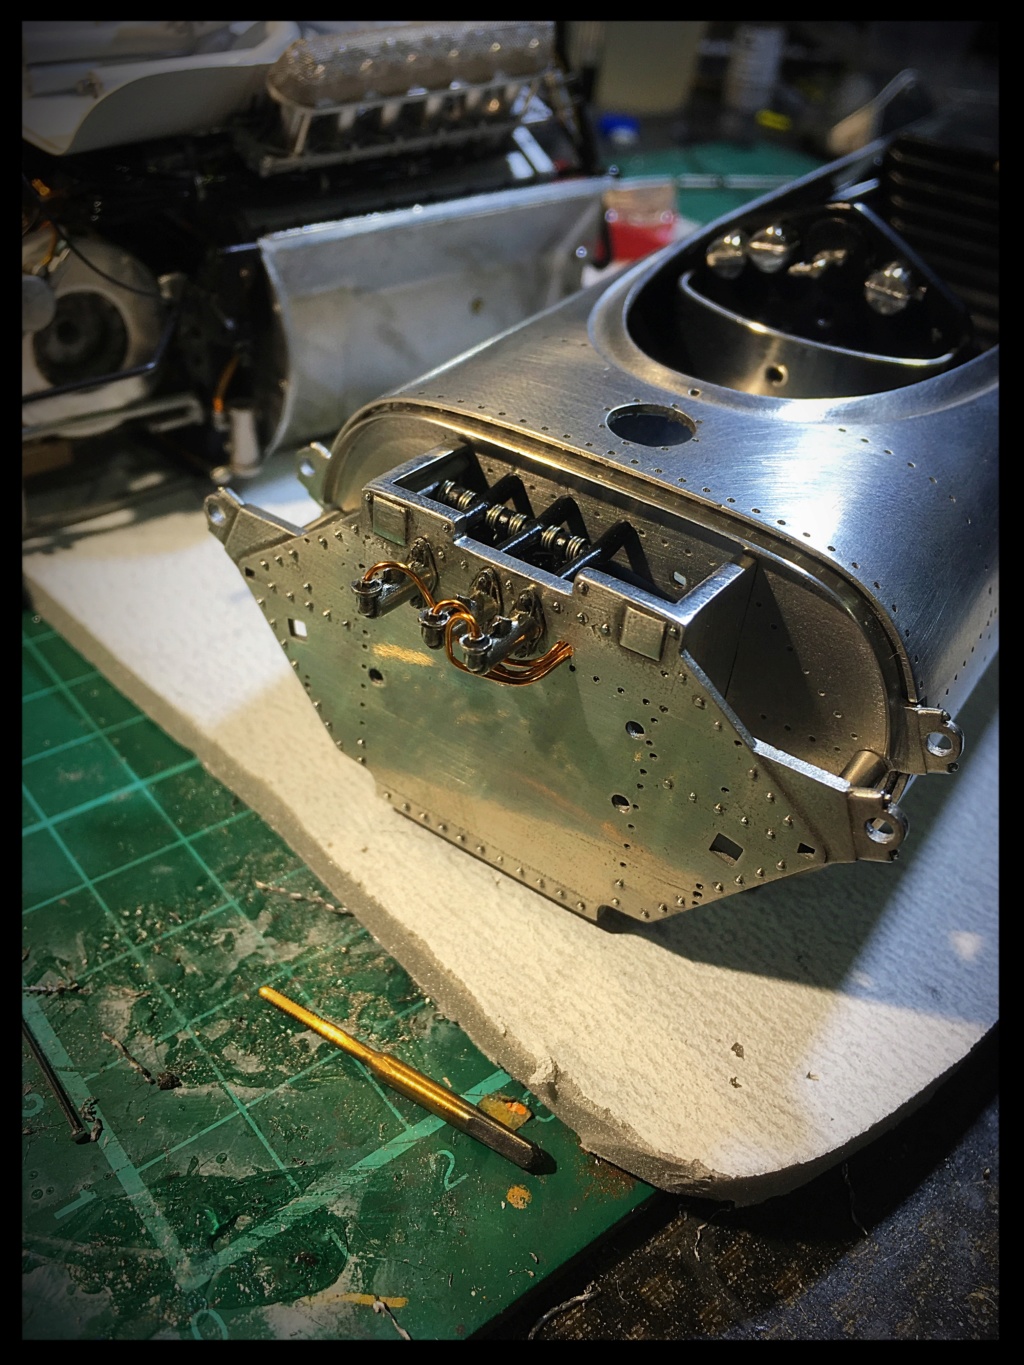
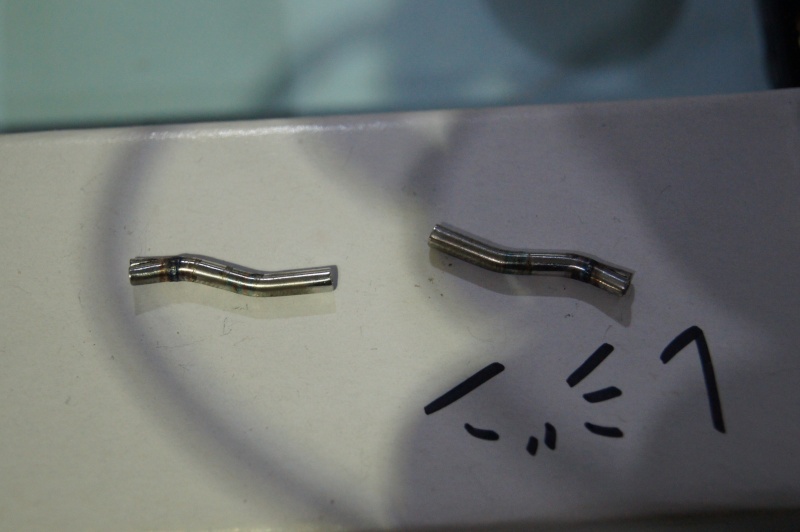
It was also necessary to show a bit of interest regarding the exhaust and prepare the white metal parts of the Spaghetti: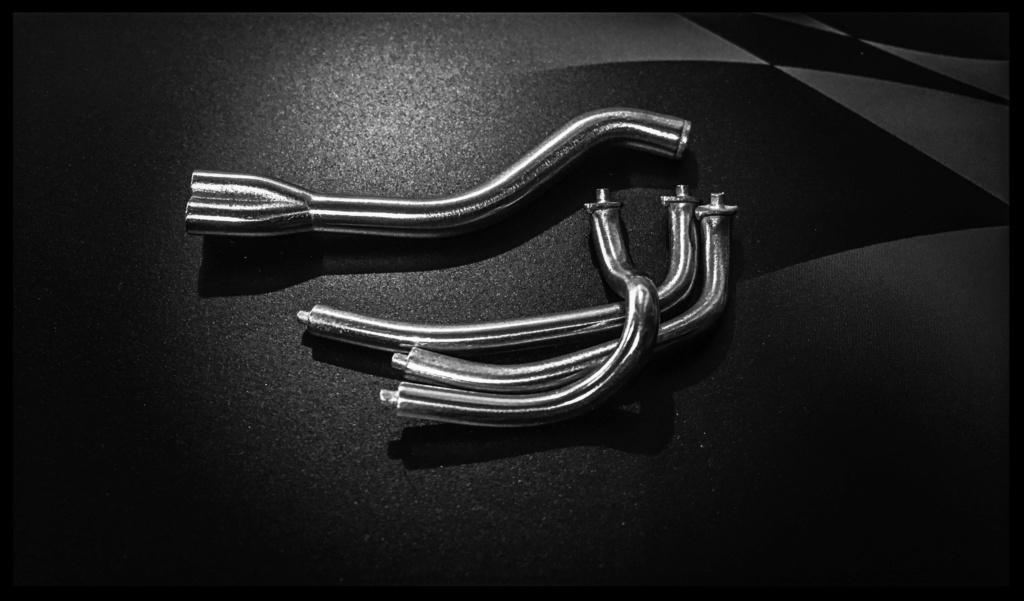
To prime and paint them:
Other parts are just treated to be left with a natural metal finish: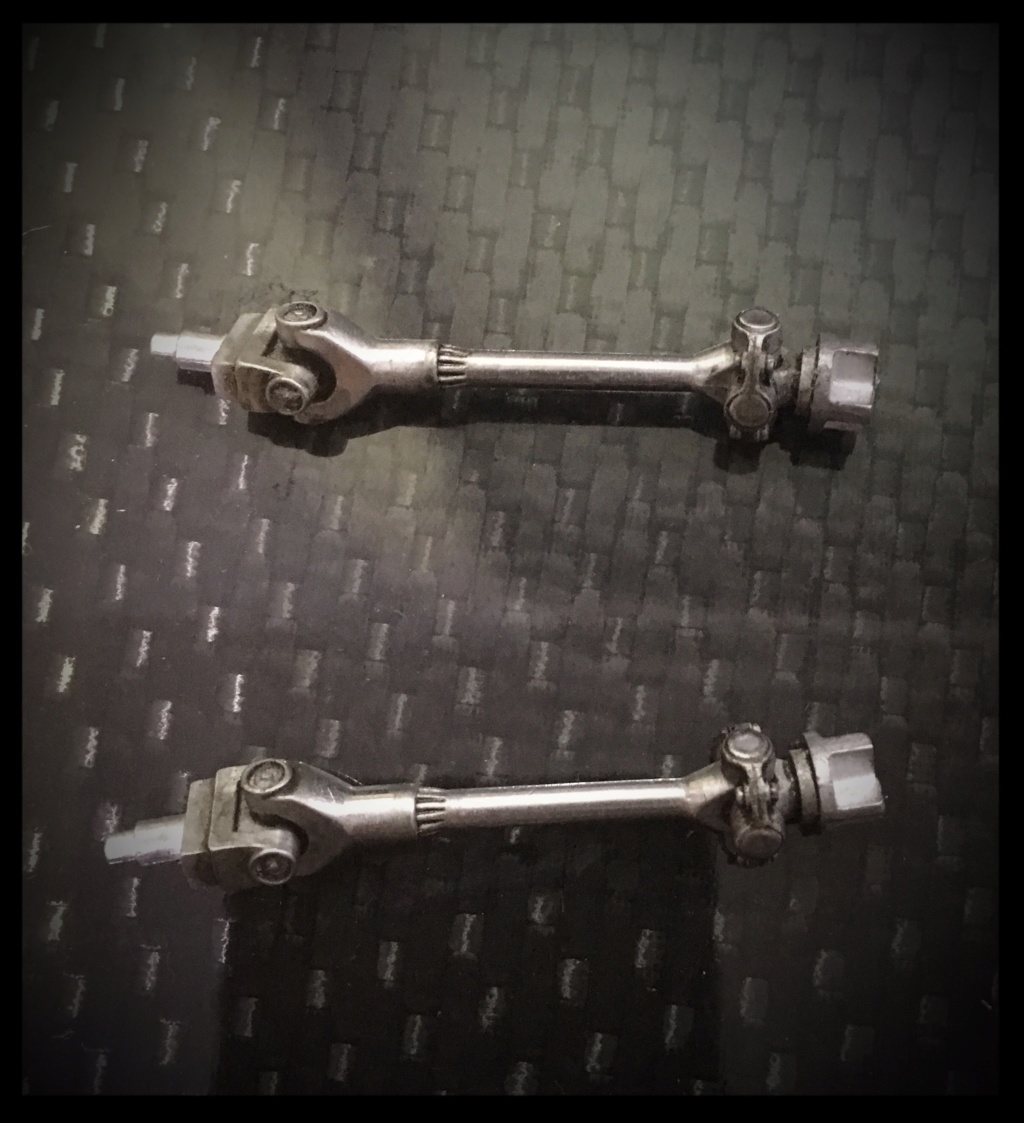

I prefer to solder them instead of gluing for evident reasons: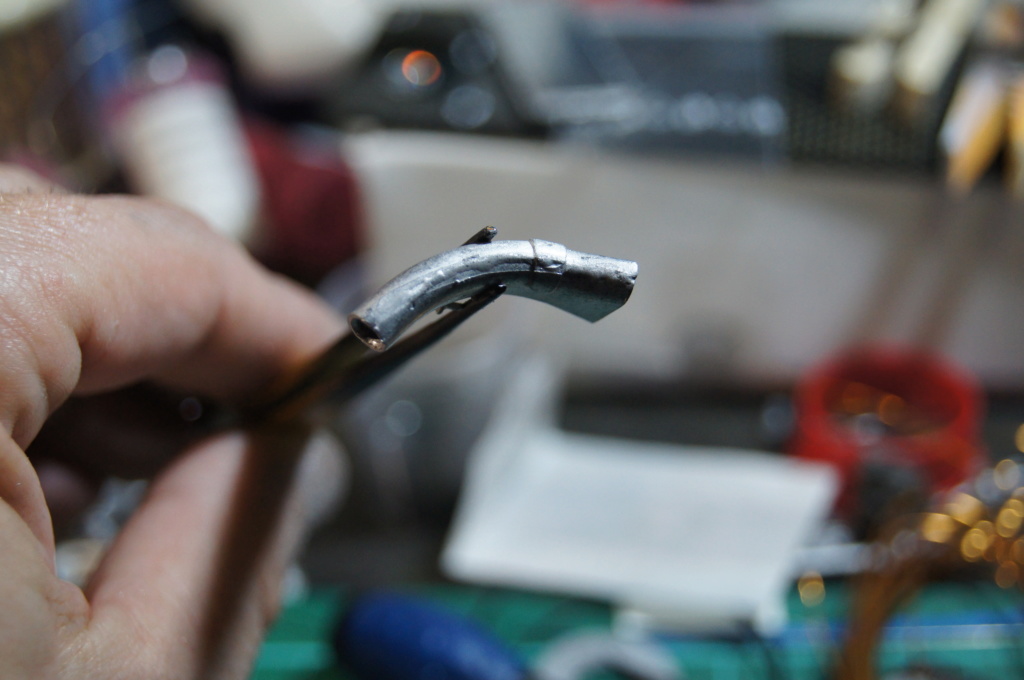
I played a bit with the iron in order to replicate weld seams :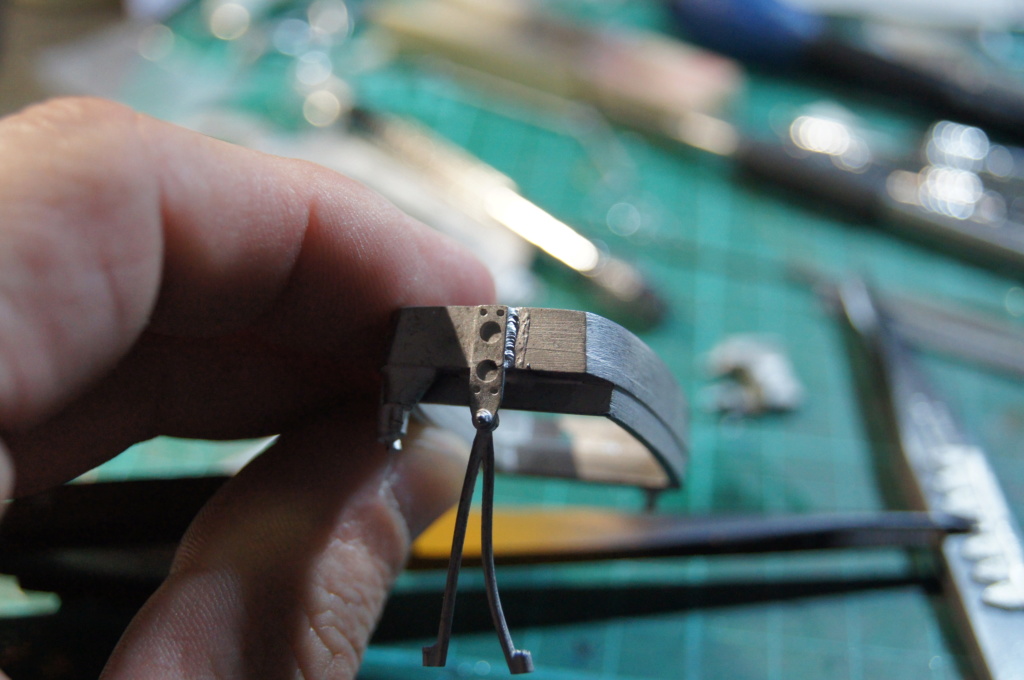


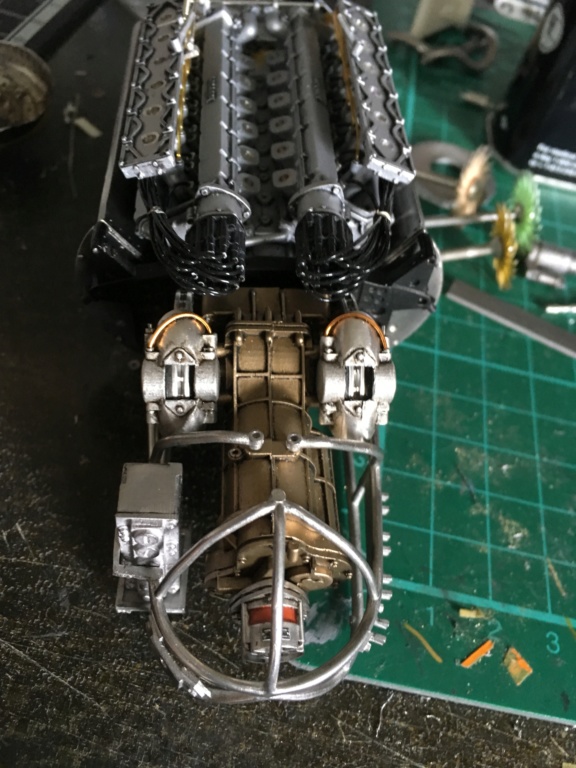
The engine connected to the gear box and vice versa, and install for test fit in its compartment: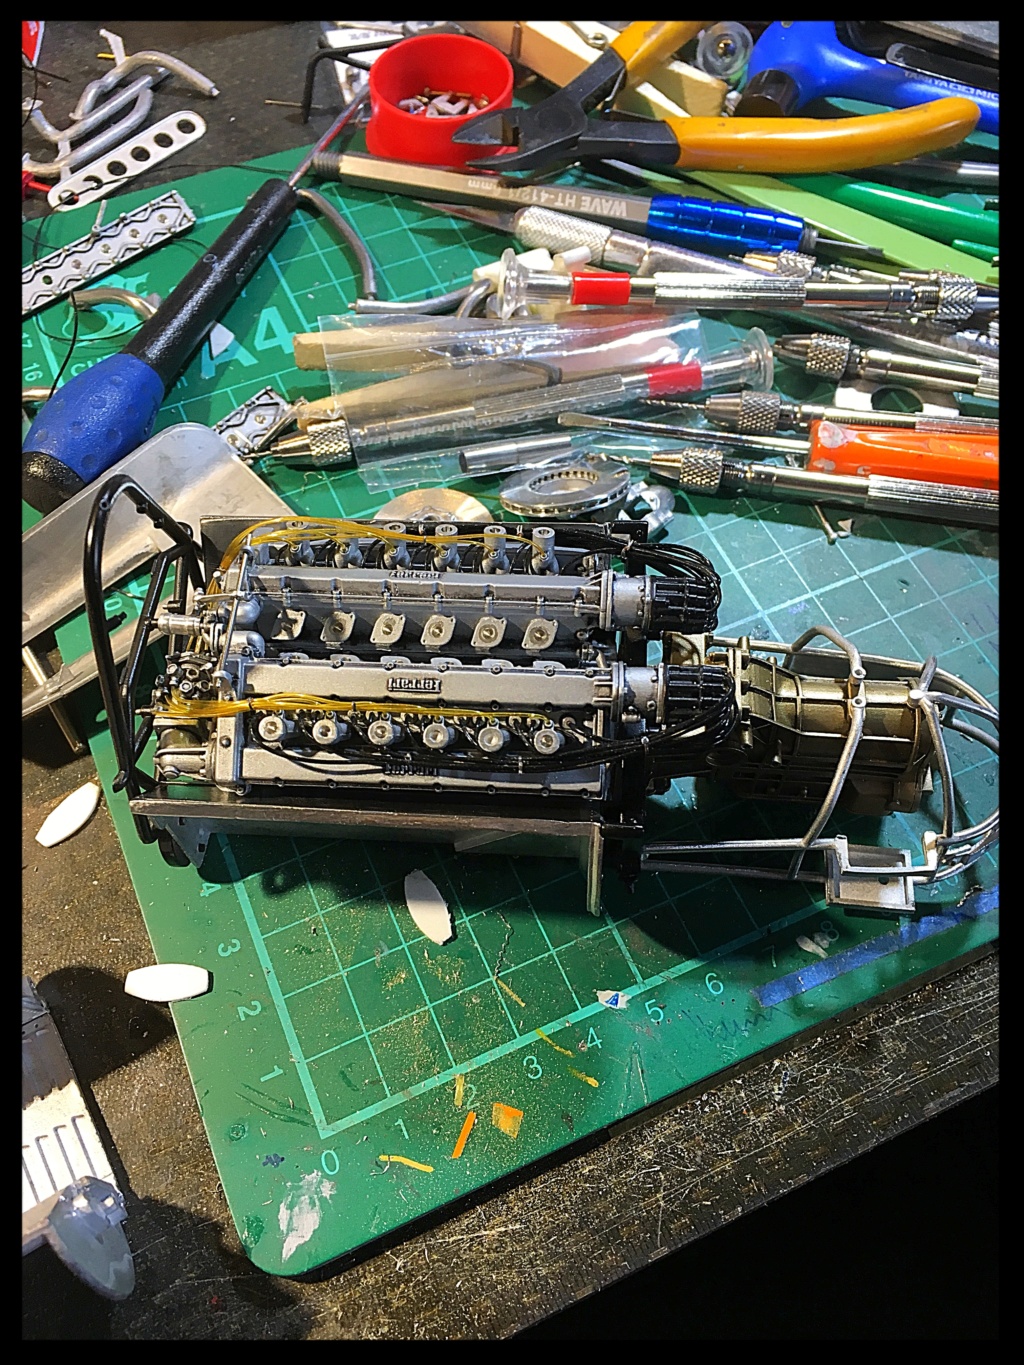
Next to the small 1/20 sister :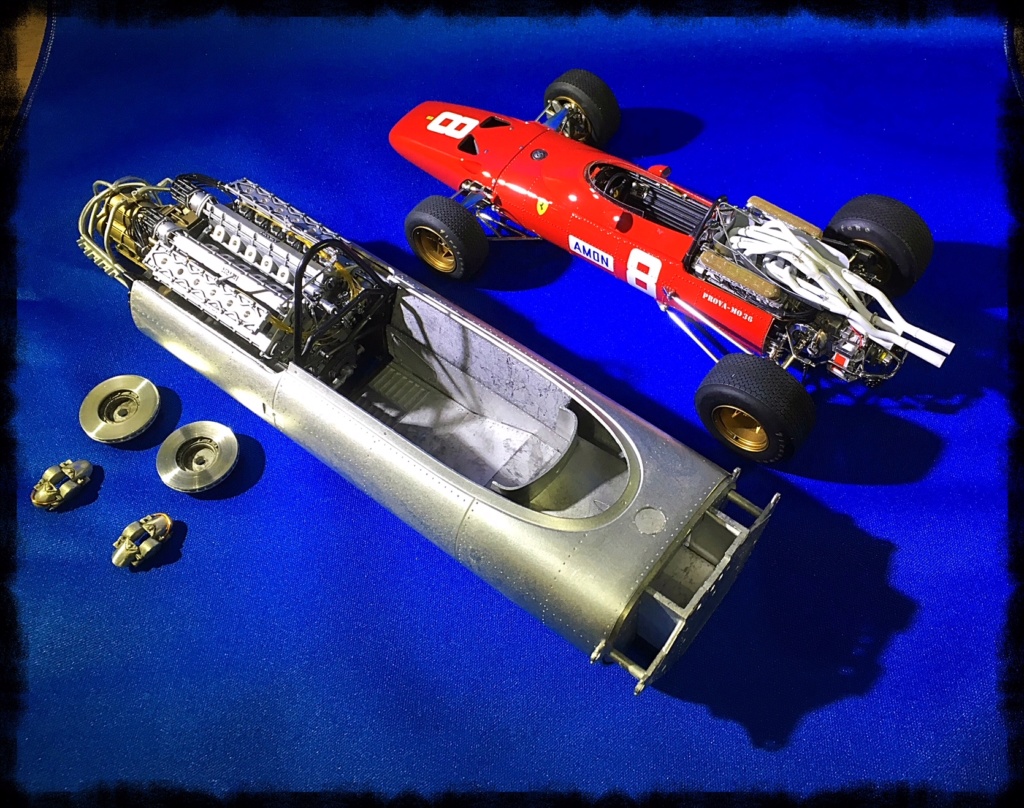
Rear brake discs before assembly on the gear box: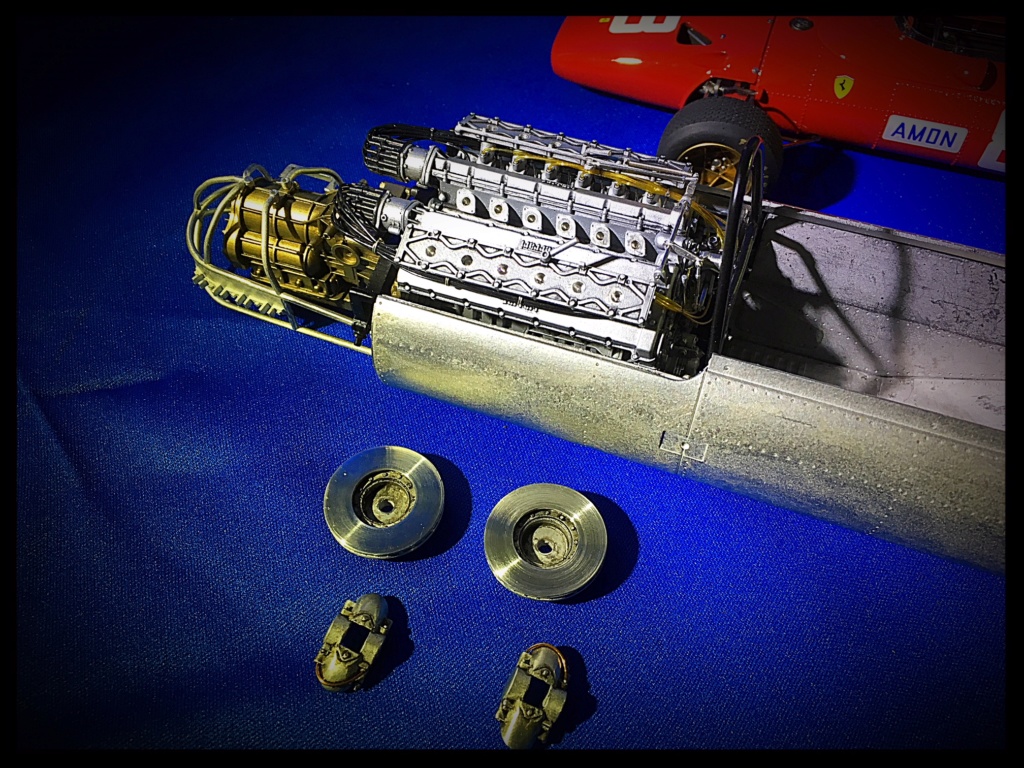
... and few accessories: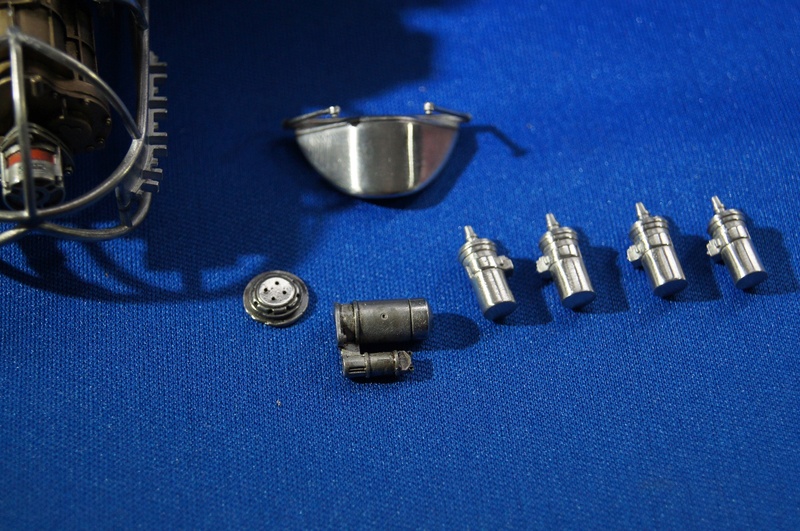
Modification of the rear hubs in order to adapt machined parts: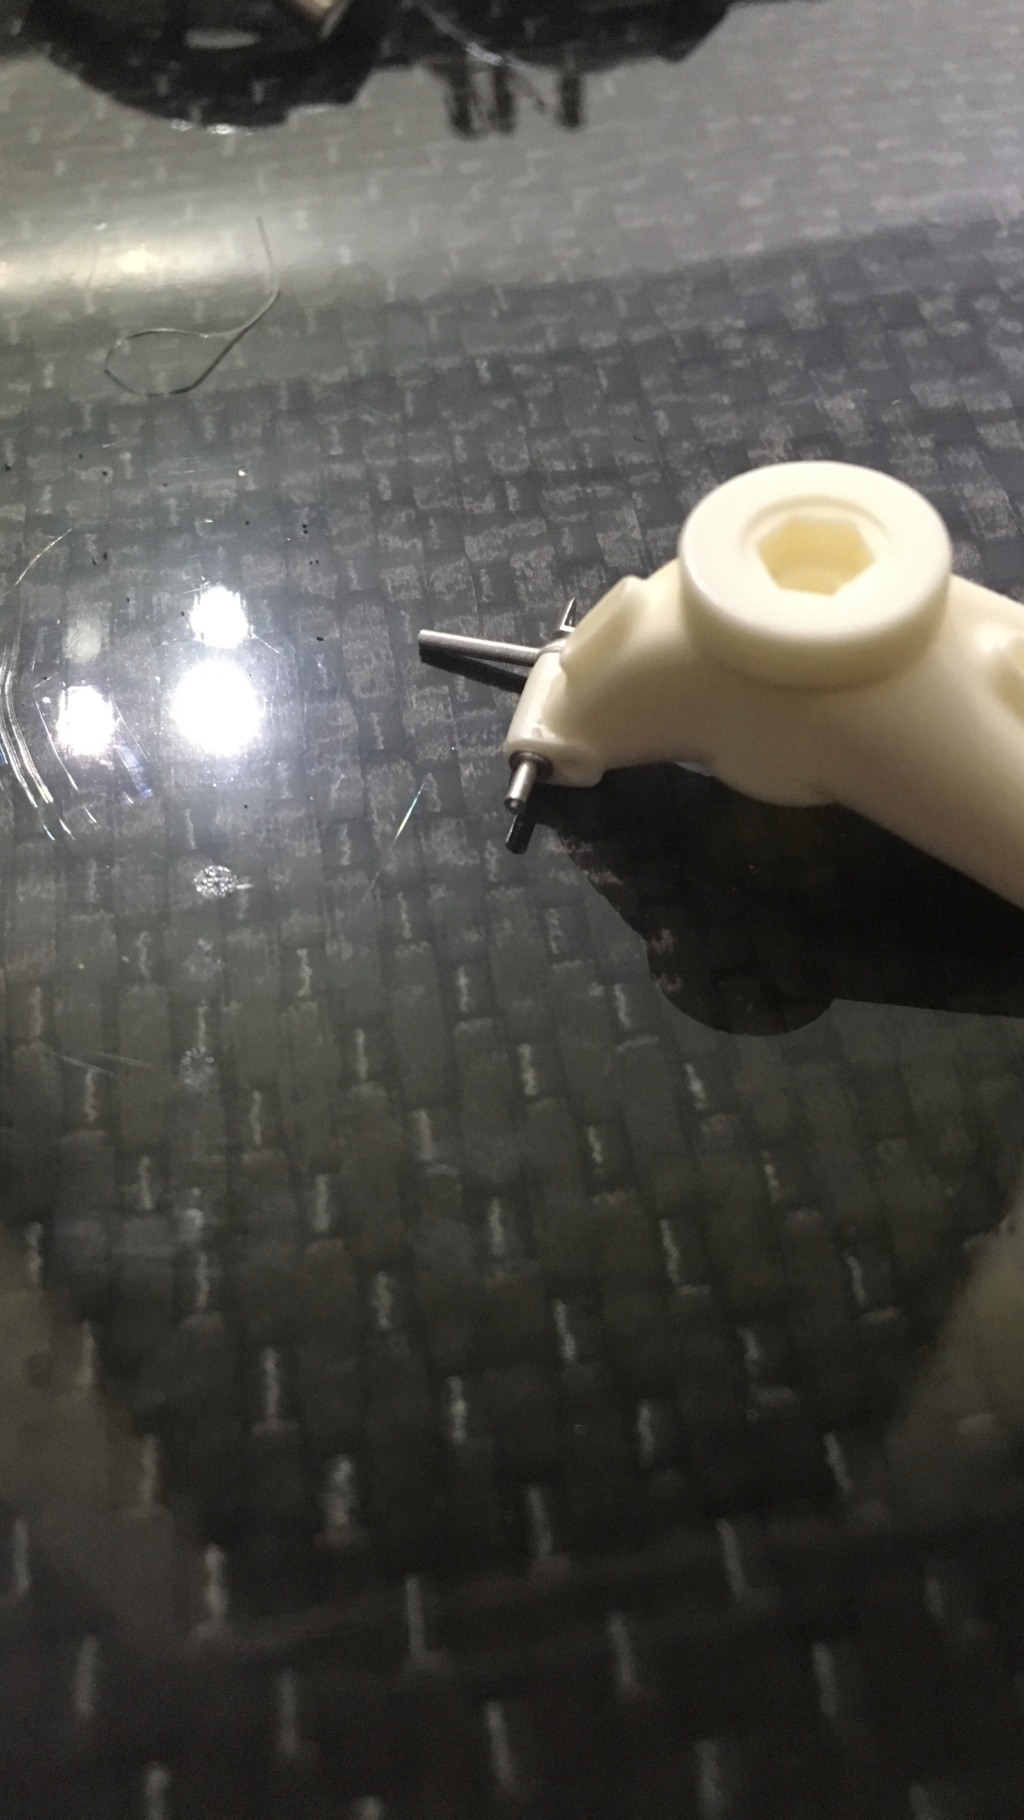
Time for primer: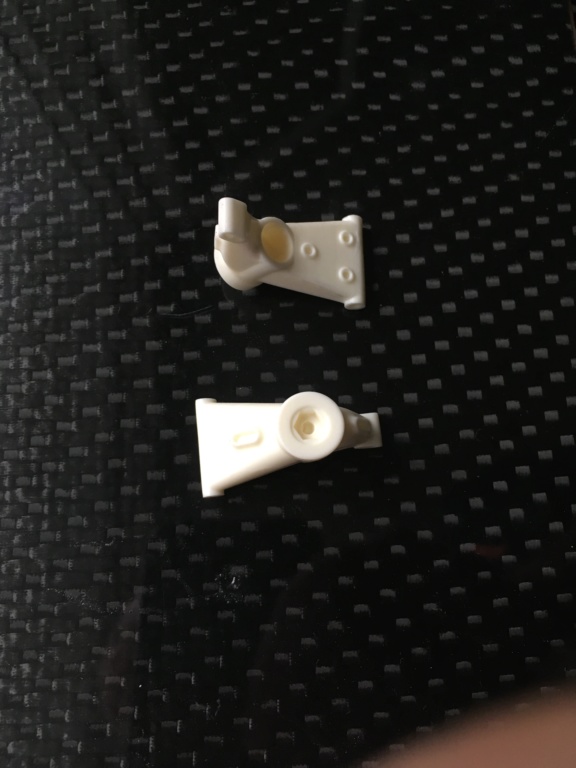
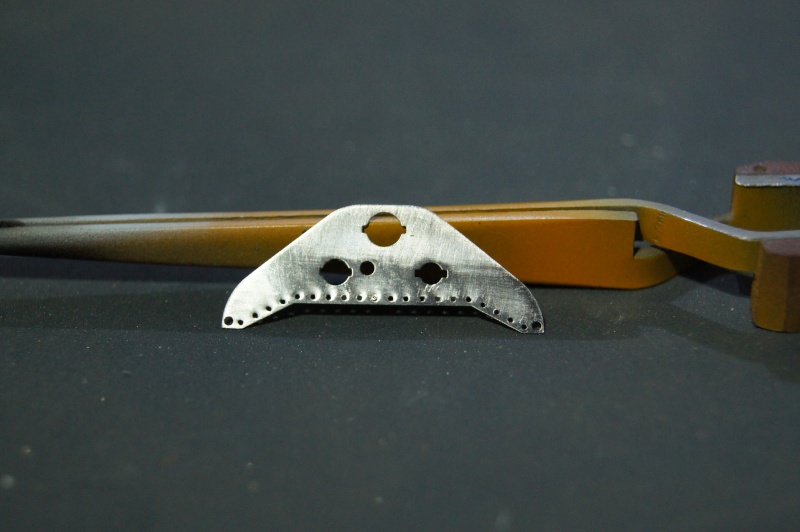
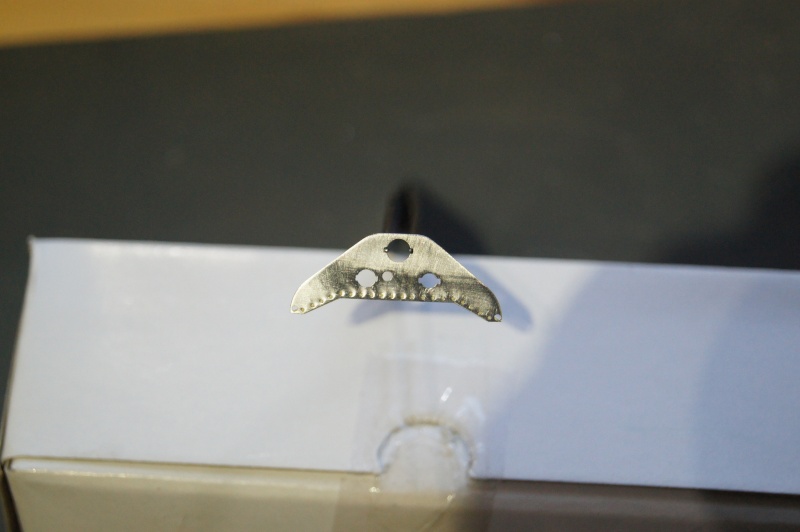
The body is drilled in order to be riveted with MFH aluminium rivet: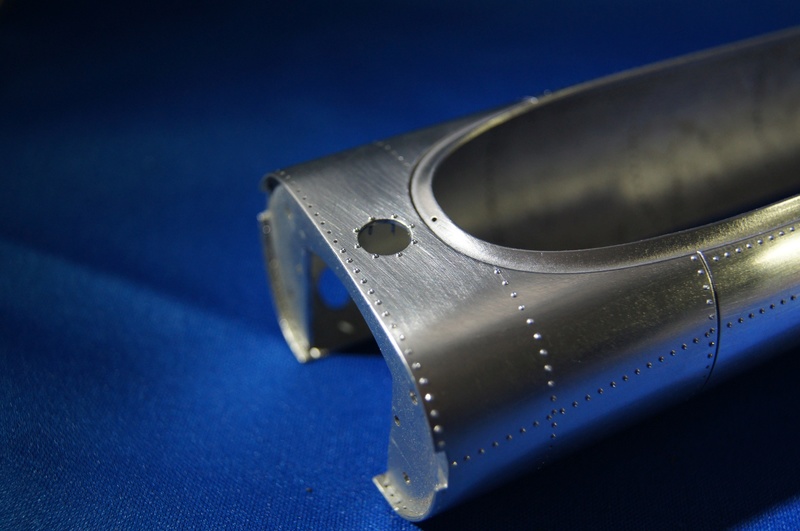
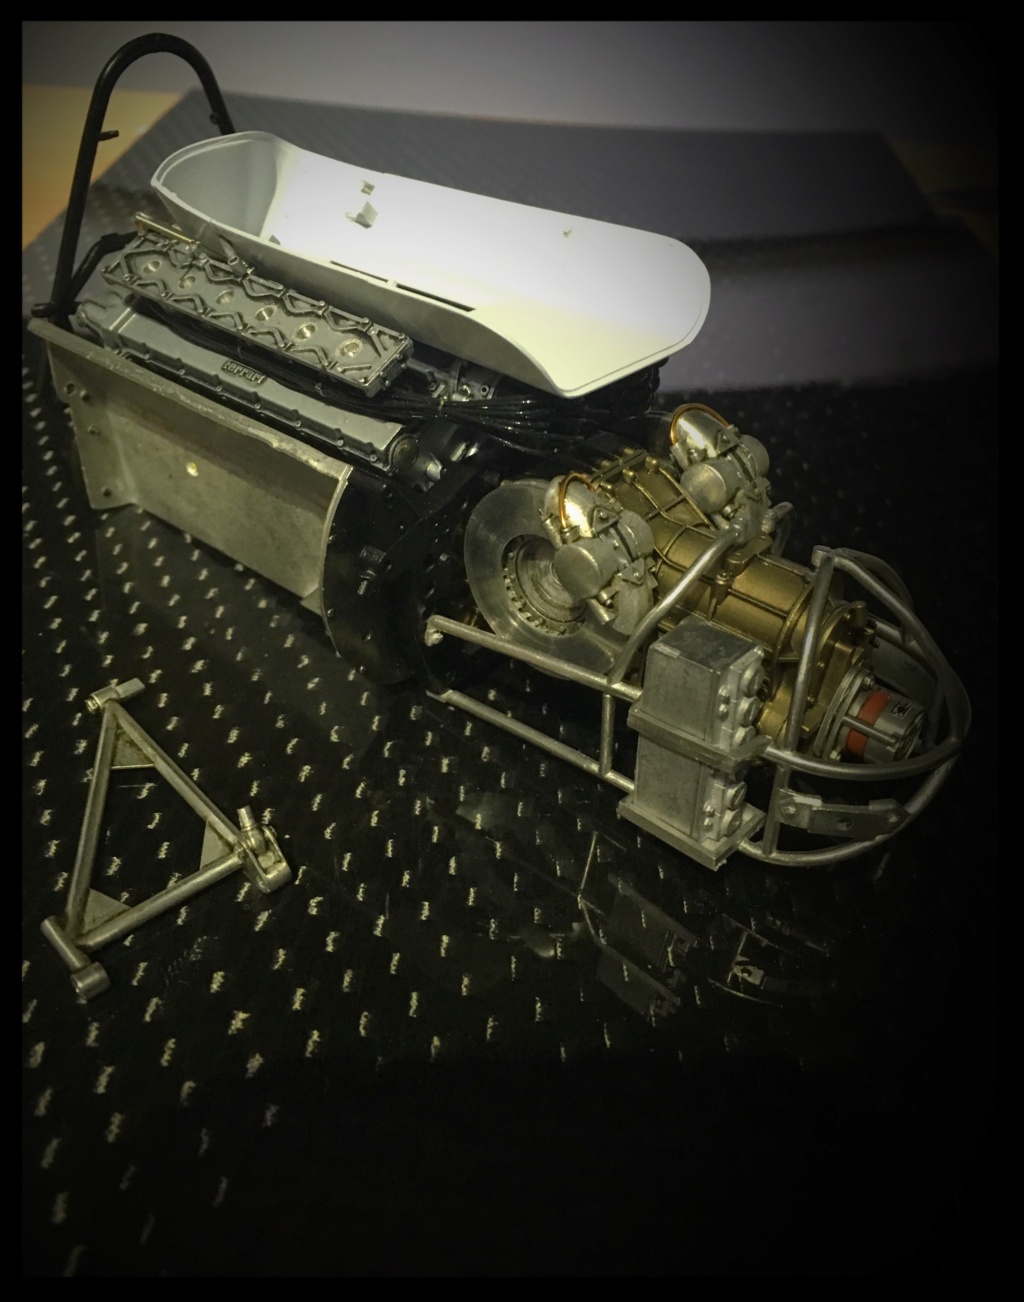
The engine is... big. Almost the size of the 1/20 kit: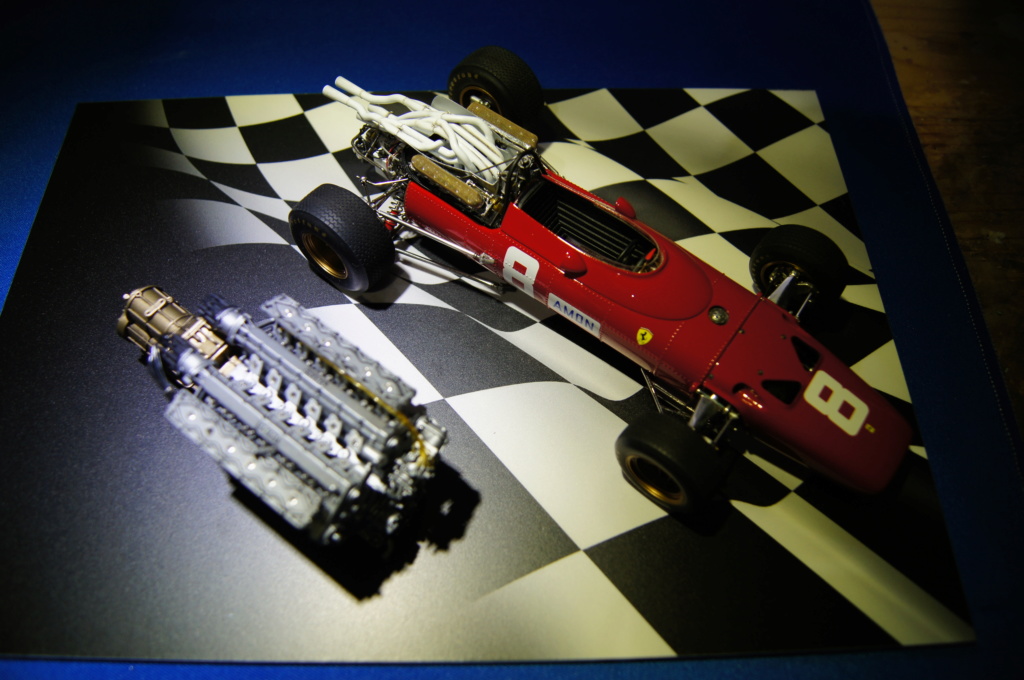
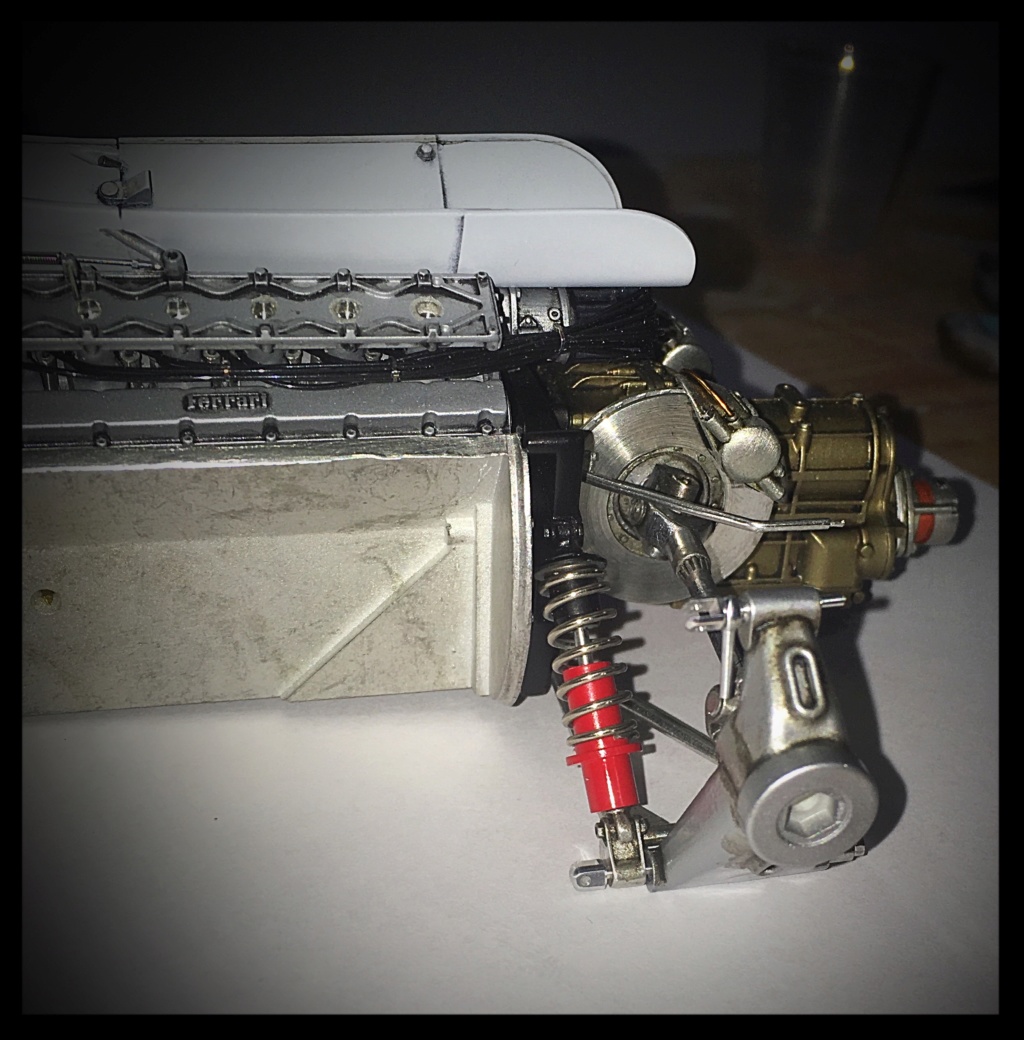
Rosso Corsa GC and Semi Gloss Black ZP on the rear shocks and the steering wheel.
Dull Aluminium (Alclad) on the rear hubs
Test fit of the front end:
Heat shield adjusted and drilled for the roll cage: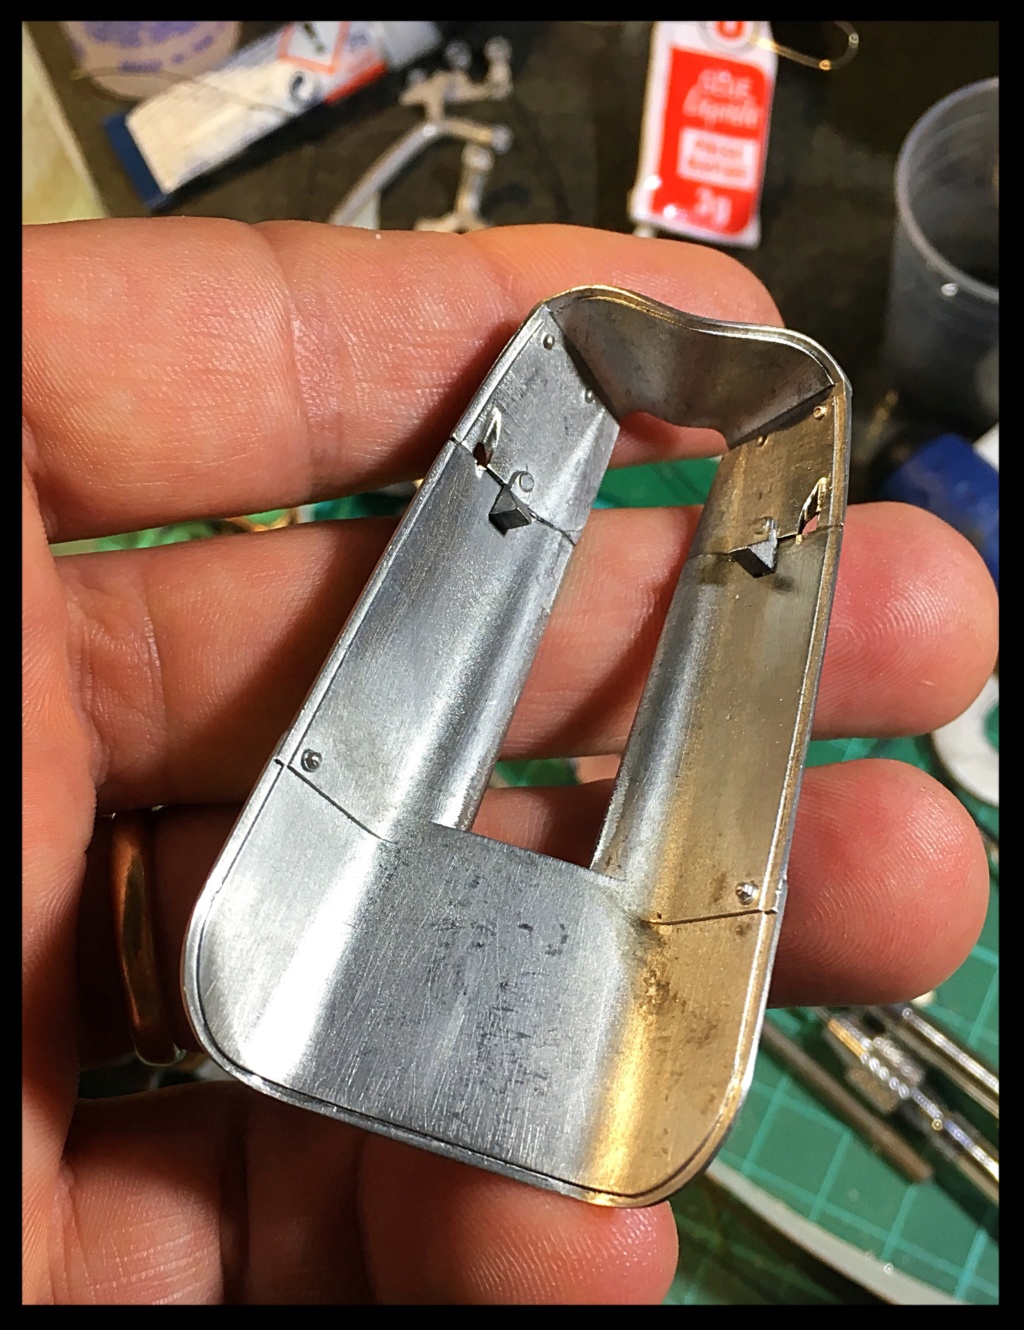
Titanium White GC: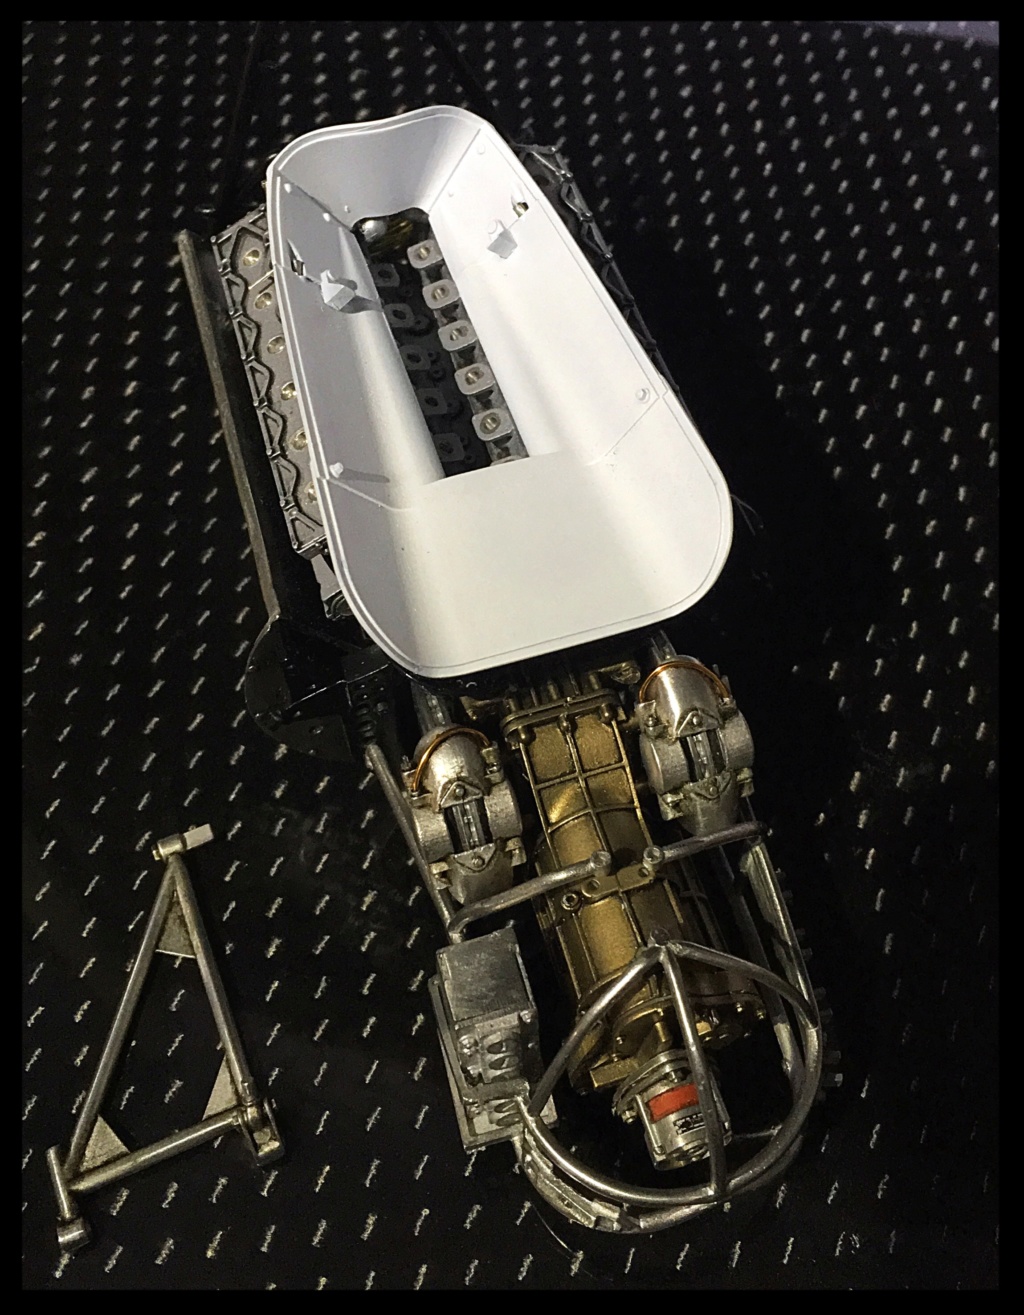
Not very happy with the Dull Alu, so black Alclad is sprayed: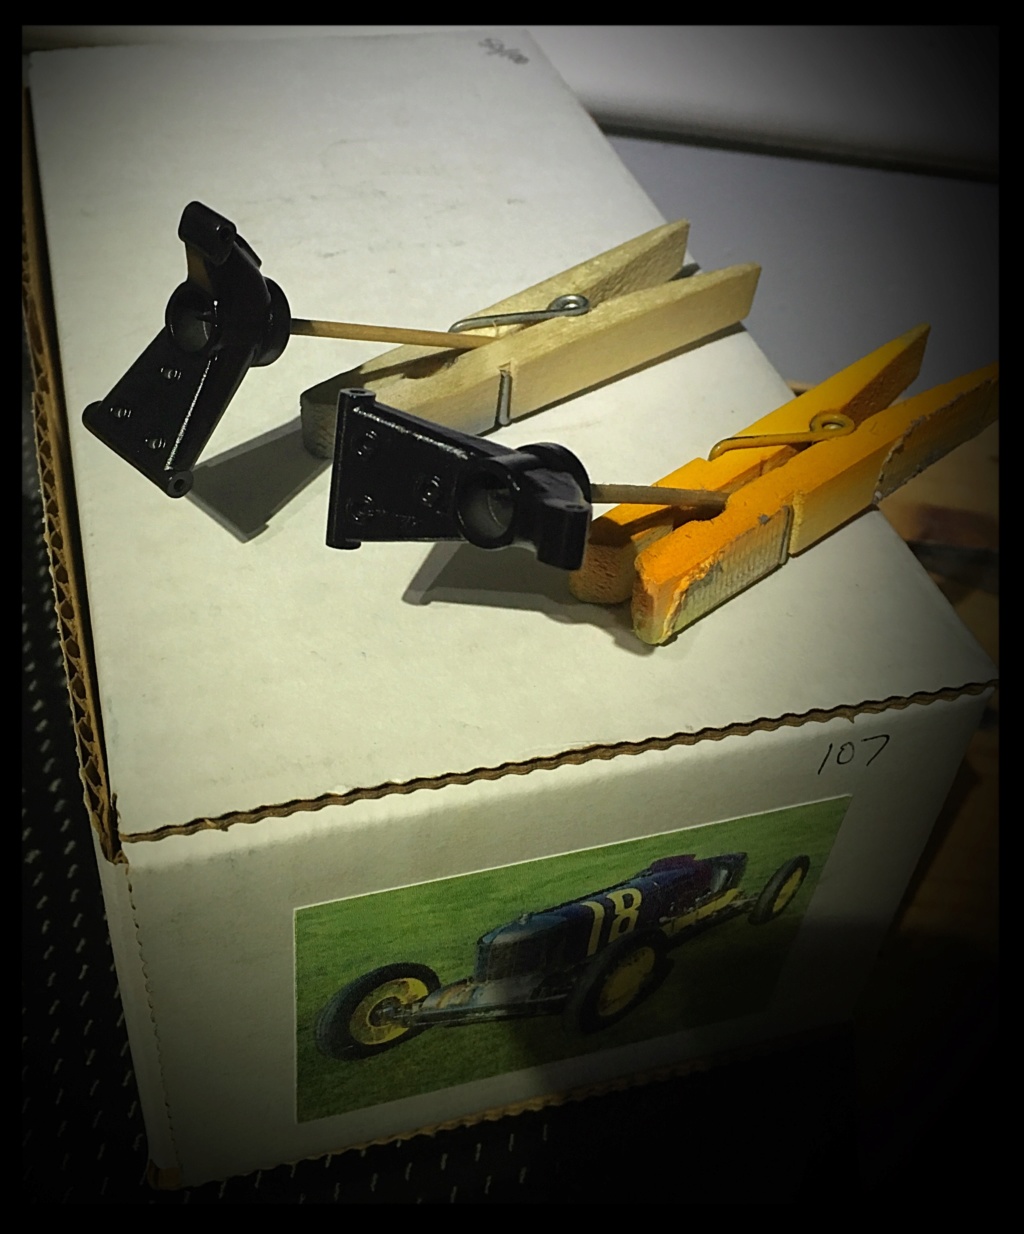
Tubes installed in the radiator and started to work on the rear suspension components: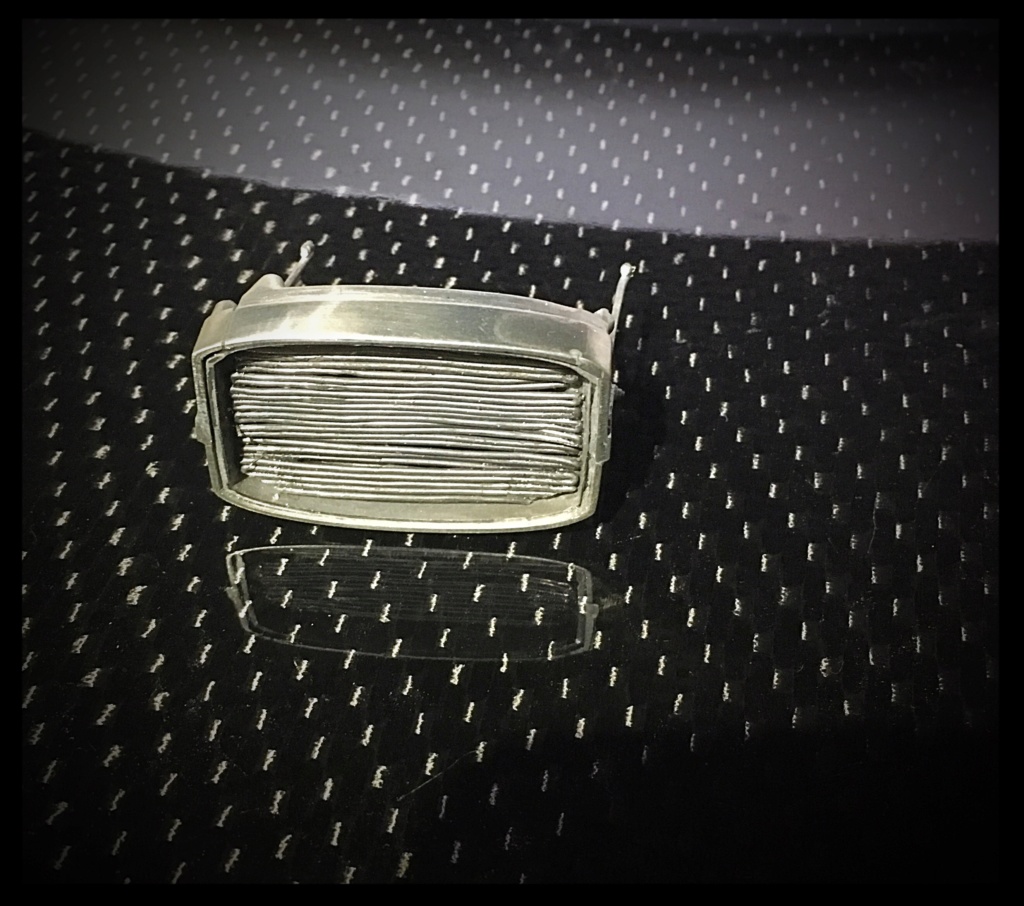
Front brakes scoops are painted white:
test fitting of the bathtub: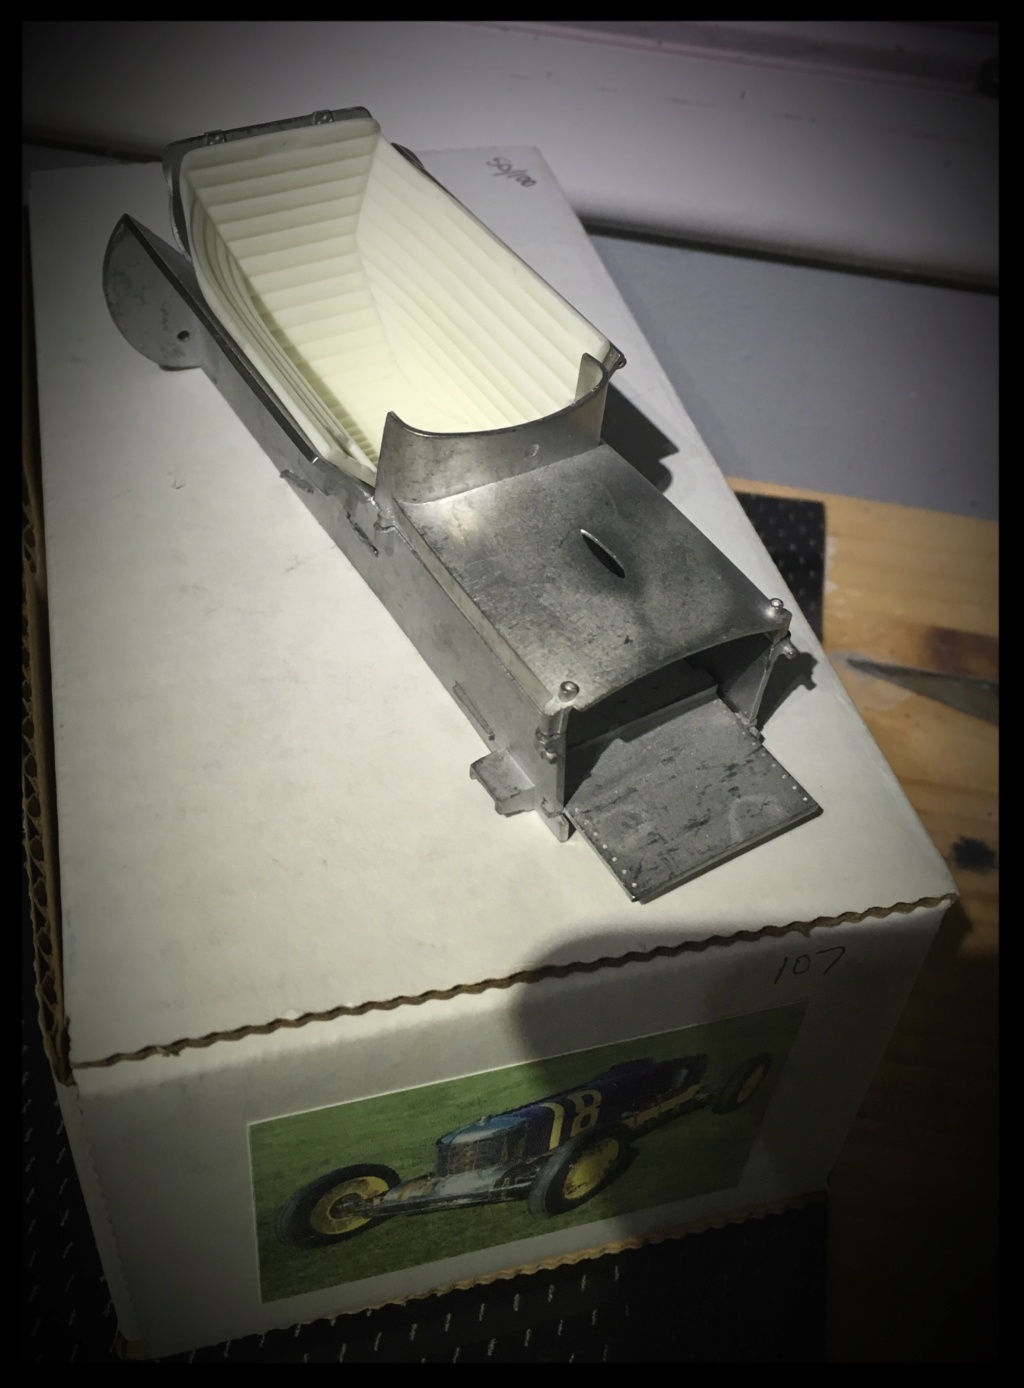
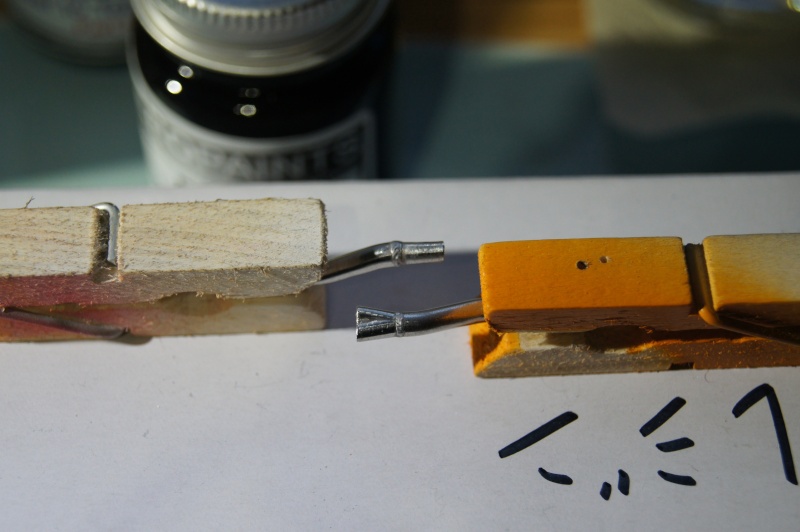
Weld seams on the 3in1 exhaust parts:
I really apologize for the poor quality of the pictures...
Alclad White Alu and Klear Kote.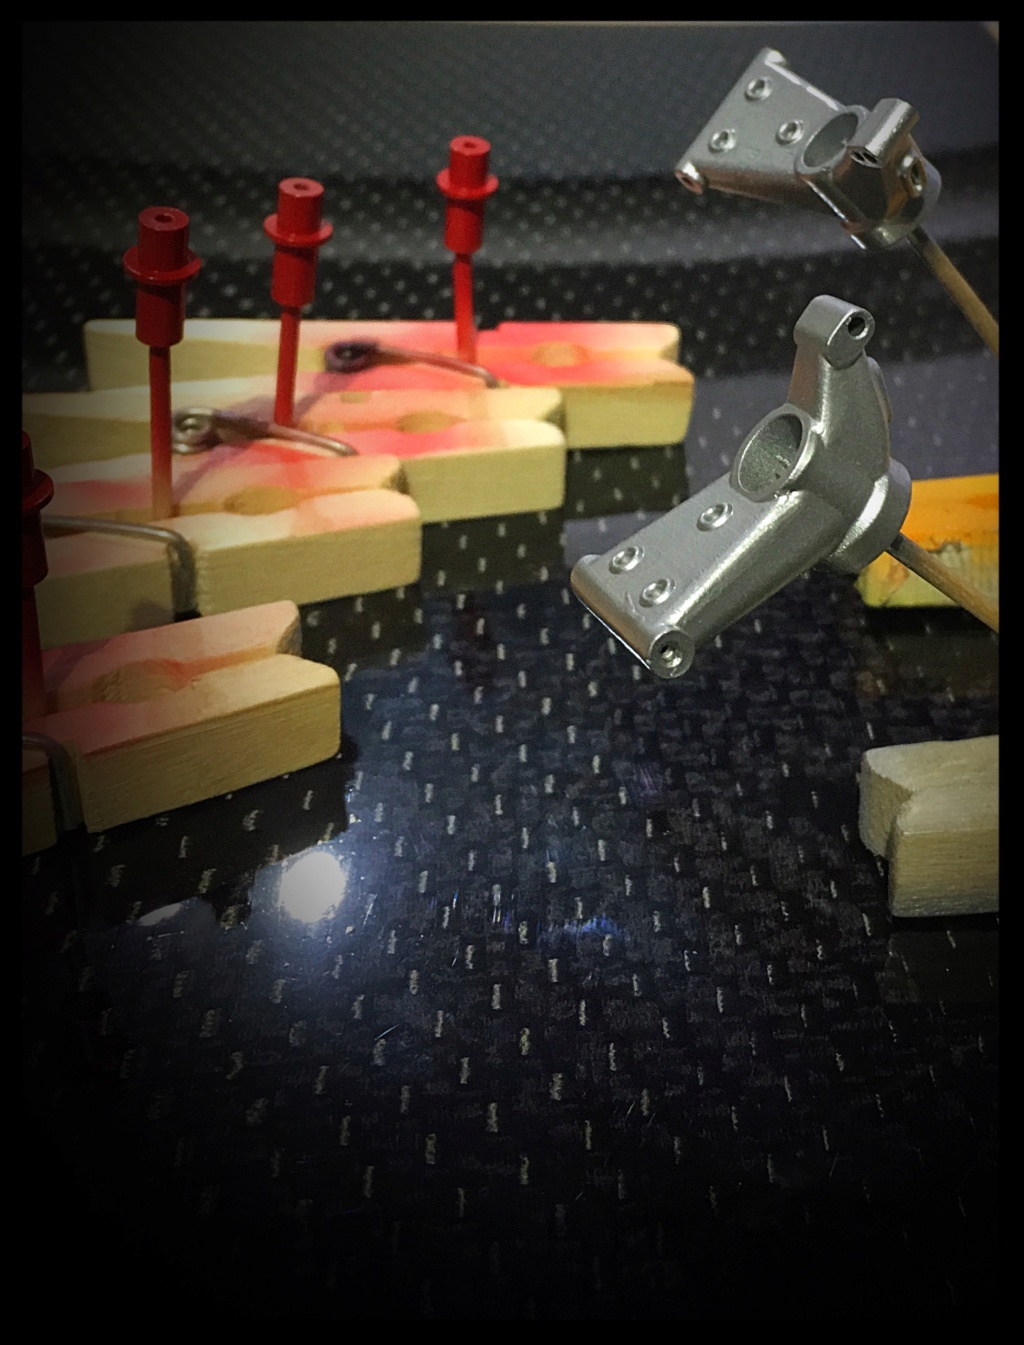
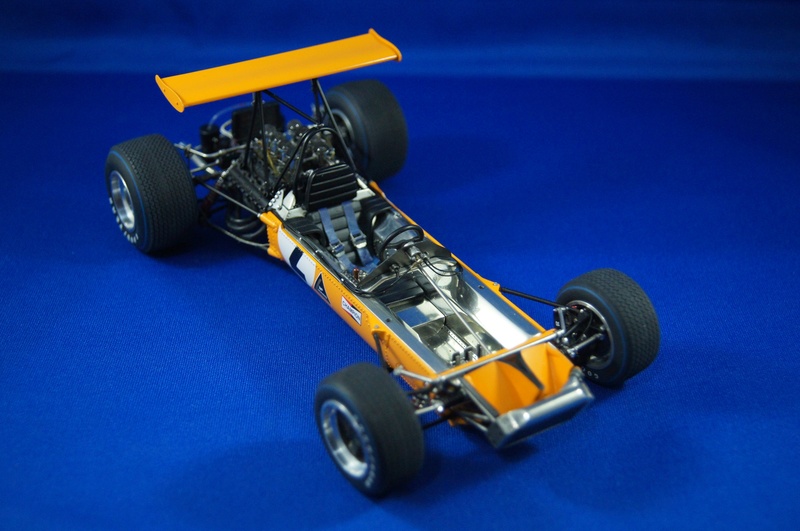
Paint family picture:
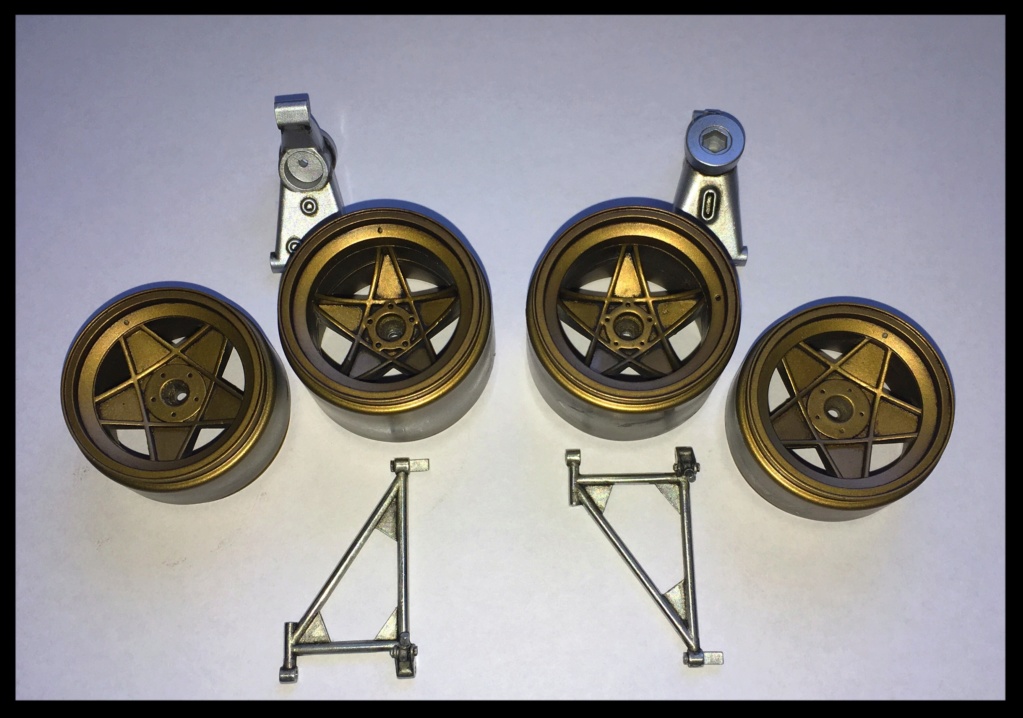
Wheels prep & paint session: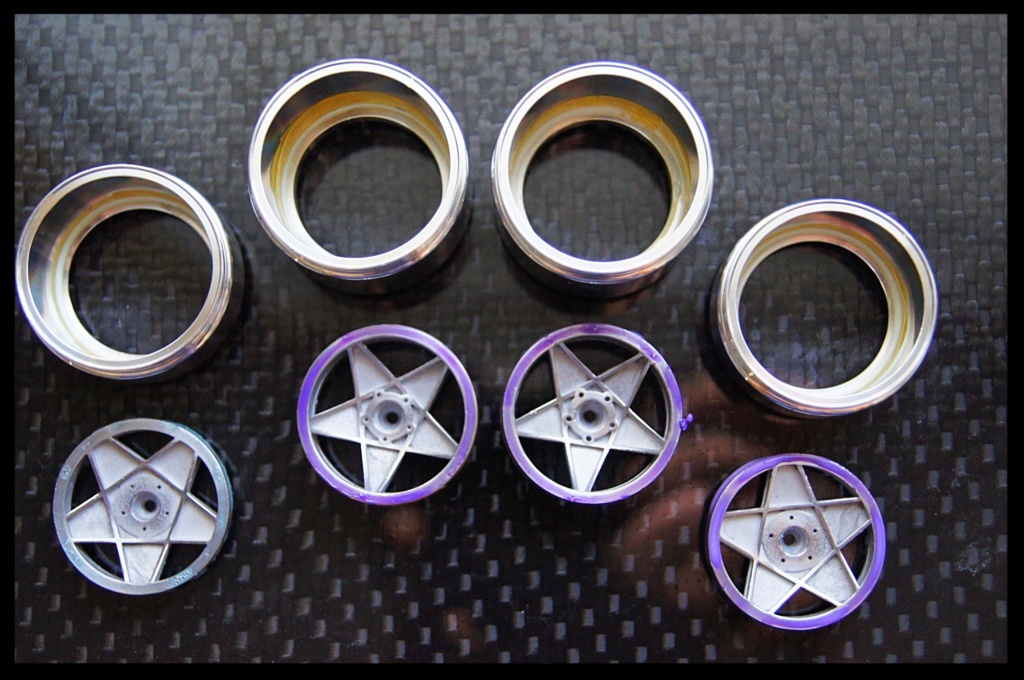
Primer: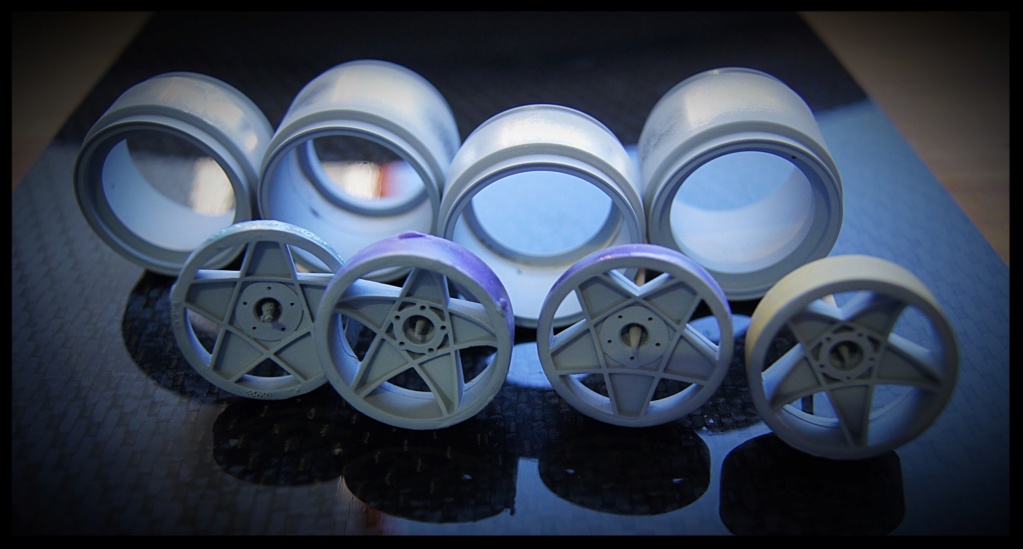
Alclad Black: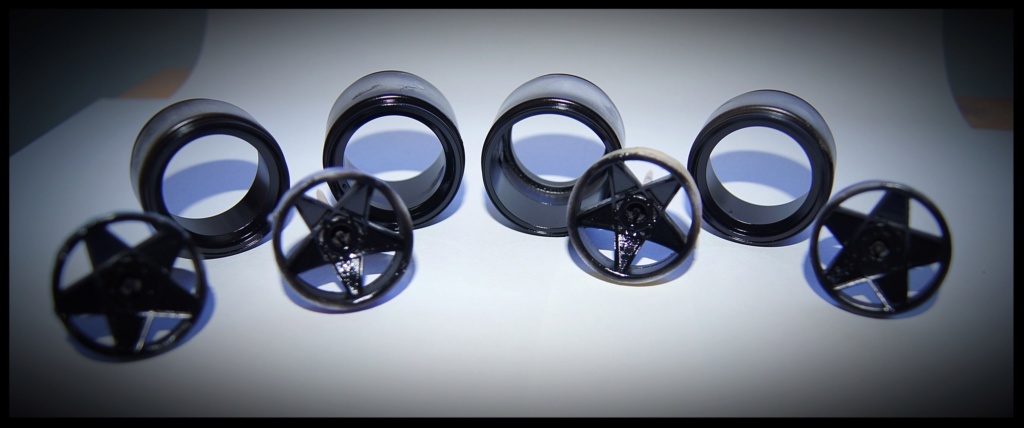
Pale Gold Alclad: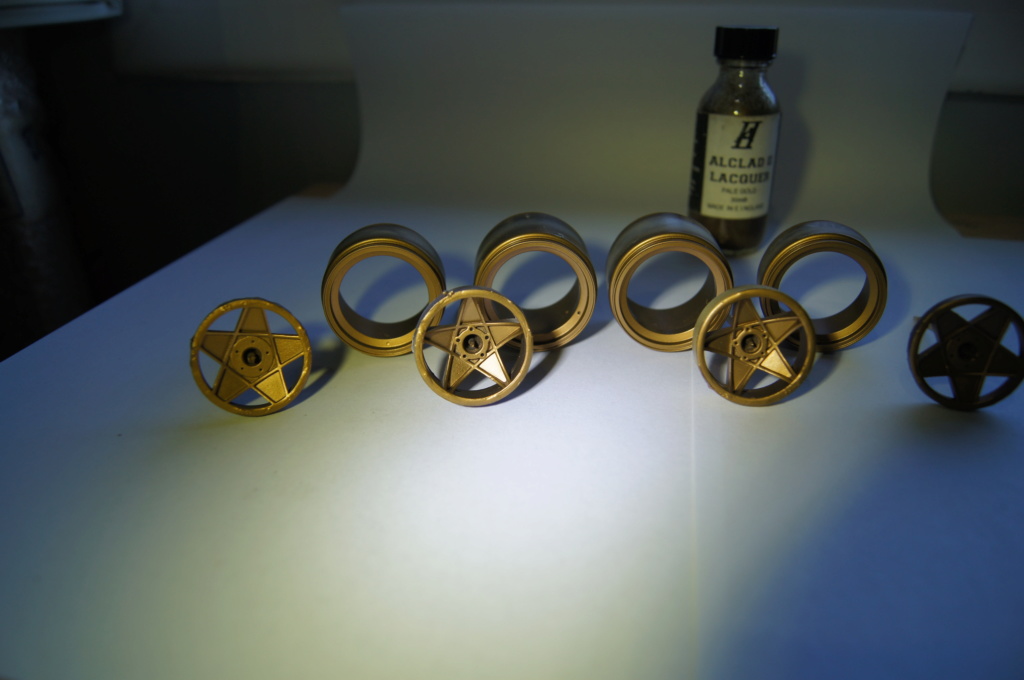
Masking off: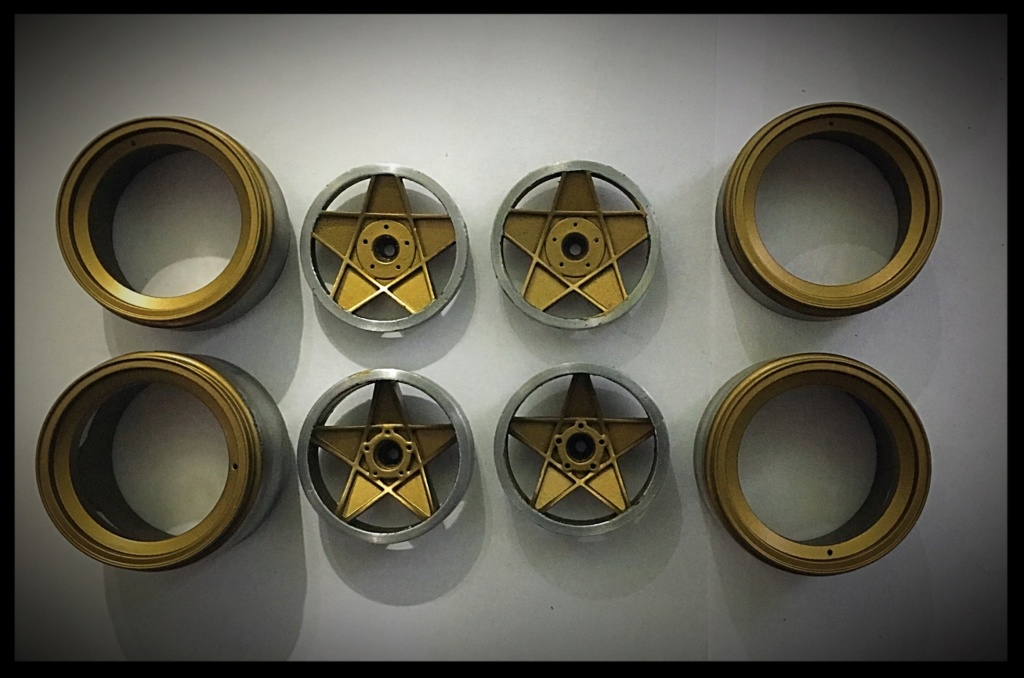
Time for oils: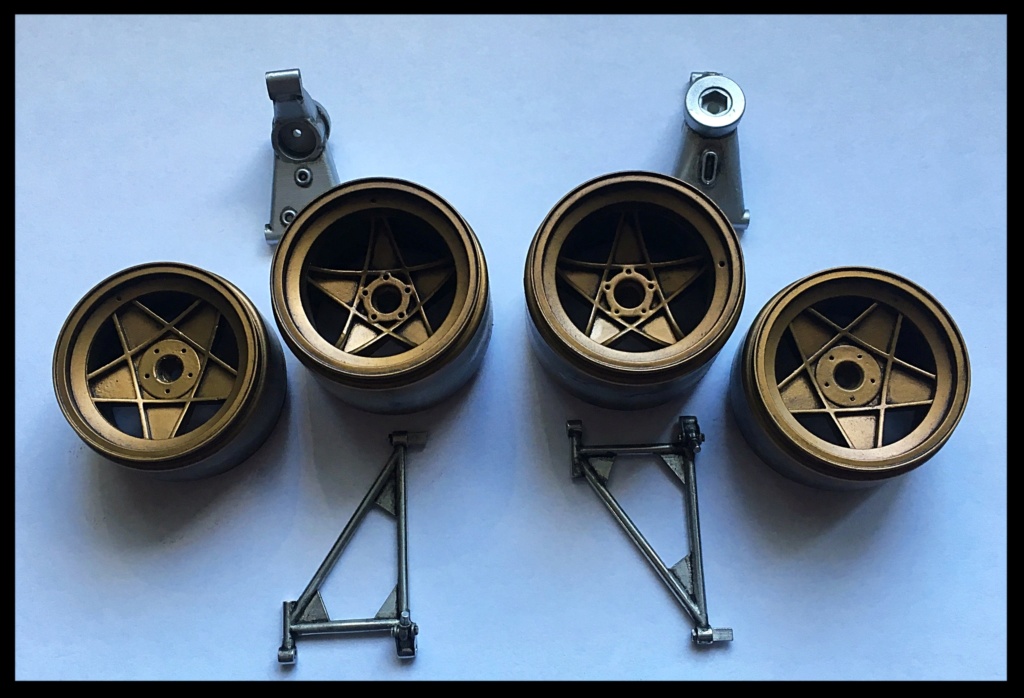
Test fit of anti roll bar, gearbox and half side transmission.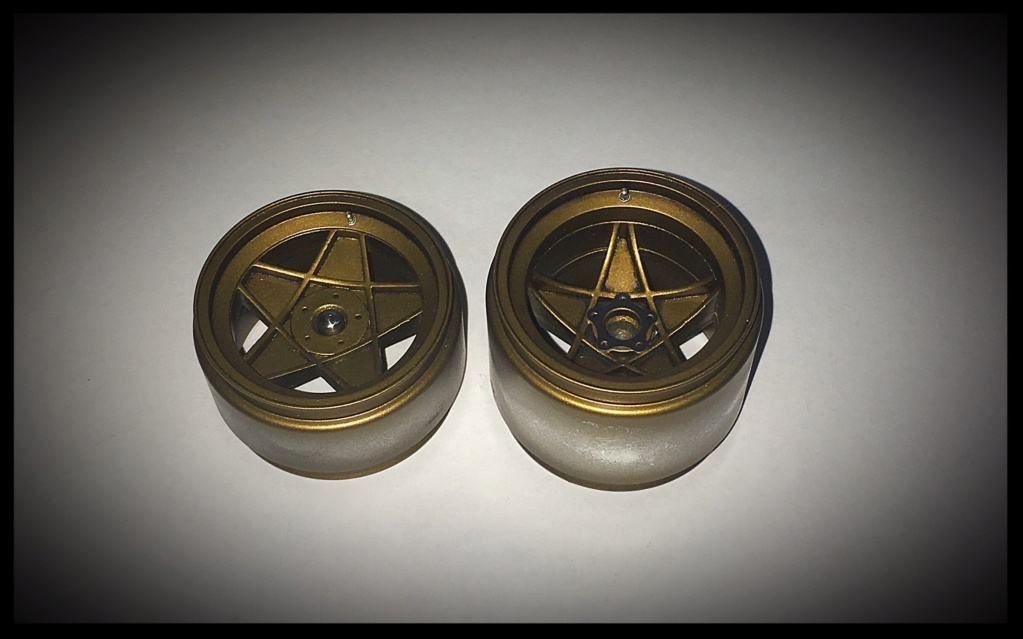
I’ve modified the throttle linkage.
The White Metal original ones were not that good, so I replaced them with machined parts.https://i.servimg.com/u/f12/12/38/43/52/99c8dc10.jpg]
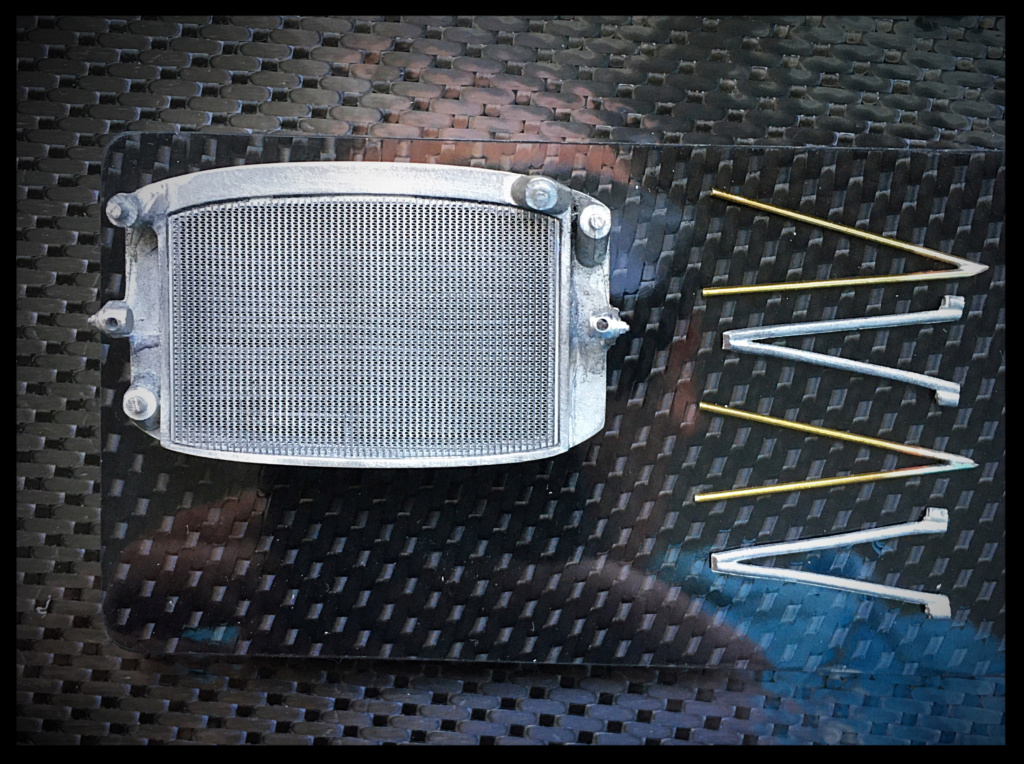
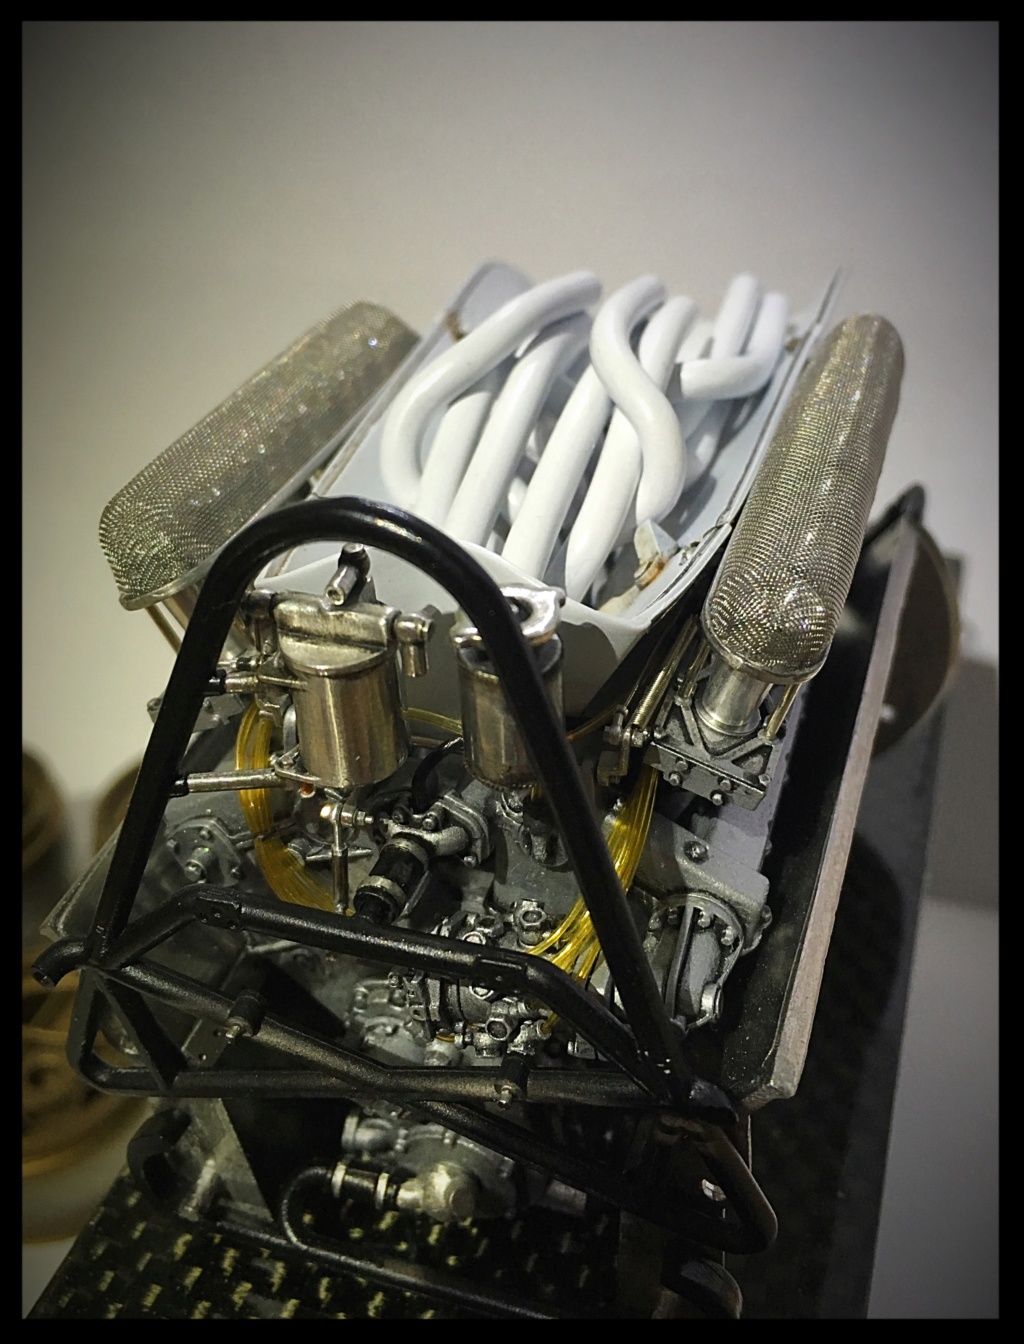
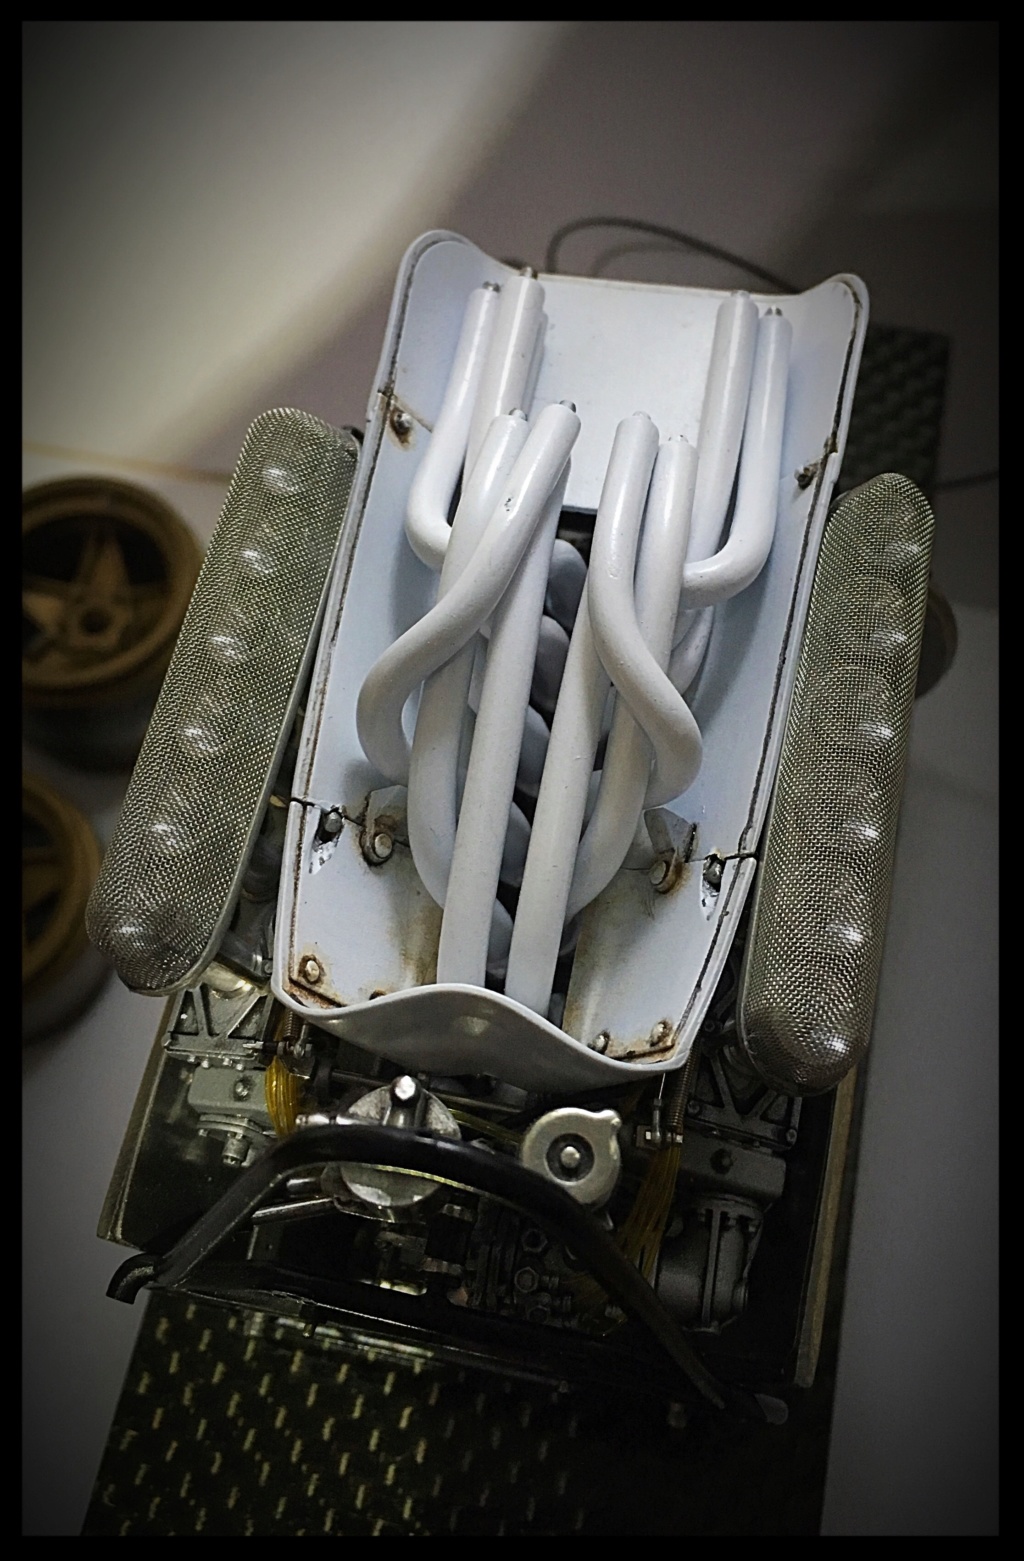
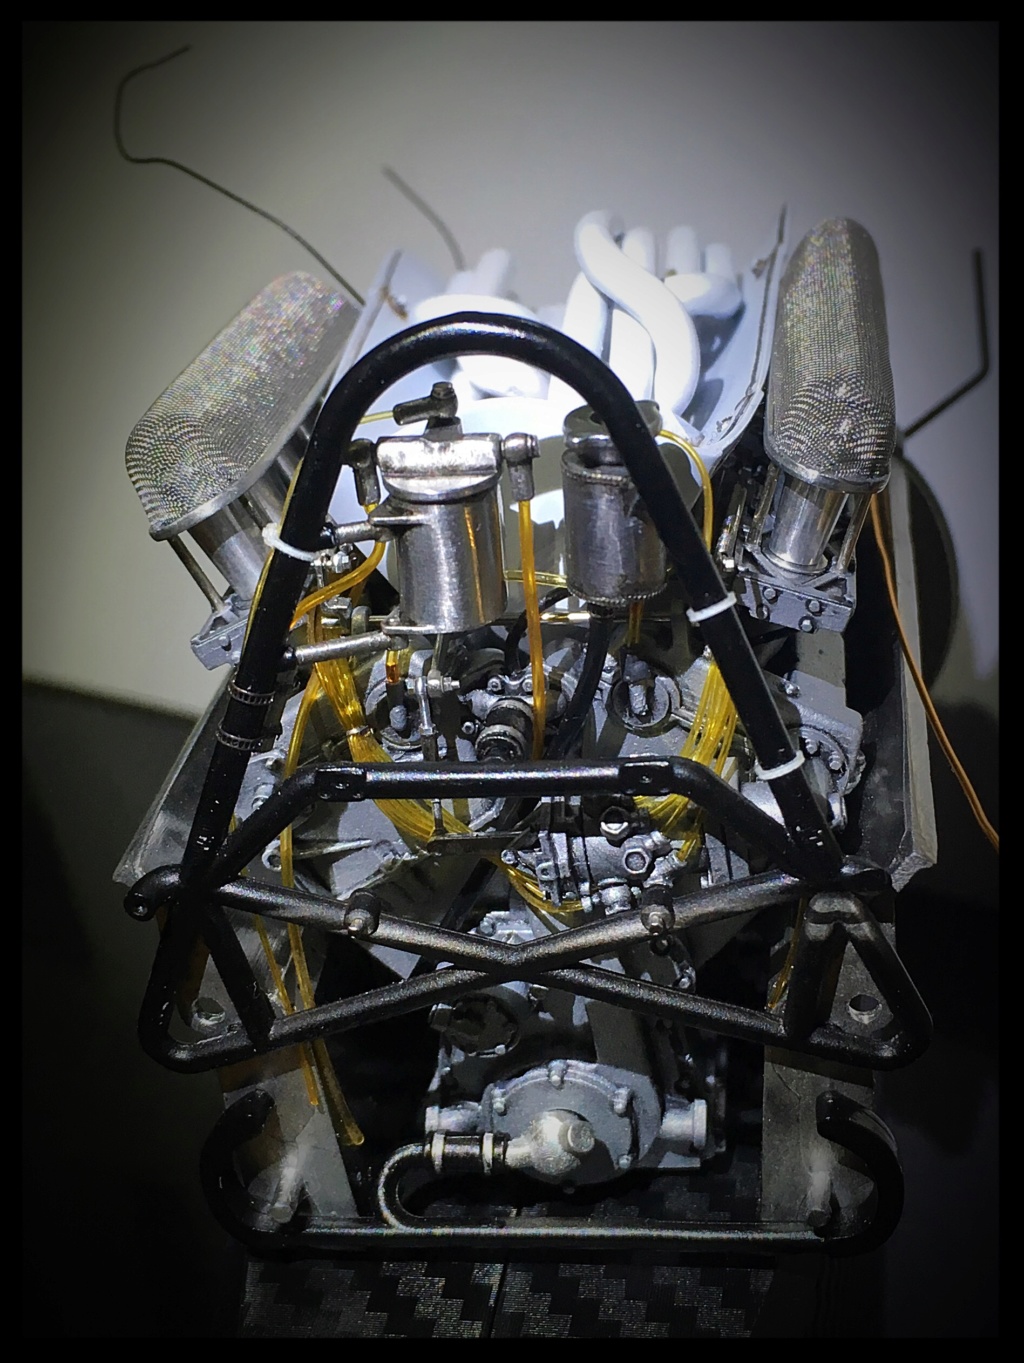
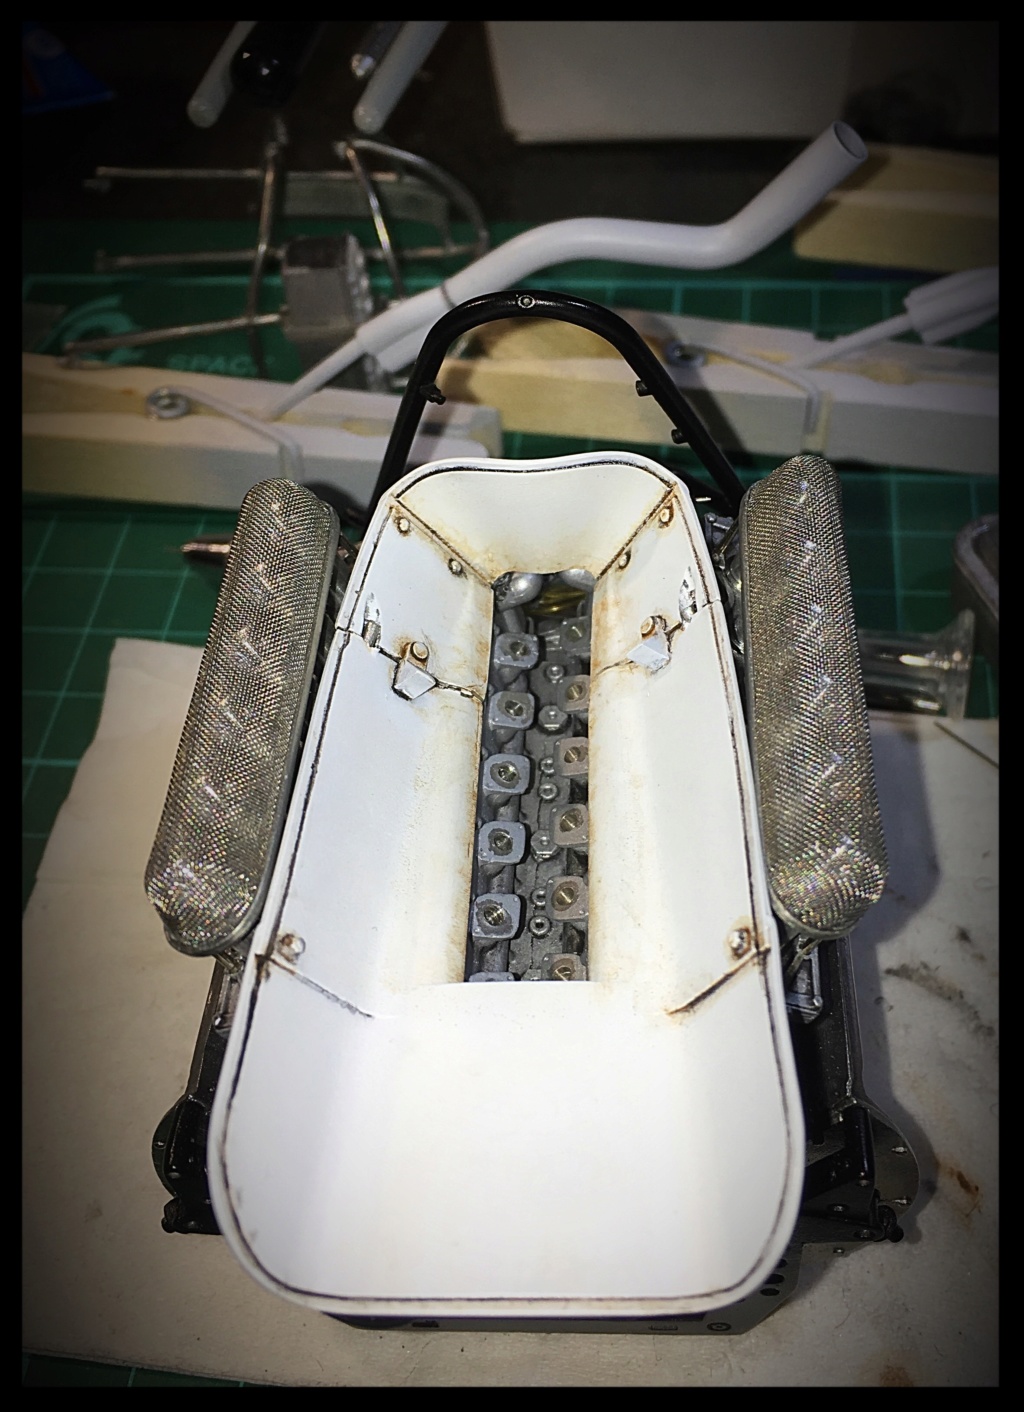
The mesh over the stacks is now done, and I must admit it was pretty fun to form and install: I’m mot unhappy with the result.
Oils have also been applied on the heat shield as well as a portion of aluminium tape on both external sides.
I really like the view of the trumpets through the mesh.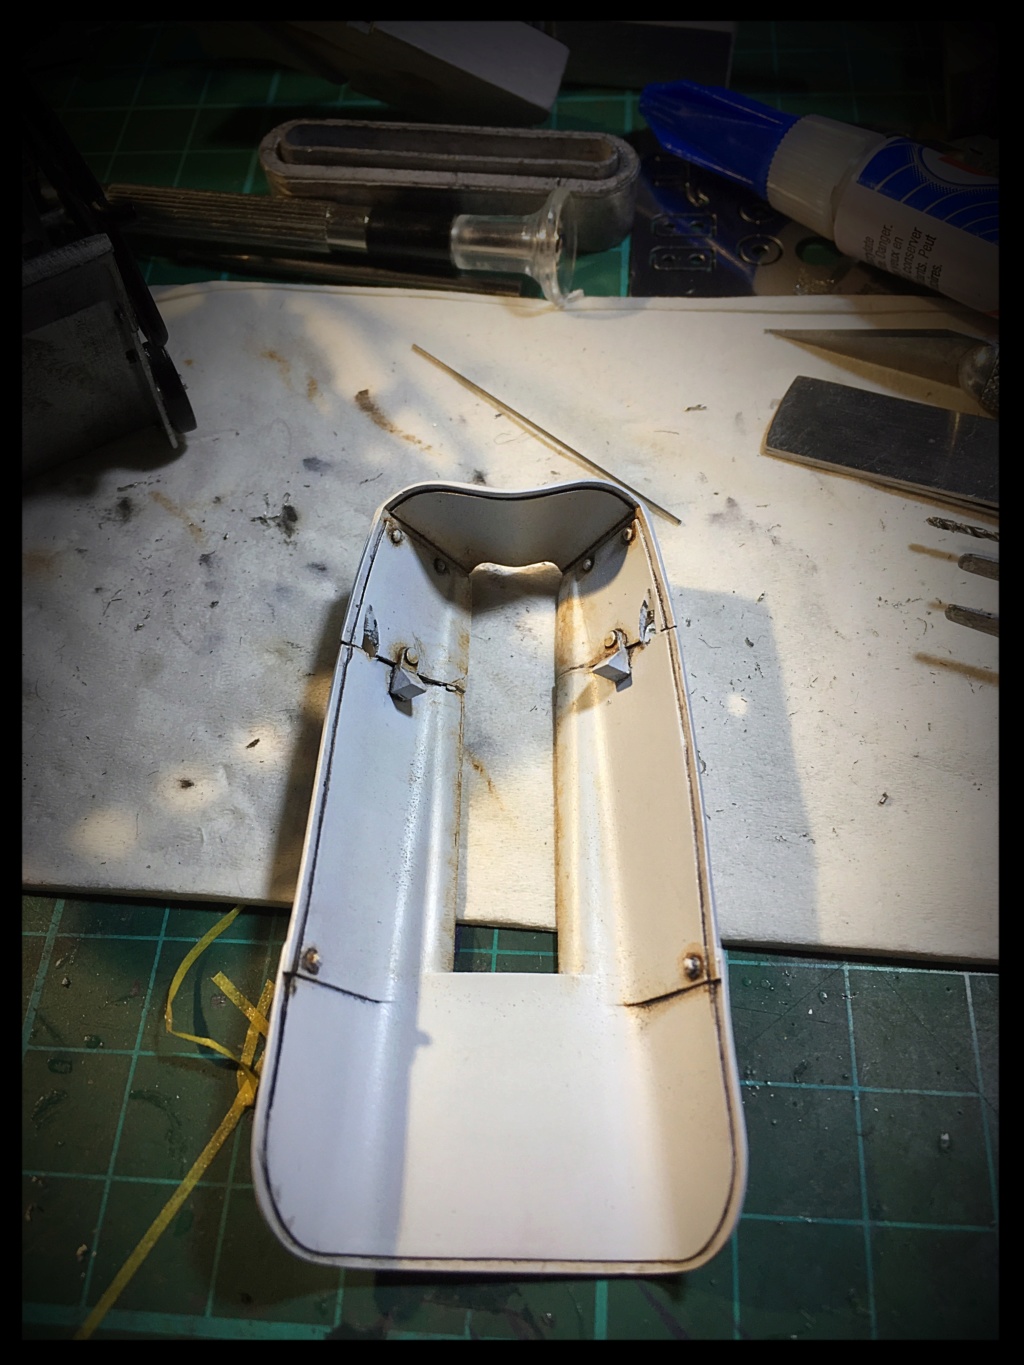
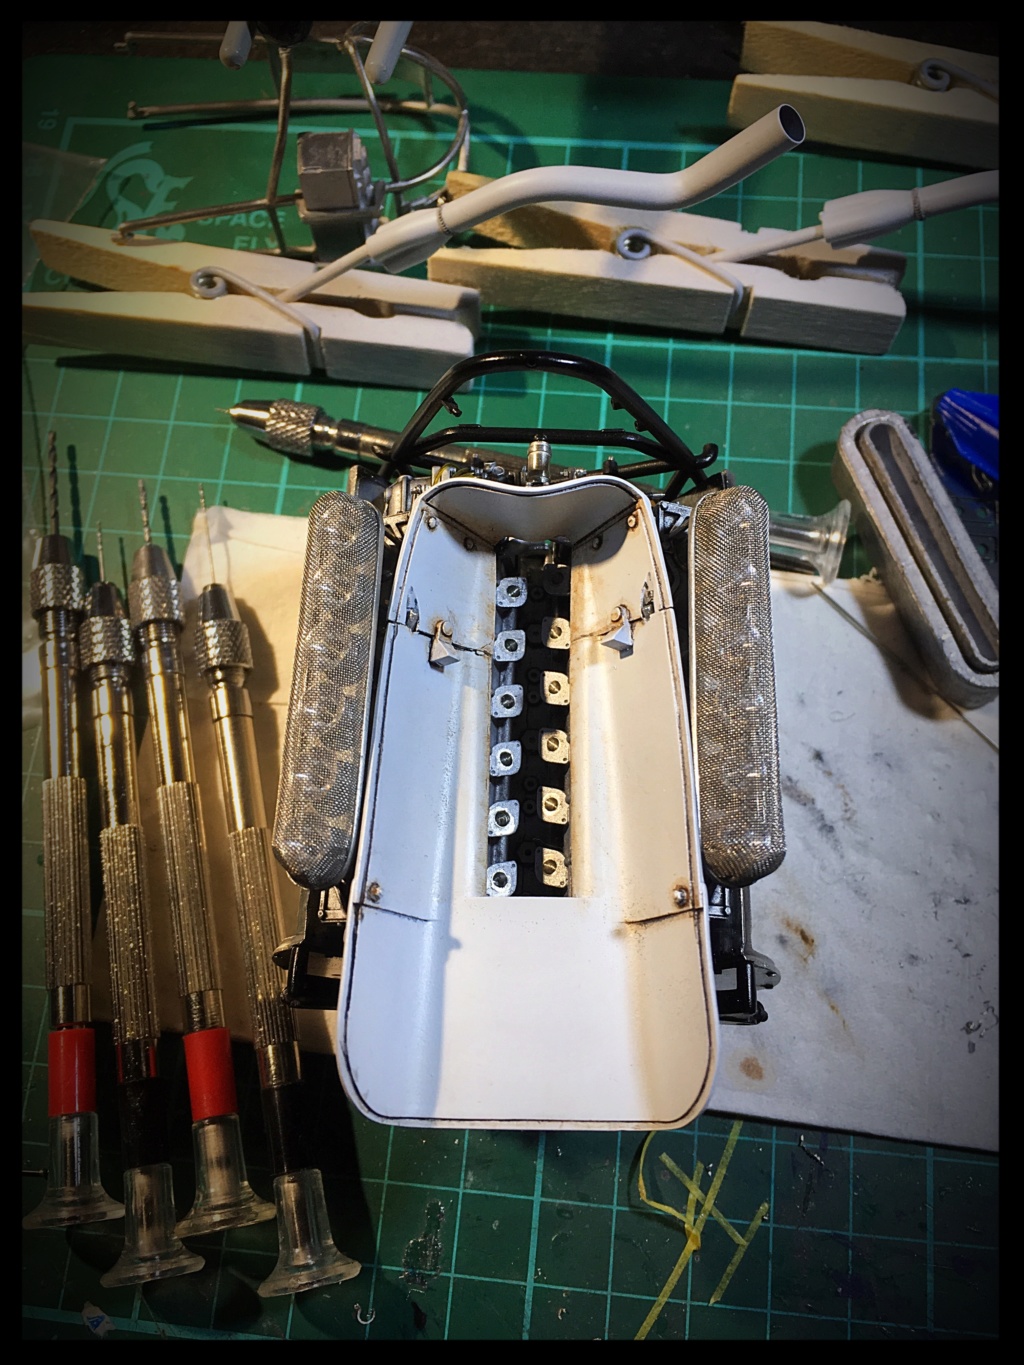
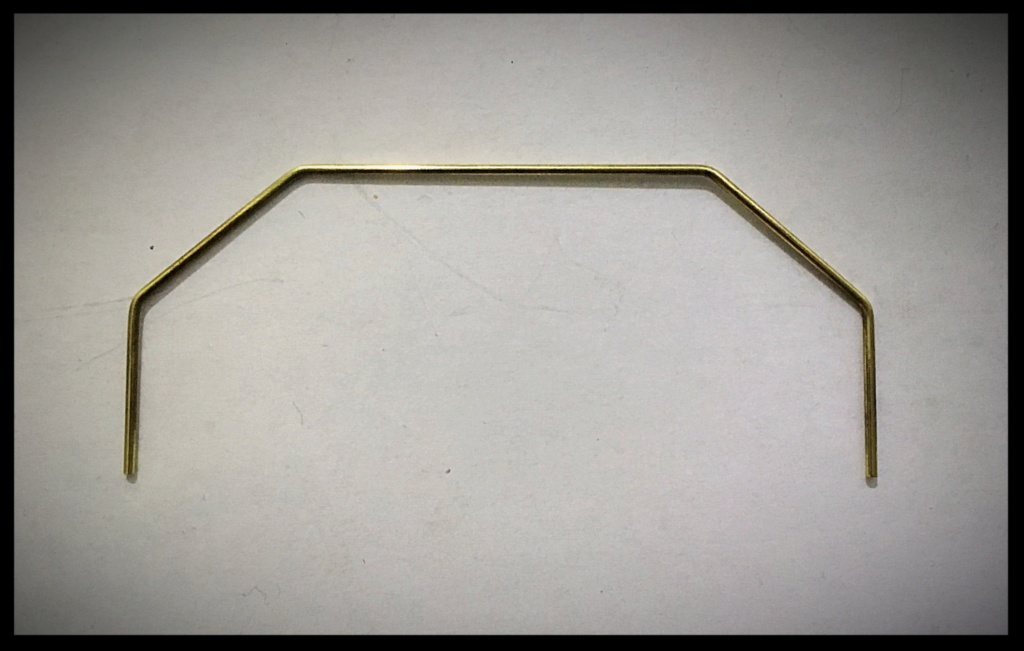
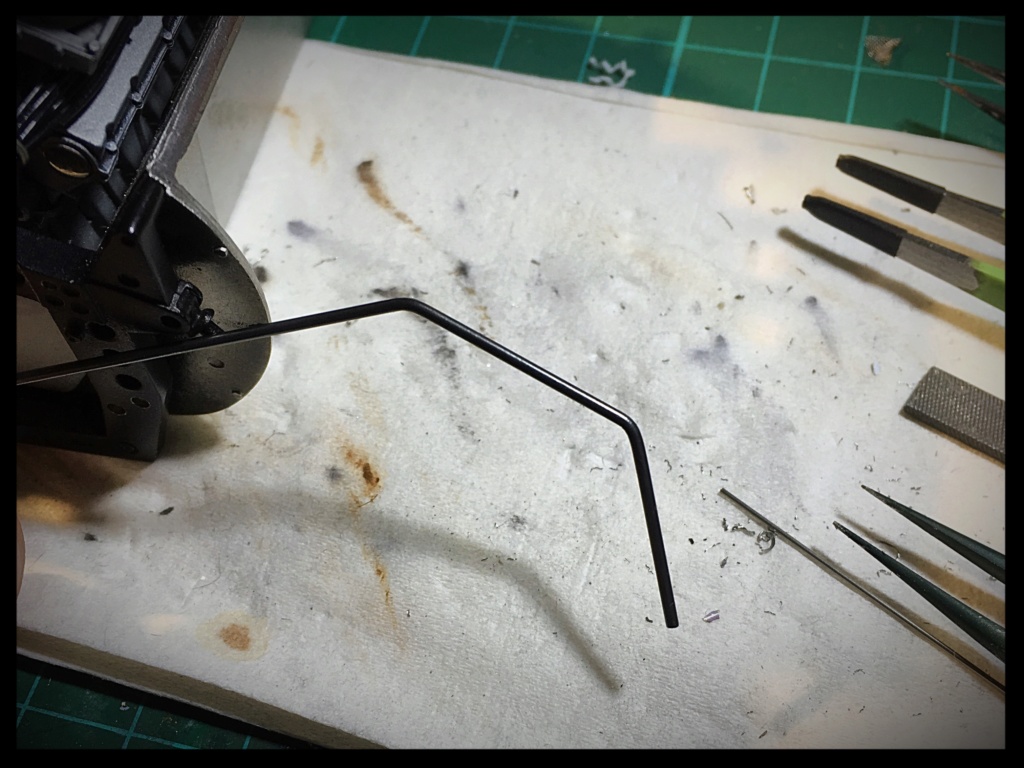
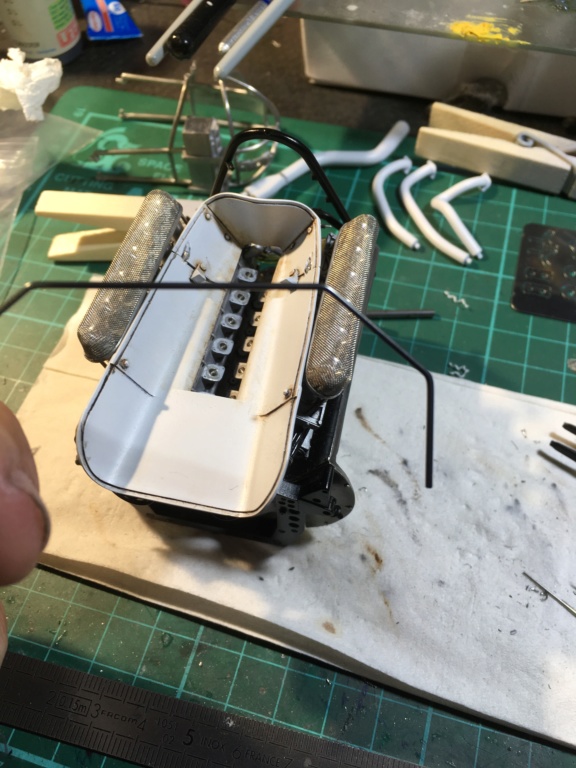
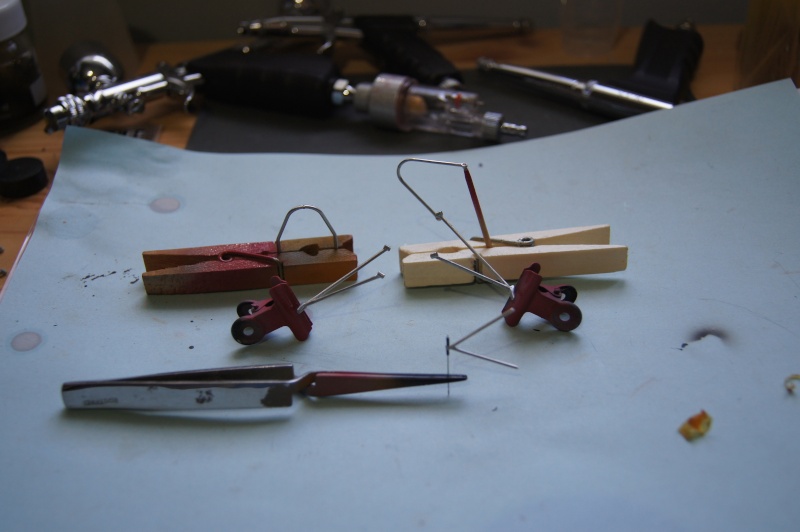
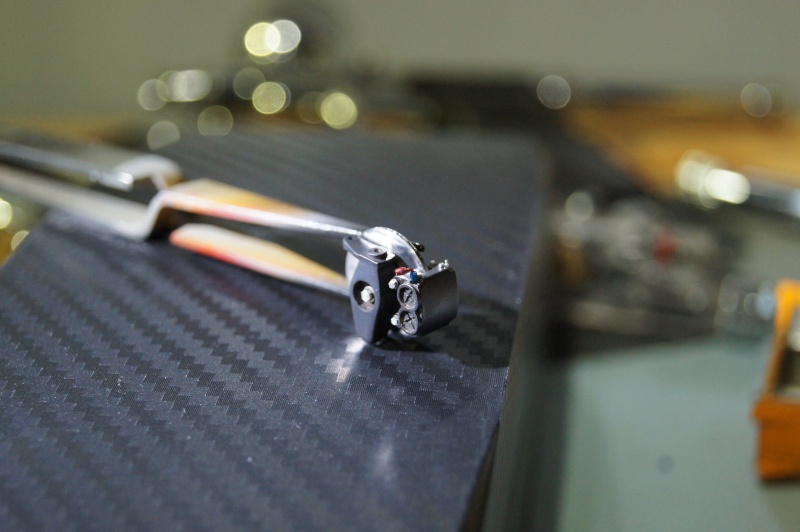
The rear stab bar has b een remade with 1mm ø brass, which was later chemically burnished.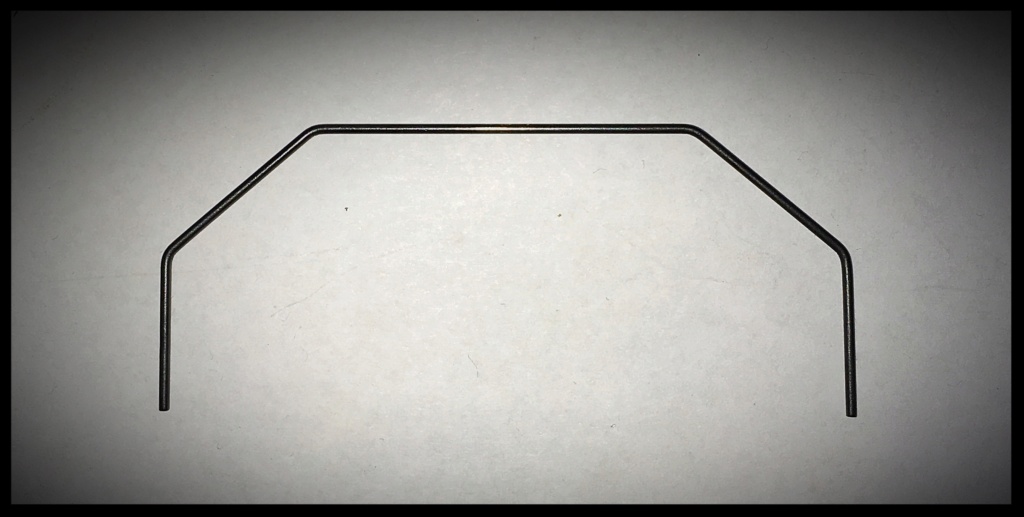
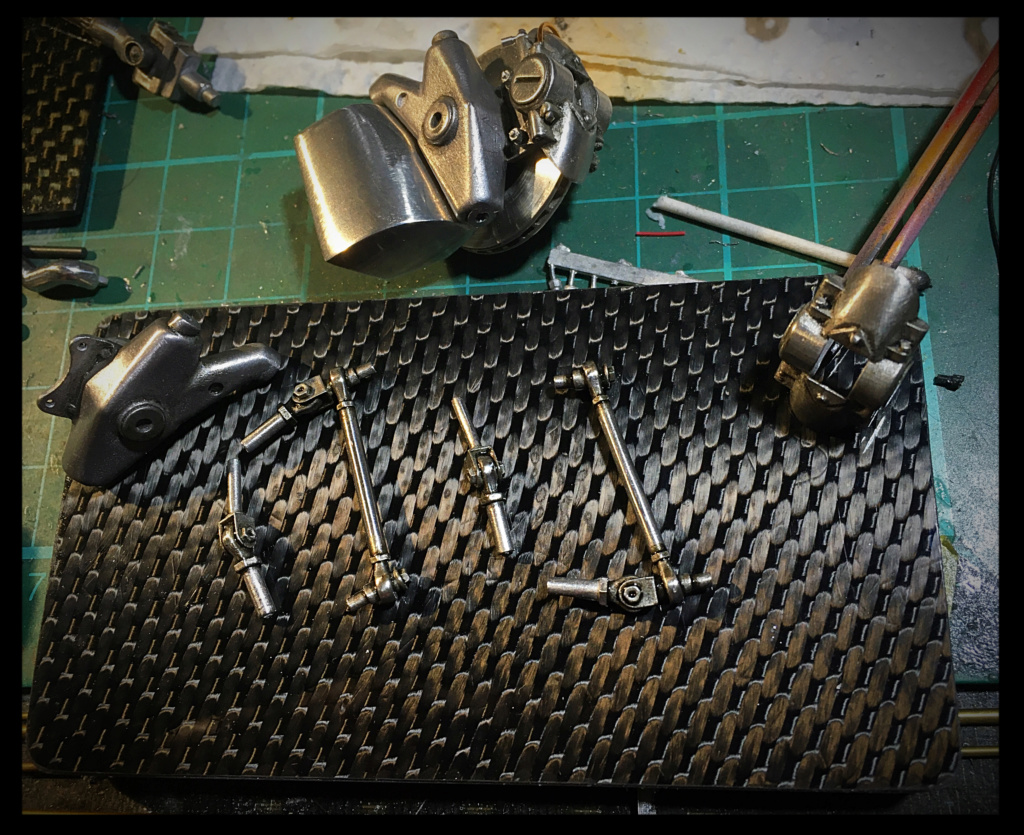
Now working on the connection rods.
One started comp ared to raw white metal origi na l part.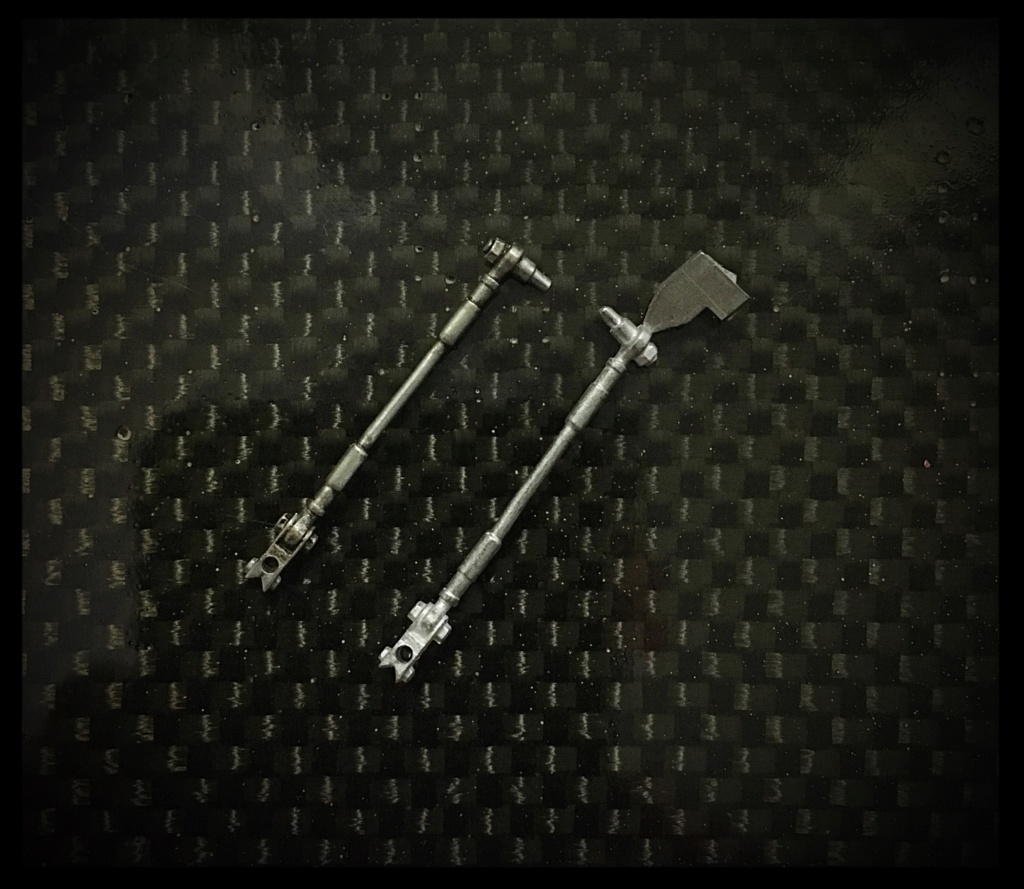
Voilà.
More soon.
Pascal -
Hi,
Stunning P4!!
What a shape and what a Car!
Bravo!
Pascal
-
Hi Joel,
Great work in the Lotus!!
Bravo.
Pascal
-
Hi,
Yeah! Real race sound for the Mini!
Few pics of the '67 1/12 312F1
Pascal
-
Thank you once again Joel.
It’s really a great pleasure to share the WIP with Mates like you!
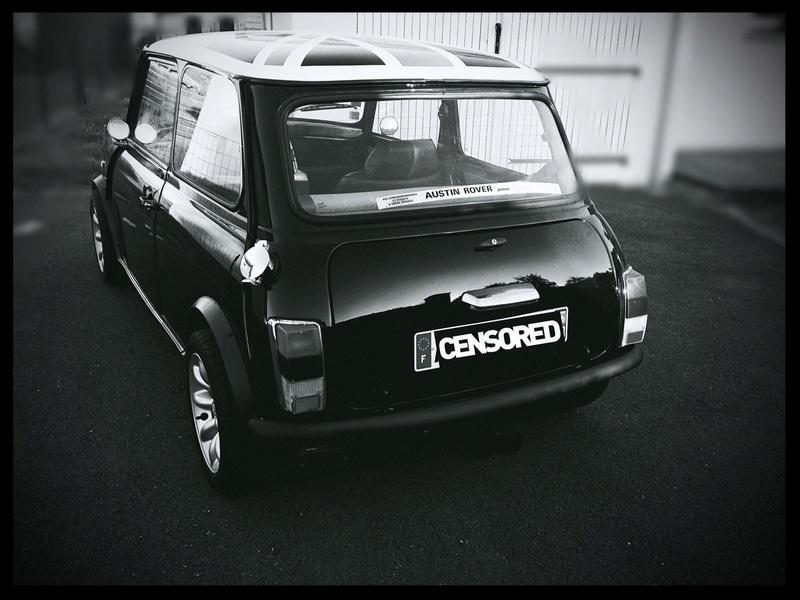
No, unfortunately... not a 1275 Cooper S.
Just my beloved Black Beauty Mini 1000 with a stage 1 and a double Maniflow inox (stainless steel) exhaust!
The Type 49 will have to wait for the 1/12 1967 Chris Amon Monaco 312F1 to be finished.
I’ve also started a M19 and a Lotus Type 43 powered with the BRM H16 engine...
Pascal
-
Thank you very much for all the kind comments Joel.
The intakes installed on the engine are not so shiny than the ones used to show the mesh which are in fact the MFH parts I'm not working with. I widely prefer the, now extremely rare, Widia Models intakes which are made of a more dull aluminium.
I also have those highly polished race mirrors on my..... Mini! (The real one, the Austin, not the BMW...
 )
)
The MFH tool for the tyres ring is a must have as the (beautiful) decals are just impossible to install correctly, I mean I'm not able to lay them down on the tires with a nice circular result!
But it's not so easy to use that great tool and I must admit that my Blue Circle Line is a bit to thick for my taste.
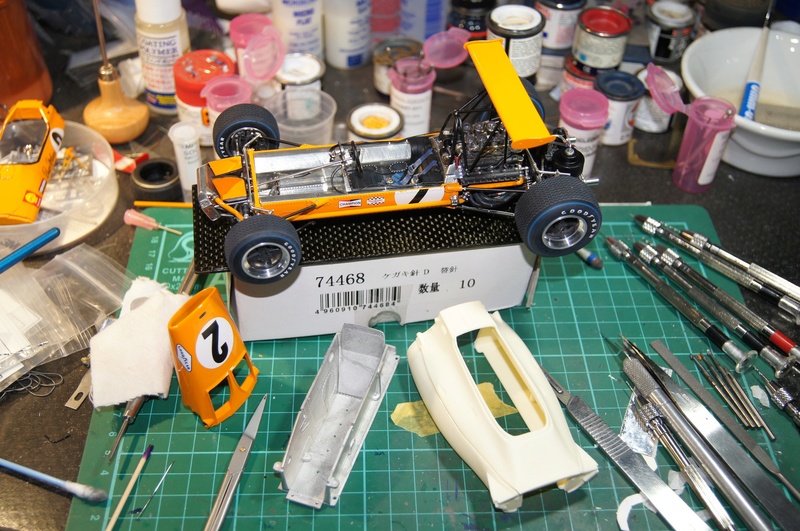
Here we are!
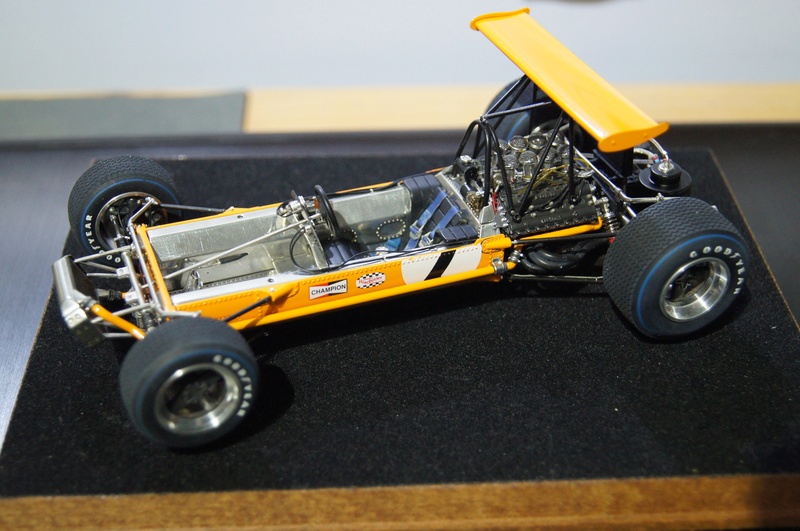
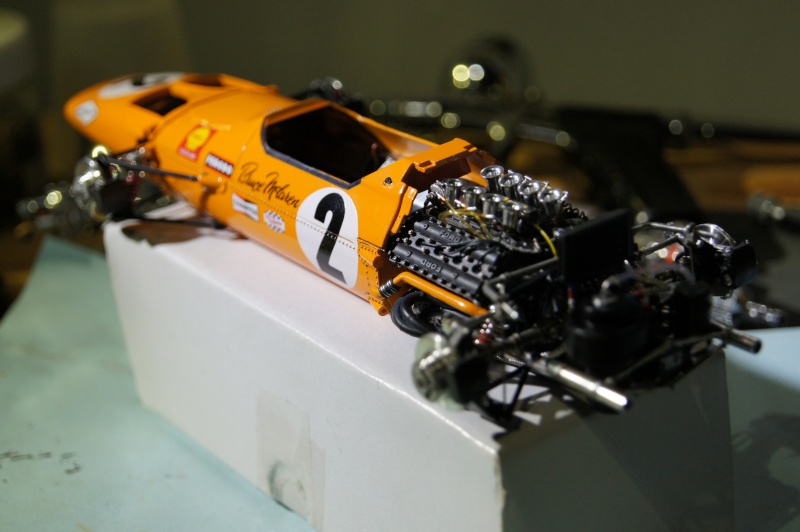
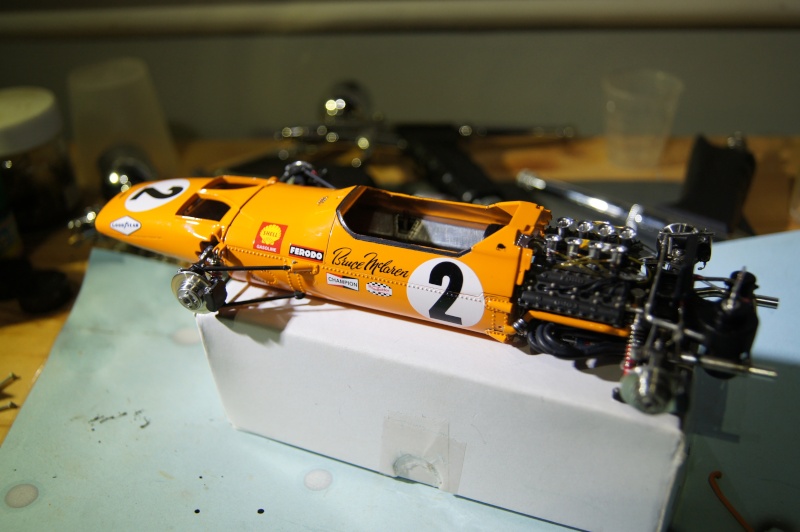
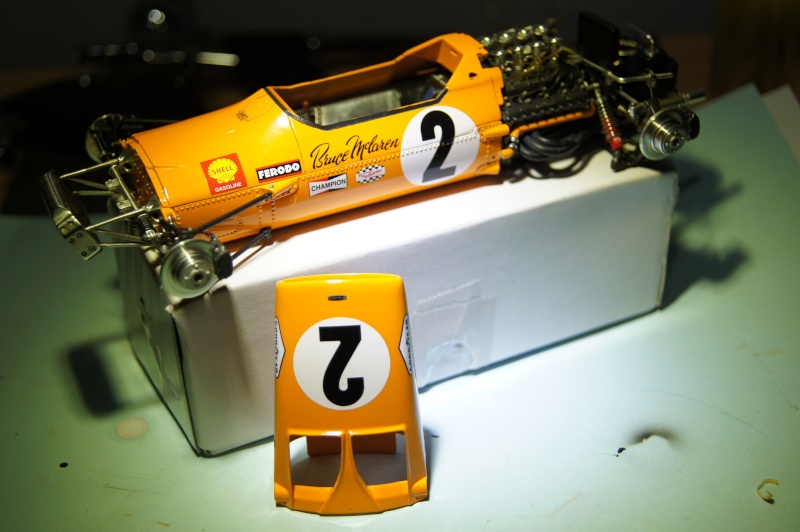
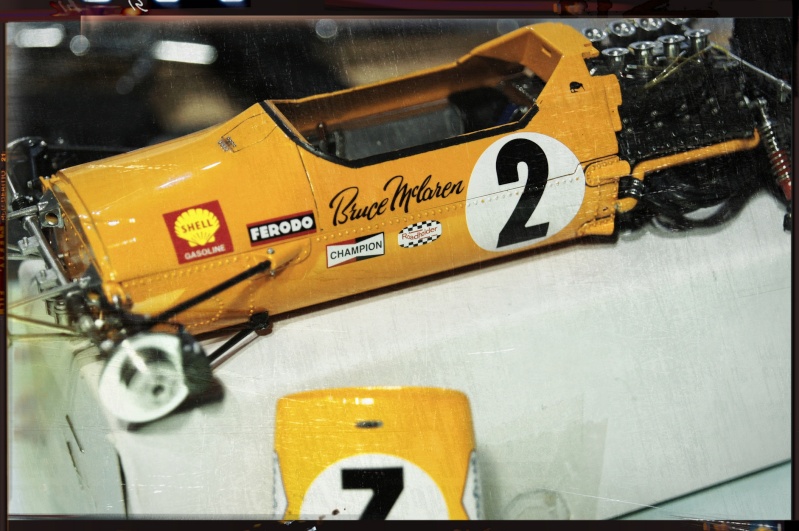
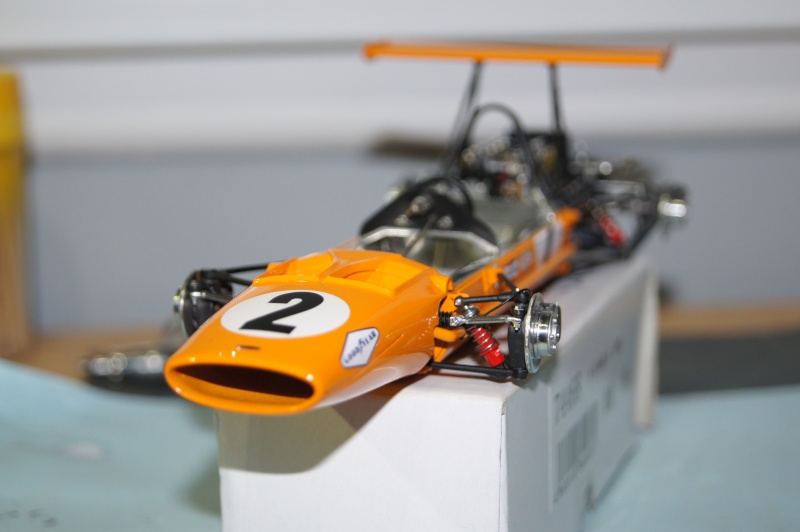
The Roaring Papaya is finished.Mat black after masking:
Windshield is installed with 0.7 resin rivets. Mirrors, Dzus and metal rivets of the front hatch are also now done.
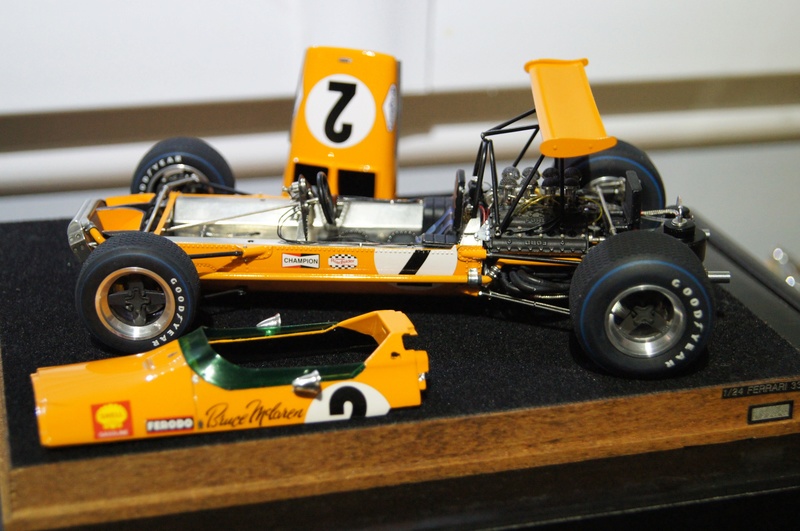
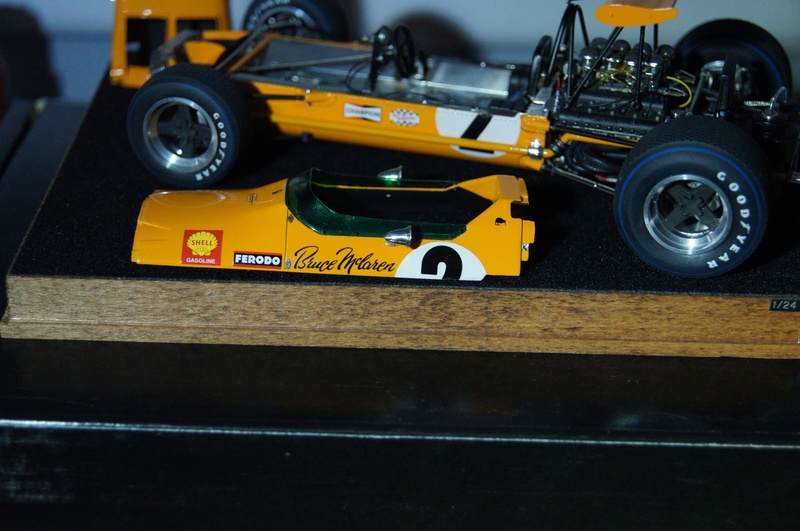
Few more pics of the car undressed.
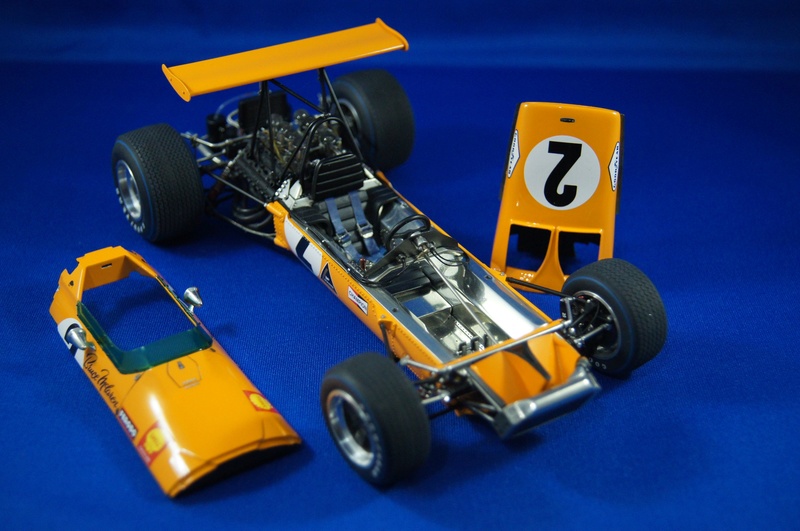
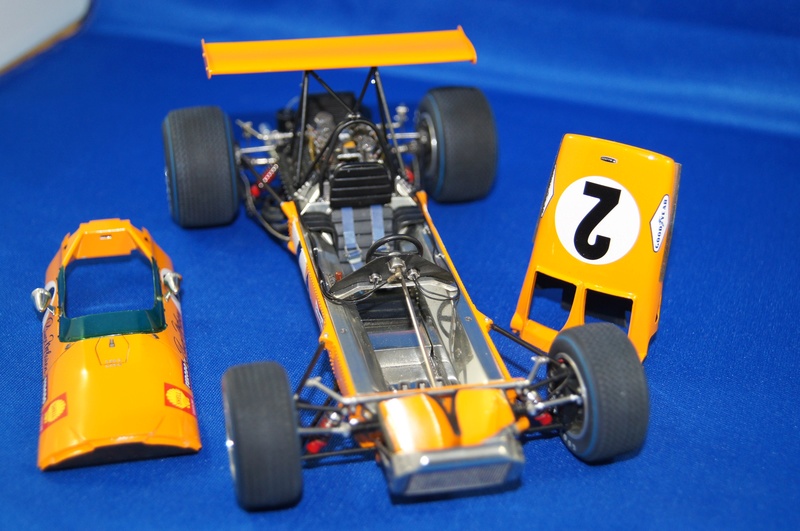
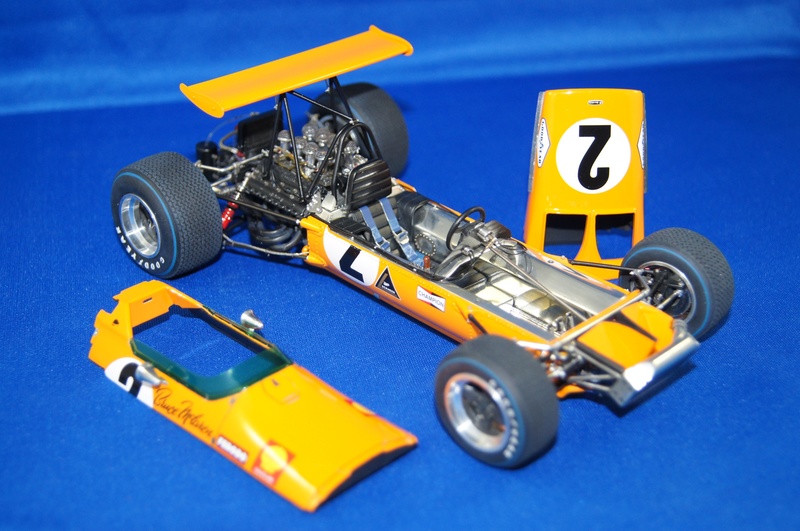
And others with "clothes" on!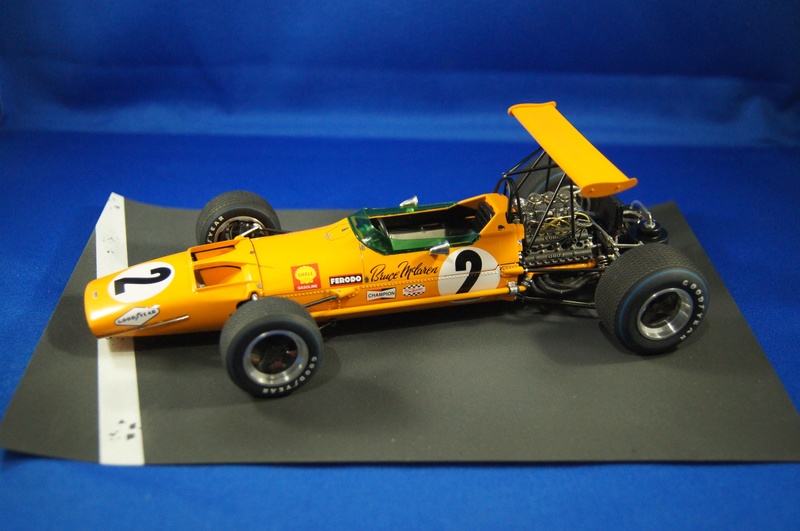
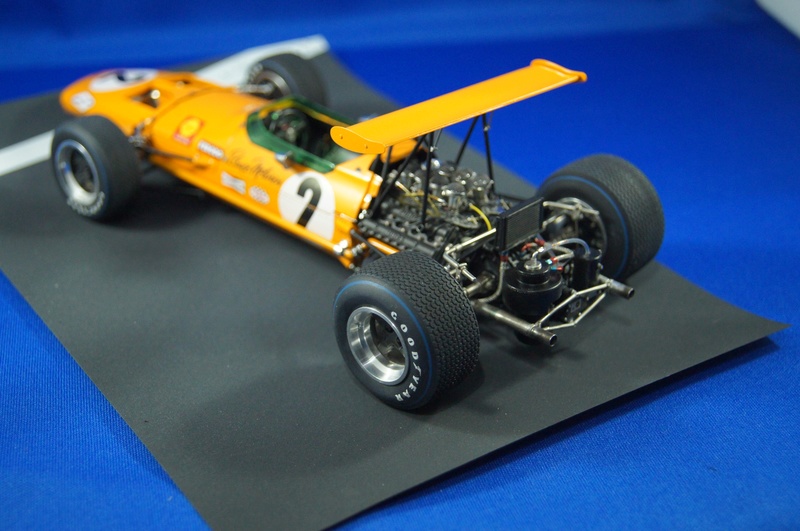
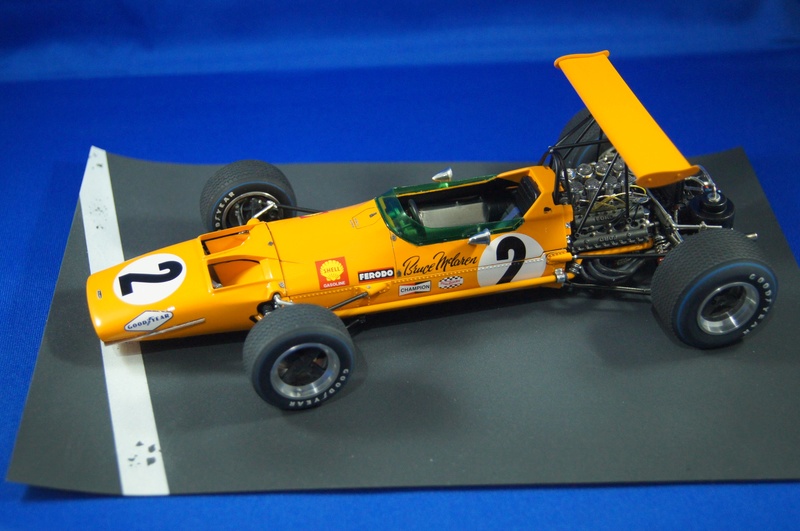
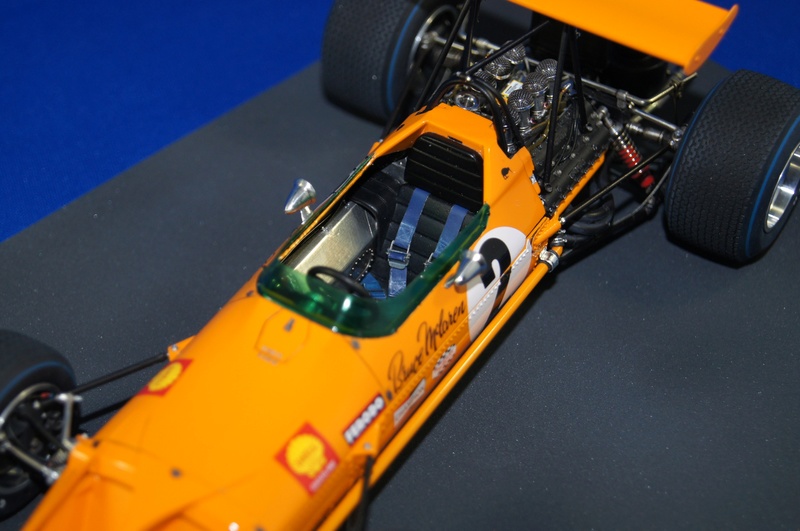
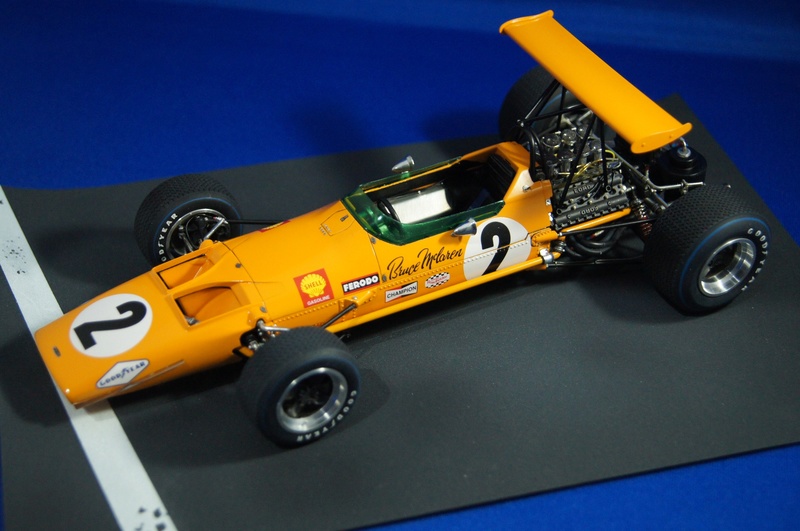
Voilà!
I hope this wip was plesant for you.
As usual, comments and remarks are welcome.Thanks a lot once again for your interest and being so patient.
Pascal

-
Hi,
Thank you very much CaptainObvious

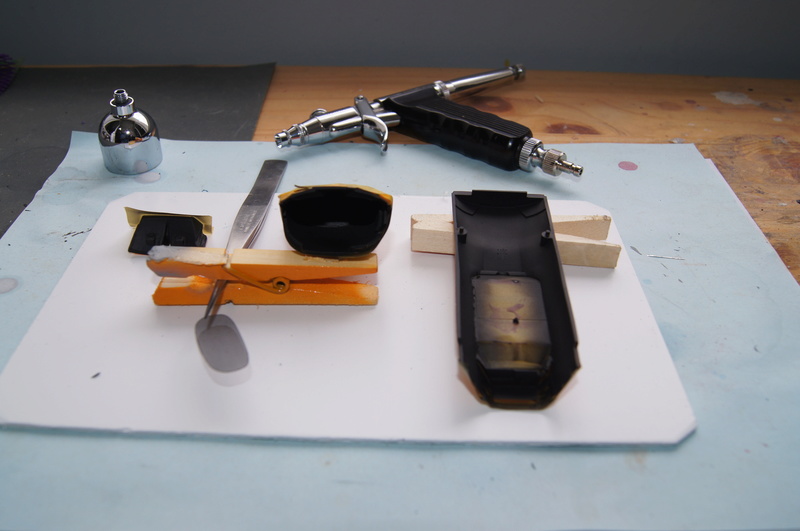
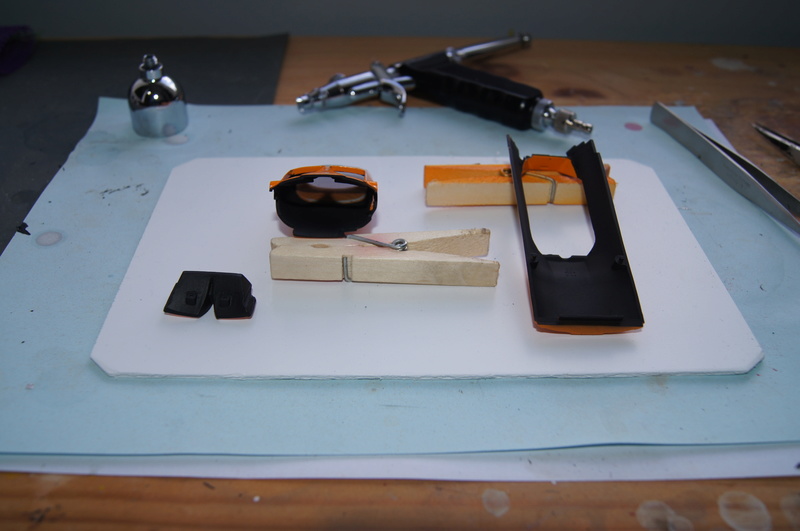
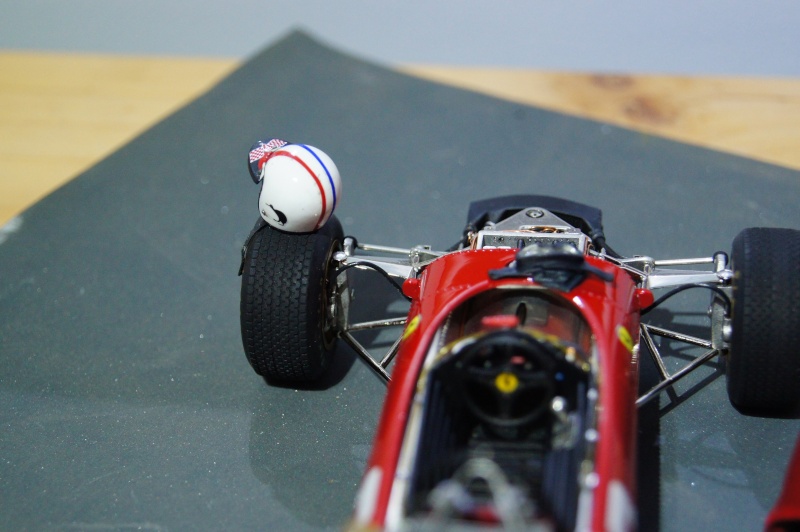
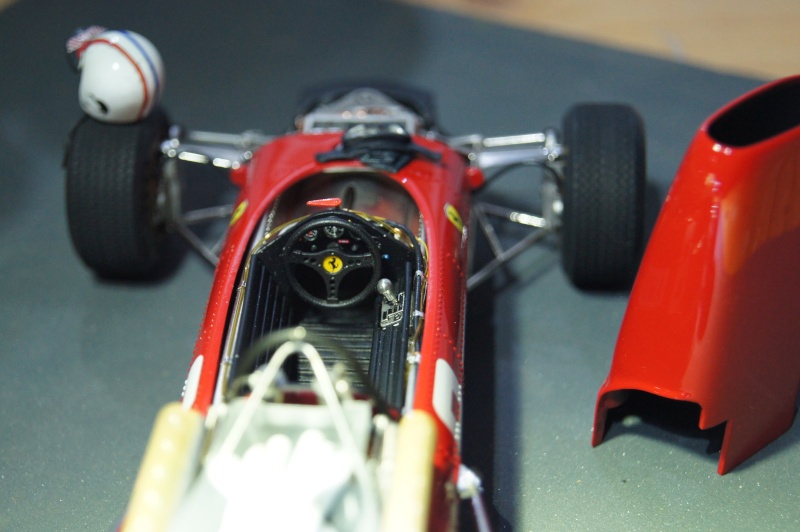
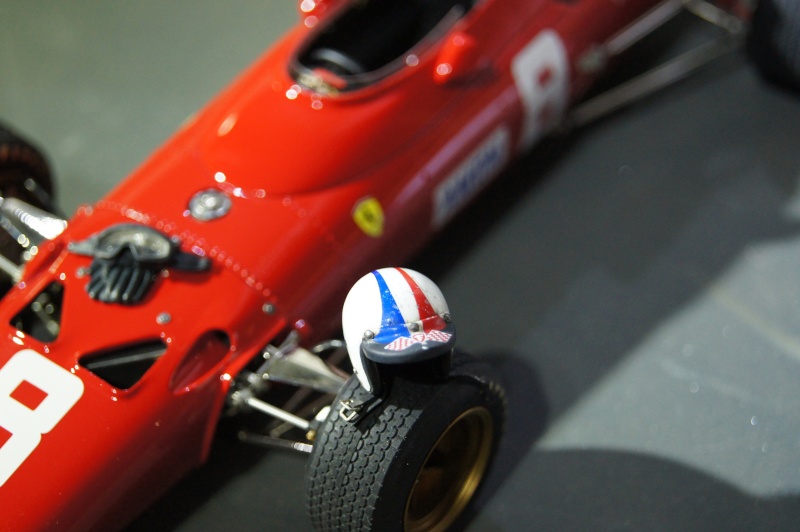
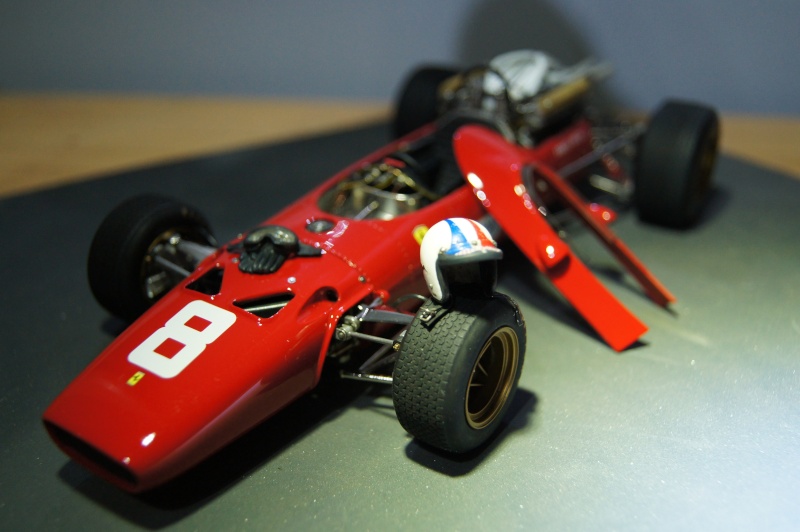
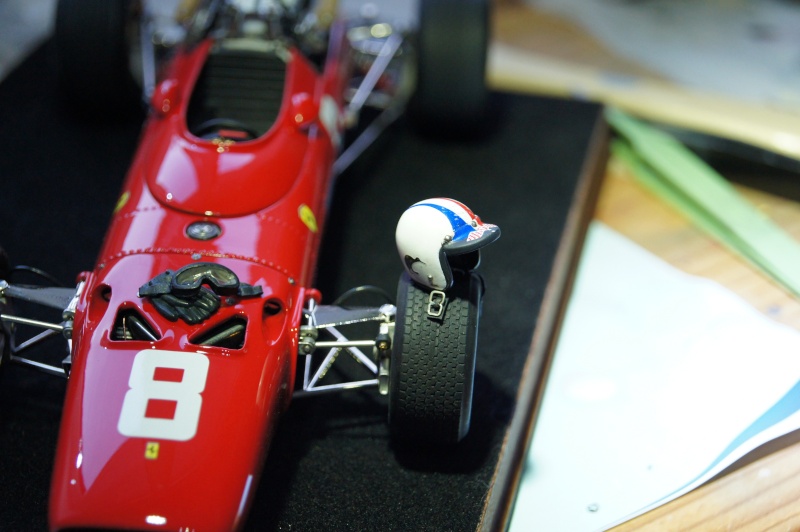
Small addon to the Red Beauty.: MFH Pilot Gear.


Pascal
-
Hi,
Thanks soooooo much for the kind comments Joel!
It seems we share the same passion and love the same legends!
Of course, Dan Gurney is also one of the greatest pilots of all time: I would have loved to know them at that time.
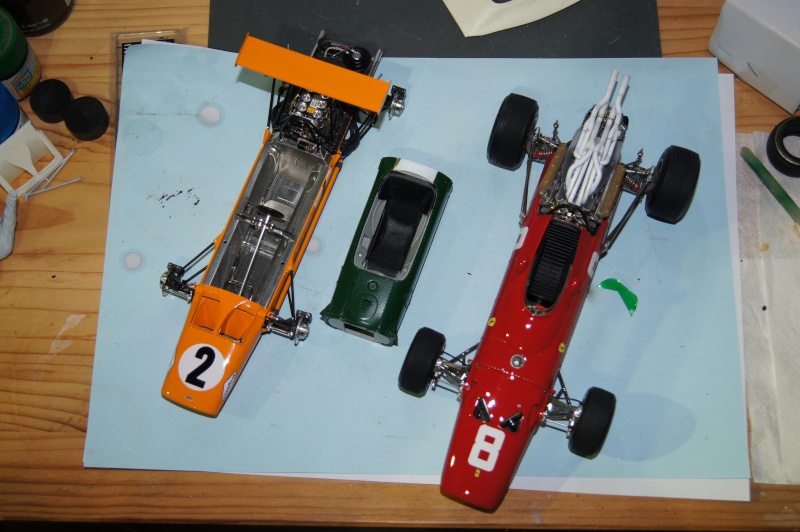
So, of course once again, I have the stunning Eagle T1G, 1/20, from MFH

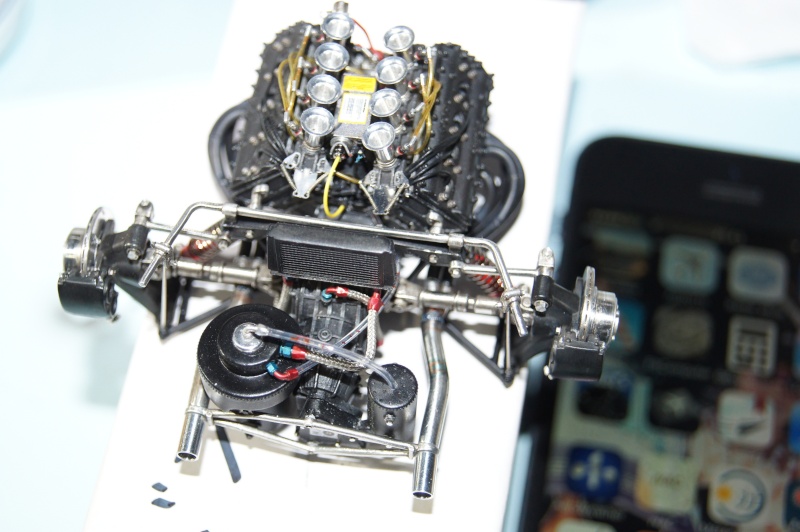
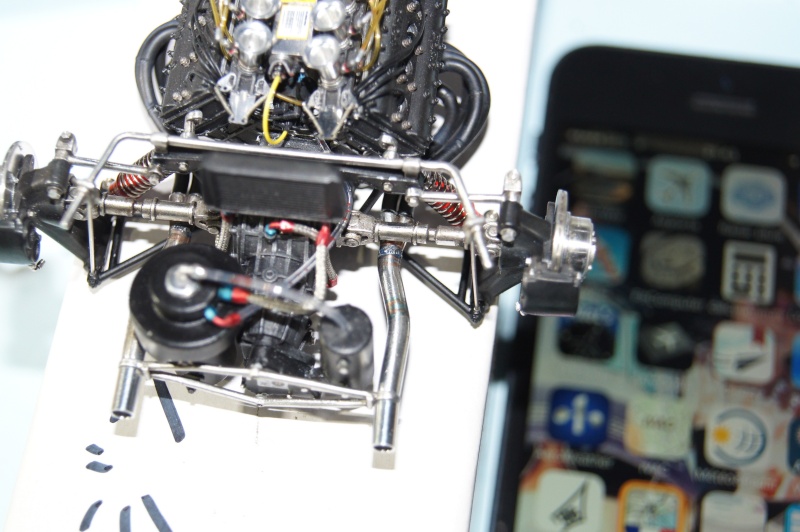
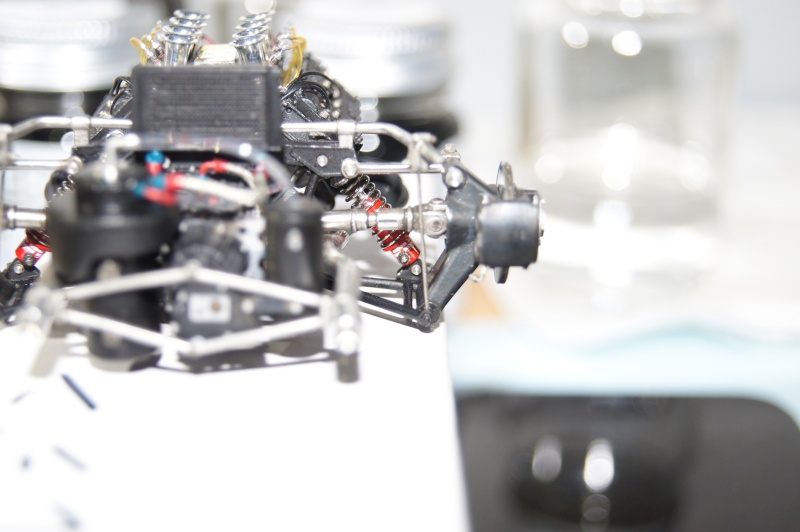
The Chassis between the McLaren and the Ferrari is the bathtub of the Lotus 49, early type used for the 5 first GP of the 1967 season. A 1/20th MFH beauty again.
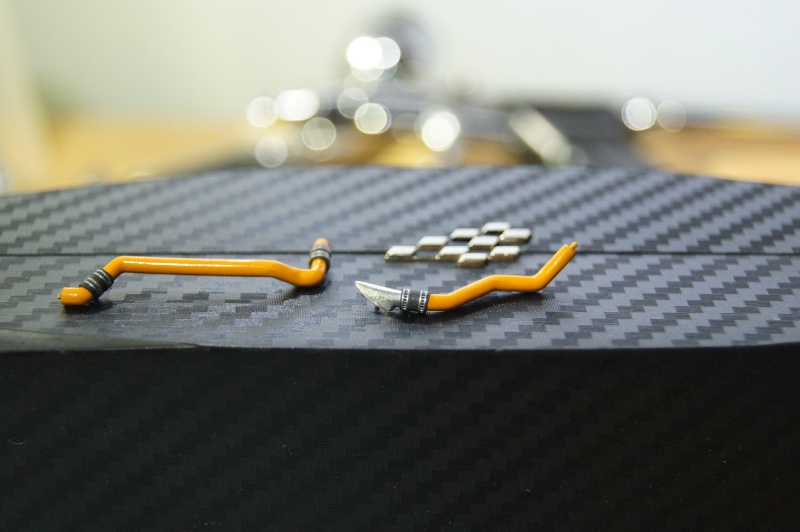
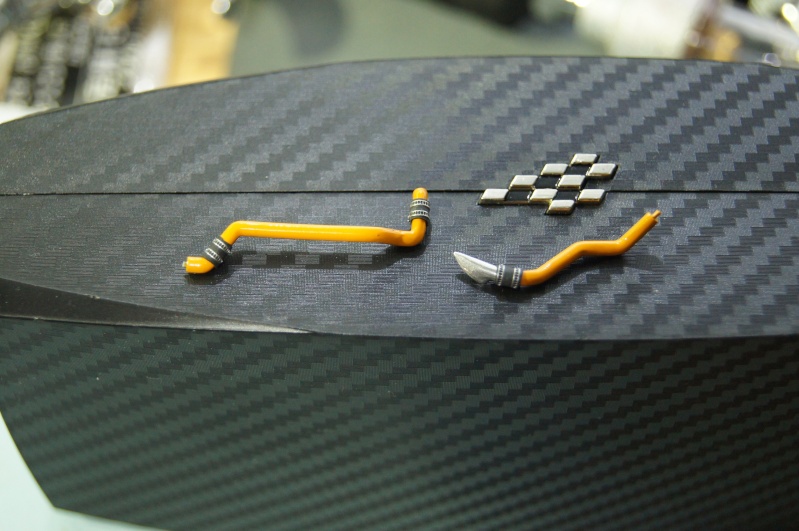
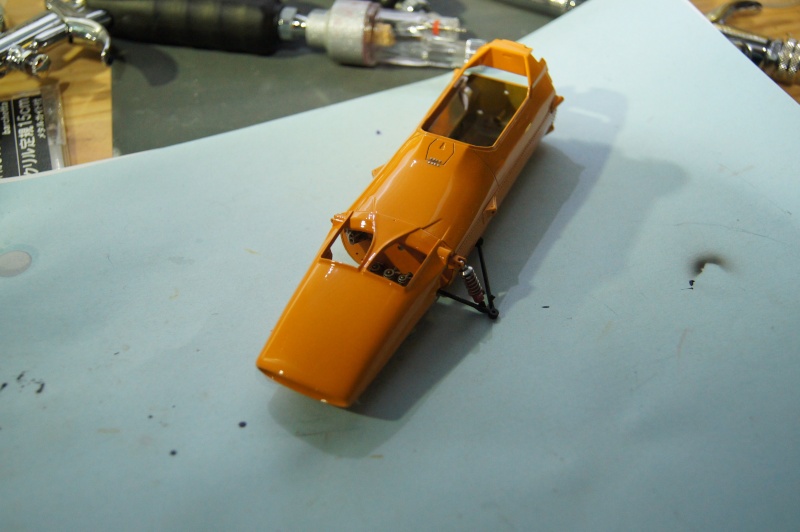
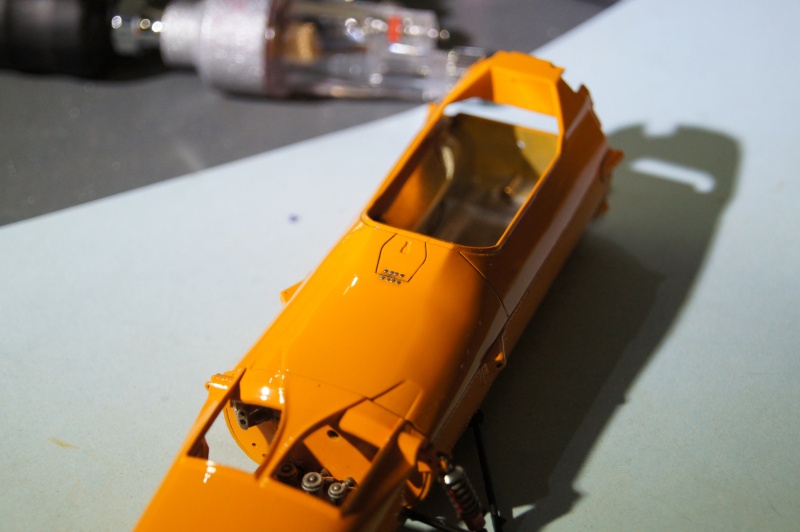
Work on the coolant pipe. The one which is running under the right side of the Body.
Masked, primed, painted and quickly clear coated with brush and Klear.
Installed and connected to the water pump on the engine side and to the radiator on the front end.
Same thing on the left side.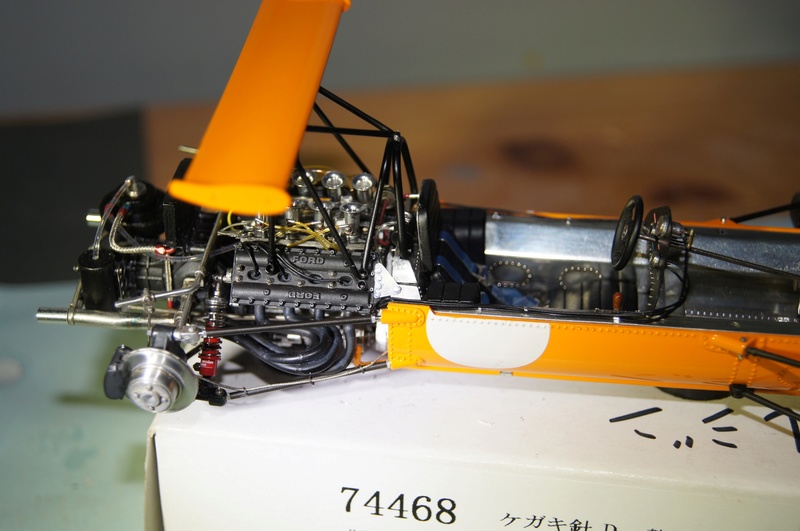
Stabilizing bar and rear view mirrors polished:
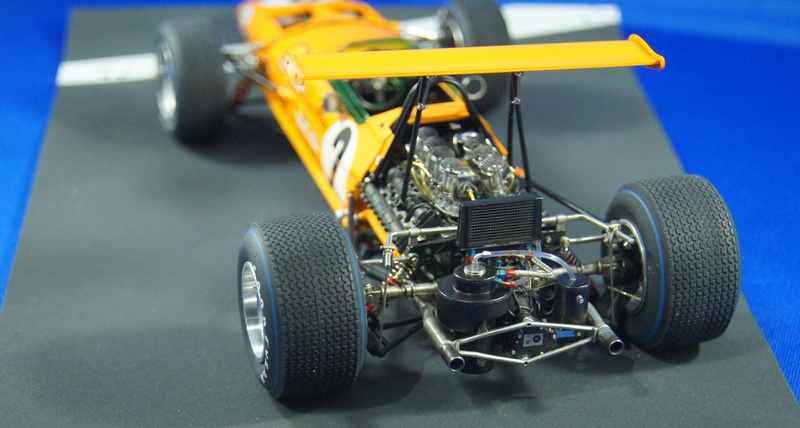
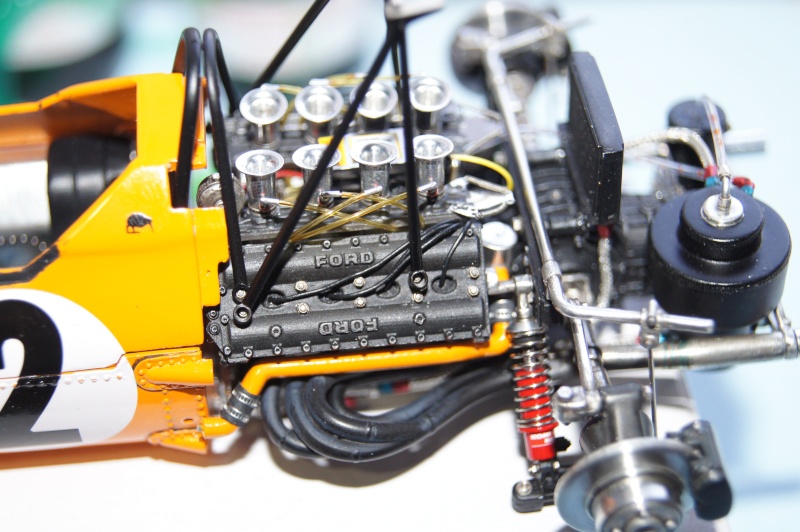
The intake trumpets are made of brass and need another color.
As usual with that kind of part, I prefer a chemical traetment.
So, the mesh is burnished with a blackening agent and slightly dry brushed with Metal Cote Polished Steel.
Then a thin aluminum band is installed around the base of the mesh.
An example on the MFH Lotus 49 DFV intakes, then on the AWESOME Widia velocity stacks of the McLaren.
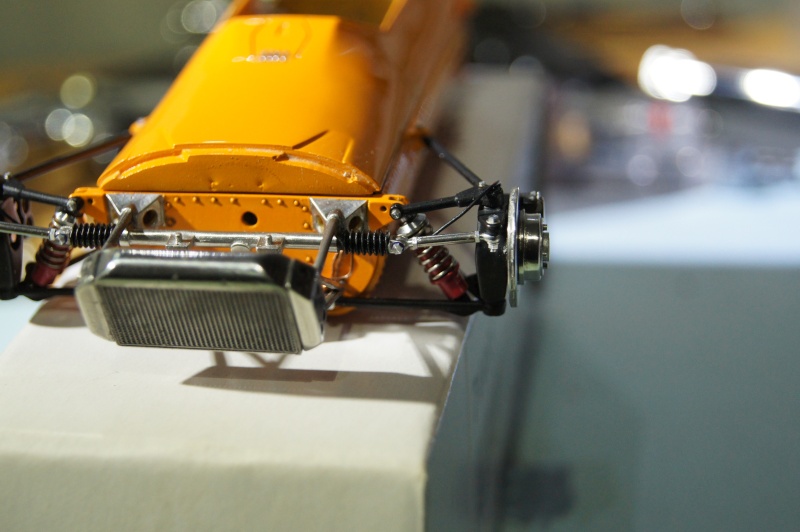
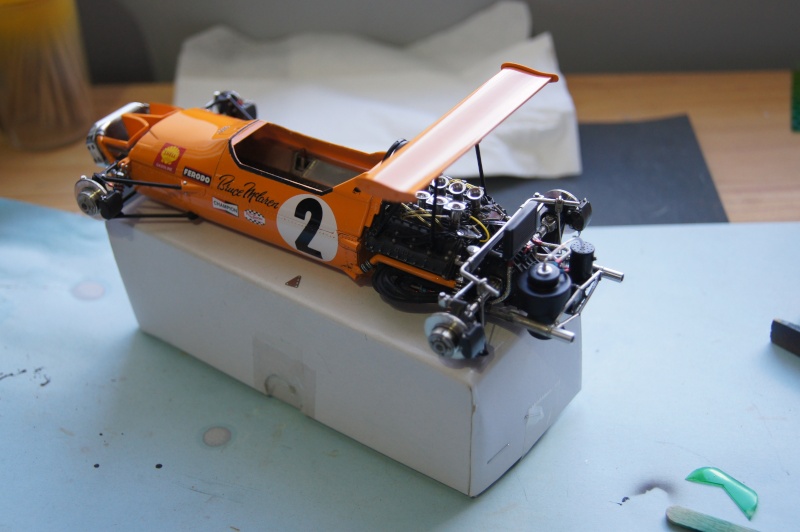
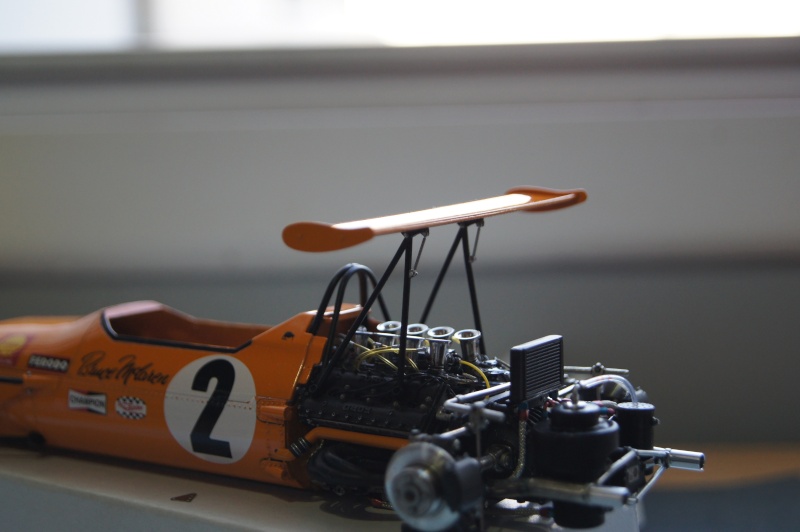
Fuel pump, expansion bowl (?...) and wing mounts installed.
The engine mounting plates are rebuilt and installed with RBMotion hardware.
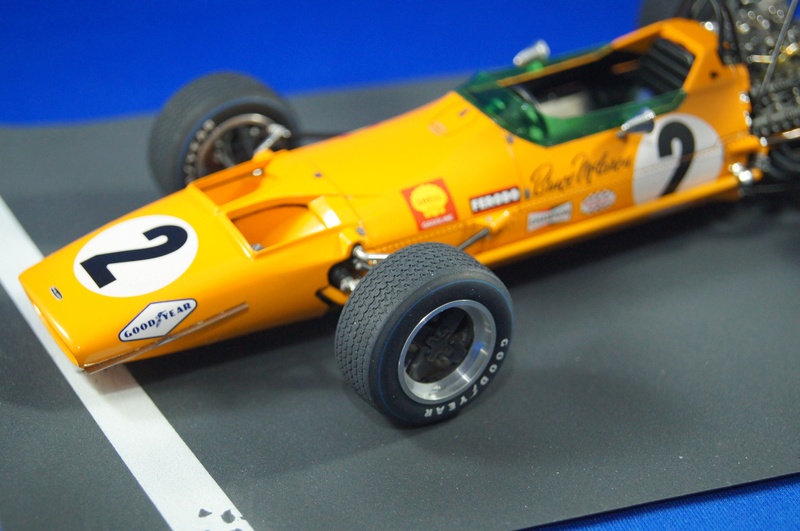
Time for the Papaya to have wheels.
Central seam line is sanded.
The blue ring is a mix of US Navy paints from Model Master Acryl.
Tires are airbrushed thru the MFH tool.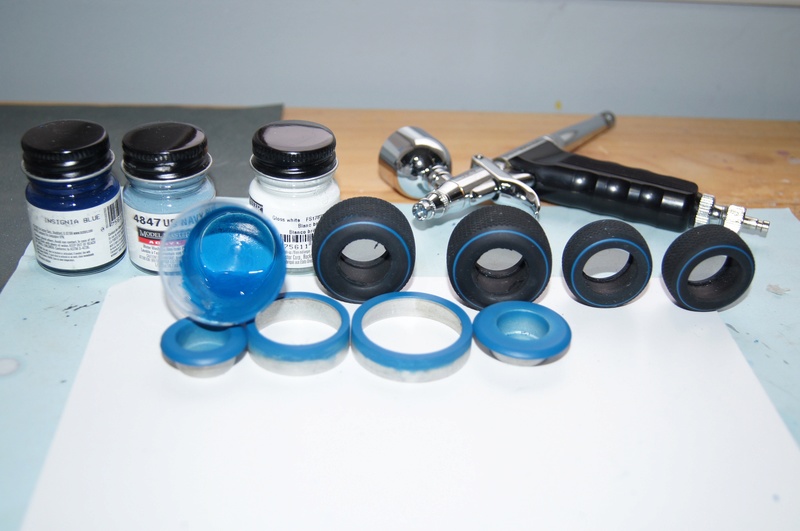
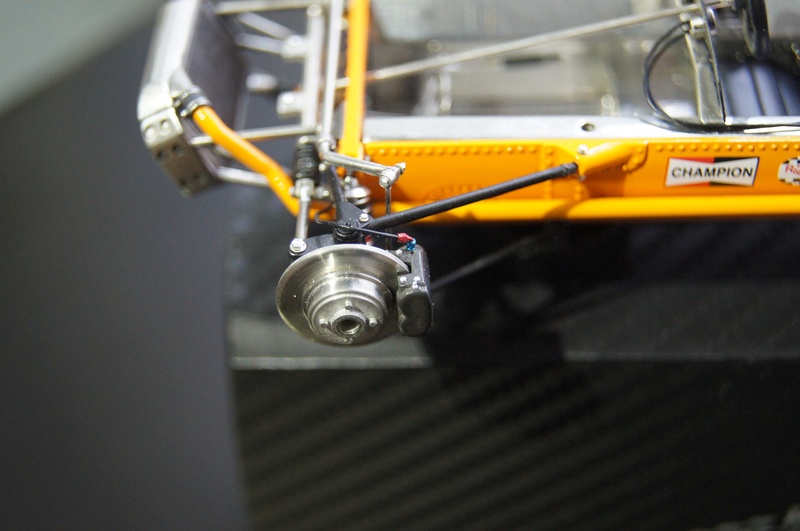
A last look on the caliper and its details...
Shoes or socks on!
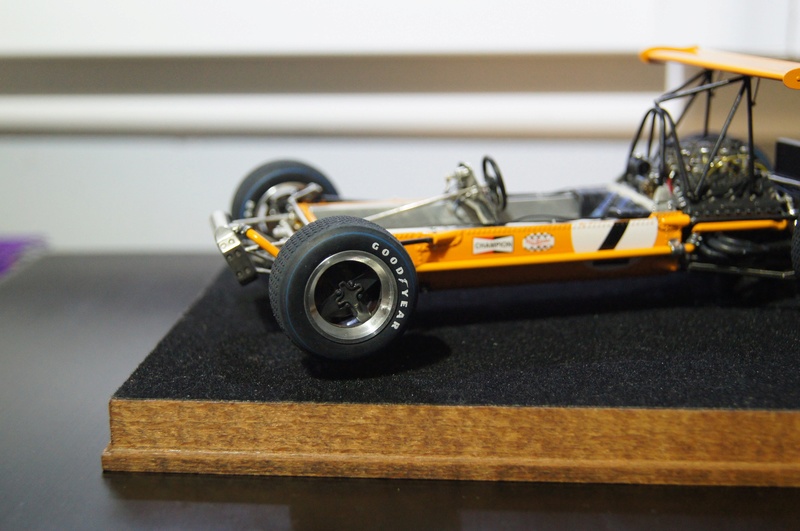
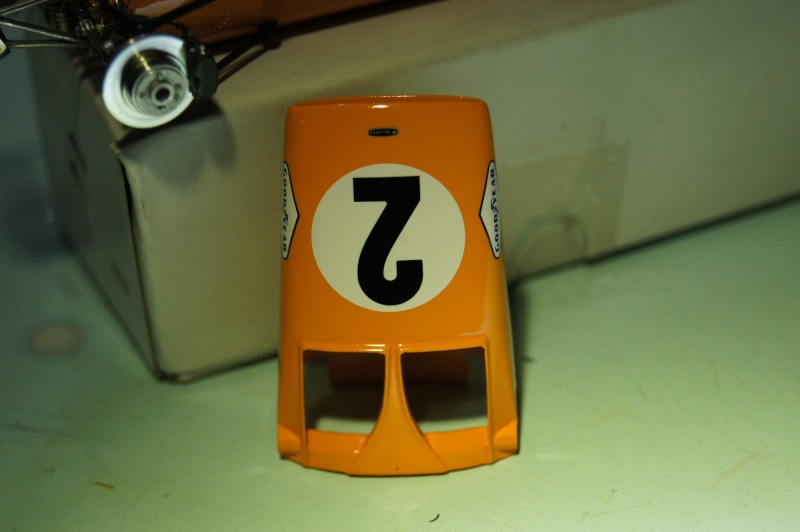
Nose on:
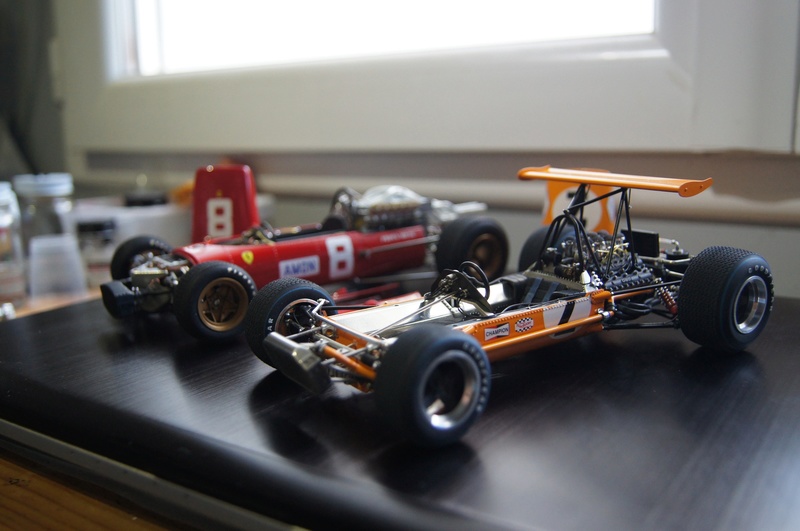
with her red friend:
already thinking to the next one...
More soon.
The end is not far.
Sorry once again for my poor english and maybe the use of the wrong words sometimes...
Pascal
-
Hi,
Thank you very much Mates!
Don't worry about the helmet and the pilot gear Joel...
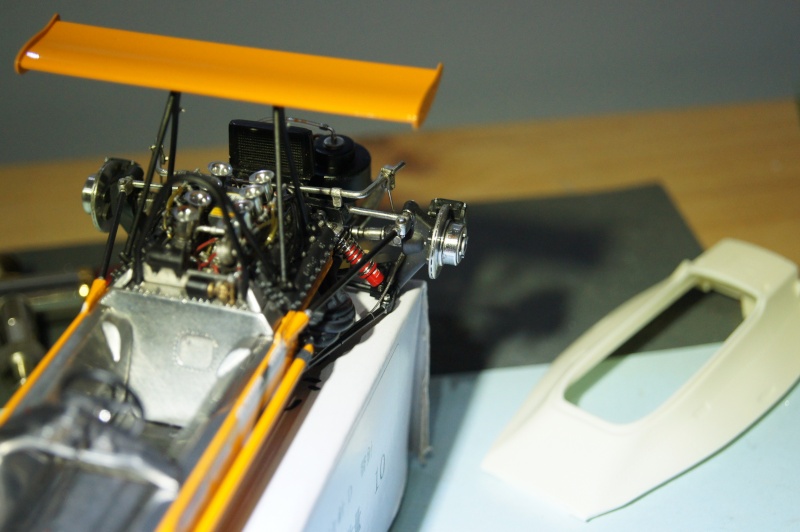
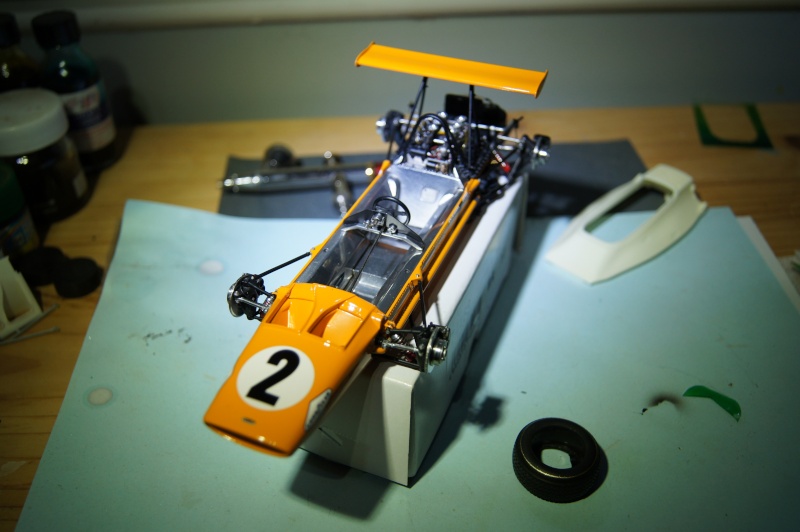
More pics of the RRROOOOAAAAARRRRING Papaya ;)
Front end of the McLaren is still progressing and almost done.
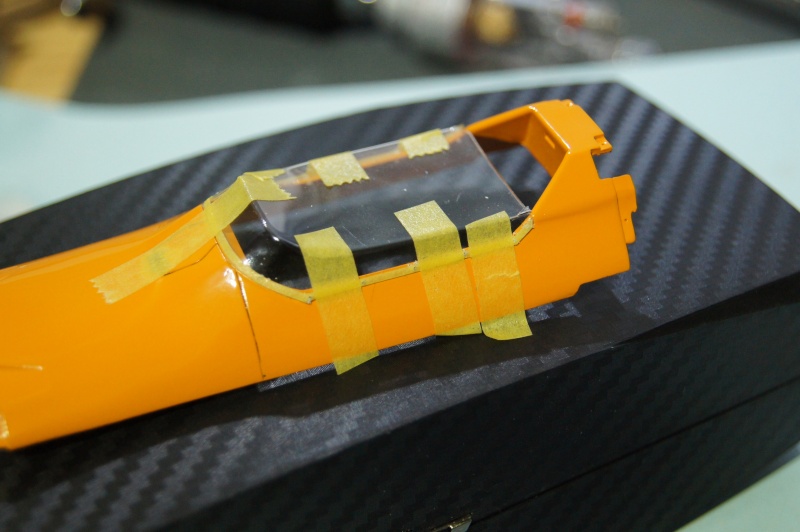
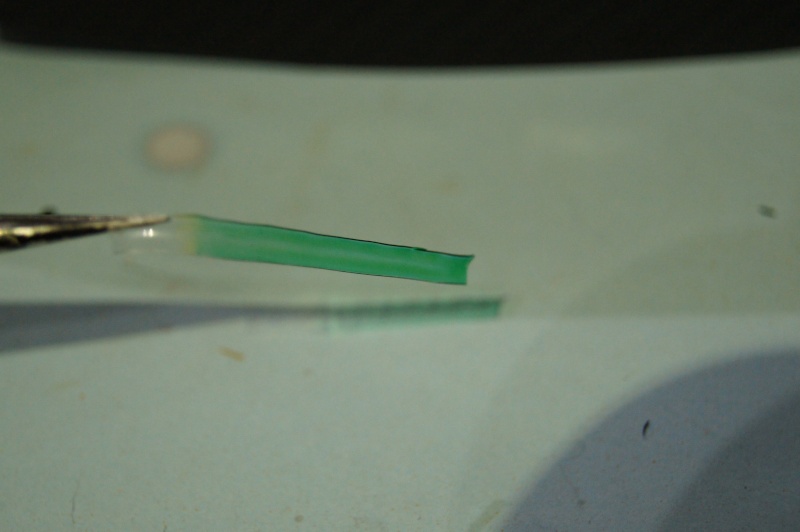
Work on the rhodoïd windshield of the M7A:
- cut,
- drilled,
- Black gasket painted
and a color test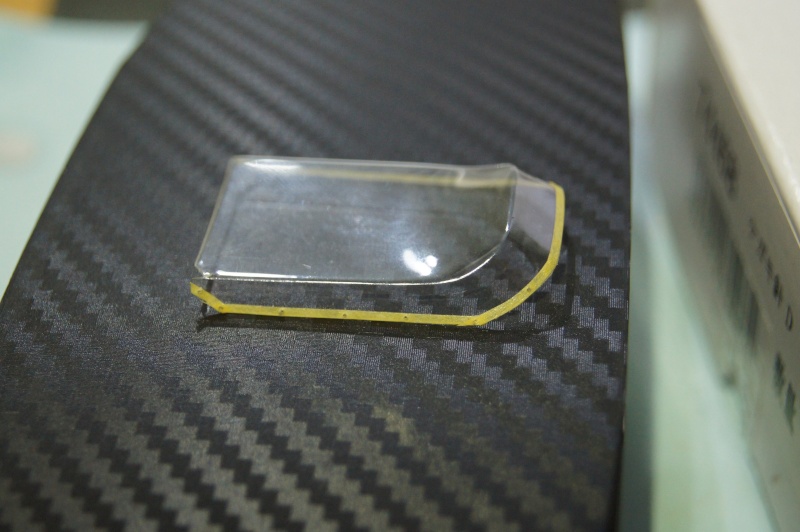
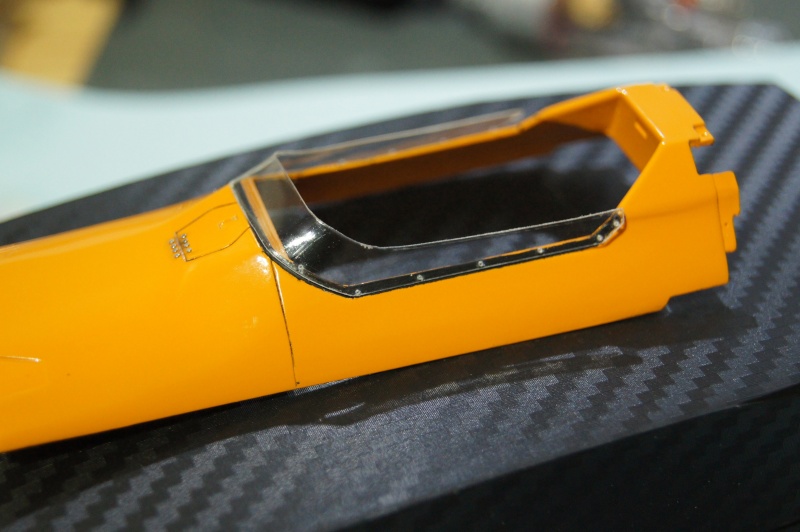
It begins to look like a Formula 1
... And I love the pilot's name calligraphy!
Prep, primer and ZP SG Black.

details added:
I forgot this part... so Orange is out.
Need to clear coat... or not...
new color test...
...PGo for this one:
Details on the masts with the linkage bracket:
New parts made:
A bit disappointed due to the fact I din't have enough nuts to make a better detailing...test fitting:

Cooling duct connected.
Alu tape having fun into a bath of MEK :
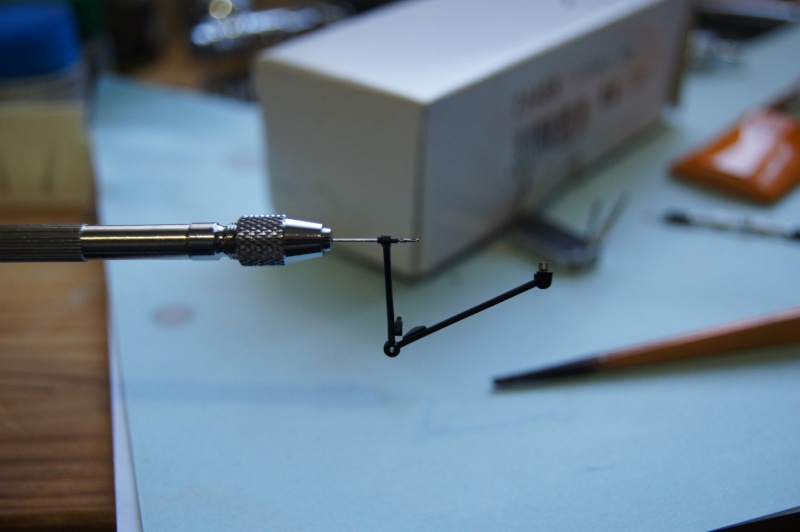
I spent a loooong time to find a solution and to succeed in modifying the rear tie rods: I didn't like that much the original ones.
I also added the brake lines .
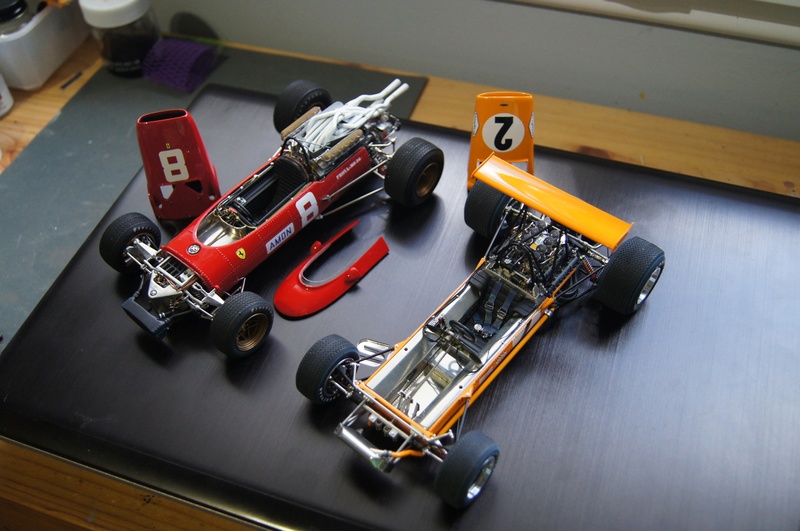
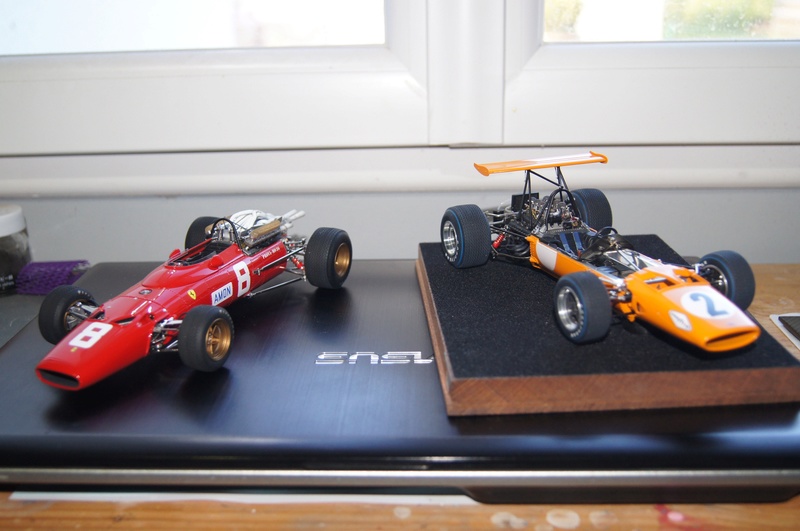
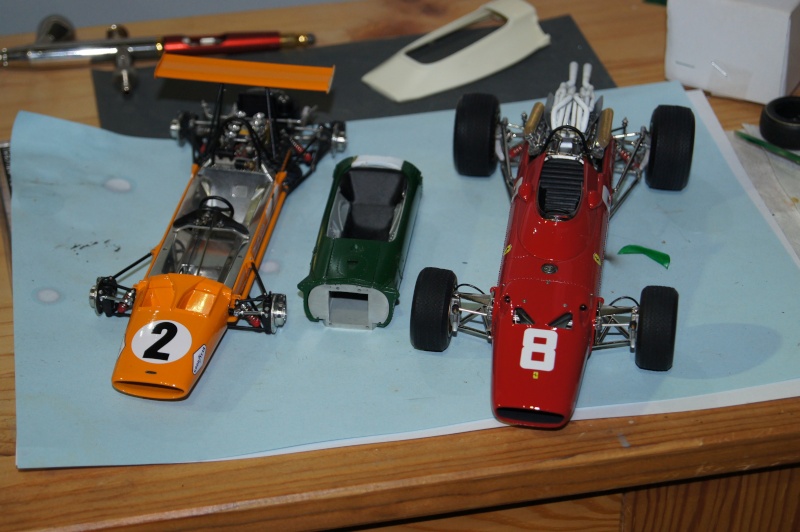
As the build is on a good way, I took some pictures of the M7 next to the 312 and the body of a Lotus 49...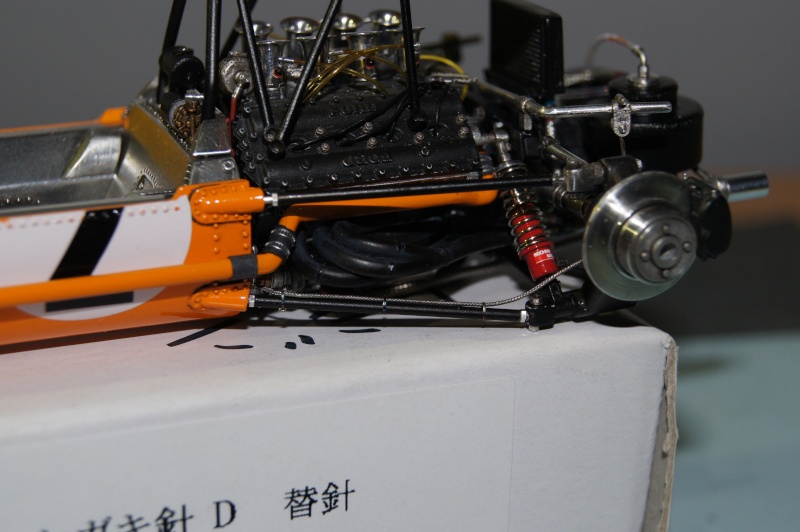
More soon!;)
Pascal
-
Few more pictures...
Started to work on the instrument panel and tachometer/tacho connection.
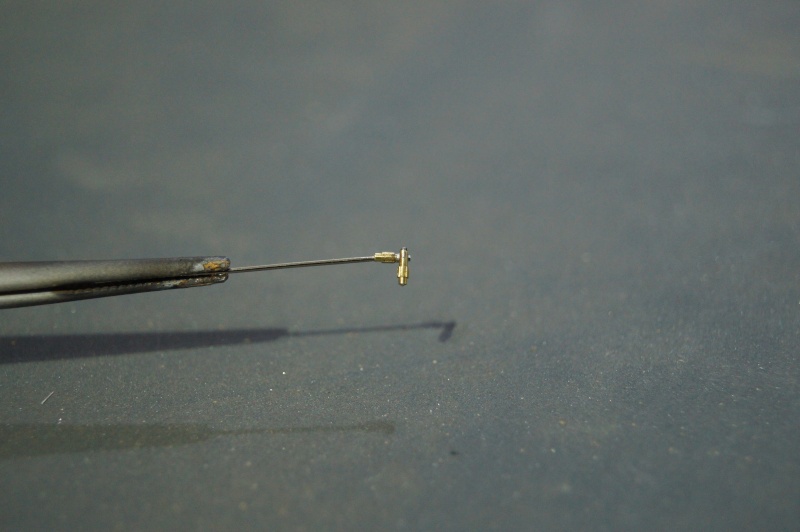
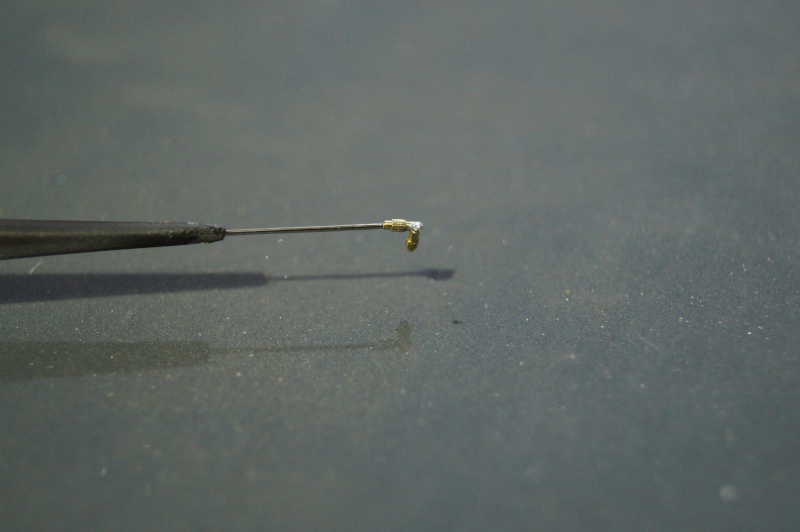
Angle gear is made of 2 parts of brass connectors, filed down and soldered.
Not the best, but not too bad due to the fact that the part diameter is 0.7.
The genuine hole in the tachometer is drilled with 0.5 bit, then filled with 0.5 lead wire.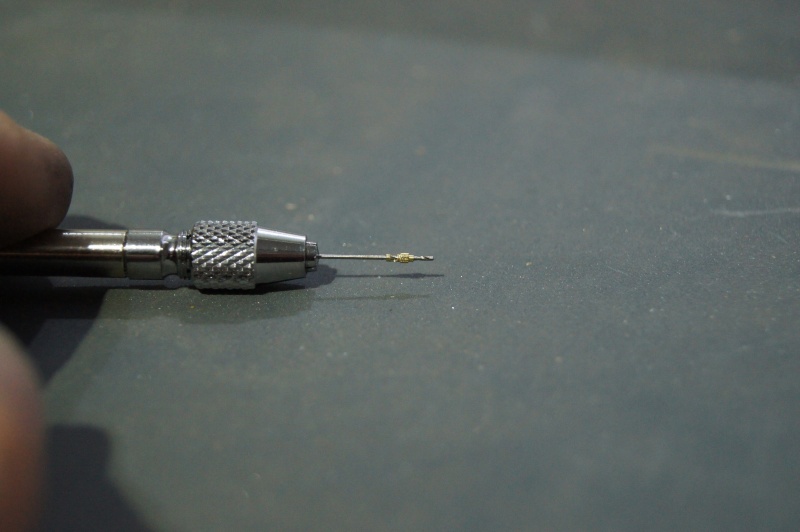
Dash board painted with Flat Black ZP:

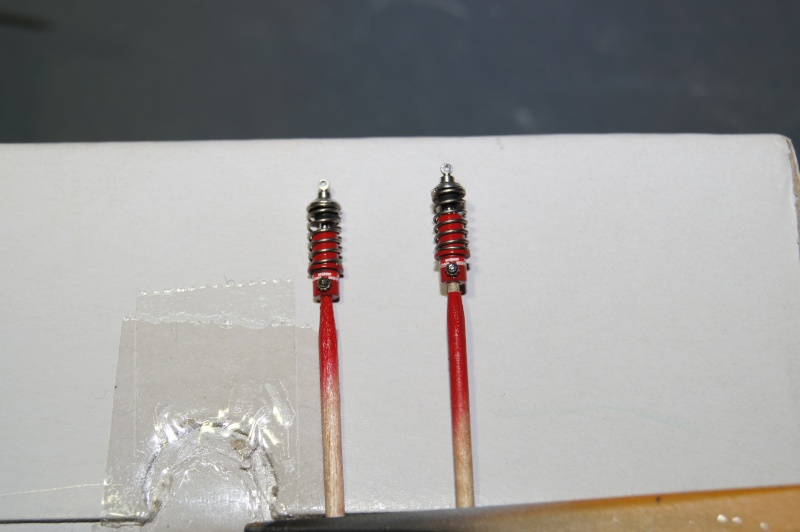
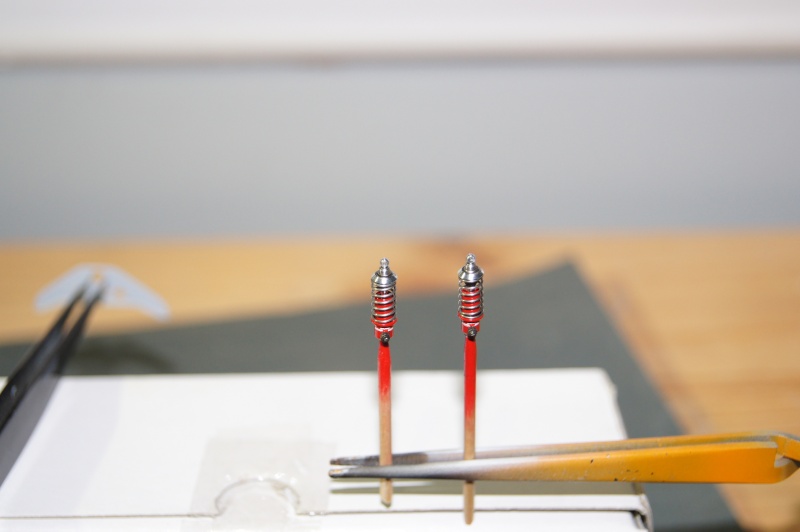
Front dampers done:
Stub axle modified:

... then burnished:
Same for the center of the wheels:
Stainless steel pop rivets cut and installed.
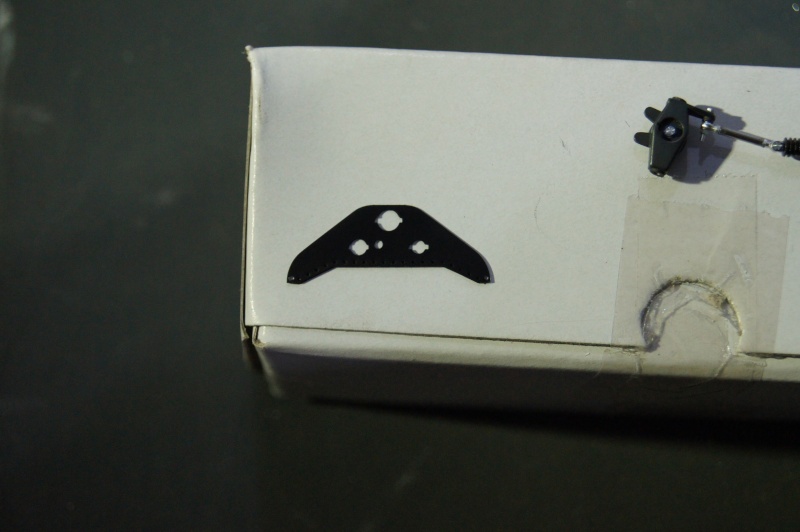
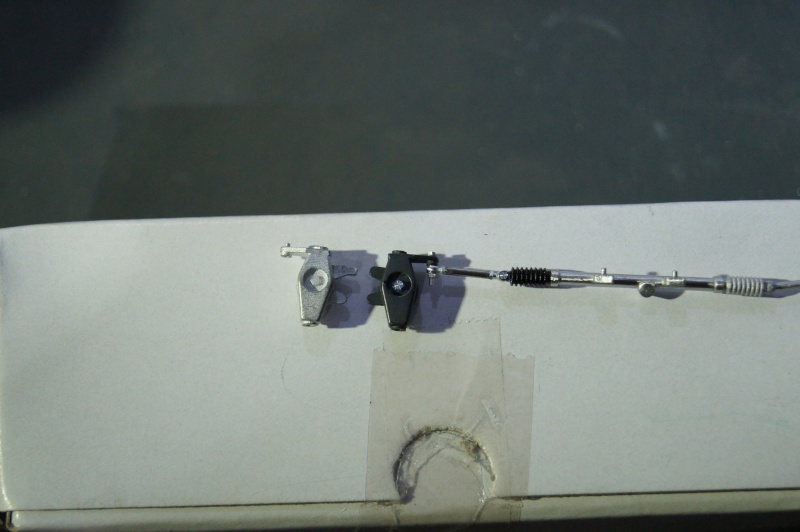
A little square bracket is fastened to the right side in order to hold the accelerator cable.
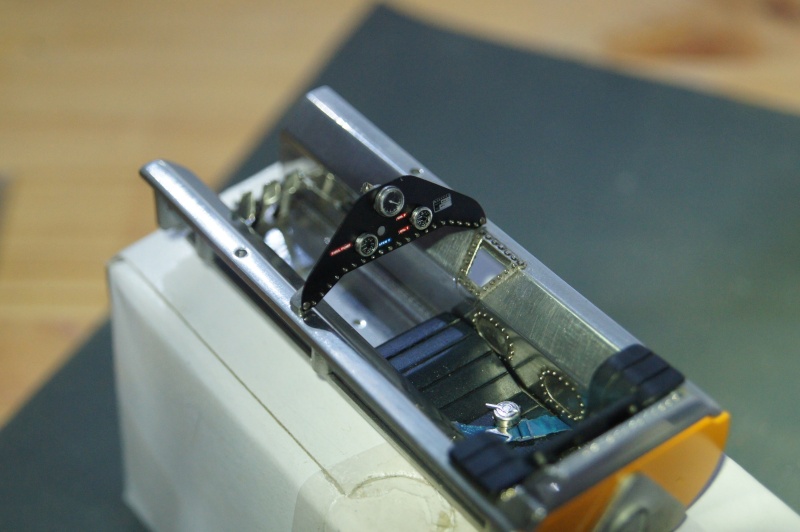
Dashboard is finished and instruments are installed:
Accelerator OK:

I've tried to do the stitching by myself instead of applying decals:
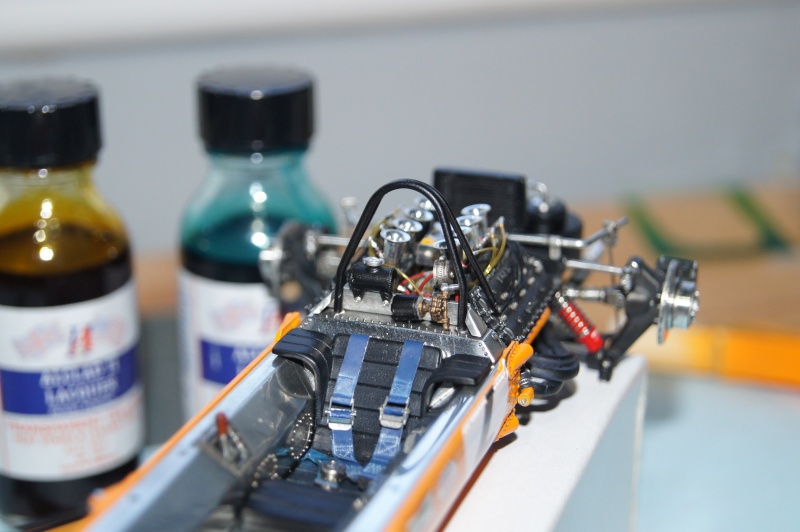
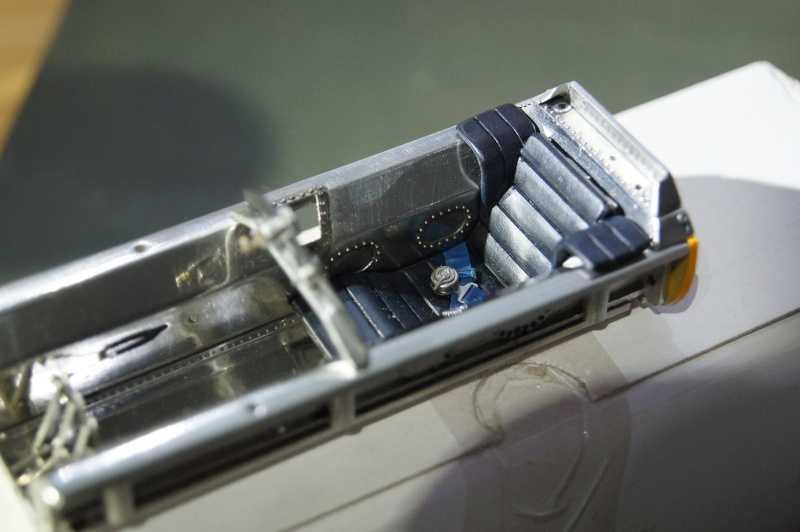
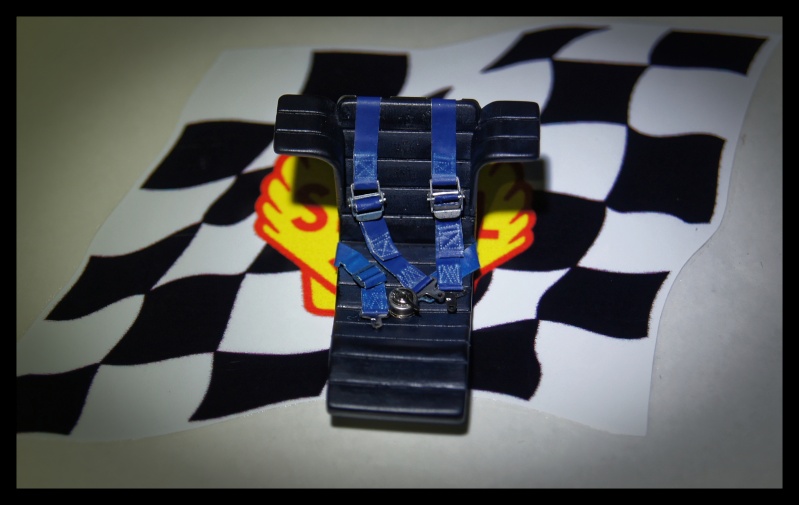
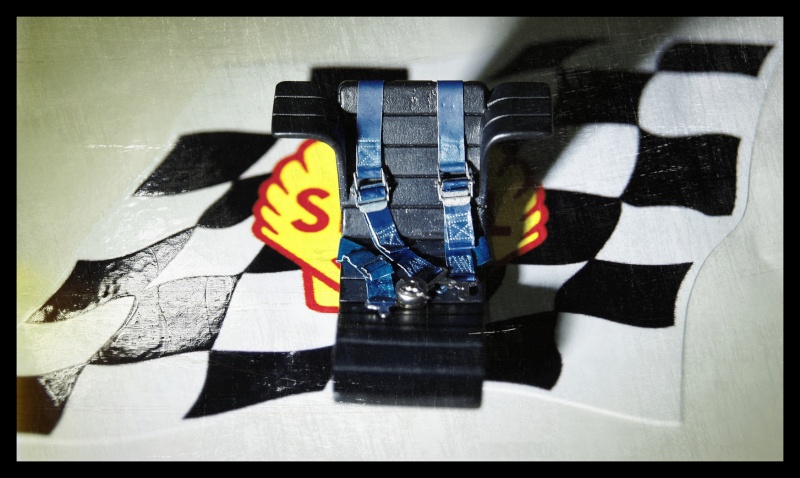
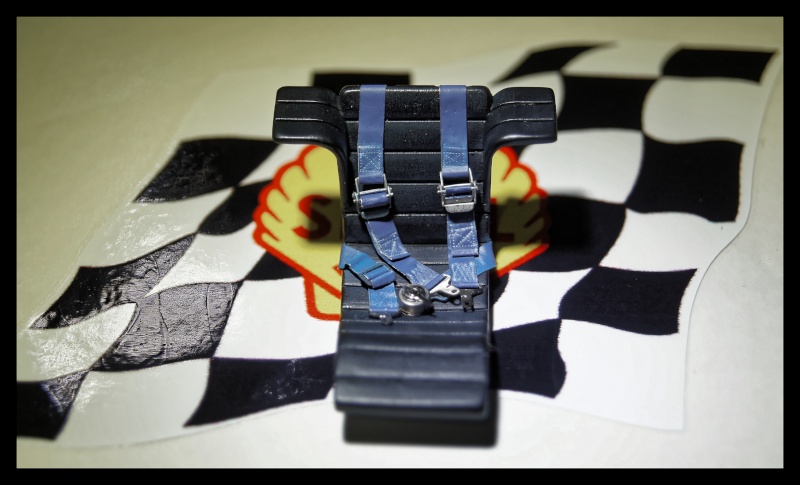
In the cockpit. A light weathering is started on the seat:
Dry fitting:

Time for the clear coat:
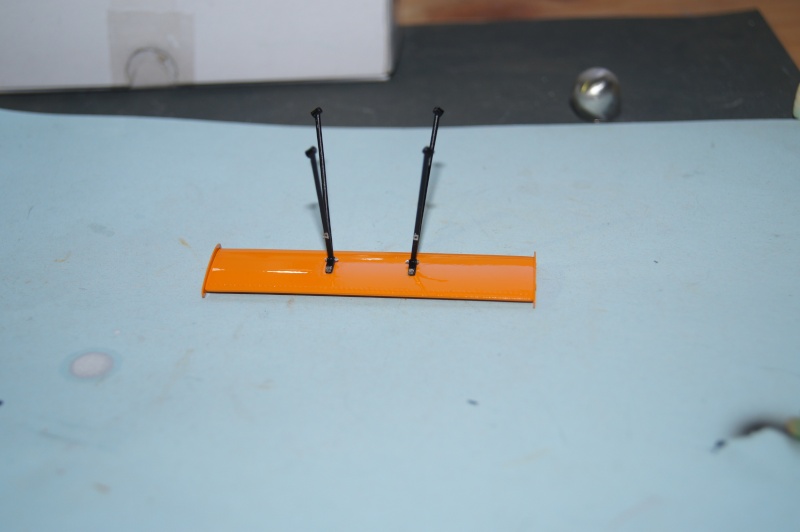
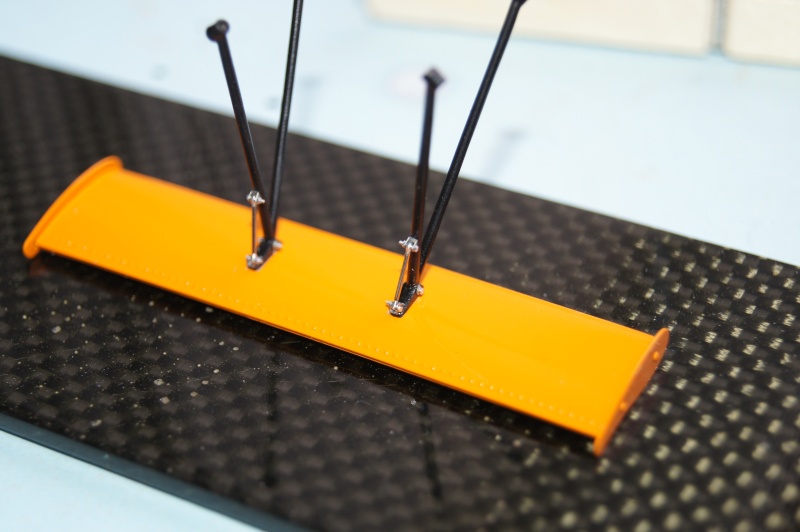
Modification for the wing support:
Shoulder straps done too:
body installed and some work on the pipes with rubber connections and clamps.

bracket for the brakes fittings
Few details for the calipers (from the MFH M19).
Test fit
More soon!
Pascal
-
Me again...
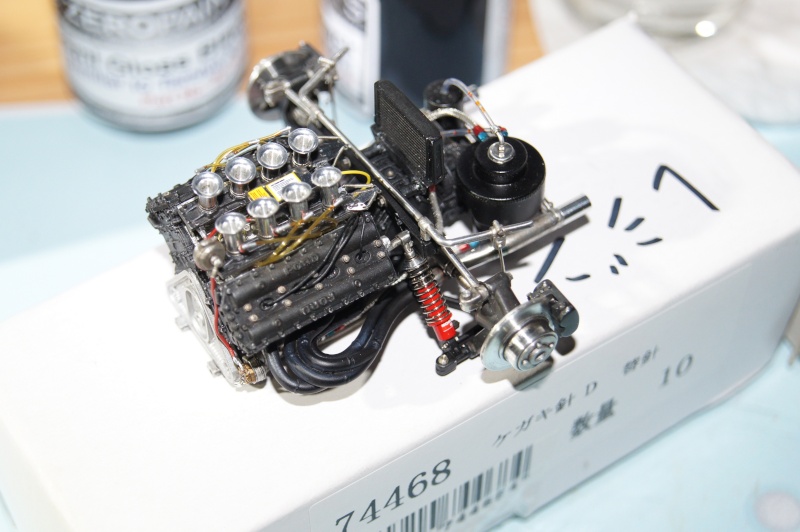
Maskol off, ZP Translucent blue and W&N Ivory black wash down on the weld lines area:
Not decided yet...
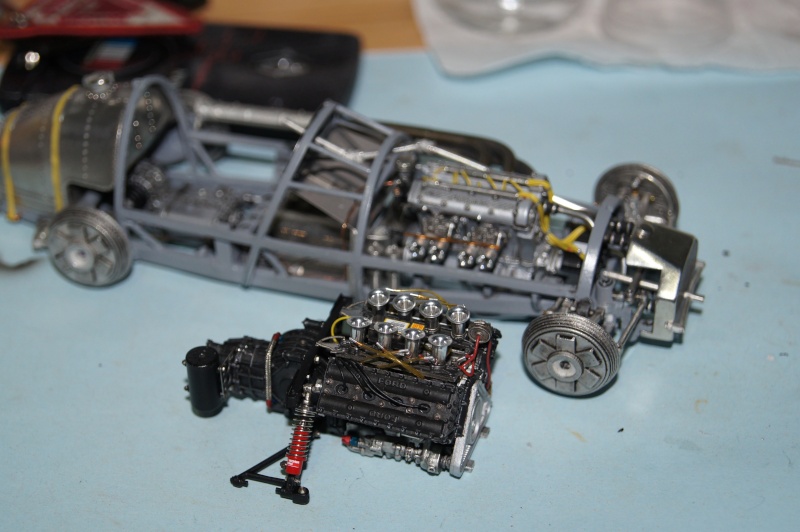
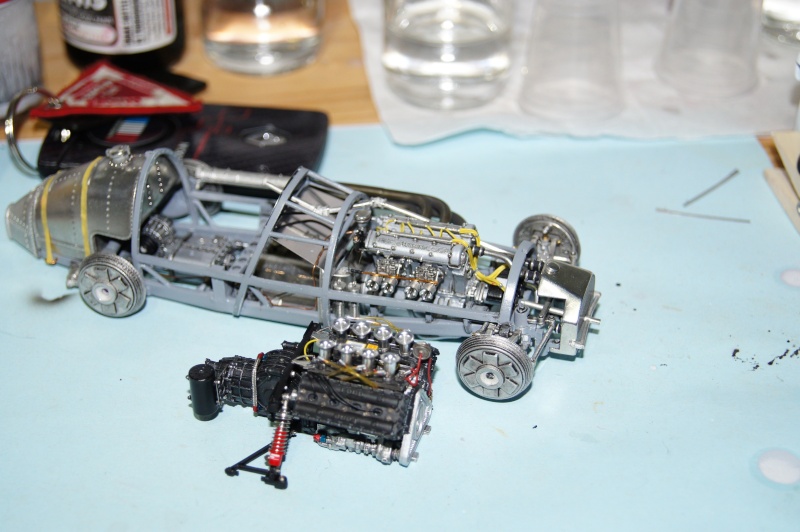
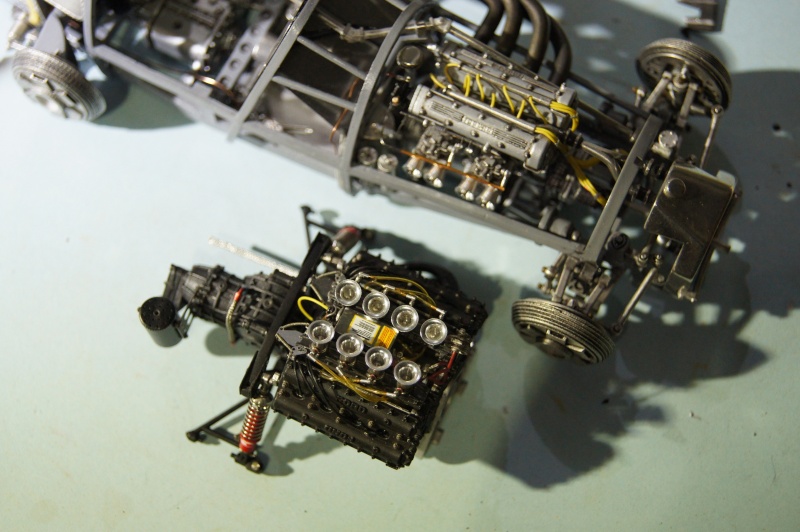
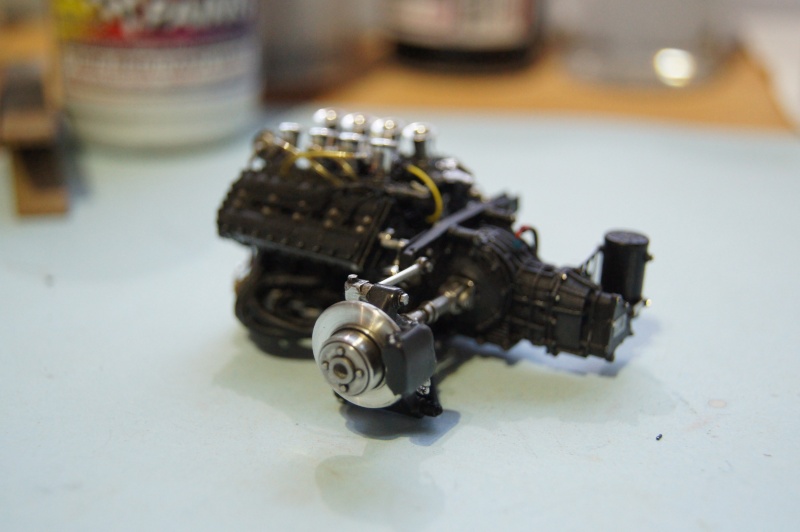
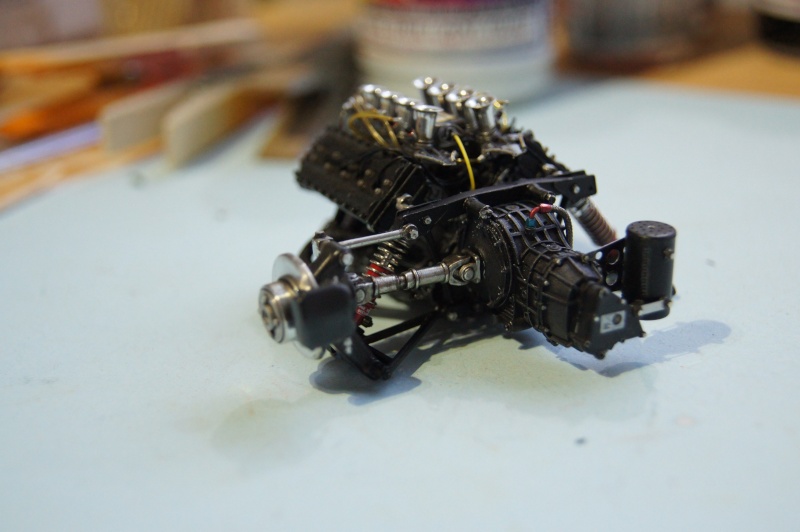
Couldn't resist to compare the DFV with the 500 F2 engine!
Should have done the same with the Tipo 218 V12 of the312F1...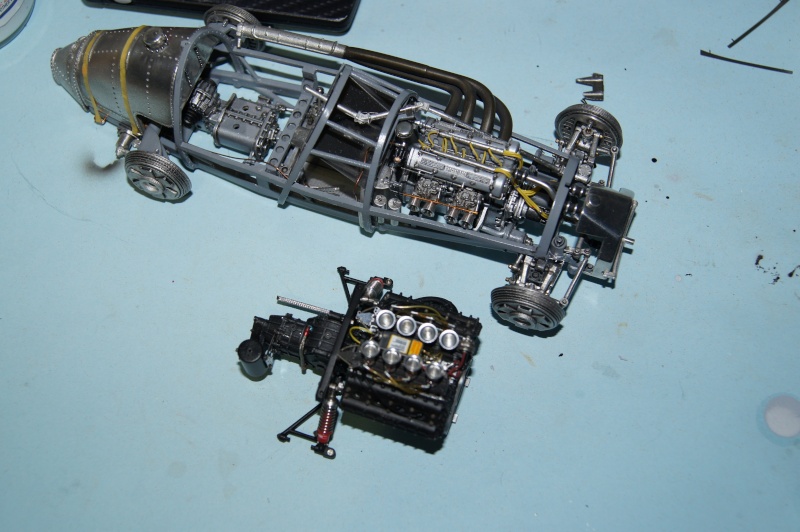
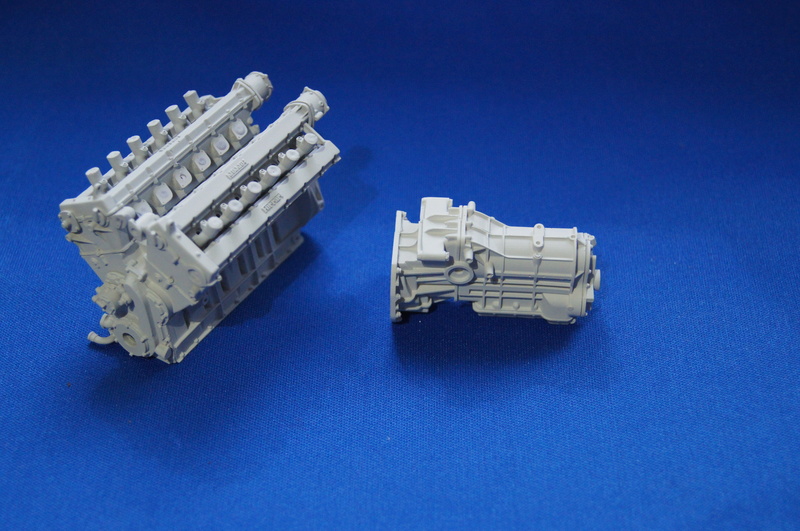
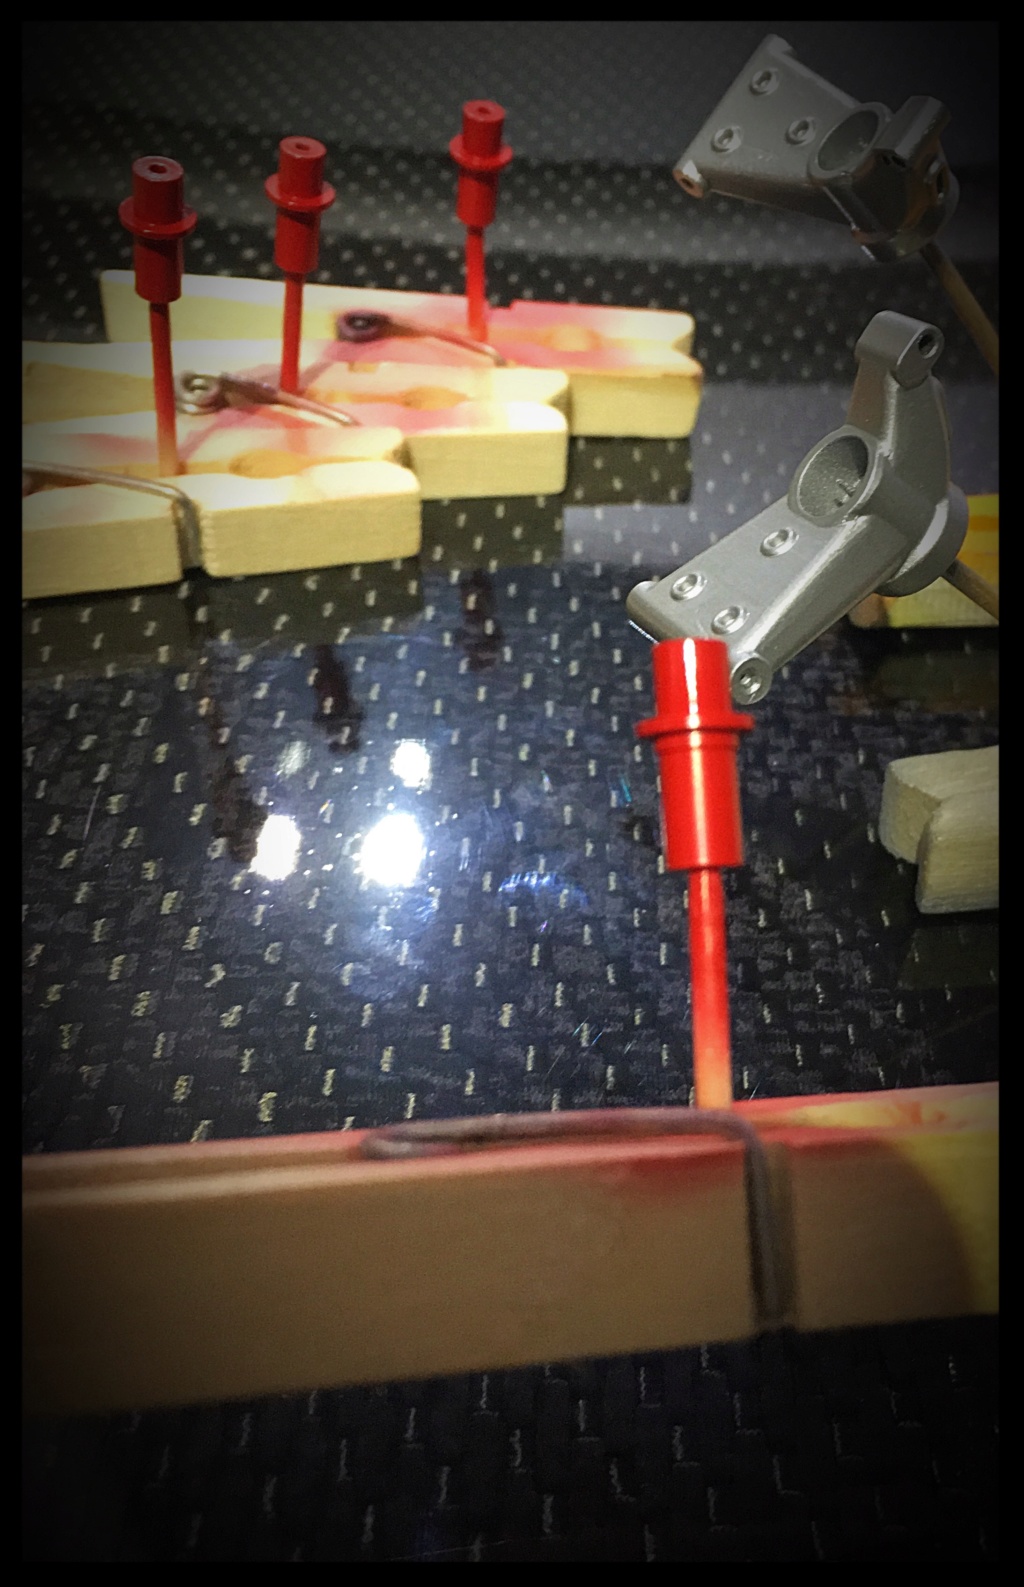
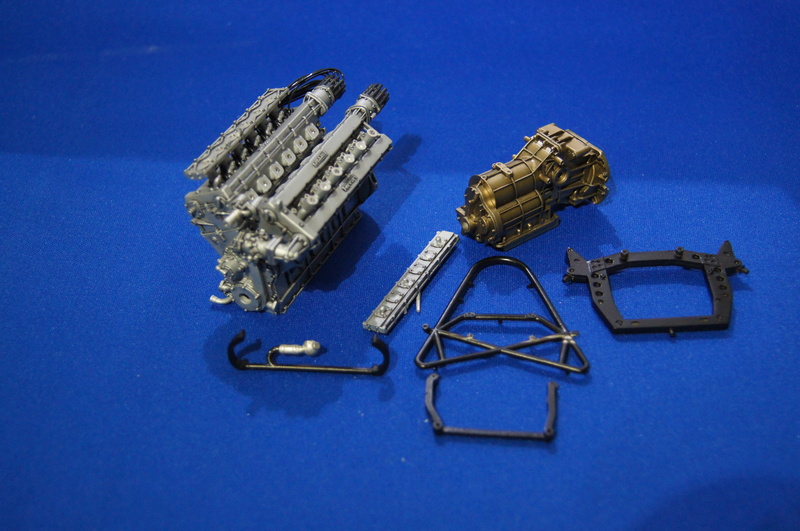
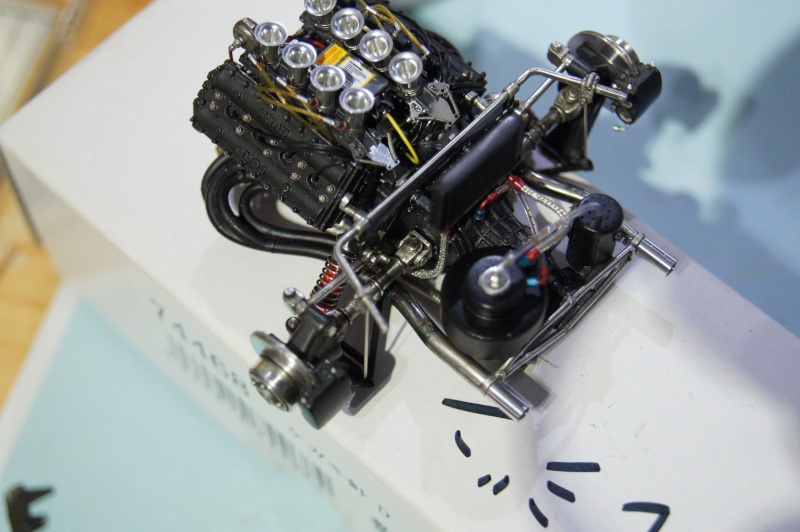
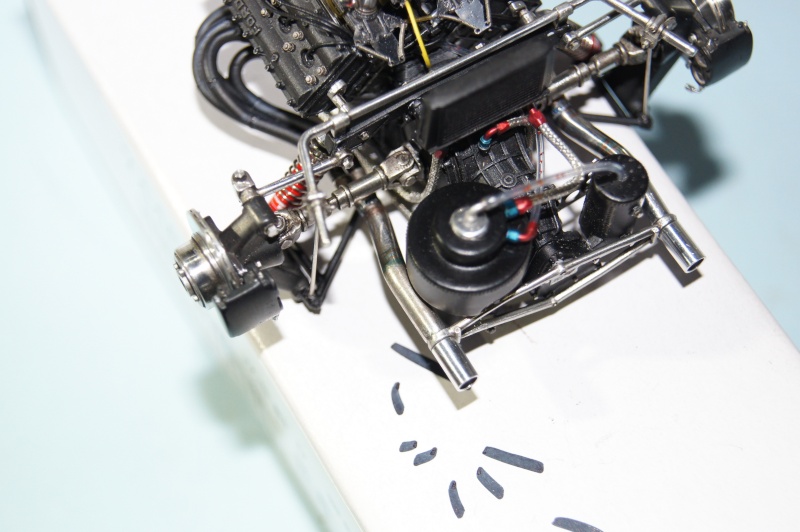
Transmission progress:

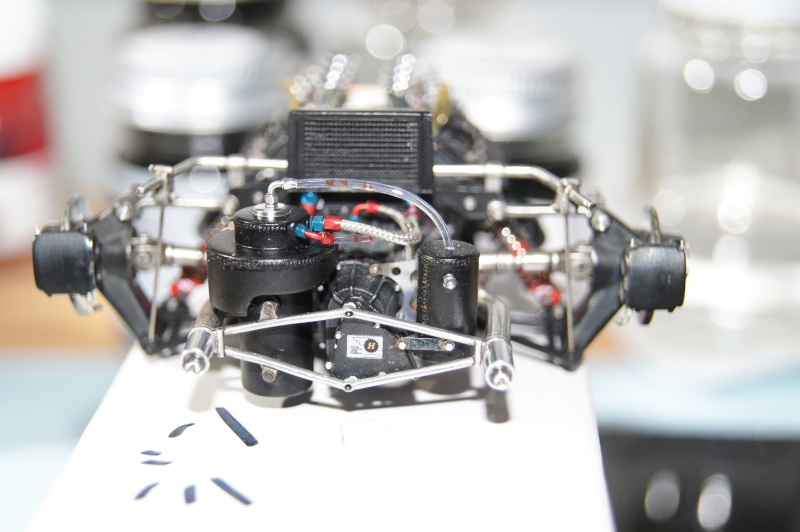
Oil coooooler; A/N fittings & braided line!
Transmission is now almost done.
Once the exhaust finished, engine and gearbox can be assembled, then fasten to the rear bulkhead.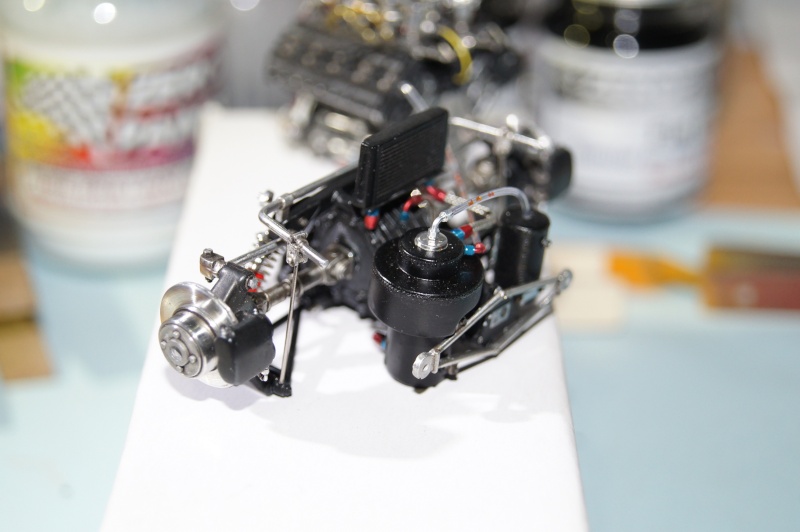
Weld lines are finished on the right side of the exhaust and left was redone.
Few heat stains added.
Weld lines are also made on the 2 in 1 tube.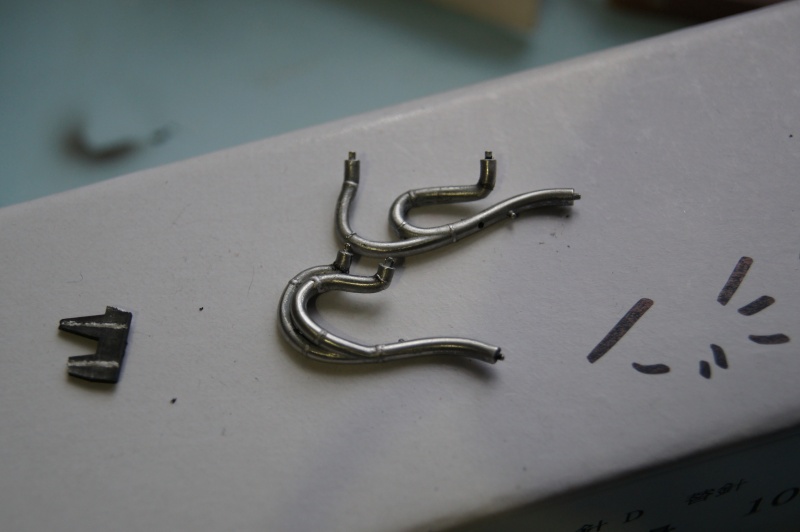
Pics of the sub assembly:
Pascal
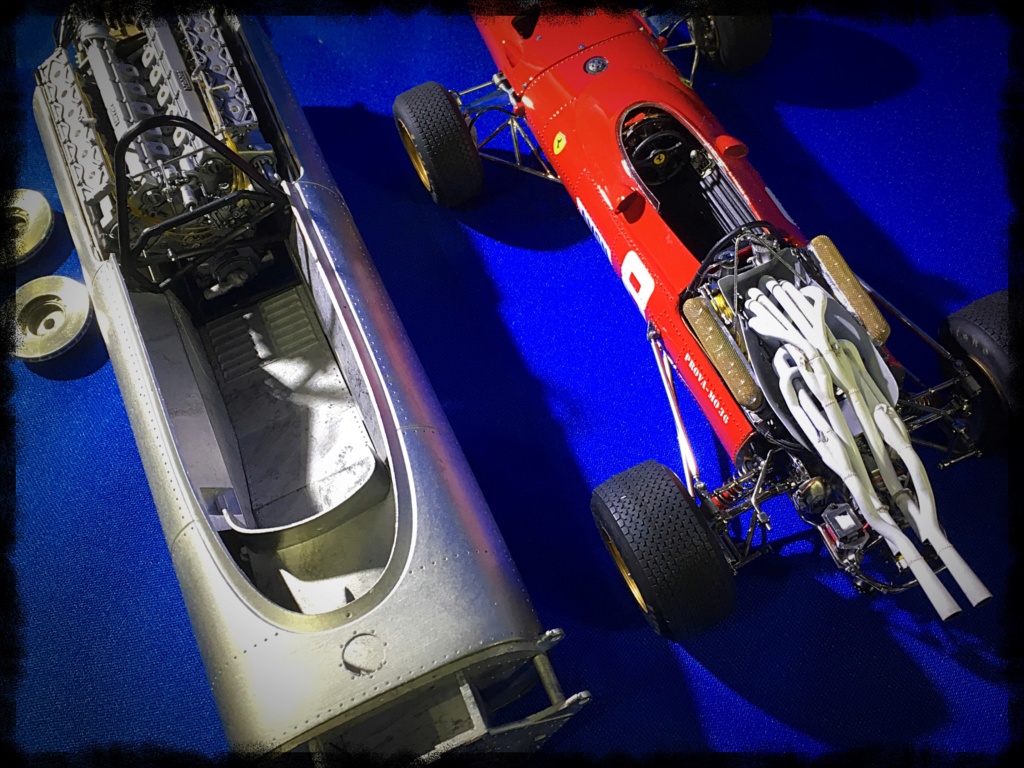
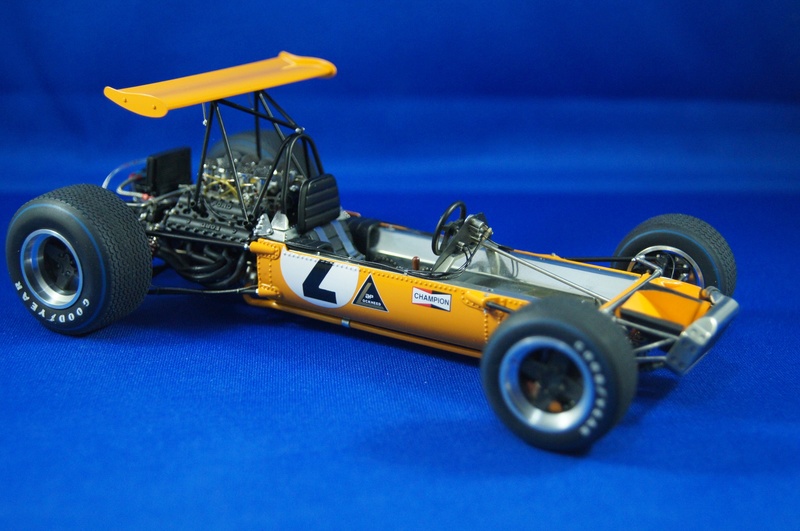
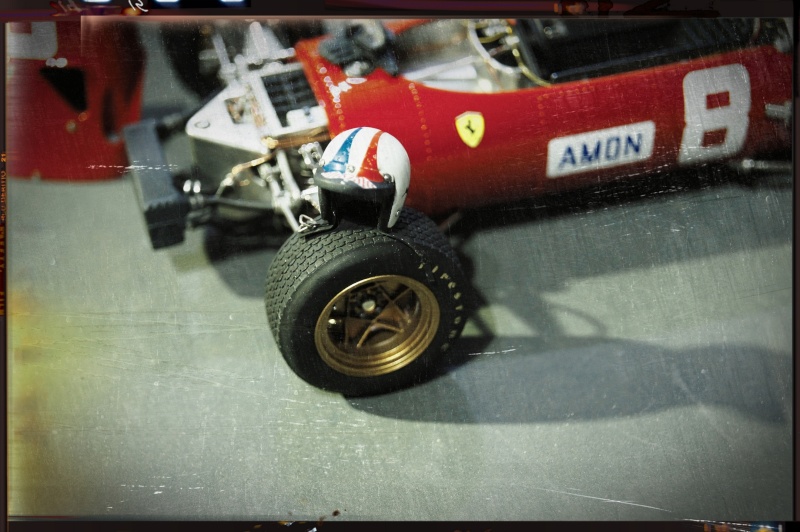
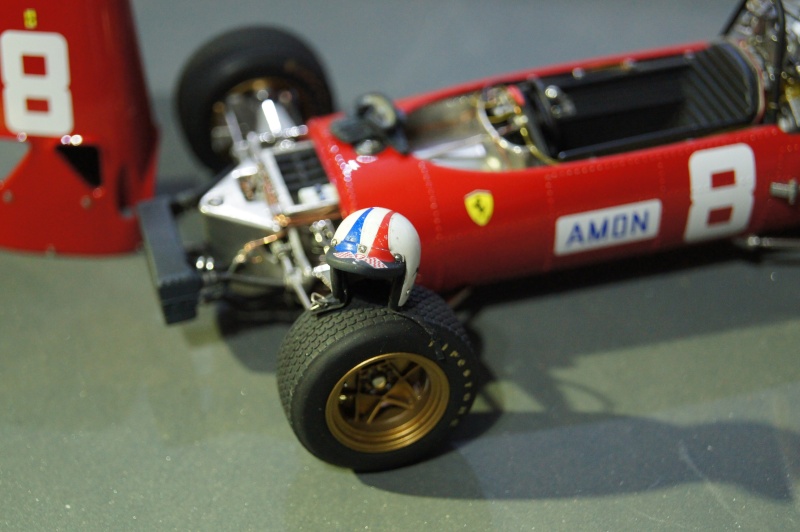
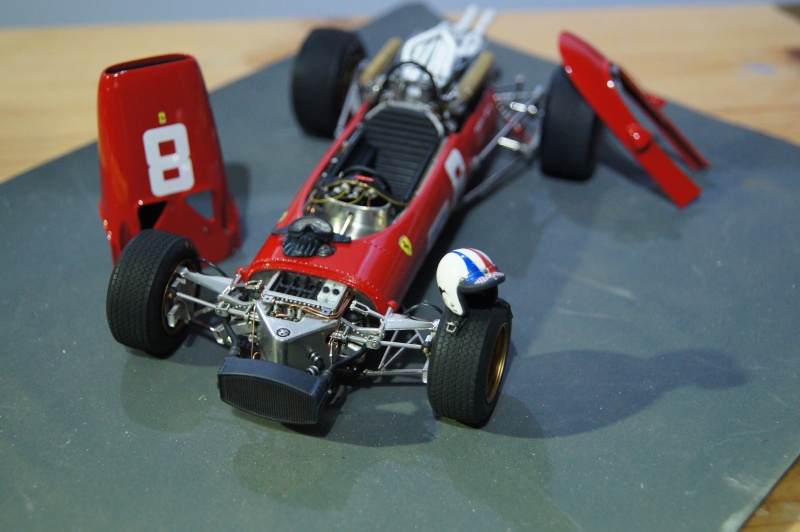
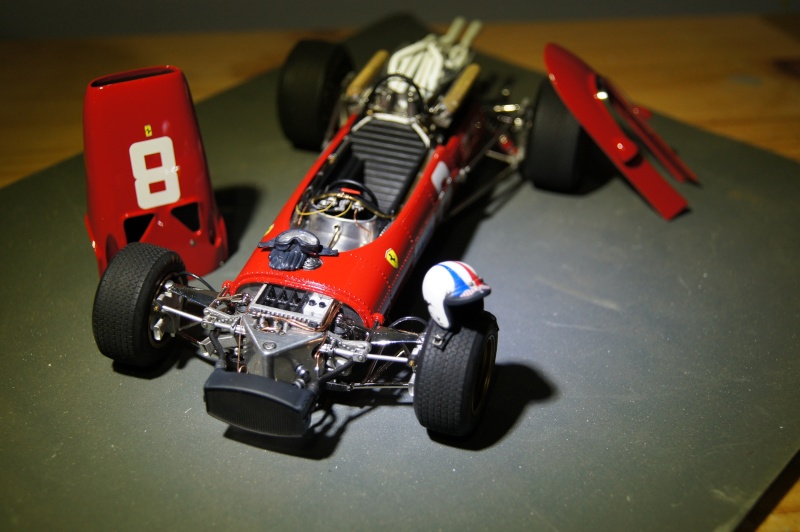
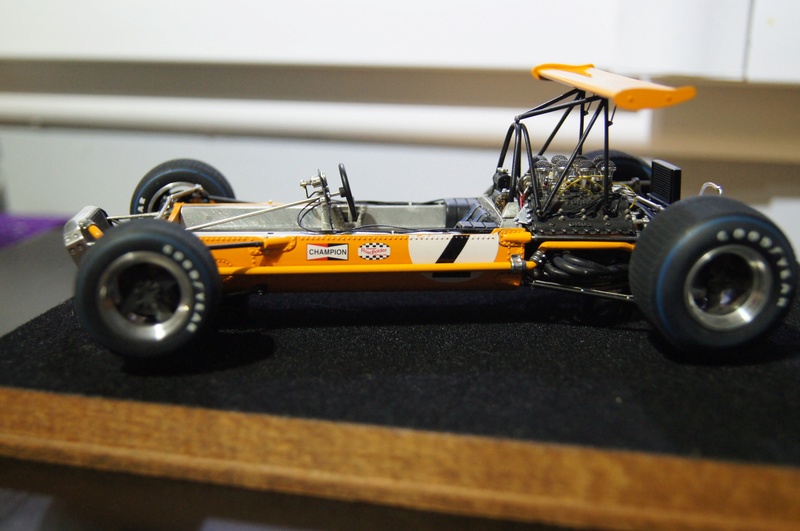
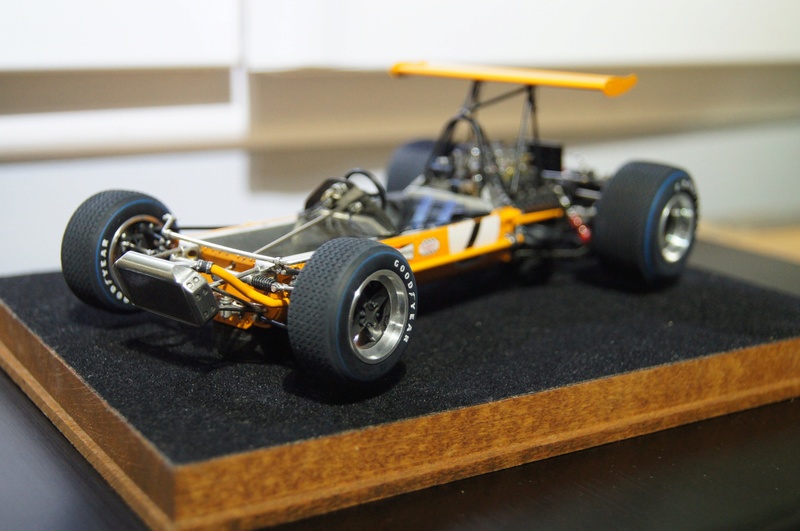
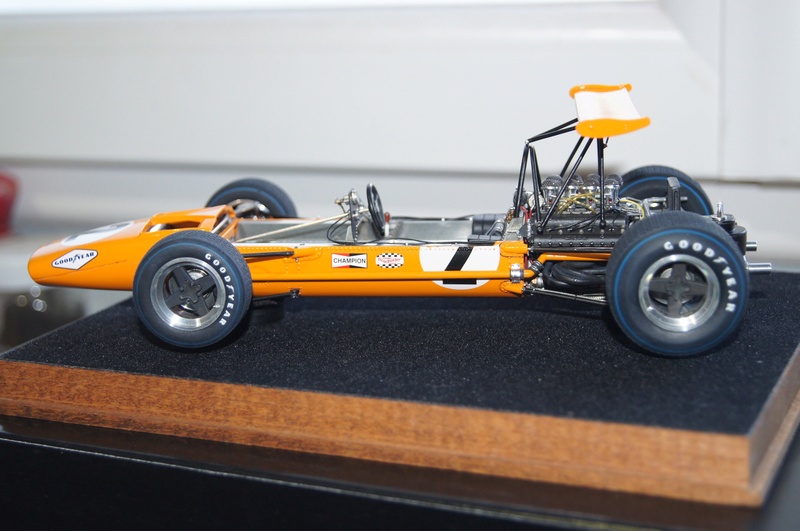
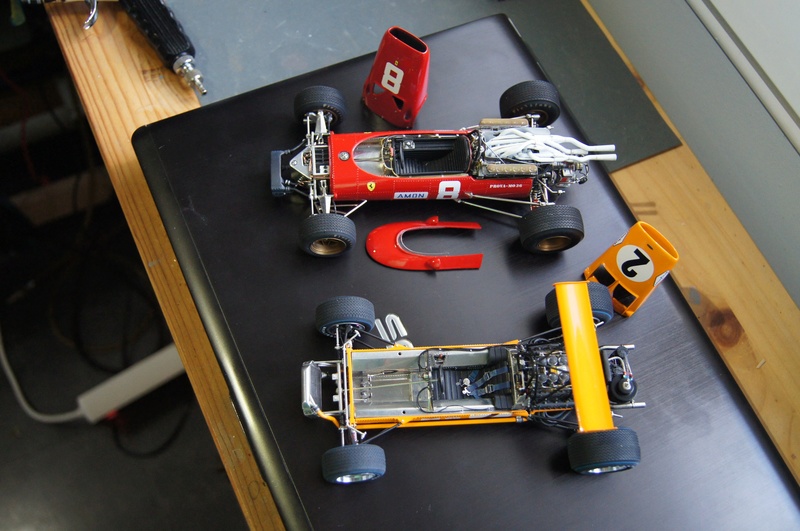
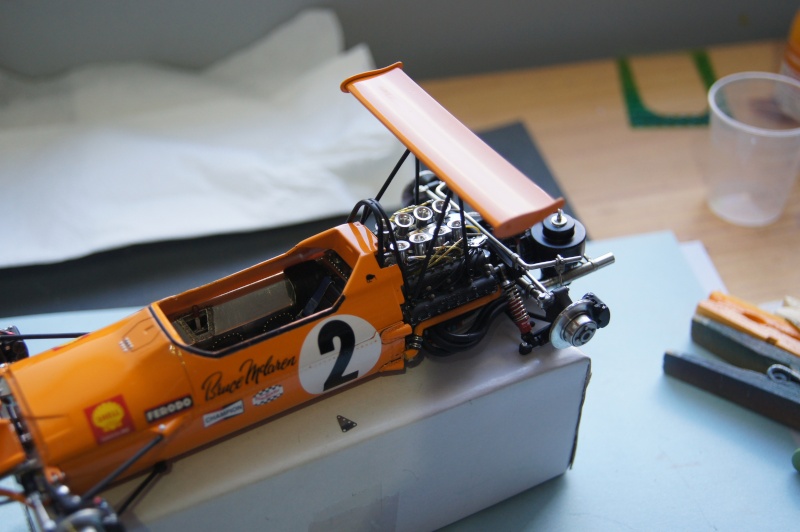
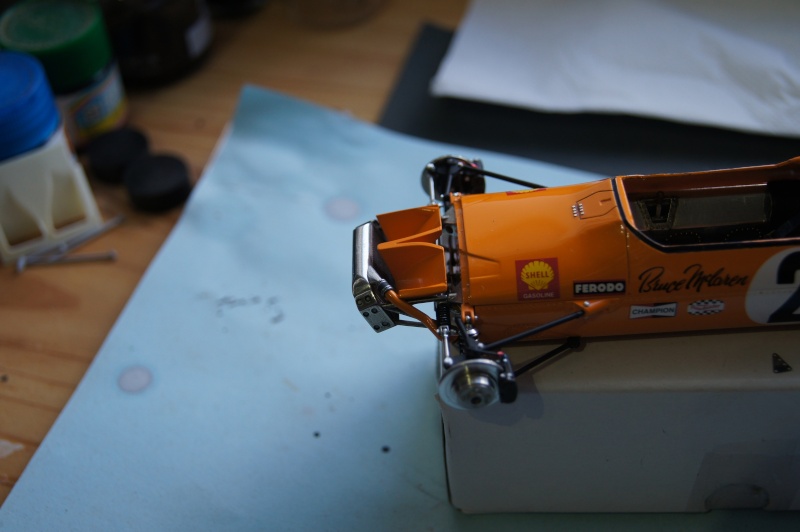
Ferrari 312F1, Chris Amon, Monaco 1967. MFH 1/12.
in Work in Progress
Posted
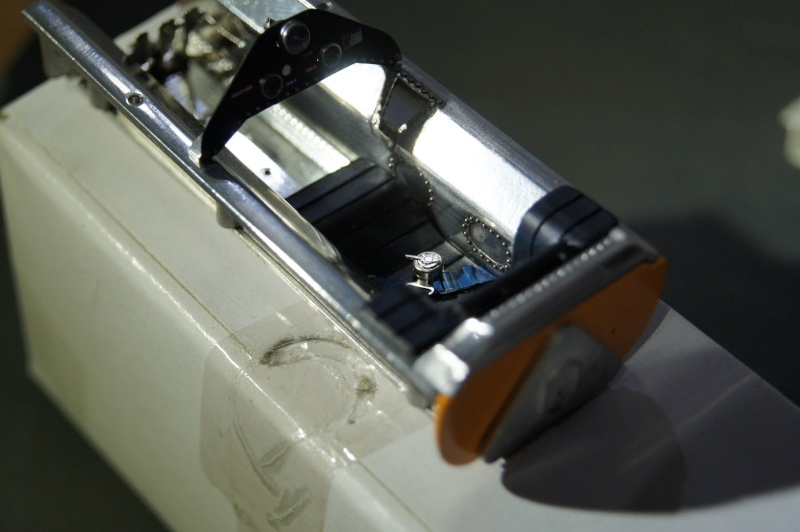
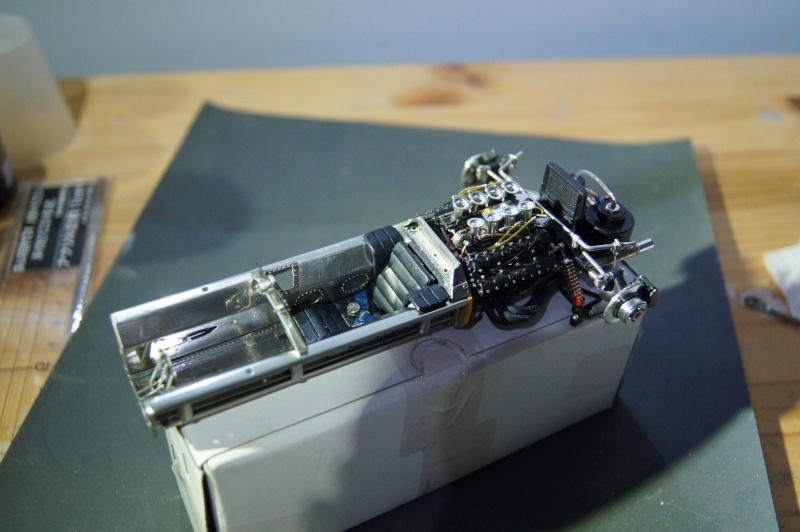
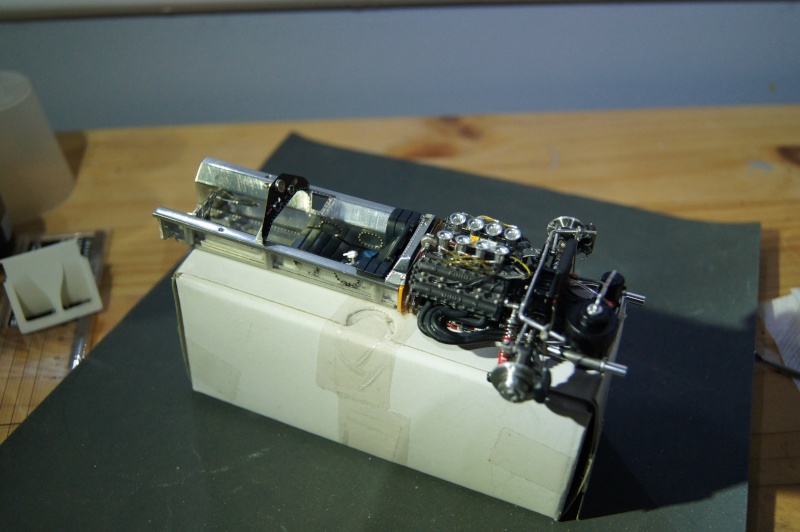
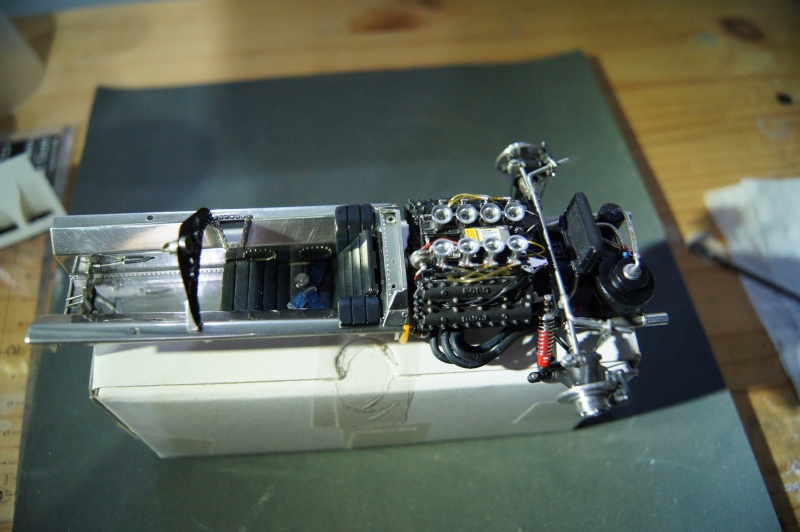
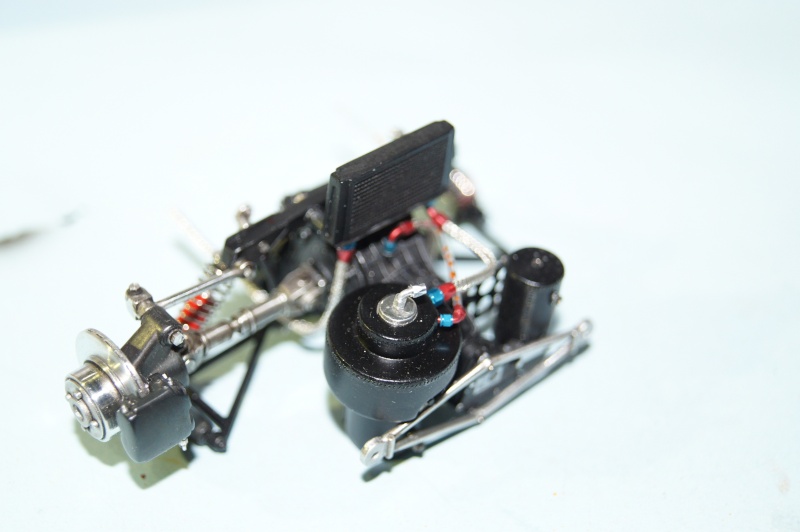
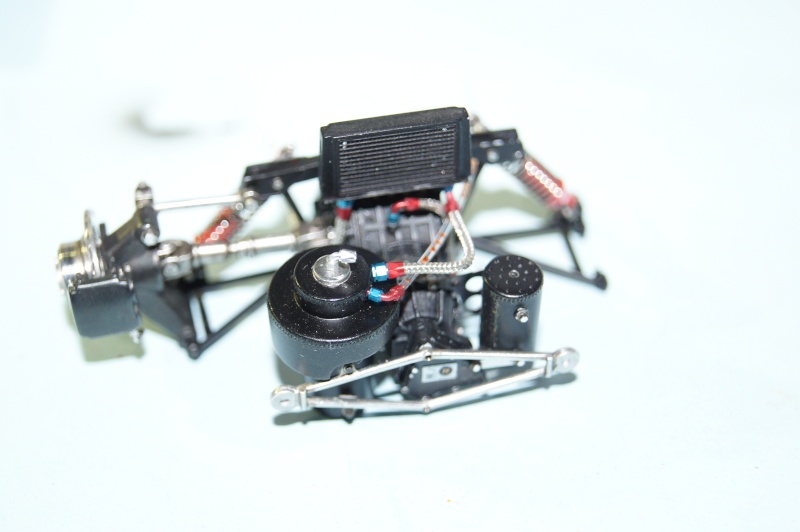
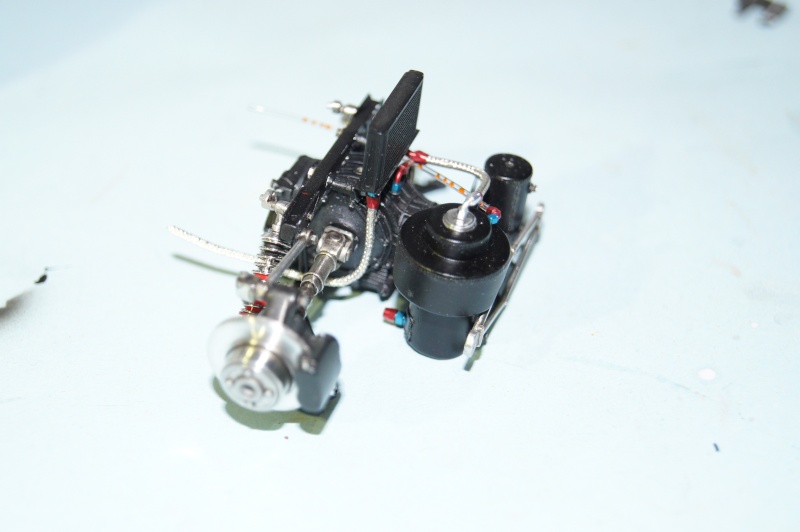
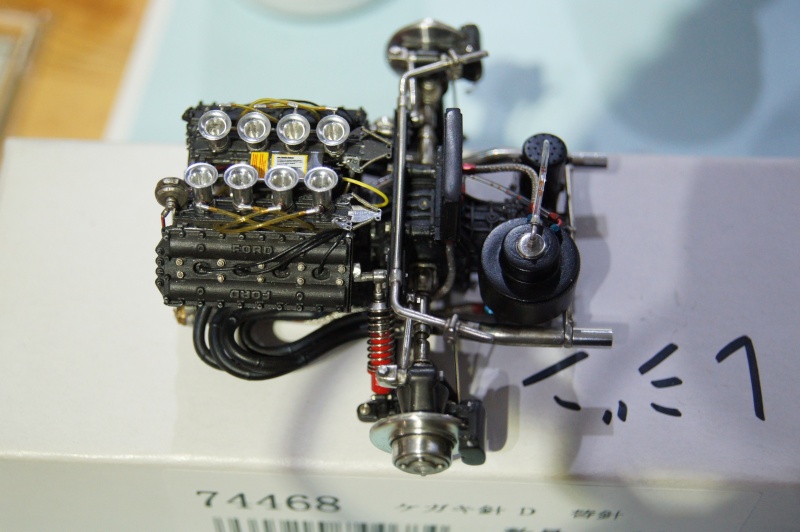
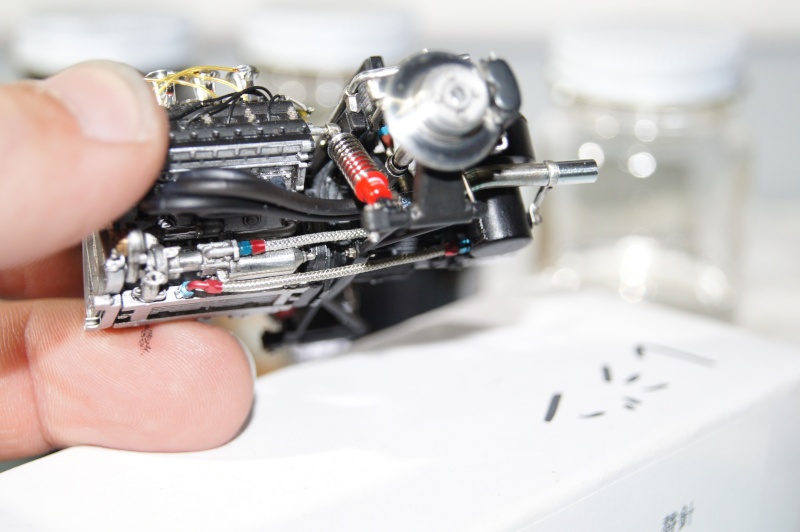
Hi,
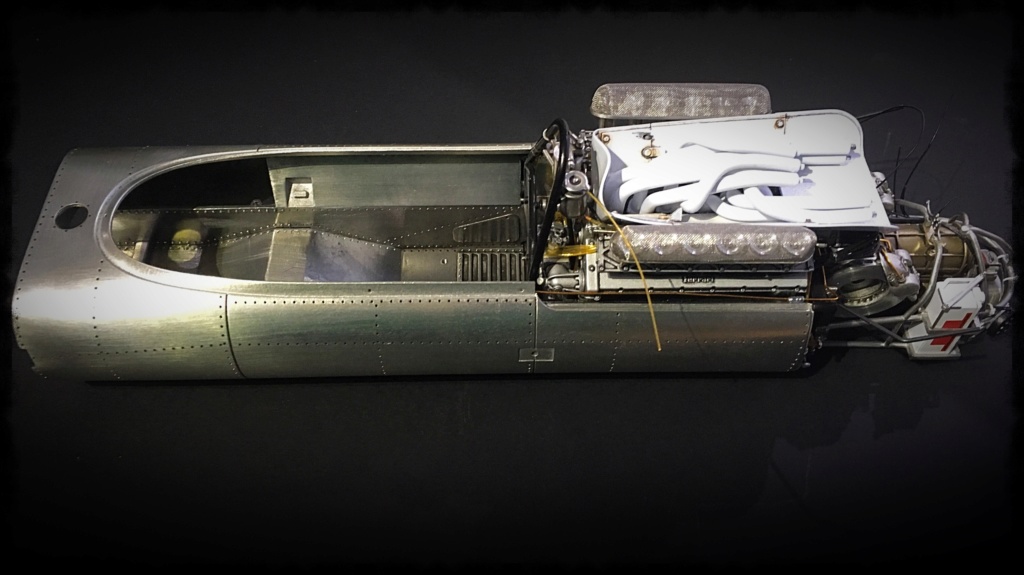
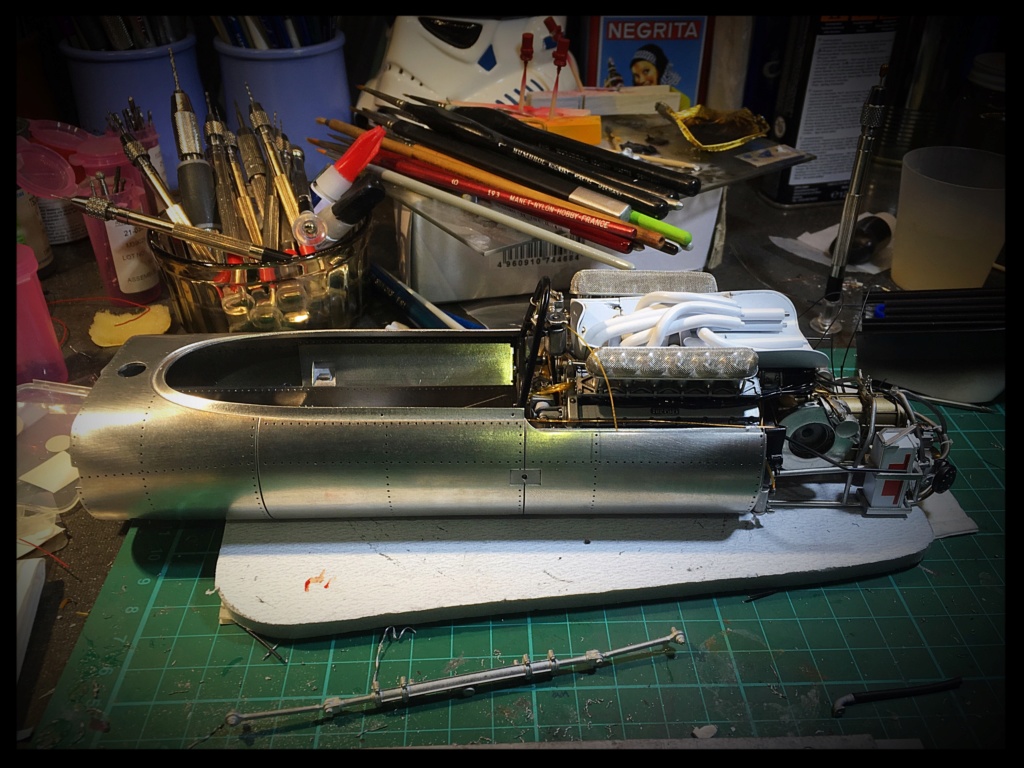
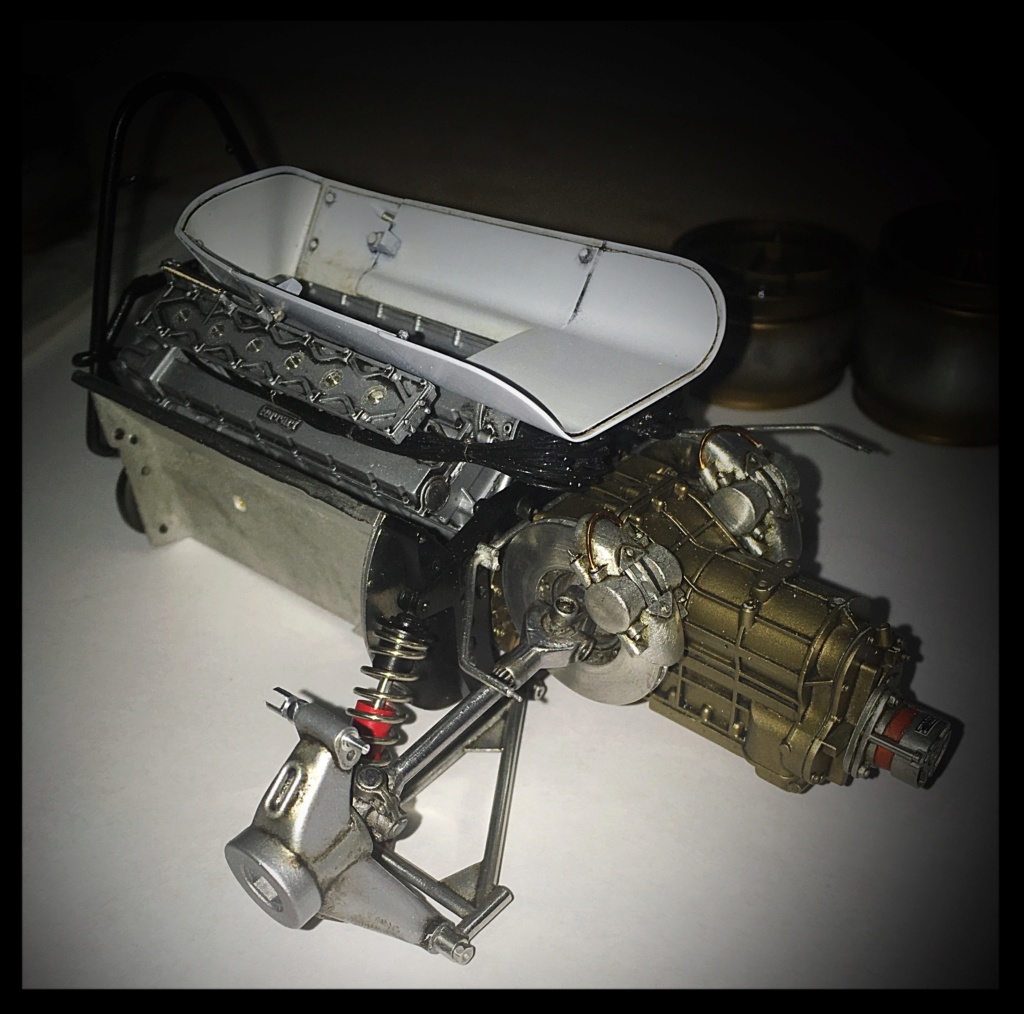
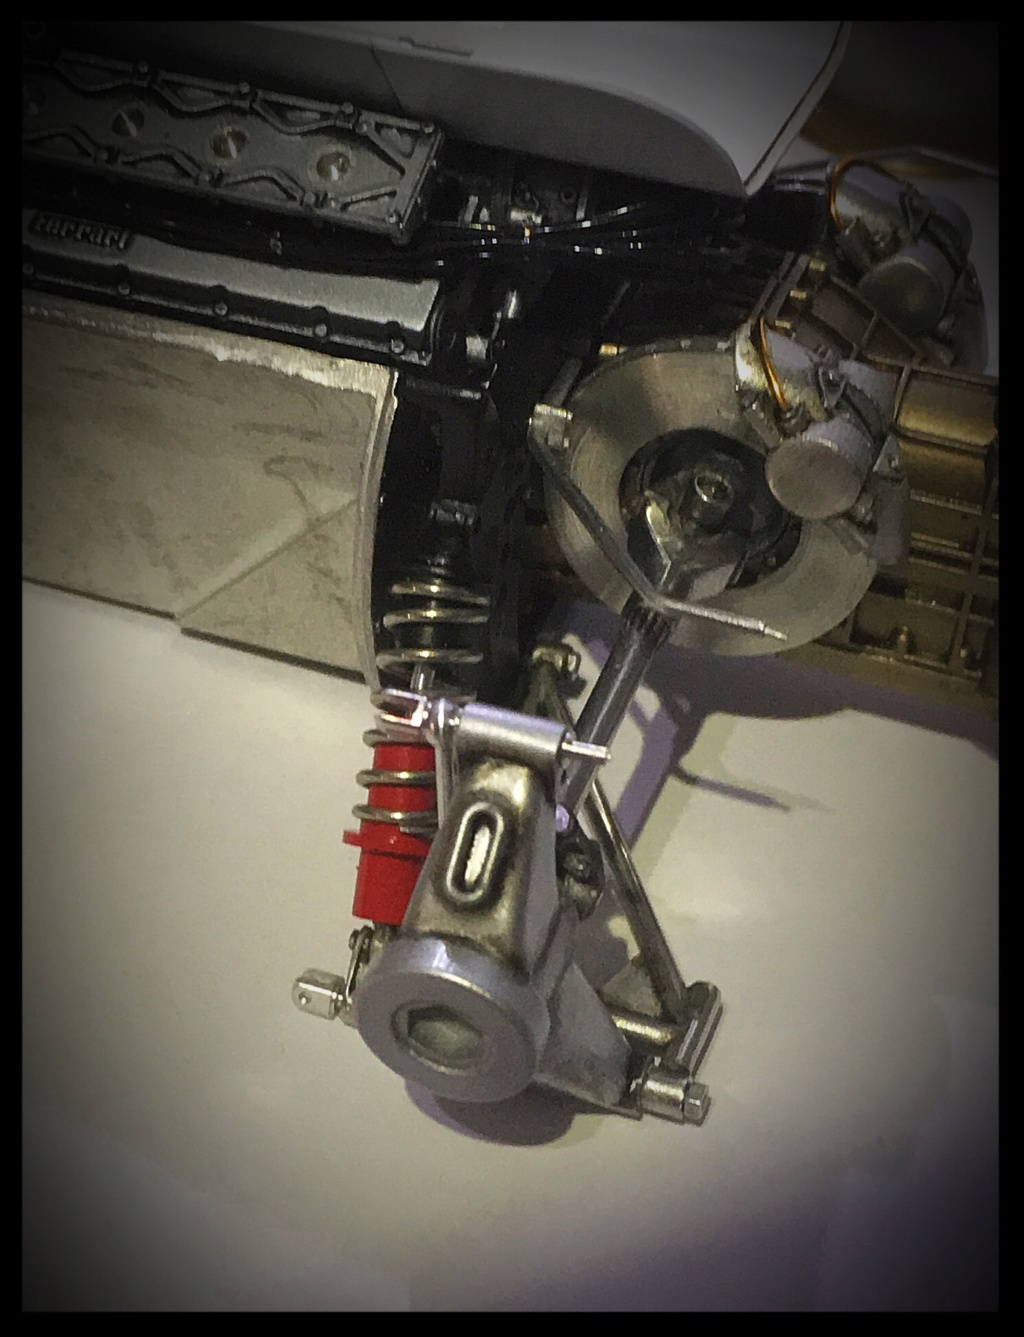
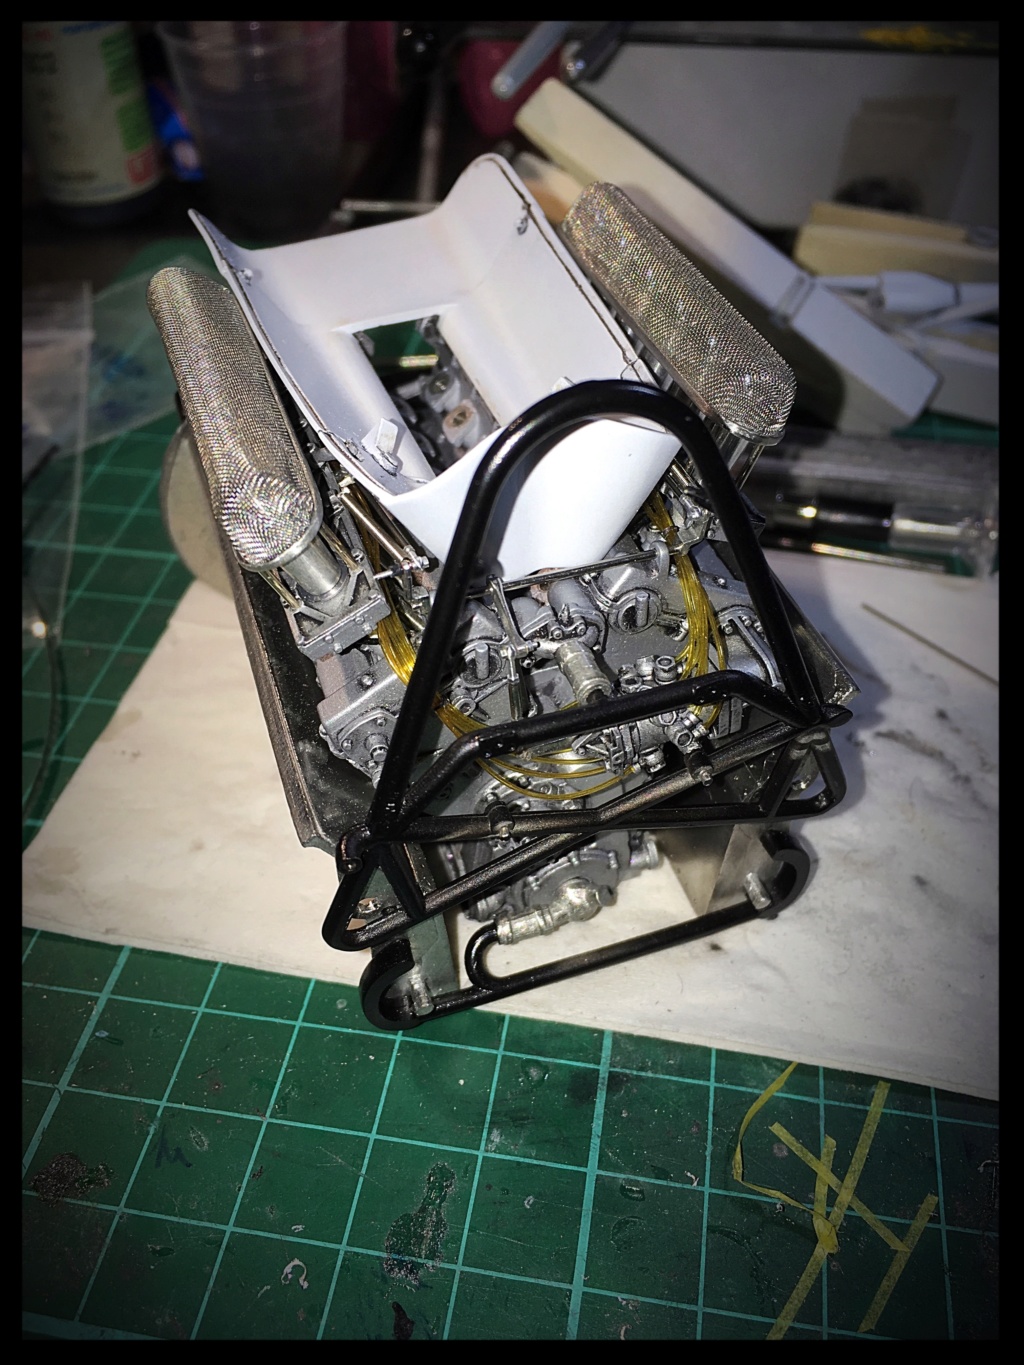
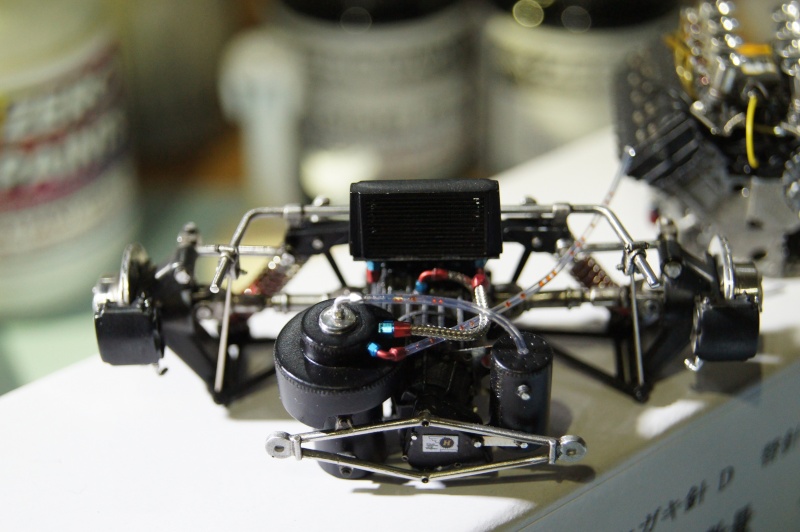
Decisive assembly if any, the engine is assembled with the chassis.
Assy is done with Loctite 401 and reinforced, as usual, with screws, washers and bolts.
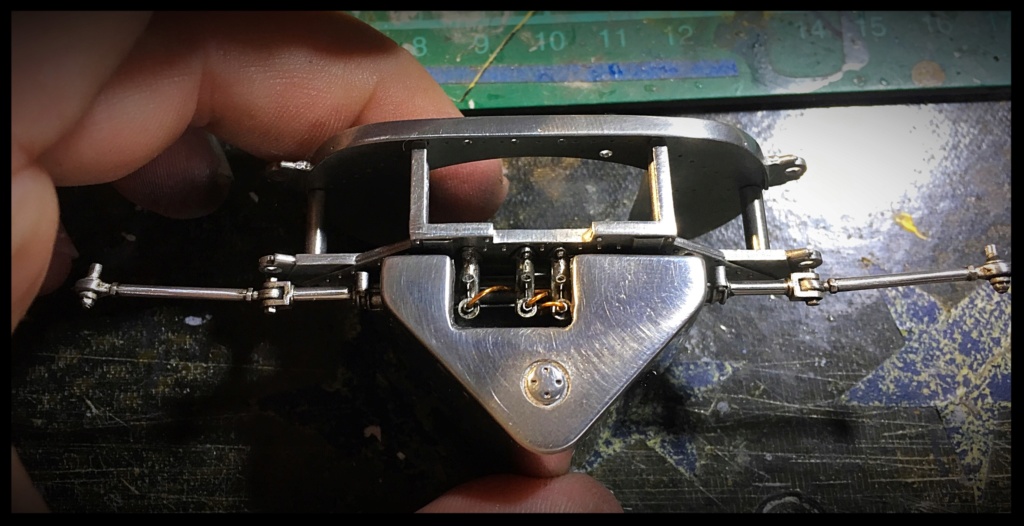
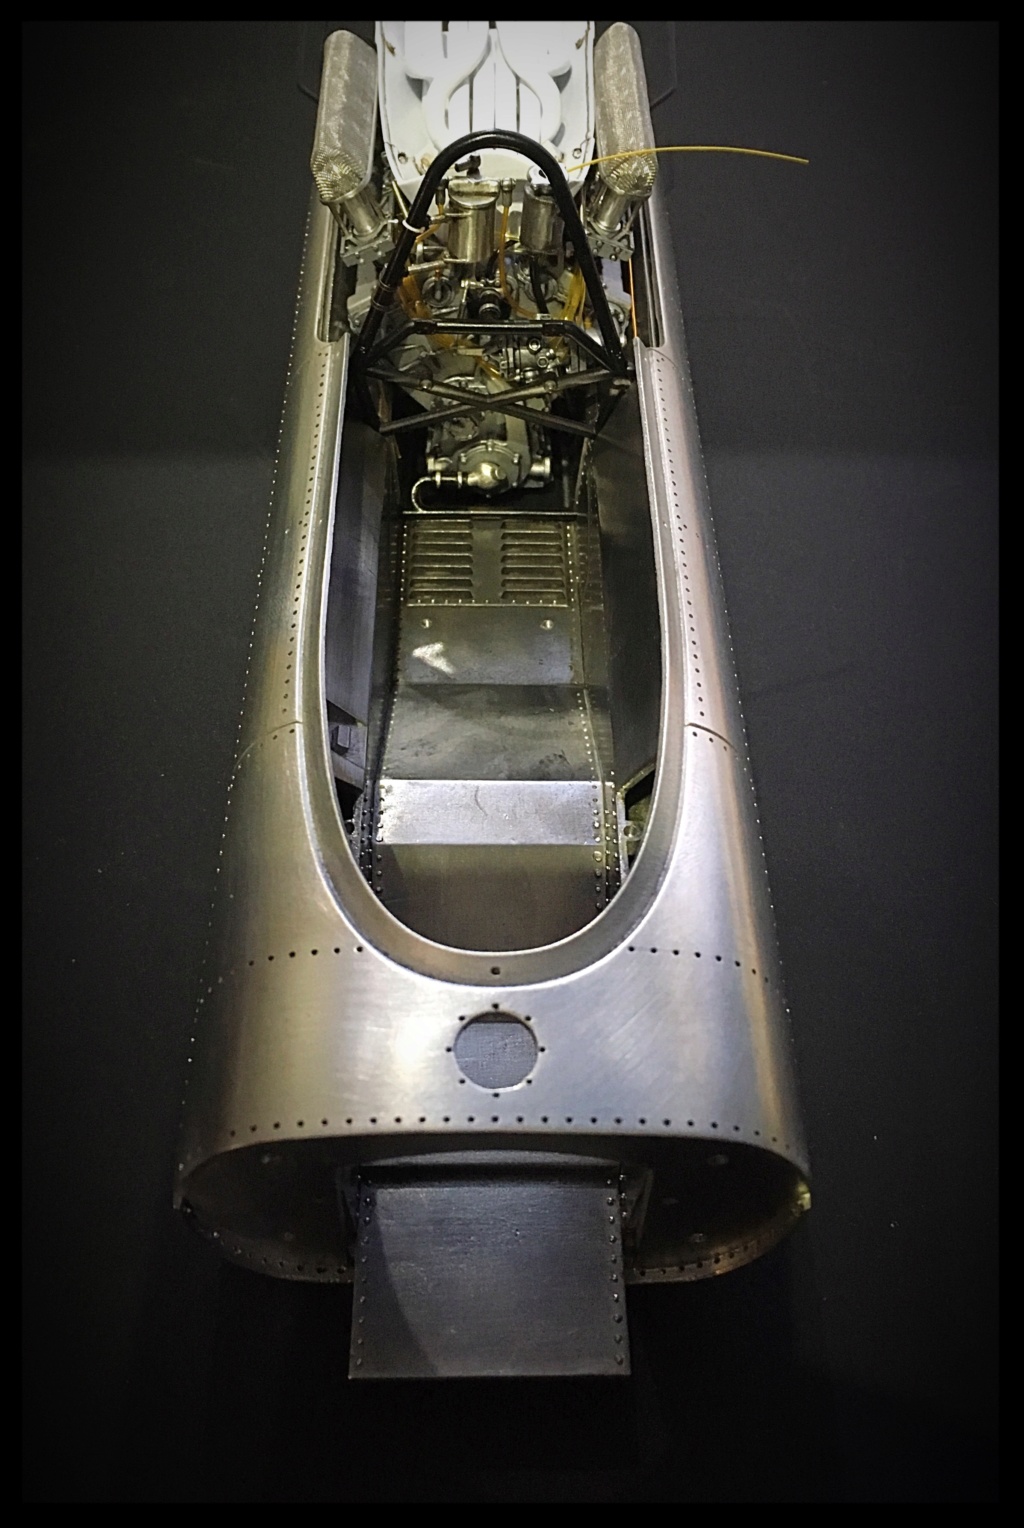
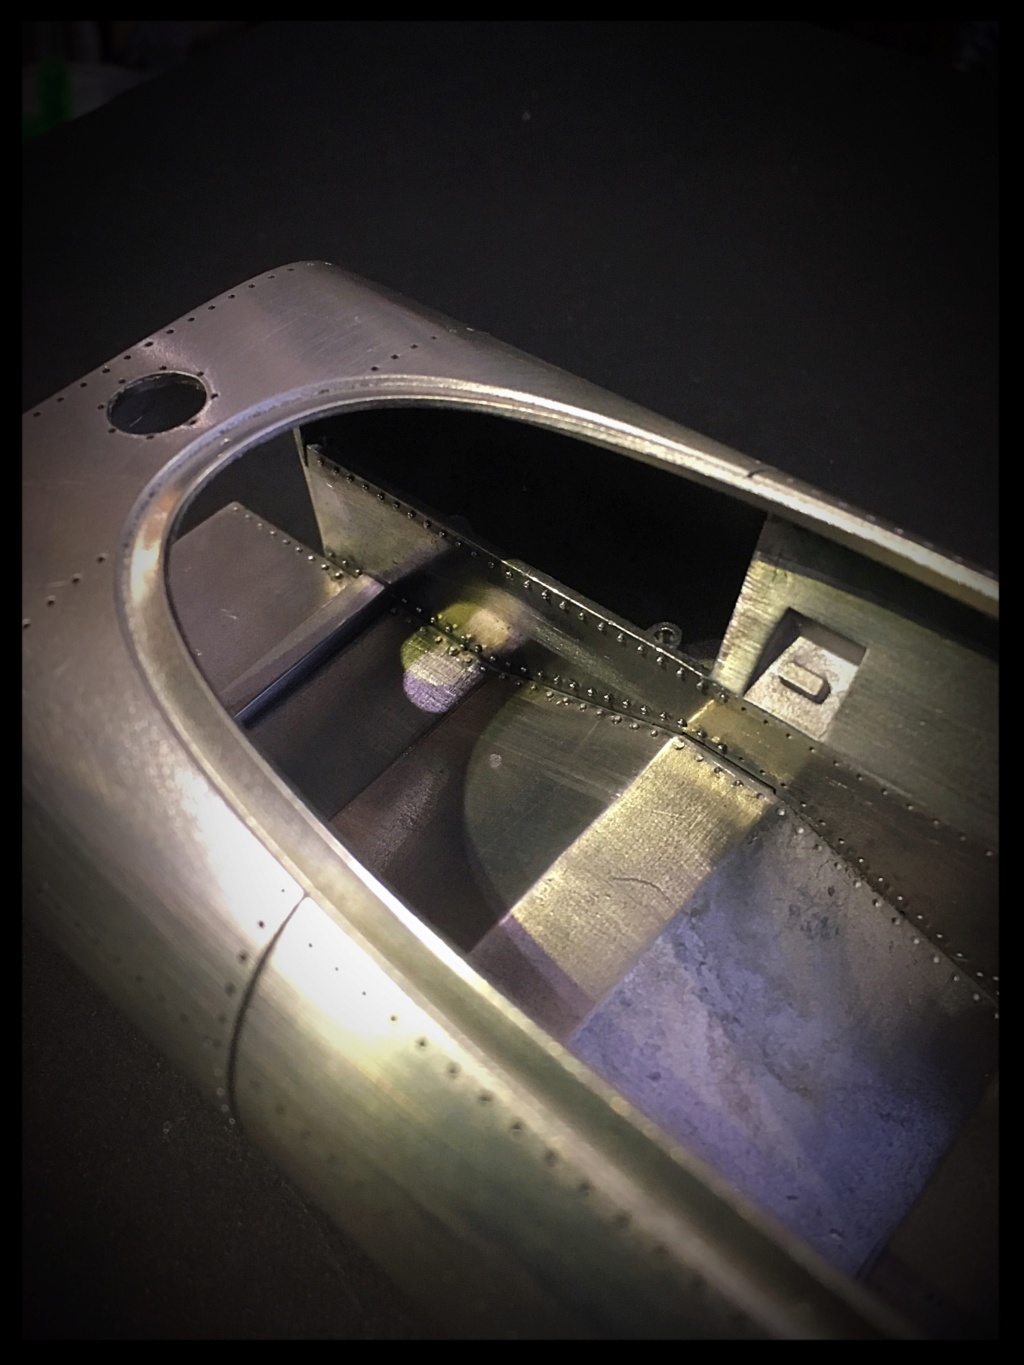
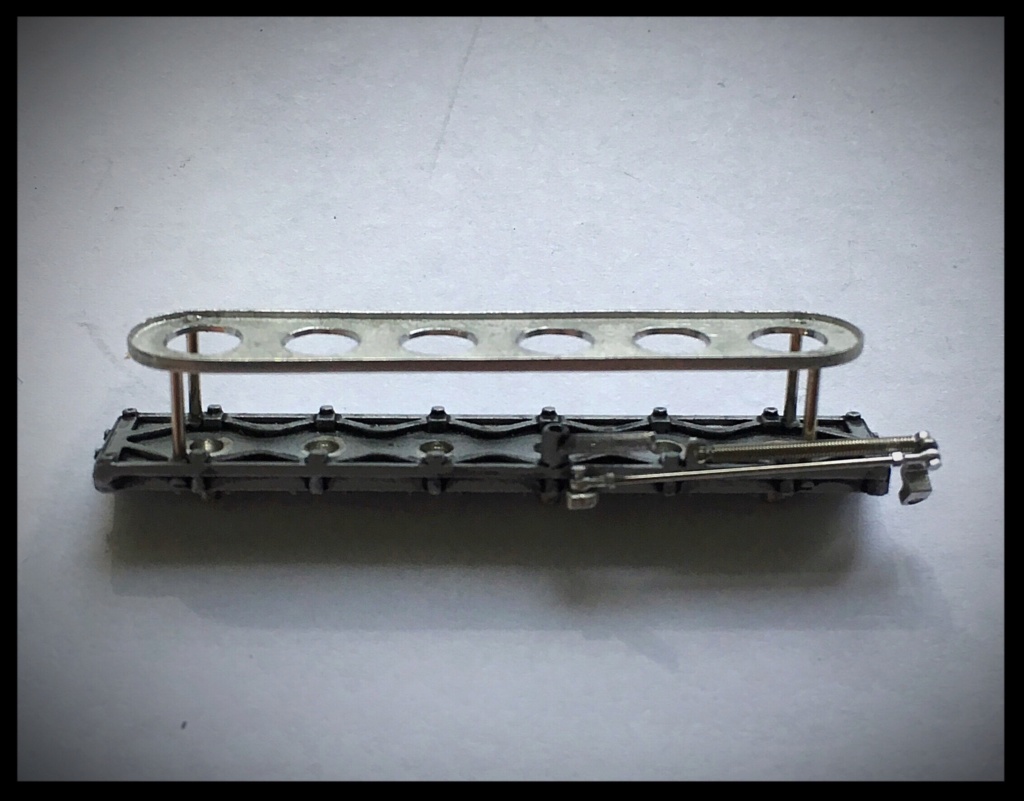
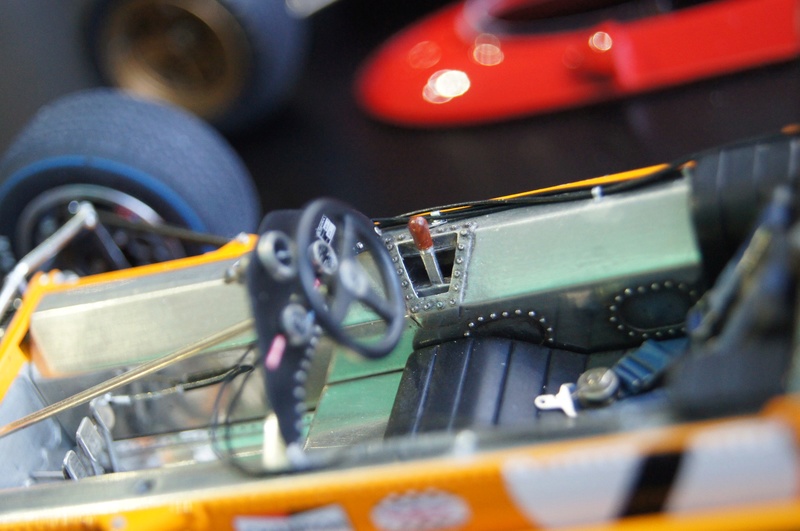
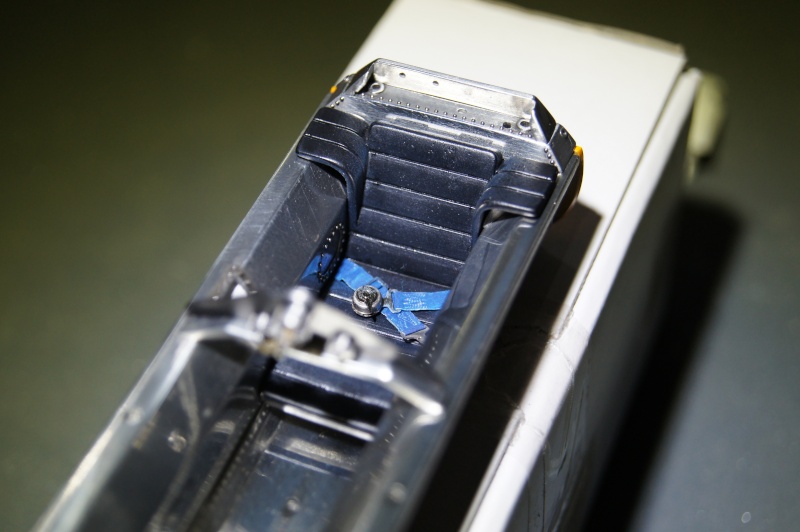
The inside of the bathtub is done, the seat is finally installed as the side water pipe and the gear selector.
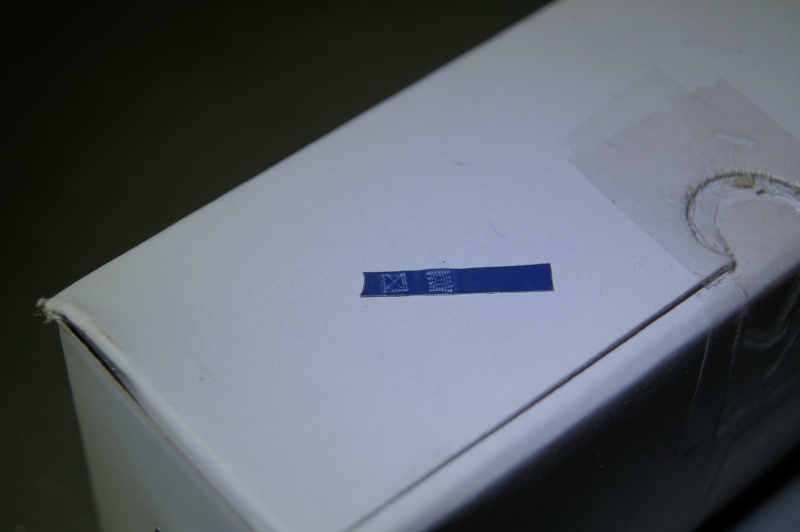
The fuel valve is installed.
More soon.
Pascal