


crackerjazz
-
Content Count
3,026 -
Joined
-
Last visited
Content Type
Profiles
Forums
Calendar
Posts posted by crackerjazz
-
-

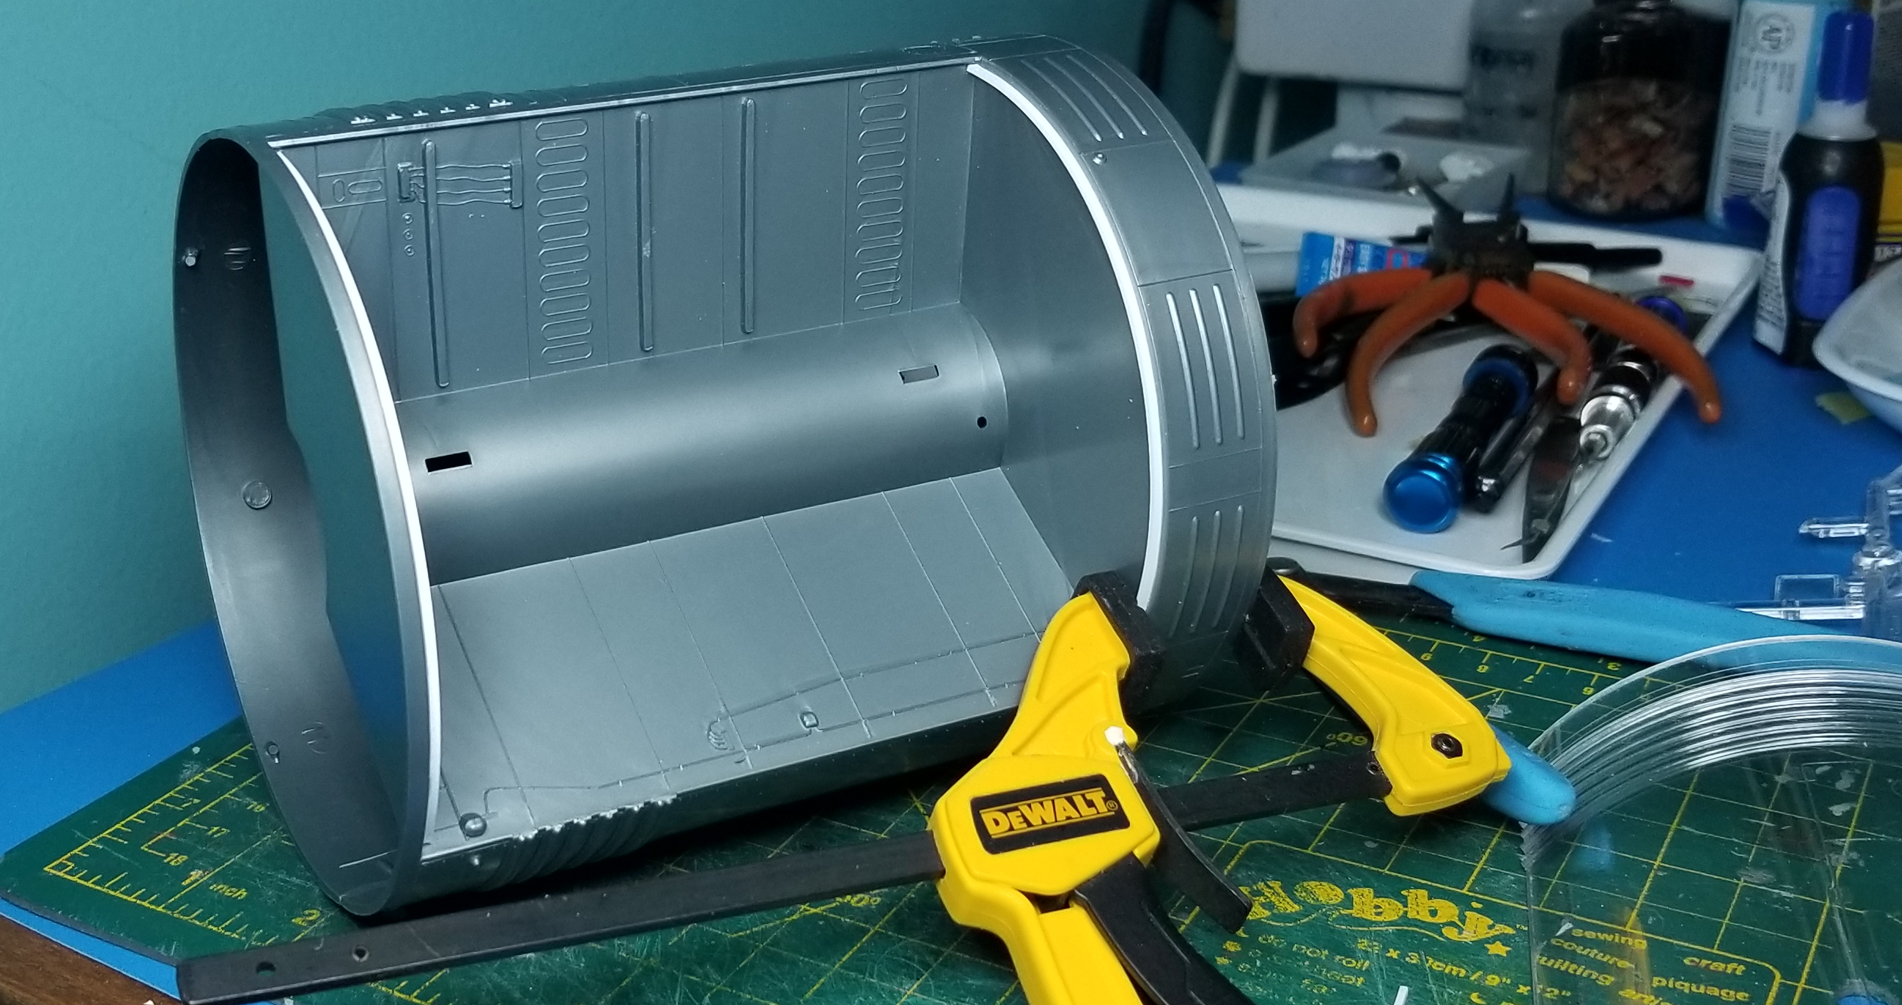
OK that should be enough craziness and backache for one day. I don't think I'm even gonna touch that upper ring as I couldn't find any good close-up shots of a sample nozzle for it. It does look like a weld line as well in some shots -- but I'm not sure so I'll just leave it as is.
-
Thanks, Bill! : ) I just wish those aftermarket detail sets were still available.
I was thinking of rescribing the raised panel lines on the nozzle but now I realize Monogram actually got it right -- they're raised weld lines.
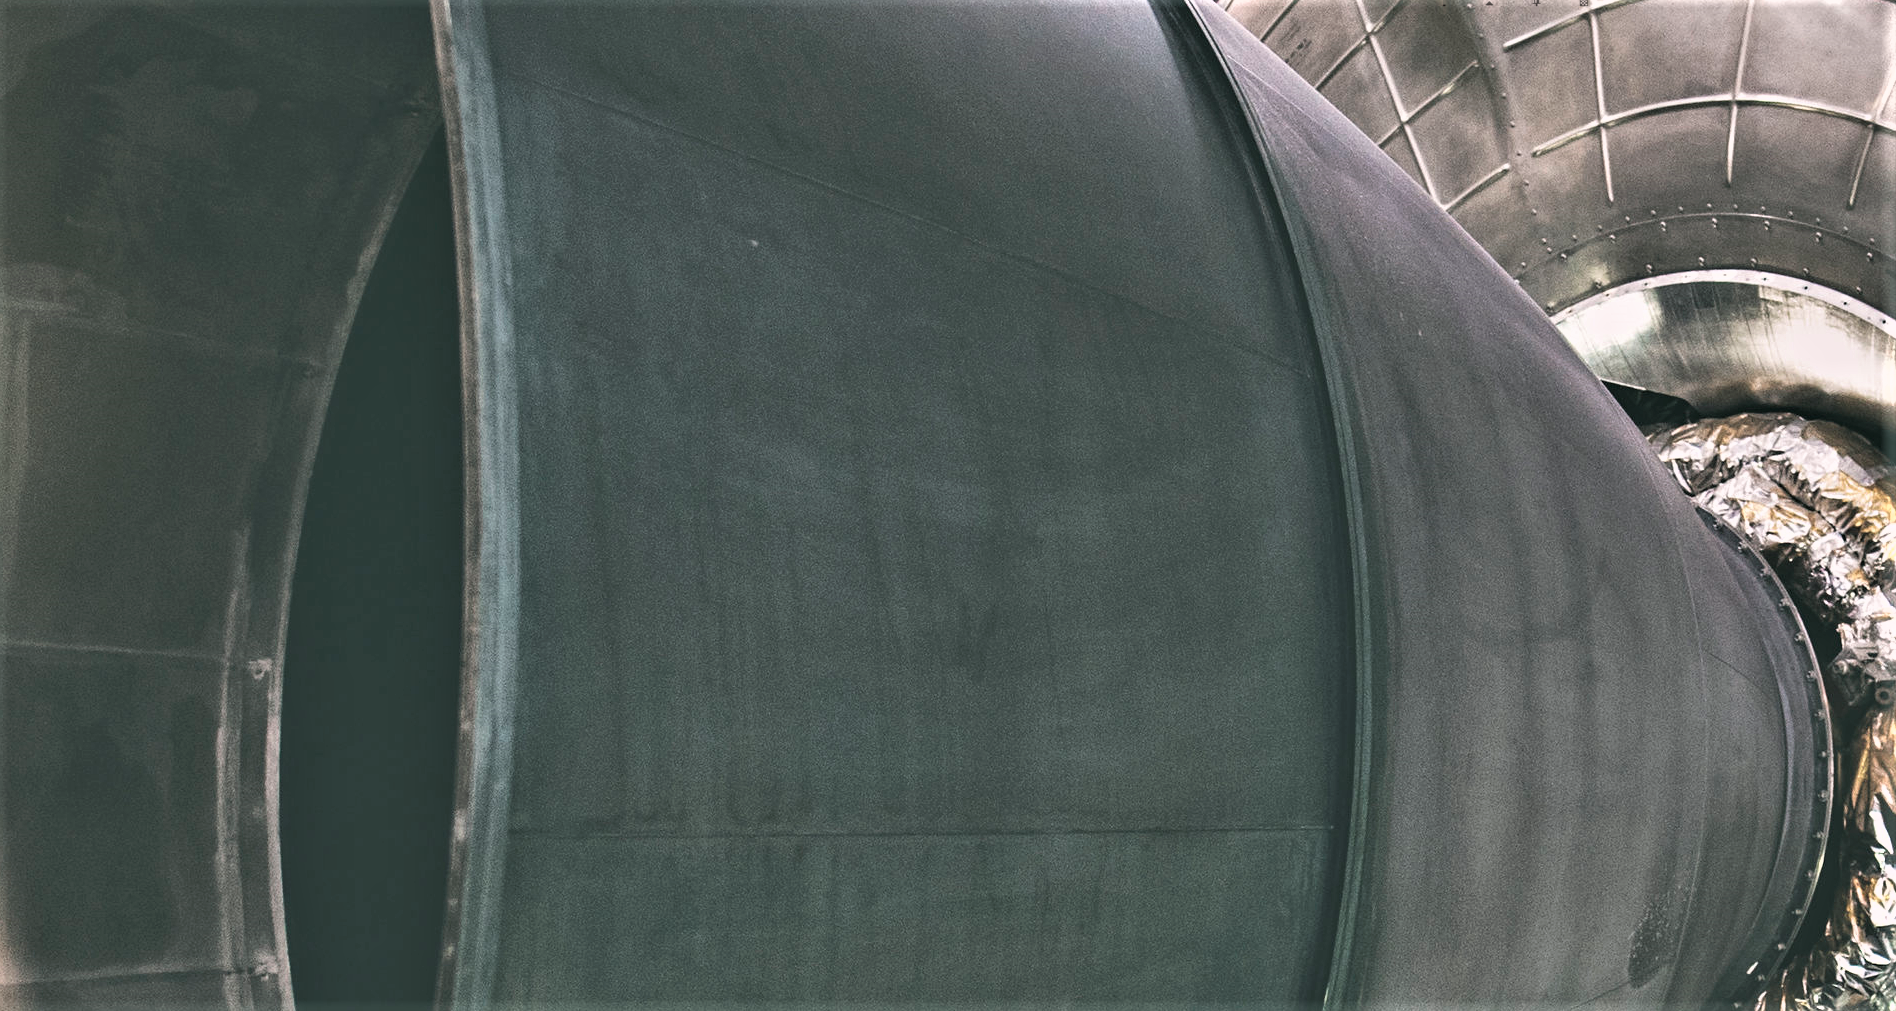


The same goes for the ones on the upper portion of the bell. Monogram got them all right, except that they all look like regular, uniform, raised panel lines.

So I thought maybe an enhancement is in order. Just for laughs I taped the sides of the panel line and mangled the panel line a little here and there with the xacto. Didn't do any cuts, just flattened it here and there using different blade angles.

I removed the tape and now it looks like a weld line : )
-
Thanks for sharing your techniques, RichB63 : ) Mind if I ask what size rods you use for the rivets which are inserted and cut off?
-
Hi Manfred, thanks : ) Yeah, I was kind of expecting some printing issues but having them print nicely on the first run is amazing. Actually, when the build was dipping in and out of the vat the dishes looked solid as they were covered in goo and my heart sank. But after doing the IPA wash and seeing that the mesh formed well and wasnt clogged up at all I was ecstatic and felt like treating myself to some ice cream to celebrate : )
Test drive:


-
Thanks for the detailed step by step instructions, Porsche! : )
-
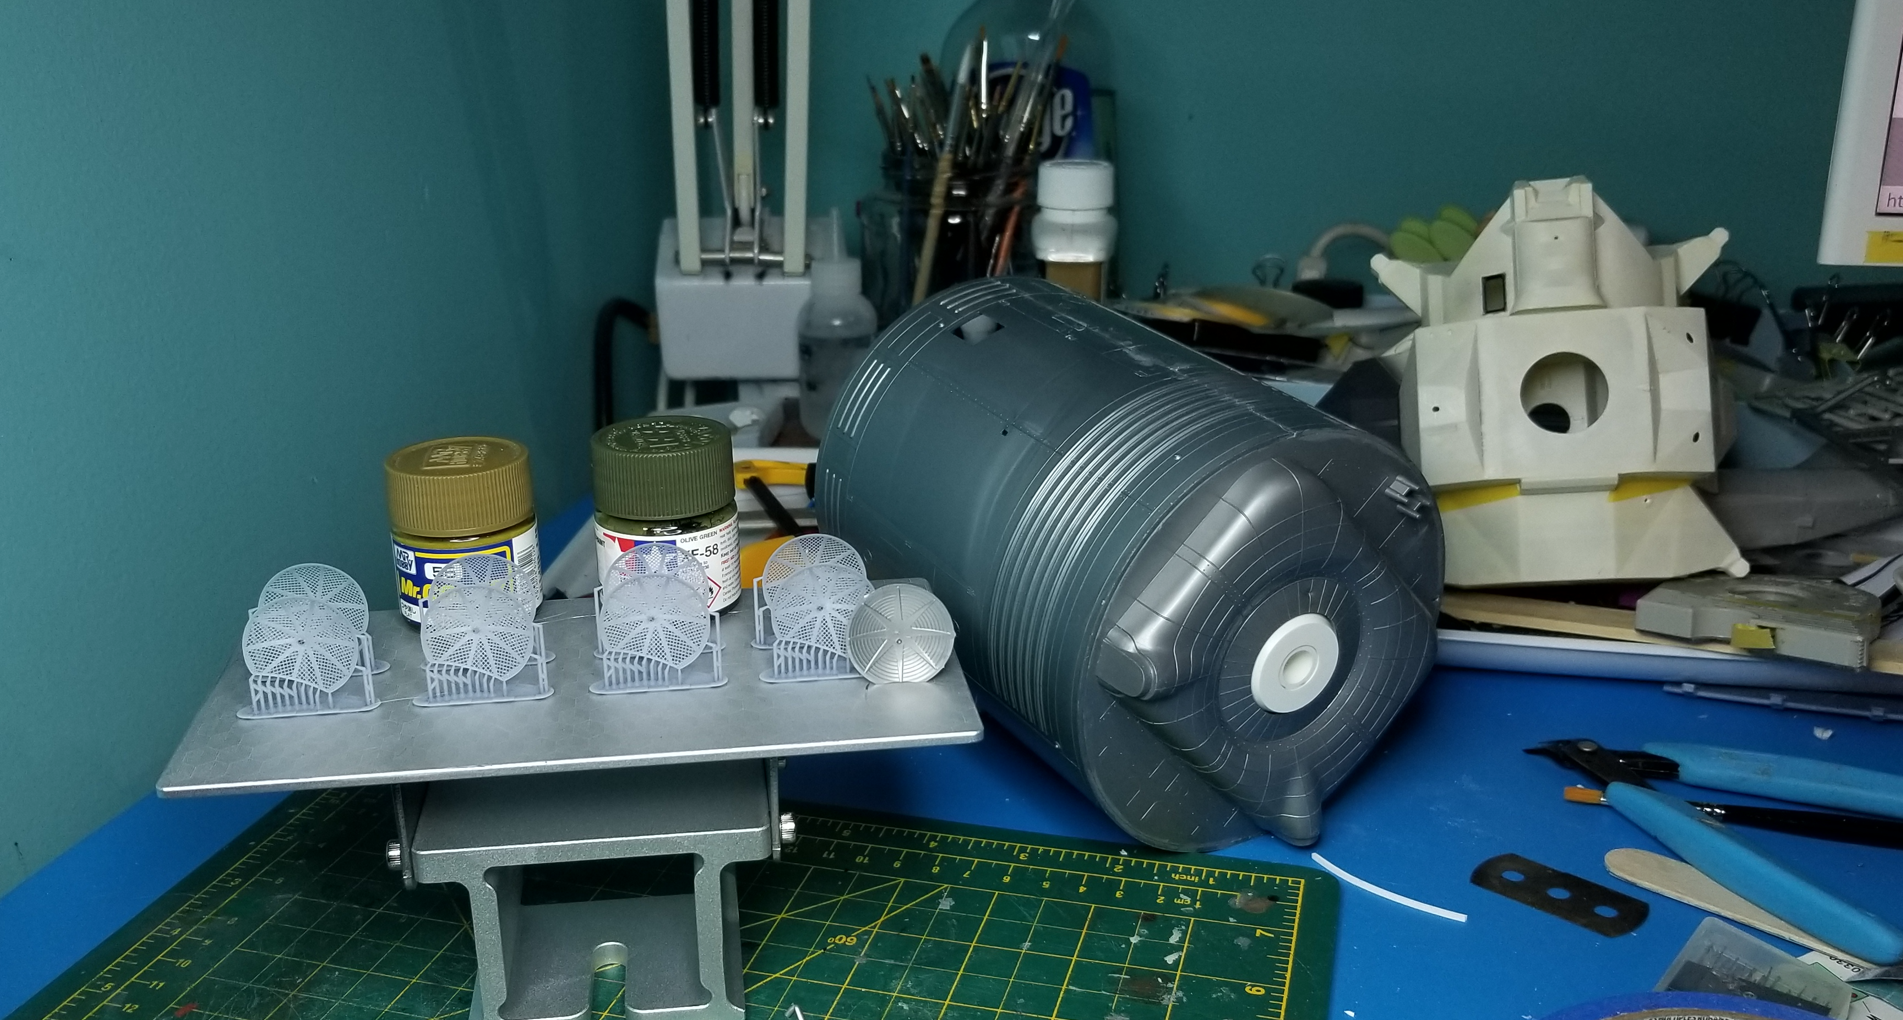
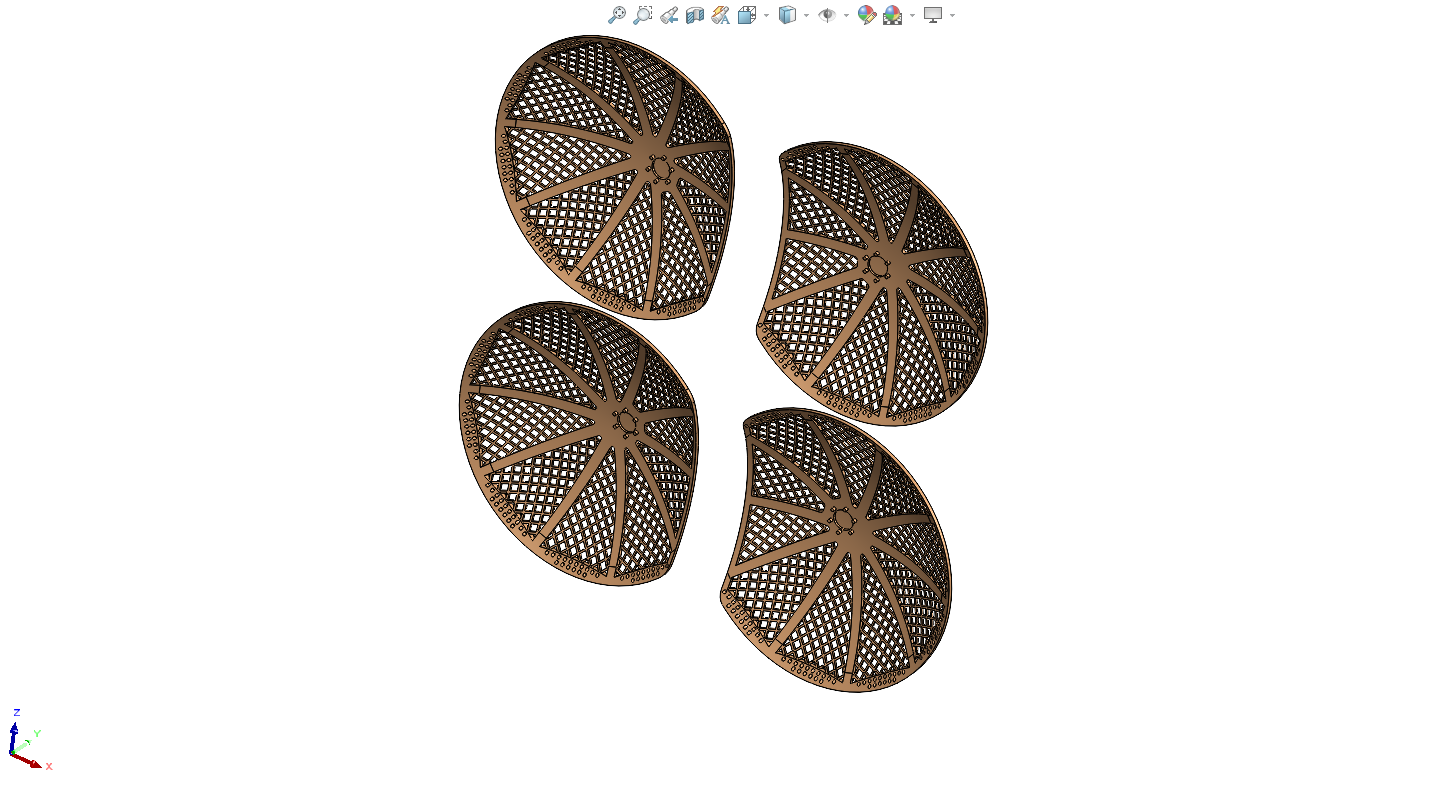
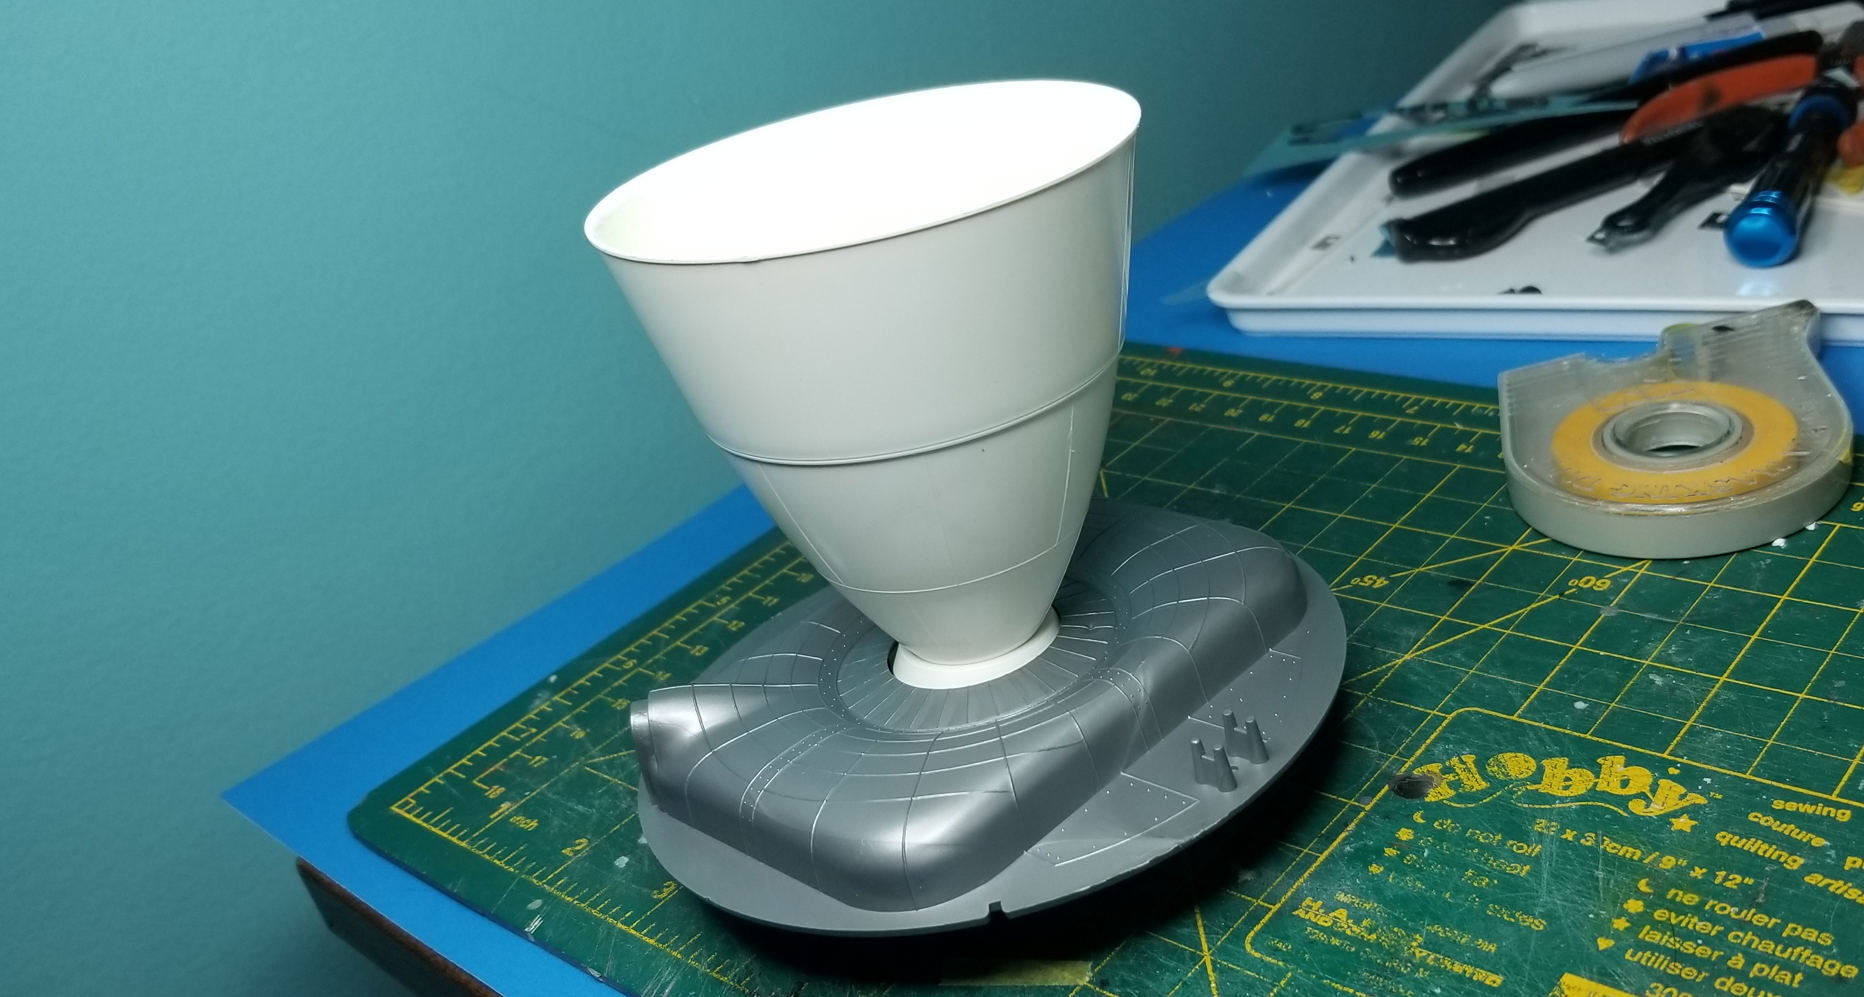
The printing worked out pretty good:
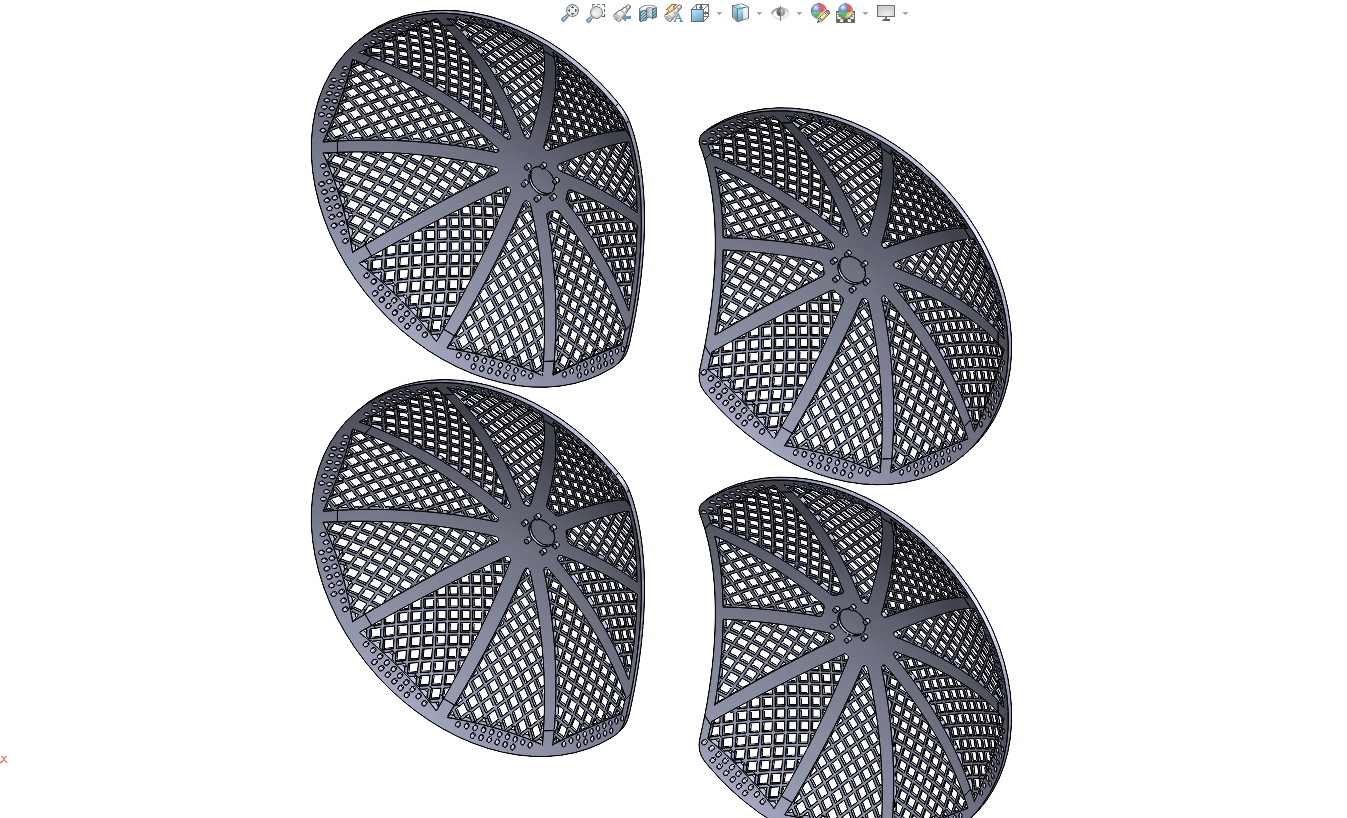
Family pic with the kit HGA:
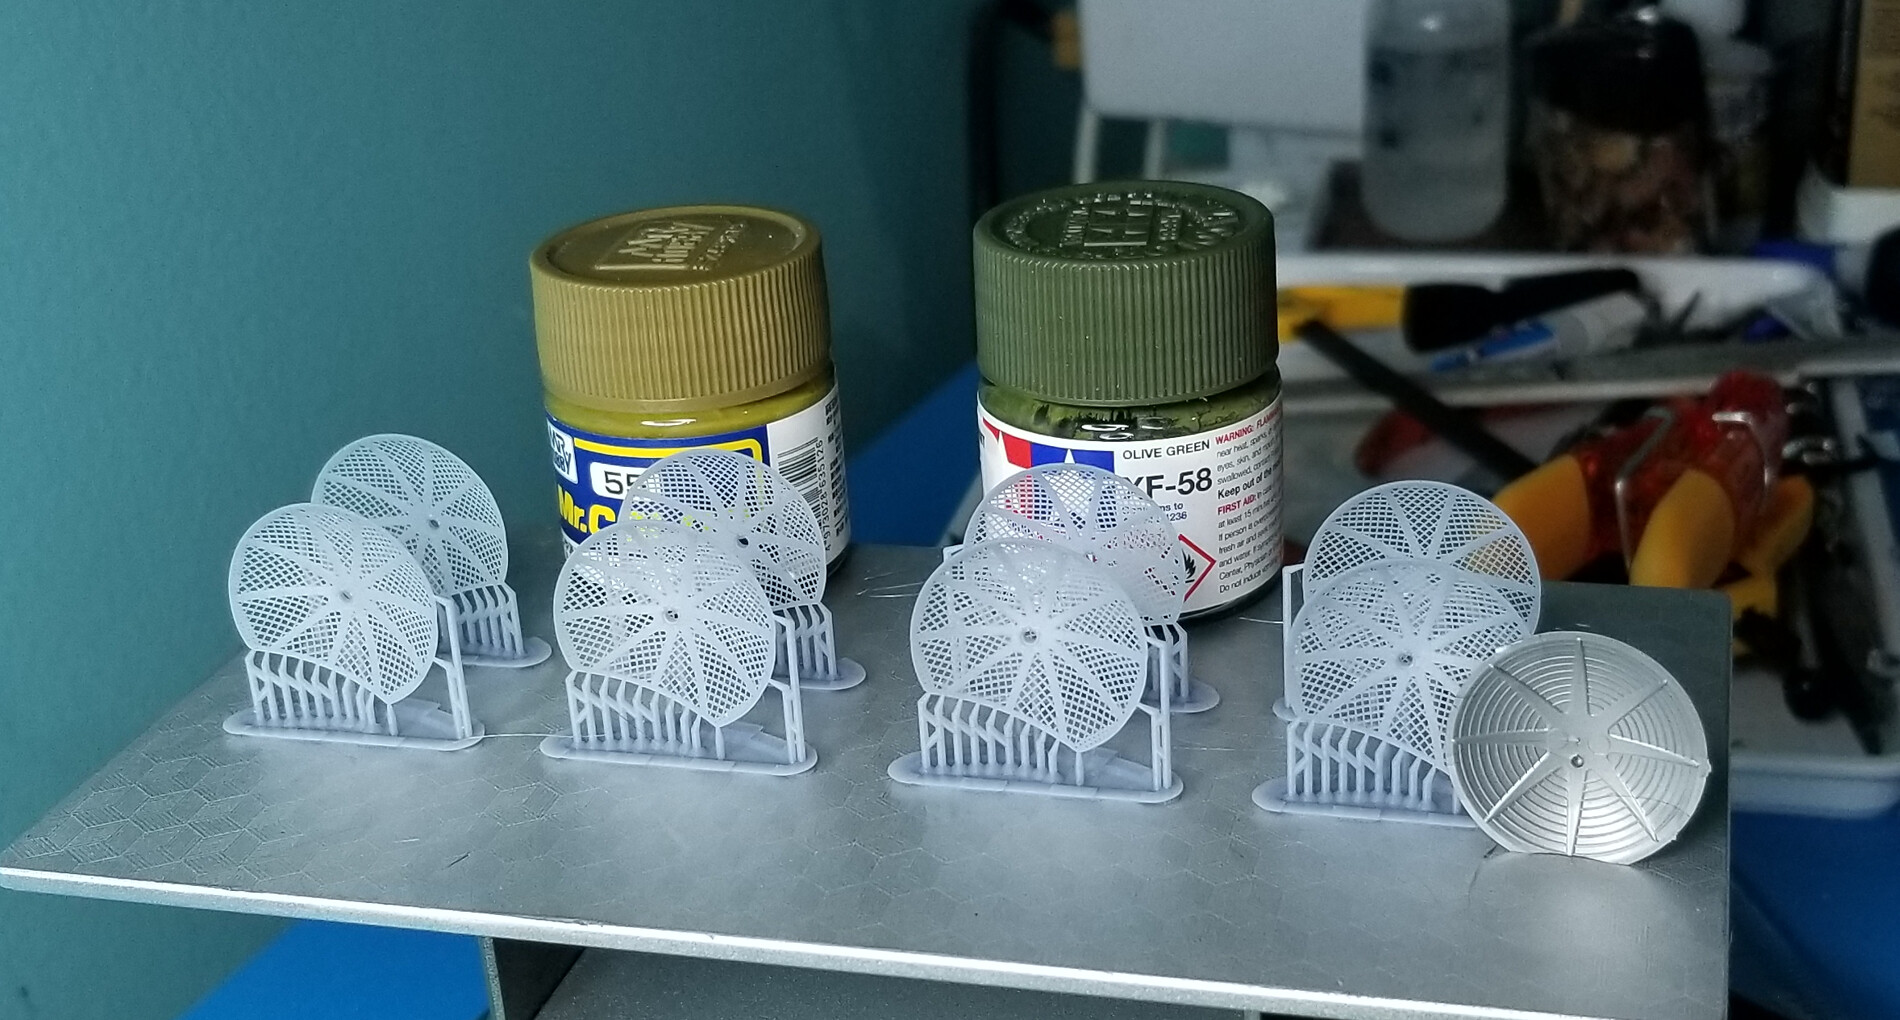

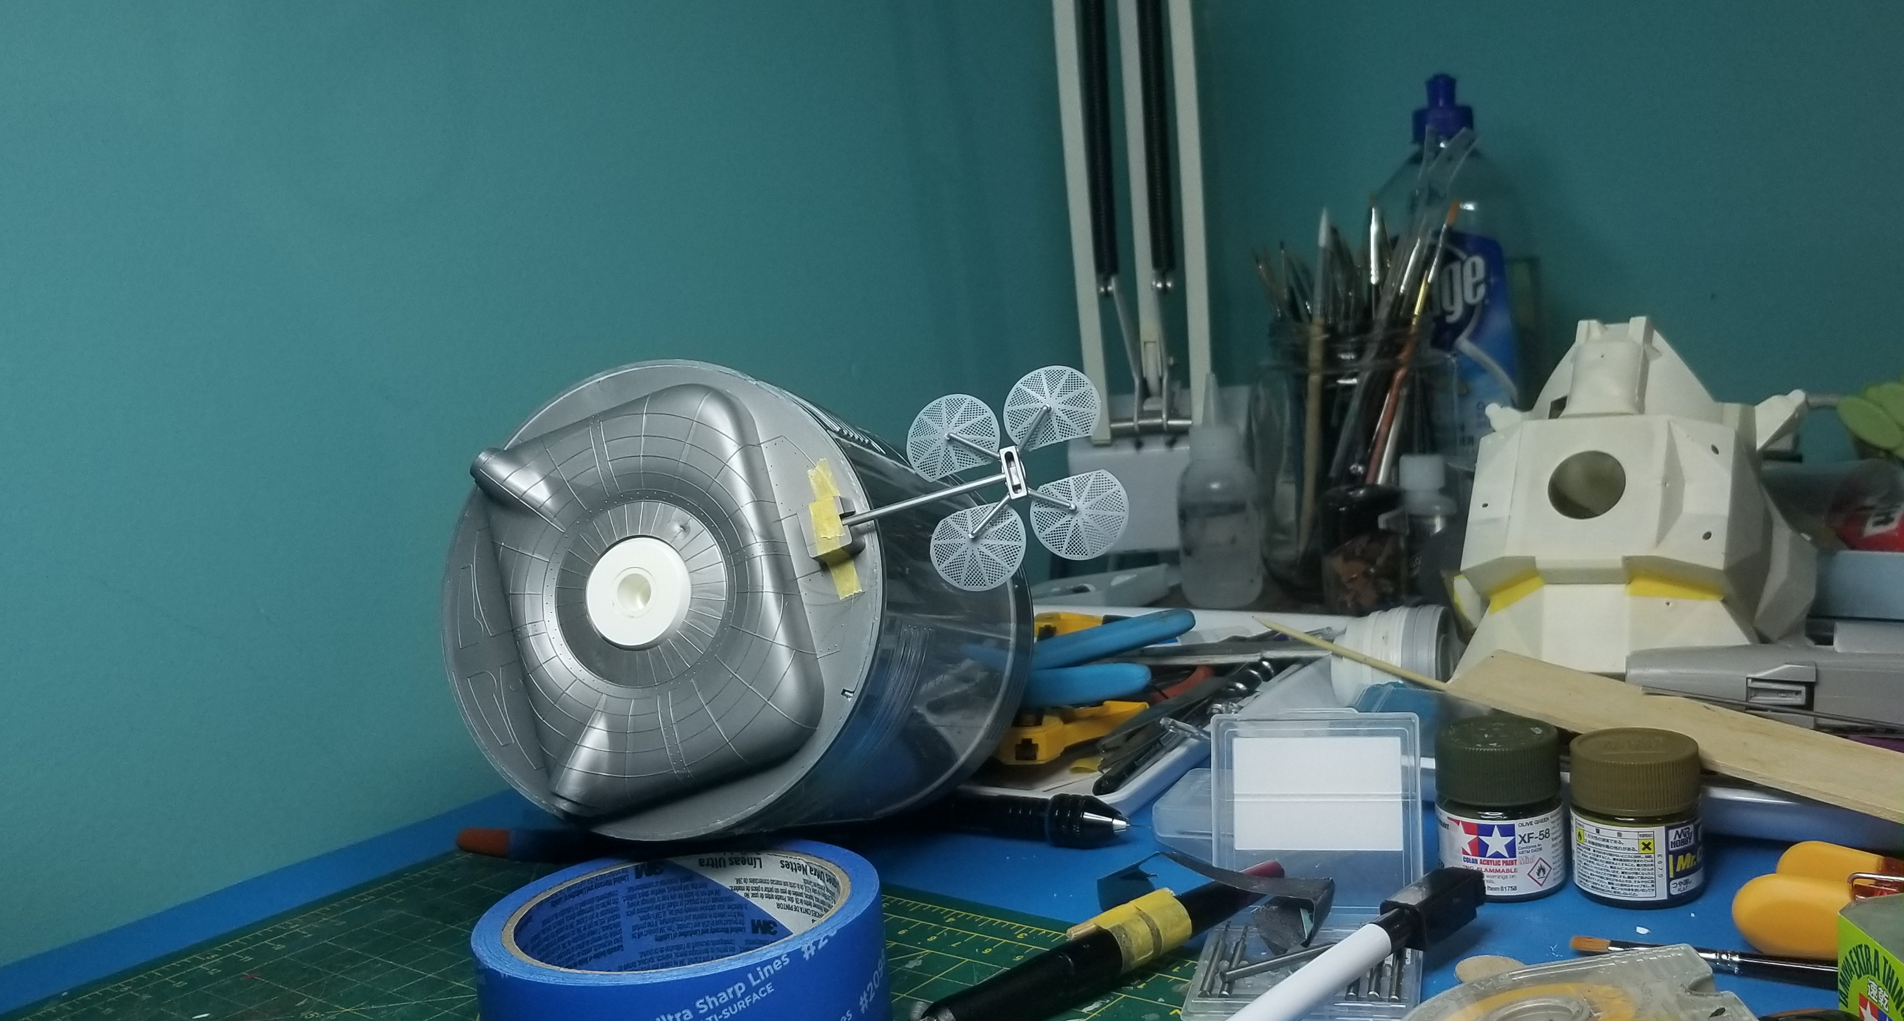
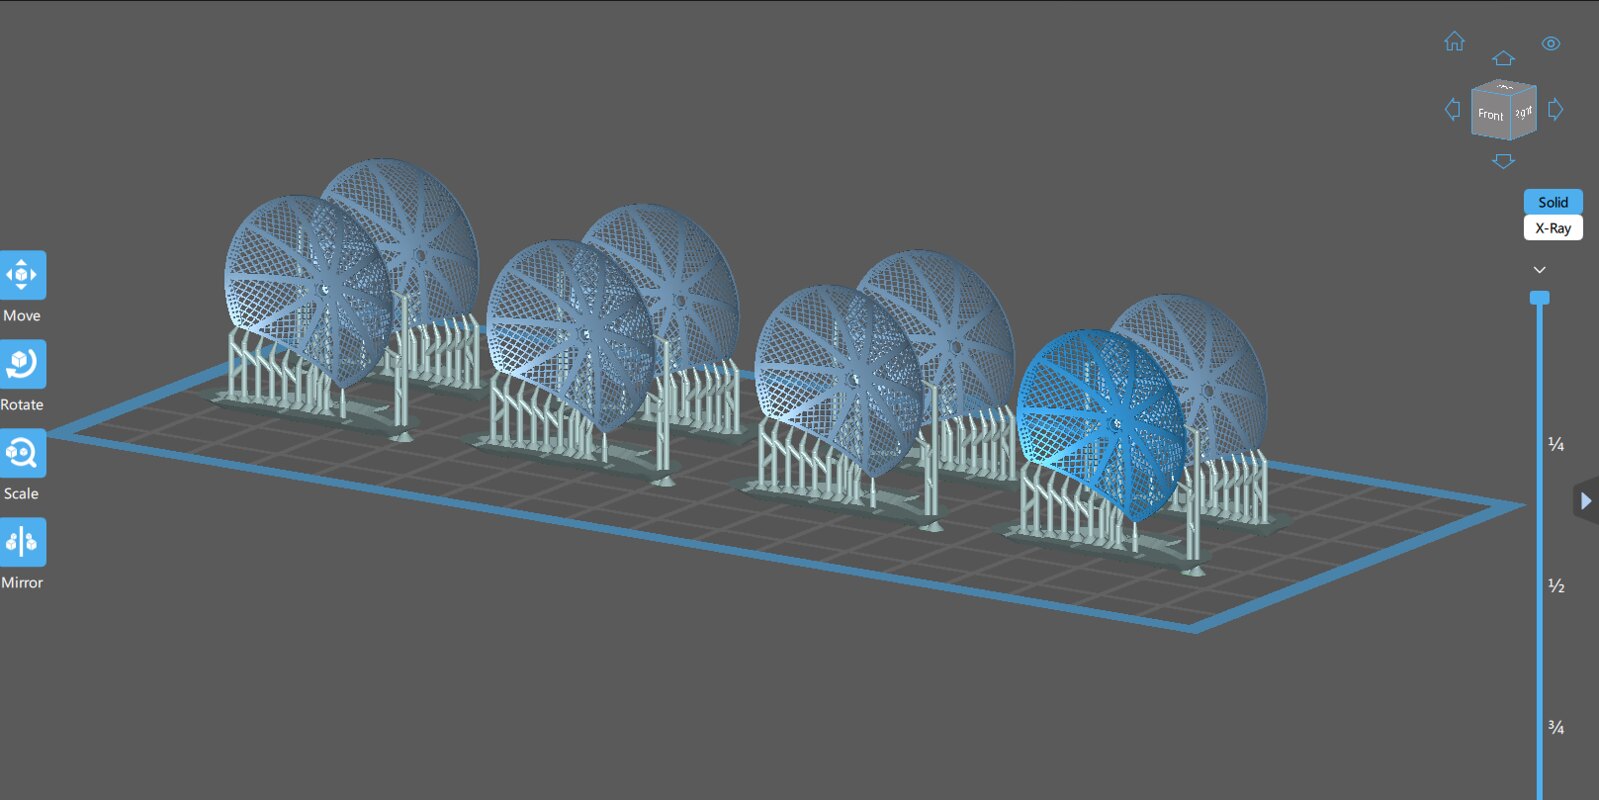
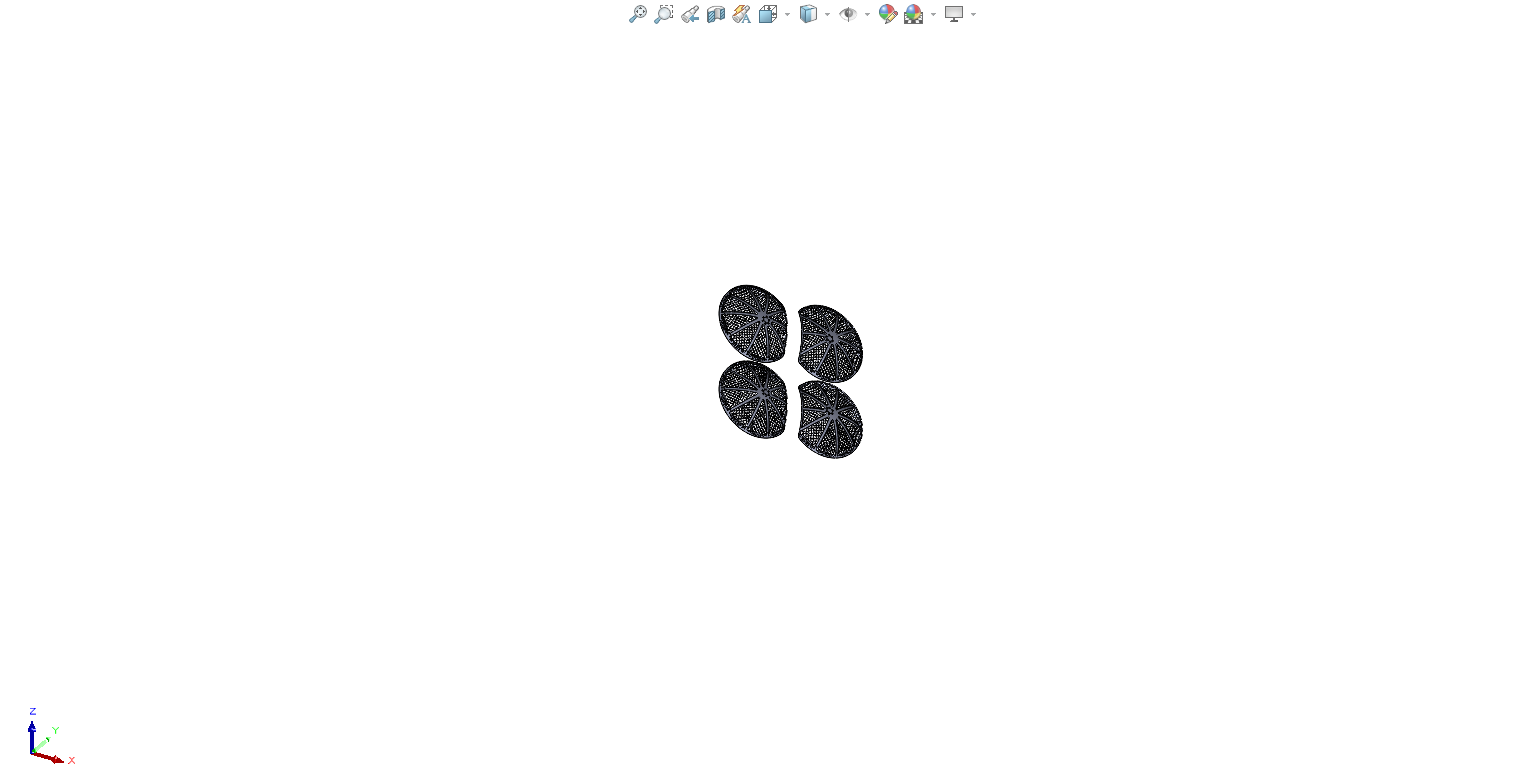
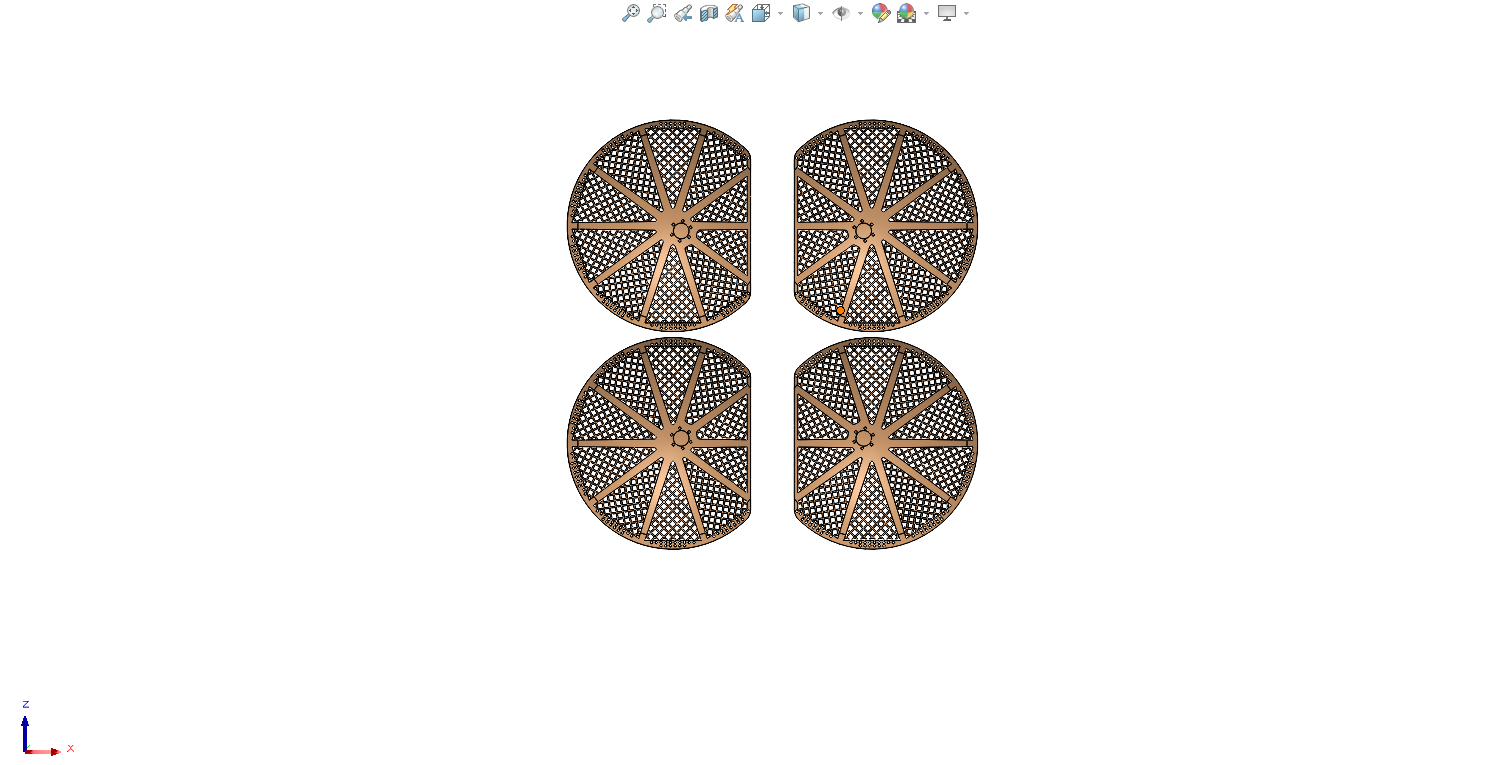
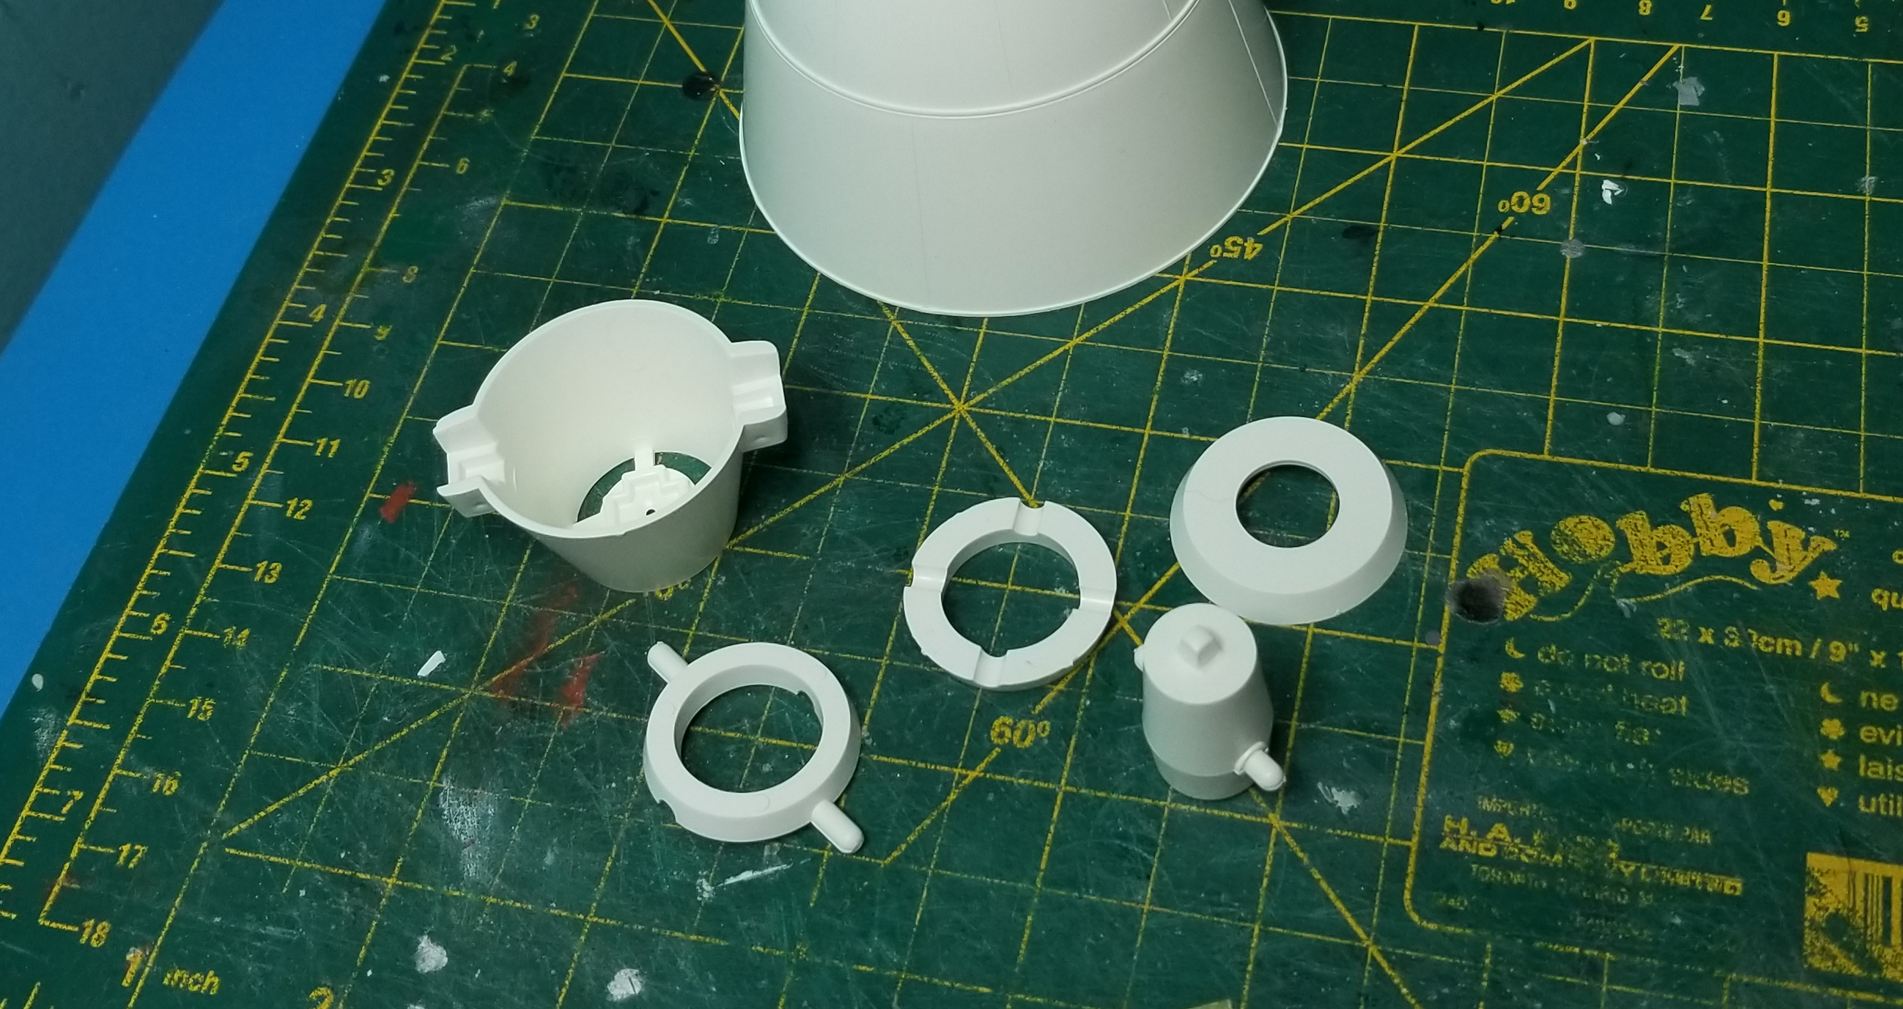
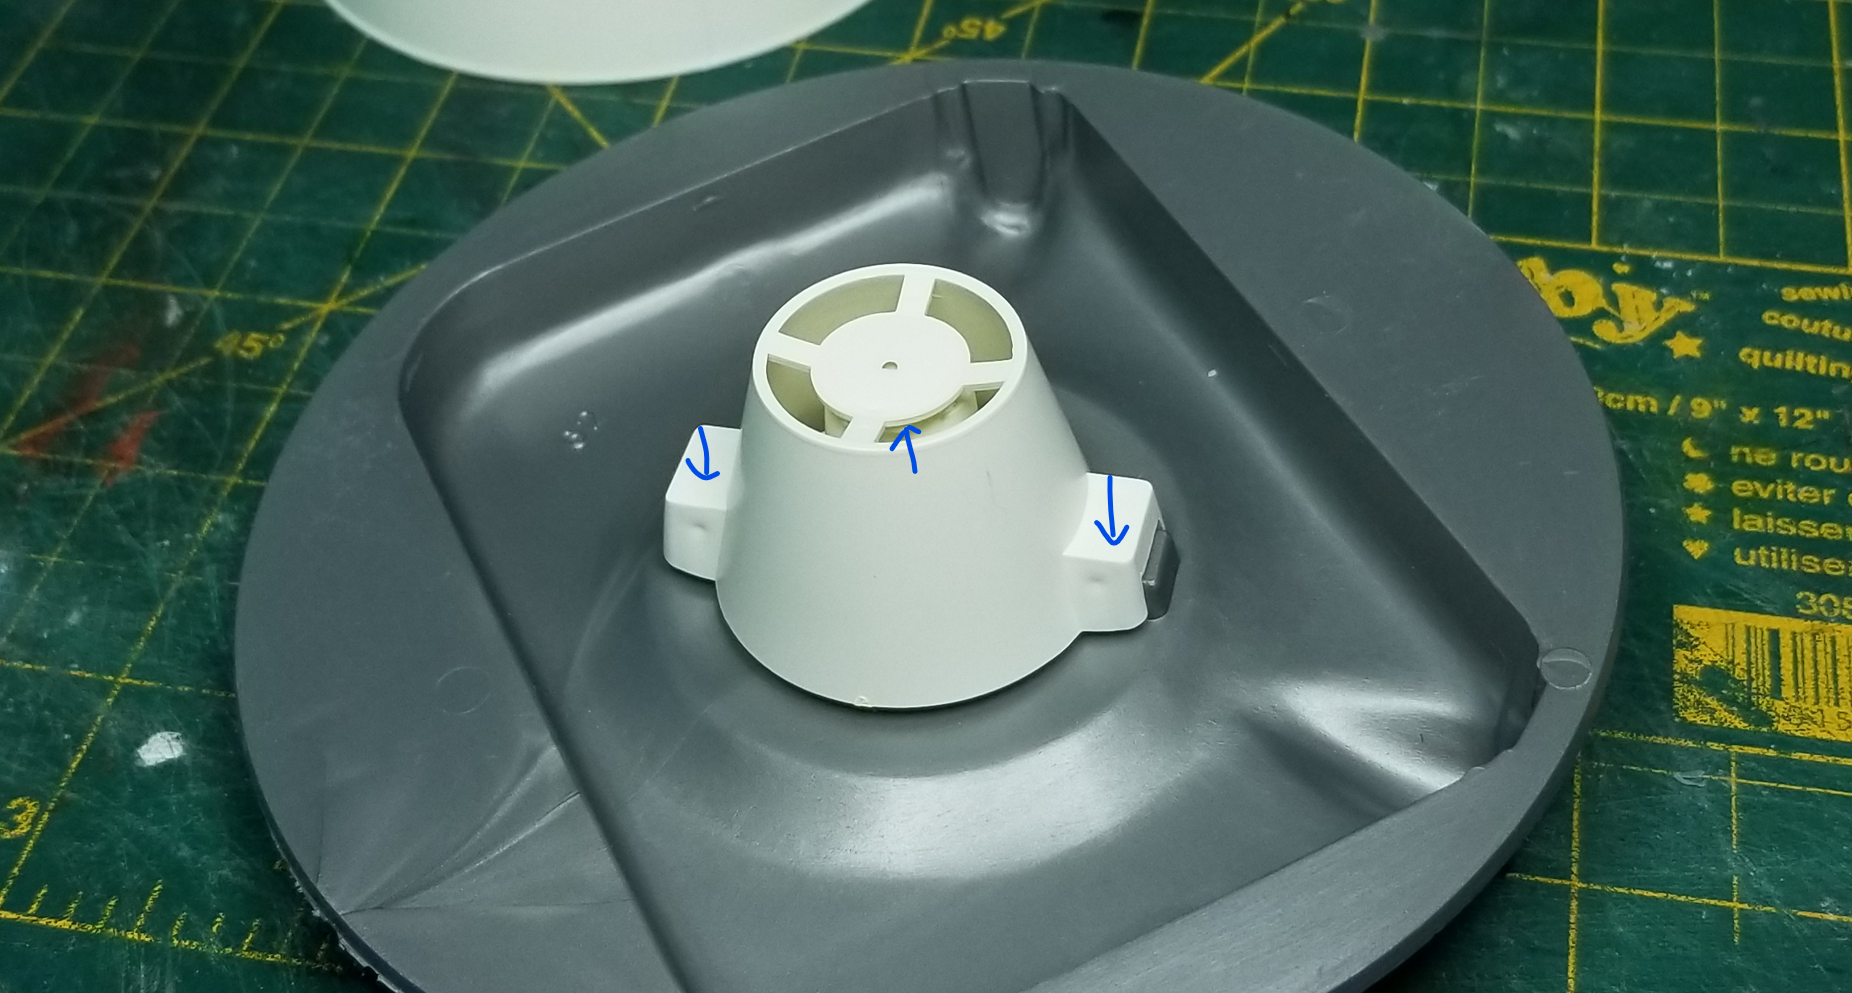
I noticed there's a bolted flange in the back so I included that as well. Blown up in the pics the mesh may not look dense enough but in actual size they look pretty cool. Make the mesh too dense and it will just clog up as the paint will tend to create webbing. All in all I think I achieved what I was after -- a see-through HGA/mesh that can be painted over.
-
Too bad there's nothing out there for 1/32. I've never tried printing my own decals before -- this is going to be exciting : )
I wanted to do something about the kit's high-gain antennas. The reflectors are solid dishes in the kit and i wanted to see if I can make some with see-through mesh.

And why are the feeder horns sitting at an offset from center?

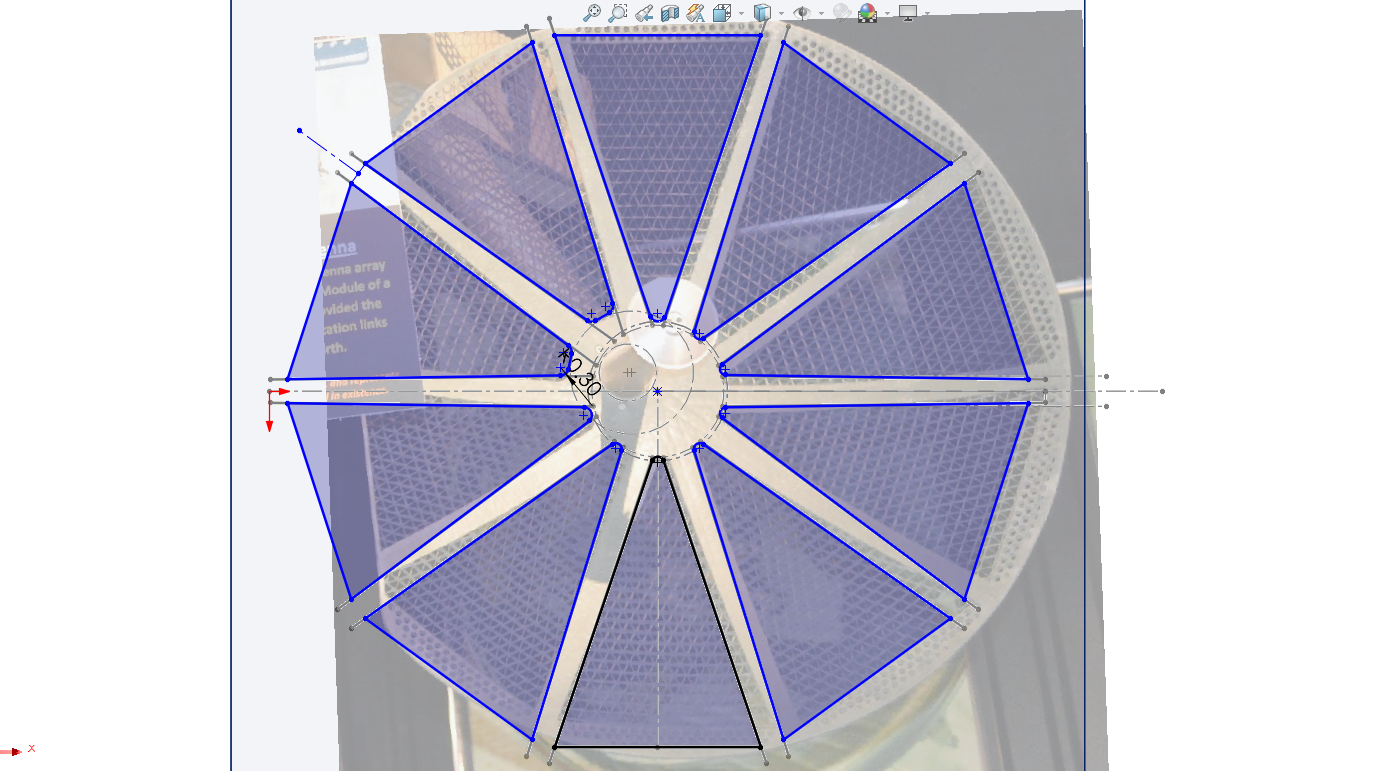

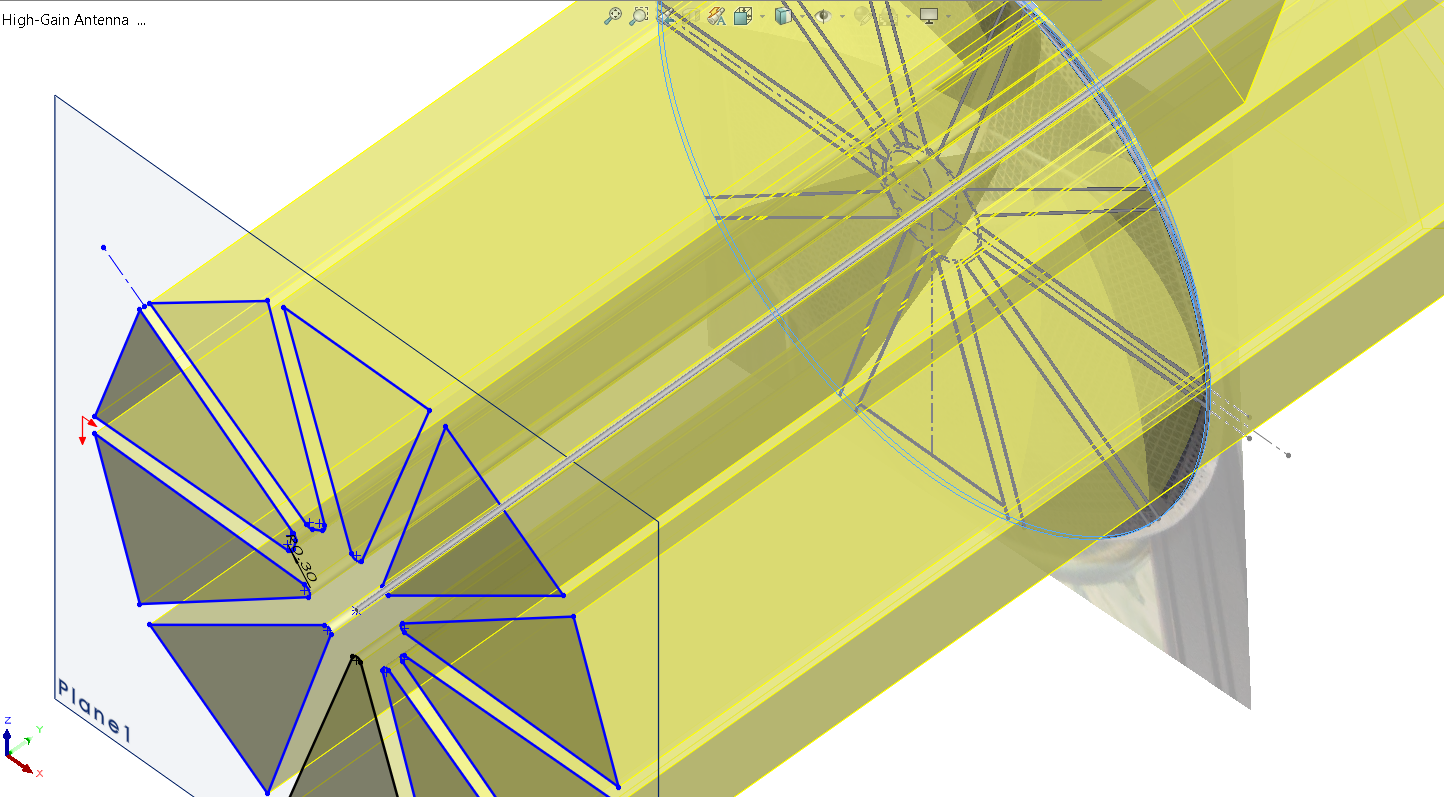


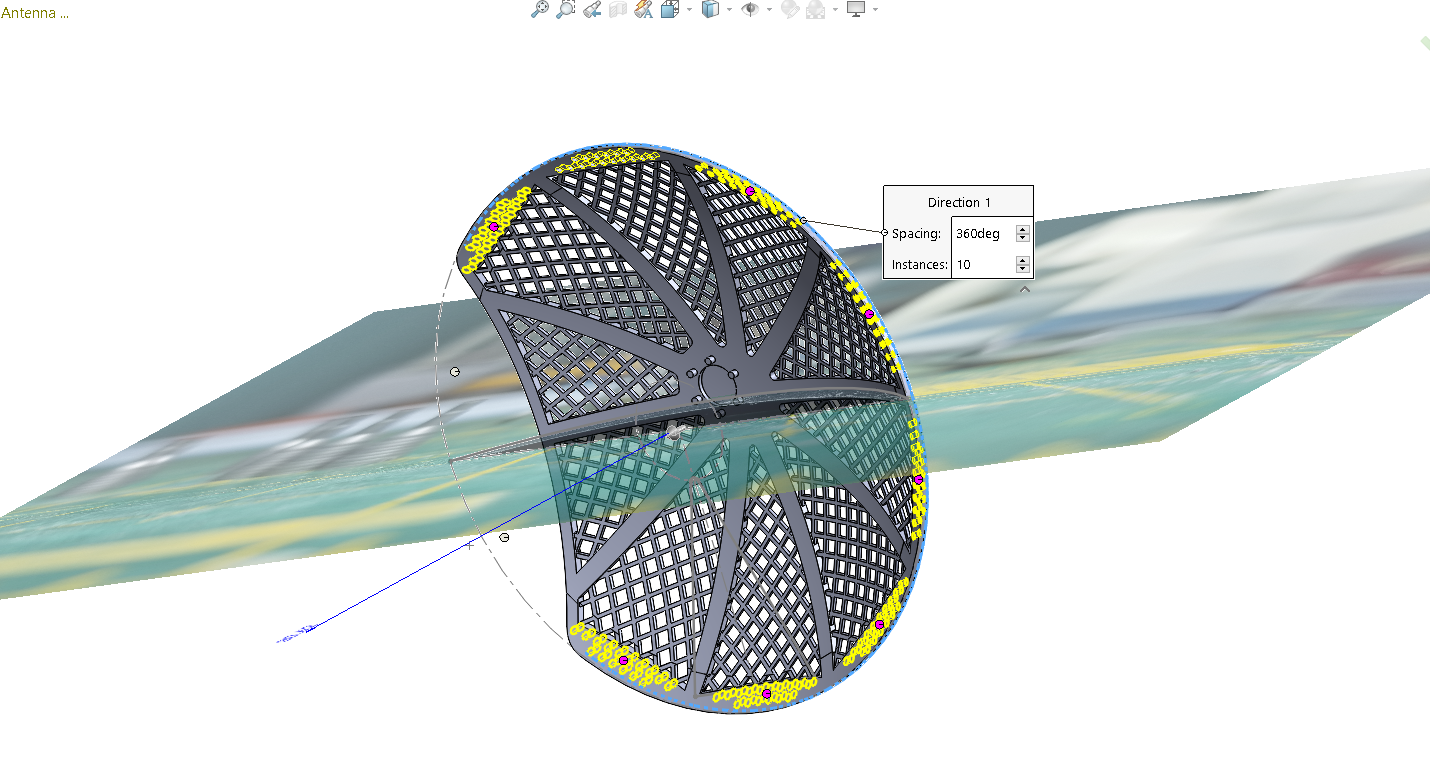

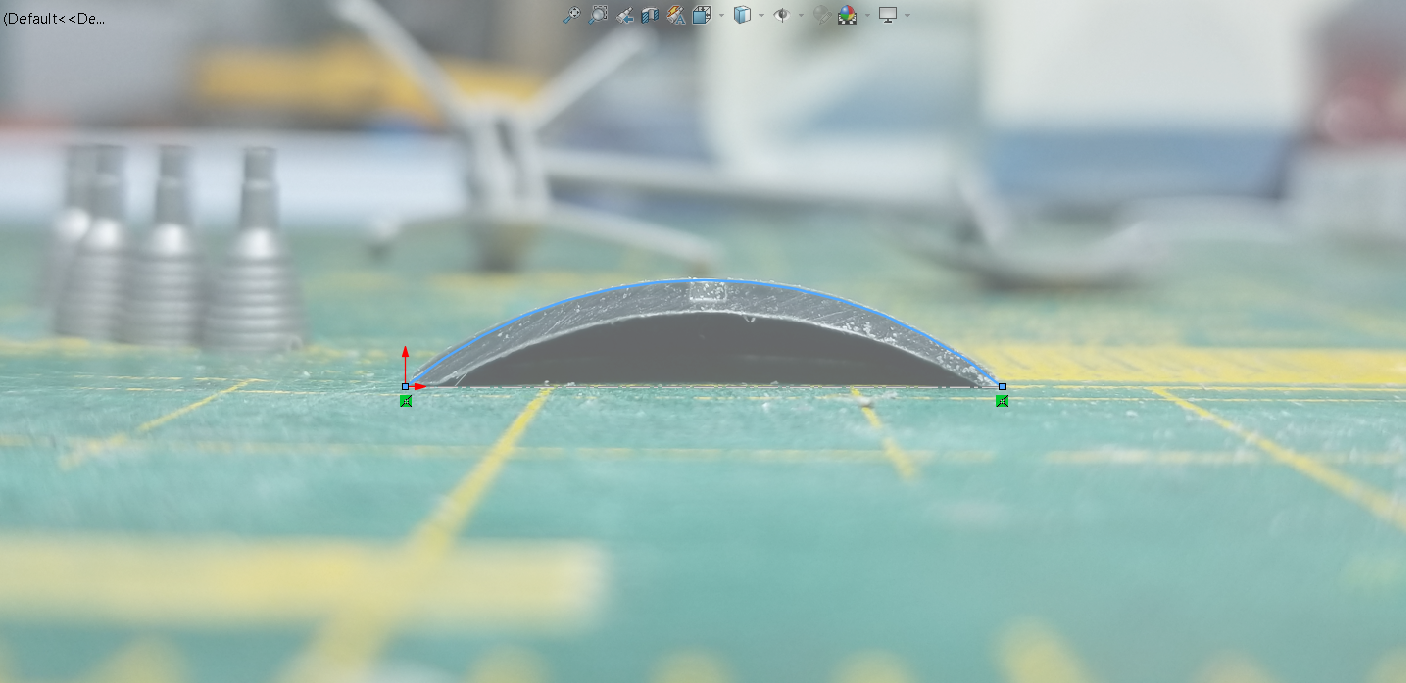
I had to observe the limitations of the printer for the mesh patterns and holes. At 24mm diameter they'll be printing like below and the mesh holes can close up if the pattern is too fine and that will defeat the purpose of the exercise to come up with something see-through. I do have a feeling the holes will fill up but we won't know for sure if we don't try. I can always try a wider spacing if this doesn't pan out.
-
That's some beautiful weathering and photography! Mind if I ask what kind of paints went on to that engine -- especially the exhaust manifold. The heat staining looks so realistic. Prop weathering is fantastic, too. Everything is.
-
Hey, @kellyF15, thanks! Looking forward to seeing your build pics! I'm still building familiarity with this spacecraft but I'm learning a lot. : )
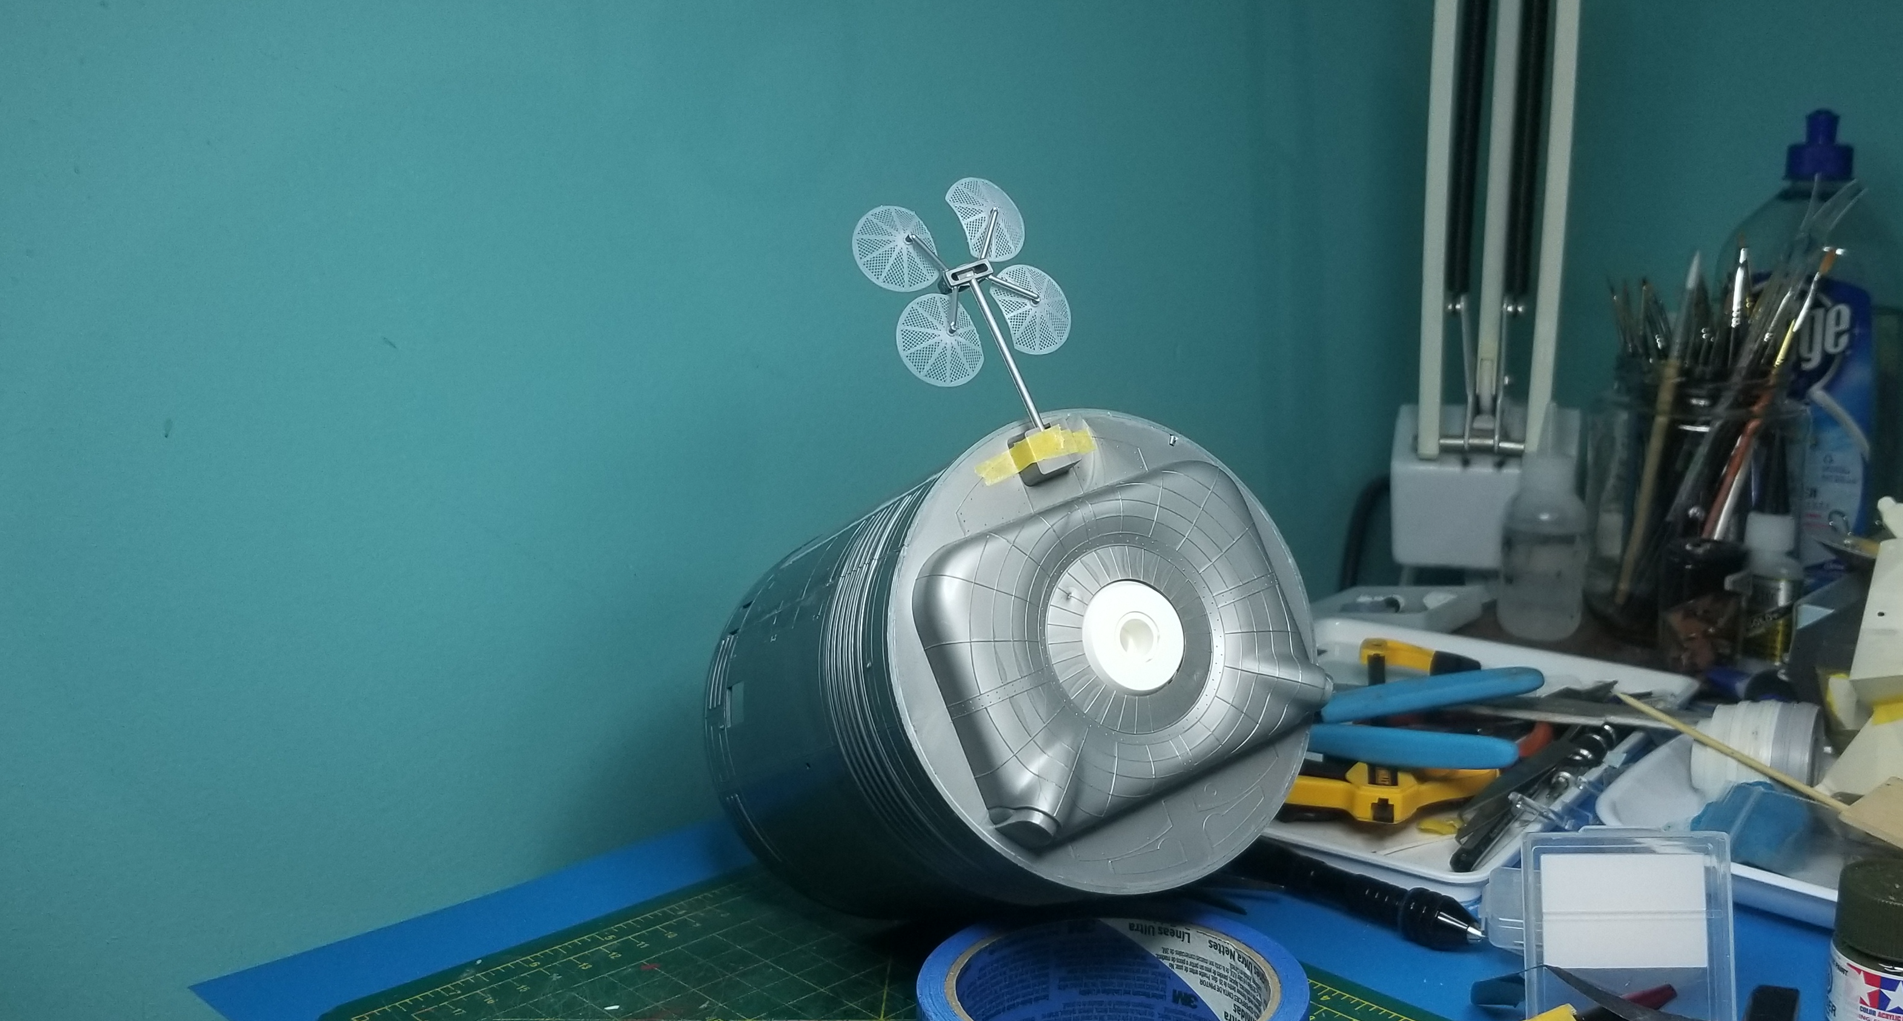
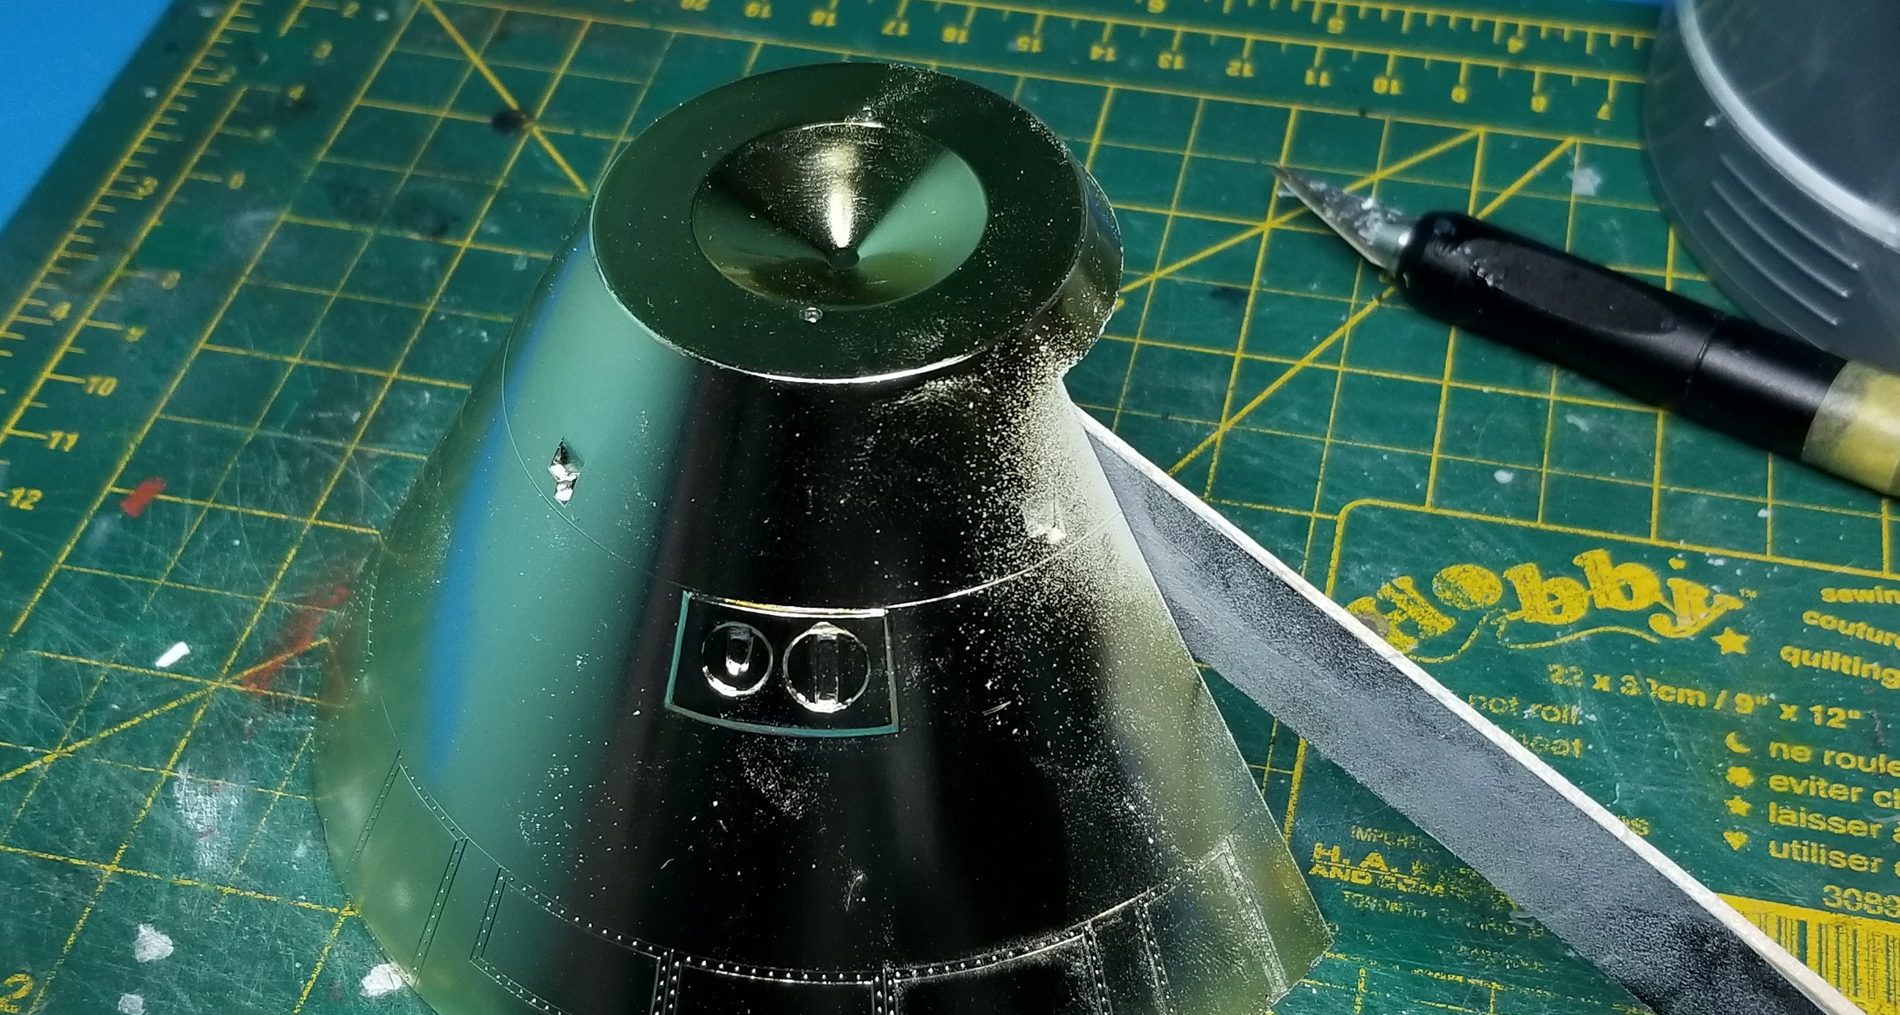
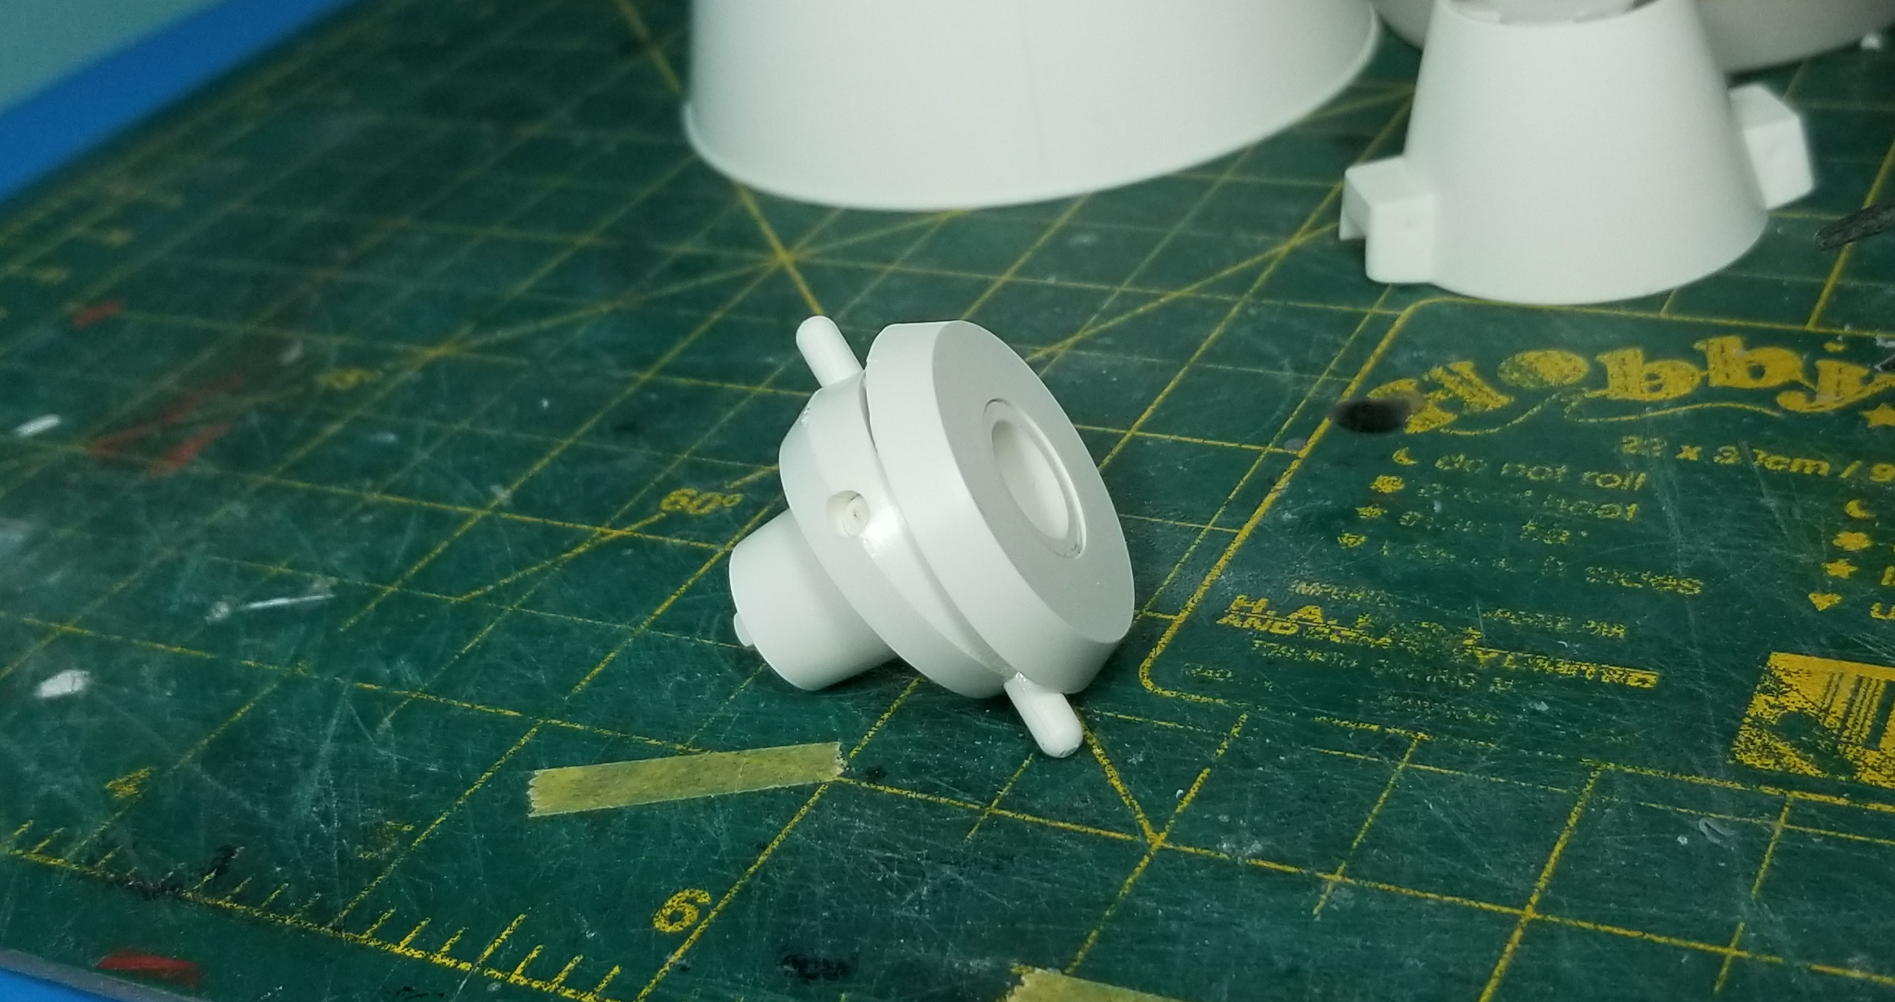
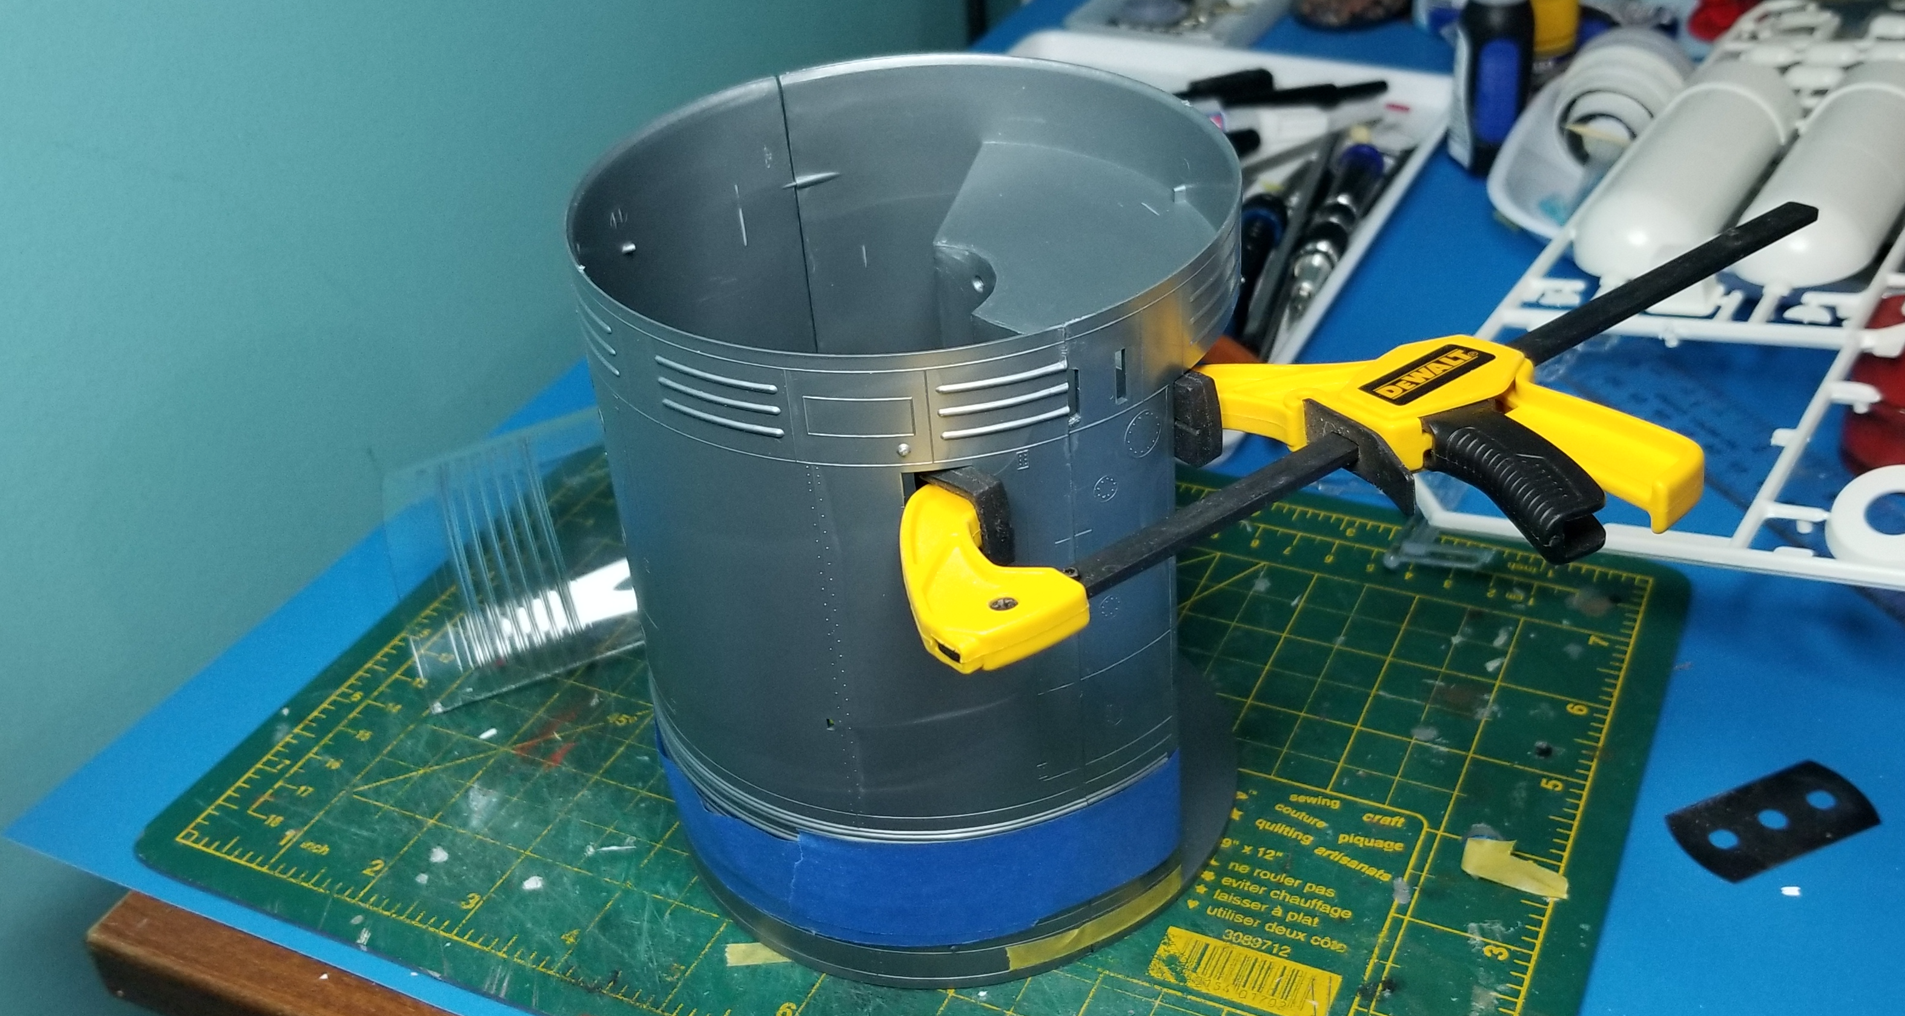
Clamped down and glued on the universal joint cage.

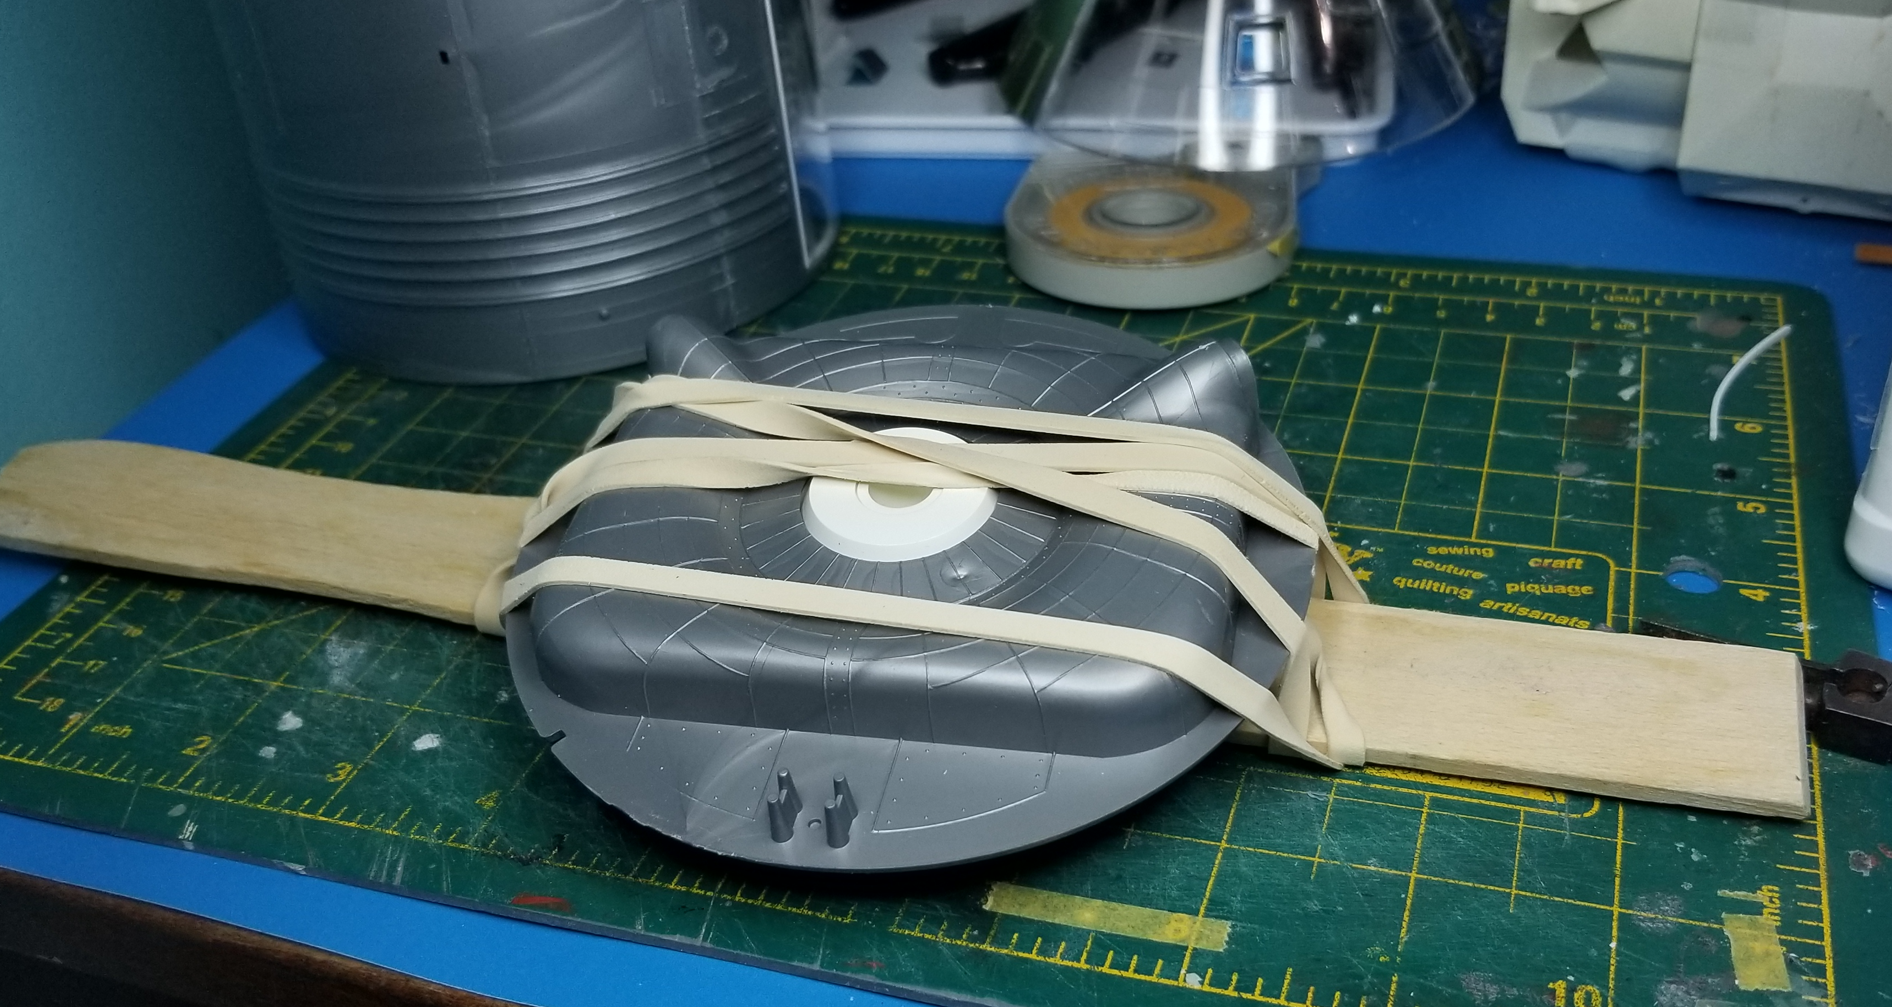
Added a little 2-part putty around the seams for good measure:

-
Hi Randy, I just saw this thread. Some cool stuff going on here! : ) Following along : )
-
Great info, habu2, thanks! : ) Sad to know the Apollo 11 mission didn't carry SIM equipment : ( I was planning on modelling the Columbia.
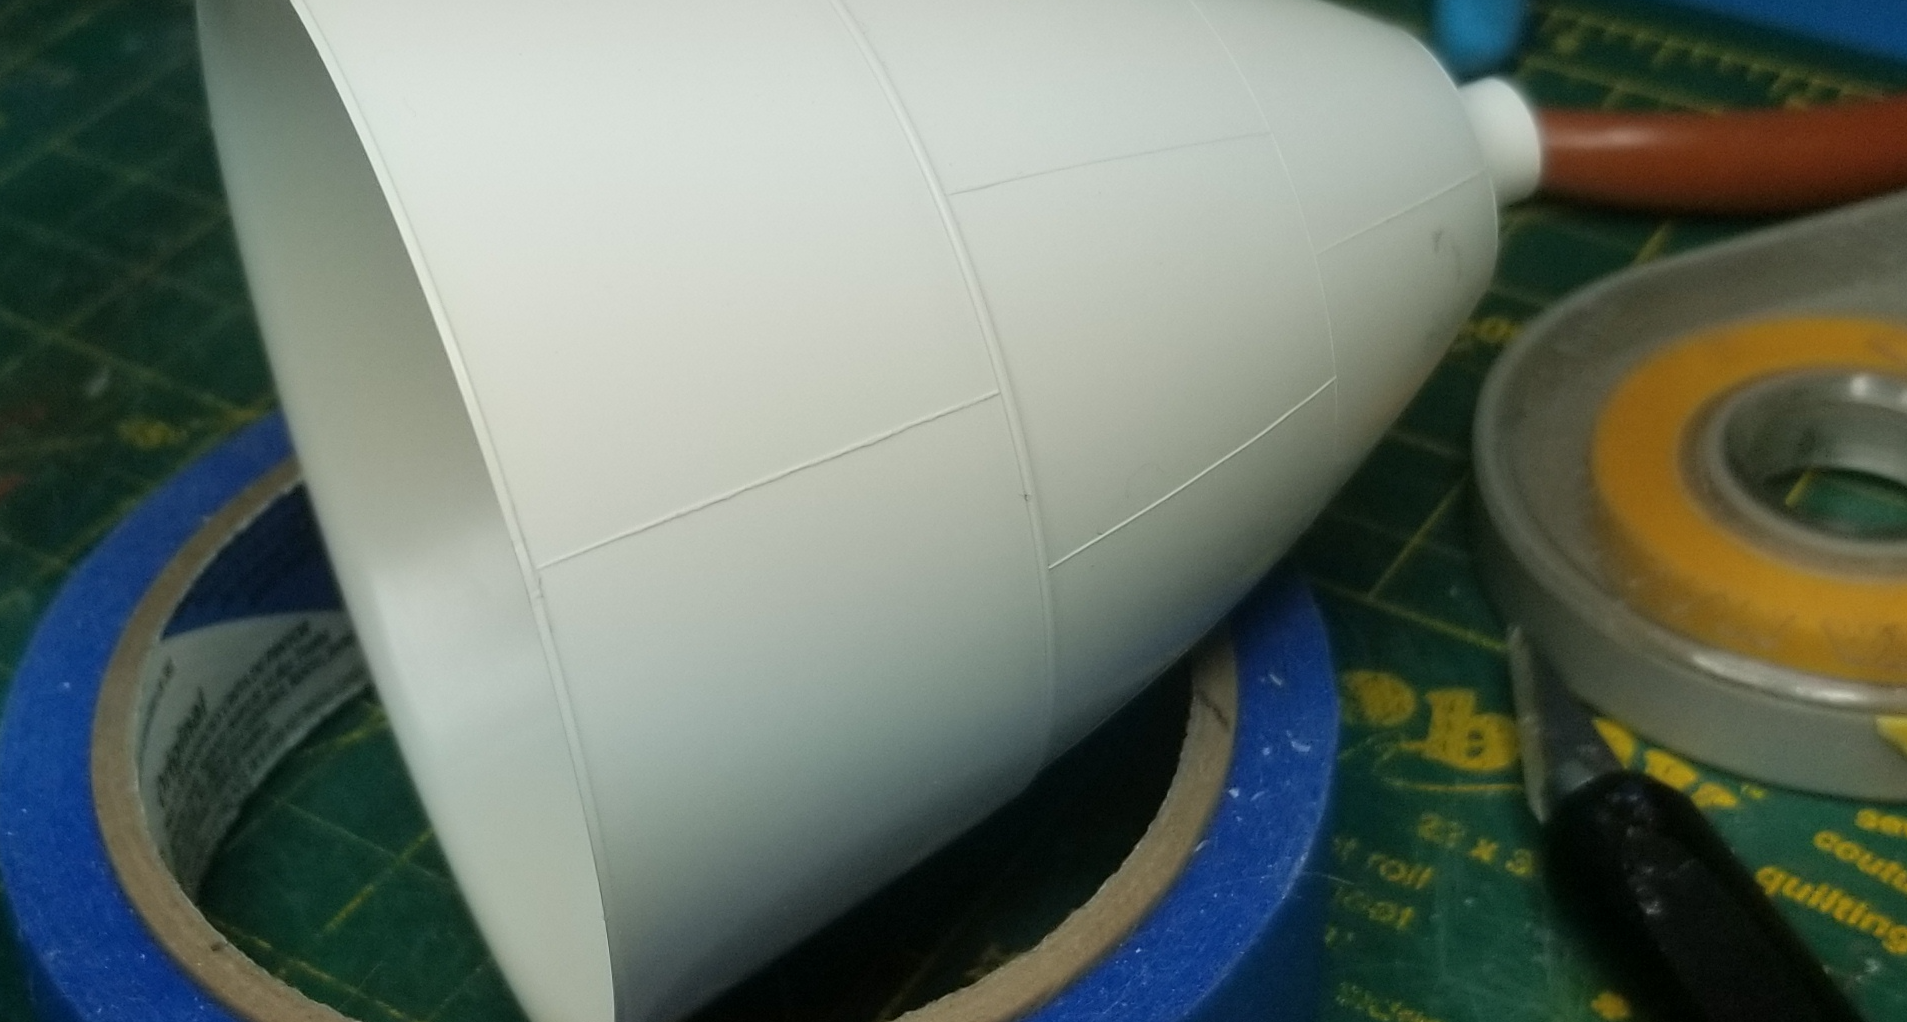
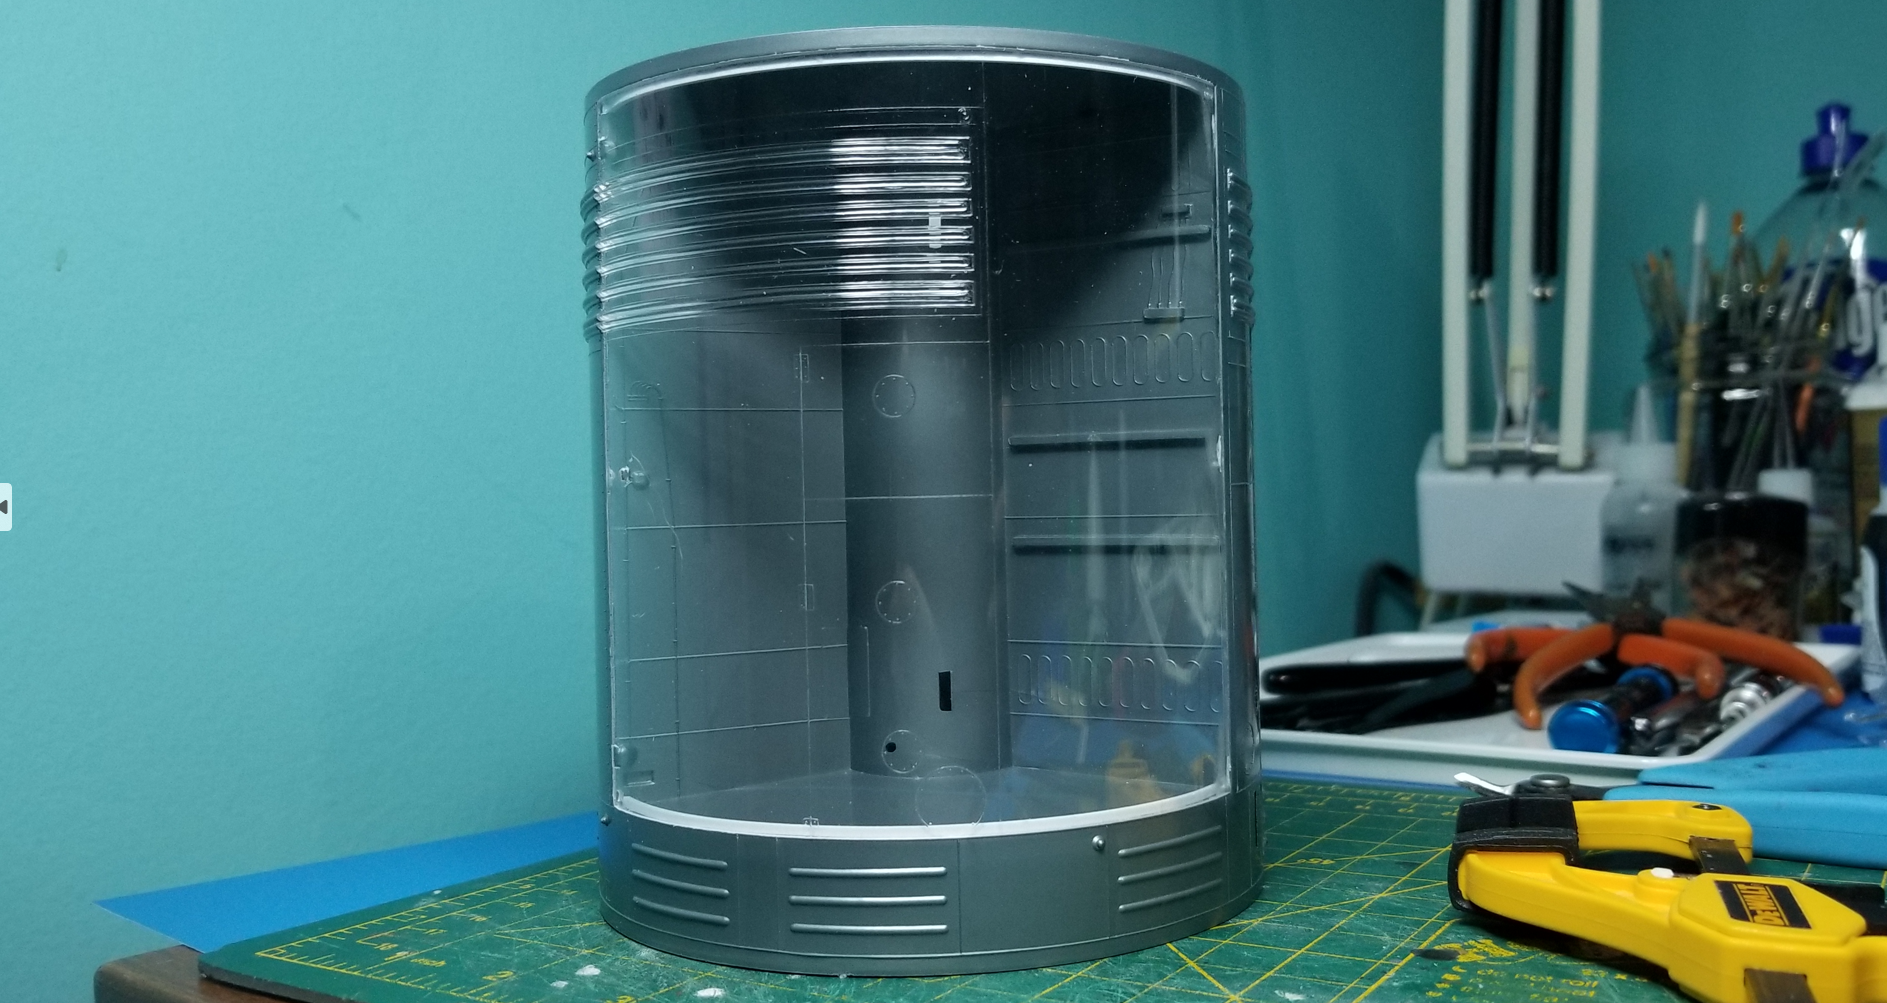
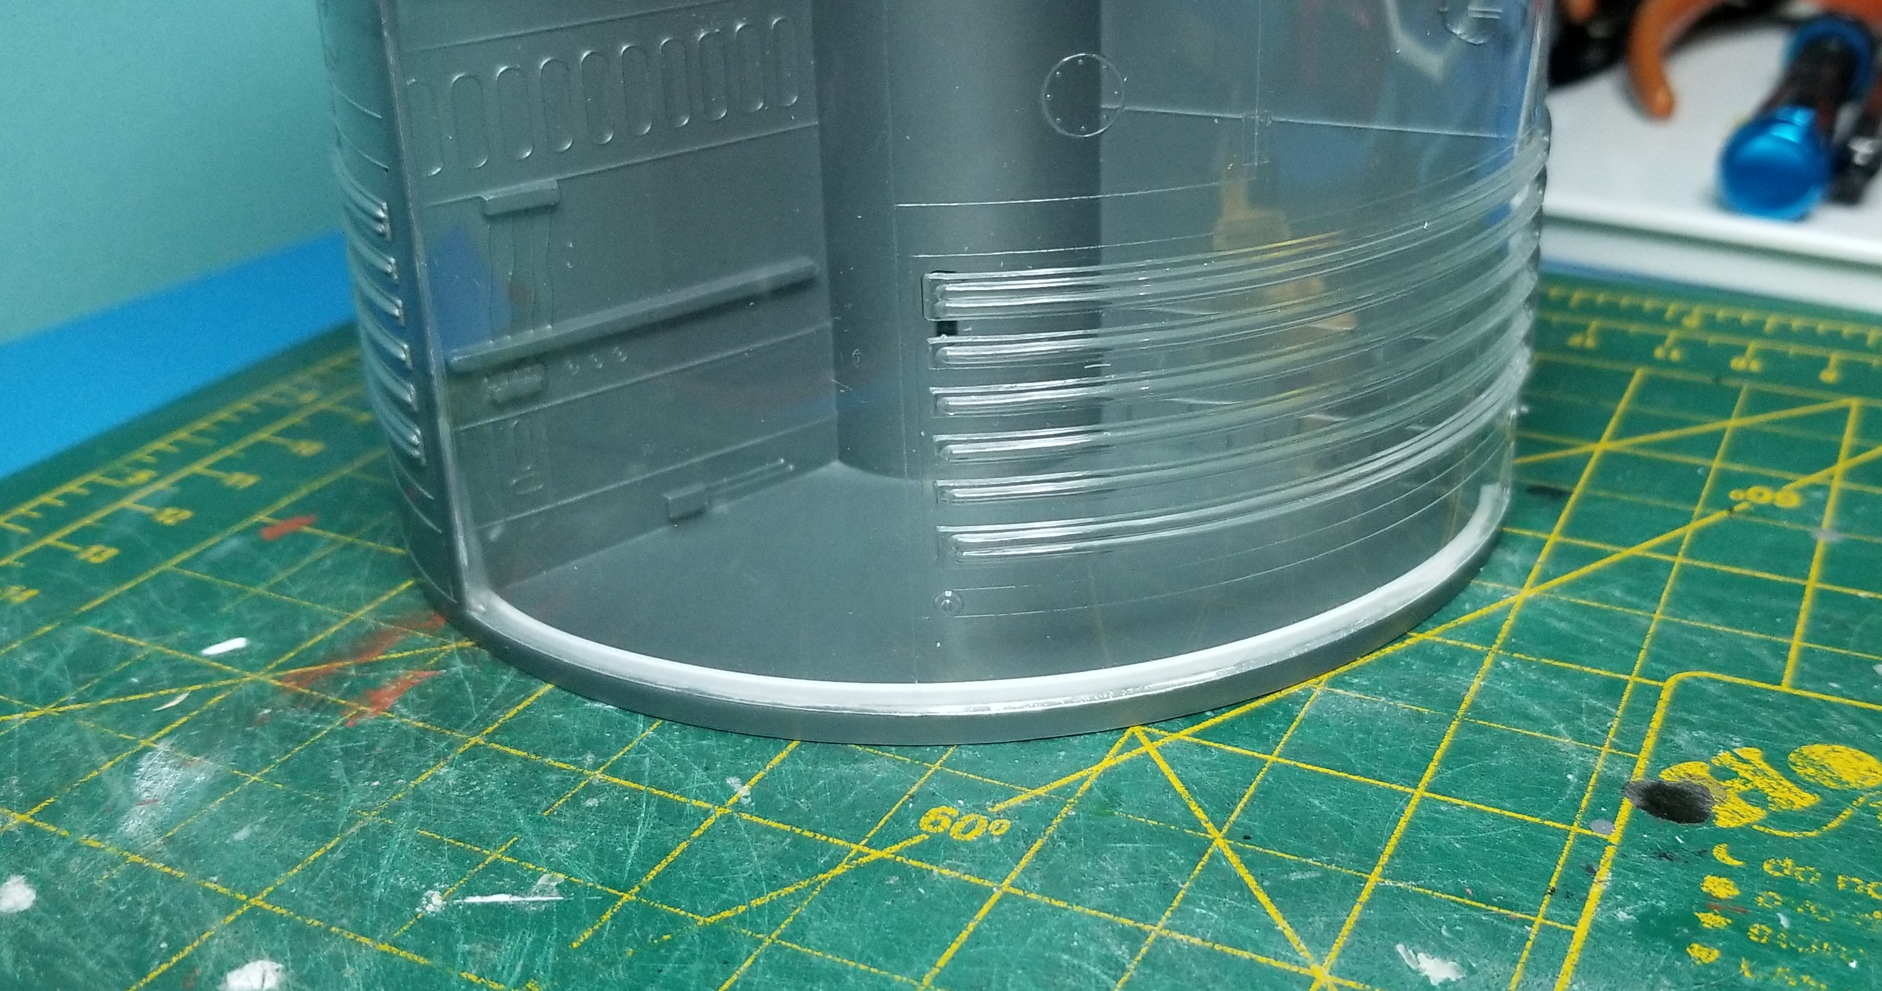
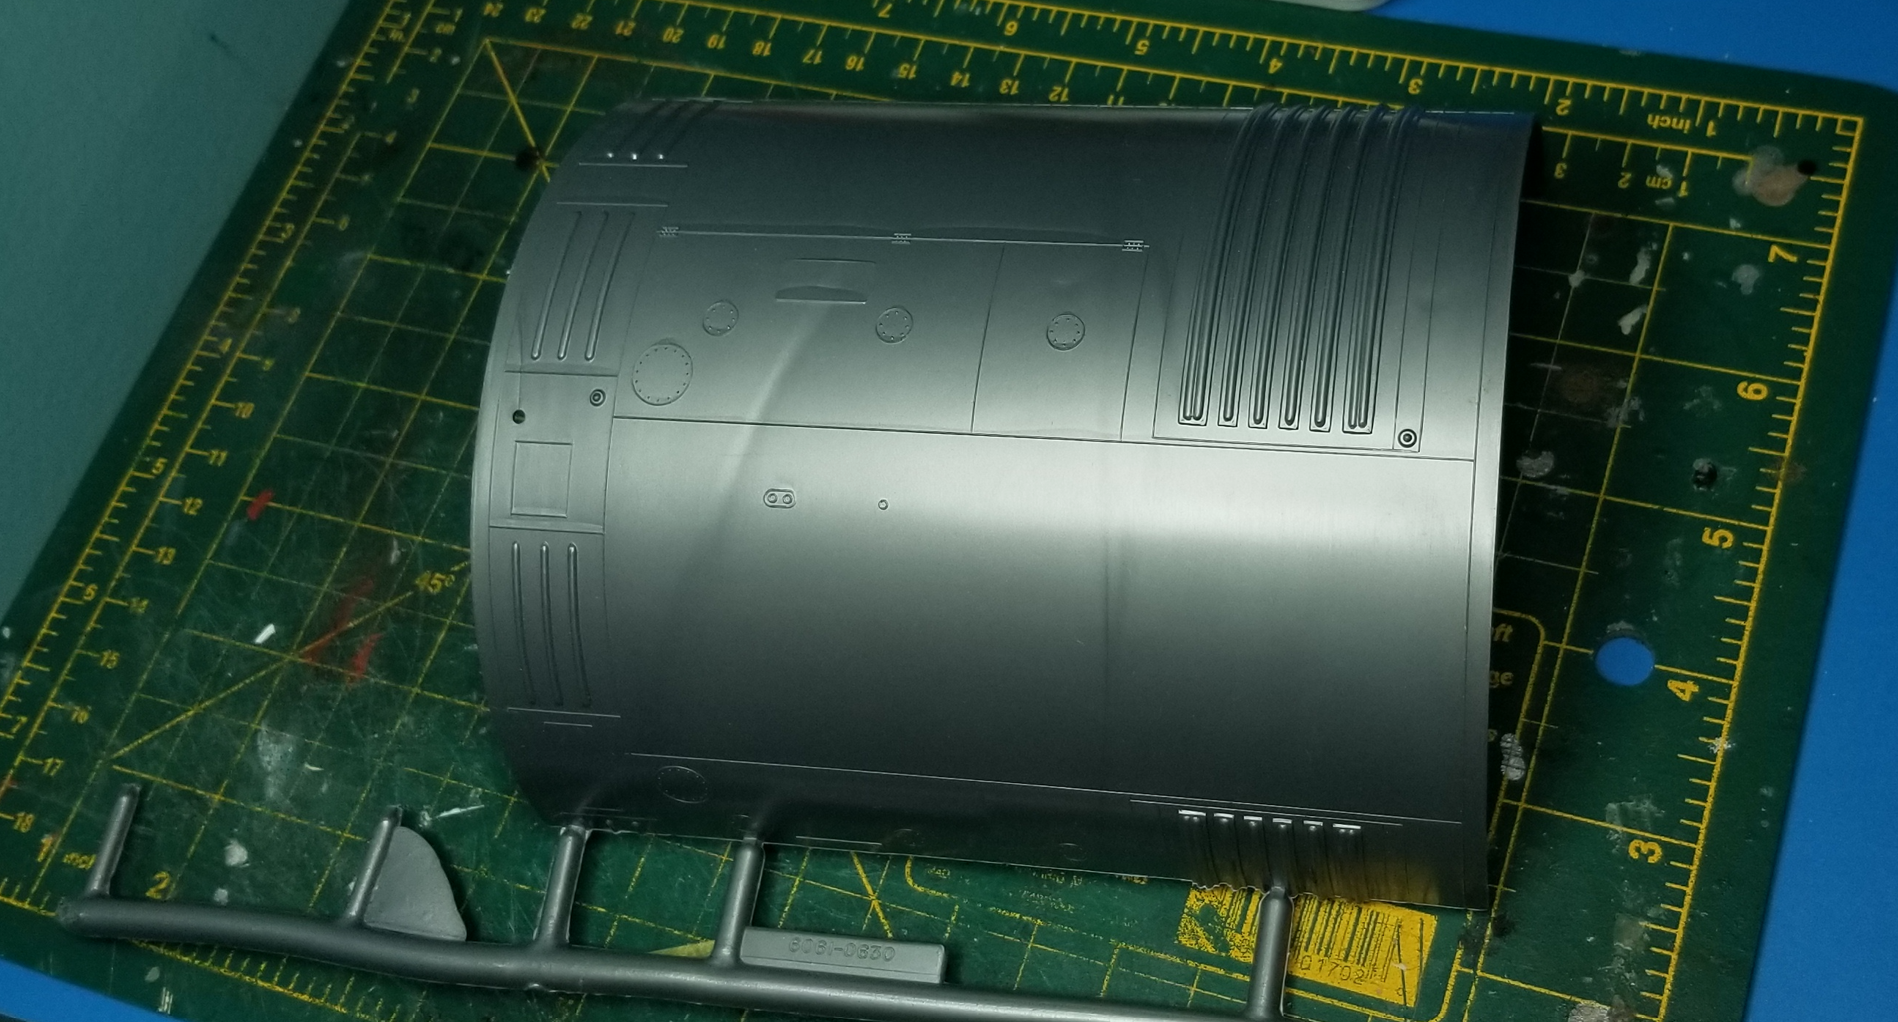
I've started sanding down the seams:
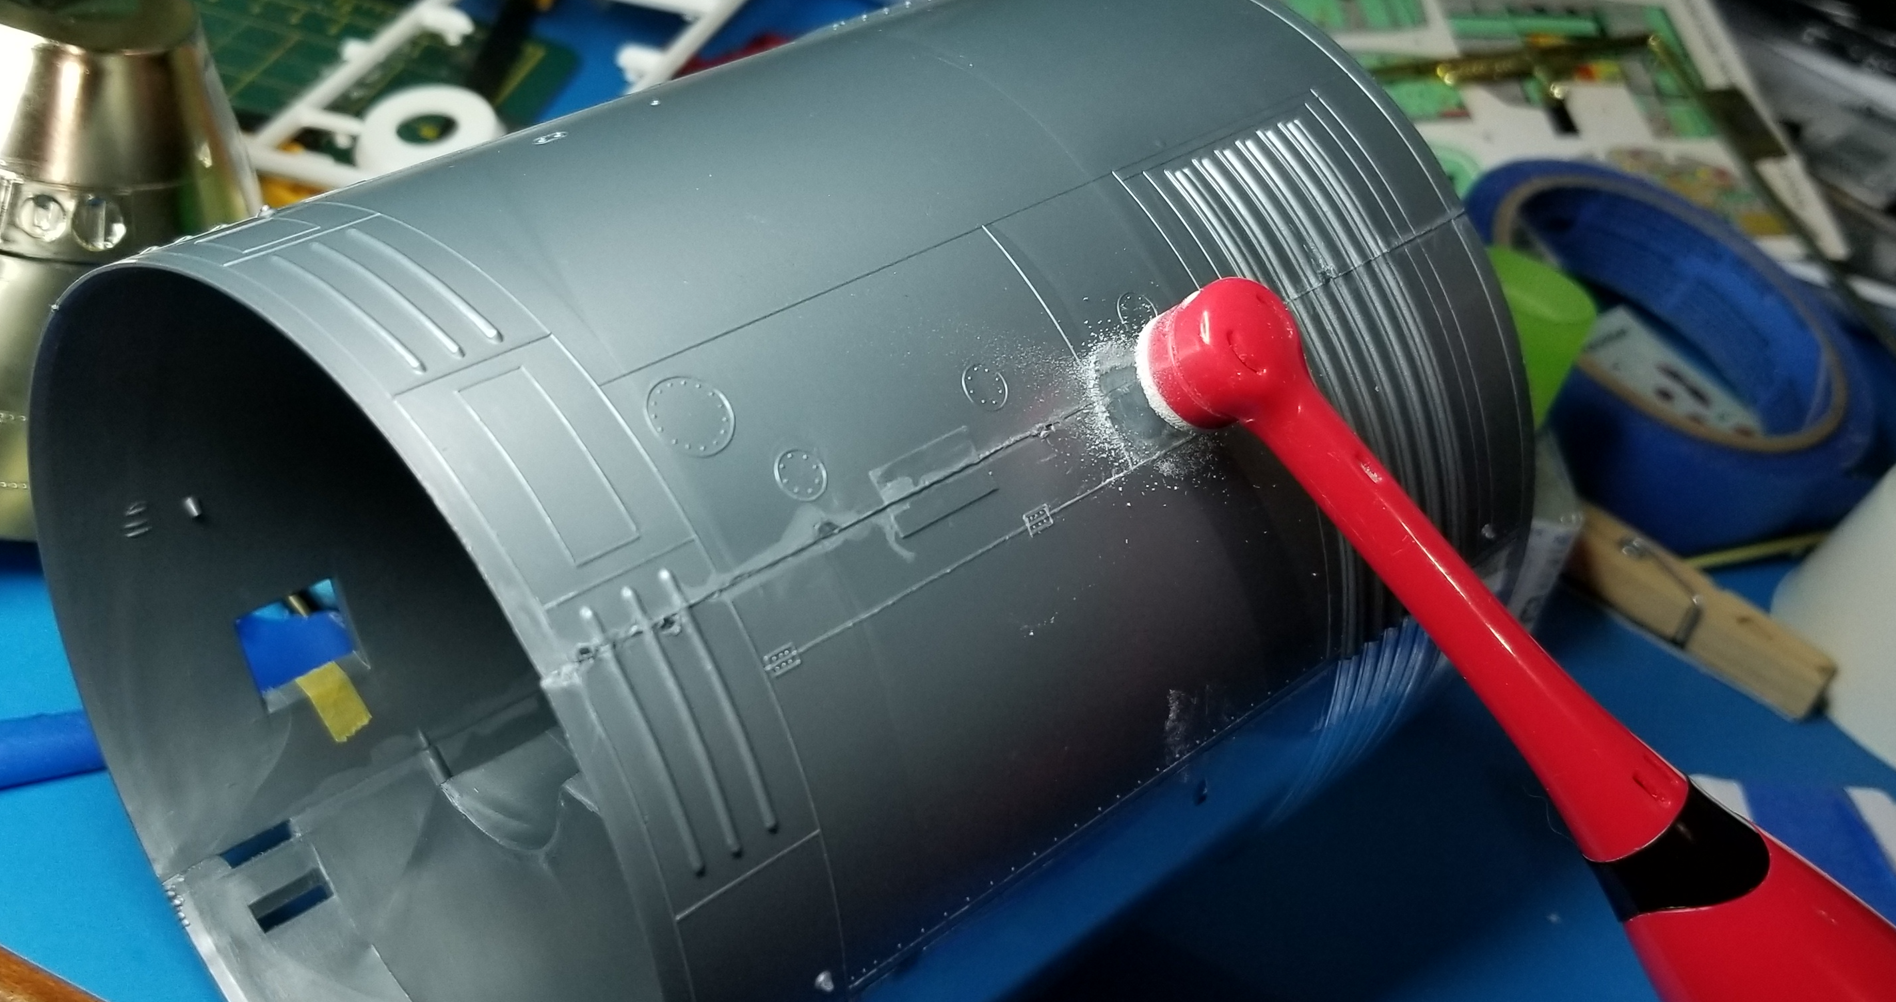
There's a step at the edge of the clear part of the cone where the only solution was to sand down this corner and a little from from the sides along this area.
Will have to do some more filling and sanding later.
I thought I'd lost these universal joint parts. Was really happy to find them:
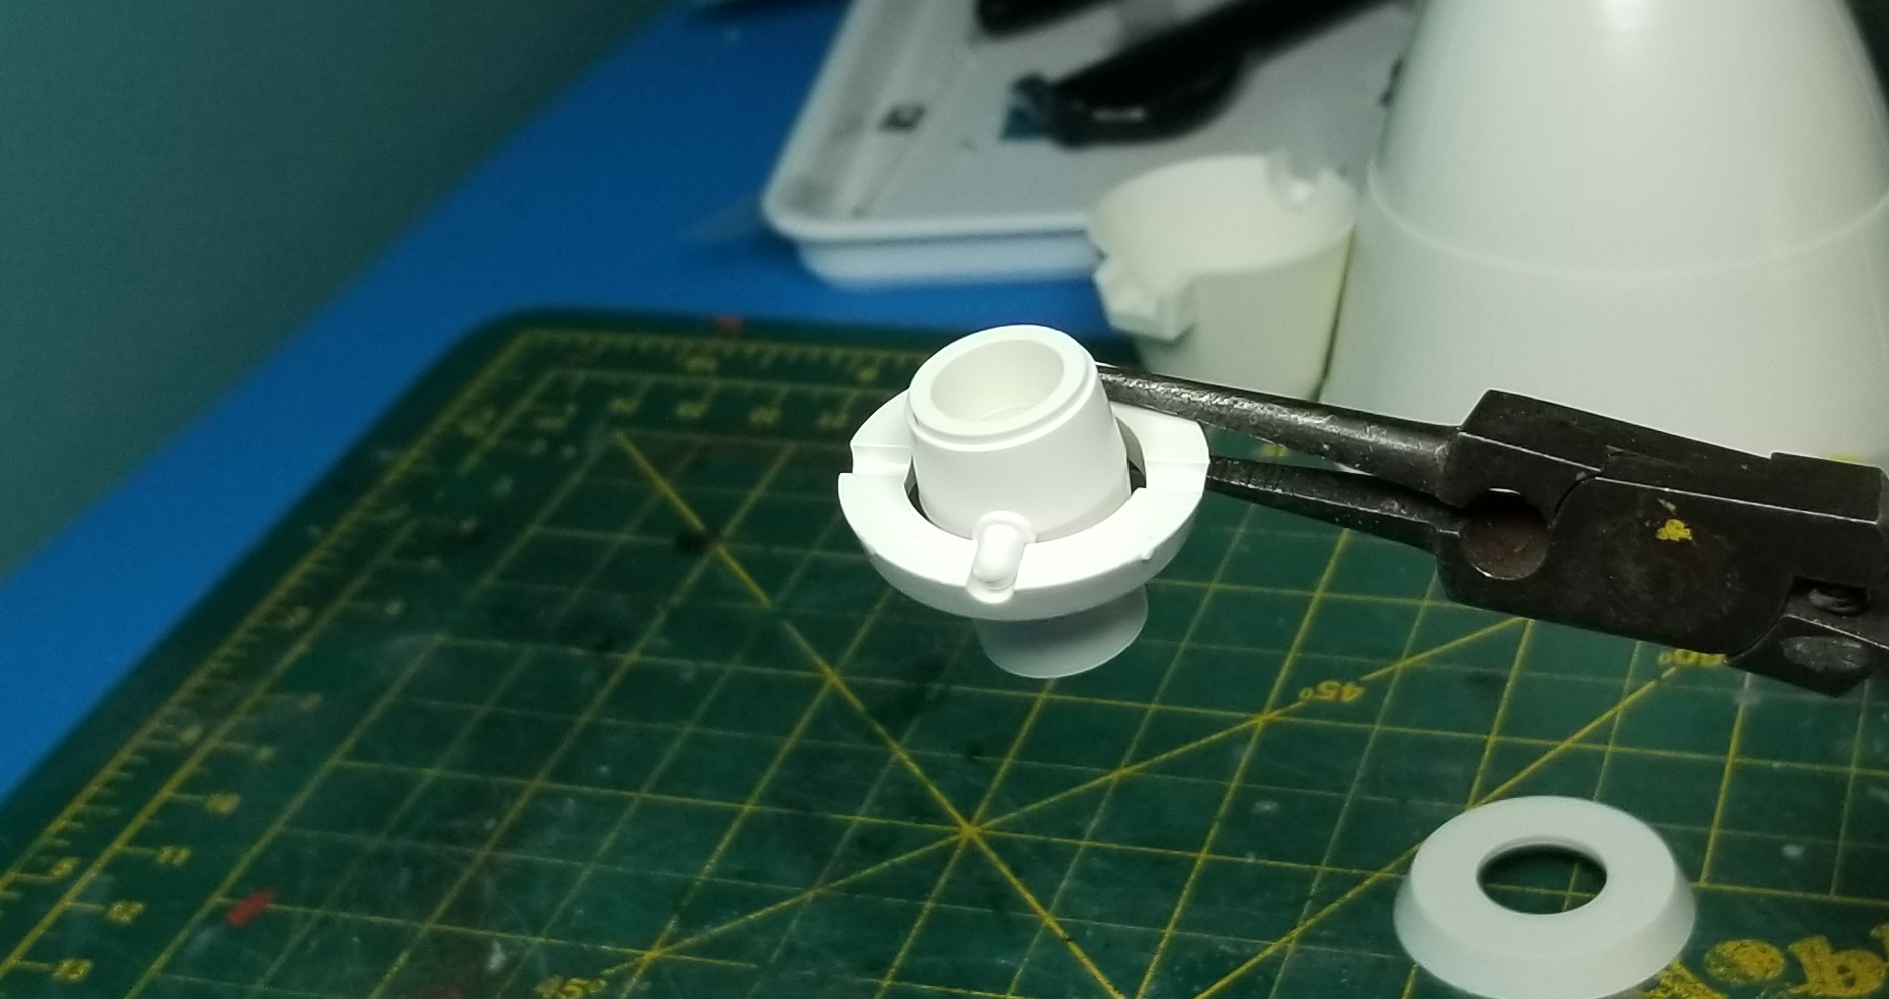
At first I was wondering if the nozzle was going to flop about. The joint was a little loose inside the sandwich:


Then I realized what they were up to. Once you glue the cage on flush to the surface, the swivelling part presses on the middle area of the cage that acts like a spring to tighten up the nozzle movement - cool! : ) This must be old hat to you guys and I probably look like someone reading an old newspaper and being amazed by the news : ) i still can"t forgive them for the seams but this is some cool engineering. :l
I'll see how I could clamp the cage down before gluing it. And I think I'll have to paint that partially hidden part first.
I forgot to mention -- can you guys recommend a good source of 1/32 LM decals? Or will I have to print my own? (ulp!)
-
I haven't really decided yet but mulling over it. I wanted to display the CSM on its own but then I still have the Vincent Meens LM that's been on the backburner for eight years : ) I was thinking I could attach it to the CSM without the descent stage for a rendezvous display and with the SIM bay open. Or I could attach the LM with descent stage to the CSM and keep the SIM bay closed. This 1/32 CSM is just huge -- the whole kit and caboodle would make an even bigger display : )

Exactly as she looked years ago. The masking tape's been there for eight years : )
-
Hi Ret, thanks! Looking forward to your own build.
And thanks to the pointers, too, Pete!
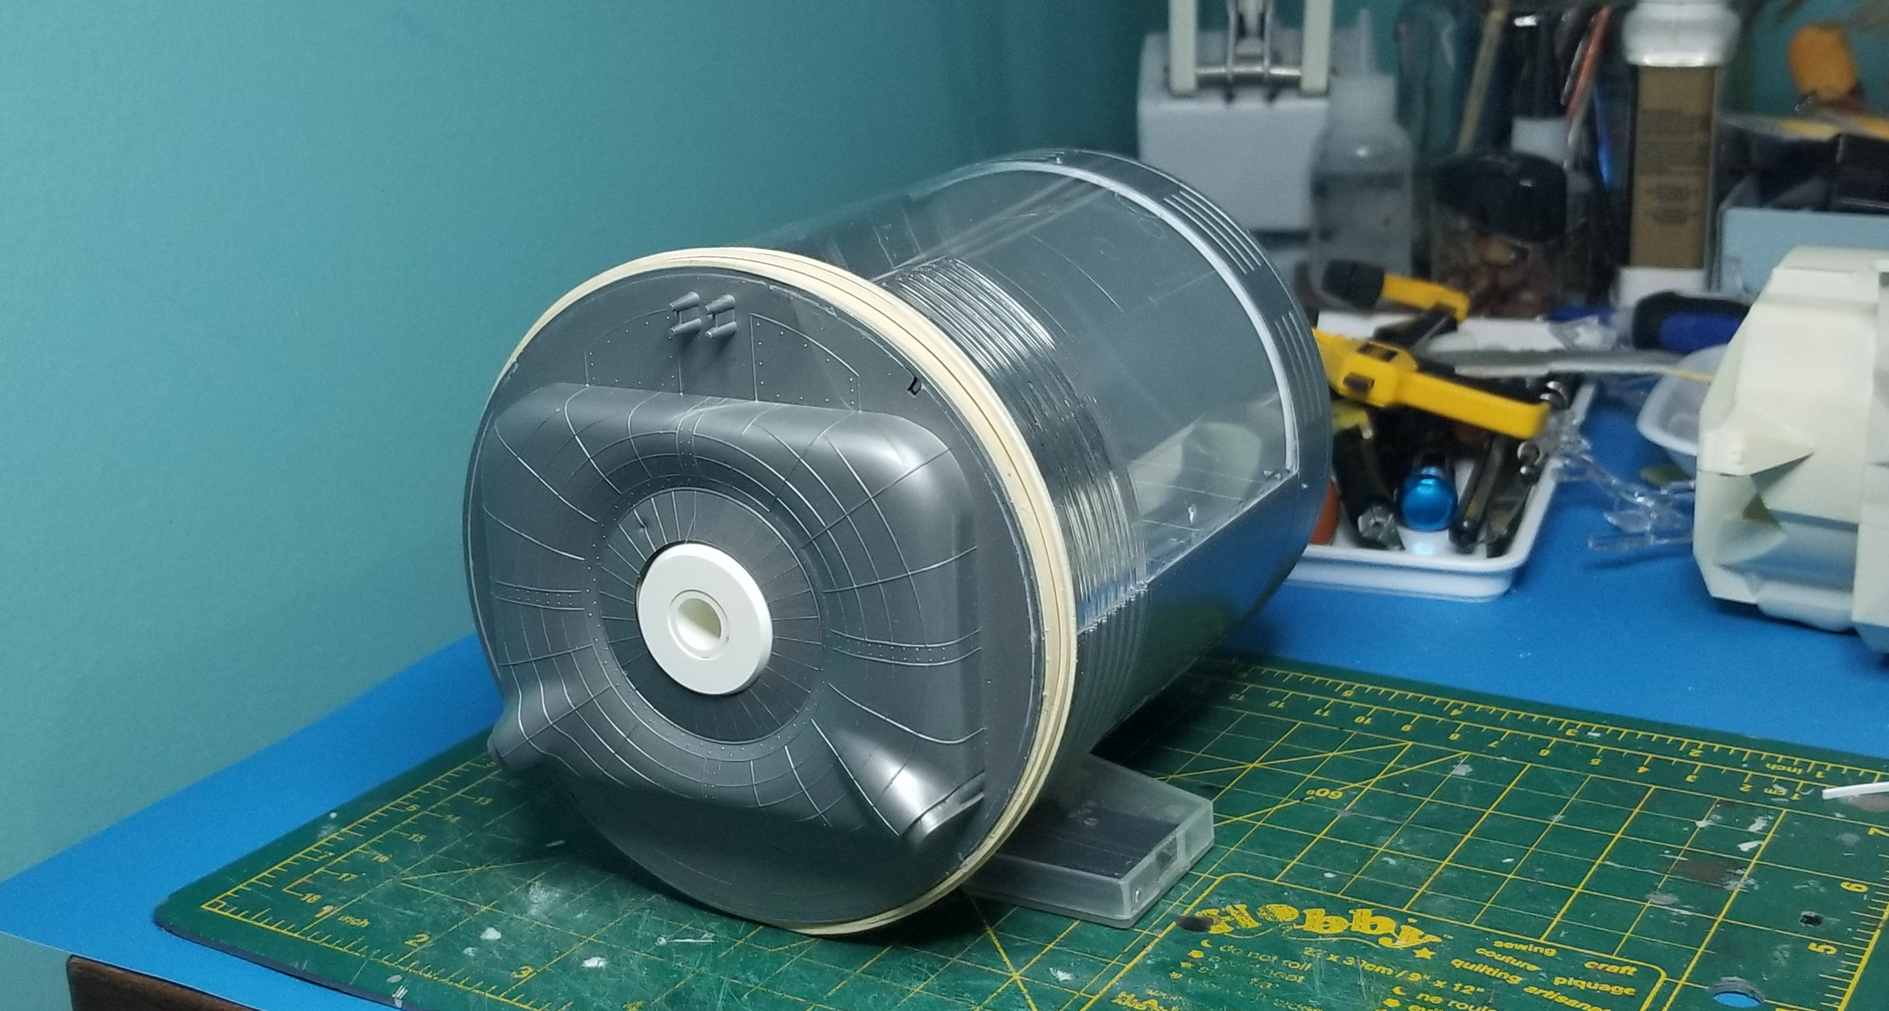
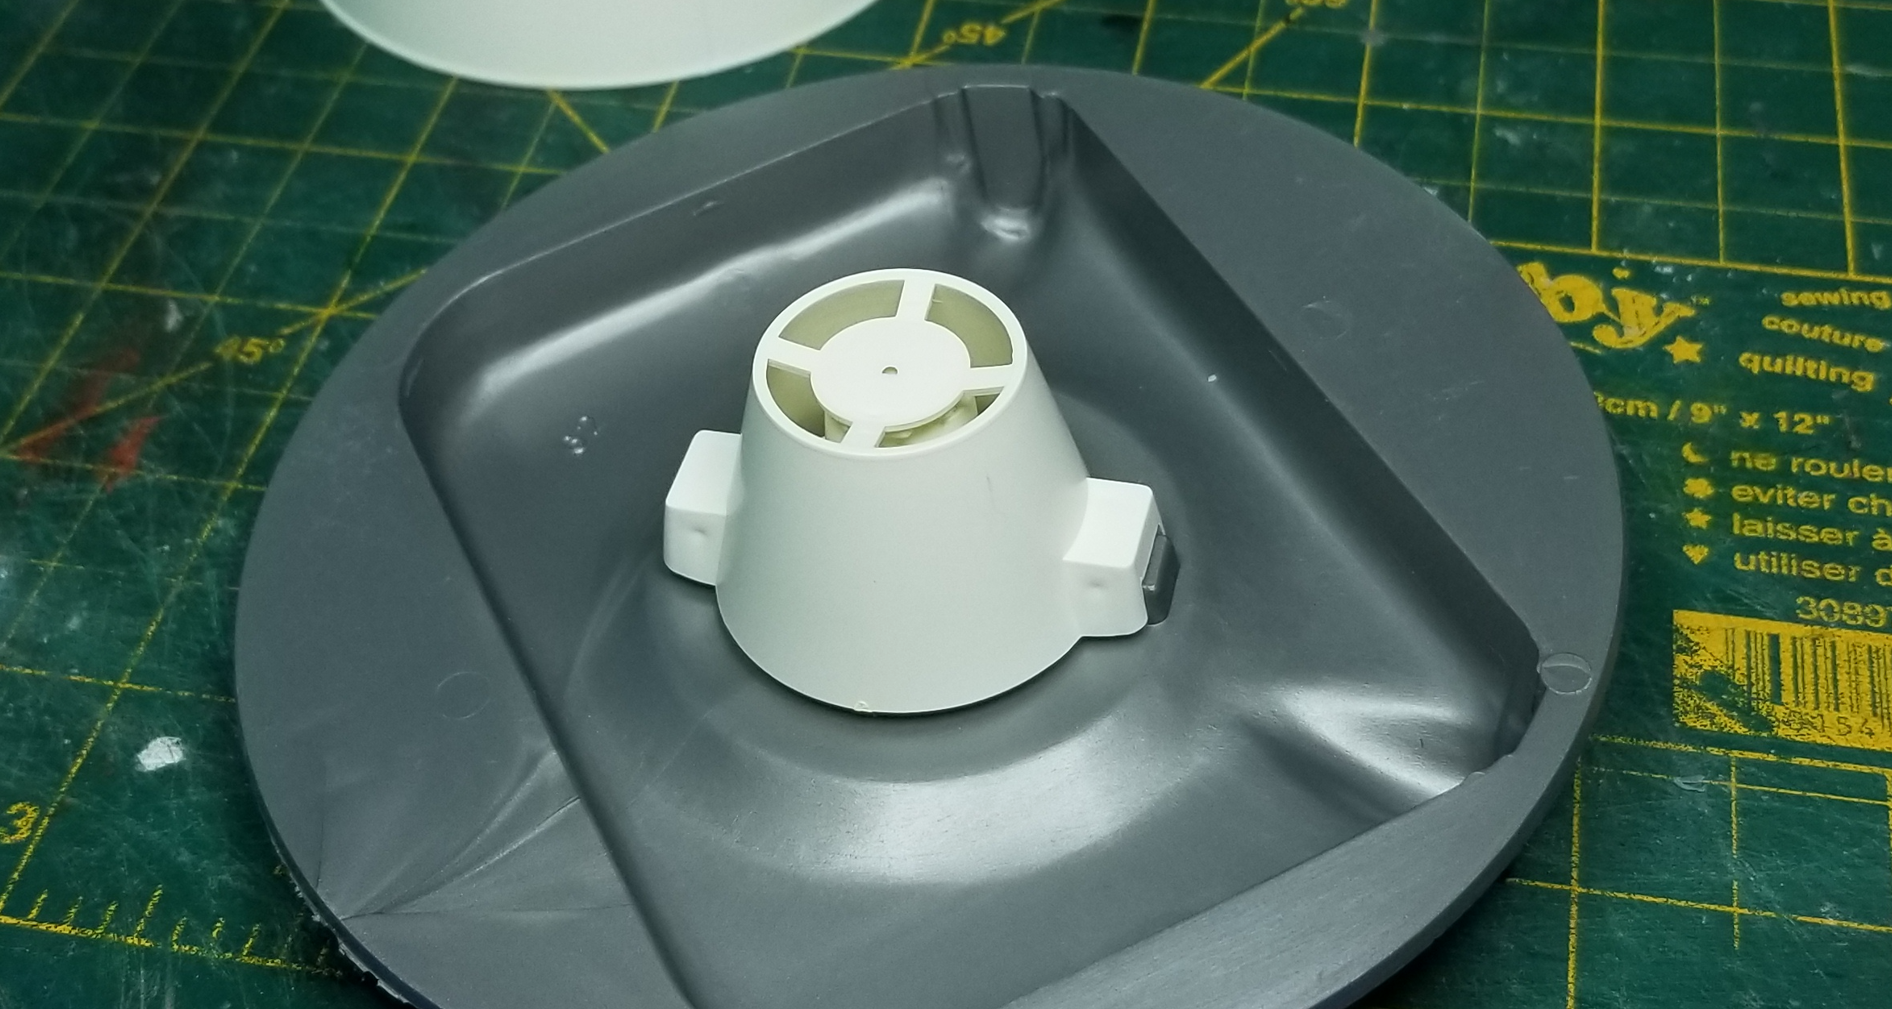
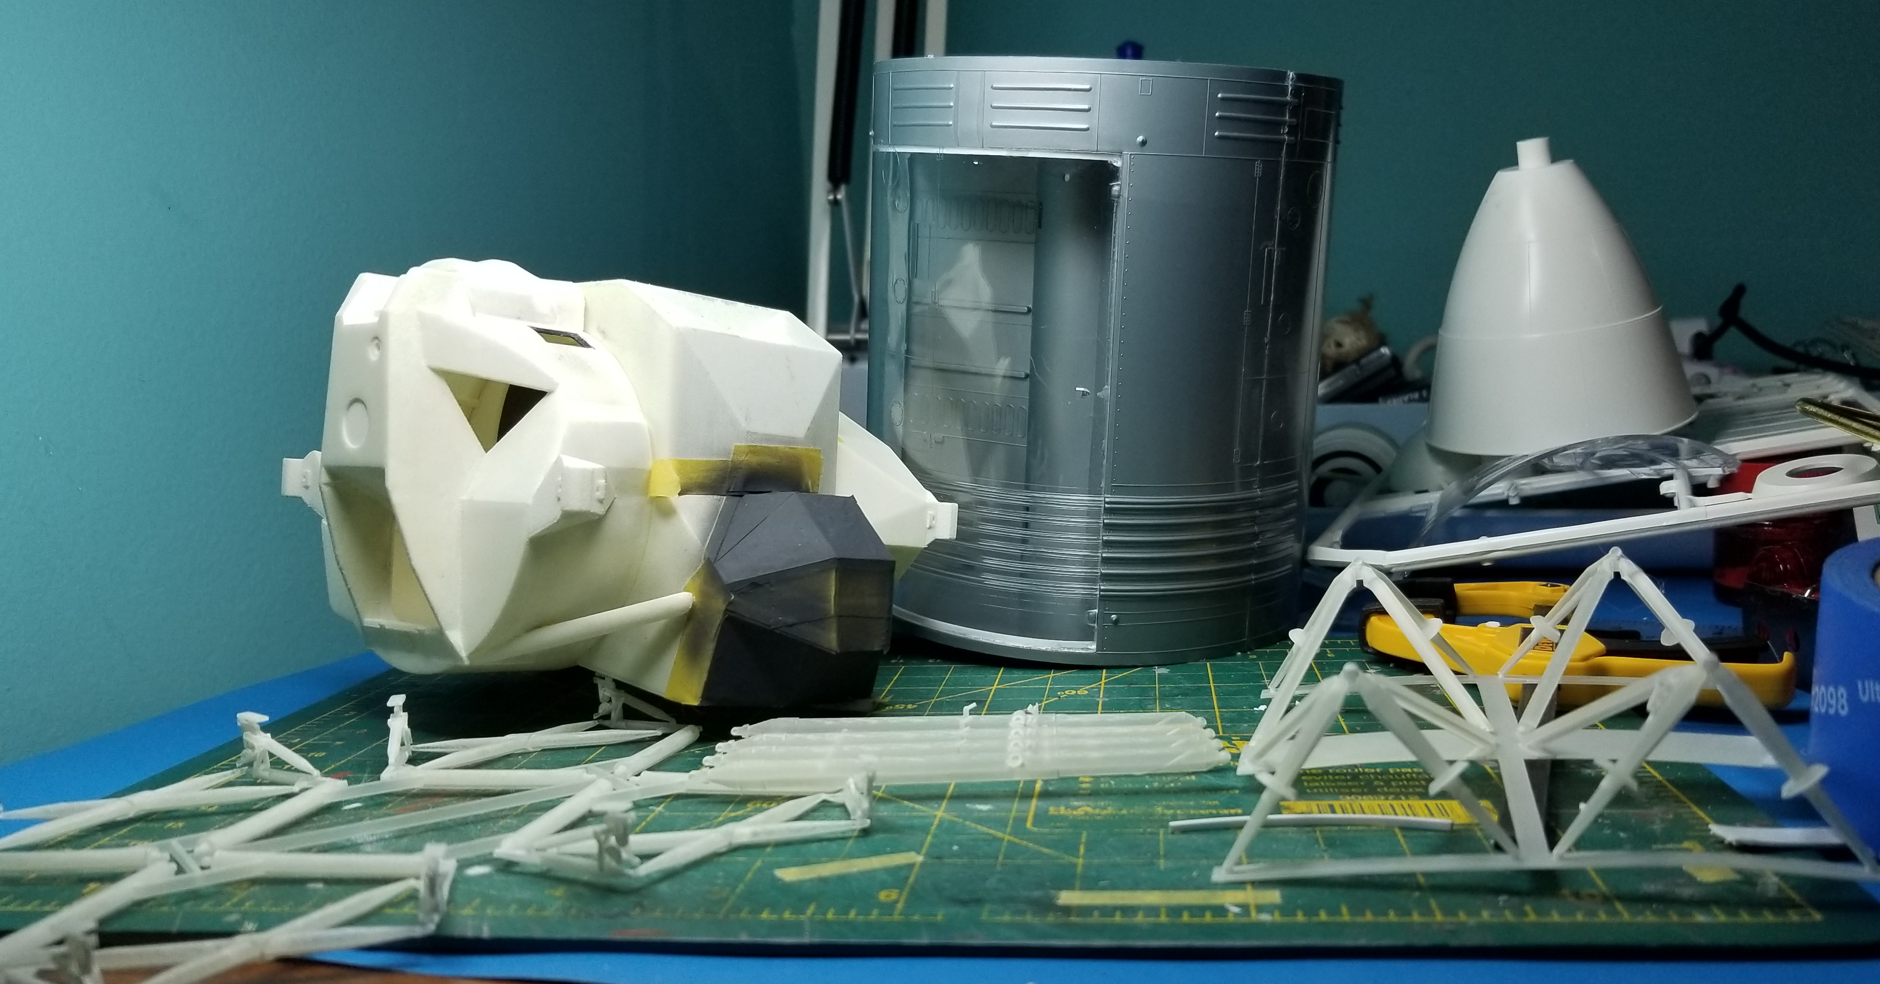
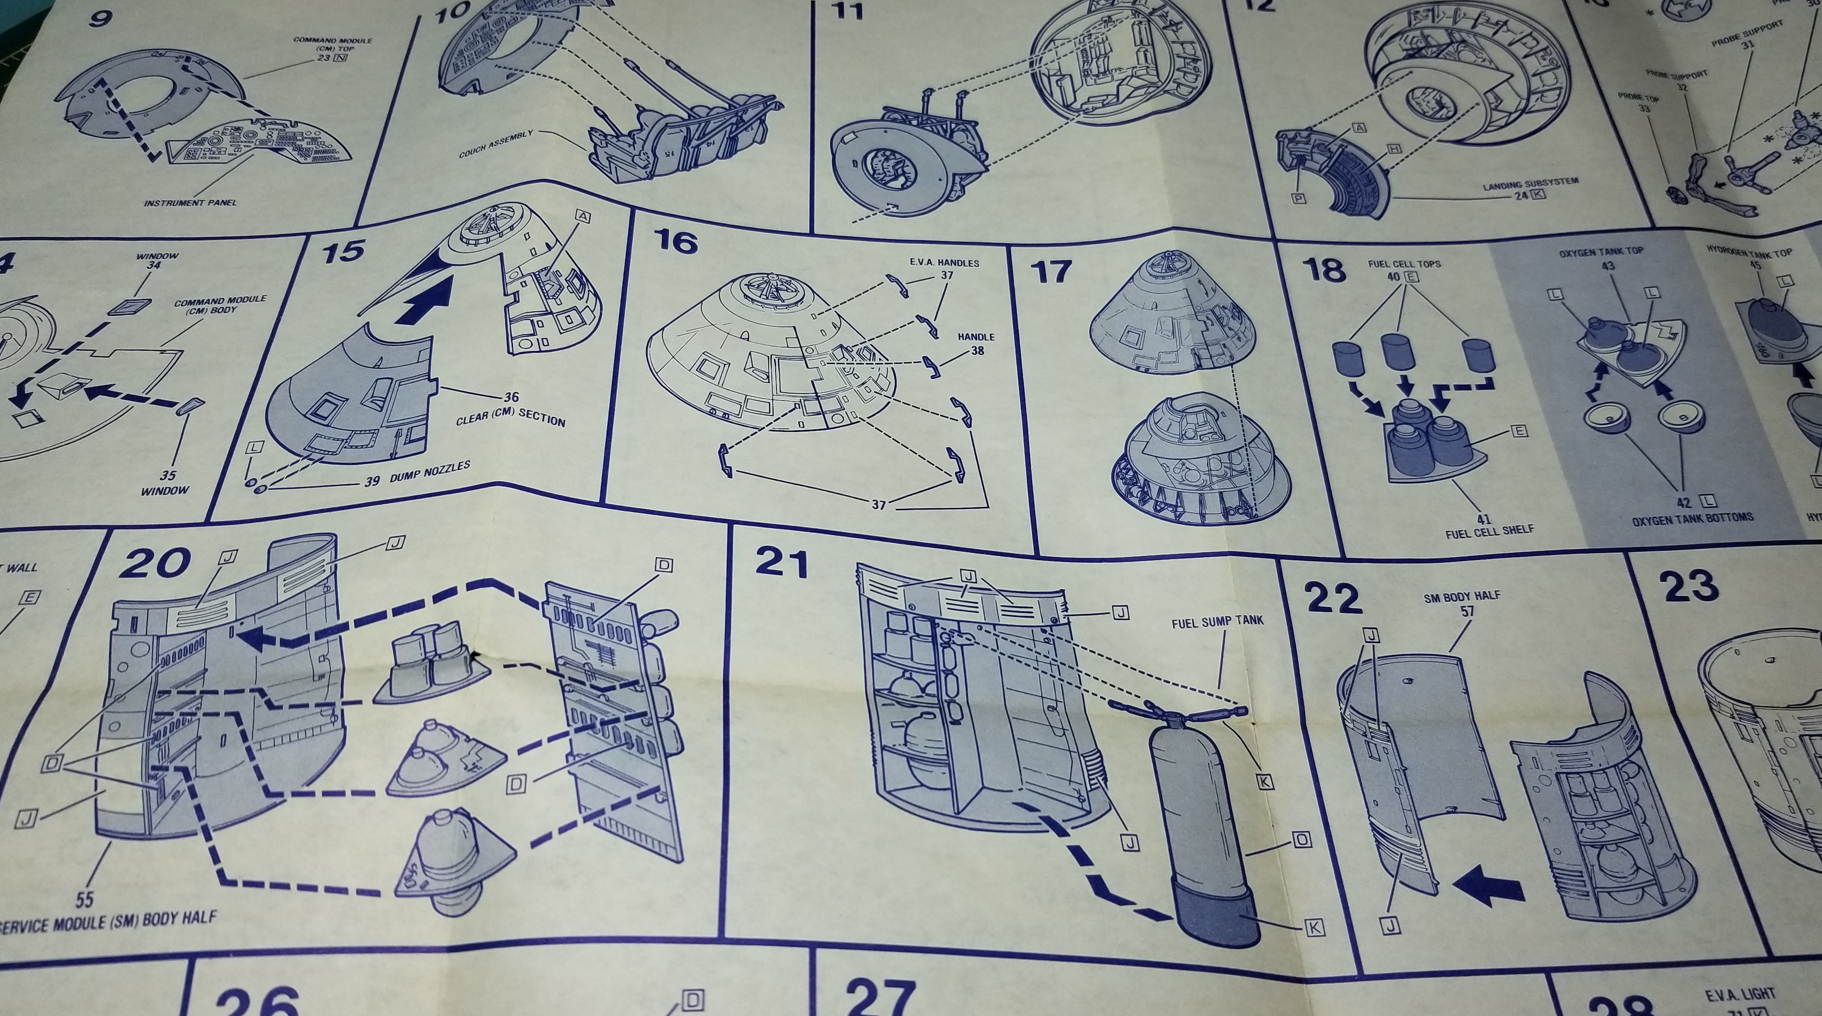
Now I understand what you guys mean about the engineering and alignment of the kit : ) So far I've joined the shell halves together.
At first I still had the alignment pins intact but noticed that they caused some misalignment between the shell halves so I had to cut them all off.

I then had to sand down the edge of the cover of the fuel cells. I'm not doing a cutaway so I'm just going to glue the thing on.

I noticed the clear part sinks in some areas so I had to glue on a lip..
The cover sits nice and flush to the surface:
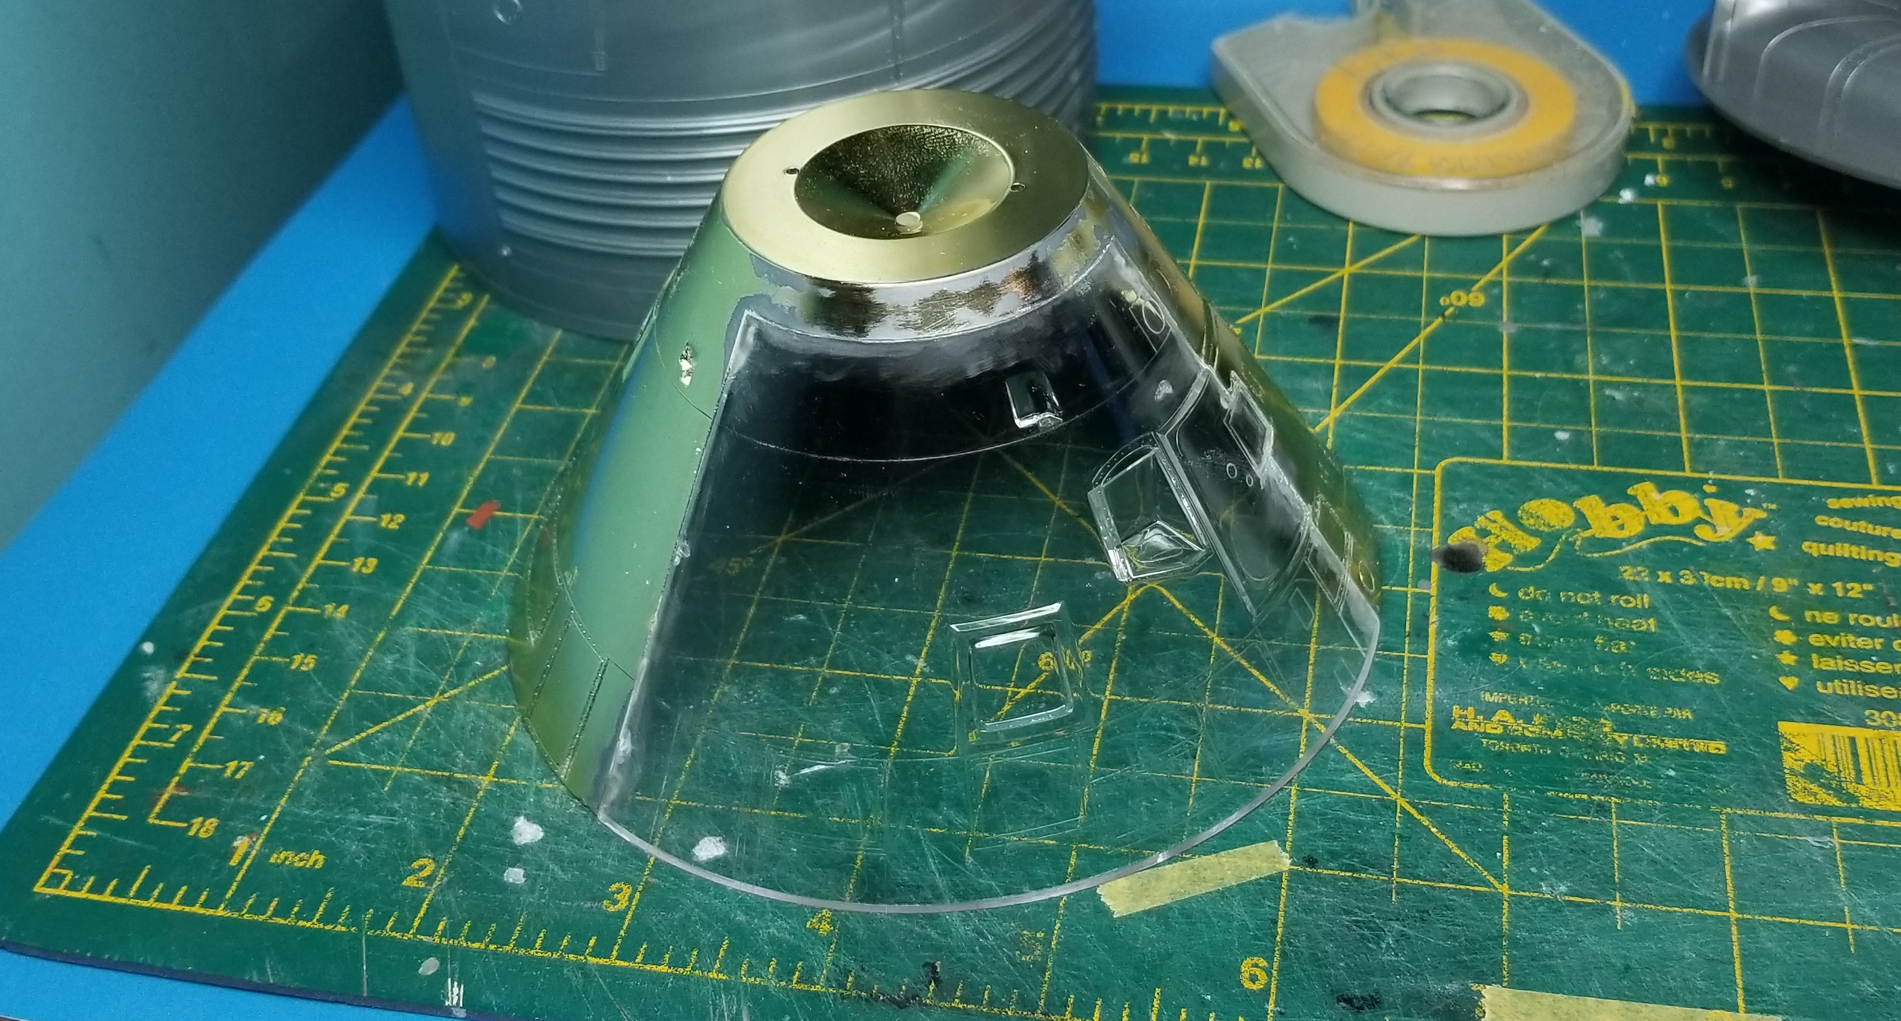
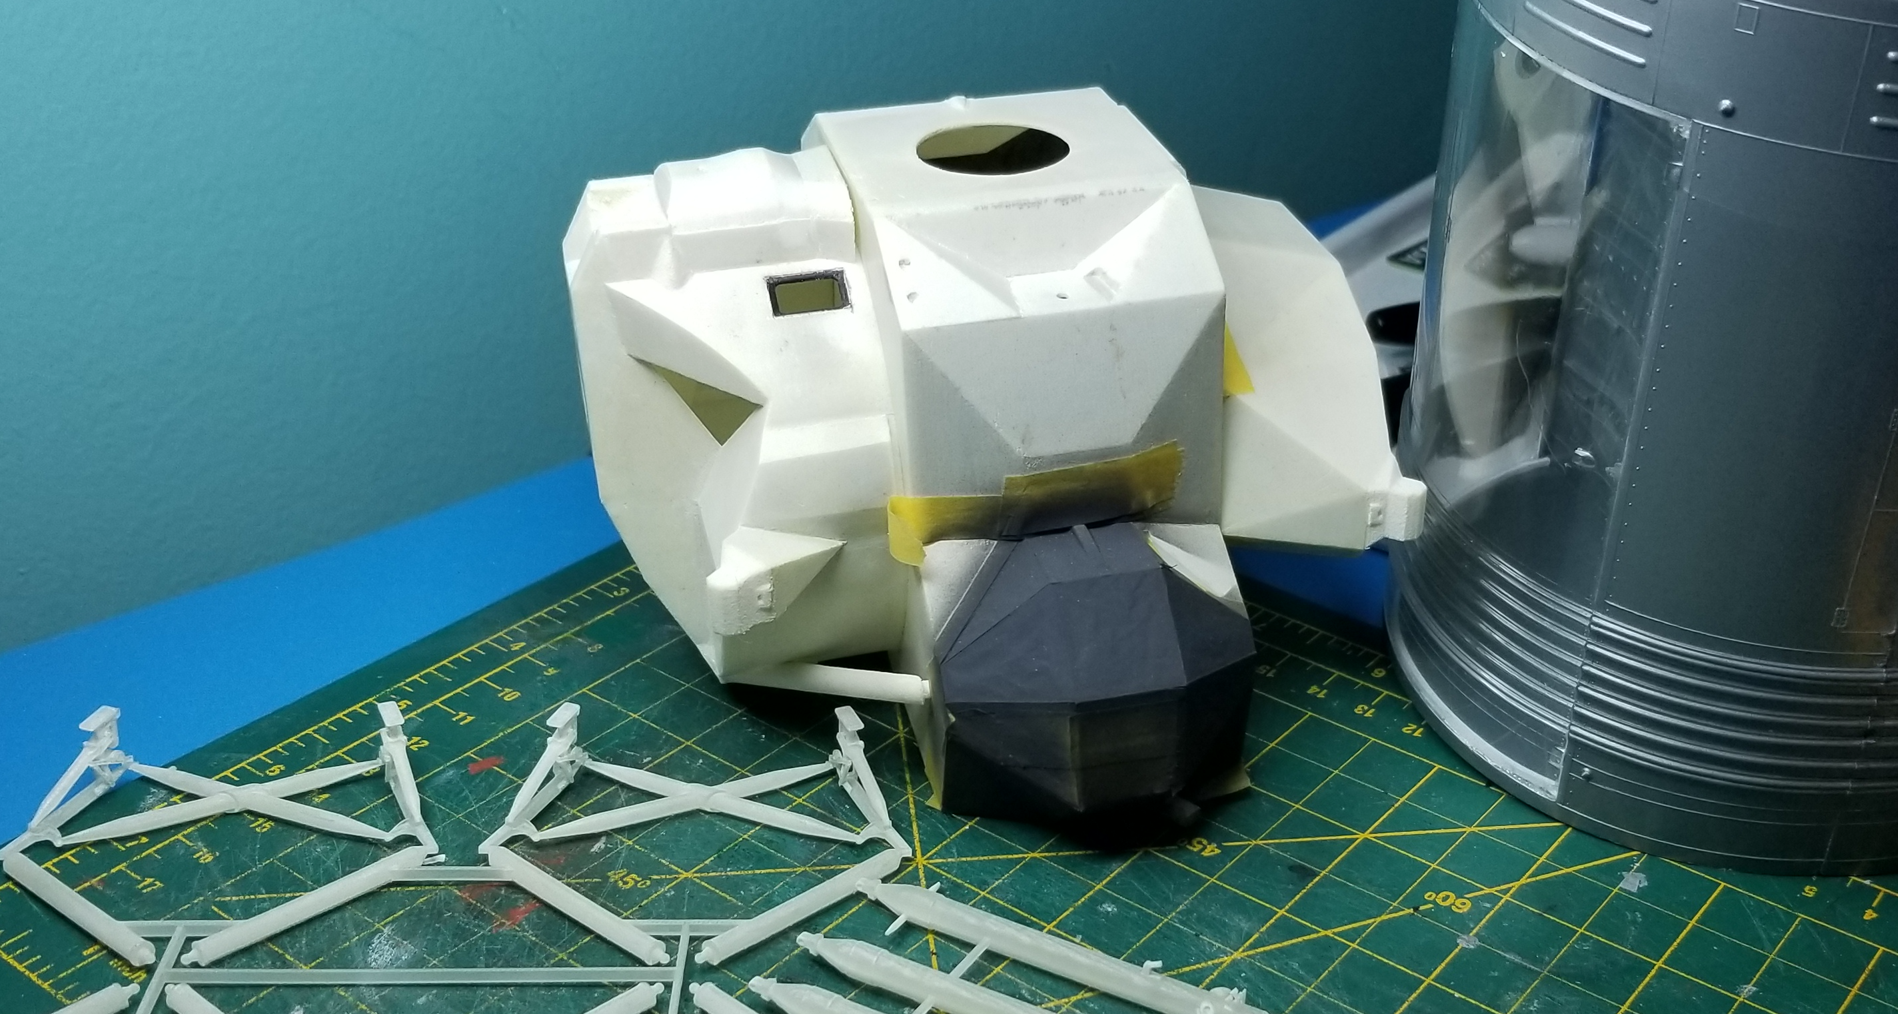
The join that the guys were pointing out. I'll see what I can do. I scratched the clear glass inside with the xacto but that's ok as it's going to be painted over.
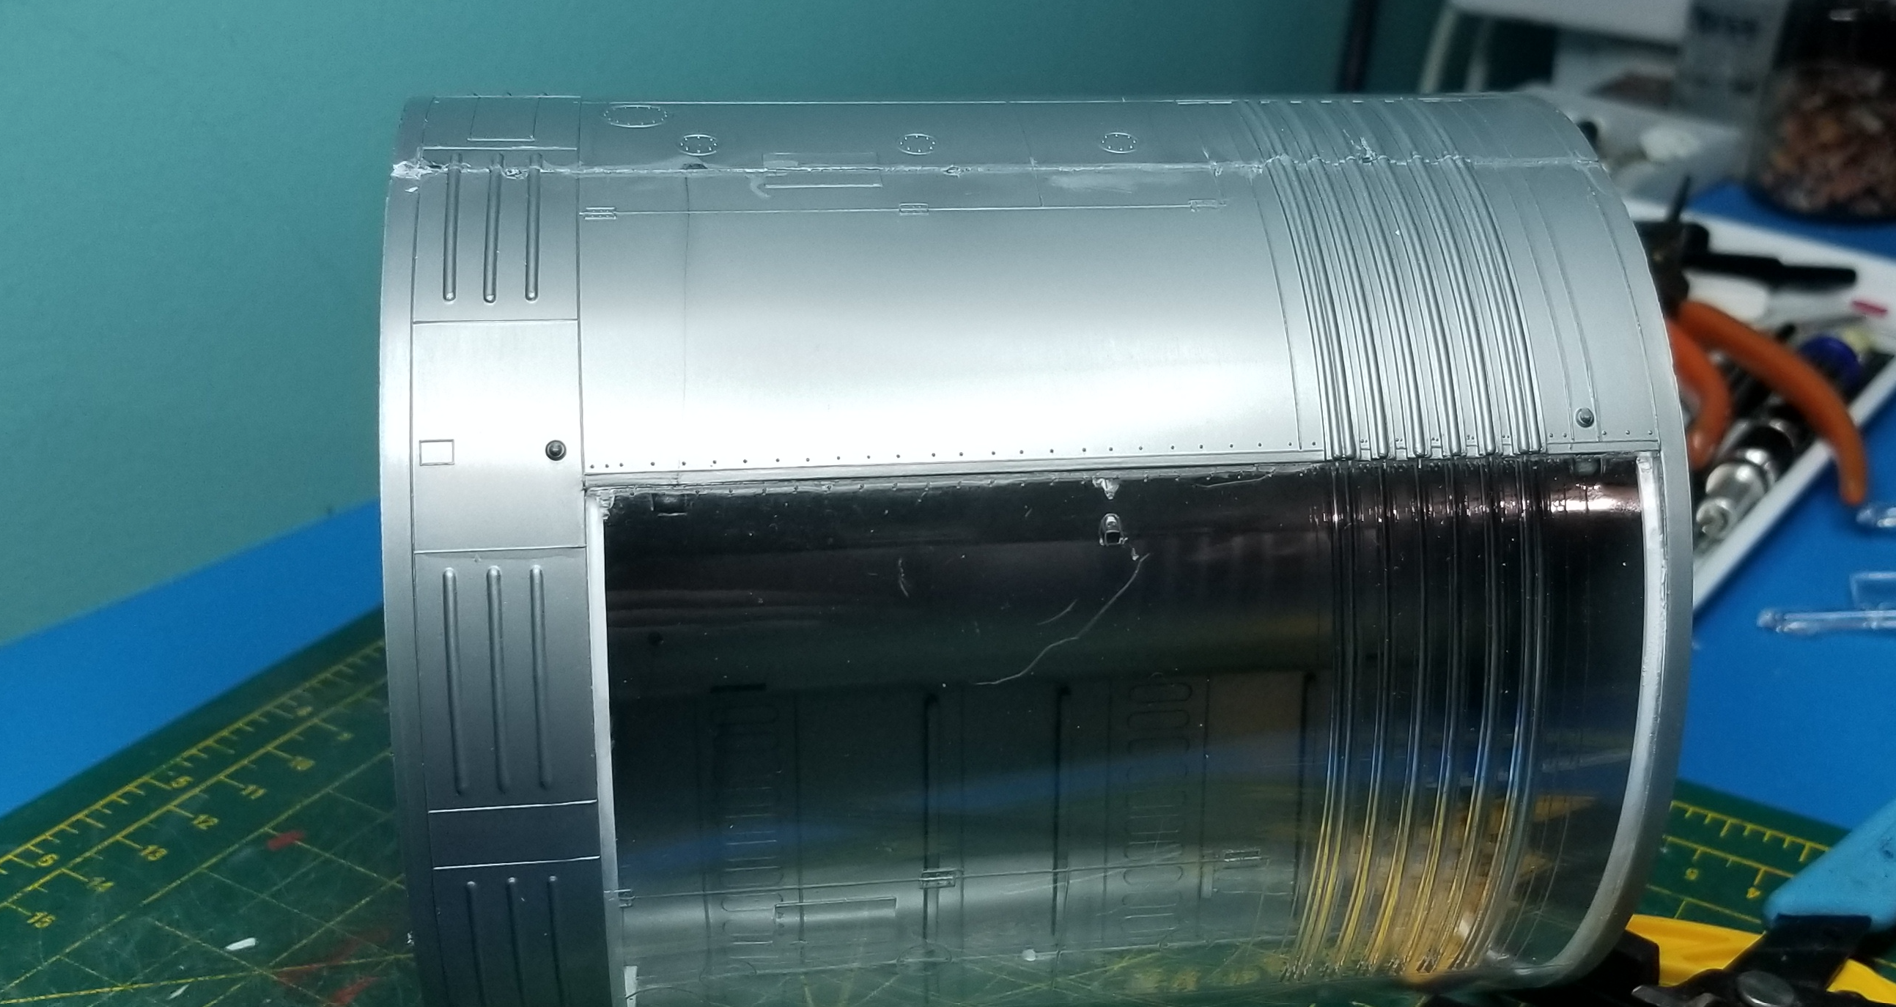
And there's this bigger gap at the other edge that I'll have to fill. Fun! : ) Regarding the SIM bay -- the experiments weren't carried out until after the LM separated, is that right? So if I were to mate this thing up with the LM (complete with descent stage) I don't need to open up the SIM cover?
-
I've got the green stuff, too : ) I'll buy whatever you have, Pete : ) Sending a PM : )
-
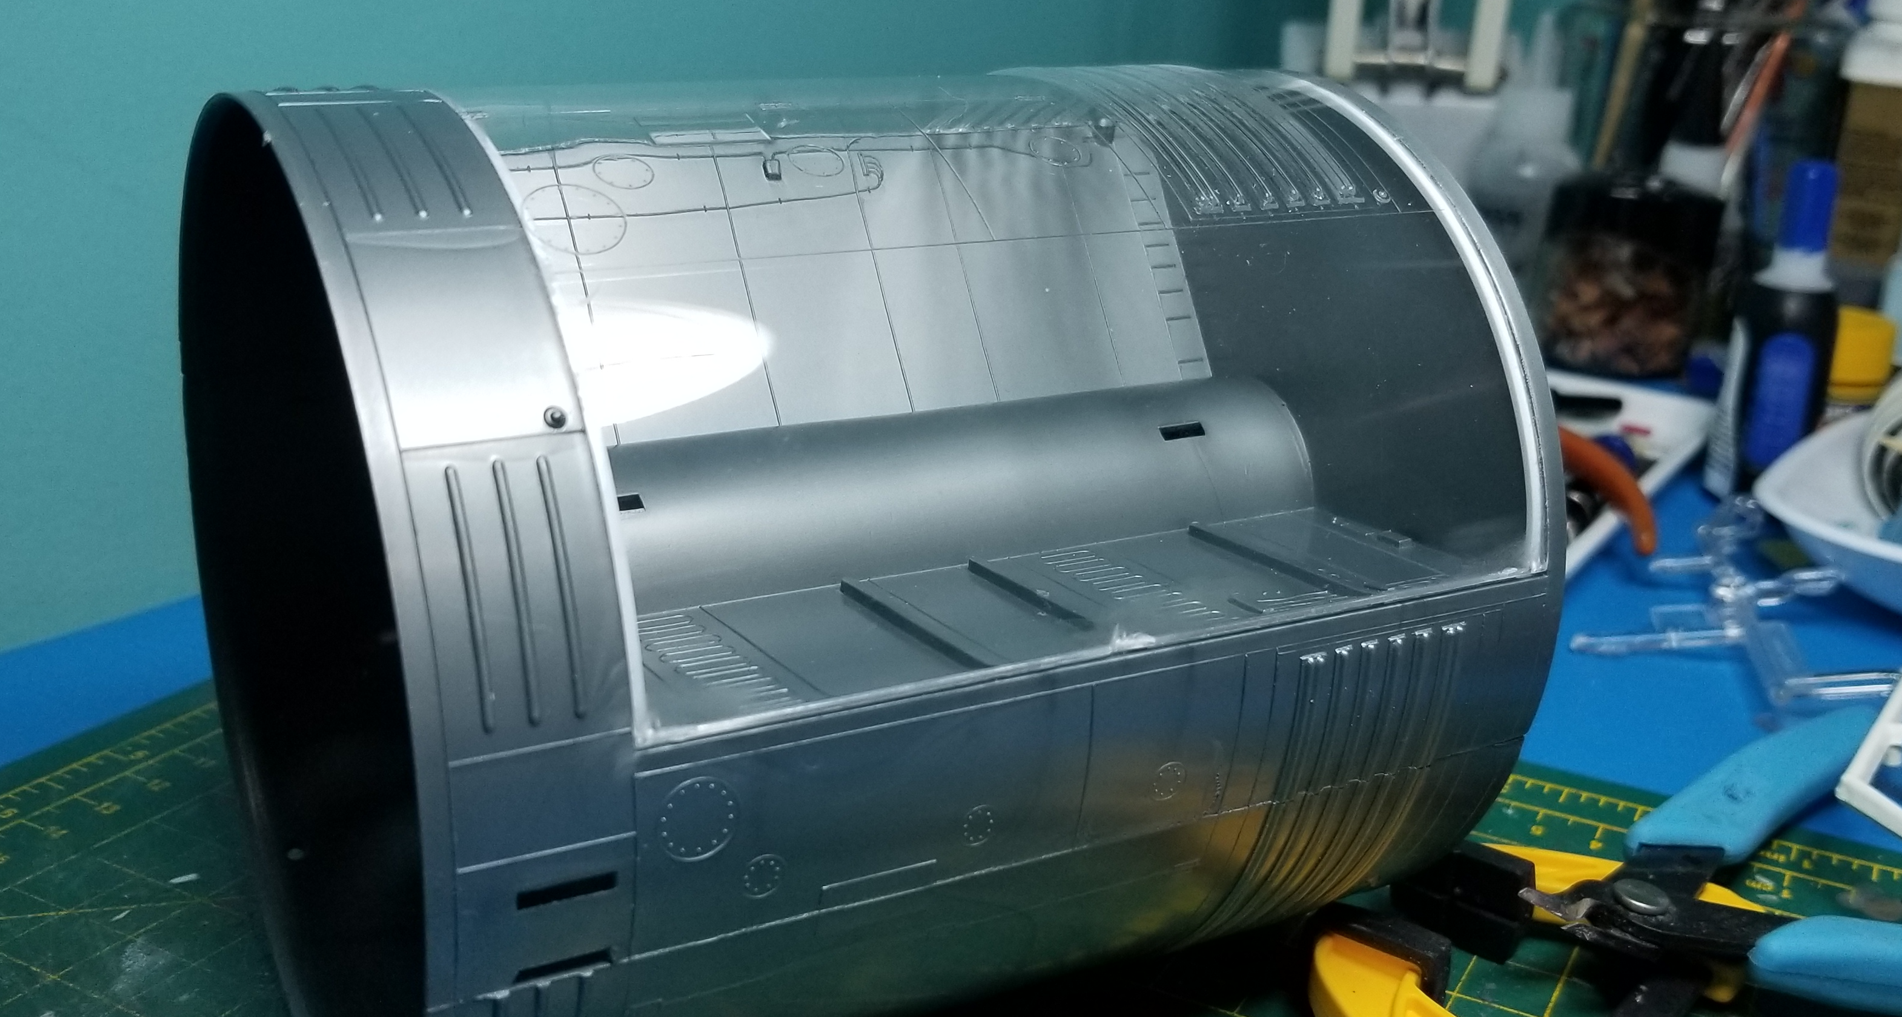
Oops, you're right. I didn't notice that other clear part in the plastic bag. And the clear windows look big enough to see inside. I wonder if I can still get away with leaving the interior empty.
-
4 hours ago, habu2 said:
I assume you mean the clear panel on the SM? The kit panel covers fuel tanks but another panel covered a scientific instrument bay and, on those later flights, the SIM panel was jettisoned to expose the instruments.
Oh ok thanks. Yes, I meant the clear one -- I guess I can safely paint over it. Will have to look into that SIM panel (I need to do some homework, brush up on terminology and get to the know the CSM better.
4 hours ago, Dafixer said:If you've got a 3D printer, this guy makes upgrade parts that are pretty amazing:
Thanks Dafixer that's really nice work, will look into it -- oh, it's our Vincent's! : )
Thanks for those links and pics, southwestforests. I'm not sure if I could do the blistering. It might end up looking like a faulty paintjob on the model : ) But that's really cool info!
-
Hi, I got jealous of Ret's CSM : )
I just re-inspected the box and was thinking about starting it. I might need a little help from you guys. I've been trying to look for some aftermarket goodies but they seem out of stock. Let me know if there's any you're willing to part with that I can buy : )
Also, I have some questions. I don't really intend to do any interior or cutaways -- I'm just after the way she looked in-flight. (1) That means I can paint over the clear part right? Or did it fly at some point without the panel? (2) The kit was a product of its time when raised panel lines were the order of the day. Do you normally rescribe the panel lines. It will take some bravery to sand them down in some areas because of adjoining rivets.
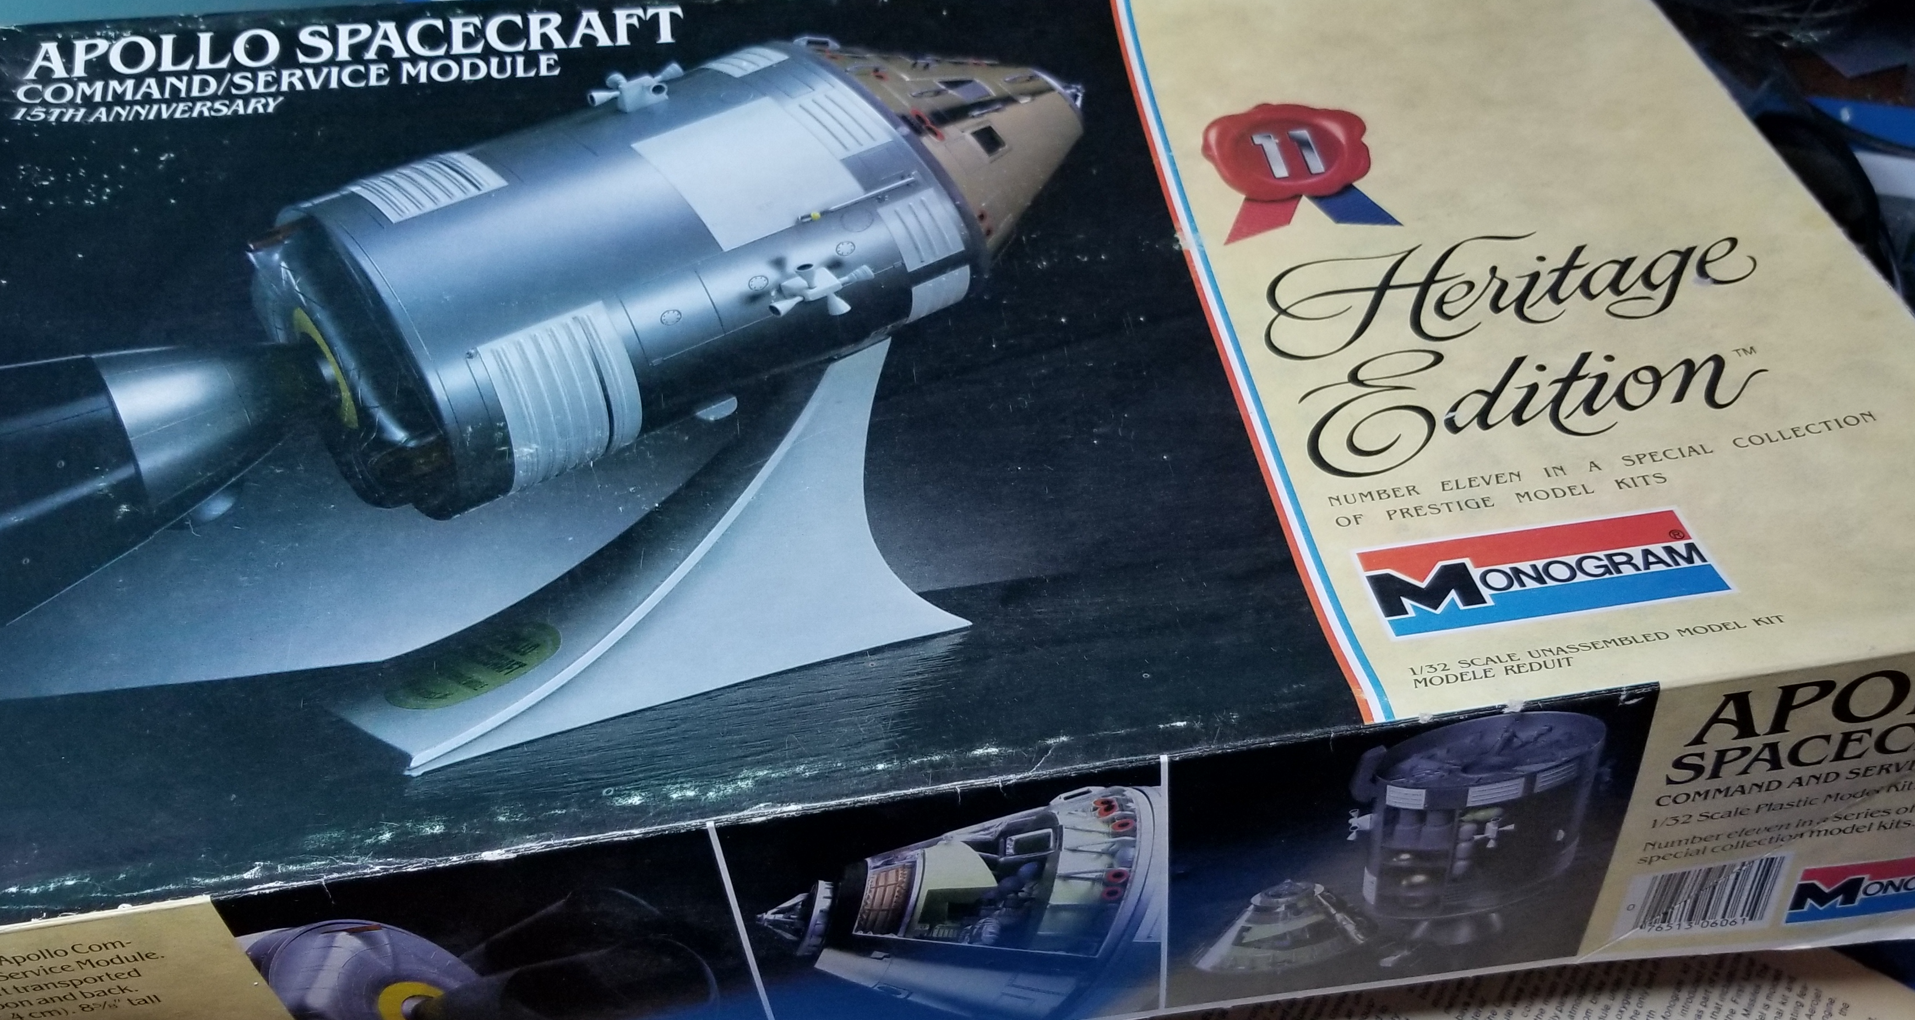


Any and all advice about building this kit is welcome : ) Thanks in advance : )
-
Oh, so that's what it's called : ) Is there a name too for buying more of the same kind of supplies just because i cant figure out if I have them already or where they are. I just know I hid them somewhere safe, but so safe I myself couldn't find them. And if there are several kinds I want to try out, I always choose the same one. My taste never changes : ) I have three unopened bottles of Tamiya quick-setting glue and multiple bottles of the same paint color : ) i think what i really need is a whole wall where everything is always visible because my brain is always on "out of sight, out of mind" mode : )
-
I do have to make to-do lists all the time, too. And the strange thing is all the ideas I want to jot down pop up whenever I don't have a pen or I can't write them down like when I wake up, or when I'm driving, and often in the shower when my eyes are covered with soap suds -- and as soon as I get out of there I can't remember a thing : )
-
That looks fantastic!
-
Hi Dirk, I can't see anything wrong with the paintwork -- the weathering seems to be hiding it which is a good thing. I think your eyes are drawn to it because you know where it is, but to the normal viewer we see the model in its entirety. I'll take that model anytime : )
-
Hi cruiz, that motor is getting to be too realistic it might fire up anytime : )
-
Love your work, Drew! Your painting/weathering skills are sick! And thanks for the detailed notes : )
-
Your works are fantastic! Following along.. How, true, southwestforests. Sometimes we forget to have fun.
Top Gun 1986 F-14A (Tamiya 1/48 - in-flight twin build))
in In-Progress Pics
Posted · Edited by crackerjazz
Some of you might have caught sight of the model show not too long ago... I had a hard time painting the missiles and still make them look to-scale with the F-14s. They looked toyish to me so I chucked them (for the moment) and entered the F-14s in model show without any ordnance.
I noticed a couple of things. My 1/48 models looked diminutive sitting on the table. I was oggling at the other models the whole time - especially the 1/32 ones. The rod supporting Iceman's jet is a bit longer and the model was bobbing up and down the whole time. And it seems as if the slightest movement would set it off like if the table got jostled a bit. I thought the bobbing would stop at some point but it never did. I could probably have connected the rod to a dynamo and it would've generated an endless energy supply to power some light bulbs : ) I'll have to replace the rods with some stronger flat bars. To decorate the base I slapped on a DVD cover which I thought looked cool at first but I think it quickly got old so I'm thinking about enhancing the base a bit with something cooler.
It's not too corny, is it? A little variation to the cool and brash Anytime Baby theme to celebrate the Tomcat's starring role in the film : )