


stalal
-
Content Count
839 -
Joined
-
Last visited
Content Type
Profiles
Forums
Calendar
Posts posted by stalal
-
-
7 hours ago, Dave Roof said:
Not at the moment. However, I've learned from another modeler that the stripes from my currently out of print sheet, FL48005, fit the 48th scale Mk-82's I've released. I may do another print run, or break up the sheet to include decals in future sets. Still up in the air at the moment. Spruebrothers has 5 of those sheets left at the moment.
I have this decal sheet! So thats great then. I will look forward to buy the set from you 🙂
-
Dave, great work. Might be a stupid question. Will the set also include decals? Thanks
-
Every few days I have to pull out the needle in my Iwata Revolution airbrush. The paint deposit makes the needle stuck. I always clean the airbrush with thinner after the spray session but still some deposit remains. May be I m doing something wrong.
-
Can you order direct from KH? I dont seem to find their website.
-
Are these sets available to buy or we have to wait for a while?
-
Kitty Hawk have their instructions wrong and they seem not to have learnt much from their previous bloopers and lazy oversight.
What about their decals? Do you guys see the same problems with their decals that we have seen in their previous kits?
-
This was long overdue. Thanks for this. Every kit maker has different details and different size for these parts.
-
On 10/14/2020 at 11:49 PM, Falconxlvi said:
You won’t regret it Carlos- this kit makes modeling fun! It’s been a long time since I’ve built a new tool kit and the way this just effortlessly goes together makes me motivated to get to the bench each day. I really think Zoukei Mura knocked it out of the park- this is light years ahead of the old Hasegawa kit!
Steve
The bold part is what I wanted to hear before even thinking of buying this kit. Thanks.
-
This shop has these colors. They are in Canada.
https://www.sunwardhobbies.ca/gsi-creos-gunze-sangyo-paints-and-supplies/
-
I found this eBay store. The prices are very reasonable.
https://www.ebay.ca/itm/GUNZE-SANGYO-HOBBY-COLOR-ACRYLIC-H423-RLM83-DARK-GREEN/273822252753
-
There were several eBay stores selling this Gunze range. However, all of a sudden there is either no one selling them or there is a supply issue. Due to COVID, it could be supply issue.
-
-
On 11/18/2020 at 6:28 AM, Drew T. said:
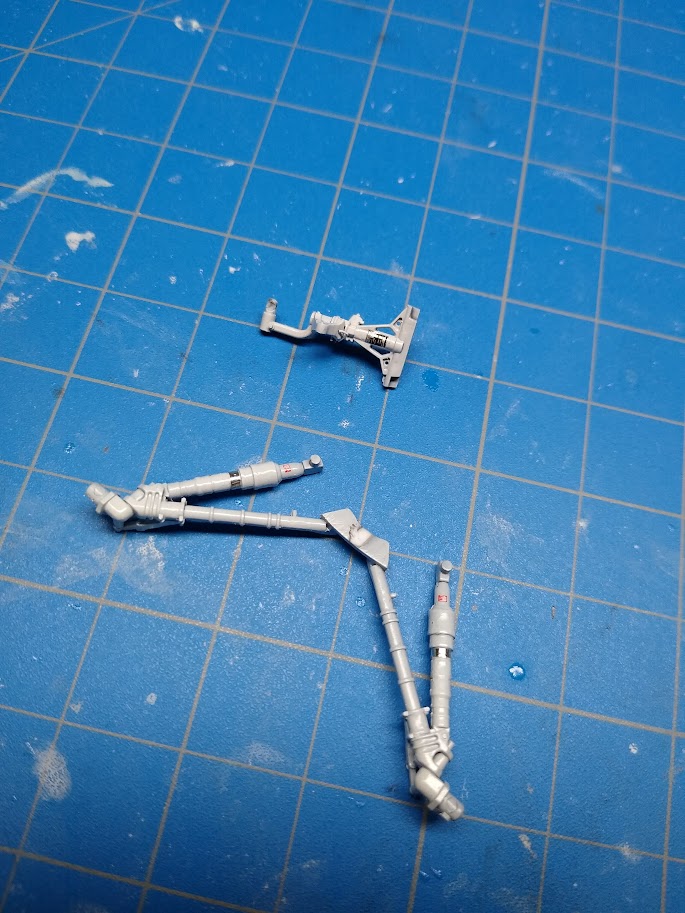
Big update today, and hopefully the last one before painting. Below is the progress I made with the pylons. I added some detail at the back of the LAU-118 HARM missile launchers that come in the Eduard kit based on photos from Jake Melampy’s excellent Modern Viper Guide. I also added some detail to the Tamiya pylons with Albion tubing to replicate the sway braces.
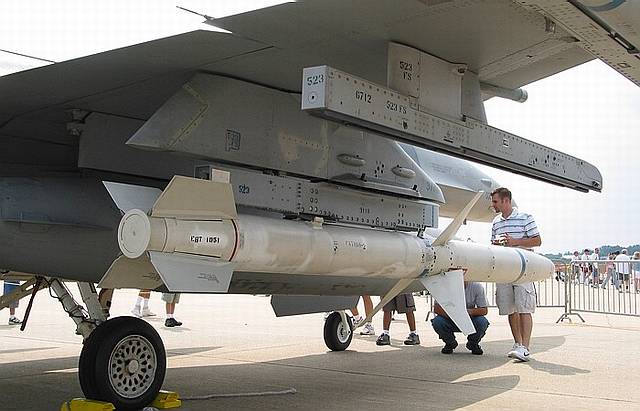
The drop tank pylons needed more work. They should have a rectangular “bulge” right below the triangular protrusions at the top of the pylons and a long narrow “bulge” at the bottom of the pylon. The below image shows what I’m talking about. I replicated this with sheet styrene sanded to shape. I also replicated what appears to be tubes sticking out from the pylon with Albion tubing and drilled a few extra holes that were missing based on photos.
Below are images from South Carolina’s ANG photo gallery on Flickr. These photos are all taken from the 2012-2020 timeframe. The rear of the drop tank pylon has what appears to be extra bracing of some type that the kit pylons don’t have.
The photo link below is of a block 30 F-16C taken by David W. Aungst in 2002 and can be found in the ARC walkaround gallery. This pylon design appears to match Tamiya’s kit and does not have the extra bracing. It seems that at some point in the last 20 years, this pylon design was changed.
http://www.arcair.com/awa01/401-500/awa409-F-16C-Aungst/23.jpg
Since I’m depicting a jet from 2013, I modified the kit pylons to match the later design with some sheet styrene. You can also see that some of the panel line detail of the Tamiya parts were filled in and rescribed, since it did not match the photos. I’ve started using Kombi Spot Putty as my go to gap and panel line filler. It seems to shrink less than Tamiya’s putty, and it dries faster, too. It still sands down very smooth, so I recommend it.
Honestly, I’ve probably spent more time tank pylons than its worth since they aren’t that visible, but at least they’re accurate now.
I thinned down the lip at the rear of the drop tanks and the fins to look more realistic.
Rivets were added to the horizontal stabilizers.
I decided to go ahead and attach the HTS pod and the pylon for the Sniper targeting pod, since there are minor gaps where these mate to the sides of the intake. It’s easier to fill these gaps now before paint.
That’s all for now. Once I get all the masking done, I’ll finally be ready to paint!
Drew
Your attention to detail is just awesome. Tamiya F-16 kit is brilliant out of the box. But adding so many little details needs a very keen eye. I was wondering what size of Albion tube you have used here?
-
16 minutes ago, caughtinthemiddle said:
A picture-heavy inbox review: https://www.kfs-miniatures.com/1-48-su-33-flanker-d-minibase/
Looks like a beautiful kit. Hope it fits well. Looking forward to getting one.
-
On 11/6/2020 at 7:19 AM, Drew T. said:
Thanks for the kind words guys! Night Owl Models, to answer your question on why I decided on SC ANG markings, I’m a native South Carolinian and I always thought it was cool that our National Guard unit has flown the latest F-16’s in the Air Force’s inventory since they were brand new. They were even the first Guard unit to fly F-16’s in 1983. About your question on the undercarriage, I already primed and painted them. I recently discovered a good off-white color to use for the undercarriage, wheel bays, and intake, which is Gunze’s C69. Although Tamiya’s kit has decals for the landing gear, I don’t think they look that realistic. Instead, I used some placards from Mike Grant’s WWII cockpit decals set as well as Airscale’s Modern Cockpit Decal Set.
The Eduard undercarriage detail set includes photoetch gear bay doors, but they look too flat to me to look realistic. I also didn’t want to deal with bending the photoetch into the correct curvature. Instead, I thinned down the doors in the Tamiya kit to a more realistic thickness. I also added some riveting to the inside of the nose gear door and thinned down the nose gear door hinges.
Finally, I simulated the holographic look of the HUD projection with Hasegawa’s TF-902 polarized film which shifts colors depending on the viewing angle.
Can agree more! That Gunze color is the most realistic undercarriage white.
-
Very nice build. This is such an impressive kit. Beautiful surface details. The decals though are not in the box!
-
4 hours ago, 94Lipo said:
Still nothing related to the kit.
-
I sold my Kinetic kit to buy and build this kit.
-
In my experience, eBay is the best place to buy. There are many legit Chinese sellers who offer great price with free shipping. The downside though is the kit takes time to arrive.
-
Great work! Thanks for sharing.
-
This is very help and much appreciated.
There is not a lot of aftermarket available for Rafale kit. There were few but it seems Wolfpack has discontinued them.
-
Does anyone know of suggested retail price?
It looks really good. Hopefully it fits well too. At times new companies make a mess of instructions.
-
For an example, if I have to paint an F-16 in modern grey scheme, I dont find any color in Tamiya acrylic range. For me, Gunze Aqueous H series paints provide the best modern grey colors.
-
Kitty Hawk dont seem to learn from mistakes as they keep repeating them. They try to cut corners. I hop this kit is different.


Testors is Gone - International Sales Affected
in General Discussion
Posted
While we talk about demise MM paint line, I still see their webpage and their list of Metalizer paints.
https://www.testors.com/product-catalog/testors-brands/model-master/metalizer-lacquer-paint/bottles
Are they still available in USA? I know we in Canada stopped getting those many years ago.