


rightwinger26
-
Content Count
1,870 -
Joined
-
Last visited
Content Type
Profiles
Forums
Calendar
Posts posted by rightwinger26
-
-
Those are some good pictures dnl, the bottom one is really good for seeing the rigging.
-
Thanks Joel.
I've gotten a little more work finished, I tend to work slow. I've gotten most of the PE attached to the fuselage that represents the stitching on the canvas, and the holes drilled for the rigging, as well as a few seams filled and sanded.


Hopefully this weekend I can put the last couple pieces of PE on, and attach the wings.
More to follow......
Bill
-
Whatever questions you have, fire away!
-
I'd be up for that, I've got plenty of WNW kits waiting to be built!
I have quite a few Eduard and Roden kits, I'm going to be out of town a lot this year, so I don't want to mod, but I'd definatly take part as much as possible if someone else will head it up.
-
Here is the synchronization gear.......

And now it's gone........

It was kind of a pain to align the rest of the cowling, so I'm done for the day, tomorrow at my club meeting I'm going to drill some holes for the rigging and start installing some of the PE on the fuselage, and fill and sand a couple of minor seams.

More to follow......
Bill
-
What about another WWI GB, it's been a few years since the Knights of the Sky build hasn't it?
-
im not good at taking pictures, but the oil tank, ammo can, and underside of the cowling are Alclad dull aluminum.


Next up is to glue the upper cowling on, then build the drive shaft and the all important interupter gear that made the Eindecker so famous.
More to follow........
Bill
-
I haven't forgot about this one, I was just focusing on GB project. I started work again today, the seams are cleaned up and I'm working on the oil tank, hopefully I can get a few pictures up in a little while. I just wanted to dig this out of the basement so I don't have to find it later.
More to follow......
Bill
-
-
-
I'm calling her done. I'm still trying to find good pictures of the rigging, but every photo I find the rigging is invisible, I've put too much effort into this to not b happy with the results, besides, the rigging didn't come in the box. I don't have enough of the AM Orilkons, and they are always out of stock, so they will be a later addition. The important thing, is that everything that was in the box is on the ship.
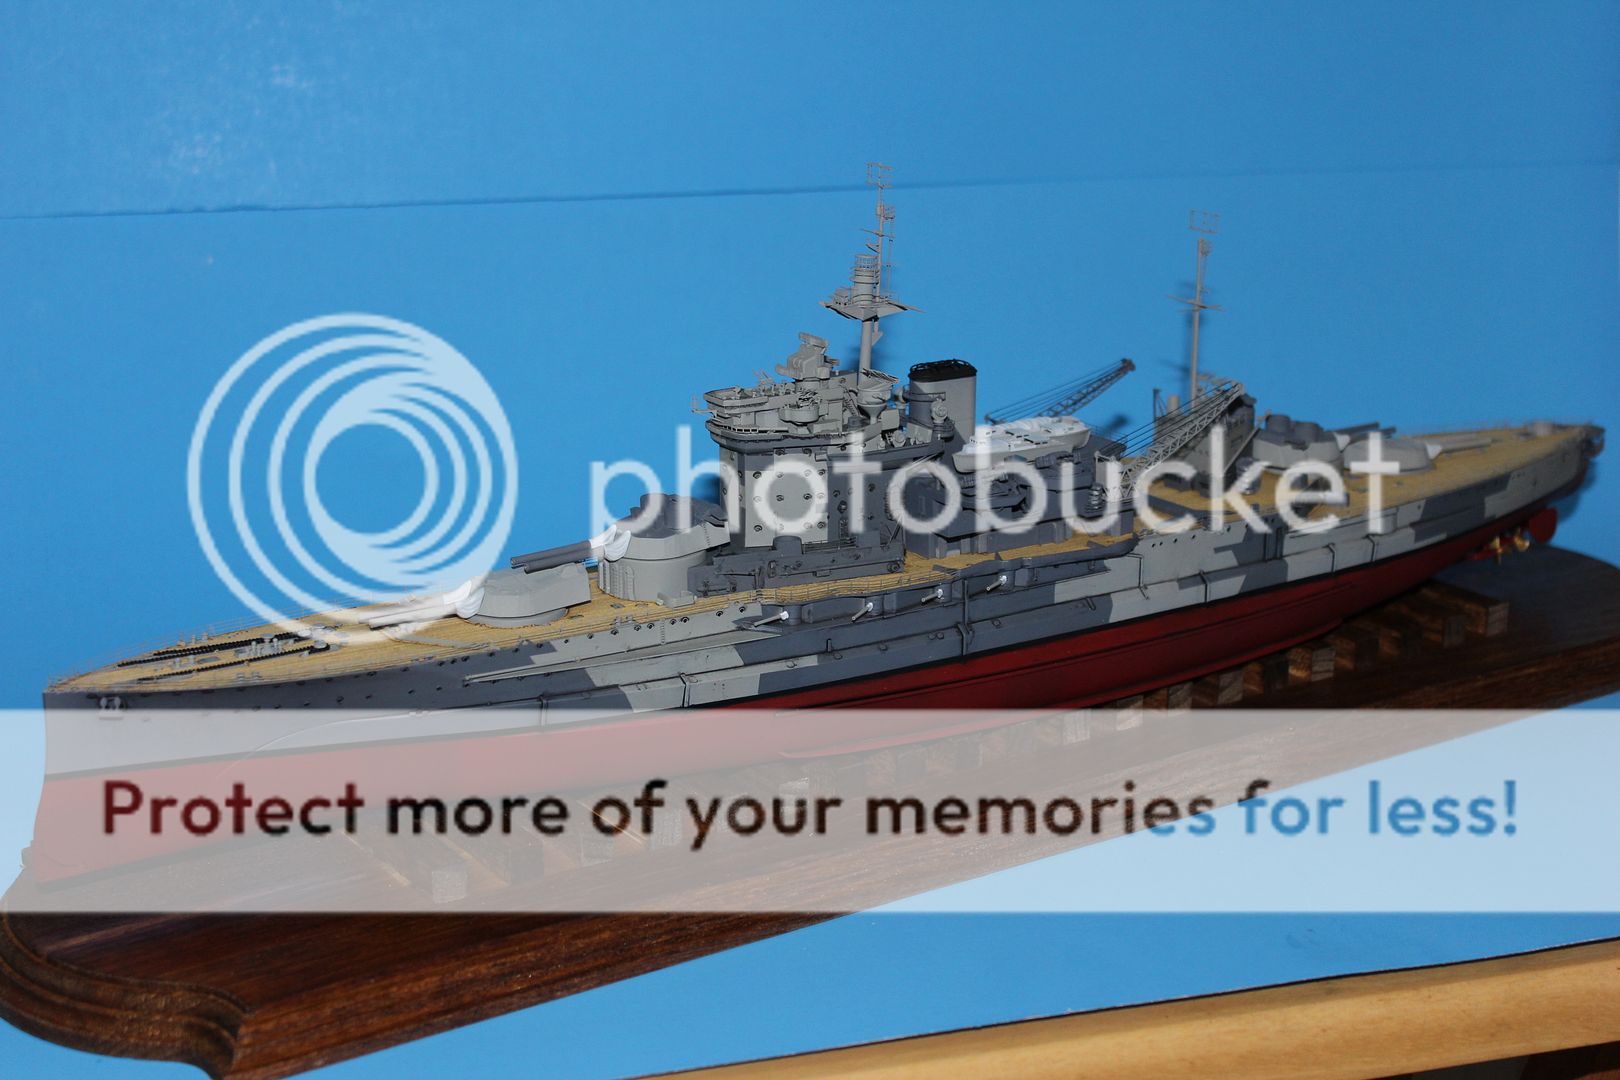
I'll put the rest of the photos in the finished thread.
For more of my ship work, I'm getting ready to restart my 1/200th Bismarck, there is already a thread for it in the ship WIPs, now that my skills have gotten better, I can do it justice.
Thanks for following.......
Bill
-
The size and scope of the universe is absolutely amazing. One of my favorite pass times is to sit in the back yard with the telescope and watch. One of my favorite things is to watch Jupiter, if you watch it for long enough, you can "see" the cloud bands move, it's truly amazing to see something that far away with your own eyes, and feel like it's right in front of you. Now is a very good time to watch the Pleiades, or Saturn if you have the means.
Bill
-
I got a MiG 3 for Christmas, I'd be in.
-
Cranes as promised.

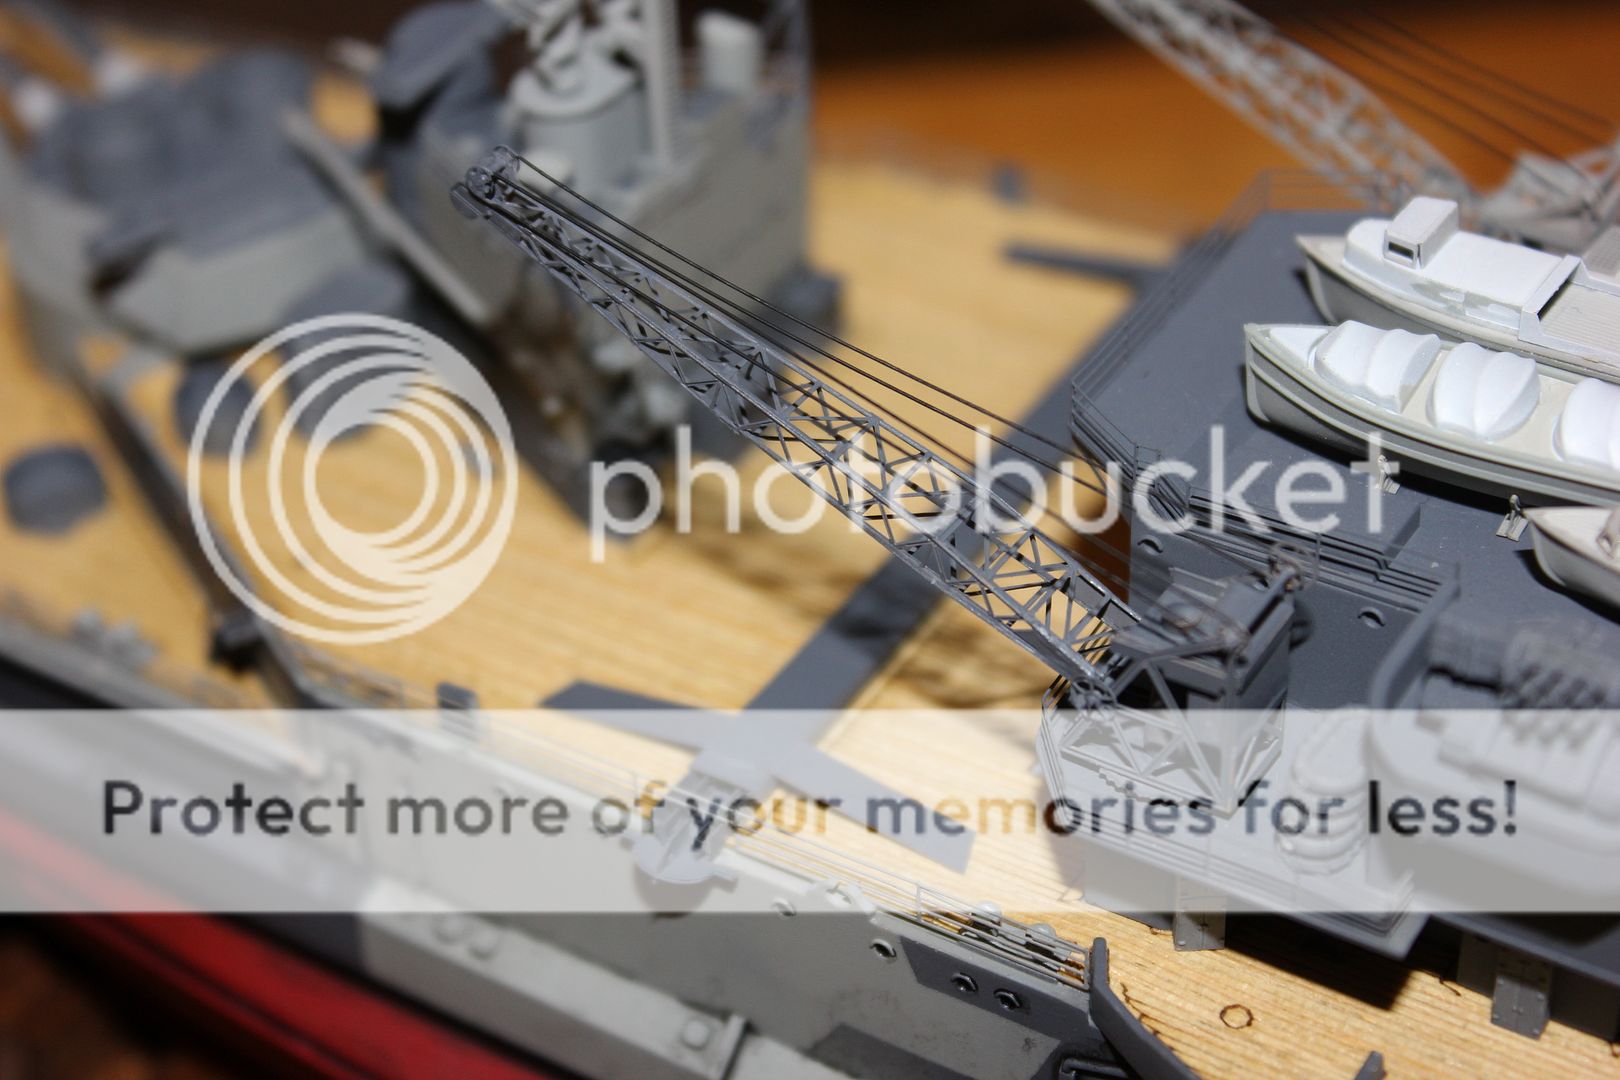
The seaplanes are almost done, I'm finished for tonight.
More to follow.....
Bill
-
Thanks again. Going has been slow, I'm coaching high school swimming now, and my practice is afterwards, so I only really get a chance to build on the weekends. But.....with the holidays, I've had some more free time. The other crane is finished, but I'm not happy with it. Tomorrow I'll paint them and install. The Walrus is half way painted, I'll finish that tomorrow as well. Once that is done, I just have to touch up some spots with paint, then rig. I'm starting to feel so,empressure with this one, I can't NOT finish a build for my GB idea. Not through lack of trying, but big ships take a while. Check back late tomorrow, I should have some pictures posted.
I think 1/350th is the best scale for ships, they are big enough to add a ton of detail without killing my eyes, but are much easier to display than 1/200th.
More soon......
Bill
-
Would the Special Hobby 1/48th D-558-1 count, lots of multi media comes in the box.
-
This sounds horrible, but that would give me another shot to finish my shelf queen from the last shelf queen build.........I suck. I also have a 1/200th Bismarck that I set aside to hone some of my ship building skills, before carrying on. I'm getting ready to pick that one up again at my next club meeting. I could be an assistant mod for any of the GB's, but not the primary, my work schedule is about to go crazy, plus coaching high school swimming, and my swimming, my time is limited right now.
-
I have zero in my display case
 and a few in the stash, I'm in!
 -
The corral is between El 1 and El 2, the street is between the Six Pack and Corral, behind JBD 1 and 2.
-
I'm just going to let the pictures talk.


I need a beer.........
More to follow.........
Bill
-
Thanks John, appreciate it. Ship building is so rewarding!
Here are the pompom directors for the aft superstructure.
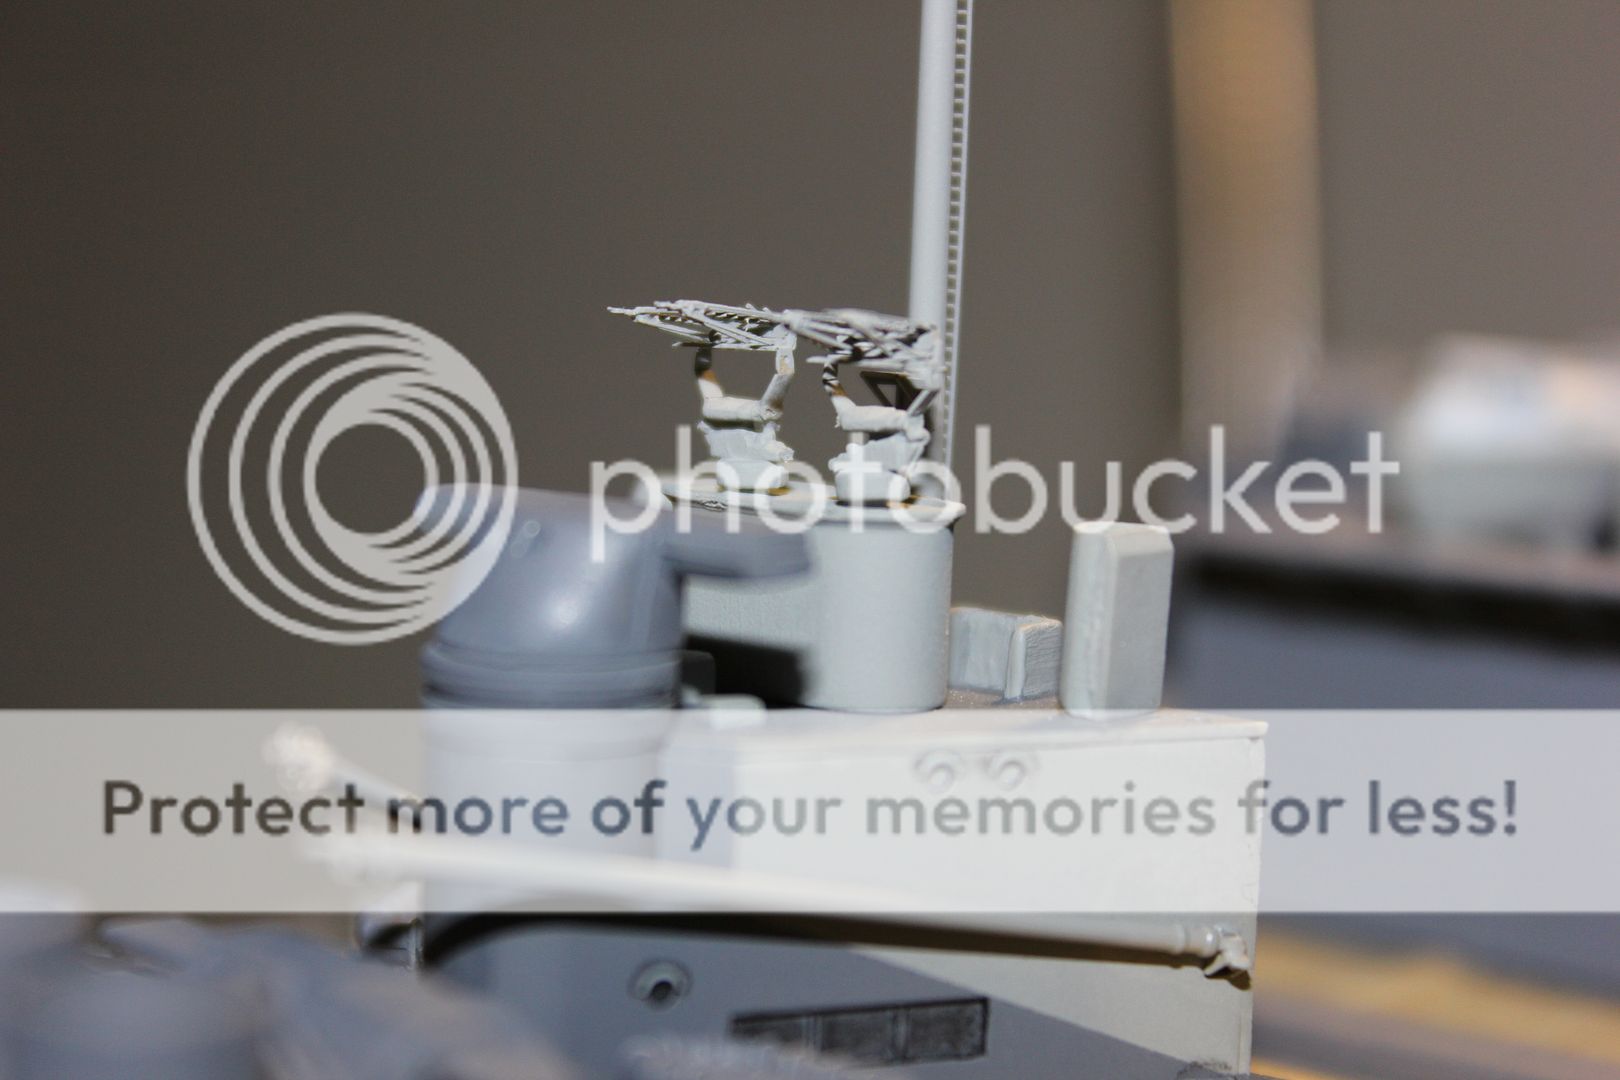
Forward superstructure is finished!

I'm soooooooo close to being finished it's frustrating! I'm getting ready to finish the aft superstructure tonight. Tomorrow my plan is to spend the day building and painting the cranes, and finishing the Supermarine Walrus, then construction should be finished. From there I just need to touch up paint, the spots are easily visible in ththe pictures so far, and rig it.
More to follow.......
Bill
-
Thanks Joel.
I used a different technique, Vallejo burnt umber with a water soaked stiff bristle brush for the seat and the rudder pedals, but I was going for a little different look with the wood. I wood (pun) imagine that on the Western Front, wood parts in a cockpit that are constantly getting sat on and kick, would get very dirty and grimey. I figured that after looking at my plywood workbench last night. So I wanted a little grain, and a lot of staining....I think I pulled it off.


I'm not worried about the back of the seat, once it's closed, you'll never see it. Tomorrow I can dull coat and close the halves. I was already planning on using oils for the wood grain on the prop. I've always used the turpinoid and stiff brush technique, but that sponge style looks cool and I've never seen that one, so since the prop is small and forgiving, and the kit came with two props.
More to follow.......
Bill
-
Never been an issue for me, remember there is no tension on these parts. If you want, you can always add a bead of paint over the elmers to seal it, I prefer to just use my overall coat of clear flat to seal things.
-
Nuff said, thanks!
The gun directors for the forward superstructure are finished, tomorrow I'll paint then and install them, and the superstructure is finished!
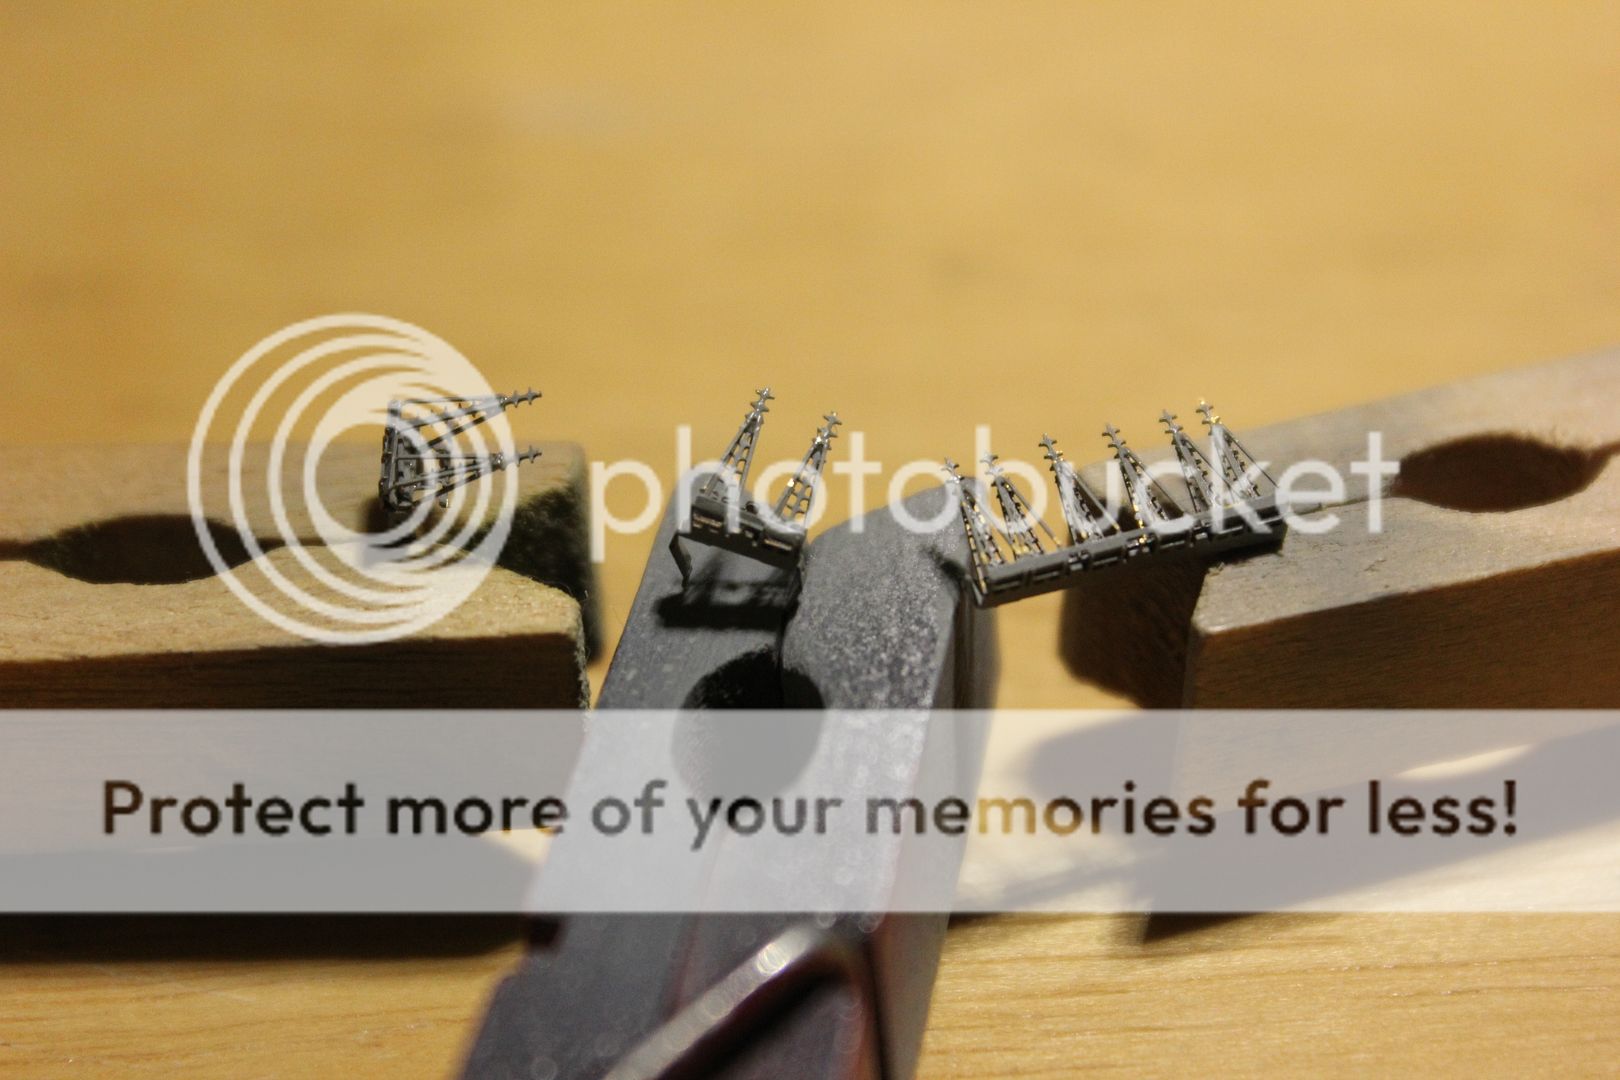
More to follow........
Bill


Fokker Eindecker
in In-Progress Pics
Posted
She has wings!
Loll the holes are drilled for the rigging, there are only a few pieces of PE left to add and I can start painting.
More to follow......slowly........
Bill