


dsahling
-
Content Count
736 -
Joined
-
Last visited
Content Type
Profiles
Forums
Calendar
Posts posted by dsahling
-
-
Does anyone have a paint mix/ratio that they use to get FS 35190 with gunze mr. color paints?
Thanks
Dan
-
What Gunze paint mixes did you use to get the light blue (fs 35190)?
-
Looking good! How do you think you're going to go about masking the camo? Since I'm about to start working on the same one, I was thinking of covering it in tamiya tape masking sheets then drawing the pattern by hand and carefully cutting it out with a small rounded xacto blade to get the "hard edge" camo effect.
-
Whoops, yep Su-30MKI, the camo is really cool looking on that one. Gotta hand it to the Russians when it comes to camouflage these days, they come up with really interesting schemes, and don't rely on that sometimes bland looking grey that we (USA) all too often use :)
-
For the blue, I use Gunze 306 + 322 (5:3) , these colors came out looking really great when I finished mine, pretty much spot on. Gunze paints are hard to beat, they spray so easily and nicely, only problem is the fumes are SO strong!
-
I recently built one of these, if the grey you're referring to is the 'darker one' it is FS 36251 and can be mixed 1:1 with Gunze 317 + 334, that's what I did at least. The "white" is technically a 'grey' color and its FS 36622 which is Gunze 311. You can check to see if its available in other brands of paints to with some of the paints, just google something like model master fs 36251, etc. I've also got a great mix for the blue with gunze paints also.
Dan
-
I'm just about to do a 1/48th Su-35 MKI prototype, and will be using the windmark conversion set. It does seem a little bit daunting, however, I just got back into the hobby about a year or so ago, and have been using some of these conversion sets. They're actually not that difficult, if you get a good little hobby saw and go slowly and carefully all it takes is a little putty/filler and some sanding to get it smooth. I do understand that it can seem difficult, so I hope you can figure something out!
Dan
-
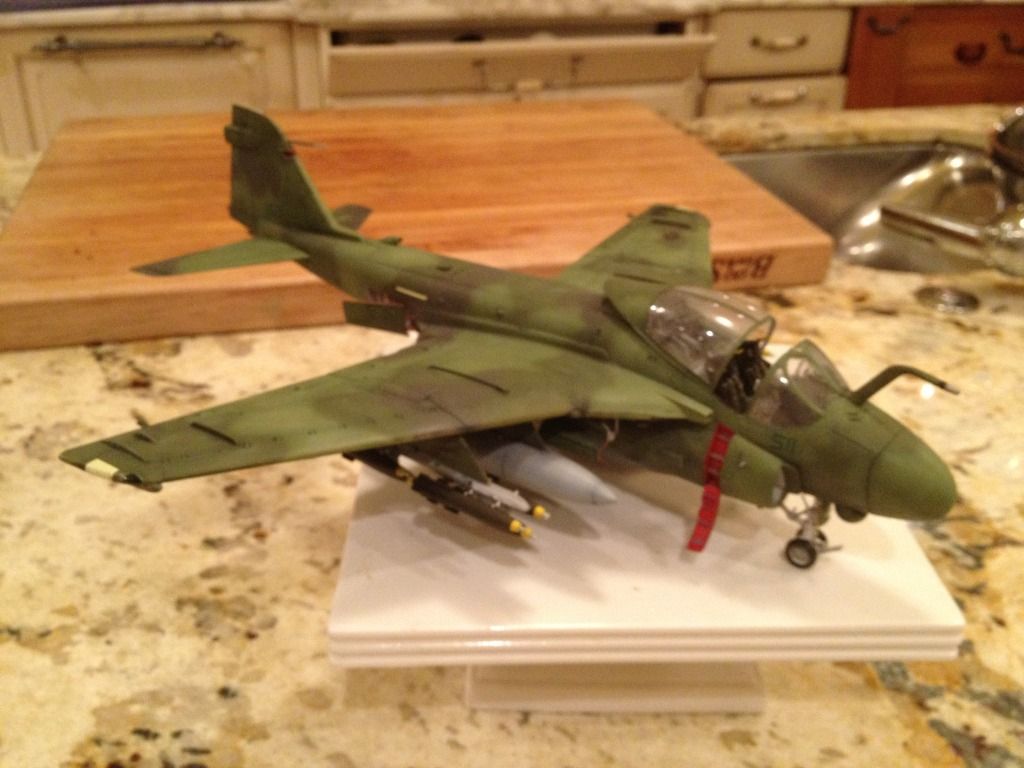
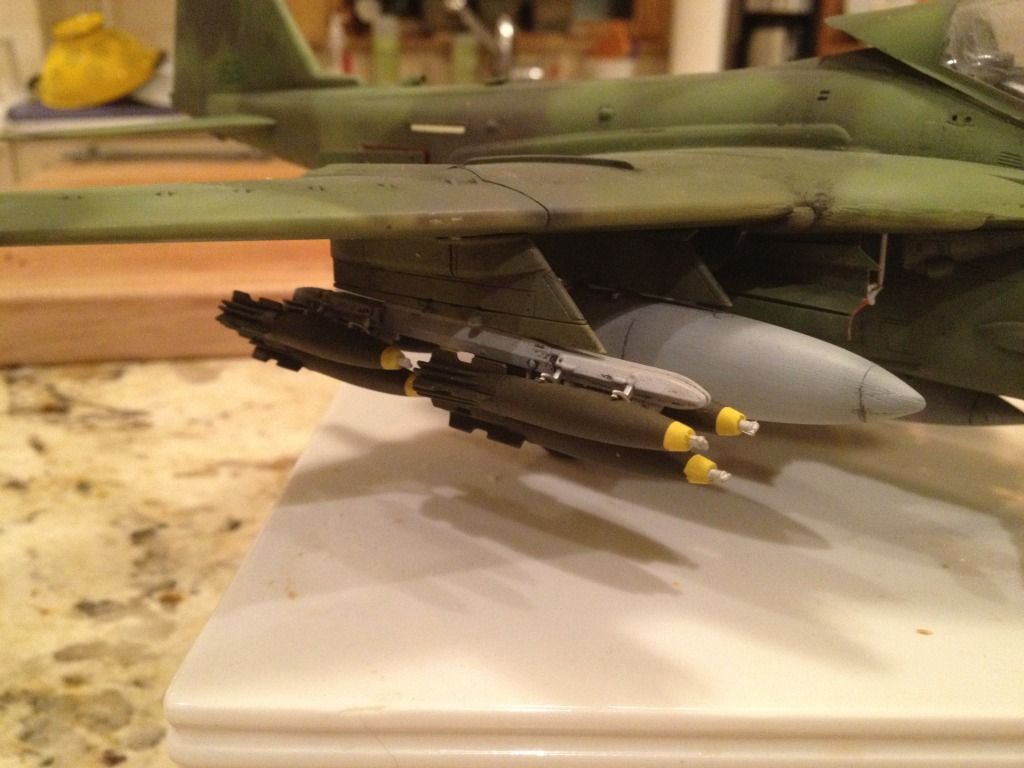
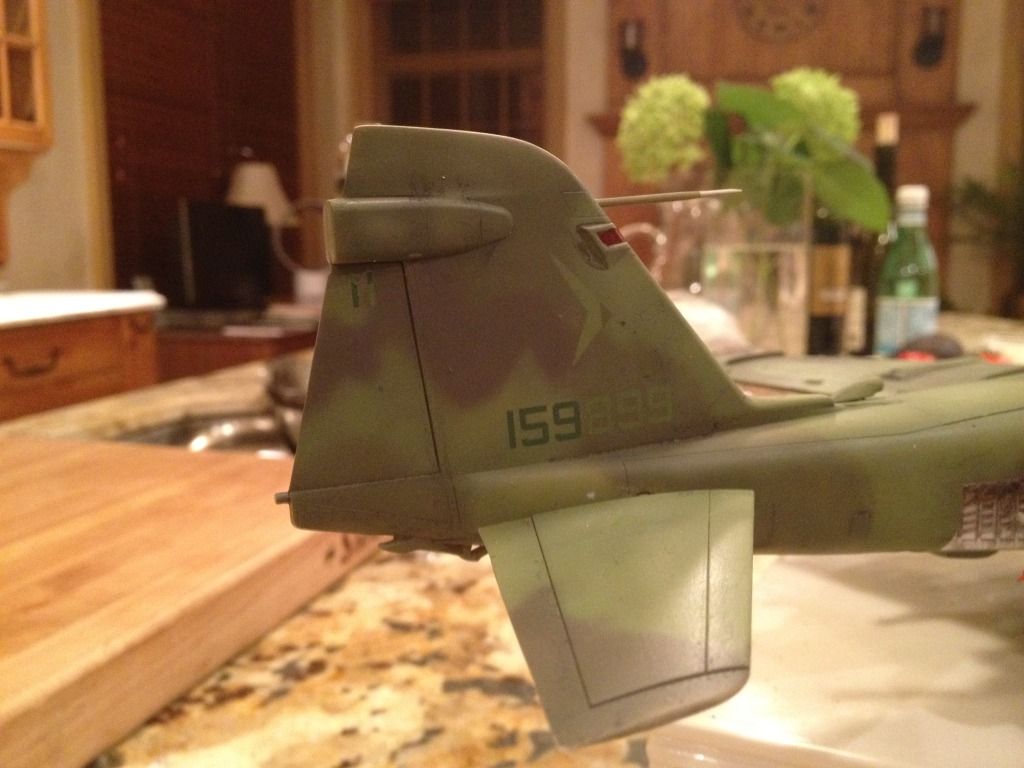
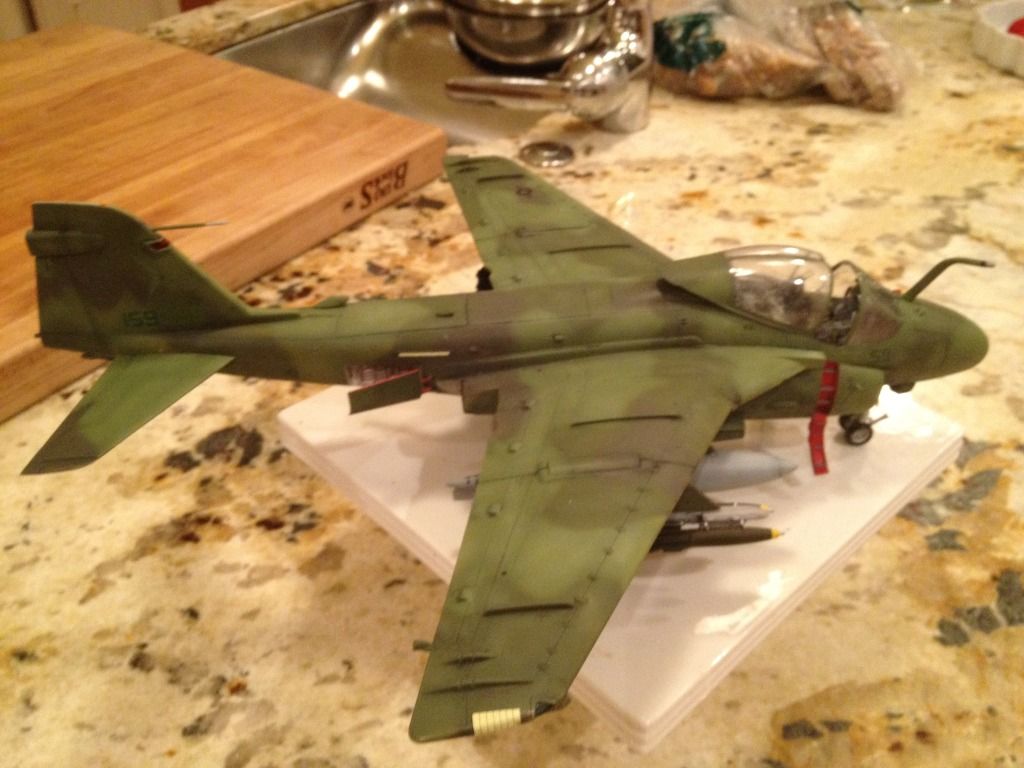
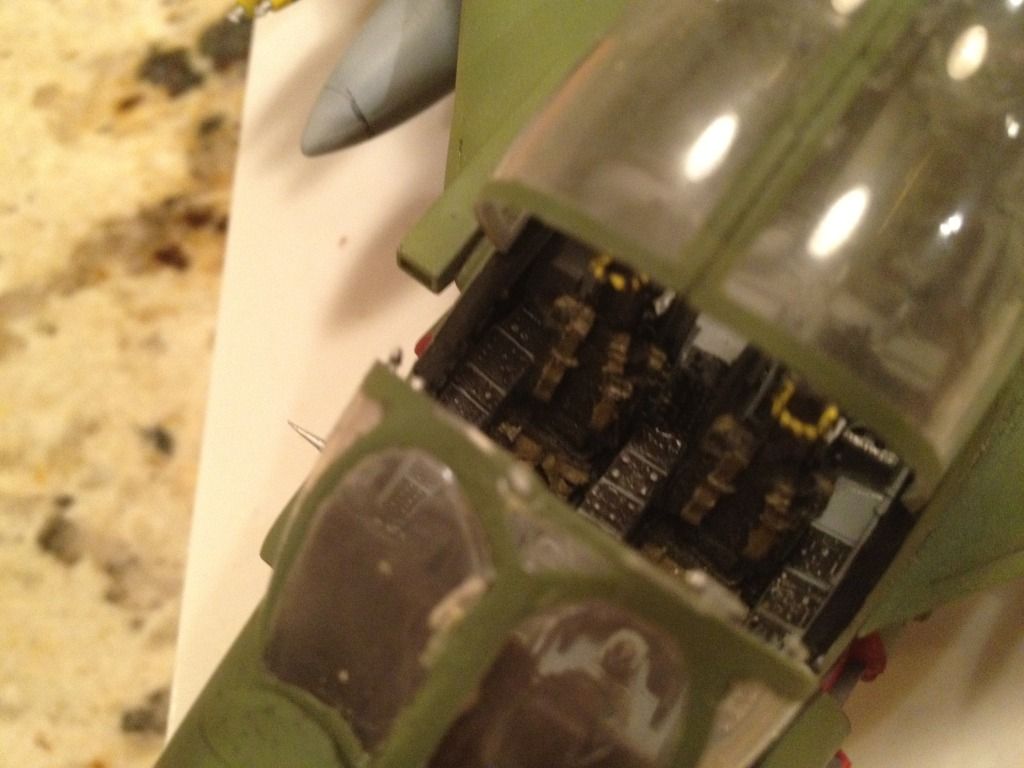
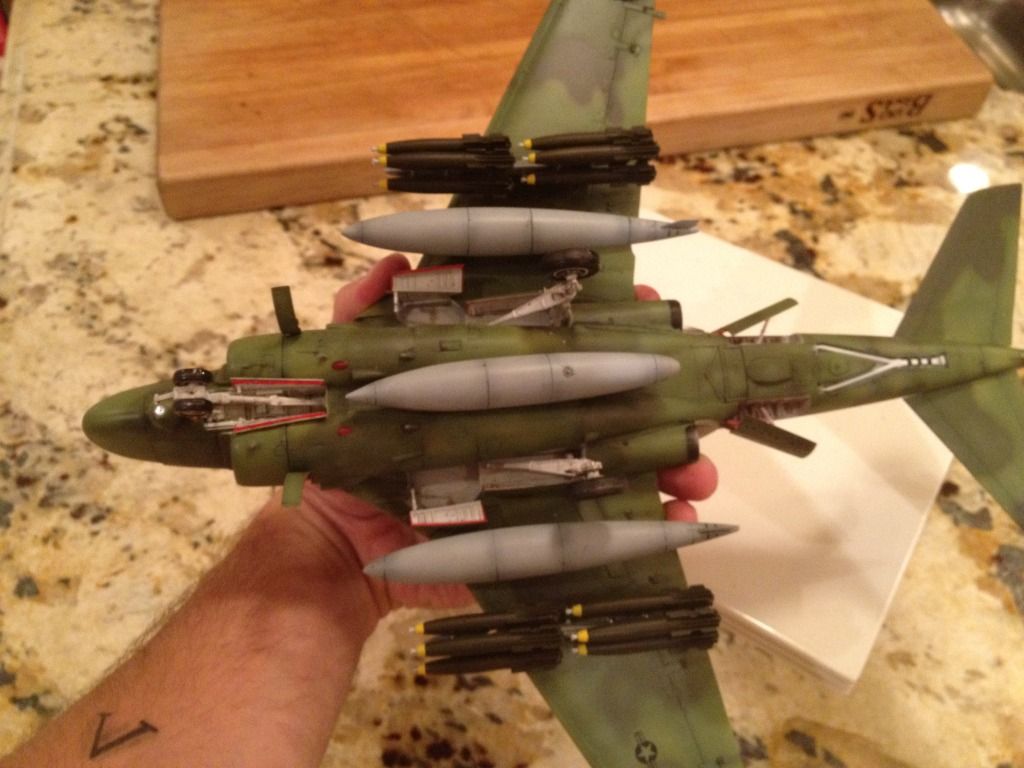
Here's the Kinetic A-6 Intruder I just finished tonight, it was primarily OOB, except for some resin ejection seats, seamless intakes, and the FighterTown decals for VA-196. The kit is ok, the recessed panel lines were nice, however, the cockpit fit was terrible, and the canopy wasn't molded properly so it took a little fixing, but overall a pretty fun kit. I find the 'grey' camouflages to be sometimes a little bit boring so I couldn't pass up a green Intruder. Aside from using blue tac for masking the light green, the rest of it was all airbrushed freehand.
Enjoy!


-
I'll keep checking out your build here, I'll try and put up some pictures of the EA-6B in the desert camo I did last fall. Now if only somebody releases a 1/32nd EA-6B!
-
If you want a really nice looking camouflage look into the desert scheme that VAQ-133 did, there's decals available for it
-
Thanks for all the help everybody! The one thing that throws me off is the dark blue, the instructions list it as a 'grey color', however, in some photos I swear it looks blue, perhaps its just the lighting? I know they used an almost identical scheme but with greys. I think I might make a modified mix with Gunze 323 for the light blue, 316 for the white, and then I'll maybe make a mix for the dark blue with 322 and 305.
-
My next build is going to be the Su-30MKI prototype (the one with the great looking camo) (see below). I've been looking around for color references and haven't found any yet, has anyone whose built this one have any fs colors? Or any gunze paints/mixes to achieve them, however, I'll take any other kind of paint recommendation too.
The link to the su-30 I'm referring to is below
Dan
-
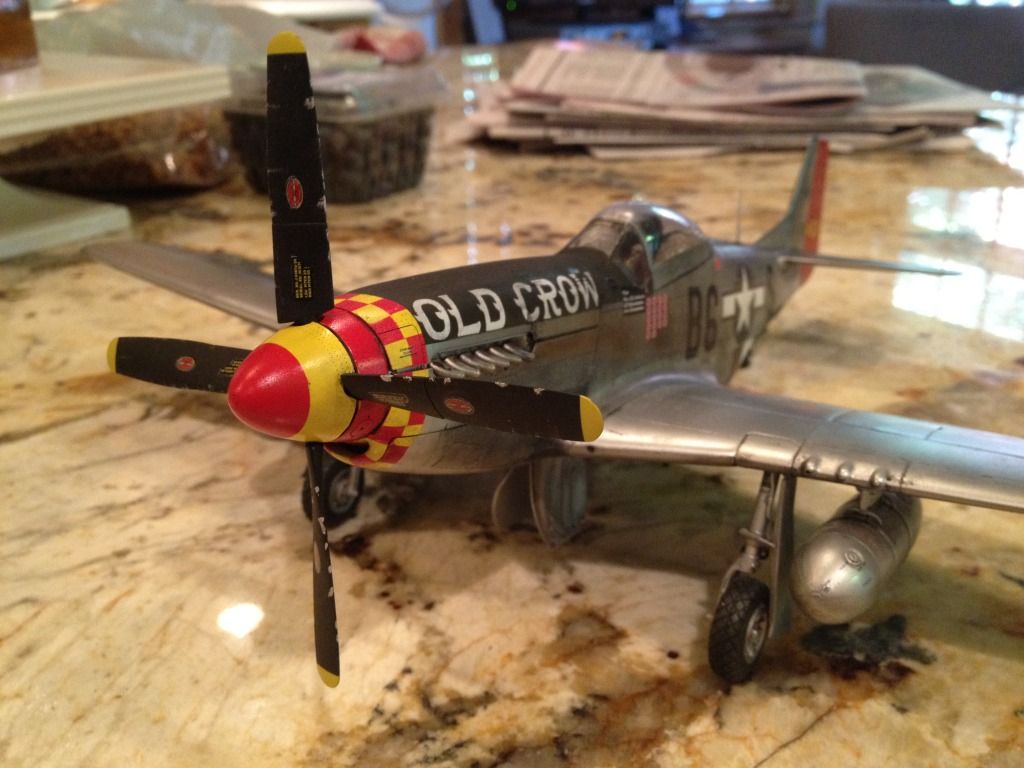
Really great looking mustang you've built there, by far one of the best I've seen! How did you do some of the weathering and shadowing along the panels?
-
Not really sure where Bay 5 is, could you be a little more specific or include a picture? However, if its the bay behind the cockpit of the left side electronics/avionics bay on the forward fuselage then it would be the blue/green metallic color, I believe Tamiya has a mix for this in their instructions, I can get it to you a little later, but I don't have access to it right now.
-
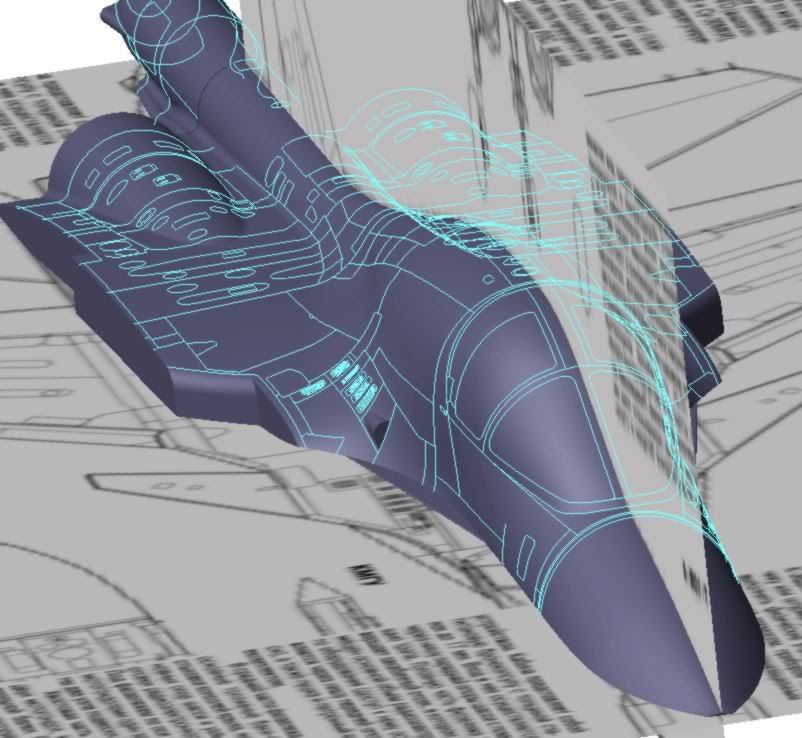
3d CAD tools can transform a 3D surface to a flat pattern. But I think it would be difficult to make the surface of an aircraft from styrene without having a skeleton. What I mean is that the flat surface must follow a "path" in order to make the correct curves of an aircraft.
Of course that is my opinion and someone else might know better

That's exactly what I'm talking about, there's drawings for the ribs/skeleton of an SU-34, simply put if one was to construct those together and then use the CAD tools for making the skin surface flat, one could simply use thin sheet styrene to cut it out and glue it over....now the only tricky part is the damn landing gear on that thing! Although, one could just opt to leave the gear up and make it an in-flight bird.
-
I wasn't talking about using CAD to make decals, what I was talking about was how decals are drawn in a two-dimensional manner, but fit over three-dimensional surfaces, think checkerboard patterns on the nose of say a P-51D mustang. With this idea, one could take the 3-D drawings of the surface of the aircraft and have them presented in two-dimesions on flat pape, which could then be cut out and simply laid over the ribs, very similar to how RC aircraft are built with balsa wood.
-
So the CAD drawing shows the curvature over the "ribs", is there any way to take the curves of the 3D model and have it drawn flat? Similar to decals that are for noses and cowlings?
-
 be patient please......
This drawing has re-inspired me to start thinking about stratch building one. I've read a few WIP threads from people who have attempted to sctrachbuild an SU-34. I know really next to nothing about CAD, but I'm curious if the computer could take the 3D "skin" of the plane and make it flat. In other words, after the skeleton of the fuselage is put together, the hardest part is getting it covered, I thought if the computer could make a flat drawing of the top and bottom, then one could simply draw it on thin plastic card and cut it (perhaps in several sections) then lay it over the skeleton?
-
be patient please......
That's a fantastic looking CAD drawing! I can only hope it becomes plastic one day! I've always found this to be a fascinating plane, and have always wondered with how popular the SU-27s have become that no one has made one yet in 1/48th scale, especially considering a couple manufacturers have done it in 1/72. Keep me posted please!
Dan
-
I was thinking about trying to put together some kind of petition or campaign to pitch to any of the manufacturers out there for a 1/48th SU-34 (I would've loved a 1/32nd but I think that'd be a hard sell), does anyone have any contacts at any of the modeling companies that we could contact?
Dan
-
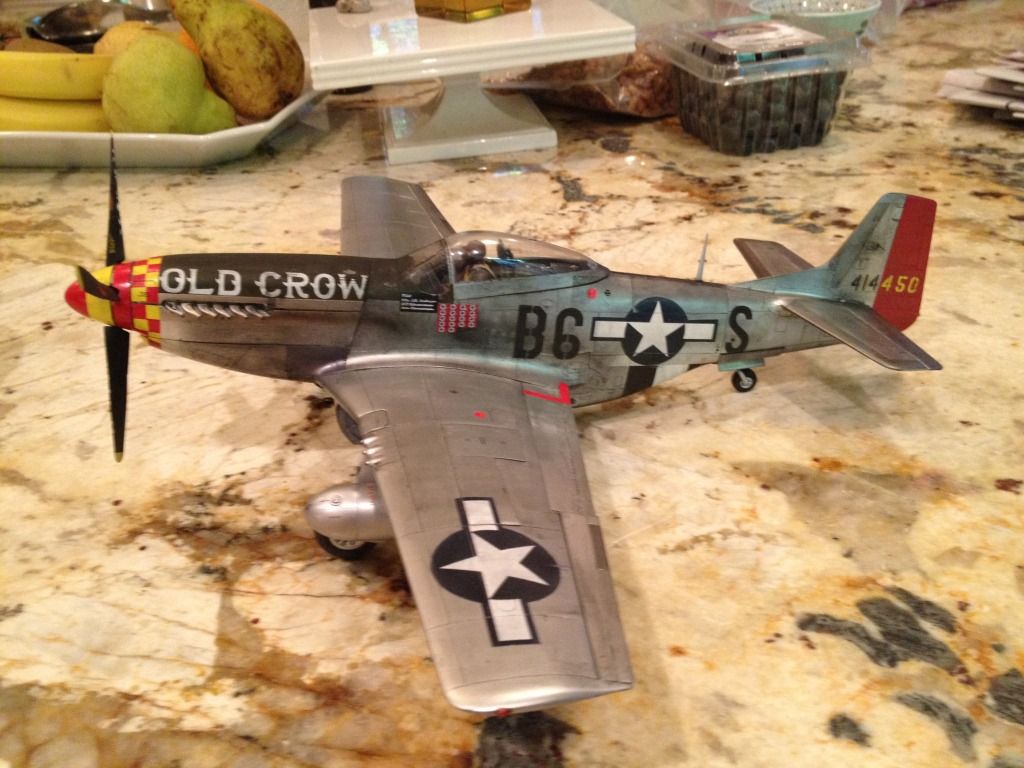
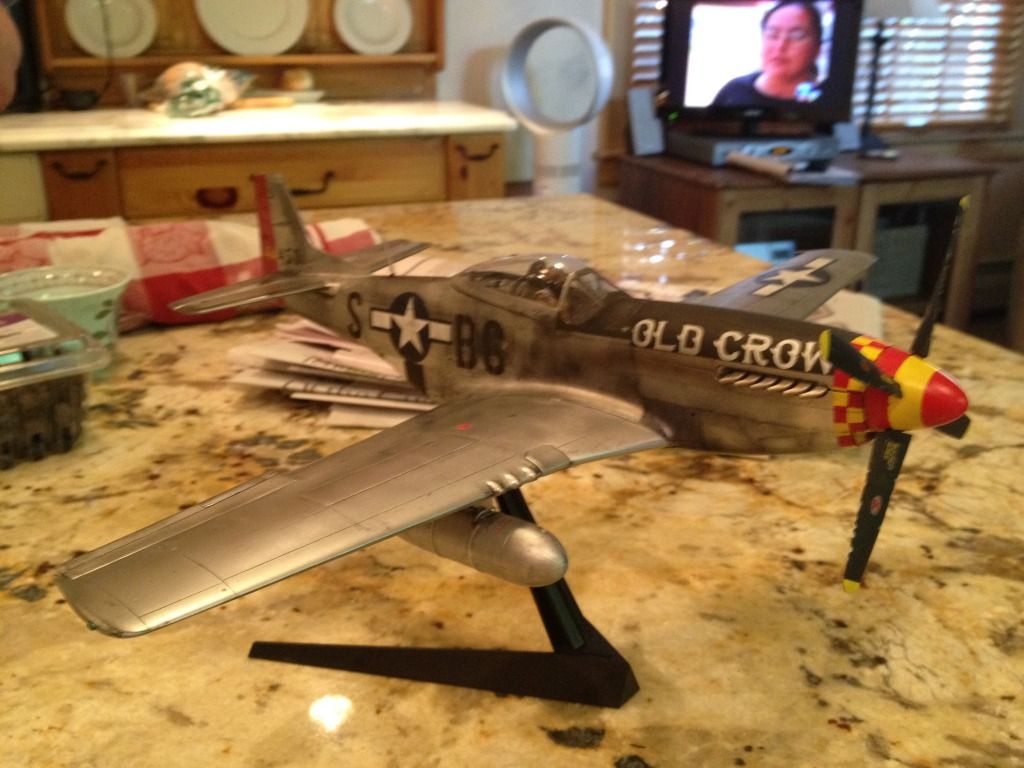
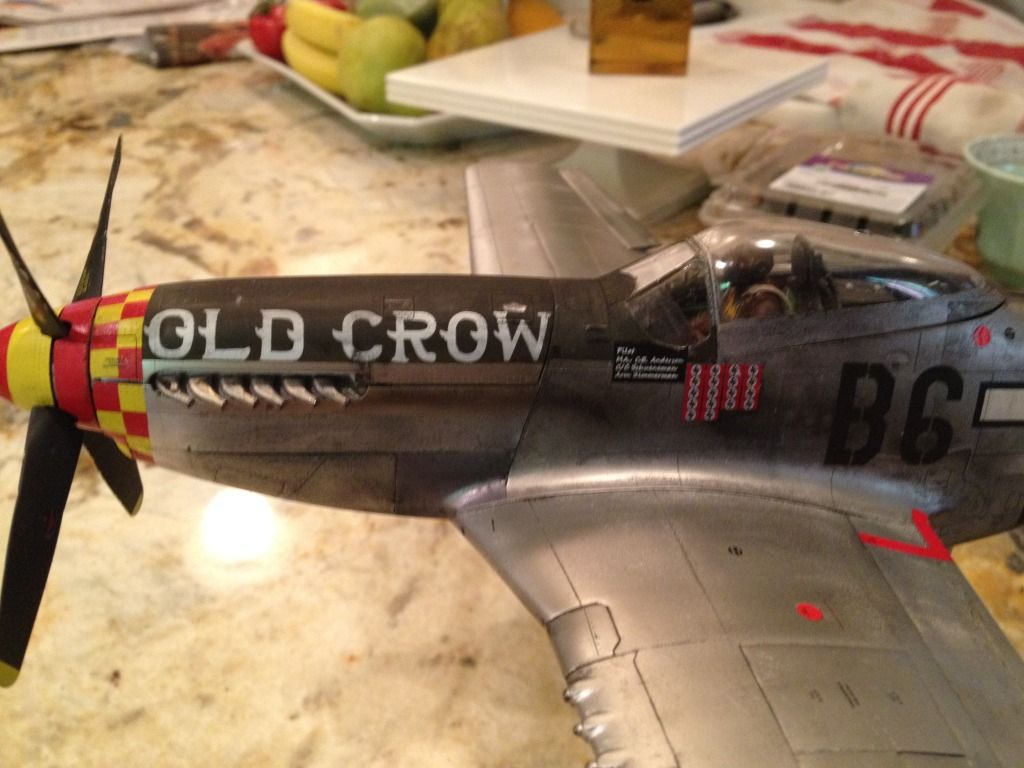
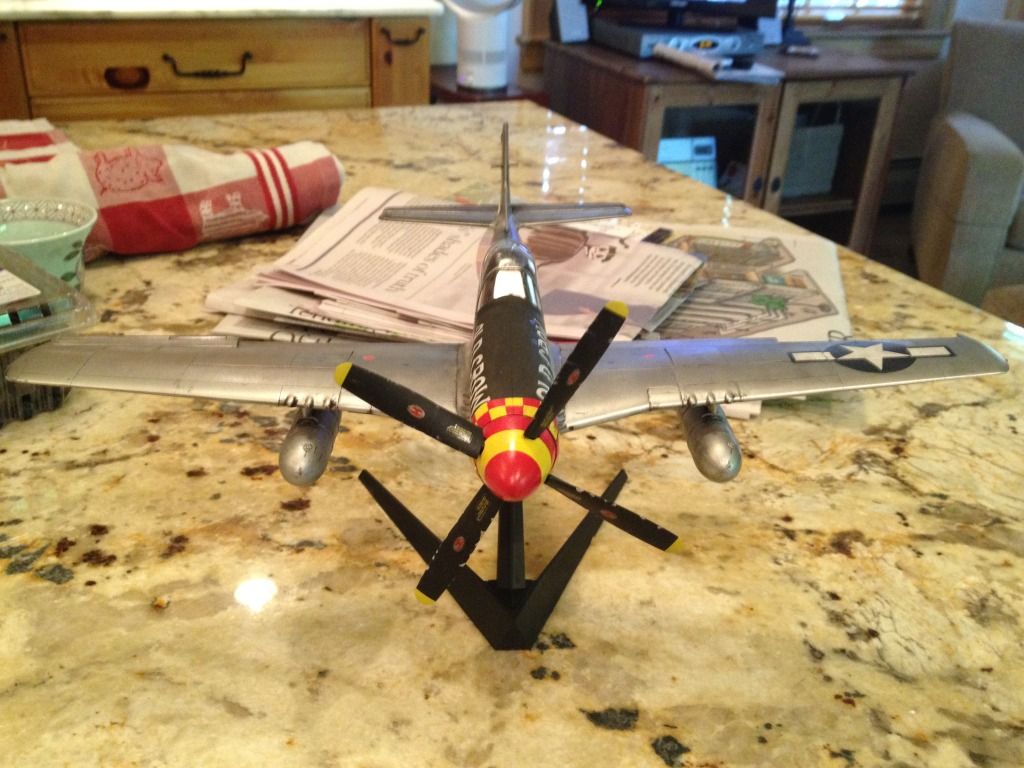
Forgot to add, I used the Scale Precision Masks for the"Old Crow" emblems, checkerboard, stars & bars, and squadron numbers and letters, these came out really well!
-
I just finished Tamiya's 1/32nd P-51D, what a great kit! Unfortunately I botched a key step and as a result I decided not to show the engine, however, I would recommend this kit to anybody! I'm gonna pick up another one soon and NOT make the same error, enjoy!

-
So I'm doing a 1/32nd P-51D "Old Crow" thats going to be done with Alclad II paints, I've started sanding the plane in preparation for Alclad, I know the trick to a great finish is to have the surface be as smooth as possible before laying down the primer. I've got some Novus Plastic Polish that I use to remove seem lines from canopies. My question is that I'm curious if I could use the Novus stuff to polish the plastic on the wings and fuselage after sanding, then let it dry for a day or so, or would does anyone know if that might cause some problems/paint reaction with the primer and the Alclad?
Thanks
Dan
-
Overall its a pretty good kit, the only problem area was getting the wing joint to be smooth, required a fair amount of putty and sanding, but nothing difficult, just a little time consuming. The cockpit they provide is really good, and if I did this plane again I would have to qualms about doing it OOB. Detail is very good, the gear bays lack some detail, but I unless youre trying to win a contest I wouldnt worry about it.
1/32 Academy Chippy Ho!
in The Display Case
Posted
Really nice looking Hornet! Superb job with what I imagine were some fairly tricky decals to work with!