

Sebastijan
-
Content Count
5,975 -
Joined
-
Last visited
Content Type
Profiles
Forums
Calendar
Posts posted by Sebastijan
-
-
Model is now primed and almost ready for painting. Why almost? Because during the photo shoot, I noticed a small crack appeared in the nose, which I have to fix first!


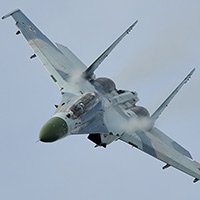
The aircraft is a real behemoth. Compared to the MiG-21, it looks like it’s a bigger scale. I imagine its size wouldn’t be an advantage over the battlefield either.

Armament to be mounted on the aircraft.

-
22 minutes ago, Solo said:
But in 1:72 it doesn't look so good:

a rather poor out of focus and underexposed photo and details about 10times bigger than real may not be actually representative of quality.
-
With some time off, being on home readiness every second week, but parenting still taking a considerable chunk of it, I managed to move forward with my Il-102 build.

K-36s painted up and ready for installation.

Il-102s heavy wings and tail design scream of a tailseater. Combination of lead fishing weights and Uschi van der Rosten Three Green in the nose will hopefully do the trick.

Instead of adding engine pods after the fuselage is closed, I'd rather install them before that, thus easily pressing them together against the fuselage surface and minimize the possible gaps.

The fuselage is together and cleaned, and I am now working on smoothing out the tail connection to the fuselage.
-
There's two narrow aluminum strips on the canopy centerline extending from the rear frames for both pilot and RIO about 2/3 forward - crew protection from lightning strikes.
If there's a single line through the whole canopy in a scale model kit, that's the result of moulding process and should be eliminated.
-
Since I started using MrPaint paints, I don't gloss anymore... no problems with silvering, even without polishing.
-
Thank you, guys!
-
My first 2020 project finished. The model itself was finished in the last days of 2019 but I needed a bit more time with accessories and the base.
In progress shots: https://vvsmodelling.com/2020/03/07/zvezda-172-mig-29smt-fulcrum-build-article/
Built article and full gallery: https://vvsmodelling.com/2020/03/08/mikoyan-mig-29smt-fulcrum/Some photos for the flavor 😉


-


The cockpit and gunners position are reasonably detailed for the scale and the decals nicely printed to bring out all the little details.

The rear gun assembled and painted and waiting for installation into the rear turret.

And the infamous K-36 seat. Anyone that built recent Modelsvit kits have come across one of these. 23 parts for a seat in 1:72!

You may have asked 23? He must have made a mistake! No, here's a sprue photo next to a completed one. All those parts go into one seat! But it looks damn fine out of the box.
-
Thanks for the interest! Ken, I've seen the Il-102 again in August when visiting MAKS - the grey is now quite weathered compared to your photos where it appears quite recently repainted.
Anyhow, time for a small update.

Il-102 main landing gear was stowed in such gondolas. Multipiece affair but it goes together rather well and fits perfectly into the wings. Also nicely detailed with combination of raised rivets, engraved lines and delicate interior frame work.

So, if you wish to pose open bomb bays, you have to cut the doors out of the lower wing half; Just carefully follow the engraved line with a scriber and you'll be fine.

The result of the cut bomb bay doors. Pretty neat result with the help of that engraved line on the inner side.

You have an option to either build the aircraft with closed or open bomb bays. If you choose the later, you have to install the bomb bay sidewalls onto the inner side of upper wing half. Again like MLG gondola, nice interior detail and perfect fit.
-
On 1/31/2020 at 3:32 PM, solher1 said:
I’m interested, what do you do to prepare the surface for decals?Juan
properly degreaseing the surface (I use IPA) and smooth the surface using polishing sticks and/or cloths - not to high shine but basically to the natural finish of the unpainted plastic.
Next step is proper paint application, which is as important as surface prep work. And from what I am seeing, it is the main cause for uneven surface and consequent silvering of decals. dnl42 just described this perfectly.
And yeah, I am using MRP lacquers.
-
None. Use a quality semi-gloss paint and do a proper surface prep and you'll safely skip this layer on your model.
-
On 1/21/2020 at 10:14 PM, Hubbie Marsten said:
Yes, but what brands do you use/like the most, Seb?
Mr.Paint. Gunze (now Mr.Hobby) are very good as well and I've heard of good things about Hataka and Akan lacquers. But Mr.Paint for the huge selection of paints, ease of use and excellent properties, are no.1 on my list.
-
New year, new project.
A&A released a 1:72 model of this very unique looking aircraft last year. Having its roots basically in WW2 era Il-2 Sturmovik attack aircraft, it is so much more bizzare, that this aircraft of archaic looking design was still marketed in early 1990s. Only one flying prototype was made, which made around 250 flights in period between 1982 and 1984 when engines livese expired. The aircraft can now be seen as one of the gate guards at Gromov Research Center at Zhukovski, Russia.
The aircraft being of quite a modular design, I've decided to skip the usual assembly flow of starting with the cockpit and tackled the engine nacelles first. The engines are designed to include the full length intakes and exhausts.

While the turbine blades look convincing enough, I was less impressed by the intake itself. Composed of two halves, the plastic was too wide to fit around the curvature of the turbine. I ended up shaving away around 1mm of plastic on each mating surface to achieve a fit. However this worsens the seam itself which will have to be carefully puttied and sanded from the inside. A job I am not really looking forward.

While turbine blades are normally of a darker metallic colour, I normally paint them in a much brighter aluminum and put on a black wash to accenuate the shadows. The reason is, that these parts are sitting deep in the intakes where little light reaches them and are thus more visible.

The whole engine assembly dryfitted to the interior of the engine nacelle half. While the intake parts itself had a more serious fitting issue, the middle connecting tube and the exhaust itself were much better fit. Especially the latter with a single piece outside part helps to hide any seams on the inside.
-
Thank you, guys!
Well, she is finished but I will post more photos in the Display Case once I finish a simple base for her.


-
Since I am in a bit of hurry to finish this one, I concentrated on building instead of shooting progress photos, but here she is as of today.
Oil paint weathering done. Hydraulic pipes on landing gear done. Ejection seat done. External fuel tank added as well as some smaller antenna (more to follow).


-
19 hours ago, Fiddler said:
Beautifull work!
I wonder why you decided to use US colours over the other SMT colours provided by Mr.Paint? I know colours are a difficult thing to discuss, but wanted to know your view about them. I don't know to much about Mr.P but they surely do look like a very interresting range of paint. I bought the 2 colours for my MiG-29S 9-13 just to try them but didn't have a chance to spray them yet. So just curious 😉
Thank you!
The reason is simple - because the other two MRP paints aren't suitable for the specific airframe I am building. Those paints are greenish grey of the repainted examples, while mine is painted in original splinter scheme which was grey without any greenish tones. Be cautious about their standard MiG-29 paints as they don't really match the real ones straight out of the bottle.
-
I apologize if I may have offended you but yeah, you are right - everyone is entitled to their opinion. I much prefer reasonable "scale thickness" than a clunky piece of plastic - same goes for a visible seam against invisible seam. If that means I have to use my brain and skills to solve the problem, even better. I love such challenges and building many short run kits has made love the challenge. Maybe my point that intakes are ok is wrong because of that?
If you'll read my review, you'll notice I have exposed a few problematic areas as well - for example, Zvezda's QC failed to notice they forgot to engrave the over exhaust fairings, which they've beautifully rendered on their first released 9.13 version.
But reading your last post, I see a contradiction to your claim.
17 hours ago, Faust said:So, you see, what's good and bad is a function of the reviewer, the times, the competition. I think people are unfairly mean to Matchbox kits, but I don't whine about it. I build them, slag on their bad points and show you can make them look nice. That's more valuable, in my mind, than just saying they're old and bad and ignoring them.
I perfectly agree with you, but contradiction is, that in case of this MiG kit, you provided only a complaint and haven't looked for, or posted for solution. Simple dry-fit of those intakes immediately shows they may be tricky to assemble. I have, in response to your complaint, provide a solution that I didn't even try yet but should reasonably work. And I think this is one of the main reasons why your post triggered such a response as it did.
-
fuel tank is ok, but for an accurate full loadout you'd need either 4 R60s or 4 R73s - I've only seen mixed R60/73 loadouts for show purpose.
-
OK, I find this article rather amusing. Even more so, because you build a rather big number of models per year and I would expect "approach" with a little more skills. Thing is, There's at least two good reasons why Zvezda decided to split the intakes in such way (and IIRC they did the same with their Flanker models). One is, that with two piece intake, you can mould intake walls much thinner if you would make them one piece. OK, you're right, they could be made out of two halves with the split down the middle but what would that solve? Nothing. What it would add, would be a nasty seam quite visible down the middle of the interior while the current solution practically hides the seam from the prying eyes. And truth be told, it is completely easy to glue those intakes together. The fit is really good and all you have to do, is fix one piece to lower body of the aircraft with some tac material (like Blue or UHU Tac) so they will hold steady and then attach the other half and glue and let it settle in the desired position. And that if, you're clumsy. I haven't used Tac on any of my two MiGs that I've built so far.
You're mentioning you've lost a lot of detail, but simple truth is, there are just a few straight panel lines in those areas, so again an easy rescribing job if you mess things up.
The cockpit side parts, while you correctly defined are designed to cater for different subversions, while not perfect, don't require much putty if you glue them correctly alligned. And with water soluble putties on the market, it's an easy and clean fix.
I really don't understand what your take on this kit is? I think it's a great kit and best MiG-29 on the market in 1:72 scale. You are complaining about things, Zvezda designed so to improve the kit and might need a little bit of modelling skill to overcome and at the same time wish for Matchbox thickness??? I bet you can still find cheap Italeri and ICM Fulcrums models on the market and maybe build those and leave the accurate ones to us?
And if you're not convinced, here's my take on the build:
-
I've got no other solution but do something about it 😄
Yeah, the camo got my attention as well.
There is a slight step, maybe a bit too pronounced by shadow in the pics. But there's one as well on the real deal, but in most cases, there's also the black antiglare painted part going by that line as well...
-
Thanks guys!
A small update.
Decals have been applied. I am using Begemot decals and I am having two issues with these. First is that some red stenciling, especially those with red X symbols are printed slightly too bold and thus became too noticable. The second issue is the clear carrier film. I am getting a strange effect on some stencil decals, that slightly resembles silvering, but it's not. Actually the colour behind the decals looks slightley brighter than the surrounding. Never happened to me before but it is what it is. I'll fade the decals anyway so I hope in the end, it won't be too noticable.


Amigo Models exhausts were used in this build and they were painted in various shades of Mr.Paint metallic paints. I am quite satisfied with the result; current look is a bit vivid but after the wash, I am quite certain, the heat stained effect will be properly restricted.


-
Thank you!
I've used Mr.Paint lacquers - MiG-29SMT Light grey, Light Ghost Grey FS36375 and Medium Grey FS36270
-
Didn't VF-114 arrived on station after the Desert Storm?
-
Well, I think I can safely say, most of the painting is done at this moment. Bring on the decals!


Ilyushin Il-102 - the last Sturmovik (update 20/04/2020)
in In-Progress Pics
Posted
Here she is. Took a while but I am satisfied with the result.