


Sean F
-
Content Count
26 -
Joined
-
Last visited
Content Type
Profiles
Forums
Calendar
Posts posted by Sean F
-
-
-
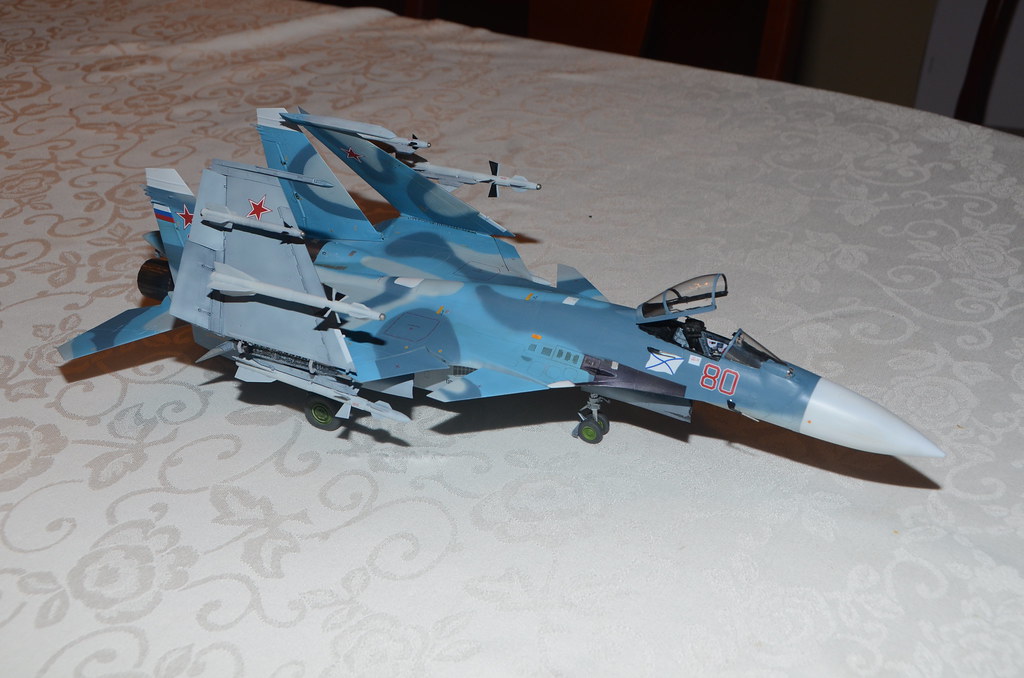
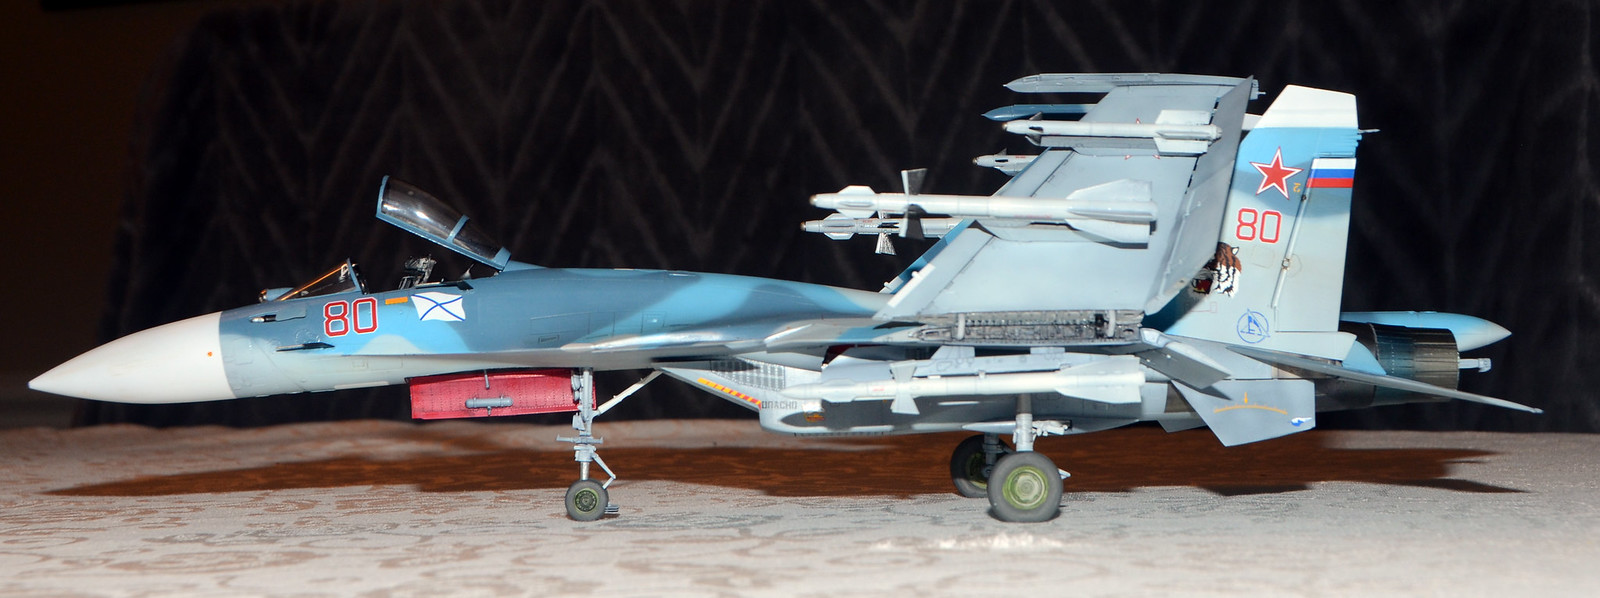
Pretty much done at this point. I took some finish photos, and then realized I'd not put the pitot tube on the front. It's a brass piece, but supposed to be black at the base and chrome at the front and that's not going to get done tonight. So here's where I am and should have some final photos I'll post in the display case later.


-
Having almost finished the Kinetic kit I'm wondering if I should have paid better attention to this thread and waited for the Minibase version. Already from the test sprues in the link above it appears like it would be much easier to assemble than the Kinetic. I do have a lot of paint left over...hum..... 🙂
-
16 hours ago, AlienFrogModeller said:
Sir,
Well done, you obviously meet your intent! That's a beautiful paint scheme and you did it justice! I too also bought it for the paint job and for the sheer size for comparison next to my Hornets...you have inspired me to get to mine soonest!
Cheers
AFM
Thank you....it does look nice in the photos and from a distance....50/50 paint we called when I was racing cars...looks good at 50 miles per hour and 50-feet away!
-
Thank you for the compliments all!
I did not get my photos uploaded, but I think at the end I'll just summarize all the area's you need to show extra care to get things together correctly. The wing fold parts simply did not fit as they came off the sprue and I had to do some surgery to get them the work.
I got the weapons gloss coated at the end of the evening and will let those dry for a few days. I did find my Mig 31 decals so I'll throw some on to add some interest to the plain weapons and get those mounted. Need to weather the tires a bit and get the gear pieces and doors installed. The model is kind of at a delicate stage right now with the wings mounted so it might be slow going.
Thanks again for all the kind words. It does look nice in the photos and the paint job really stands out. But their are a lot of little issues on the kit if you look closely. Certainly not a win, place, or show at any contests but I knew at the start that would happen. Really just bought this for the paint job!
-
I tried to remove the front gear and the whole well came loose!
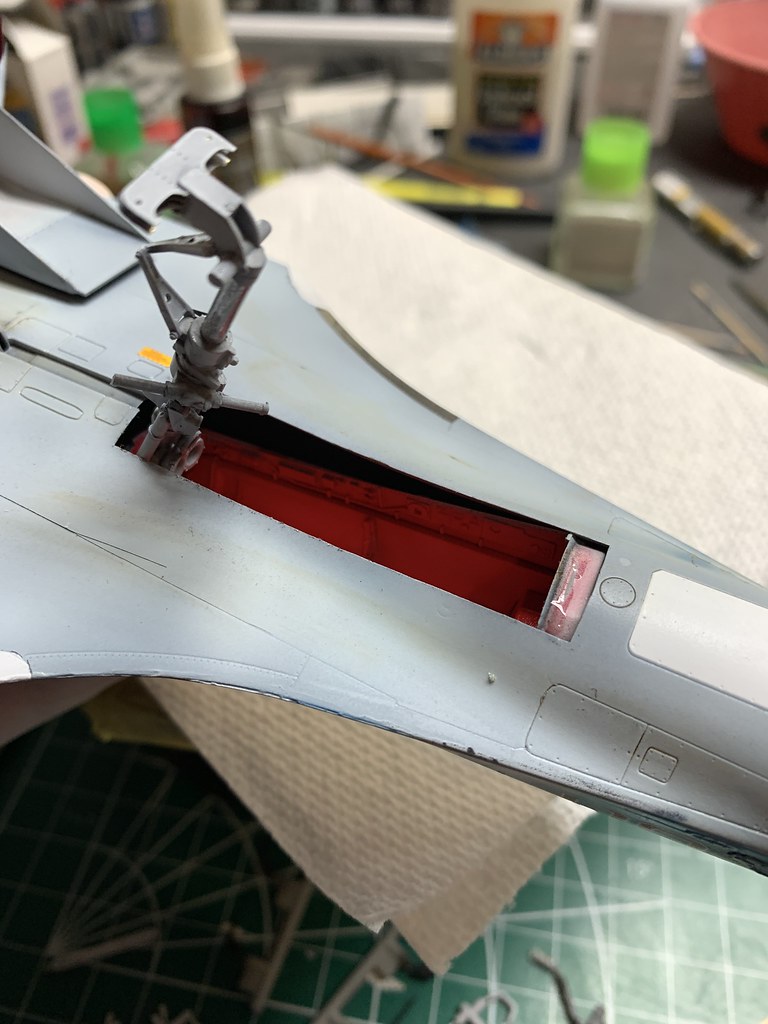
I managed to get some superglue inside the well and get it reattached.
The missiles will not fit with the flaps down....
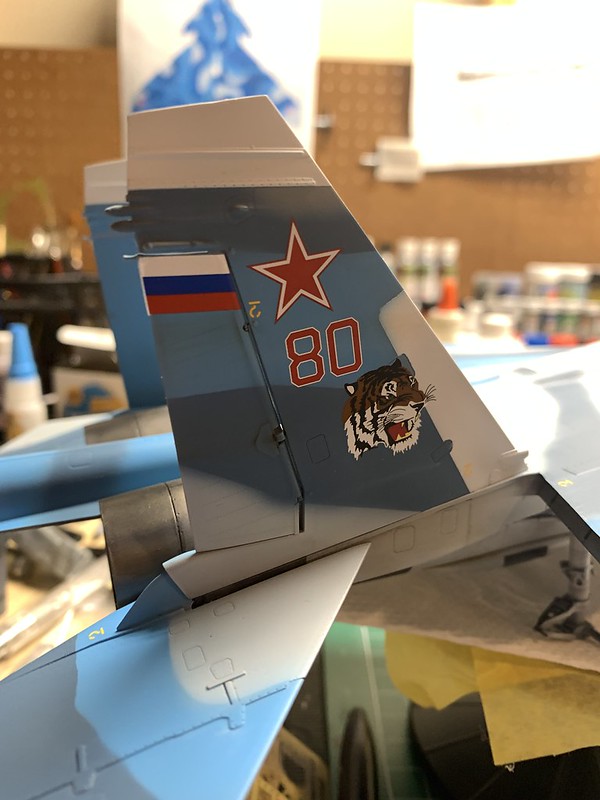
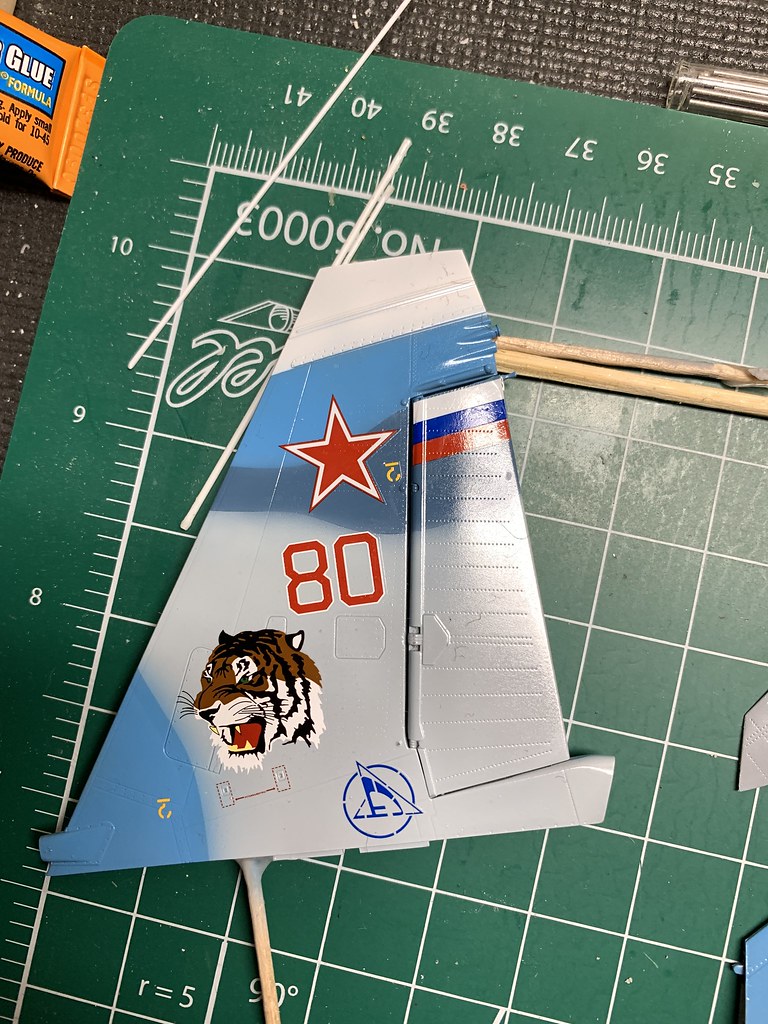
Installing the tail!
Getting the wings installed folded was a PITA... I'm on a mobile but when i get to a keyboard I'll provide some tips to get them on...


-
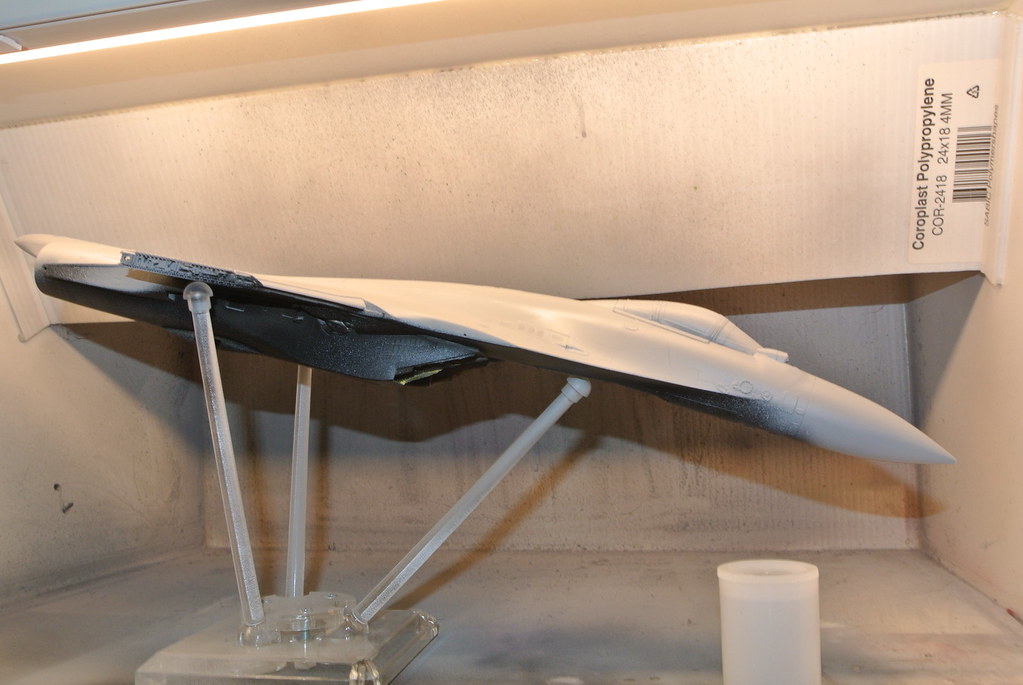
Flat coat is on and I've partially assembled a few things. Although I did not glue the gear in place and I realized last night I need to remove it. Still need to attach a few things and it will be easier without the landing gear sticking out (folded wings, tail, elevators, etc.). In the home strech.
Liquid mask worked perfectly around the canopy and windscreen.

wings are not actually attached, I just placed them on the fold mechanism to see how they look
model table is a mess (like always at the end of a build...stuff just seems to be everywhere! 😉 )

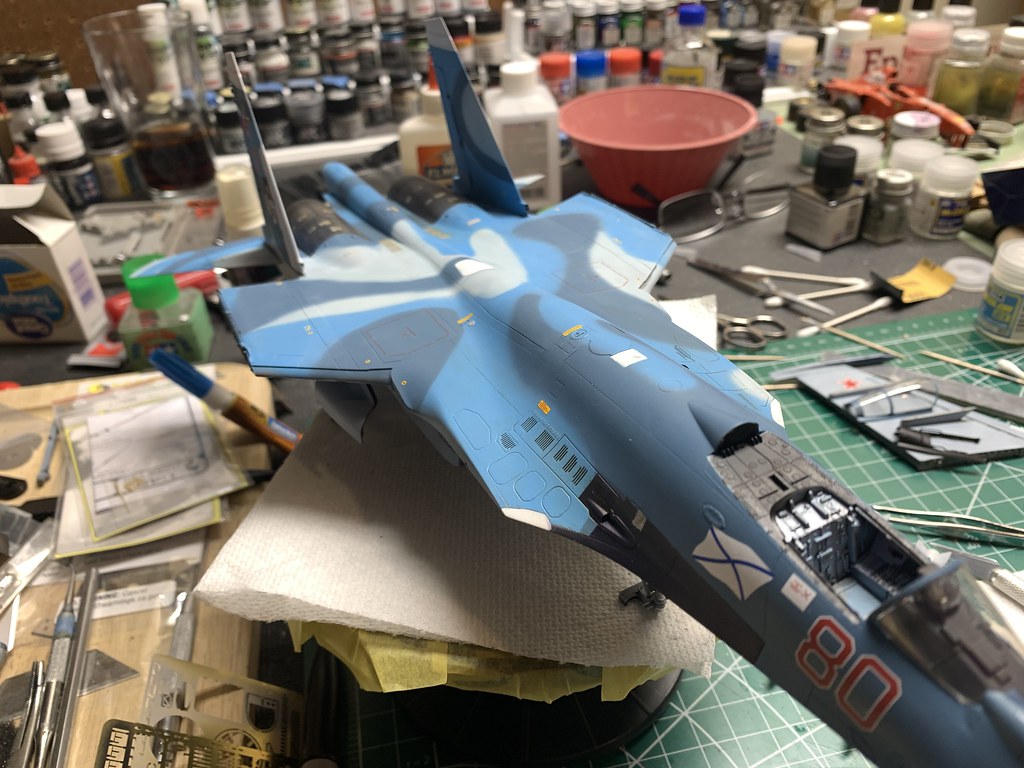
Tail is not attached, just slotted in place.
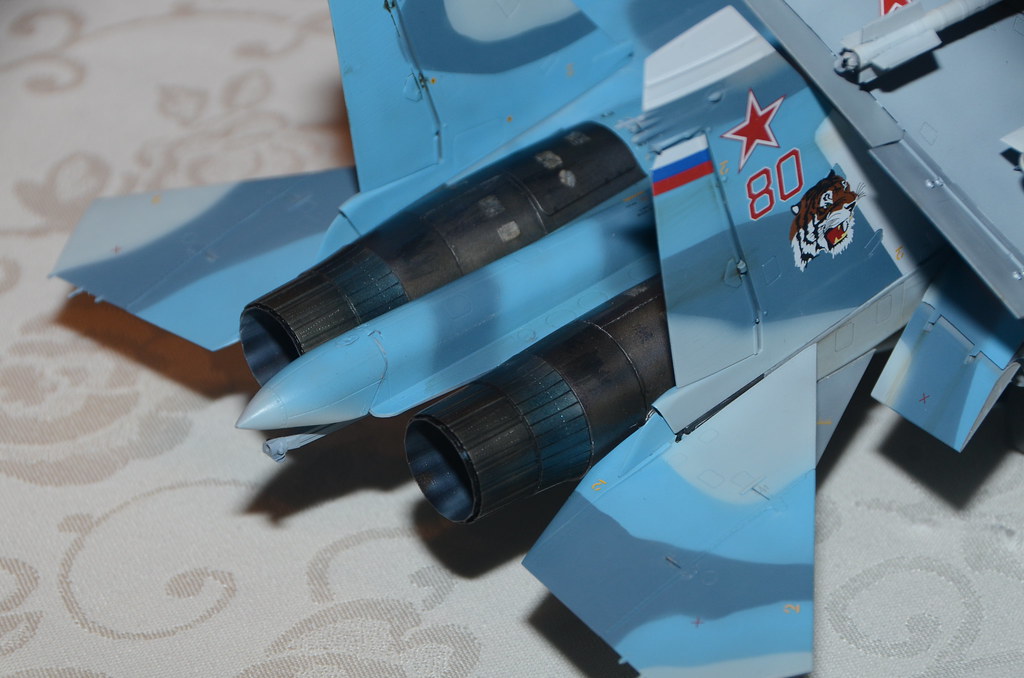
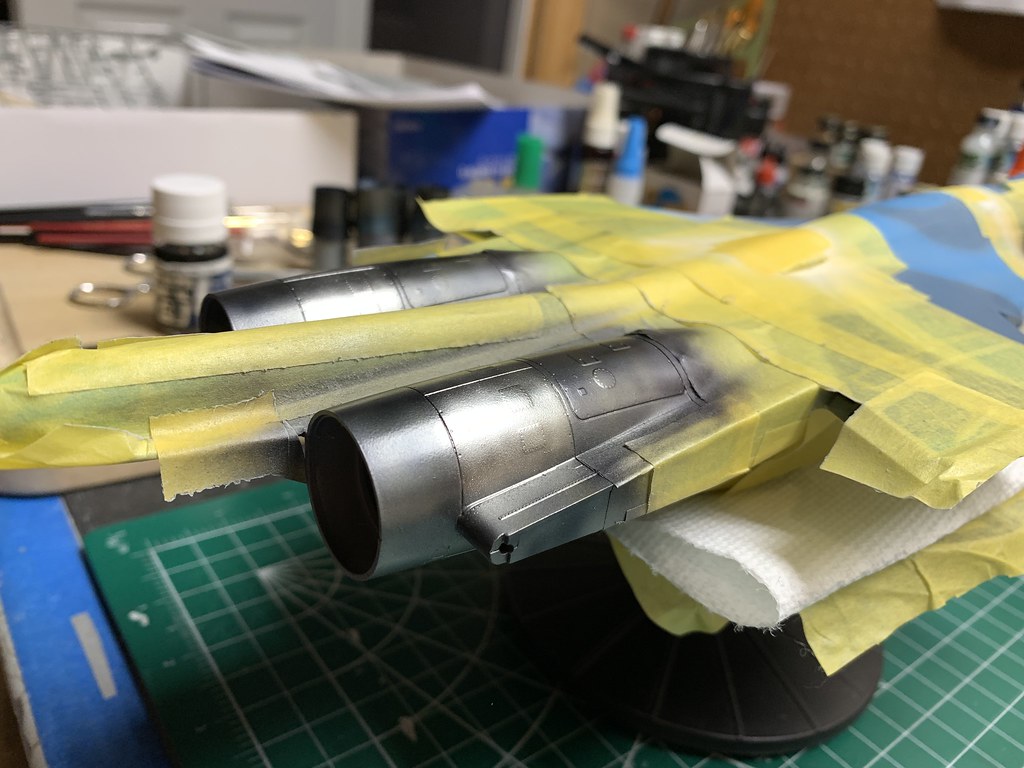
engines are kind of meh...should have just left the silver doors alone. Tried to to it by hand an mucked it up. I suppose I should really go back and mask and do them right.

painted the missles with some black rudders (?) - sorry no picks. I think I have a bunch of decals left from the AMK Mig 31 build so I may gloss those and apply some random decals. They just look kind of boring plain white.
-
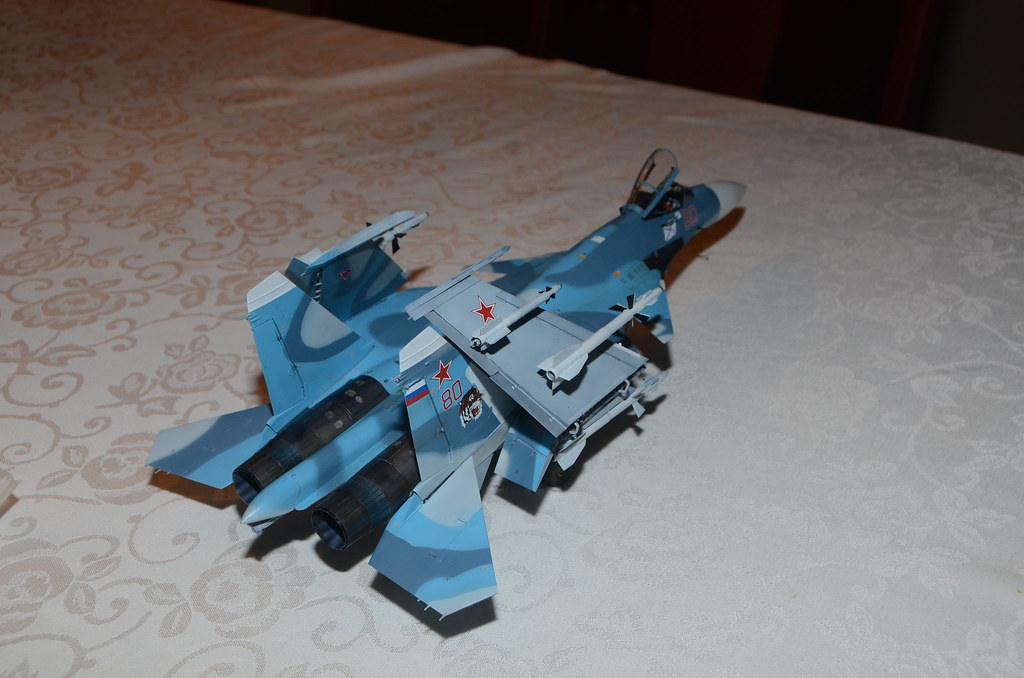
Got the gloss coat and decals in place. Not going to do a lot of weathering on this one. Also cleaned up the gear and got the missiles are painted. No decals included for the missiles.
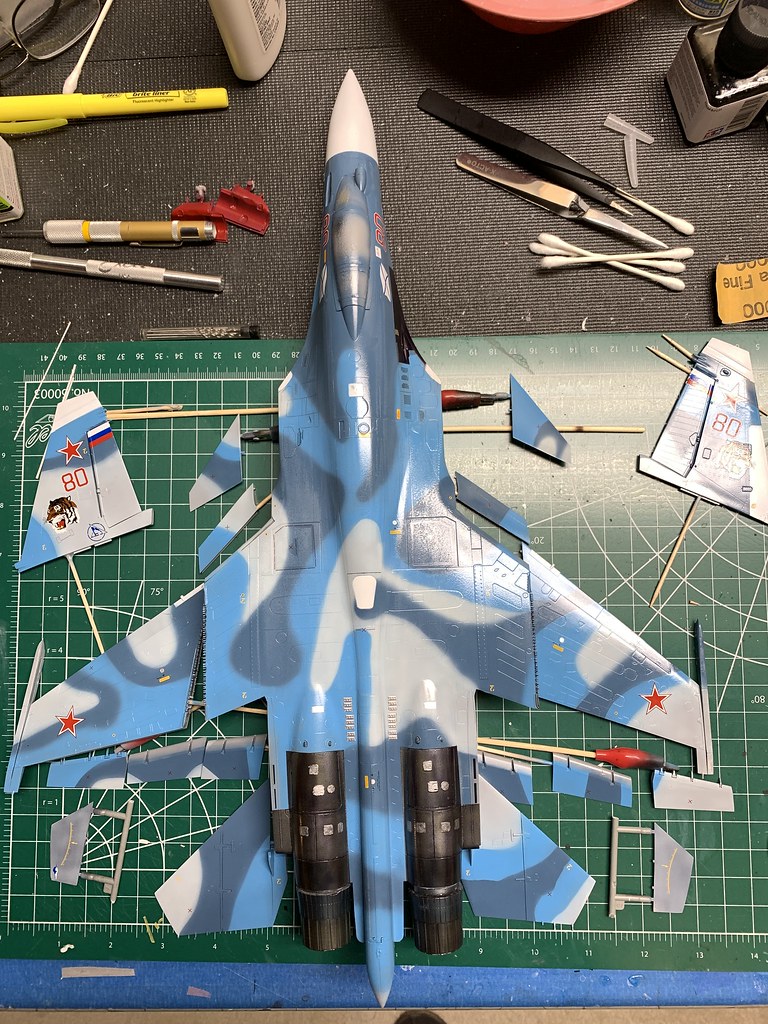
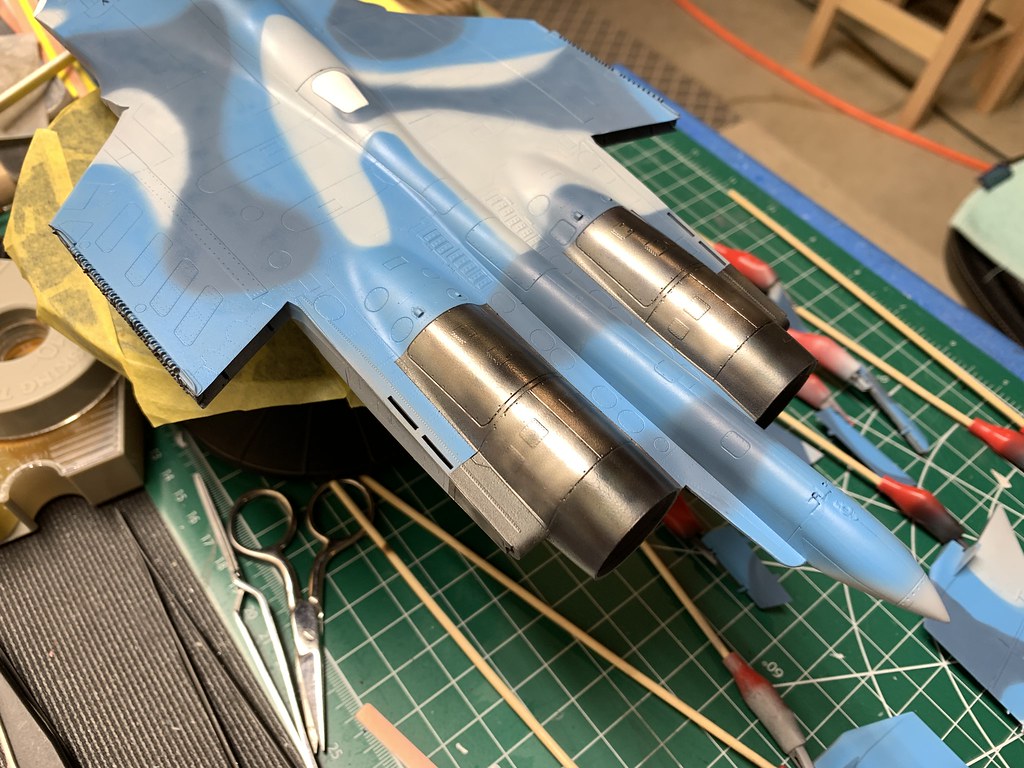
I threw the engines into the back but obviously not all the way just to see how they look.

-
18 hours ago, RichB63 said:
Correct.
And to be clear, all F-4A/B/N (plus most RF-4B) airframes had the thin wings/thin tires.

Its entirely possible that little bulge is a stand alone part you attach to the wing and not molded as part of the upper wing itself.
-
I just realized I need to paint those access doors a bright silver color!
-
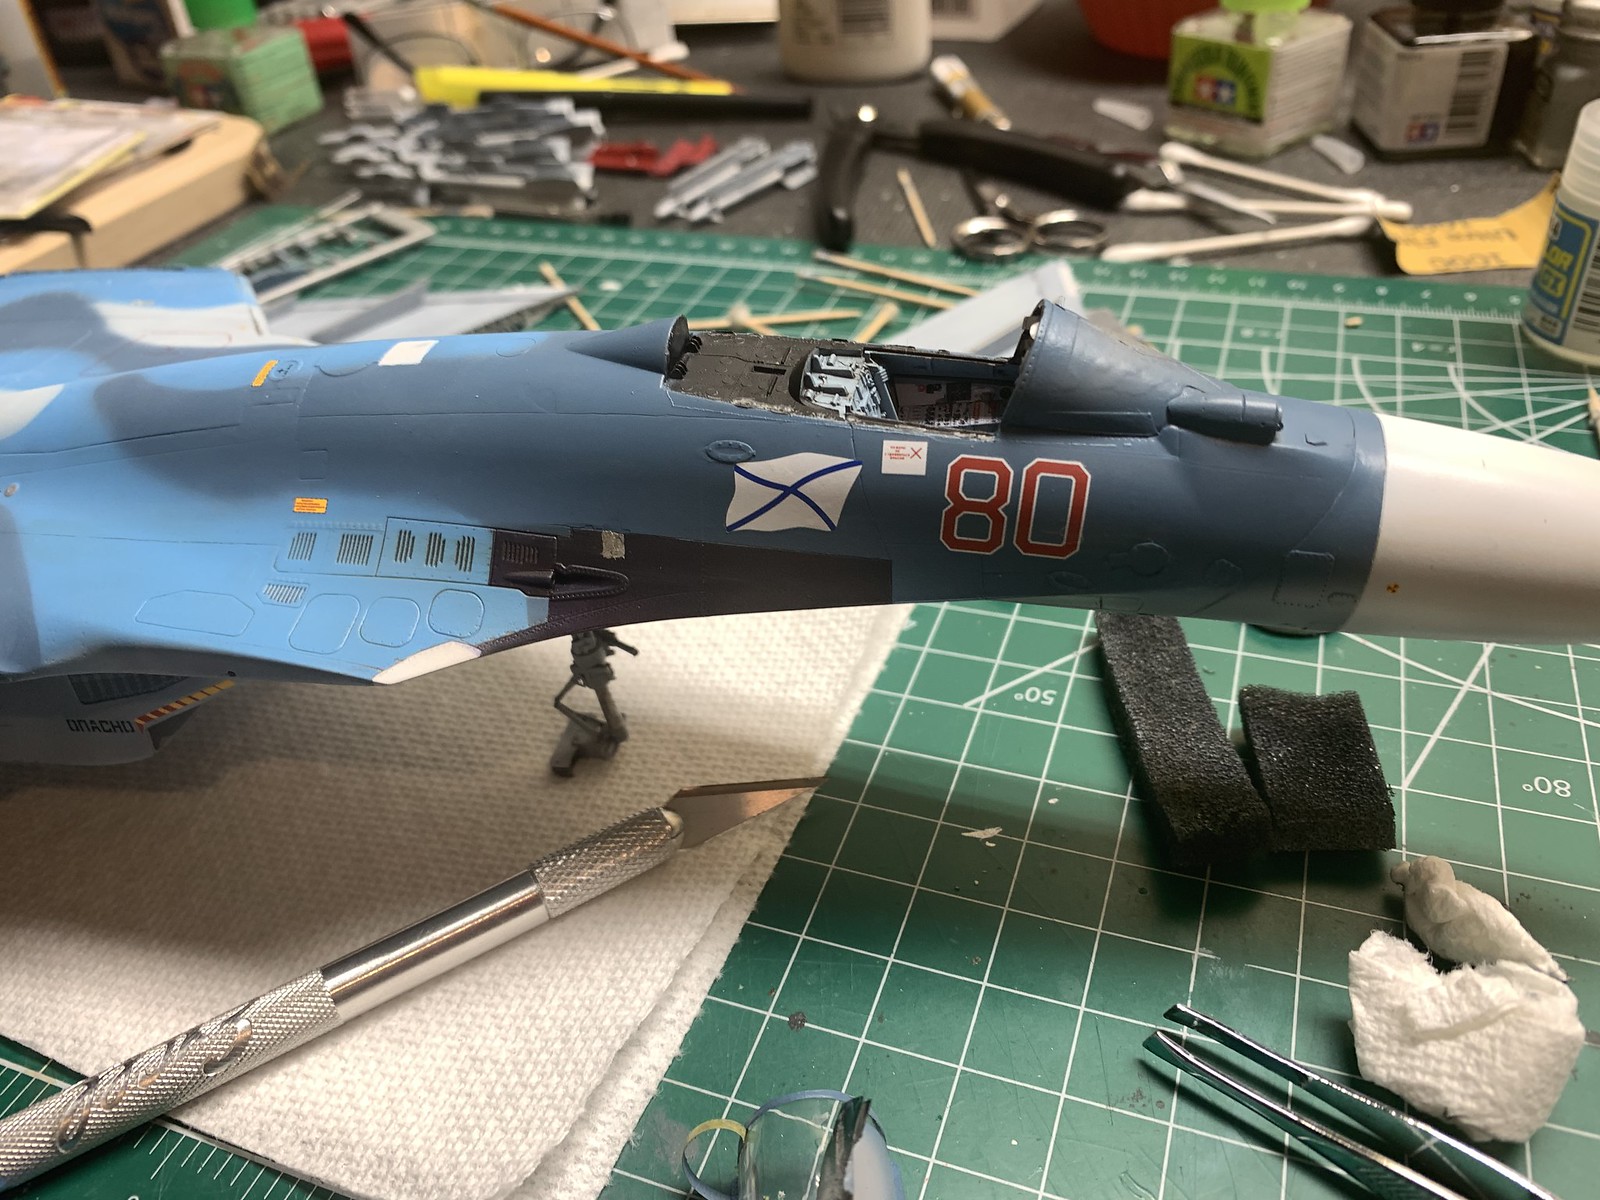
I swear this thing is fighting with me like no kit I've ever built!
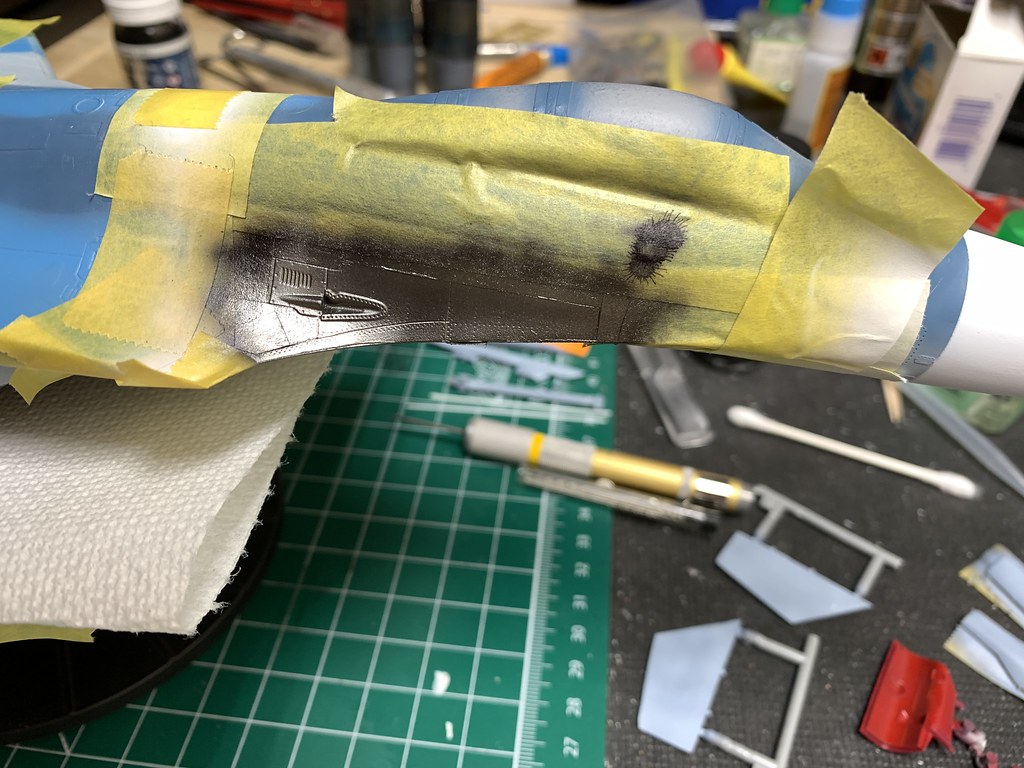
This is the third chunk of paint thats lifted. You can see another in the dark blue just above thie one in the metal. Ive never had this happen!

I, might just "weather" it and move on.....
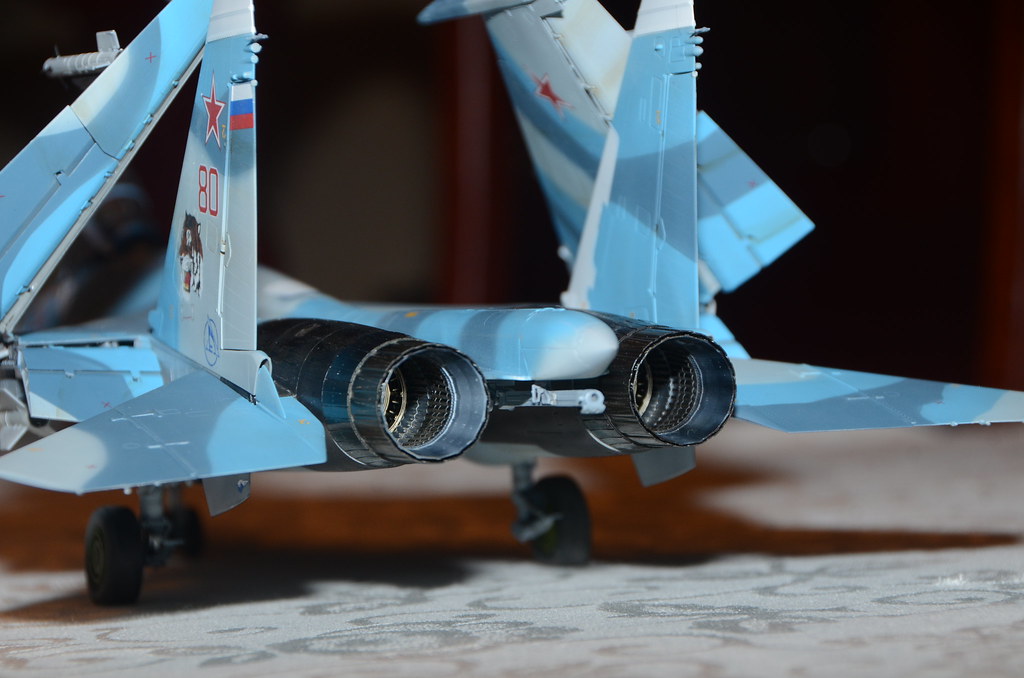
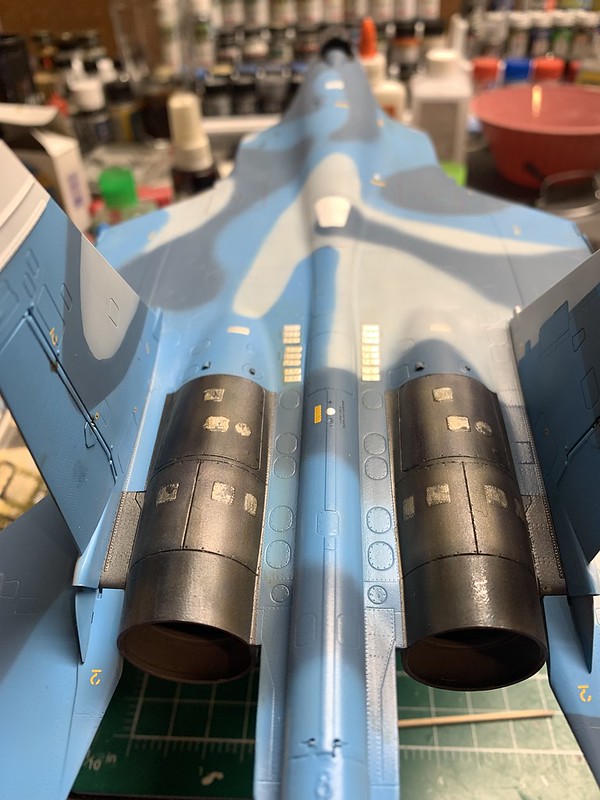
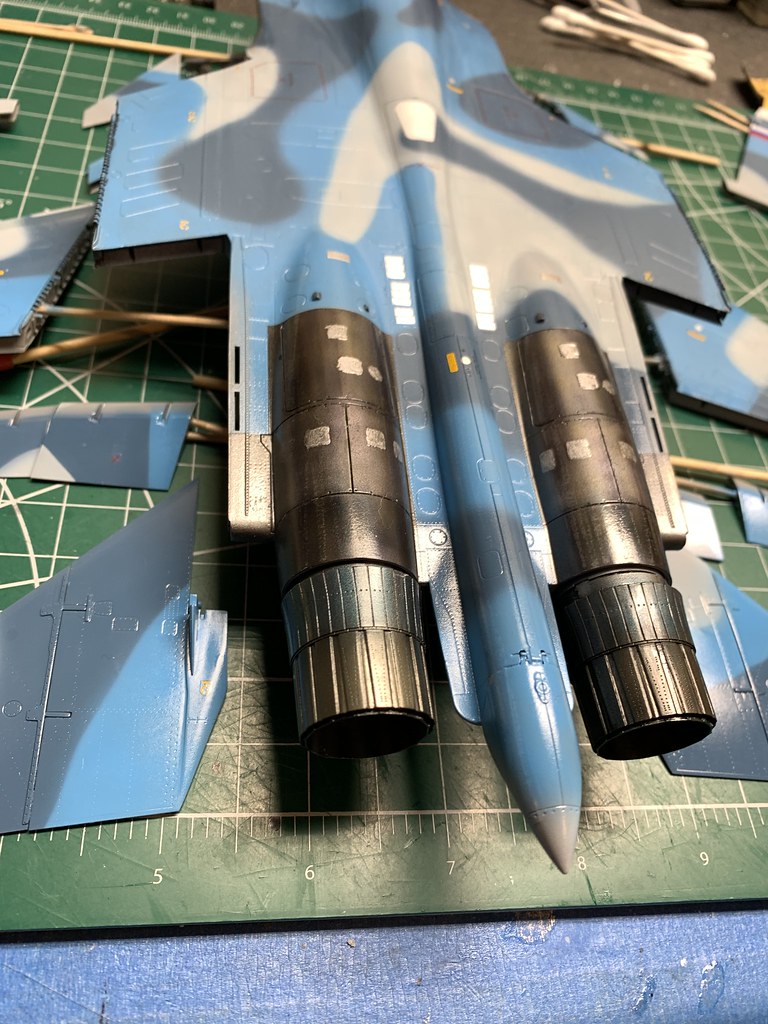
Got the engines done. Gloss coat, weather, landing gear, armaments, seat and cockpit are still left... Typing that actually kind of depressing....

-
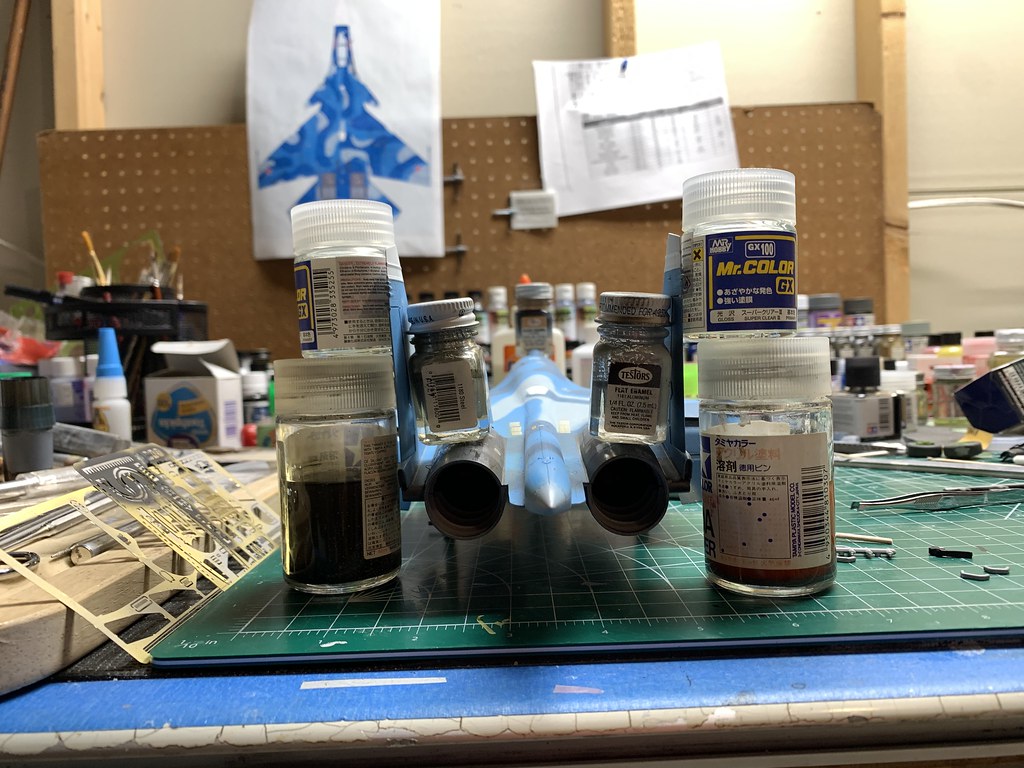
Odd thing happened when I was spraying the Alclad II. When I put the first coat of Aluminum down, strings were shooting out from the surface of the model. They did not stick, but it was like the paint was drying in the air. I have a scrap model on my paint bench and no matter the pressure or distance or flow, little strings of paint were coming off the surface. I’ve never encountered this before.
I cleaned up the mess, dumped the paint out of the air brush, dumped some lacquer thinner thru the airbrush and tried the other Alcad colors (titanium, jet exhaust, airframe Al) and those all sprayed fine at my normal settings (18 psig). The AK metal colors sprayed fine as well.
I’m assuming something happened with the Aluminum color and it’s now bad? Anyone seen this before? I used the same color on the exhaust nozzles and it worked just fine.
-
Not really a huge Phantom guy but I'm sure I'll buy one.
Is it me, or do the hips look a little wide....haha Just kidding!
-
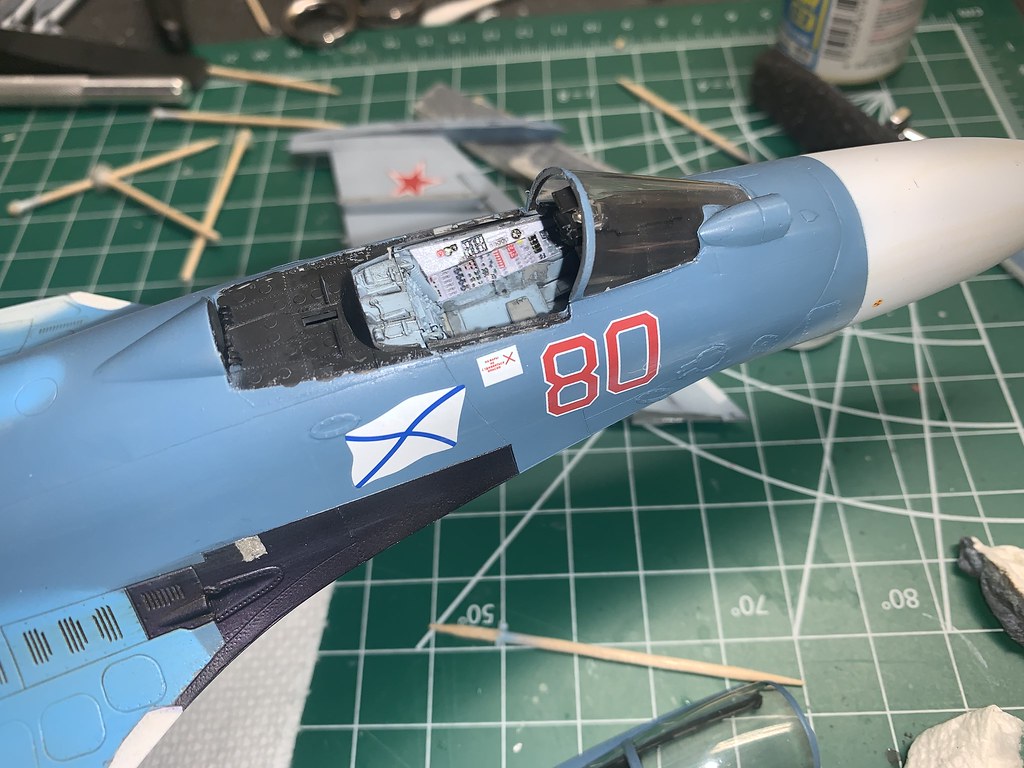
Small update. Got the white panels and nose painted. Then got the black gloss on the metal areas and started the engine covers. Letting it dry now and will do some clear blue and red tomorrow.

-
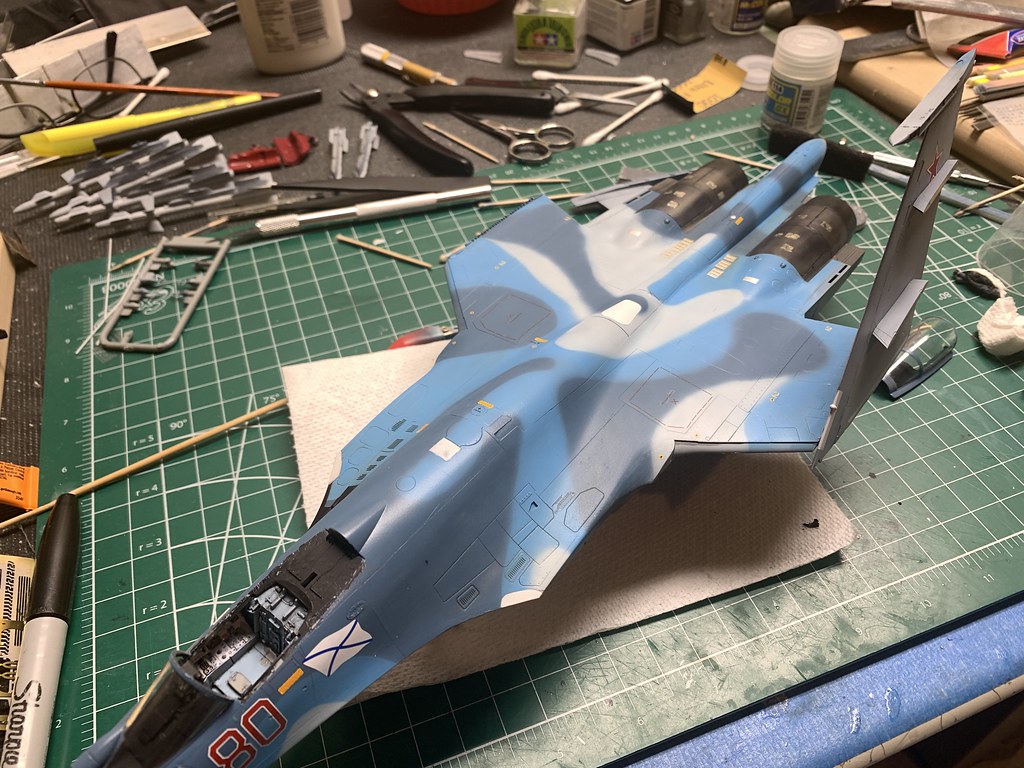
Not really much of an update. I went back and used the Blue-Tak stuff to mask and redo the camo scheme. Gosh, that was the most mundane task I've ever done in regards to modeling. I seriously thought about putting it all back in the box and starting something else...cut blue tak, roll out blue tak, stick blue tak on model along camo edge...cut strips of tape to mask behind blue tak....ugg...so glad that's over!
I did end up with some ghost like patterns so I pulled the tip off the airbrush, put it at lower pressure and cleaned up a few spots. Overall it looks OK. Need to go back and touch up the dark blue in a few spots. Still need to add the white nose and panels, mask and paint the gun panel and engine area's. Then onto the landing gear and weapons.

Thanks...hoping to rap this one up in the next week or two....probably three at the rate this is going! Although the hard part is done now.
-
On 1/6/2021 at 4:05 PM, legend1 said:
i did a lot of dry fit and the position of the gear legs looks ok to my eyes
Looks good!
-
I know I should mask thr paint, just not looking forward to it!
Thanks for the tips on the silly puddy. I read that and blue tack also works.
-
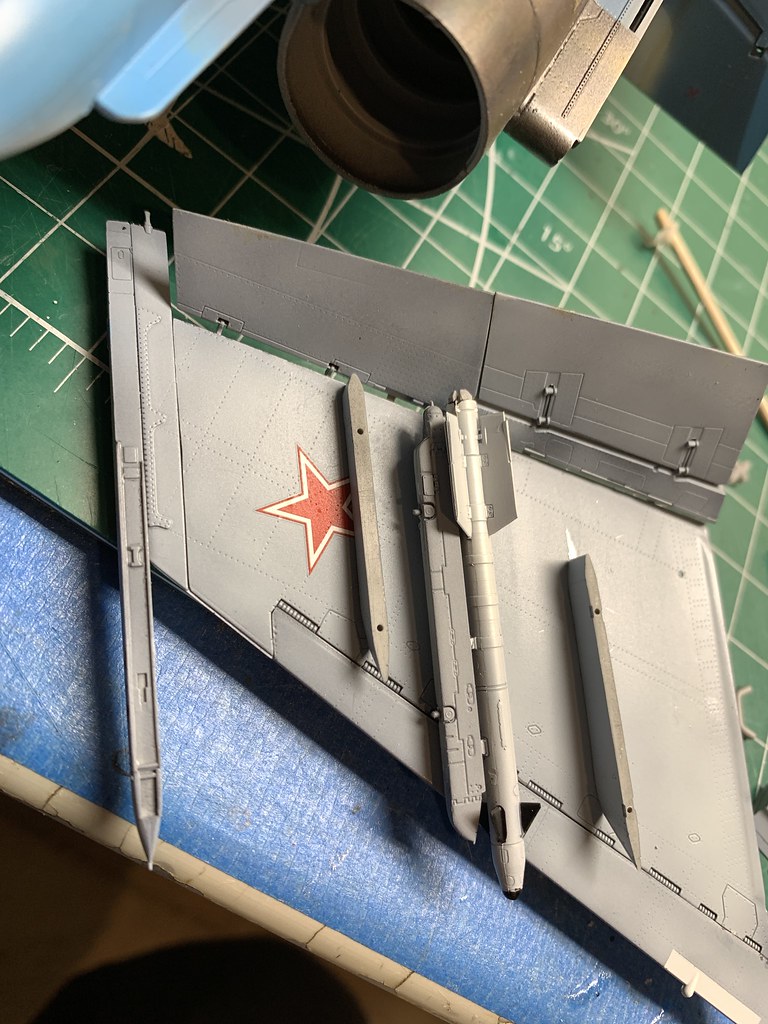
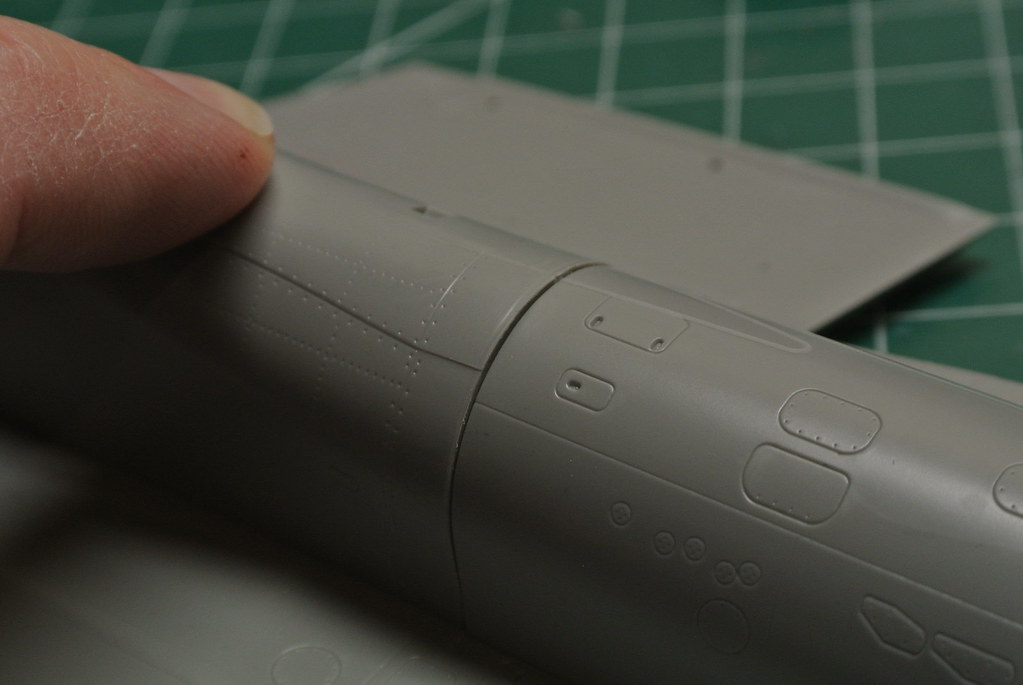
Make sure and read the link I put above as well.
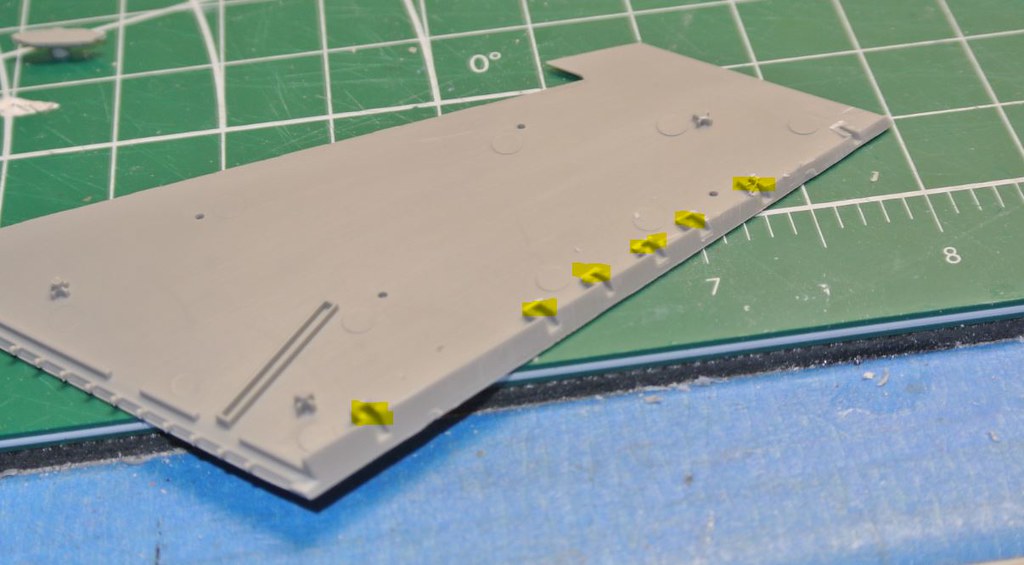
Here is the wing area I mentioned earlier. You'll need to grind/sand down those highlighted tabs where the flaps slide in to get the rear of the wing to fit together without a huge gap at the back.
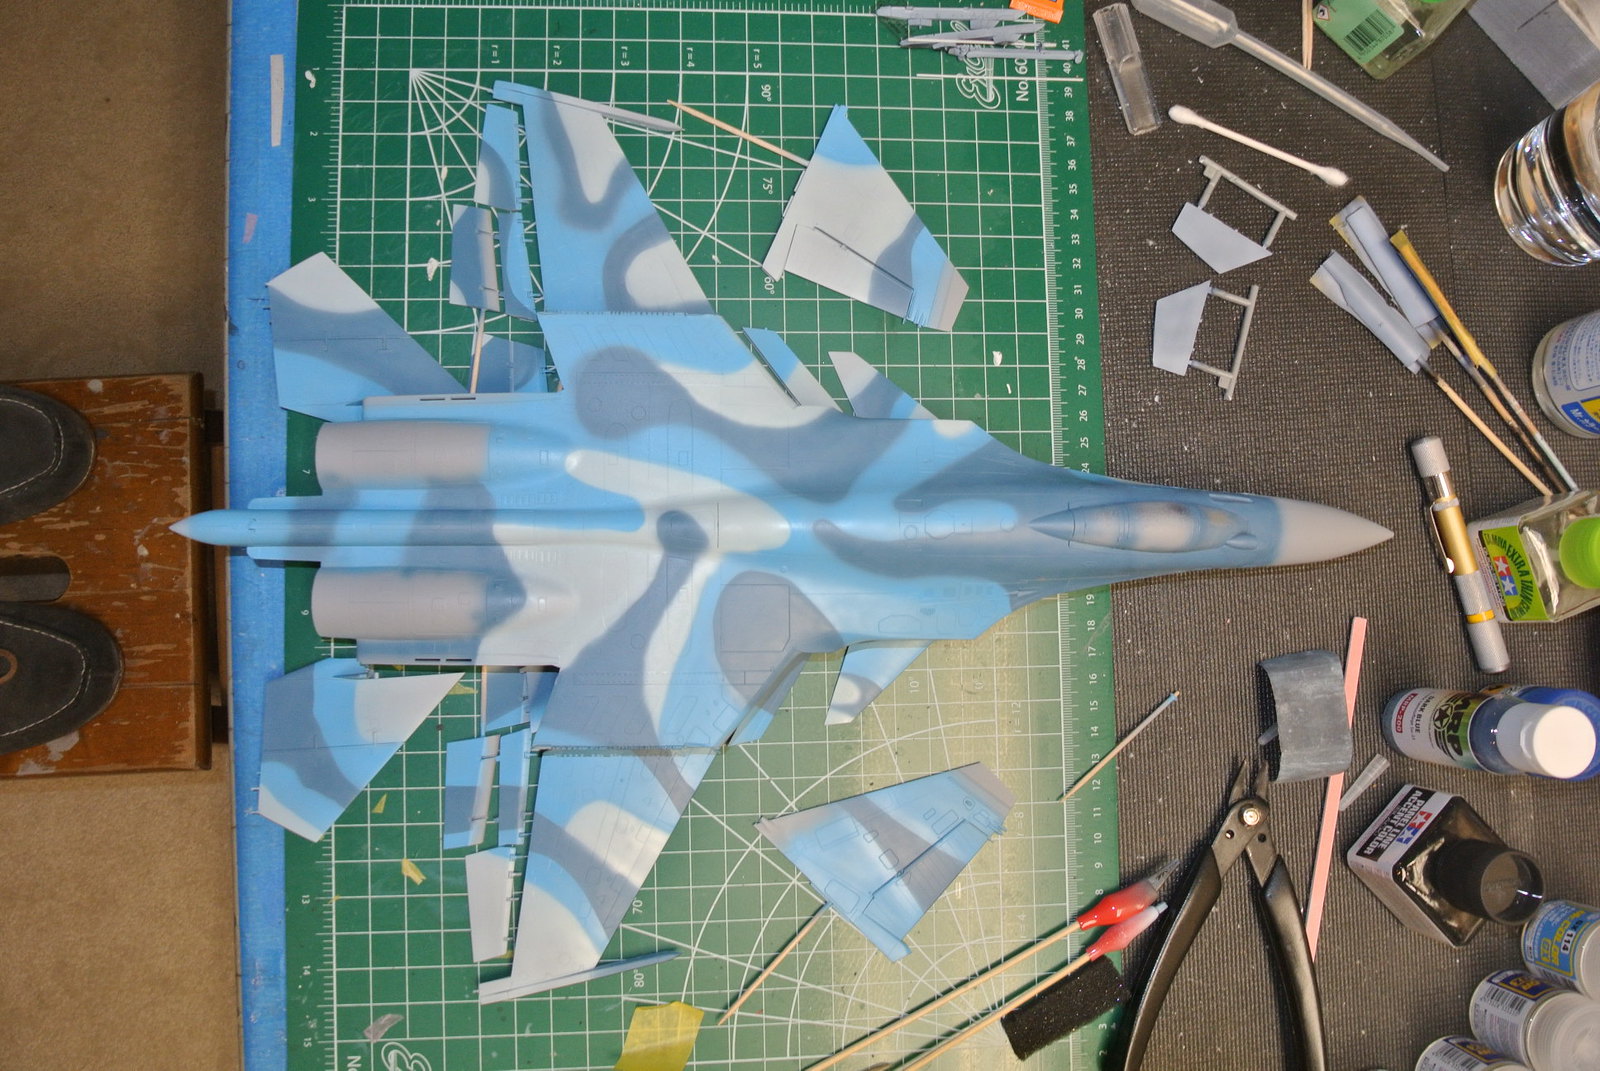
Here is everything primed and the grey coat put on the underside and top areas. I laid it all out to get everything lined up for the blue colors.

Here are the engines just slid into place. Resin on the right, kit on the left
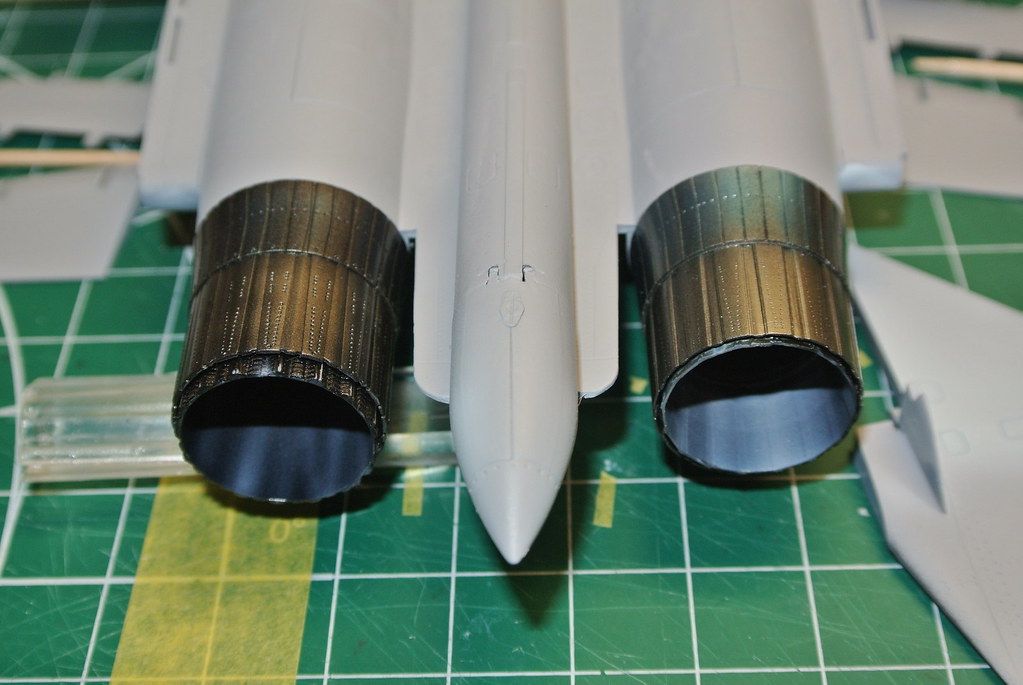
Resin Version;
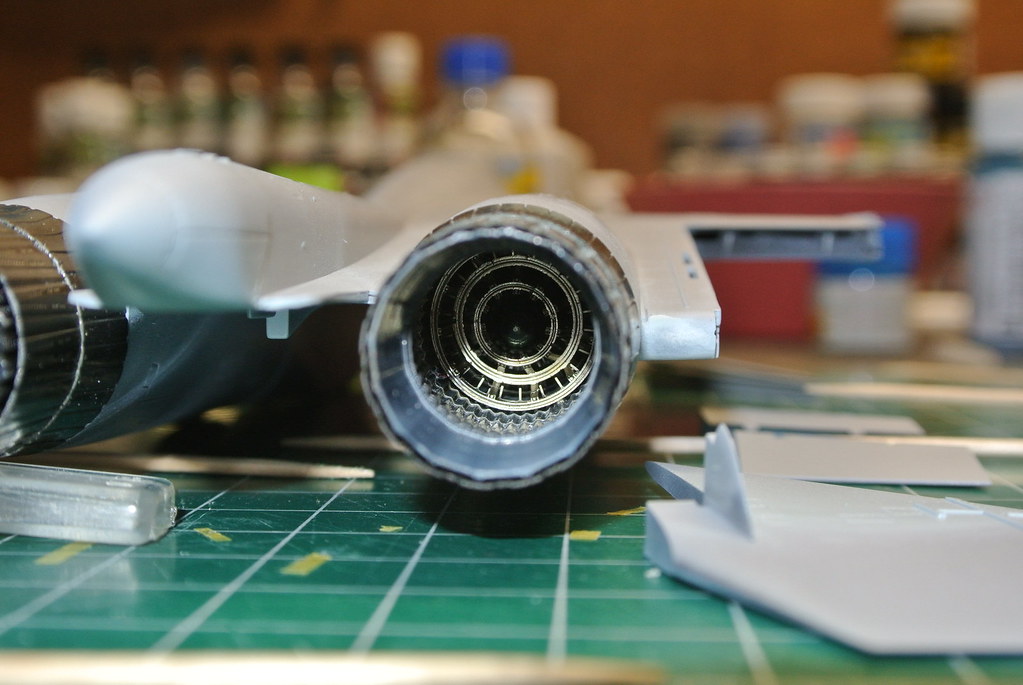

Kit Engines;


Honestly, if you can get the photo etched flame holders together on the kit version, they do build up and look pretty good with some shading/weathering. I've actually note done any shading yet but will get to that.
I actually did a freehand for the color coats. I know, not really correct but I did not want all the extra work of masking. This is a few days after paint and I went over everything with some wet 1000 grit to get the bumps down. I've go to go back over all the colors again to clean up some overspray and a few areas the sanding took down to the primer. Also had to clean up some of the panel lines.
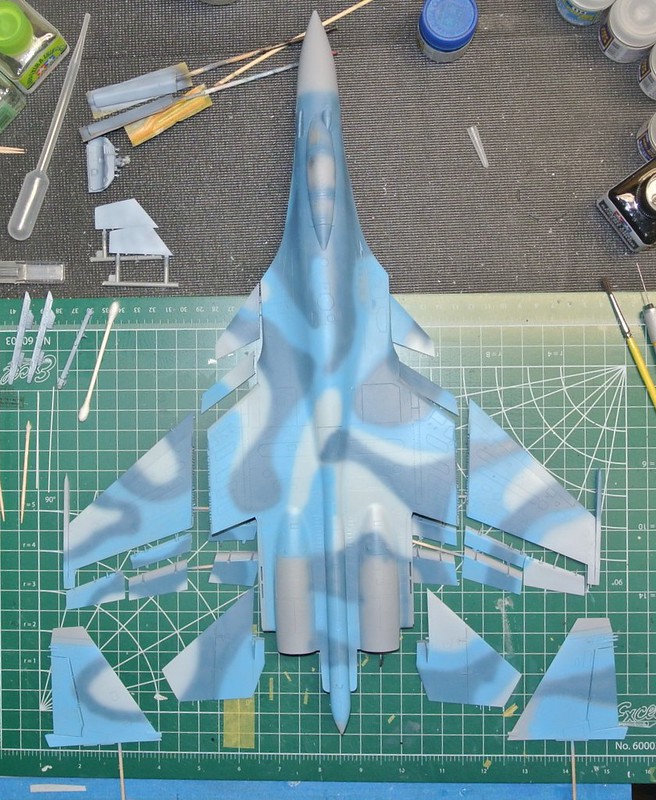
I may go back and mask of the top colors to get the hard edge they are supposed to have. Not really looking forward to all that extra work though so I may skip it....:)
-
I've built that kit. It's a really great kit.
The landing gear is very difficult to get right (at least it was for me). The instructions are a little vague because of the isometric view they supply. Dry fit a lot and make sure it all fits or you'll end up with some diagonal wheels!
-
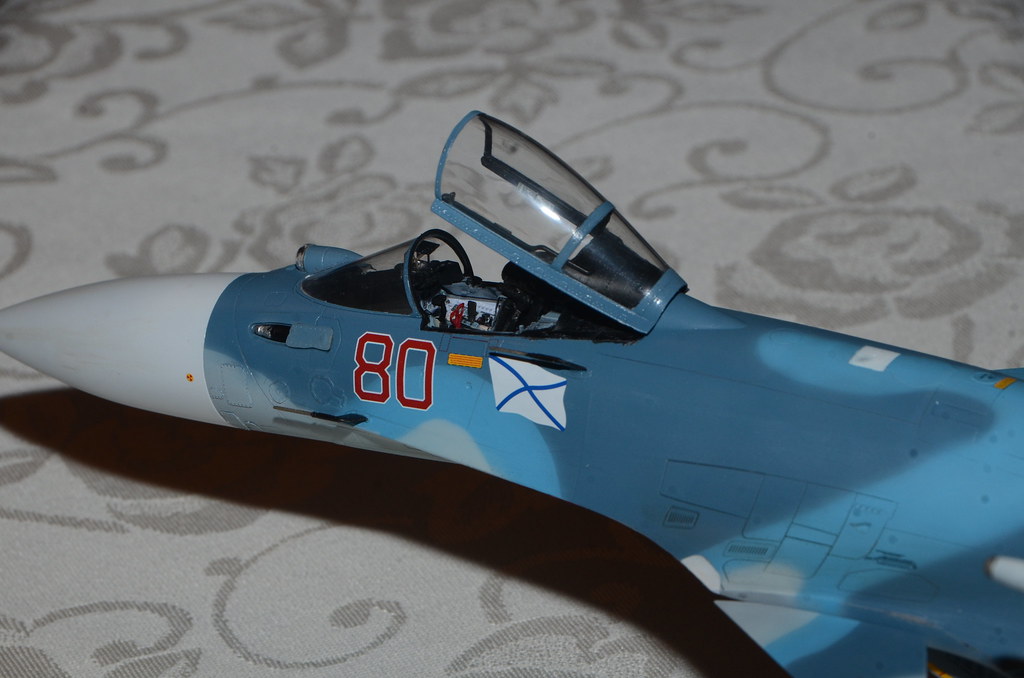
A little more progress. Got the HUD built up and installed. Came out OK but it will be mostly hidden under the windscreen anyway.

I managed to get the windscreen on the front and canopy to fit better with a little sanding of the frame between them and a little off the back of the canopy.

Then the IR seeker did not really fit to well so I sanded that a bit to get a better fit up front as well
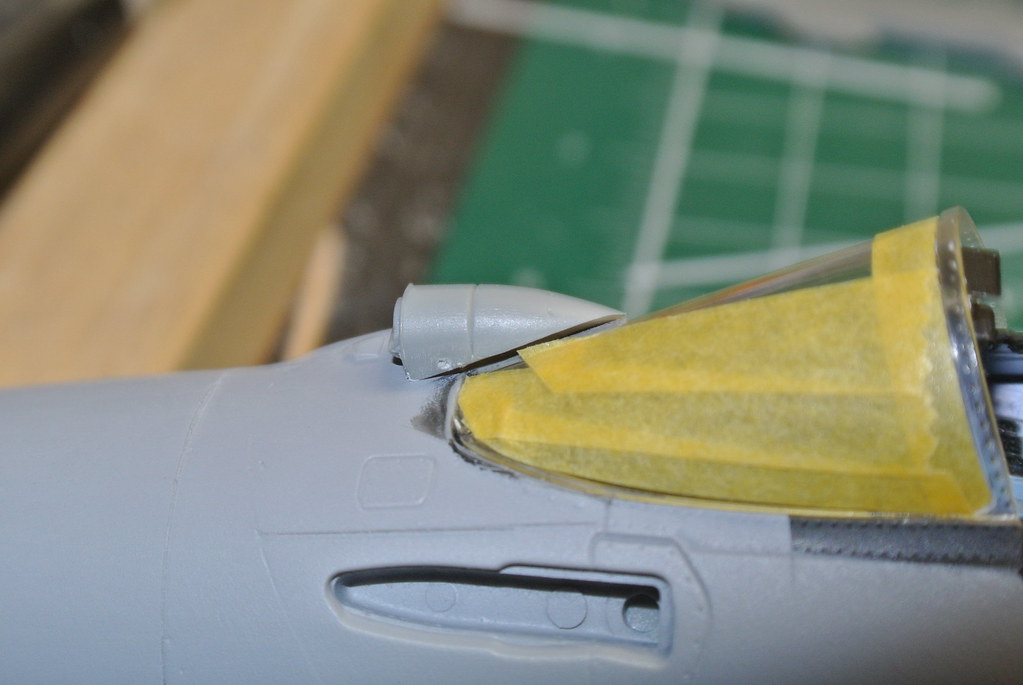
Did you know you can use Perfect Putty on clear plastic and not damage the clear parts? Just let it dry for a minute then use a q-tip in water to wipe of the excess. I actually just figured this out. I knew it was water based so I figured "why not"...sometimes things work out!


I put on the windscreen and then mounted all the loose parts for primer. I put black Mr Surfacer 1500 50/50 with Mr Leveling Thinner on the bottom and then just shot Tamiya Grey Primer out of the can on the top. I typically use the black Mr Surfacer for most primers applications, but I've did a model in the past utilizing the black but the topcoat was blue and it just killed the blue (made it way to dark as you'd expect). I did not want to kill the top colors on this one so I primered in grey on top. I was not to concerned about over spray, just wanted a good primer coat. I'll go back later and sand it smooth.

Please fell free to comment, good, bad or indifferent. I'm not building a show winner here (would required just way to much effort for this kit) and you will not hurt my feelings! 🙂
-
Some more progress...
The windscreen is a little large and causes the canopy to ride the back hump. I usually install the windscreen and then glue down the canopy with white glue and paint the kits so everything is even and matches on the plane.


I could sand down the windscreen so it does not overhang into the canopy but that might remove too much detail. I'll figure something out....
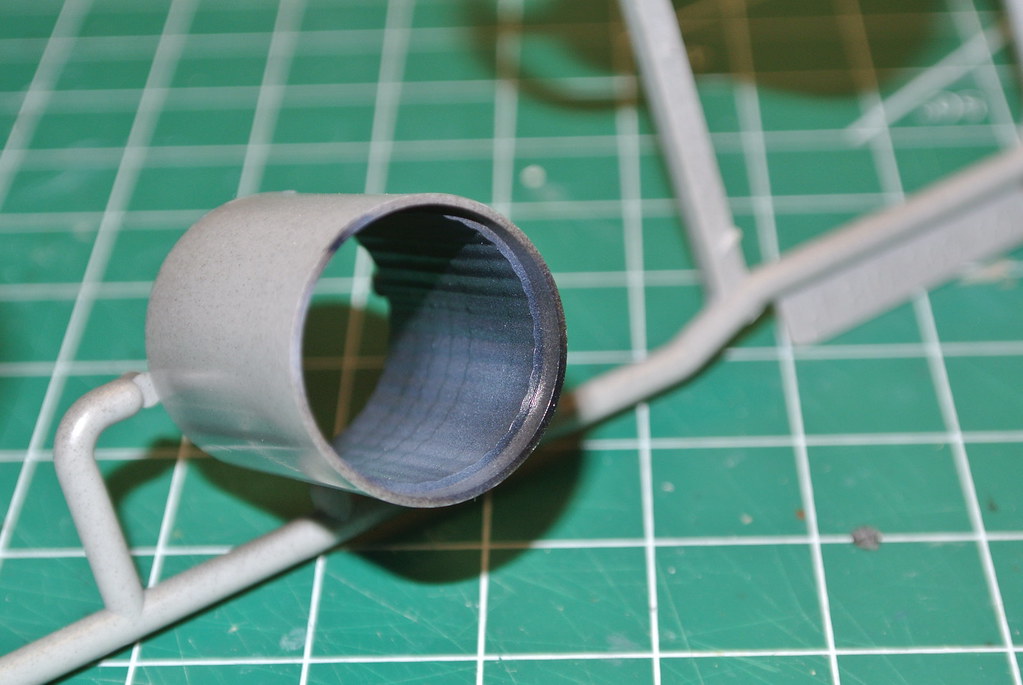
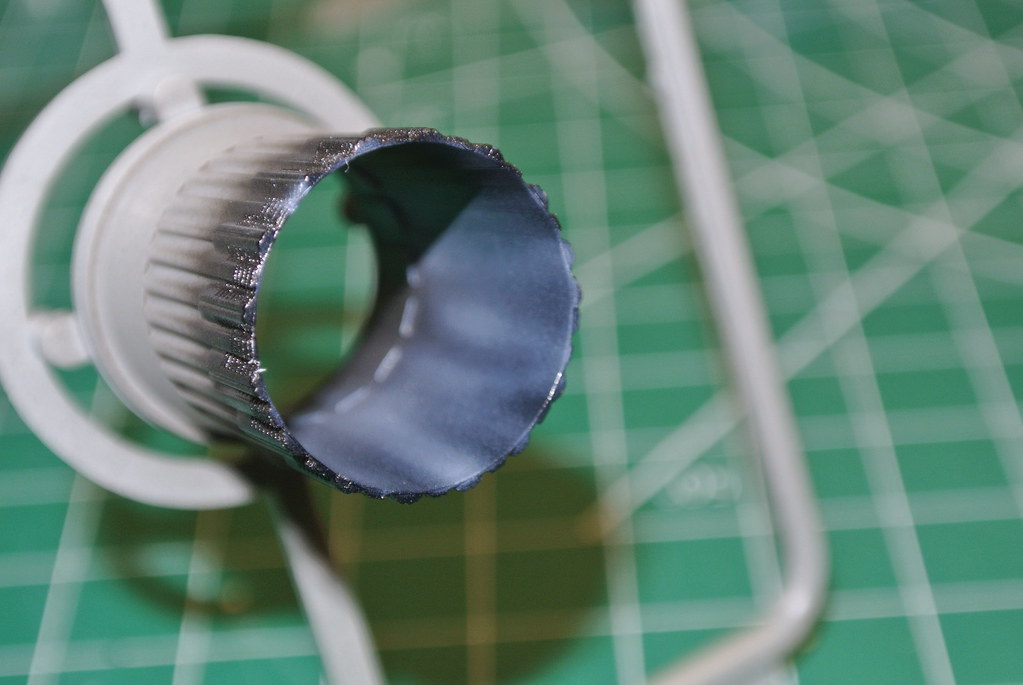
When you attach the front intake of the engines, they do not align and match up with the the lower fuselage.
A quick sanding of the flat surfaces that attach at the lower fuselage give a much better fit and no need to sand down the round misfit in the above photo and have to rescibe all that detail. Just be sure and only sand the back area. I sanded down the entire length and caused a slight misfit. But still better than it was.

I glued attached the front and rear fuselage portions together and left the wing and canard area free of glue for the time being. It was too difficult to try and hold it all together and glue/rubberband/clamp....also, I hadn't decided if I was going to fold the wings or not and you have to glue in some inserts between the wing halves if you plan to do the wings folded (I later decided to fold the main wings).

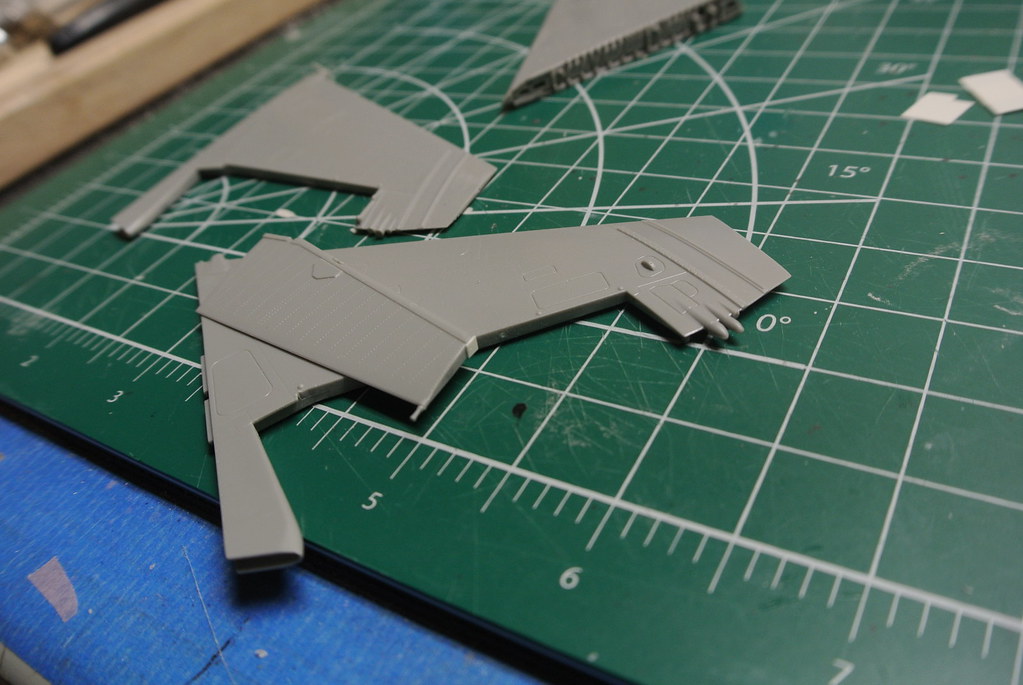
while that was drying, I moved onto some other area's. The the instructions show the elevator parts go together like this....
Obviously wrong...swap the parts from what the instructions show and the look like this.

I did not want to display the air brake open, but when closed it does not exactly fit correctly into the space in the fuselage...

So I added some layers of sheet styrene...and a few layers of bare metal foil to get just the right thinkness to lift up the air brake so it fit more flush with the top
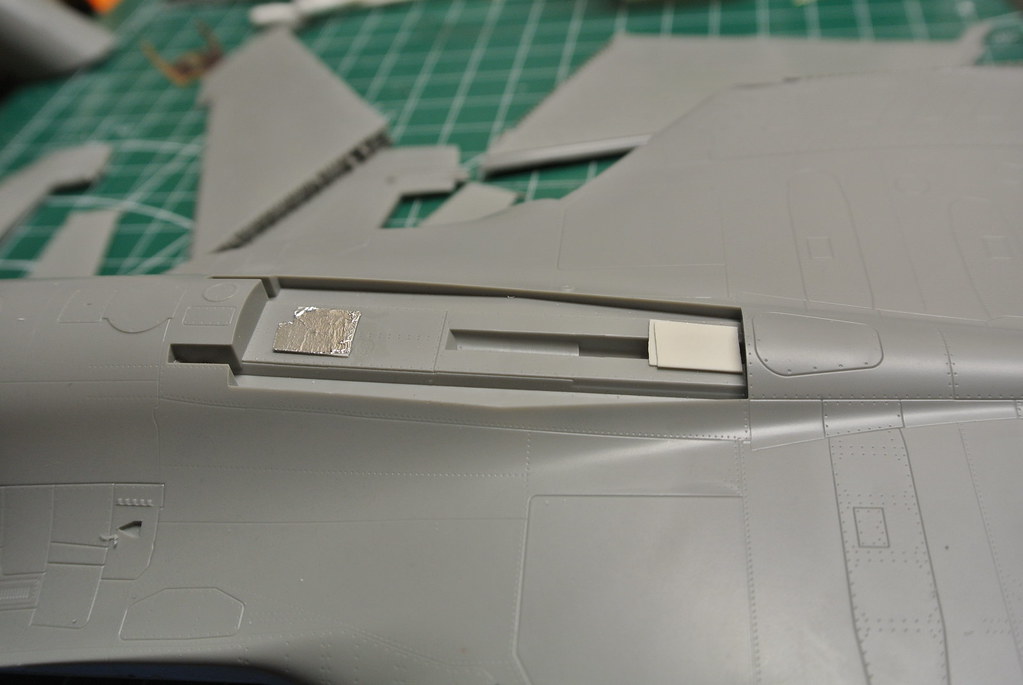
much better

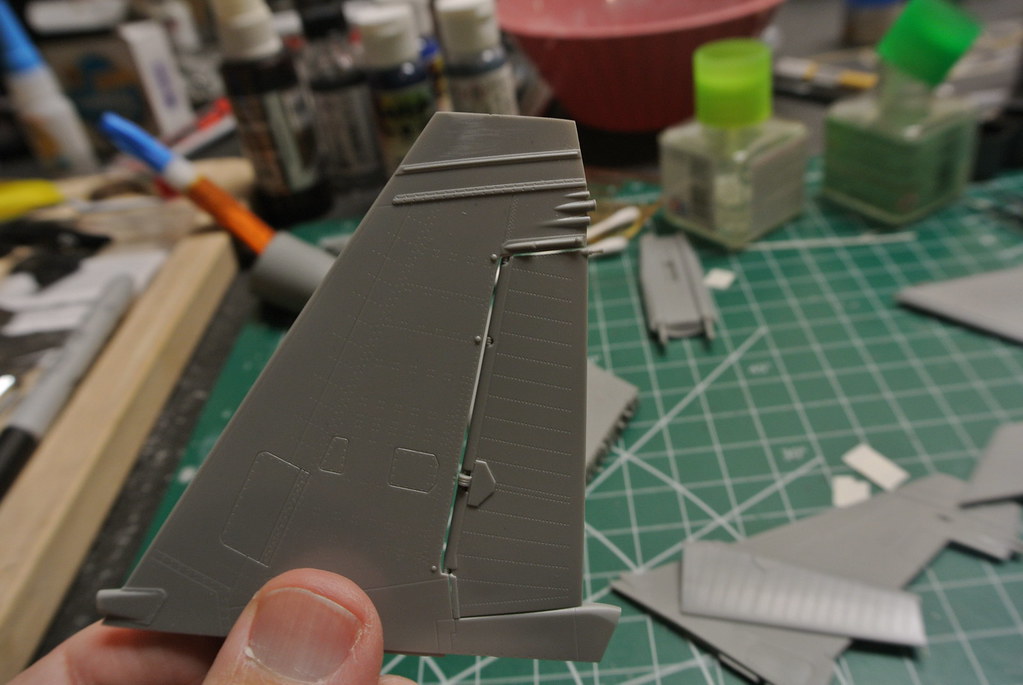
I didn't get a good photo, but the back rudder portion does not fit well (again, just no positive connection points) onto the tail portion. The round front of the rudder butts up against the flat cut out in the tail fin...not good
So I sanded things a bit, then put a small piece of styrene on the upper portion of the rudder to get a better joint to glue
I did sand down the styrene piece to be round at the front, but it give a much better fit and look of the rear tail/rudder area
I've got the wings assembled and will get those pics uploaded....there are a few areas there you'll want to sand away to get the wing halves to fit better but nothing major.
Overall its going OK...not the best kit in the world, but it will build up into a nice model once painted (the real reason I bought it in the first place!! 🙂 )
-
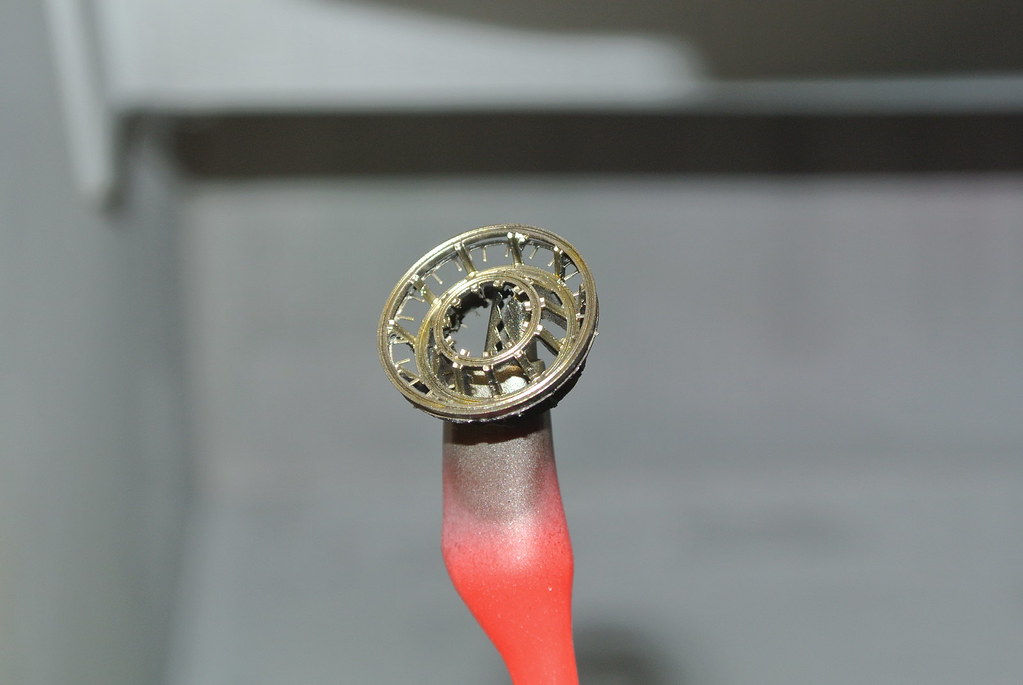
Here are the engine parts. I primed them first with MRP Grey primer, then Alclad gloss black, the a combination of Alclad Jet Exhaust, burn iron, Aluminum and Tamiya clear blue
RESIN first;

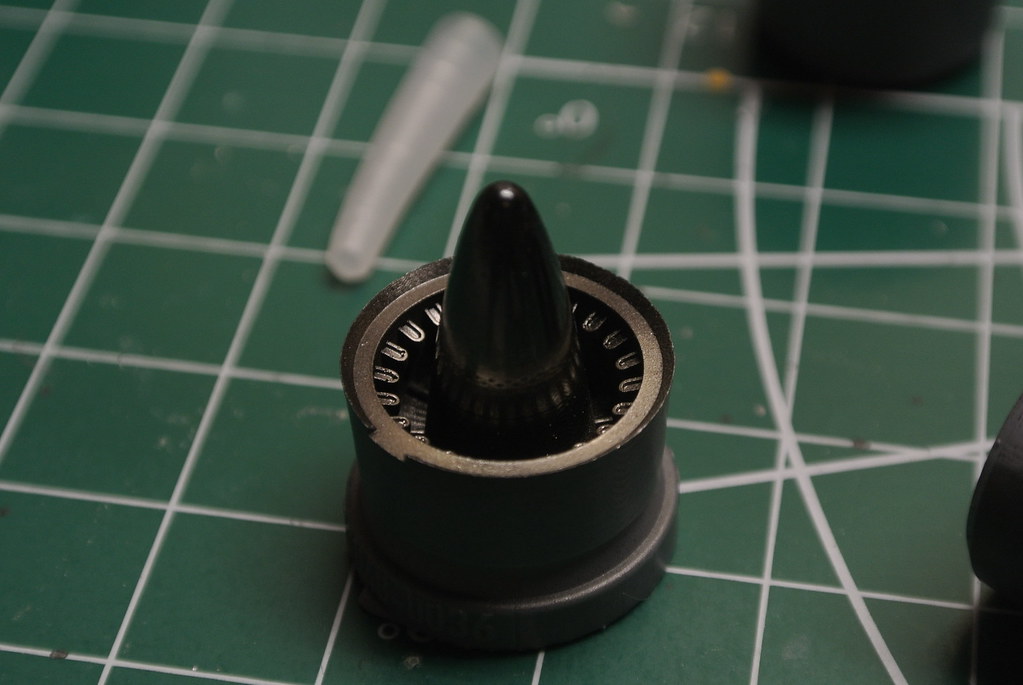

Kit Parts;

And here is the main wheel wells I mentioned earlier. Each sidewall is shown in the instructions to just butt-weld together..much easier to just install and glue in place. White MRP Primer, Tamiya Red and Alclad Aqua-Gloss as of now.

that's as far as I've gotten so far.
-
This is my first build thread, but not my first model kit. I suppose I should upload some photos of finished models in the Display Case.
Been modeling since I was a kid, got back into it as an adult then parenting took over (that and the home we lived in had no model space except the garage in the Texas heat which was a no-go!). Got back into modeling again in 2013 after we moved to a new home and been building 1-2 a year since.
So this is my build thread of the Kenetic Su-33.
Big thanks to BaconRayGun for his build thread here.
Lots of good info in his thread and some things to watch out for!
First, as he mentions, dry-fit everything, and I mean everything more than once. Their are some questionable engineering decision in this kit and you have to wonder what they were thinking. For example, when you assemble the main gear wheel wells they basically butt-weld the ends! No locating pins, no positive locking mechanism, nothing. Just butt them together and apply glue. You'll see below it's much easier to just insert them into the lower fuselage section rather than try to assemble them as stand alone items. I would compare this kit to the Academy F-4...it can be made in to a nice model, has some good details, but you have to ask what the hell were they thinking sometimes. The ejection seat is another area..just kind of wonky how it all goes together. Anyway, on with the kit.
A few starting photos and some progress. This will be a slow thread as I have a tendency to work stop/start a lot and will make a bunch of progress, then nothing for a week or two.
The BOX!!!!
Extra parts...

Disaster right away. One of the resin engine parts was chipped...I was thinking I'm going to have to fix this with some sheet plastic or something then I looked under the foam in the box and the chipped piece was in there!

A little superglue and fixed
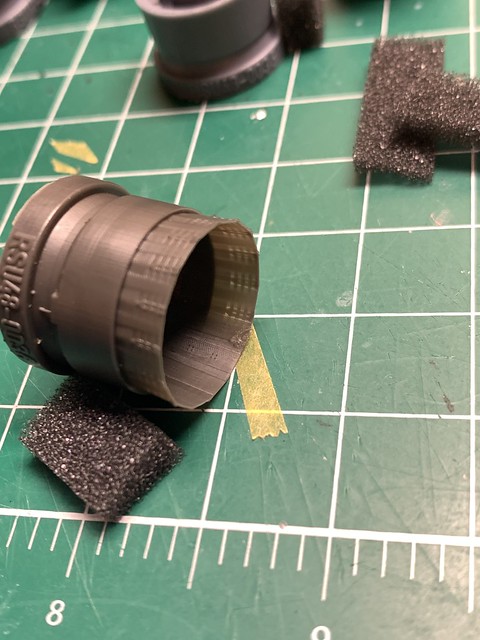
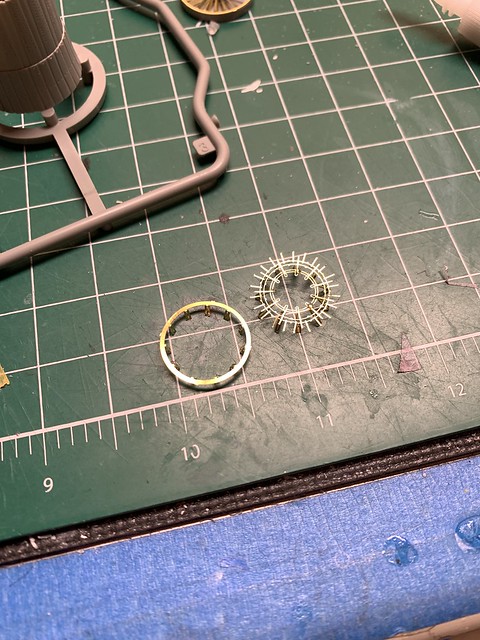
I decided to start with the engines and nozzles and build both the kit and aftermarket to compare them. The kit nozzles have some good details, but are not 100% correct on the insides. Also, the burner flame holders all all photo etch and I have no idea how someone could put these together...just a bunch of tiny brass fingers are supposed to glue together..yeah, right.

I just realized I have no photos of the nozzles I've already painted up and I started on the cockpit (I'll post the nozzles later).
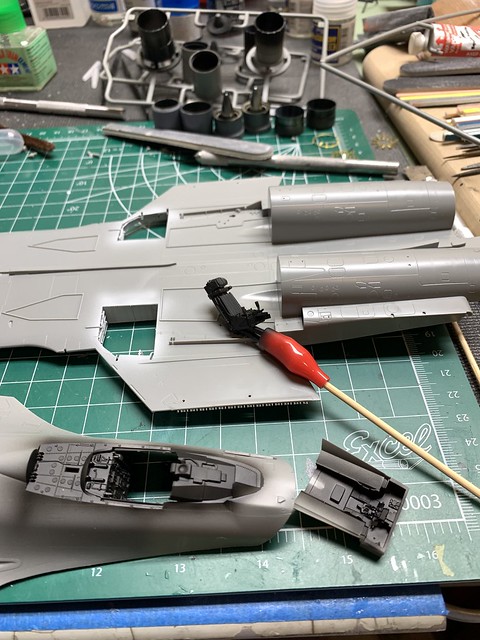
Here again is an odd way to assemble the cockpit. The floor/front just butts up against the back section/wall area. Their is a small lip it fits into, but it's just not a very positive set up. Then it attaches to the lower section of the fuselage parts...huh??? Never seen this before. Usually it goes into the sidewall or UP into the cockpit combing area so you know you have it fit correctly. I decided to glue it up with white glue first and check the fit and the back part really did not fit all that well. So I decided to superglue the back wall to the upper section, glue in the sidewalls and then primer (Mr Surfacer 1500 black + Mr Leveling Thinner) and paint with MRP (mix of colors to match the Eduard pre-colored cockpit parts.

You can see the main gear wells installed here and primer'd white for the final red finish.
-
Thanks for the link and BaconRaygun I read your build thread. Good info. there.
I to picked up the Eduard set and the resin exhaust nozzles and a few other bits from Spru Brothers. I'll post an build thread sometime this fall when I get started on this kit.
Nothing from the Nats?
in General Discussion
Posted · Edited by Sean F
You just need to search “Facebook IPMS” and you can go to the page and see all the photos posted. It’s an open, public page so anyone, even non Facebook users can see posts and photos. You just cannot post comments or photos since you are not a Facebook user.