

spaceman
-
Content Count
2,879 -
Joined
-
Last visited
Content Type
Profiles
Forums
Calendar
Everything posted by spaceman
-

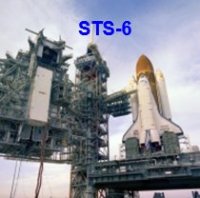
Space Shuttle Launch Pad 39A with Challenger STS-6 (1:144)
spaceman replied to spaceman's topic in Real Space Modeling
Hello everybody, the remaining three support struts were produced in the same way as described lastly. During the drying I brought the second sickle pair to the final shape. After cutting off the strips on the support struts, both sickles were glued with the rod (Ø 0,25 mm) for the upper rotational axis, then the excesses cut off, and smoothed the ends. Then I tried my hand at a coupling fork and have carefully slit the spacer (0,7 mm x 1 mm), which was us -
Space Shuttle Launch Pad 39A with Challenger STS-6 (1:144)
spaceman replied to spaceman's topic in Real Space Modeling
Hello everybody, it went on with the fold-out strut construction that lies between the sickles and is marked blue. Source: NASA (STS-135) As a spacer for the sanded off lateral Evergreen strips (0,15 mm x 0,5 mm x 3,7 mm) I used a strip (0,7 mm x 1 mm), and have tried to laboriously fix this structure, which is carefully held in the tweezers, between three steel rulers, which was a hair-raising action, because the strips tipped over several times doing so, before I managed to glue them to the bottom rotational axis (0,5 mm x -
I fully agree with you, Joe, it's really a kind of magic, simply perfect! And you keep getting better, step by step. Keep it up! Nothing ventured, nothing gained.
-
Hey Joe, too bad you didn't take a shot of the 1.000 supports on the blades. All the parts look fantastic.
-
Space Shuttle Launch Pad 39A with Challenger STS-6 (1:144)
spaceman replied to spaceman's topic in Real Space Modeling
Hello everybody, before I turn towards the remaining sickles, I took a closer look at the linkages of the upper Door Actuators and thought about how and from what I could best scratch these filigree individual parts, whereby it is always important for me to understand the interaction of the components of an assembly and their function to some extent. And for this it is always worth looking at detailed photos with high resolution from different perspectives, like this one here of the upper linkage in the folded state, which I want to reproduce, Source: N -
The Lord of 3D Prints has done conjuring tricks again, you are the purest sorcerer, Joe, I congratulate and freeze in awe.
-
Space Shuttle Launch Pad 39A with Challenger STS-6 (1:144)
spaceman replied to spaceman's topic in Real Space Modeling
Good morning everybody, and I proceeded in exactly the same way and drew the upper contours of the individual sickles one after the other using my original form on the remaining 7 Styrene Sheets (0,13 mm), whereby the original form always has been fixed by the steel wire (Ø 0,3 mm) and by a tape strip on a Balsa plate. Then I've carefully cut out the top sides of the sickles with the nail scissors as close to the contour as possible, which was a very tedious and stressful affair, since the part had to be re-clamped several times i -
Space Shuttle Launch Pad 39A with Challenger STS-6 (1:144)
spaceman replied to spaceman's topic in Real Space Modeling
Hello everybody, since the one-off production in this way is a bit too tricky and time consuming and the shape of the parts is also not very reproducible, I switched to a kind of small series production. To do this, I drilled through a strip at the linkage axis (Ø 0,3 mm) and then this strip with 7 other strips, with the lower contour cut out, as well superimposed as possible and clamped in scissor tweezers. Then I carefully drilled through the entire bundle and pushed a steel wire (Ø 0,3 mm) through the hole -
Space Shuttle Launch Pad 39A with Challenger STS-6 (1:144)
spaceman replied to spaceman's topic in Real Space Modeling
Hello friends, after carefully cutting out the holder, I held it in tweezers and carefully smoothened it for a while at the top side with my finest TAMIYA Diamond file for photo-etched parts, measured its height again and again and compared the contours with the STS-132 -Photo, Source: amazon.de until I was halfway satisfied with this prototype, which differs pleasantly from my first guinea pig (above). In order to make my work easier when making the remaining 7 holders, I've bored a small hole (Ø 0,3 mm) at the location of the -
Hey Joe, I take off my hat, and bow to the artist. Definitely great job so far.
-
Space Shuttle Launch Pad 39A with Challenger STS-6 (1:144)
spaceman replied to spaceman's topic in Real Space Modeling
But not in this life anymore ... -
Space Shuttle Launch Pad 39A with Challenger STS-6 (1:144)
spaceman replied to spaceman's topic in Real Space Modeling
OMG Kirk, I think that this is a rumor. -
Space Shuttle Launch Pad 39A with Challenger STS-6 (1:144)
spaceman replied to spaceman's topic in Real Space Modeling
Thanks Mike for your nice compliment. Sometimes it's to tear one's hair or like herding cats, but it's still fun. -
Hey Joe, I'm happy for you that you finally have the opportunity to implement your ingenious 3D modeling skills yourself in 3D print. Practice makes perfect. And I can see how that spurs you on to keep going, therefore hold on tight to your dreams ... I'm excited to see what the finished "grasshopper" will look like and can't wait to see it.
-
Space Shuttle Launch Pad 39A with Challenger STS-6 (1:144)
spaceman replied to spaceman's topic in Real Space Modeling
Hello everybody, here the Safety rope made of NiCr wire (Ø 0,2 mm) has been put on at least as a test. With gluing the cable onto the door, I will wait until the upper linkages of the Door Actuators are glued onto both doors, Source: NASA (STS-132) Source: NASA (STS-125) which I have now planned, but for which I first had to determine various dimensions again. Source: NASA (STS-125) In the closed state of the doors these linkages are folded and are only folded out to support the opened -
Congrats Joe, simply Incredible!
-
Space Shuttle Launch Pad 39A with Challenger STS-6 (1:144)
spaceman replied to spaceman's topic in Real Space Modeling
Karl for looking in on me. I've heard such nice compliments quite a few times and can already classify it correctly. Stay tuned. -
Hi Joe, as one can see, this is all a science in itself, but you have the needed patience and perseverance ... Hold on tight to your dream!
-
Great progress, Joe - No pain no gain, and therefore be brave, learning by doing is the best option.
-
Space Shuttle Launch Pad 39A with Challenger STS-6 (1:144)
spaceman replied to spaceman's topic in Real Space Modeling
Hello everybody, in a time full of interesting soccer games, I want to get back to you quickly so that I don't lose the thread myself and get completely out of step. I'm still dancing around on the Payload Bay Doors without a Safety rope, what needs to change immediately. But these mini-struts took me some lot of effort, which is why I finally wanted to get this over with. From this perspective als well as at high resolution, one can still see the details best. Source: NASA (STS-114) On the one hand there is the lateral strut a -
OMG Joe, and I thought I was just doing crazy stuff like this, but that seems to be worse than milking mice ... But in the end it looks great, it's worth the effort. Meanwhile you slowly seem to become the Lord of the Printers now, keep it up and hang in there.
-
Greatest respect Joe, I suspect these linkage struts will be a big challenge for your printer. Hang in there and keep cool!
-
Take a look here at LUT Guru Mischa Klement, you might find what you are looking for there. https://www.kartonbau.de/forum/thema/23444-apollo-saturn-v-lut-1-96/
-
Space Shuttle Launch Pad 39A with Challenger STS-6 (1:144)
spaceman replied to spaceman's topic in Real Space Modeling
Hello friends, meanwhile I found out what this steel rope was all about, which sometimes sagged down a bit, like in this image. Source: NASA (STS-101) And if I'm interested in a technical detail like that, then, as is well known, I get to the bottom of it. And through my Swedish friend David from NSF (DaveS) I met a member of the then Can Crew whose explanation is as amazing as it is simple. "That cable what we tied off to for fall protection when we walked down the door in the horizontal configuration to verify the latch’s we’re closed prop -
Space Shuttle Launch Pad 39A with Challenger STS-6 (1:144)
spaceman replied to spaceman's topic in Real Space Modeling
Hello everybody, while I was looking at this image, I noticed this long steel cable to the right of the Torque tube, which is attached by a hinge to a strut and runs across the entire Starboard Side Door, Source: NASA (STS-135) where it is locked in a bracket. Source: NASA (STS-135) At first I couldn't explain the meaning and purpose of this steel cable, but I want to try to find out somehow. Maybe someone of you knows wherefore it is good for ... And then it was down to business, because these linkage is really