

Sebastijan
-
Content Count
5,975 -
Joined
-
Last visited
Content Type
Profiles
Forums
Calendar
Posts posted by Sebastijan
-
-
5 hours ago, Mstor said:
I've seen pics where each individual cartridge is surrounded by painted panels.
https://www.airliners.net/photo/Russia-Air-Force/Sukhoi-Su-27SM3/2150568/L
Actually the colour of the cartridge is sometimes slightly different than of the surrounding panel, but the countermeasure panels on Su-27s are always bare metal. I'd suggest @Aigore when the paintjob will be done, to just mask the panels, and spray them with different sheen metallic colour to the one he used (preferably slightly darker) and then unmask the whole deal... should create a nice contrasty effect between the panel and the individual cartridges.
Su-33s on the other hand, due different CM location, have individual cartridges without the unpainted surrounding panel.
-
Not sure why you went so far to mask each individual countermeasure cartridge, as the whole panel is in bare metal.
Here's a pic I did back in 2011 where those panels can be clearly seen as well as stained empty cartridges.
-
They should be fine, I guess. I've used Airfix decals on my tails and were spot on. Maybe some slight trimming would be required, but nothing drastic.
-
3 hours ago, Solo said:
Fine Molds launched this kit last year, this is with no doubt the best F-14A in 72.
Actually the first boxing was released in 2017 and another one late last year.
It's a blast of a kit with really just a few faults.
Here's mine I finished this year: https://vvsmodelling.com/2019/05/14/grumman-f-14a-tomcat-vf-41-black-aces/
-
the lower arm should be angled outwards while in the kit, it's pointing straight backwards. The difference is most noticeable if you look at the model from the front.
-
-
Once again, thank you very much!

-
Thank you guys! Glad you like her!
-
Just finished this gem of a kit!
Full article and gallery : https://vvsmodelling.com/2019/05/14/grumman-f-14a-tomcat-vf-41-black-aces/Some teaser photos


-
thanks, mate!
-
Thanks, mate!
I don't like everything open as well, but since she will be placed on diorama, eventually, I can live with that 😄
-
A bunch of bits and pieces attached, matt coated and unmasked... The end is in sight at last!


-
Thanks guys!
-
Hi everyone! After a longer absence, I am back.Was pretty busy at work with some joint NATO exercises going on and we had to provide ATC services for extended periods of time and the little time that was left, I spent it with my family.Then this came along - another TOMCAT!But fear not, I managed to sneak some time and add some details and put her on her own legs and here she is... some details still waiting to be attached, then flat coat, and again detailing, some weathering and on towards the finishing line.


-
Thanks guys!
-
Landing gear was improved by the use of Albion Alloys brass tubing and Plusmodel lead wire

Landing gear painted up and weathered.
 Tomcat after light washes


Final look after specific panels were further weathered and certain panel lines over painted.


-
And here's a good view of Airfix decals problem - left wing Airfix, right wing Microscale

-
Thanks guys!
I've hit the builder's block with this build when it came to decals. The only company that did the decals for the scheme I'm building, were Airfix. They have included decals for one of the VF-41 line birds from the JFK's 1997 Med cruise as well as CO's bird of VF-14 Tophatters with really nice tailart. The latter however has two serious problems - one side of the decal sheet is pretty badly off register and Airfix managed to screw the pooch with Modex numbers - the real bird carried 214 while Airfix printed the 201.
Anyhow back to VF-41 option. While the decals are surprisingly thin and the tail art decals fit perfectly, almost all other decals are like 15% too big. The "NO STEP" decals, compared to the Microscale sheet I used in the end, looked like 1:48 compared to 1:72. So yeah, in the end, some scheme specific decals were used from Airfix, others were mostly Microscale and some from a Fujimi kit (which had quite bad adhesion).
Anyhow all the troubles behind, here she is, ready for the next level of weathering.


-
Excellent build!
-
Thanks, Laz!
-

The interior compartments were give a coat of White paint.
 Afterwards the details were painted and a wash was applied to enhance the shadows.
The right hand side was given the same treatment.

With all the details painted and wings and pylons attached, it's time to gloss it up and finally start the decalling process!
-
Thank you, guys! Can't wait to continue with her tomorrow.
-
Thank you!
Last wip of 2018!

Did further weathering of the overpainted panels and added grime and dirt on the most often used panels.


Added antiglare panel, over-intake walkways and painted the canvas bags and airbrake interior.
-
Thanks, mate!
Minibase Su-33 1/48
in Jet Modeling
Posted
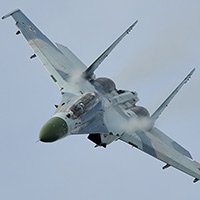
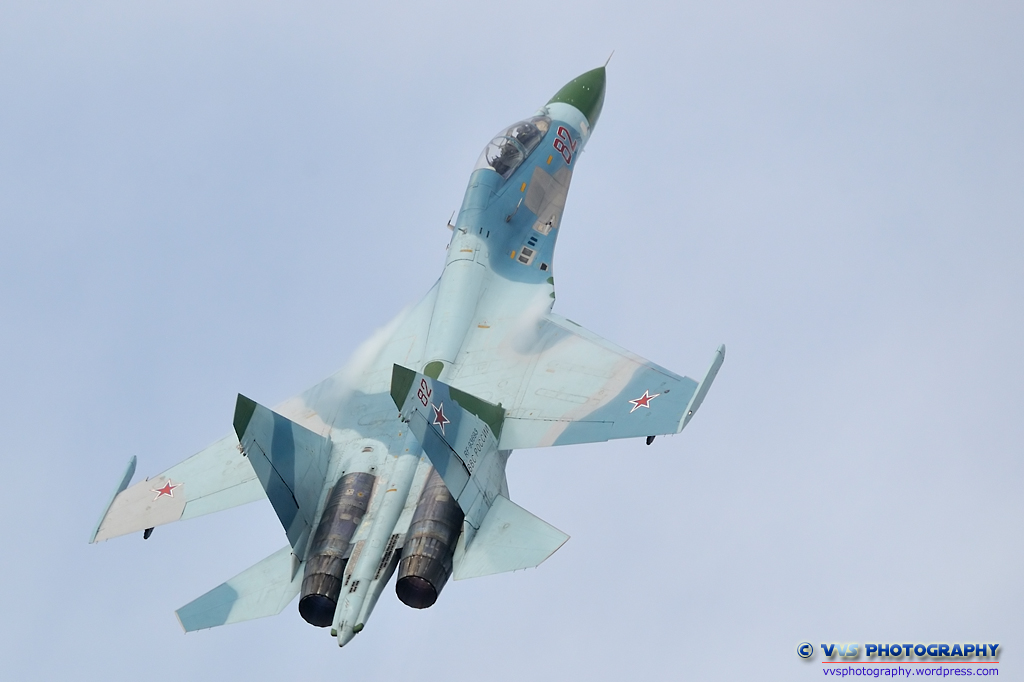
I am not so sure MRP201 is entirely incorrect. There appear to be neutral grey and blueish-grey colours used (The pic Nino posted is clearly neutral), as are soft and hard demarcation camouflage and last but not lease - check the nose area on this pic and you will clearly see, the bottom is more blueish than the top gray - so definitely 4 different colours on that bird. I don't say it is a norm, but browsing through photos for reference can yield interesting results.
https://russianplanes.net/id196211