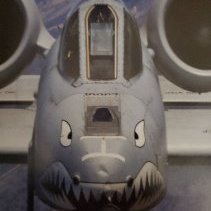
taggor Posted January 5, 2015 Share Posted January 5, 2015 (edited) Hello all, I know there a quite a bit a good WIP's about the Hobby Boss 1/48 Hog using the Aires cockpit but, I haven't seen or read about what parts of the cockpit tub need work in order to fit it to the kit. I can't see what needs to be worked on and I have dry fitted the tub many times. Before I go at mine with a file and sanding sticks I thought I would ask what others have done to make this cockpit fit and specifically the areas that need the work. Even links to a WIP I have missed would be helpful. Thanks all for the help! Where the needle file is pointing to is the area that wont close without excessive pressure. As you can see the fit is really good but, maybe I am chasing after a "white stag" with wanting this fit to be better. Another shot but, not quite as good as the "birds eye." The gap at the front of the wind screen mount is where the fit requires excessive pressure to close IMO of course. I am curious to see what others may have done to make this a better fit, if that's possible. **Moderators: If I should have posted this in the tips section please move and sorry for the confusion.** Edited January 5, 2015 by taggor Quote Link to post Share on other sites
warthoglvr Posted January 5, 2015 Share Posted January 5, 2015 I used the Aires pit in my HB A-10. Didn't have too much trouble at all. The only modification done to the pit was to remove the A/C duct piping along that sidewalls as this was removed on later Warthogs. WIP thread is HERE Quote Link to post Share on other sites
taggor Posted January 5, 2015 Author Share Posted January 5, 2015 Hey there warthoglvr! Thanks for the WIP. Beautiful work on that Hog! It looks as if you contoured the upper portion of your cockpit tub with a file from the photos that I can see of the rear of the tub. My dry fitting wont allow me to "close the nose without applying some pressure (too much pressure) especially the area where the wind screen vents for the cannon and washer fluid go. So this is a good place to start and thanks again! Quote Link to post Share on other sites
nikosmeta Posted January 5, 2015 Share Posted January 5, 2015 (edited) I had no problem what so ever. It took me about 5 min of sanding and dry fitting. I was impressed because I use AIRES a lot and this is not normal. Here is my WIP in a Greek forum. You can use google translate if you want. http://www.modelclub.gr/forums/index.php/topic,20825.0.html Edited January 5, 2015 by nikosmeta Quote Link to post Share on other sites
taggor Posted January 5, 2015 Author Share Posted January 5, 2015 (edited) I had no problem what so ever. It took me about 5 min of sanding and dry fitting. I was impressed because I use AIRES a lot and this is not normal. As soon as I can, I will try to post some pictures to help show what I am trying to describe. I want to add that my dry fitting has been without any sanding or file work. At the moment I have the RH fuselage half primed and drying. It may not be until tomorrow to give it a good 24hrs cure. By no means is this a horrible fit but, it may help describe my concern a bit better. I would like to "close her up" with a minimum a pressure. Thanks for the reply and the link to the WIP! -By the way your WIP is very impressive! I am beginning to get a bit nervous about building this kit with all the great builds/WIP's already here.... and there but, maybe I can help with some kit corrections for future builds of the kit with some how to's in a WIP form. Edited January 5, 2015 by taggor Quote Link to post Share on other sites

Recommended Posts
Join the conversation
You can post now and register later. If you have an account, sign in now to post with your account.