Flyboy3394 Posted December 6, 2017 Author Share Posted December 6, 2017 Update: Finally just about ready to lay down a topcoat and begin decaling. Fixed the mistakes with the wingtips and added the light grey bit on the rightside vertical stab (you'll see what I mean). Overall pretty decent, but there was, somehow, some paint bleed under the masking tape! And also some peeling from the masking tape on my precious CAMO! Beginning to feel like every step forward I take, another step back occurs. Likely going to just finish this build up as is and call the damaged bits "weathering". Not giving up, but really want to move past this guy and put it on display. It does still look really good overall, but the minor mess ups screw with my head. Next: touch ups and top coat, then decals. Stay Tuned.... Quote Link to post Share on other sites
Joel_W Posted December 10, 2017 Share Posted December 10, 2017 The Camo scheme is really looking quite good. Believe me, I feel you pain and frustration when paint is pulled up. More then just masking and repainting is required so that the patch work can't be seen once done. Joel Quote Link to post Share on other sites
Flyboy3394 Posted February 23, 2018 Author Share Posted February 23, 2018 Update: Exhausts are in the painting process! First Coat of Alclad Steel and a little bit of Stainless Steel: I will be clear coating this, and doing a variety of hotmetal shades and colors, mainly red and blue for heat stains. Quote Link to post Share on other sites
Joel_W Posted February 23, 2018 Share Posted February 23, 2018 Your NMF really looks quite good. I've masked directly over Alcad with detacked Tamiya tape and never had a problem. The less Clear Coats you apply, the closer to real metal it will look like. Joel Quote Link to post Share on other sites
Flyboy3394 Posted February 23, 2018 Author Share Posted February 23, 2018 1 hour ago, Joel_W said: Your NMF really looks quite good. I've masked directly over Alcad with detacked Tamiya tape and never had a problem. The less Clear Coats you apply, the closer to real metal it will look like. Joel Thanks! I have found it is ALL in the gloss coat you lay down first. if its smooth, the NMF comes out really nice. As far as taping, how de-tacked does the tape need to be? I really would ratherf not have to restart all this because I get lifting. Quote Link to post Share on other sites
Joel_W Posted February 23, 2018 Share Posted February 23, 2018 1 hour ago, Flyboy3394 said: Thanks! I have found it is ALL in the gloss coat you lay down first. if its smooth, the NMF comes out really nice. As far as taping, how de-tacked does the tape need to be? I really would ratherf not have to restart all this because I get lifting. Flyboy3394 All I really do is run it over the back of my hand twice. Never had an issue. Watch, next time I need to mask Alcad: DISASTER Joel Quote Link to post Share on other sites
Flyboy3394 Posted February 23, 2018 Author Share Posted February 23, 2018 59 minutes ago, Joel_W said: Flyboy3394 All I really do is run it over the back of my hand twice. Never had an issue. Watch, next time I need to mask Alcad: DISASTER Joel Best knock on some wood real quick. Quote Link to post Share on other sites
Flyboy3394 Posted February 26, 2018 Author Share Posted February 26, 2018 pdate: Exhaust Added some heat stain coloration today (Alclad Hotmetal red/blue): The reds and blues came out a bit too dark, so I went over it with some Aclad Stainless Steel: Next up is fixing the broken off wingtips and then FINALLY clear coating, decaling, and washing. Jesus its been a long road with this. Quote Link to post Share on other sites
Joel_W Posted February 28, 2018 Share Posted February 28, 2018 Flybox3394 Really a nice job of heat staining the exhausts. Joel Quote Link to post Share on other sites
Flyboy3394 Posted March 12, 2018 Author Share Posted March 12, 2018 Update! Got it clear coated, and decaled! Looking pretty good overall. The wingtip stations continually break off, so I recently glued them back on and did a rough paint job over them. Hopefully i can find a way to make the bad paintjob and clean break less noticable on the final product. From here, its just enamel wash, gluing on weapon stations and missiles, and a final dull coat to seal it all up! Anyone have a good suggestion for a mount I could use for this? Its in gear up configuration, so I need it to be in flgiht on my shelf! Quote Link to post Share on other sites
The Madhatter Posted March 13, 2018 Share Posted March 13, 2018 Did your's not come with the clear stand? Quote Link to post Share on other sites
Joel_W Posted March 13, 2018 Share Posted March 13, 2018 Flyboy3394, look'in real good. Decals came out perfect. When I have issues with small parts continually breaking off like antennas (WWII aircraft), I carefully drill a whole in the bottom and a hole in the mounting surface. I then glue in a metal pin to the part, then to the surface. When dry, it's solid as a rock. Joel Quote Link to post Share on other sites
Flyboy3394 Posted March 13, 2018 Author Share Posted March 13, 2018 2 hours ago, The Madhatter said: Did your's not come with the clear stand? No, I built mine from a Zvezda kit, not the Hasegawa Ace Combat kit, which comes with a stand. Quote Link to post Share on other sites
Flyboy3394 Posted March 13, 2018 Author Share Posted March 13, 2018 8 minutes ago, Joel_W said: Flyboy3394, look'in real good. Decals came out perfect. When I have issues with small parts continually breaking off like antennas (WWII aircraft), I carefully drill a whole in the bottom and a hole in the mounting surface. I then glue in a metal pin to the part, then to the surface. When dry, it's solid as a rock. Joel Excellent advice sir! I wish i had thouht of this the first 3 times they broke off. Quote Link to post Share on other sites
11bee Posted March 13, 2018 Share Posted March 13, 2018 Great job on the heated metal effect. I've never been able to satisfactorily replicate this. How well did those Alcad paints spray? Quote Link to post Share on other sites
Joel_W Posted March 13, 2018 Share Posted March 13, 2018 We learn much better from our mistakes then our successes, which we tend not to learn much if anything at all. Joel Quote Link to post Share on other sites
Flyboy3394 Posted March 13, 2018 Author Share Posted March 13, 2018 1 minute ago, 11bee said: Great job on the heated metal effect. I've never been able to satisfactorily replicate this. How well did those Alcad paints spray? Thanks! The Alclads sprayed really nicely. Especially given how cold it was when I sprayed. I did heat the paint bottles up a bit, and cranked my space heater to make sure the paint behaved the way i wanted it to. I have found the key with the Alclads is the gloss base. It needs to be perfect, or as near to perfect as possible. I usually spray it, then cover it for at least 24 hours to let it fully dry and avoid getting airborne particles in the fresh paint. I have 8 Alclad NMF and other paints, so I am well invested in them as of now. Quote Link to post Share on other sites
Flyboy3394 Posted March 15, 2018 Author Share Posted March 15, 2018 Update: Panel Wash on top is mostly done: I used Abteillung black enamel paint with mineral spirits to thin it. The panel lines are pretty shallow so much of them were wiped away when I attempted to clean the wash off. I also bagan mounting the missile stations, which proved to be a bear. Probably should have just mounted them when I first built the frame, pre-paint. I am thinking final steps are coming soon. Finish mounting pylons and missiles, install cockpit glass, and hit it with one last clear coat. As for the mount, I am thinking something like this: Clear acrylic tubing inserted into the afterburner nozzles. Quote Link to post Share on other sites
Flyboy3394 Posted May 7, 2018 Author Share Posted May 7, 2018 Update: Model is done! Not as good as id hoped, but its done and I am moving on to the next project with major knowledge of what and what not to do! And here is the stand I made with clear acrylic tubing and a display base for gundam models. I will be painting the base grey to mask the imperfections left from gluing the tubes in. Little supports underneath: I will post final pics of it on the stand next. Quote Link to post Share on other sites
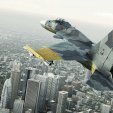
Joel_W Posted May 8, 2018 Share Posted May 8, 2018 That splinter camo scheme really makes a impact on a viewer for sure. Looking forward to seeing how your Su-33 looks on the stand. Joel Quote Link to post Share on other sites
Flyboy3394 Posted May 15, 2018 Author Share Posted May 15, 2018 Here it is up on the stand! The biggest letdowns on my part were the wingtip pylons, which broke over and over: Overall, lots of problem areas as this was technically my first kit. Learned a lot, and now will take that knowledge and use it for this: Will be doing a real SU-33 build, gear down, wings down, in the Russian Navy color/camo scheme. I also ordered the Eduard colored PE set for this to really make the cockpit pop and look real! Quote Link to post Share on other sites
Joel_W Posted May 15, 2018 Share Posted May 15, 2018 Flyboy3394, Looks mighty impressive on the stand if you ask me. Even more so when you consider that it's your 1st build. I'm officially signing up for your SU-33 build. Joel Quote Link to post Share on other sites
clioguy Posted May 16, 2018 Share Posted May 16, 2018 Nice! I also like the Whiskey collection 🙂 Quote Link to post Share on other sites
Flyboy3394 Posted May 22, 2018 Author Share Posted May 22, 2018 On 5/16/2018 at 10:39 AM, clioguy said: Nice! I also like the Whiskey collection 🙂 Spent a lot of time acquiring it. But now doc says I gotta go dry for 2 months! on the plus side, gonna get me one of these once i end the 2 months! Quote Link to post Share on other sites
clioguy Posted May 25, 2018 Share Posted May 25, 2018 On 5/22/2018 at 6:56 PM, Flyboy3394 said: Spent a lot of time acquiring it. But now doc says I gotta go dry for 2 months! on the plus side, gonna get me one of these once i end the 2 months! That is a great whiskey! I have a couple of Nikka (Coffee Malt and SIngle Malt) and they are good, though I prefer smokey ones like Lagavulin, Ardbeg, etc 🙂 Quote Link to post Share on other sites

Recommended Posts
Join the conversation
You can post now and register later. If you have an account, sign in now to post with your account.