

dnl42
-
Content Count
3,857 -
Joined
-
Last visited
Content Type
Profiles
Forums
Calendar
Posts posted by dnl42
-
-
Bravo!
Most excellent work!
-
Glues that evaporate quickly are meant to be applied to parts already in position. For smaller parts, that should be easy to manage. For larger parts, such as fuselage or wing, align the parts carefully, perhaps using tape to maintain alignment. Then start at some convenient location, make sure the seam is perfectly aligned, and apply glue in that location. Apply the glue sparingly, and you'll see it wick into the joint. Once the glue has set, perhaps a minute or so, move further along the seam and repeat the process. For a fuselage, you might start at the nose or tail, work along the top, around the other end, underneath, and then back to the start.
I like a JLC saw to remove parts from the sprue. With some practice, you can remove the most fragile parts without undue stress. Others prefer to use "sprue nippers." Try to figure out which approach works best for you. Both tools are immensely valuable.
-
I have the 1st version of that. It uses a single-edge razor blade. The maximum material thickness is limited by the height of the blade at the fence and the stiffness of the material, which could cause the blade to flex. At the fence of my 1st version, the blade is 3/4 in above the cutting surface, but probably 3/8 of an inch is a better size to consider
Also, that looks to be a regular cutting mat. My 1st version has a Masonite cutting surface. It's inlet at the blade, so use doesn't damage the cutting surface.
-
1 hour ago, USAFsparkchaser said:
Does anyone no more about the link between the virus and loss of smell and taste? I just spoke to my mother and talked to her about my aunt who is in hospice right now. My mother said she mentioned she has no taste or smell which just happened. I believe this is a early sign of the virus and has me really worried for my aunt and family members.
Loss of smell and taste are indeed symptomatic of COVID. They used to say a fever was required, but while highly likely, it isn't always present.
-
Oh, that has never happened to me.

-
Outstanding find

-
Gloss white is a Hard color to apply. The key is to apply light coats for coverage and then apply a final wet gloss coat. Same process for yellow. Well, you should always paint this way for all colors, but it's critical for white and yellow.
-
Great work!!!
I love the schemes on Cal Fire aircraft!
-
-
Exactly as @is it windy yet? and @Mstor wrote. The hardware store stuff for cleaning your airbrush and mixing equipment. MLT for thinning paint. Plain Mr Color Thinner for stripping paint from your model as well as shaping Mr Surfacer 500 and Tamiya Putty.
I did a complete strip down the the P-51D, Bad Angel, in my current sig.
-
That's very sad. WNW kits were always a joy to watch in progress and when completed.
-
Excellent work!

-
Besides AM decals for the markings I wanted, the only other AM I got were those Eduard Brassin exhausts for the Airfix kit. Beside the part thinning I mentioned above, I worked on the tires. My specific aircraft needed the hexagonal tread design. I didn't happen to have any available, so I just used my JLC to finish off the diamond tread pattern of the Airfix plastic.
Overall, I'm quite happy with the result! Better still, the kit is a bargain ($23 @ Sprue), even with the AM exhausts ($7.50 @ Sprue) and CAM decals.
I now have 2 Mustangs in the display cabinet (this plus Tamiya's RAF III) and 2 Mustangs in the stash. I will bash the Accurate Miniatures RAF MK-1A Mustang as NA-73X and build Tamiya's P-51D as a Tuskegee aircraft.
-
Well done!
I have a lot of respect for well-done hand-painted models. What paints?
-
@AlienFrogModeller and @Whiskey, thanks!
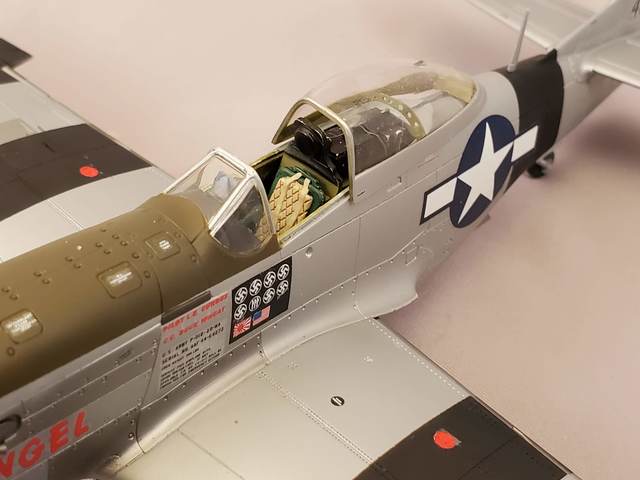
The kit's generally well done and builds nicely. I mean, I didn't make too much of a mess of it! There are some small improvements that can be made. The seat side braces and canopy frame can be thinned down; the latter can also be drilled out. The Eduard Brassin exhausts are a nice touch.
The one thing that annoys me are the inner MLG doors. They only build in the fully down position, which isn't the most accurate. But, that's a nit. They got the MLG wells right!
-
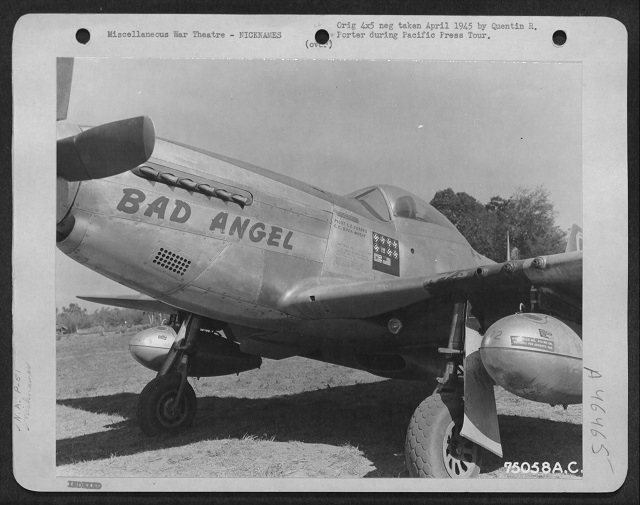
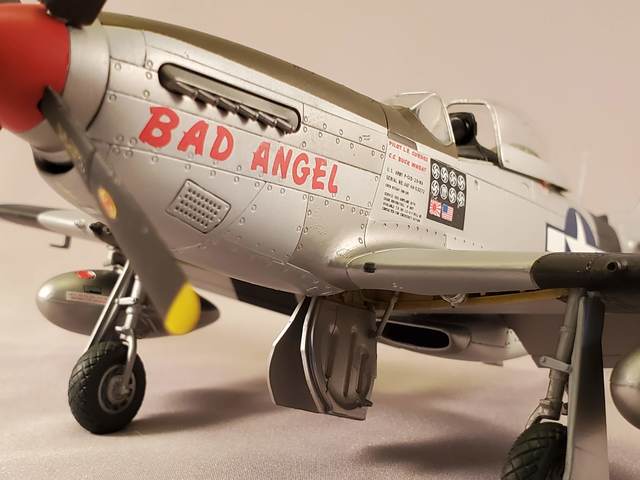
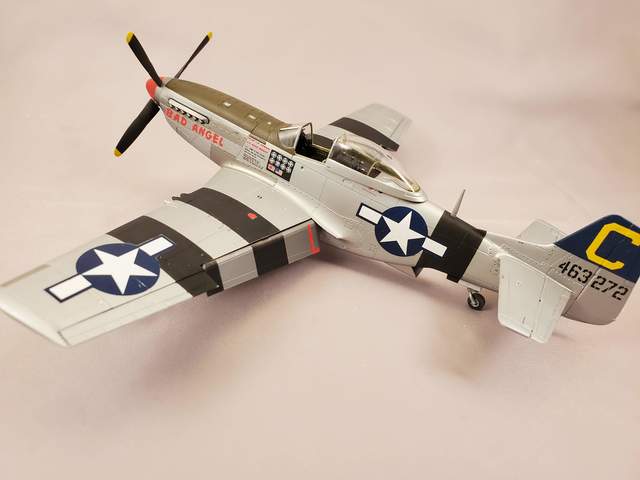
Here is P-51D, "Bad Angel". Flown by L.E. Curdes. Lt. Col. Curdes flew in the ETO and PTO. He is noted for having downed German, Italian, Japanese, and, um, an American aircraft.
This is the Airfix 1/48 F-51D boxing, CAM's Thoroughbred Mustang decals, and Eduard's Brassin exhaust stack for the Airfix kit. Paint is Mr Color with Alclad for some details.
Here's Wikipdeia's description of the event leading to the American kill marking.
QuoteOn February 10, Curdes, now a Lieutenant, formed a squadron of four aircraft that departed from Mangaldan Airfield in the Philippines. Their objective was to investigate if the Japanese were using a temporary air strip on the southern tip of Taiwan. No airfield could be found and Curdes returned to the Philippines. Flying over the island of Batan, the squadron split; Curdes and Lieutenant Schmidtke headed north, while Lieutenants Scalley and La Croix headed south.
Scalley and La Croix located a small Japanese airfield and attacked it and also called for reinforcements; Curdes and Schmidtke headed south to join them.
During the attack on the airfield, La Croix was shot down and made an emergency landing in the sea. As the squadron circled, Curdes could see that his companion had survived, and remained in the area to guide a rescue plane and protect the downed pilot. While covering La Croix, Curdes noticed a larger plane was preparing to land at the Batan airfield. He went to investigate and found the aircraft to be Douglas C-47 transport with US insignia. Curdes tried to make contact by radio, but was not successful. He maneuvered his P-51 in front of the plane several times trying to get the C-47 to alter course, but the C-47 maintained its course.
Curdes lined up his P-51 directly behind the C-47 and fired his .50 caliber machine guns into one of the C-47s two engines, causing it to fail. The C-47 still maintained its course for the Batan's airfield so Curdes then disabled the remaining engine forcing the pilot to ditch in the sea. The plane successfully ditched without breaking up, and the crew was able to evacuate into a lifeboat. La Croix approached and was brought on board the C-47's life raft, where he was informed about the situation. The plane had apparently been lost in poor weather and its radio had stopped working. As it was also running out of fuel, the pilot headed directly to the island's airstrip, unaware that it was under Japanese control.
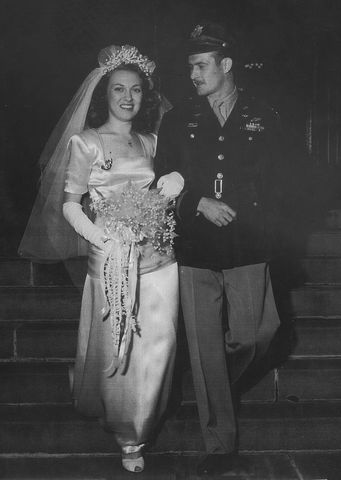
At this point, the dusk and low level of fuel of the P-51 forced Curdes to return to base. The next morning, he accompanied the rescue PBY to pick up the downed C-47 pilot and 11 crew members, including two nurses, all of whom had survived the incident. To Curdes's surprise, he discovered that one of the nurses, named Svetlana Valeria Shostakovich Brownell, was a woman with whom he had had a date the night before the incident. Contrary to subsequent reports, Curdes did not receive a Distinguished Flying Cross for that event, although he did receive credit for the "Kill" and displayed it on his aircraft.
And here's a photo of Curdes and his bride, Svetlana Valeria Shostakovich Brownell. How many husbands can claim they shot their future bride out of the sky?
A photo of the prototype; a color youtube video is also available.
Without further ado, here's the finished model.
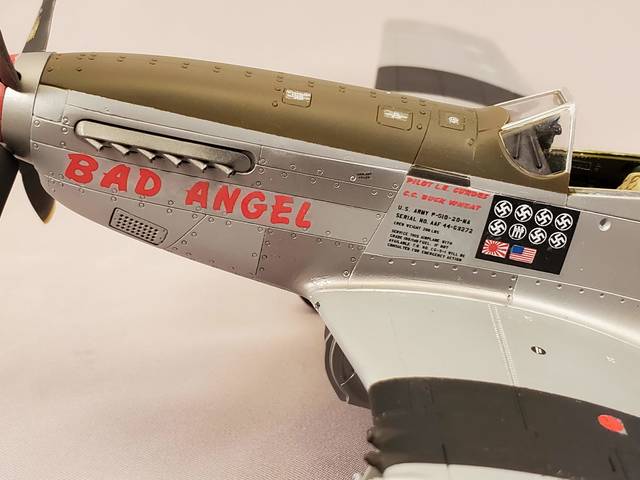
And here's the reason for this build, those amazing kill markings.


-
Here's am interesting F-15C to consider
https://taskandpurpose.com/unsung-heroes/f15-wwii-paint-job-honors-medal-of-honor-hero
-
I've looked at using the 1/48 PT-17 for an N2S. The different engine, particularly the forward exhaust collector, is a very prominent difference. Looking at the contemporaneous Wikipedia photos, the N3N also has an exhaust collector forward of the engine cylinders.
BTW, this page has some specific airframe comparisons between the N3N and N2S.
-
A couple of simple improvements are the side braces on the seat and the canopy cross-frame. Both are significantly over thick; the latter can also be easily drilled out. Also, some wire atop the battery and radio improves the look.
-
My experience is it's the flattest clear coat. Click on the LCM3 in my current sig to check the final photos and judge for yourself.
I also like the satin, which are the C-47, XF5F, and AT-6.
-
I haven't brushed it. I believe feather means to apply lightly and build the coat out from the starting point, applying to a still wet edge.
I use it a lot and it has a very very low odor. If you want an authoritative statement on the product, you'll have to contact Microscale Industries.
I see you asked about masking. Paint's robustness depends on many factors. While I always prime, I also make sure the model surface is clean. I always wash my hands thoroughly before working on the model, and wash bare ready-to-paint surfaces with IPA before applying the first coat, which for me is a primer. I only use Tamiya paper masking tape (yellow) and vinyl tape (white), so they're low-tack right out of the bag. I then de-tack the tape by first laying it on my cutting map before I cut it, and then applying the pre-cut tape to the clean palm of my hand before I finally apply the tape to the model. Finally I use primarily use Gunze Mr Color paint, a lacquer, which is completely out of the non-toxic wheelhouse, but it's very robust!
Finally, NEVER, EVER, apply any tape atop decals. Period. Ever. Even if there's a clear coat atop the decal. When I need to mask around decals, I use Parafilm "M", plain paper, or Post-It Notes (still avoiding putting the adhesive atop a decal).
-
I like Microscale Industries Micro Flat and Micro Satin products. Brush on directly or thin with water to airbrush (this is what I do). My current sig has models using this stuff.
HTH
--
dnl
-
Maybe you can fix it. I've just stripped a complete model because I was unhappy with the base coat. I had primed with Mr Surfacer and then airbrushed Alclad. I was able to strip the paint using Mr Color Thinner applied with cotton pads and swabs.
To be sure, I have models with errors large and small. The AT-6 in my current signature has 2 horribly wrinkled wing stripes. The key is to learn. In those cases, it was what not to do, but hey, that's learning.
-
To measure line, wrap line around a large dowel or other cylindrical object. The turns should be snug but not stretched. Think 10, 20, or 30 turns, to get a band around 1/4 to 3/4 inch wide. Measure and divide by the number of turns.
Best non toxic dull coats
in Tools 'n' Tips
Posted · Edited by dnl42
I thin any airbrushing medium to the thickness of 1% milk. Look at the atomization to ensure it is fine and uniform. I also make sure the medium lays down on the surface smoothly. It's always important to watch the paint as it hits the surface to ensure it's slightly wet. It must not be dry. It must not be runny.
My airbrushing station is in my garage, near the door, which I always open.
HTH
--
dnl