taggor Posted April 5, 2015 Author Share Posted April 5, 2015 (edited) Mark, OMG!! Your pit looks incrediable even in larger then life size pictures, which is pretty hard to pull off. Detail after detail after detail. Just fantastic modeling. Joel I am speechless! Thank you so much! It means a lot Joel. Thank you so much Joel! I owe it to everyone here on ARC and on other forums. Even though I dont post to every build here, I do try to view a lot of them and I am inspired immensly with all the amazing work here. I am really happy to be able to be a part of it! Sounds "kind of corny" I know, but I really mean it! I owe it to you all to "give it my best!" I want to hang out with all of you "big dogs!" I am very humbled by you all! Of course, Joel, your one of those "big dogs." Thanks so much for participating and liking my work! The same for all of you who I have met and have yet to meet here on ARC and elsewhere. My sincerest thanks! Edited April 5, 2015 by taggor Quote Link to post Share on other sites
taggor Posted April 5, 2015 Author Share Posted April 5, 2015 Sorry, I have to post and run. Today's pit (4/5/15). Details later. -Mark Quote Link to post Share on other sites
Joel_W Posted April 5, 2015 Share Posted April 5, 2015 Taggor, Wow!! Joel Quote Link to post Share on other sites
taggor Posted April 10, 2015 Author Share Posted April 10, 2015 (edited) 4/9/15 Thanks Joel for your liking my work! I appreciate it! Hello all, with the cockpit done it's time to see how she fit's to the fuselage halves. Or rather see how much work will be involved in making it fit "reasonably." I will start with a few pics I had taken a long while ago of the cockpit sides. I wasn't too happy with the results only because of the paneling that I had added. They are really not to scale but, I thought about making new ones and these seemed to be "OK" all of a sudden!! Haha. The initial work was done right around the same time as I got the UMM scribe. I just filed down the existing detail and drew on the quilt pattern with a pencil to use as a guide for the scribe. the black/green paneling can be seen in Jake Melampy's book but, not all A-10's have this same look even after the LASTE upgrade which removes the cockpit heating/cooling ducts found on the unmodified panels. The little black ? rectangular thingy! Haha, is to represent the NVG hanger. These panels were the only items I gave any noticeable weathering to using a wash of Tamiya acrylics in Buff, Flat Brown, and Testor's Aircraft interior black. My own mix of Sage Green was used again for the green. Well after doing my budget, I will not have any sort of photography set-up to take better photos until maybe next year so I wont be able to share any "professional grade" photos ( to be read AMATURE PHOTOS!) of the cockpit with you all. So here are the last two pictures that focus entirely on the cockpit. The first I used a flash just for fun. This was done during test fitting and I liked it. You can see the Fairchild logos on the rudder pedals. The last one comes with a funny story to follow. Actually there are two funny/not so funny stories that go with both pictures. I'll start with the top photo of the cockpit with the flash. Story #1 "As I am test-fitting the cockpit to the fuselage halves, I braced the glare shield with some plastic to the cockpit tub, turns out that I used too much and needed to reduce the angle of the glare shield. When I did this I knocked the whole IP and glare shield into the trash!! Sure enough, the landing gear lever broke off of the IP and into the trash too!! Arrgh. To my amazement, I FOUND IT! Yeah! I could have made another one since Eduard includes three in their A-10 interior set but, I was happy just to glue back on the original!" Story #2 Prelude! I made this last bit that you can see on the RH console to complete the cockpit detail. It's a lever but, I am not sure what function it has for the cockpit but, it's there so I made it! "The lever I had made is made up of a brass part from Eduard's A-10 interior fret. There is only one lever like this unlike the others they provide in their kit. The knob is made again with a tooth brush filament and glued to the brass base. I didn't learn from previous experience to NOT grip the part from the ball end of the part! So..... ping..... away it flies into the void!!! Needless to say, I decided to hunt for it. I looked and looked and looked. Thinking that the carpet monster had struck again. I even expanded my radius during the search. No luck. Wouldn't you know, the part was stuck to my sock!!! Yeah. Another crisis solved in the world of micro detailing!!" I have some more pics to post detailing the fitting of the cockpit and Aires nose wheel bay but, that will have to wait for another day. Thanks for checking out my work and hope you got a little laugh out of it too! Until next time! -Mark Edited April 10, 2015 by taggor Quote Link to post Share on other sites
jacobp51 Posted April 10, 2015 Share Posted April 10, 2015 Looking good Mark! I like the technique and results for the quilting. Don't worry about the photos, they do the job for in-progress updates. I'm taking all of mine with my Samsung S5. Work with what you have - just like mixing your own paint! Keep up the good work! Jake Quote Link to post Share on other sites
taggor Posted April 10, 2015 Author Share Posted April 10, 2015 (edited) Looking good Mark! I like the technique and results for the quilting. Don't worry about the photos, they do the job for in-progress updates. I'm taking all of mine with my Samsung S5. Work with what you have - just like mixing your own paint! Keep up the good work! Jake Thanks Jake. I am still working on the post. I have to save every now and then or weird stuff happens and sometimes I loose an entire post entry. Thanks for the kind comments. Hope your scratch building is coming along with good success! -Mark Ok, done with the post! You are right about the photos. I suppose I wanted to get my amateur photography on but, it's too costly right now. Need to save a bit. Also your are right about working with what I do have. I should be glad to be able to post pictures at all! Thanks for stopping in Jake! Edited April 10, 2015 by taggor Quote Link to post Share on other sites
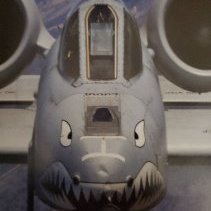
taggor Posted April 11, 2015 Author Share Posted April 11, 2015 (edited) 4/11/15 The fitting! Here is the second part of the last update with the stories. All of the following pictures try to illustrate work in progress at fitting the Aires nose wheel bay , cockpit, and gun shroud/paneling. First here you have the Aires nose wheel bay. Very nicely detailed. This image shows how much material needs to be removed in order for the gun cover/panel to have a chance at fitting flush and it's not down low enough at the time of this picture. I placed a bit of plasticard over the very front because I had begun to file through the very top panel to the bay! This, more or less, keeps me from going any further with my file. The step down on the bay is indicative of where the wheel bay meets the cockpit tub. In the background you can see the initial angle of the glare screen that needed correction from story #1 in my previous post. Here it is too high and needs to come down. Otherwise there will be problems later on that will only be compounded. These next two shots show the kit part/panel that must mate up with the wheel bay. The first is "in progress" while the second is complete. You need to remove the locator tabs from the side where the wheel bay will sit as well as removing material from the kit part where the kit wheel bay would go. For this the half round file is your best friend. Working slowly I was able to remove the afore mentioned "blocking" points and locator tabs. It's hard to see but, in the second shot, towards the front you can see that I made a kind of "half round" profile for the gun shroud/cooling duct. The kit comes with this molded square which certainly is fine but, the real aircraft have this half round profile. I used a round med file to accomplish this. Working slowly to check profile as I went. The real aircraft as shown below (of course it's the 23rd! and from the same, or close to the same time period as my build with the gun gas covers in place.) : The above image was taken from the net and as far as I know is public domain. If I am in violation of copyright please contact me immediately by PM or directly at taggor@aol.com for removal. Another two shots of the panel in place with the wheel bay. Here everything is just dry fitted with no cement. I am using blue poster tack to hold the wheel bay in place while I test the fit. You can see a small bit of a gap at the front of the wheel bay / panel. This is workable and I think is due to a slight warp in the wheel bay. The gun's sleeve fit is horrible but, workable. A lot of this is due to the contour of the sleeve underneath where the sleeve meets the panel. Again, it's only a "dry" fit so I am confident I can work through it. ****I just lost the bulk of this post so for the time being I am going to post what was saved. I will be updating this post periodically. Sorry, I am not sure what is going on with my machine but, I will have additions up soon****. Edited April 11, 2015 by taggor Quote Link to post Share on other sites
kurnass77 Posted April 11, 2015 Share Posted April 11, 2015 Great work so far mate! I can't wait to see it finished,I've always loved the Hog,and as a child I see one with the old Lizard scheme in a Rome air show;it arrived ultralow from our back as a beautiful,noisy surprise. Keep it up you good work ! Gianni Quote Link to post Share on other sites
taggor Posted April 11, 2015 Author Share Posted April 11, 2015 Great work so far mate! I can't wait to see it finished,I've always loved the Hog,and as a child I see one with the old Lizard scheme in a Rome air show;it arrived ultralow from our back as a beautiful,noisy surprise. Keep it up you good work ! Gianni Thank you so much Gianni for the kind comments! I am not only fighting the kit I am fighting my laptop with my posts! Haha. I remember the early grey scheme and the lizard too! Love them all! Your airshow experience must have been awesome! I have never been up and close to an A-10! About the only time I have actually seen one was in the New Mexico desert. A jet probably from Davis Monahan conducting exercises. Thanks for stopping in! -Mark Quote Link to post Share on other sites
taggor Posted April 11, 2015 Author Share Posted April 11, 2015 (edited) Last two photos for this update The first shows the corrected angle of the glare shield and the gap right in front. This area still requires some pressure to fit. Still dry fitting at this time. I re-enforced this spot with a brace from styrene strip stock so that when I commit to adhesive, the bond will be really strong and not just reliant on the small area there to hold it together. My contention is that the Aires cockpit is slightly wider than the kit part. I inquired in the Jet Modeling forum a couple of months ago about this and it seemed that the folks who replied did not have the same difficulty. Anyhow, what you can't see are some nasty gaps along the glare shield to the fuselage. The rear deck also has issues but, I am going to try to build up the sides of the fuselage to correct this and make the deck flush. It's certainly workable but, will take time to make right. For final parting thoughts, I had always wondered when Hasegawa would make a 1/48 A-10 kit since about 1982 on. Guess I am still wondering. Even with these problems the HB kit is still the "best" newer A-10 kit for more of what an A-10 should be in 1/48 for my money. So until next time! -Mark Edited April 11, 2015 by taggor Quote Link to post Share on other sites
Joel_W Posted April 13, 2015 Share Posted April 13, 2015 (edited) Mark, Simply outstanding progress, especially with all the work that the Aires cockpit and wheel well requires. I certainly admire your work and precision. Not all of us would or could do what you're accomplishing. I can assure you that when I finally get around to building a 1/48 scale A-10, it won't be anywhere near the level of your build, as I'm just basically an OOB builder. There is nothing wrong with your photography. Your pictures are basically properly exposed, and they're clearly focused. Most digital cameras have enough menu options for this type of work. Decent lighting is the key no matter what type of camera one uses. And of course a decent tripod as well. Now you can avoid using the built in flash. For grab shots I still use the built in flash. Joel . Edited April 13, 2015 by Joel_W Quote Link to post Share on other sites
kike Posted April 14, 2015 Share Posted April 14, 2015 What you're doing is insane Mark!! a real pleasure to watch Quote Link to post Share on other sites
falcon20driver Posted April 14, 2015 Share Posted April 14, 2015 That cockpit is unreal! I'm absolutely blown away. Quote Link to post Share on other sites
taggor Posted April 14, 2015 Author Share Posted April 14, 2015 (edited) Mark, Simply outstanding progress, especially with all the work that the Aires cockpit and wheel well requires. I certainly admire your work and precision. Not all of us would or could do what you're accomplishing. I can assure you that when I finally get around to building a 1/48 scale A-10, it won't be anywhere near the level of your build, as I'm just basically an OOB builder. There is nothing wrong with your photography. Your pictures are basically properly exposed, and they're clearly focused. Most digital cameras have enough menu options for this type of work. Decent lighting is the key no matter what type of camera one uses. And of course a decent tripod as well. Now you can avoid using the built in flash. For grab shots I still use the built in flash. Joel . As always, Joel, thank you so much for your kind comments and posting to the WIP! I will admit, your comments leave me speechless. I really appreciate your words and liking my efforts on this build. As far as your building an A-10 OOB, I wish I could recommend one that would be easy out of the box but, I just simply can't. My opinion is all of the current 1/48th offerings require lots of work to make into a "reasonable" replica. That's kind of what I was implying when I commented about Hasegawa not offering one in 1/48. Why Hasegawa? A little story: Around 1982 ish, I was building Monogram's 1/48 F-14A which I thought at the time no mfg could touch except Tamiya but, the Tamiya kits were too expensive for me as a teenager( The F-14 was nothing like I am doing these days. The model has long since seen a landfill somewhere I am sure). Well, this is around the time Hasegawa was doing their F-4 Phantom II kits and to me, they were a notch above anything else I had ever seen in an aircraft model. There may have been better but, I wouldn't have known. This also is the time when the magazine title of Scale Modeler was the current magazine and Fine Scale Modeler was the premium format magazine, if you remember. Anyhow I always wished Hasegawa would make an A-10 kit in 1/48 but, to this day they never have. So we have to make due with what is out there. Initially I was going to make the Italeri kit but, decided not to, based on that square nose it has. The details are not as crisp either. The Monogram kit is OK but has old tooling. Sierra Hotel also makes some good AM for the kit. So the HB was the best choice of the current lot IMHO. Unfortunately it too requires a lot of work to make it look good. Thanks also, for your comments on my photography! Sill using the Samsung S3 camera on my phone! The lighting I may be able to budget in. I do have the light box but, need to have it shipped to me. Maybe I will get some of the good light bulbs I had read about in The Scale Hornet. I would like to be set up and experimenting by the end of this build I hope. Again, thanks Joel! What you're doing is insane Mark!! a real pleasure to watch Thanks kike! I think what you are doing with your F-2B is equally impressive! Every aspect of your build is clean and masterfully painted! I am eagerly awaiting your completed build/diorama! Thanks for stopping in, posting, and of course, thank you for liking my work. That cockpit is unreal! I'm absolutely blown away. falcon20driver, as with Joel's comments, I am speechless. Thanks you so much for your kind comment! I can say very much that your work "blows me away." I was silent with your Tomcat build as I didn't even know what to say except WOW! (Not much of a post! Haha) Your current build is no different! I am humbled and extremely thankful that you stopped in and posted! Finally, I want to thank the ARC community. It's really great to come here and see all the wonderful builds going on and more than anything, it's such a great community to learn from, be inspired by, and share my work with you all. That to me is what makes ARC such an important part of my work. Of course all of you challenge me to make the best effort I can. So thanks to all! I also want to say that I am really a student of Sid DeKoning's build as I have mentioned before. He solved a lot of difficult problems concerning the HB kit and AM parts. I am not using all of the same parts as he did. I chose some different things but, I use his build as a guide even now and from time to time I am able to ask him some questions about how he solved some issues with the kit that are not clear in his WIP. So, I want to thank him here. If my build comes close to his I will be very happy. Also there are some ARC members behind the scenes that have provided many helpful details about the real aircraft. George Hitchens is one that comes immediately to mind. There are more but, it would take a whole page to acknowledge them (you all know who you are!.... I hope!Haha). So, I just wanted to let you all know that while my efforts at the construction and painting are my own, I am extremely grateful to many in the ARC community and elsewhere that I can't say it enough. My most sincere thanks! I am honored to be a part of this forum and to "hang out here" with you all. -Mark I almost forgot, I wanted to let you all know where I am at four months into this project since my WIP tends to be "all over the place" when it comes to what is semi-complete. 1. Left Wing sub-assembly is complete and ready for wheel well paint. 2. Right Wing sub-assembly is complete and ready for wheel well paint. 3. Rear rudder assemblies are glued. ready for rear stabilizer assembly and photo etch. 4. Rear elevator is assembled. Ready for Rudder assemblies and detail parts 5. Cockpit is complete and installed (obviously from photos! Haha.) 6. Fuselage is glued and currently working on the seams between halves. 7. Nose wheel well fitted as well as it's corresponding panel (most recent update from this post.) That's it for now. It's tedious to blend the fuselage halves together so it will be some time until I update again on that progress. I may try to show all of the "product" going into this build if I can find the time to take the picture and fit everything into the shot. We will see! Edited April 14, 2015 by taggor Quote Link to post Share on other sites
Joel_W Posted April 15, 2015 Share Posted April 15, 2015 Mark, For the level of detail and accuracy your building at. Your list of completed sub assemblies after just 4 months is pretty darn impressive. Joel Quote Link to post Share on other sites
taggor Posted April 16, 2015 Author Share Posted April 16, 2015 Mark, For the level of detail and accuracy your building at. Your list of completed sub assemblies after just 4 months is pretty darn impressive. Joel Does this mean that I don't qualify for the "Old and Slow" title!? Haha. Well if not how about..."Middle Aged and Slow"!? Seriously though, thanks Joel! It sure doesn't feel like I am making progress though. I am glad to have something that "kind of" looks like a flying cigar at least! Quote Link to post Share on other sites
Joel_W Posted April 16, 2015 Share Posted April 16, 2015 Does this mean that I don't qualify for the "Old and Slow" title!? Haha. Well if not how about..."Middle Aged and Slow"!? Seriously though, thanks Joel! It sure doesn't feel like I am making progress though. I am glad to have something that "kind of" looks like a flying cigar at least! :woot.gif:/> Mark, Nope. I've got the corner covered for Old & Slow. Been at it on and off for more then 40 years, so I can say for certain that your pace at your level is near on perfect. Joel Quote Link to post Share on other sites
taggor Posted May 5, 2015 Author Share Posted May 5, 2015 (edited) Update 5/5/15 First, thanks Joel for the continued support and following my build. It's much appreciated! Well...... hello all again. I finally got around to taking some photos of the various AM and kits involved in this build The "full monty." Well, almost. I forgot to put the TwoBobs decals in the shot and some of the other sources of decals since just the TwoBobs sheet is not specific to the aircraft I am trying to model I will be using some other sources for decals as well. I will try to illustrate those when I get to the decal stage. Still a ways off yet. The BIG ED HB photo etch kit, which as I have discussed previously, and in my case, needing an extra exterior kit for the small bits needed to enhance the elevator assembly. Then, from left to right, Steel Beach's slime lights, SAC's metal landing gear, True Details pilot helmets (really just a little addition that I thought would be neat), and the Olimp update set. The Olimp set I got mainly for the decals before I was able to acquire the TwoBobs sheet. Most of what comes with this set would be for a later A-10A equipped with the LIGHTNING pod or A-10C since it includes JDAMS and various antennae to "update" a kit to the "C" version of the jet. I wanted to use the airburst fuses included in the kit. If I don't have to make them..... it's a + however, I will be using Wingman's MK 82's as they are cast cleaner than the Olimp versions. The Olimp castings are not bad but, I was a little disappointed with my kit here because the rocket launcher tubes were broken at the lip of the tube and that is a hard fix. Not impossible but, challenging. Sorry all for the blurry photo but, I guess I got lazy. First the Italeri "sqare nose" hog kit. Initially I was going to make a fleet of Italeri hogs but, that was until I looked closer at the fuselage detail and got well....... rather disgusted at the proportions and "crudeness" of the kit. At least I decided to NOT use the Italeri kit, after I had bought three kits (one of which was the newest "C" boxing. Well, it's not a "C." Only the box is!) and a few Aires AM parts for it! Turns out some of the tiniest details Italeri includes in their kit are a much needed addition to the HB kit. Items like sway braces, antennae, and the rear engine cowlings. The fuselage half that disappointed me had now been named "Ralph" and serves as my test piece for painting, scribing, and anything else new to me to try out first before committing to the HB kit. Next up the gold standard of reference Jake Melampy's Modern Hog Guide. I was EXTREMELY fortunate to acquire this book! Finally, from left to right, North Star's AGM-65 with LAU-117 launcher. A much needed AM part especially for the LAU-117 as it is the standard rail for the A-10 and other jets using the AGM-65. The triple launcher is, seldom if ever, used on the A-10. Finally, Wingman's Mk. 82's. OK, so at the very bottom of the pic from left to right. Master Models GAU-8 muzzle, Royale Resin wheels, and ARV's Have Glass II windscreen and Canopy. All right, last installment here. From top to bottom, left to right. Aires wheel bays and cockpit (For my mistakes and for additional parts, two cockpits are used). Finally, two detail kits from Sierra Hotel Models. The first is a series of antenna and resin boarding ladder and wheel chalks. The last SHM item is the fan blades and cowlings. To conclude this post..... the star of the show..... the HB 1/48 A-10A. Mostly "correct" but, as you all have seen and know...... it has issues too but, the "lesser" evil of all current 48 A-10's out there. Finally the Hobby Master Ltd Modern Airfield base. So that's it for what I am using (mostly. I am sure I have missed something besides the decals and I will think of it later, if I have missed something). Next up..... a very small update to show you all where I am at. -Mark Edited May 20, 2015 by taggor Quote Link to post Share on other sites
taggor Posted May 5, 2015 Author Share Posted May 5, 2015 (edited) Hey all..... I just lost another entire post. I need to settle down a bit before I try to post the second half of my update....AGAIN! What the........!!!????? I will try to have the small update back up today or tomorrow. -Mark Edited May 5, 2015 by taggor Quote Link to post Share on other sites
Joel_W Posted May 5, 2015 Share Posted May 5, 2015 Mark, Impressive to say the least. Not only have you defined the direction and level of your build, but you've acquired virtually every AM product needed to create those additions and corrections. To me that's more important then just buying for the sake of having everything just in case it's needed. The amount of time you've had to invest into research of both the real aircraft, as well as HB kit, and AM parts is clearly evident in your approach to the whole build. I also noticed the fishing gear. I know that my fishing time has decreased over the years proportionally to my involvement, and desire to build a better model. Joel Quote Link to post Share on other sites
taggor Posted May 5, 2015 Author Share Posted May 5, 2015 Mark, Impressive to say the least. Not only have you defined the direction and level of your build, but you've acquired virtually every AM product needed to create those additions and corrections. To me that's more important then just buying for the sake of having everything just in case it's needed. The amount of time you've had to invest into research of both the real aircraft, as well as HB kit, and AM parts is clearly evident in your approach to the whole build. I also noticed the fishing gear. I know that my fishing time has decreased over the years proportionally to my involvement, and desire to build a better model. Joel Thanks Joel! I will say that I did look for a lot of AM from different sources to possibly build a couple more A-10's but from different years. I want to do one sometime from the 75th EFW around 2006-07 OEF as they were able to employ the LITENING pod system and use the com pods Maybe even do one from the early days when they had just come out. However, with all the work here I don't know how much of a reality that will be. At least not right away but, you never know. I have no shortage of kits nor subject matter! Cars, sci-fi, etc. I love them all! Haha. Good "catch" on the fishing gear. I do like to go every now and again with friends but, I am by no means an accomplished angler. I just do it to relax and be with friends. Like yourself, I find that I am more motivated to work on my model kits these days! -Mark Quote Link to post Share on other sites
taggor Posted May 5, 2015 Author Share Posted May 5, 2015 (edited) Update Pt. II 5/5/15 (hopefully without incident) Most of the latest work I think is not very post worthy but, it is tedious and I have a couple of things to share. Since I am working on blending seam lines and re-scribing I have to concentrate a bit more since this is the foundation for the final finish and it needs to be right. At the moment I am really just working on the fuselage. For side sub-assemblies I have the elevators that I am working on. Think Holly Hobby or Blue Bonnet! Haha. The fuselage halves have a reputation for not aligning well. I solved that by removing a few locator pins and when assembling them I would tack glue portions together first, get the alignment, and finish with Tenax, Extra thin, and/or thin super glue. The upper two halves have what I would call "peaks and valleys" with the two halves fitting flush at only a couple of points on the top. The bottom was actually pretty good and does not require real aggressive sanding. I will use the tail as an example. You can see where I wrote level. That is a point where the fuselage halves mate well. The right side (while looking from the tail) was higher than the left so I worked my sanding stick on the right with 320 grit to level off the "high side" using an arching motion so as not to flatten the top. Also, I needed to stop periodically to re-scribe the panel lines as I didn't want to start from scratch. I am still a little intimidated by starting re-scribing from scratch so I like to have a guide. For me this was tricky with the tail hatch as I didn't want to lose any of the contour lines. You can see above the "better fit" of the lower section. It has a bit of a "trough" that is easily fixed with Mr. Surfacer 500 and 1000-2000 grip wet/dry sand paper. I had already finished the uppermost section blend by the time I chose to post so here is a completed blend including the GPS/EGI receiver. The receiver required some work to look as it does here. This is what it looked like with just basic sanding and file work. I took out the base of the receiver as Eduard PE goes on to enhance the look of the receiver. The blue painters tape is there to help minimize file and sandpaper "chatter" and keep it local. I think HB probably took the fuselage halves out of the mold too soon or maybe this was a pour point for the mold but the receiver needs work. Filling and re-shaping with Mori Mori polyester putty. Here I had done some work and checked it with Mr. Surfacer 1000. It's easier for me to see the work as a whole rather than as "putty and plastic." I then can zero in on the areas that need more attention with a sanding stick or paper. When I am fairly certain I have cleaned it up enough from this point I work the area with some 1000 or 2000 grit paper, clean it up, and spray Tamiya fine white primer and re-check the work again. I still have some finer clean up to do but, I wanted to work the rest of the fuselage halves so I have left it as illustrated above (in the picture with the Tamiya white primer) for now. Edited May 9, 2015 by taggor Quote Link to post Share on other sites
taggor Posted May 5, 2015 Author Share Posted May 5, 2015 (edited) Update Pt. III 5/5/15 Ok so the final update of this mini update to give you all a point as to where I am at. While I work through the tediousness of the blending of the fuselage, I have started work on the elevators. As to be expected some detail needs to be removed just as with the wings. Many of the panel lines are not visible with photos of the real aircraft and at 48 scale..... well, you get it. Also as with the wings, the rivet detail for the leading edge is at the wrong place. Who knew!? Haha. Here I have marked with Sharpie the various lines and rivets I need to take out. Also, the trim tabs need to "pop" a bit more so they will have a bit of re-scribing. So, that's what I have been up to with the A-10 build. Not very exciting work but, at least you all know I haven't put it down even with the F/A-18C project I have going too. I should never have started another kit...... really! But, I did and here I am! Haha. Until next time. -Mark Edited May 5, 2015 by taggor Quote Link to post Share on other sites
Joel_W Posted May 6, 2015 Share Posted May 6, 2015 Mark, That's a lot of progress in my book. Excellent job on the GPS/EGI receiver area. One thing that I've already borrowed from you is how you like to rescribe. When I read it, bells went off, as it's the answer to my age old problem of completely having to rescribe sanded or puttied off panel lines: "RESCRIBE BEFORE YOU COMPLETELY REMOVE THEM !! :bandhead2:/> Half the time I screw up the start from scratch rescribing. With your method, I've already have built in guides. Just a fantastic idea. Joel Quote Link to post Share on other sites
taggor Posted May 6, 2015 Author Share Posted May 6, 2015 (edited) Mark, That's a lot of progress in my book. Excellent job on the GPS/EGI receiver area. One thing that I've already borrowed from you is how you like to rescribe. When I read it, bells went off, as it's the answer to my age old problem of completely having to rescribe sanded or puttied off panel lines: "RESCRIBE BEFORE YOU COMPLETELY REMOVE THEM !! Half the time I screw up the start from scratch rescribing. With your method, I've already have built in guides. Just a fantastic idea. Joel Hey Joel! Thanks for the post. The F/A-18C project that I am doing for my friend has been a great help to me to get used to some new ways to re-scribe. I have been using all but one of my scribing tools. That would be the UMM SCR-01, UMM SCR-02, and from my very first post, the Flexifile fine pin vice scribe. The UMM SCR-01 is my "go to" scriber. When I got it, which was during the beginnings of this project, I only used the side where you guide the scribe with your index finger but, now I use the hook side more often where you pull the scribe towards you. I have learned two new things this way. One was the notion to let the weight of the scribe only start your line. Especially starting with no existing line as a guide. The picture with the fuselage top primed in white, shows some long panel lines that I had "obliterated" with sanding and successfully re-scribed with the information above and below. I did make some mistakes to begin with but, because I went slow and very little pressure on the tool, I was able to sand out my initial mistakes. With Pete Fleishmans F/A-18 book and Jeff Thompson's build, specifically, I learned that Mr. Thompson used Dymo label tape as his edge guide. He did his work with a pin vice. They happen to slip out of existing shallow panel lines quite a bit. With the UMM scribe the Dymo tape works well too. I have some clear Dymo tape and with one of the backers off you can see how the tape is going on and what's underneath your edge guide. Also as a plus, because it's tape, you can place it on curves well, unlike say a metal straight edge which you have to place then tape down. I am by no means an expert yet as I still overshoot my lines and have to fill and fix! Haha. Subjects with shallow recessed lines are great practice for re-scribing. I find that if I adhere to my rule above by letting the scribes weight only, do the initial cuts, I can increase the depth more easily than if I start by adding pressure to the tool right away. If you add pressure right awasy, when the tool jumps your guide or existing line, you will have a DEEP line to fix and no one wants that. It's all about just using the tool's weight only! I still have to use templates for hatches and doors occasionally, but those are done with the fine pin scribe. I am glad that I am able to help share ideas Joel. For the most part all of what I learn has been learned from someone else too. I have a LONG way to go to be like a Tommy P with his Globemaster but, maybe if I keep working at it, I can get there too! -Mark Edited May 6, 2015 by taggor Quote Link to post Share on other sites

Recommended Posts
Join the conversation
You can post now and register later. If you have an account, sign in now to post with your account.