SERNAK Posted July 13, 2015 Share Posted July 13, 2015 Speechless by the level of detailing!!! As Sharkmouth says, can't think of what you're capable of doing with an WWII aircraft's build!!! Keep up the good work!!! Quote Link to post Share on other sites
Shorty84 Posted July 13, 2015 Share Posted July 13, 2015 Hi Mark, nice update. You're adding quite a lot of PE to your Hog. And thanks for the info on the debonder. Up to now, if something goes wrong with placement I carefully remove the PE part and clean (read: sand) the PE and the contact area on the kit and try it again. So I may give the debonder a go in the future... I really like your idea to use paper to represent reinforcements on the airframe. I tried something similar with Tamiya-tape and superglue in the past. At the moment I'm experimenting with IP-boards printed on paper to upgrade cockpits. This works similar to colored PE without the need to buy a whole PE-fret. I'm curious how your rivets will look in the end. At the moment they look quite prominent so it will be interesting how they blend in when painting and weathering is done. Cheers Markus Quote Link to post Share on other sites
chuck540z3 Posted July 13, 2015 Share Posted July 13, 2015 Haha! You and I seem to both have the almost the same glues on our bench Joel. I have the Zap-A-Gap thin and medium (for filling work), the Loctite Gel (cheap and good for those jobs that need the strength. I used it during the wing construction.) I chose the Super Thin in an effort to NOT have as much glue build up while trying to get that "capillary action" on PE parts. The best way I have found is to immediately soak up excess glue with a Tamiya (applicator?) swab? I would recommend trying the Un-cure on a scrap piece of plastic with any "spares" PE part first to get the "feel for it" first. I don't want to eat my words about it NOT "attacking" the plastic. I haven't had any issues but, I have only been using it on the A-10 kit at present. Always better to be safe than sorry! Sometimes the un-cured glue can seem like its the plastic but, that hasn't been the case. It's just glue that needs to be removed further from the model. I will be curious to hear your results with the product Joel. -Mark Nice work Mark! Guys, the CA debonder you want to buy is called Great Planes. There are likely other debonders out there that work just as well, but I haven't found it yet and I've tried about 5 of them. It is, by far, the strongest and easiest to use. Mark, on your photo-etch parts, rub a Q-tip soaked with debonder over all the parts to remove the glue residue on the top surface. You want the Q-tip wet, but not so much that the debonder pools around the PE part, or it might lift. Even if it does lift, just re-apply more CA glue, then clean it up again. Model on! Quote Link to post Share on other sites
Joel_W Posted July 13, 2015 Share Posted July 13, 2015 (edited) Mark, Believe me, I'll let you know how the Debonder works when I finally get to use it. And thanks Chuck for posting the information as to which Debonder to get. Now I have to go and see if Sprue Brothers carries it. They're my go to guys for just about everything these days. Joel Edited July 13, 2015 by Joel_W Quote Link to post Share on other sites
jacobp51 Posted July 13, 2015 Share Posted July 13, 2015 Mark - your results are well worth effort. Spectacular detailing with the fasteners and PE!! I can't wait to see this model all finished! Jake Quote Link to post Share on other sites
taggor Posted July 13, 2015 Author Share Posted July 13, 2015 Mark - your results are well worth effort. Spectacular detailing with the fasteners and PE!! I can't wait to see this model all finished! Jake Thanks Jake! I can't wait to see it finished too! However, this means that the F-18 is taking a back seat for a little bit. Hope your windscreen repair is coming along. Looking forward to your progress! -Mark Quote Link to post Share on other sites
taggor Posted July 13, 2015 Author Share Posted July 13, 2015 Hi Mark, For PE which doesn't have stress placed on it, I use Gator's Grip Hobby Glue (an acrylic based product) which is available in thick and regular consistencies. Put a dab on a plastic surface (polypropylene lid from a coffee tin is what I use), touch the PE bonding surface to the blob, attach, clean up excess with water moistened cotton swab (personally, I use Q-tip brand because I can stretch the plastic tube at the center to make cyanoacrylate cement applicator tips - yes, I am a cheap skate). What scheme are you considering? Hoping to see what you'll do with the WWII propeller aircraft. Regards, Saul, thanks for stopping in and posting! Thanks for the tips and advice on the Gator Grip. The Q-tip trick is a good one too. I have the ones with the cardboard shafts so that one is not going to work for me until I need some more. I discussed the markings at the very beginning of the thread but, I would like to "dress this up" as A-10A 79-0179 from Operation Anaconda 2002. The 74th was the first EFW to support it which in turn rolled into Operation Enduring Freedom. My only concern is that some photos I have suggest that this particular aircraft may have been wearing markings of the 75th but, belonging to the 74th. I am in a bit of a bind with this right at the moment since I am unsure whom to contact to verify. I have some leads but, nothing concrete at this time. I really wanted to do it with markings from the 74th as I love the blue tipped tails of the 74th but, I would like it to be historically accurate marking wise if at all possible. If I ever get done with the two jets I have going I plan on doing a WWII P-40 Tomahawk of the AVG. I have the kit and plenty of markings to choose from. We will see. I can't really see the "end of the tunnel" yet. I am not going to start another kit as I have learned the hard way with this project that doing more than one kit is a "no no" for me. I just can't "shift" between projects without losing focus which has happened several times with this one. Of course that slows progress for both works. Thanks again for the post and stopping by! -Mark Quote Link to post Share on other sites
taggor Posted July 13, 2015 Author Share Posted July 13, 2015 Speechless by the level of detailing!!! As Sharkmouth says, can't think of what you're capable of doing with an WWII aircraft's build!!! Keep up the good work!!! Thanks for the kind words SERNAK! I could say much the same for your work as well. I would definitely like to "get on" with the WWII subjects but, I must finish what I have started to date. Thanks for stopping in and posting. -Mark Quote Link to post Share on other sites
taggor Posted July 13, 2015 Author Share Posted July 13, 2015 Hi Mark, nice update. You're adding quite a lot of PE to your Hog. And thanks for the info on the debonder. Up to now, if something goes wrong with placement I carefully remove the PE part and clean (read: sand) the PE and the contact area on the kit and try it again. So I may give the debonder a go in the future... I really like your idea to use paper to represent reinforcements on the airframe. I tried something similar with Tamiya-tape and superglue in the past. At the moment I'm experimenting with IP-boards printed on paper to upgrade cockpits. This works similar to colored PE without the need to buy a whole PE-fret. I'm curious how your rivets will look in the end. At the moment they look quite prominent so it will be interesting how they blend in when painting and weathering is done. Cheers Markus Hello Markus! Thanks for stopping in. As you mention about the Tamiya tape, I have used it to good effect with the construction of the cockpit details. I really liked the way it cut so clean. I am curious to see your IP's. I know all too well about the cost of buying additional frets of PE. Especially with this project but, I think the results are worth it. Please post some of your work with the IP's when you have an example that you are satisfied with. Ahh yes...... the controversial rivets...... white primer has a way a "brightening things up" especially over top of grey plastic. I think they will be fine. As I have said not too long ago...... "Well, if it turns out like crap, I will toss this kit and start a new one." I am anxiously waiting to get to paint to sort this issue out once and for all. However, I know that even then it will not please many. Oh well. I am eagerly awaiting more progress on your fantastic Sparka! I have one of those kits and by your WIP, I am not so sure I want to head into it anytime soon. Thanks again for the post! -Mark Quote Link to post Share on other sites
taggor Posted July 13, 2015 Author Share Posted July 13, 2015 Nice work Mark! Guys, the CA debonder you want to buy is called Great Planes. There are likely other debonders out there that work just as well, but I haven't found it yet and I've tried about 5 of them. It is, by far, the strongest and easiest to use. Mark, on your photo-etch parts, rub a Q-tip soaked with debonder over all the parts to remove the glue residue on the top surface. You want the Q-tip wet, but not so much that the debonder pools around the PE part, or it might lift. Even if it does lift, just re-apply more CA glue, then clean it up again. Model on! Thanks for stopping in Chuck. Thanks for the positive comment on my work and giving the "repeat" about that de-bonder you like so much. I had found it but, at an online shop I frequent less. I want to try it some time. I think the SB Un-Cure does a good job. At this point I only have two de-bonders to compare. Thanks for the tips too! -Mark Quote Link to post Share on other sites
taggor Posted August 5, 2015 Author Share Posted August 5, 2015 (edited) Update August 5, 2015 Pt. I Hello all. Well I have some more progress to share. I am not quite finished with any of it but, the following "mini" update. This is more about the tedious small things again and falls somewhere in the "yeah I care a little" section of model making. This small update details the work at blending the "turtle deck" to the rest of the fuselage. As the prior picture below illustrates it wasn't quite a flush fit for me. I seem to have some of the worst luck at fitting these Aires bits which will come around again for the nose gear later (horror story coming!). I just don't have the time to give a "full update" today. From this: To this: I know that it may not look like much but the process took a bit to arrive at the second picture. It's ALWAYS nerve wracking to work around an area that you like to think "it's done" and this was no different. Sorry all, I am having PC issues again and lost most of this post. I will have to finish this later. -Mark Edited August 6, 2015 by taggor Quote Link to post Share on other sites
Spad Posted August 5, 2015 Share Posted August 5, 2015 I'm glad to see you at work !!!! Indeed there are some problems in adapting the aires pit with the rest of the fuselage, I made up the gap with the addition of two strips of evergreen on the sides of the back of the pit, a micro gap is always present but is darkly much better than before. I confess right now that I started the painting of my model after a heavy preshading, I gave little color but finally I passed the part I like most. I expect to see other interesting updates! :) Quote Link to post Share on other sites
Youngtiger1 Posted August 5, 2015 Share Posted August 5, 2015 Just saw this thread and I'm not sure how I missed it. You are doing great work and I really like how you did the rivets...they are perfectly spaced :thumbsup:/> Mike Quote Link to post Share on other sites
Joel_W Posted August 5, 2015 Share Posted August 5, 2015 Mark, Any modeler worth is "salt" would instantly realize the effort, time, and skill needed to blend in a resin cockpit to the fuselage where is just doesn't show as a batch job. It's near on perfect. Well done my friend. Joel Quote Link to post Share on other sites
taggor Posted August 6, 2015 Author Share Posted August 6, 2015 I'm glad to see you at work !!!! Indeed there are some problems in adapting the aires pit with the rest of the fuselage, I made up the gap with the addition of two strips of evergreen on the sides of the back of the pit, a micro gap is always present but is darkly much better than before. I confess right now that I started the painting of my model after a heavy preshading, I gave little color but finally I passed the part I like most. I expect to see other interesting updates! :) Hello Vincenzo! Yeah, I am working on it exclusively now with the F/A-18 set aside for now. I just don't have as much time to work on the kit, take pictures, and post. I am interested (as is most following your build) how the paint is turning out. I hope the colors that we discussed are working out for you. Thanks for stopping in. Sorry about the problems with my post. I should have something more complete later. Perhaps by the weekend. -Mark Quote Link to post Share on other sites
taggor Posted August 6, 2015 Author Share Posted August 6, 2015 Just saw this thread and I'm not sure how I missed it. You are doing great work and I really like how you did the rivets...they are perfectly spaced Mike Hello Mike! Thanks for stopping in. It's very easy to miss all sorts of great work going on here at ARC. It would be a full time job just to read every "In Progress" thread alone! I appreciate your kind comment on the rivets but, I can't take credit for that as Hobby Boss already had them there. I just "punched" them out more for sanding and wash purposes. If you go back to my wing work you can see some rivet work that's not quite so evenly spaced! Haha. -Mark Quote Link to post Share on other sites
taggor Posted August 6, 2015 Author Share Posted August 6, 2015 Mark, Any modeler worth is "salt" would instantly realize the effort, time, and skill needed to blend in a resin cockpit to the fuselage where is just doesn't show as a batch job. It's near on perfect. Well done my friend. Joel Hello Joel! Thanks for the post and the kind comment. Sorry that I couldn't finish the post. I am working on it. I hope to have something "more substantial" to share by the weekend or Monday 5/10. Looking forward to the Scooter. I haven't seen it yet or perhaps I missed it but, I will be looking for it. I still say that for "Old and Slow" you sure are turning them out! -Mark Quote Link to post Share on other sites
Joel_W Posted August 6, 2015 Share Posted August 6, 2015 Hello Joel! Thanks for the post and the kind comment. Sorry that I couldn't finish the post. I am working on it. I hope to have something "more substantial" to share by the weekend or Monday 5/10. Looking forward to the Scooter. I haven't seen it yet or perhaps I missed it but, I will be looking for it. I still say that for "Old and Slow" you sure are turning them out! -Mark Mark, This time of the year, I don't spend all that much time modeling per session as I do in the colder months, so the work is coming along even at a slower pace. Plus two days ago my turn to install Windows 10 came, and I've been tweaking it little by little. Everything is nearly perfect now with a much modified Start menu, and I've turned of Cortana, the talking assistant, so my security settings are where I need them to be. The rest of Win10 is truly amazing. When you find the time just stop by and checkout the Scooter, but don't look for a cutting edge build. This is one of my OOB Builds for fun and relaxation, but still built to my standards. Joel Quote Link to post Share on other sites
taggor Posted August 7, 2015 Author Share Posted August 7, 2015 (edited) Ok, well... try number 2 to show some of the process pics of the turtle deck that were lost with my fist post attempt The first image is how it started by cutting strips of sheet plastic. The thinnest sheet that I have. I used the HB canopy as a contour guide to cut the curvature of the plastic. Glued in place and let the fun begin. The second picture illustrates the mask to apply Mori Mori polyester putty to "sqare off the connection of the fuselage to the deck. In this way I don't have so much mess to clean up. As applying putty can get ..... well, out of hand sometimes no matter how careful you might want to be. The third picture shows the finished application of the Mori Mori but, also shows that "lip" that always happens while sanding thin plastic. This was a real pain and you can see that some of the rivet detail from the Aires cockpit suffered from it. However, this isn't necessarily a "bad thing" in that, most paint finishes on aircraft are not the "carefully applied" type that we would like to think they are. Sometimes it's just "slopped on" to provide the corrosion protection needed. Necssarily obscuring details. At least that's my story and I am sticking to it! Haha. Once the blend was achieved (to be read, "When I had had enough torture trying to blend the strips down") I made a paint mask with Tamiya tape that gave me the rounded black portion of the deck. The cockpit sides and remainder of the deck were shot with Gunze 308. I chose not to highlight the detail as before since I have a little bit to go until I can call the area's around the cockpit finished. Than I will worry about dry brushing and the like. Next up will be the "horror story" I eluded to earlier. With all my preparation of the nose gear fitment earlier, you would think it would have gone smoothly. WRONG! I will touch on that next with some support photos. Hopefully my computer will co-operate and you all wont have to check in for only a couple of photos. Also I will say that I have chosen to use the Revell/Monogram windscreen and Canopy for a few reasons and I will try to touch on that too. So until next time when you will know what not to do when installing ballast and nose gear wells! Haha. -Mark Edited August 7, 2015 by taggor Quote Link to post Share on other sites
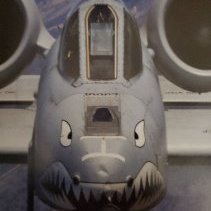
taggor Posted August 10, 2015 Author Share Posted August 10, 2015 The Horror Story 8/9/2015 Ok.... well I am hoping that my computer will co-operate with me on this post. I have collected enough pictures for this mini update. After this update you all will be only a week behind my actual work. I am leaving for an eight day TDY starting on the 11th and wont be back home to work on my build until the 19th. This may be a good thing! Haha. So before I get to the pics I need to describe "the horror." Obviously there are no pictures of this. I needed to work fast to correct a BIG error on my part. I had pre-painted the Aires wheel well and was ready to glue it in place along with the ballast that I had prepared months ago. When I did my initial test fitting of the wheel well I did not try to use the ballast. In this way I made a grave error and glued some ballast in the very front of the nose which caused the wheel well not to fit flush. This was all done with super glue gel! Yay. So I panicked. I doused the wheel bay with de-bonder and broke two needle files in the process! I didn't know it at the time but, the de-bonder had seeped through to the cockpit and had managed to get on the glare screen of the IP! Needless to say, I don't think I would have had a mind to continue this project had the de-bonder gotten to the IP or other parts of the cockpit. I am not sure I could have corrected my mistake any other way. As luck would have it, the cockpit IP and other parts were NOT affected and this was such a sigh of relief! On the other hand, my prior work to fit the wheel bay did not work out the way I thought it would so the panel that covers the gun housing and wheel bay was about 1/8 - 1/16" higher and would not fit flush at all (GROAN! Haha). So with that my work has been all about trying to blend this error away. I also wanted to add that I discovered, only today, that I had once again broken off the throttle control from the cockpit (that's four times now! Haha). I managed to find it wedged between the left rudder pedal and cockpit wall (BIG SIGH OF RELIEF!). It's back in place now where it should be. For how long is anyone's guess! Haha. I hope to NOT break it off again. So.... on with the pics! For the photo above, after I had got "a grip" on my mistake, I decided to add a portion of the gun barrels that you can see. Since HB includes the entire gun assembly, I was able to use a portion of the barrels and (not sure what to call it) a ring type attachment structure to add it which helps it to glue to the inner sleeve portion of the barrel shroud. The kit has this weird "lip" running to the rear of the shroud. I cut it off and what you can see is where the "lip" would have been where the barrels attach. At least one little victory! (Yes, BIG TIME Rush fan! Haha!) The effects of the de-bonder. It more of a paint stripper since it wont harm the resin or plastic. Now for some work moving away from that "horror" Sorry about the blur on the last two there but, I think you get the idea. Finally I would like to thank ARC member dmk0210 for sharing his collection of 23rd photos with me. I have been struggling with the authenticity/accuracy of the markings I initially chose to apply to this project and with his help, I now have an alternative if I can't get confirmation of the markings for A-10 79-0179 specific to the time period I wanted to use. A preview of things to come: Time to get the water boiling! Haha. Thanks all for checking in and I hope your stop here was at least helpful for your own HB A-10 build! Until next time. -Mark Quote Link to post Share on other sites
Joel_W Posted August 10, 2015 Share Posted August 10, 2015 Mark, At least it was a horror story with a happy ending. Now if you had used epoxy like I do to hold lead weights in place, then the outcome would have been a lot different. CA glue, at least for me is easy to break the bond by just grabbing and twisting the parts. They pop right off. The close ups of the Turtle deck are even more impressive now that I've seen how you went about it. Very nicely thought out and done. Have a great vacation. Cya when you're back on the forums. Joel Quote Link to post Share on other sites
jacobp51 Posted August 10, 2015 Share Posted August 10, 2015 Good save Mark! Since I spent a long time away from the hobby, I found myself making all kinds of errors on my Hornet build. We spend so much time trying to get everything "just right" and then, *BAM* - you spill a bottle of thinner all over the work bench!! Oh man, as if building these plastic kits wasn't tedious enough, correcting building mistakes and fixing blunders is all a part of the ride. Looks like you handled the A-10 mishap very well! I can't wait to see this build get closer to the finish line! I am so close to finishing my Hornet; it's actually pretty ridiculous that I haven't found the time! My wife (and I) recently inherited a 1975 Firebird from her father. It needs some serious work, and I know NOTHING about those cars. But, I did know it needed a home in the garage, and that meant I had to move my model bench elsewhere. I think I am almost ready to unbox everything and set-up the new work area. Hope to get an update, or even a finished build post soon! Keep up the good work. Have a good TDY, too. Jake Quote Link to post Share on other sites
Spad Posted August 10, 2015 Share Posted August 10, 2015 The skill of a modeller is not measured only when you're not wrong, but also on how they remedy their mistakes, right now you have proven your skill! Quote Link to post Share on other sites
taggor Posted August 12, 2015 Author Share Posted August 12, 2015 Mark, At least it was a horror story with a happy ending. Now if you had used epoxy like I do to hold lead weights in place, then the outcome would have been a lot different. CA glue, at least for me is easy to break the bond by just grabbing and twisting the parts. They pop right off. The close ups of the Turtle deck are even more impressive now that I've seen how you went about it. Very nicely thought out and done. Have a great vacation. Cya when you're back on the forums. Joel Thanks Joel! Yes, I was happy that the damage was not worse than it was! My TDY unfortunately is not a vacation and it's really hard to be away from the build as long as I am! At least while I am at work I can check on the forum from time to time. -Mark Good save Mark! Since I spent a long time away from the hobby, I found myself making all kinds of errors on my Hornet build. We spend so much time trying to get everything "just right" and then, *BAM* - you spill a bottle of thinner all over the work bench!! Oh man, as if building these plastic kits wasn't tedious enough, correcting building mistakes and fixing blunders is all a part of the ride. Looks like you handled the A-10 mishap very well! I can't wait to see this build get closer to the finish line! I am so close to finishing my Hornet; it's actually pretty ridiculous that I haven't found the time! My wife (and I) recently inherited a 1975 Firebird from her father. It needs some serious work, and I know NOTHING about those cars. But, I did know it needed a home in the garage, and that meant I had to move my model bench elsewhere. I think I am almost ready to unbox everything and set-up the new work area. Hope to get an update, or even a finished build post soon! Keep up the good work. Have a good TDY, too. Jake Hello Jake! Great to hear from you. Well, as you know, life happens. I really want to see your completed Hornet. I had to put mine down for the time being since it is just too much for me to switch subjects between the A-10 and the F/A-18. I am hoping that after your F/A-18 that you will continue to have another project on ARC. -Mark The skill of a modeller is not measured only when you're not wrong, but also on how they remedy their mistakes, right now you have proven your skill! Hello Vincenzo! Thanks so much for your kind words. I am sure that you are probably very close, by now, to showing some of your painted Hog. I am really looking forward to it! -Mark Quote Link to post Share on other sites
adamitri Posted August 14, 2015 Share Posted August 14, 2015 Hey Mark, thanks for the link to your build. Very impressive. Quote Link to post Share on other sites

Recommended Posts
Join the conversation
You can post now and register later. If you have an account, sign in now to post with your account.