BrittMac Posted July 7, 2009 Share Posted July 7, 2009 Wow, it all looks great! I can't wait to see how it is going to be finished. Yes, alcohol does seem to help with family gatherings...... This build may be simple for alot of guys here, but I am the low man on the totem pole when it comes to PE and Resin items, so I really appreciate all the pics and tips. They will help immensely I am sure. Quote Link to post Share on other sites
Floyd S. Werner, Jr. Posted July 14, 2009 Author Share Posted July 14, 2009 (edited) Moving along although slowly. I am on nights again so the pace should pick up. This time I'm getting the model ready for paint. One thing that I added out of the norm was the anti-collision light which can be molded in clear red or grey resin. I opted to try the red one for giggles. You can see the poor fit of the incorrect engine panel. That is a lot of styrene and superglue. Next up I tried some of Archer Fine Transfers Rivets. I have to say that these little jewels are really nice and should match the kit rivets after painting. Very highly recommended. I'll be ordering more for my other Cobras and Hueys. The rest of the time was spent putting on the PE for the various panels, here is the whole underside of the tailboom. and the right side of the fuselage. I did have to fill in some of the electrical compartment as the PE part is slightly smaller than the opening but not on every side. This was easy to do with some superglue and filler. The electrical panel looks great. Off to get the canopy dipped in Future. Floyd Edited July 14, 2009 by Floyd S. Werner, Jr. Quote Link to post Share on other sites
Tank Posted July 14, 2009 Share Posted July 14, 2009 Very nice....about the lights, what about the position lights? Is there colored resin for them also. With the Archer rivets, which set/s are you using? I have the Arctic Cobra I am starting and will need to get some of them. Quote Link to post Share on other sites
Albert Moore Posted July 14, 2009 Share Posted July 14, 2009 Hi Floyd, Beautimus work as always, she's coming together quite nicely. I know what you mean in regards to getting more modeling done while working nights. The bulk of my build ups were done while I was on the vampire shift. I had plenty of time on my nights off and would model well into the wee hours, plus I'd have a few hours to build in the afternoon before it was time to head out for work. Once I was moved to days my output dropped significantly. Cheers, Alby Quote Link to post Share on other sites
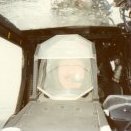
Floyd S. Werner, Jr. Posted July 16, 2009 Author Share Posted July 16, 2009 No pictures this time. I was not happy with my canopy. I created some stress cracks on it so I decided that after doing all that work that I was not going to accept the canopy as it was. Also Joseph provided some templates for the det chords that I didn't have before so I wanted to stay true to his vision and do this. I also learned some things last time. One thing was to paint the styrene black before I glue it in. This will speed the process and aleviate having to mask the inside of the canopy when it is done. I'm also going to try to use Gator Glue to attach the det chord and styrene door structure. It is slow going. I dipped the canopy today so I'll look it over in the morning to see how it is coming along. So far I've had to dip it four times. I think I have it this time. LOL Hopefully more pictures tomorrow. Floyd Quote Link to post Share on other sites
Anthony in NZ Posted July 16, 2009 Share Posted July 16, 2009 Hiya Floyd That is awesome indeed! Shame about the canopy after all of that. I bet she looks impressive "in the flesh" so to speak. I was up having a drink with Tore from FalconSquadron canopys last week as I was on business up there. I saw your big canopy master whilst I was there and had a wee smile knowing it was yours. He said that it was quite a tricky one to do without damaging them. Tore is a really tallented guy and so willing to share his knowledge. Thats what I love about this hobby, being prepared to share ideas etc....... Joseph had a spare tailrotor for my next big 412 project and I was gobsmacked at how nice they are.....thank you Joseph!! Keep up the great work Cheers Anthony Quote Link to post Share on other sites
Joseph Osborn Posted July 16, 2009 Share Posted July 16, 2009 Very nice....about the lights, what about the position lights? Is there colored resin for them also.With the Archer rivets, which set/s are you using? I have the Arctic Cobra I am starting and will need to get some of them. Nope, the position lights are cast into the wingtips and the light fairings for the tailboom. They can be cut off and replaced with tinted epoxy, though. The clear red anti-collision light was sort of an experiment. I probably won't be offering it as a regular item unless there's a strong demand for it. The Archer rivets are super-cool. They are on the new tail fin and I will be using them on future projects, too. The .008" and .014" are the most useful for my 1/32 and 1/35 projects. The canopy is proving to be a bit of a sticking point for both me and Floyd; it's not that the vac-form canopy doesn't fit or is hard to work with, rather it's because the AH-1S had much more detail stuck inside the canopy compared to the AH-1G. The detonation cord that goes around the perimeter of each of the four side windows is a very prominent feature, as is the helmet sighting system. I am making templates of both of these items that you can use to make your own pieces. My goal is to make it easy to add these items to the inside of the canopy WITHOUT having to cut the canopy apart and adding an internal sheet styrene framework. I think the addition of these items will make the canopy sufficiently "busy" to represent the real thing. This is delaying the release of the set, but I've been working on it for so long that I'm not going to rush the product and short-change the customer. Of course it's also delaying a lot of other projects, but them's the breaks Joseph Quote Link to post Share on other sites
Avus Posted July 16, 2009 Share Posted July 16, 2009 Awesome work! It's always a pleasure to watch the masters work. About the rivets: I've seen them used but always wondered how they work. Do you use them like water slide decals? Quote Link to post Share on other sites
Anthony in NZ Posted July 16, 2009 Share Posted July 16, 2009 Great to see you like the Archer rivets as I have several sets on order for my BK 117. Let us know if there are any tips or pointers for using them. Cheers Anthony Quote Link to post Share on other sites
Tank Posted July 16, 2009 Share Posted July 16, 2009 Nope, the position lights are cast into the wingtips and the light fairings for the tailboom. They can be cut off and replaced with tinted epoxy, though. The clear red anti-collision light was sort of an experiment. I probably won't be offering it as a regular item unless there's a strong demand for it. As I was looking around ARC a cat was selling these...... To me I think this would work better than trying to paint the lights the correct color and getting a realistic feel to it. Those are 1/48, but something in 1/32-1/35 would be cool, IMHO. As you can tell, I would be in favor of a product set like this for helos in general or geared toward a certain model. The Archer rivets are super-cool. They are on the new tail fin and I will be using them on future projects, too. The .008" and .014" are the most useful for my 1/32 and 1/35 projects. Thanks, the people at Archer are top notch. Course having them in your back yard helps too. I will have to get me some of them. The canopy is proving to be a bit of a sticking point for both me and Floyd; it's not that the vac-form canopy doesn't fit or is hard to work with, rather it's because the AH-1S had much more detail stuck inside the canopy compared to the AH-1G. The detonation cord that goes around the perimeter of each of the four side windows is a very prominent feature, as is the helmet sighting system. I am making templates of both of these items that you can use to make your own pieces. My goal is to make it easy to add these items to the inside of the canopy WITHOUT having to cut the canopy apart and adding an internal sheet styrene framework. I think the addition of these items will make the canopy sufficiently "busy" to represent the real thing. This is delaying the release of the set, but I've been working on it for so long that I'm not going to rush the product and short-change the customer. Of course it's also delaying a lot of other projects, but them's the breaks :DJoseph You may have already thought about but I will throw out there. Is it possible to do the det cord and such in vinyl, Roof did that for the AV-8's and people like the result of it. I have a set but havn't used it yet but it seems like the better option than to paint it or using PE. While I think the S is cool, I am really looking forward to the J release. Keep up the good work Joseph. Quote Link to post Share on other sites
Floyd S. Werner, Jr. Posted July 16, 2009 Author Share Posted July 16, 2009 About the rivets: I've seen them used but always wondered how they work. Do you use them like water slide decals? Yes just measure and cut. Dip in water and apply. Just like any other decal they need to go on a smooth surface. Floyd Quote Link to post Share on other sites
Avus Posted July 17, 2009 Share Posted July 17, 2009 Thanks Floyd, sounds veeeery interesting. Now I have to find them somewhere ... Quote Link to post Share on other sites
Floyd S. Werner, Jr. Posted July 17, 2009 Author Share Posted July 17, 2009 Made some progress today. First off the canopy pieces are finally acceptable to me. Now it was time to add the framing. Since I already did it once I simply popped it off the old canopy. Painted it black, thinking it would be easier to do this before I glued them on. See I can be taught. LOL I simply added the new canopy framing to the new canopy with GATOR GLUE. This stuff works great and cleans up with water. I'll see how it handles up to a little handling, but so far it was far superior to white glue. I used locking tweezers to hold the pieces in place and then just cleaned up any sputz with a toothpick and cotton bud with water. While waiting for that to dry I also used Joseph's template to make the det chord. I think I may have this. The tape is 30 day tape with very little tack to it. I superglued the ends together. Tomorrow I hope to get it attached. I'll paint it dark grey before I do and hopefully it will work. I'm going to use the Gator Glue to attach it and see how it works on this. It dries clear so I don't anticipate any problems. Then I decided that it would be better to fix any mistakes prior to putting the canopy on. So I masked up the cockpit, mast area and the upper portion of the anti-collision light and sprayed some Alclad Grey Primer. I love this stuff as it dries really quick, like before you put the airbrush down. Anyway, there were some areas that needed some TLC, but far fewer than I would have thought. I didn't have time to get it sprayed again today but I will tomorrow. Oh the rivets worked like a champ. I used a size too small but they are acceptable to me. It is amazing the difference a primer coat makes. This baby is coming along nicely. Still haven't decided on markings. Joseph just pulled one out of his fourth point of contact that I just might have to do. If not I'm now leaning to an Israeli aircraft. At least it would be a combat veteran. LOL More tomorrow. Floyd Quote Link to post Share on other sites
Avus Posted July 17, 2009 Share Posted July 17, 2009 Splendid! I'm looking forward to see the chords in place. BTW just ordered some rivets! Quote Link to post Share on other sites
Floyd S. Werner, Jr. Posted July 20, 2009 Author Share Posted July 20, 2009 Wow, I am glad to have the inside of the canopy done. I've been talking with Joseph and think that vinyl det chords are the way to go. That said I used the solder and attached it with Gator Glue. While I liked it I think Elmer's White Glue is easier to use and clean up. Here is the HSS and all the interior stuff attached. Included in the front cockpit is a scratchbuilt compass and rear view mirror. Some scratchbuilding had to take place on the cockpit doors. I needed to make the interior door handles from styrene. Fireball's PE for the outside handle was added as well, but if your aircraft had the same type of handles as later models of Cobras you will have to scratchbuild them as well. Finally just another test fit which indicated I needed some styrene around the doghouse area but the rest fit like a champ. Don't be distracted by the ugly look of the clear parts. Once I add the color you won't be able to see any of that stuff. With all the stuff hanging from the canopy, the det chord, and other stuff I'd say it looks plenty busy enough. After another seam and primer check it will be time to attach the canopy. Then the model should progress rapidly again. Still leaning towards an Israeli aircraft. Floyd Quote Link to post Share on other sites
rotorwash Posted July 20, 2009 Share Posted July 20, 2009 Floyd, Looking beautiful! I be interested to see a US S-MOD cobra in 32nd, but I must agree, however, that the Israeli scheme is much more colorful. Ray Quote Link to post Share on other sites
petebuilt Posted July 20, 2009 Share Posted July 20, 2009 Floyd, Regarding the canopy framing, did you know that Evergreen makes black styrene sheets? The canopy looks fantastic BTW! Pete Brown Quote Link to post Share on other sites
Floyd S. Werner, Jr. Posted July 20, 2009 Author Share Posted July 20, 2009 Looking beautiful! I be interested to see a US S-MOD cobra in 32nd, but I must agree, however, that the Israeli scheme is much more colorful. I agree I wanted to do a US one, but in my haste to build up the cockpit set I painted it black. This sort of limited my options. I should have painted it grey and then I would have built the 2nd ACR aircraft. I was going to do a National Guard bird but someone else may be doing that. hint, hint. So I thought why not something different and in that scale the light brown will set it off nicely in my display case. Maybe next time. I did not know that Evergreen made black styrene. Hmmm, I'm going to have to find some. Floyd Quote Link to post Share on other sites
Avus Posted July 21, 2009 Share Posted July 21, 2009 It keep proceeding splendidly! I love all that detail on the canopy. Quote Link to post Share on other sites
Floyd S. Werner, Jr. Posted July 26, 2009 Author Share Posted July 26, 2009 Been slugging away at this baby slowly but surely. I didn't like the det chord that I laid down and Joseph pointed out that it was too small. I used the wrong diameter soooo, I pulled off the old and cleaned up the canopy somemore and added new det chord the correct size this time. It looks much better. I've attached the canopy to the fuselage with white glue and it fit really well. I still have to add the WSPS to the canopy framing. Probably Monday when I hope to get the canopy masked and primered. In the meantime I've been busy with the wings. Here you can see the attachment point for the TOW with the sway braces installed. The rocket pods went together really well. I'll be using M-200 pods for my aircraft. Everything here fit like a champ and looks really good to me. I used the more modern ejector racks actuators so I could use the older style on a G model in my future. Then I added the stuff to the wing. Everything fit really well. One of my inner pylons had to have a touch of filler, but only a touch and it was perfect too. I've decided that since I painted the cockpit black and I have all the bells and whistles (WSPS, round skid tubes and such) that I would have to do a National Guard aircraft. I've chosen the Arizona NG as it has a unit marking on the upper doghouse. It will give me a chance to weather the US Army Helicopter Green really well. Floyd Quote Link to post Share on other sites
Anthony in NZ Posted July 26, 2009 Share Posted July 26, 2009 Beautiful work. That swaybrace detail is something else! Thanks for the update! Quote Link to post Share on other sites
rotorwash Posted July 26, 2009 Share Posted July 26, 2009 Floyd, She's looking beautiful! I have to confess, I'm glad it's gonna be a Guard bird. In fact I have a strong suspicion I know which one! I was gonna post a pic of her, but I figured you might want to surprise everyone at the end. I can't wait to see her finished. Ray Quote Link to post Share on other sites
Avus Posted July 27, 2009 Share Posted July 27, 2009 Splendid! Truly amazing! Quote Link to post Share on other sites
Longbow Mech Posted July 28, 2009 Share Posted July 28, 2009 Holy Cow dude!!!!!!!!!!!!!! Looks awesome Brock Quote Link to post Share on other sites
Floyd S. Werner, Jr. Posted July 30, 2009 Author Share Posted July 30, 2009 (edited) OK we are getting down to the wire, TOW wire that is LOL, on the fuselage. The canopy fit into place beautifully. I was very happy with the results. After it was attached with white glue I masked up the outside of the canopy with Tamiya tape and some 30 day tape. I don't want to rip off the canopy when I remove the masks. Once that was done it was time to add the little things to the outside, such as the WSPS channel and cutters, both top and bottom and the rain removal system which was a beautiful piece of work. Some other very little things were added prior to painting. I am awful glad I did this now and not ruin my paint job later. Everything fit perfectly it was just my gluing. Ham handed. Anyhow, the steps were easy to go on as was the skid light. I sanded the top piece and ruined it so I had to scratch another one. I'm quite happy with the results. Since I just couldn't have the skid light hang there without any cables to it I added some solder for the wiring and then secured it to the skid with some Tamiya tape and ran the wiring into the light and the fuselage. Next came the Anti-Strella exhaust. Because I used an earlier version of the exhaust pipe the new deflector didn't work for me. I ended up having to pull and older style (lacks some minor details) of deflector and it fit as it was designed to do. Had I waited to start the build once I had everything in hand I would not have had an issue with the new exhaust and deflector. The final thing for the fuselage is the TSU. I dreaded this piece because of the little and fragile piece in the front. Well I worried for nothing. It worked out perfectly. The bending will challenge you though. LOL The TSU itself is so cool. I hate to put a cover on it. I might just leave it off and put it on the gunner's seat for a splash of color on the inside. I mean that thing came out beautiful. Now if I can only paint it nice. Early position indicator installed when this photo was taken. New and longer indicator. Haven't decide if I will paint it tomorrow or just work on the rotor blades. Hopefully the painting will get done. Floyd Edited July 30, 2009 by Floyd S. Werner, Jr. Quote Link to post Share on other sites

Recommended Posts
Join the conversation
You can post now and register later. If you have an account, sign in now to post with your account.