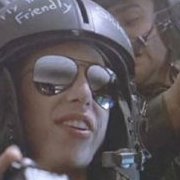
Lasinaatti Posted March 30, 2024 Share Posted March 30, 2024 (edited) Hey y'all! Time for another Hog. After almost a month, I finally got my hands on the Academy A-10C. Well... sort off. It's actually a Hobby 2000 boxing of the same molds with some much cooler decals - Hogs, that took part in Operation Inherent Resolve fighting against the Islamic State, 2017-ish. Local store said Academy aren't producing this set much for some reason. Don't know how true that is but I'm happy I got this one. There's some great pictures of the tail numbers in the decals with plenty of kill markings, unique weathering and of course - full loadouts. I even have a leftover GBU-31 from a Tamiya F-14D I can use! The Academy kit has a fantastic one-piece aft section that's just a dream. The seams on the A-10 kits have always been a PIA, so this is going to be a breeze - much like their Zulu Cobra I built a few years back. In general they've tried to eliminate unneccessary seam lines which is very thoughtful of them. Most jets these days are super flat which gets rid of the seams by nature of design but the A-10 doesn't get that luxury thanks to its older style of fuselage. The kit isn't without its faults though, but like I said, first impressions are very nice. I had to fill my Hog-needs with something until the GWH C model is released. Issues include the angle of the engines, which is a bit steep, as well as the infamous shallow intakes. I can live with them though, & I'm not shelling out $40 for the intake fix kits. There's great pictures of 81-0988 in the air, so I'm gonna build this one with the gear up. Almost feels criminal hiding all that beautiful detail under the landing gear doors. I don't think any manufacturer has added as much detail to the main wheel-wells, so it's nice to see some progress here. So far I've just done some general cementing & preshading, can't wait to get really going with this one. Going to be a fun project. No PE or resin this time, which I'm fine with - saving those for the GWH-kit. Edited May 27, 2024 by Lasinaatti Quote Link to post Share on other sites
BastianD Posted March 30, 2024 Share Posted March 30, 2024 Nice kit, looking forward to follow your progress. Quote Link to post Share on other sites
Thadeus Posted March 31, 2024 Share Posted March 31, 2024 Nice start. Great motivational pics for the build. I was looking at the Academy Hog for a while if I ever was to build a Hog in 1/48. The Hobby 2000 boxings are indeed much cooler. Quote Link to post Share on other sites
Lasinaatti Posted April 1, 2024 Author Share Posted April 1, 2024 Some progress this weekend. Gave the pilot his tan flight suit for the sandbox. Still needs a wash but I'll add that after a gloss coat. Not that happy with the detail, an aftermarket pilot would definitely do wonders here. Didn't bother cleaning up the legs either since it'll mostly be hidden in the cockpit. Applied the base colors for the cockpit as well. The decals for the instrument panels are quite nice so all the details will come after the gloss coat. I painted the ejection handles with a white to prepare for the yellow for better coverage. I'm missing a good bright green color, so I'll have to hold off on painting the oxygen tank. Also added some fading & dust for the black sections. Some dry brushing too, eventually. Test fitted the forward fuselage. Fit seems alright, but we'll see how that goes with the finished cockpit. Probably going to add some yellow/gold tinting to the windshield sides. Also planning a folded US flag in the cockpit so we'll see how that comes together... Saw someone on Reddit use foil for that. Quote Link to post Share on other sites
A-10 LOADER Posted April 1, 2024 Share Posted April 1, 2024 Good start so far. Did you ever finish your AC-J Gunship? Steve Quote Link to post Share on other sites
Lasinaatti Posted April 1, 2024 Author Share Posted April 1, 2024 4 hours ago, A-10 LOADER said: Good start so far. Did you ever finish your AC-J Gunship? Steve It's finished! Just need to get some photos that'll do her justice. Waiting for sunny weather mostly. I have to build a little lightbox some day as well. Would make photos so much easier! Quote Link to post Share on other sites
Collin Posted April 3, 2024 Share Posted April 3, 2024 On 4/1/2024 at 2:54 AM, Lasinaatti said: Some progress this weekend. Gave the pilot his tan flight suit for the sandbox. Still needs a wash but I'll add that after a gloss coat. Not that happy with the detail, an aftermarket pilot would definitely do wonders here. Didn't bother cleaning up the legs either since it'll mostly be hidden in the cockpit. Applied the base colors for the cockpit as well. The decals for the instrument panels are quite nice so all the details will come after the gloss coat. I painted the ejection handles with a white to prepare for the yellow for better coverage. I'm missing a good bright green color, so I'll have to hold off on painting the oxygen tank. Also added some fading & dust for the black sections. Some dry brushing too, eventually. Test fitted the forward fuselage. Fit seems alright, but we'll see how that goes with the finished cockpit. Probably going to add some yellow/gold tinting to the windshield sides. Also planning a folded US flag in the cockpit so we'll see how that comes together... Saw someone on Reddit use foil for that. Following here for sure. Does the pilot actually fit? I typically end up cutting off the legs to get my pilots to fit in the cockpit for my in-flight builds. Cheers Collin Quote Link to post Share on other sites
Mr.Happy Posted April 3, 2024 Share Posted April 3, 2024 Top Notch. Nice work on the pilot figure. Keep modeling. Mr. Happy Quote Link to post Share on other sites
Lasinaatti Posted April 4, 2024 Author Share Posted April 4, 2024 20 hours ago, Collin said: Following here for sure. Does the pilot actually fit? I typically end up cutting off the legs to get my pilots to fit in the cockpit for my in-flight builds. Cheers Collin Seems so, from the dry-fitting I did. I feel like modern kits are much better in this aspect. Fit is much better than kits from 20 years ago. Quote Link to post Share on other sites
Eastern Posted April 4, 2024 Share Posted April 4, 2024 (edited) Non scale of mine but gonna follow with much interest. Cheers and happy modeling! Alexander Edited April 4, 2024 by Eastern Quote Link to post Share on other sites
Lasinaatti Posted May 5, 2024 Author Share Posted May 5, 2024 Finally back! Been quite busy with work but eager to get back into it with the Hog. Folded the US flag for the cockpit. The measurements for it were accurate in 1/48th, and it was then folded in the correct fashion. I had to cut some bits off because of the difficulty of folding something so small that many times. Just need the dark blue coloring & some stars and we'll hopefully be good (if only it were that easy...) Also added some details to the ejection seat. The black sections on the C seats were a surprise to me so I had to hand paint them. Not that it would have been easy to mask those sections off anyways for airbrushing. The ejection handles are a bit messy on the inside but the figure will hide that. Also painted the stick. As well as drybrushed the black sections of the cockpit. Looks like I'm finally ready for the clearcoat for the instrument panels. I could probably forgo it here, but it'll help with the adhesion, especially with the uneven surface. The clearcoat will also help with the eventual wash. Quote Link to post Share on other sites
Lasinaatti Posted May 5, 2024 Author Share Posted May 5, 2024 Hey y'all. Got the cockpit together very quickly actually! Added some documents on our pilot's lap to cover up that nasty hole on the leg. Worked out quite nicely. I clearcoated everything, applied the decals and wash, and sealed everything with AK's 3rd Ultra Matte Varnish. This stuff's been working super well for me & gives me a dead flat surface. The decals were brilliant. The raised details didn't give me any issues & the instruments look just painted on! Some of the side panel switches are misaligned but you can't even tell unless you zoom in. That was most likely just user error & I won't give the manufacturer any crap for that. Also finished up the US flag & glued it in place with some wood glue. I think I got the position right but unfortunately I had already masked up the windscreen so we won't know until I unmask her. The tinted side windows that some Warthogs have did cross my mind but I haven't had a good experience with clear colors so I decided to just let that slide. Got her all sealed up now and just need to add a few more bits & pieces before she's ready for Light Ghost Gray. Quote Link to post Share on other sites
Thadeus Posted May 7, 2024 Share Posted May 7, 2024 Looking pretty good, especially on these decals in cockpit. Great fit. Quote Link to post Share on other sites
Lasinaatti Posted May 24, 2024 Author Share Posted May 24, 2024 Back again with the hog. Finally got the Compass Ghost scheme how I want it. I might have to tidy up the fuselage sides a bit though, but it's getting there. Finally got Dark Ghost Gray down, as AK's rendition hasnt been correct at all to my eyes. I've always just rectified this by adding some Tamiya Sea Blue on top of it to make it bluer but this time I decided to make a proper paint mixture. A mix of Intermediate Blue & Dark Ghost Gray seemed to do the trick & I'm very happy with the end result. It was however still lightened with some Light Ghost Gray on top to simulate some additional fading. Also painted the false canopy on the underside. It's a bit messy right now & doesn't look that good but it'll all work out when I weather the bottom fully. It's going to be very dirty. Working on the ordnance as well, the GBU-54s had some overspray which I'll need to fix but we're well on the way. The rocket tube still needs the edges painted which is why it's still masked up. The engine intakes were also masked & painted. They came out looking very nice, even if they are still a bit shallow. My next big thing are these weird painted sections on the leading edges of the wings. This unit, or these tail numbers in specific seem to have it, & I wouldn't be able to sleep at night if I didn't attempt to recreate them. Shouldn't be too difficult, & it'll add a nice touch. There's a surprising amount of variance in the Compass Ghost schemes. Quote Link to post Share on other sites
Lasinaatti Posted May 24, 2024 Author Share Posted May 24, 2024 Started work on those painted sections which would have been perfect as decals.... kind of disappointed in the decals of the kit now, when they obviously go to great lengths to recreate these specific tail numbers, but then forgo something as unique as this. Oh well, at least it'll be a nice challenge. Still need to do the thin little darker lines so you can actually make out what I'm trying to recreate here. And they really do need to be as thin as I can make them. Otherwise it'll just be comical looking. Quote Link to post Share on other sites
A-10 LOADER Posted May 24, 2024 Share Posted May 24, 2024 Those "weird painted sections" are actually Corogard, it's a polyurethane tape, applied to the leading edges, to help prevent nicks and chips. After it's applied the area looks darker. On white it looks slightly yellow. Steve Quote Link to post Share on other sites
Lasinaatti Posted May 25, 2024 Author Share Posted May 25, 2024 21 hours ago, A-10 LOADER said: Those "weird painted sections" are actually Corogard, it's a polyurethane tape, applied to the leading edges, to help prevent nicks and chips. After it's applied the area looks darker. On white it looks slightly yellow. Steve Good to know! Any reason they don't seem to appear on most A-10s? Quote Link to post Share on other sites
A-10 LOADER Posted May 25, 2024 Share Posted May 25, 2024 2 hours ago, Lasinaatti said: Good to know! Any reason they don't seem to appear on most A-10s? Dunno. I know our jets had them. Steve Quote Link to post Share on other sites
ST0RM Posted May 26, 2024 Share Posted May 26, 2024 I like that you started with a chromate primer, then the grey. And the dirt accumulated in the instrument coaming is perfect. Quote Link to post Share on other sites
Lasinaatti Posted May 26, 2024 Author Share Posted May 26, 2024 3 hours ago, ST0RM said: I like that you started with a chromate primer, then the grey. Haha, I like using colors that stand out against gray, so I can see which sections still need paint. The chromate green was actually a happy accident, I meant to buy a lighter shade but someone had put that cockpit green in with the lighter ones. The fact that it looks like actual airplane primer is very cool though! Quote Link to post Share on other sites
Lasinaatti Posted May 26, 2024 Author Share Posted May 26, 2024 Got the Corogard sections painted & I'm quite happy with them. The edges are obviously too big for this scale but it gets the point across! All the ordnance is done too, now everythint is just waiting for a gloss coat & decals. After that I can get down to weathering. Quote Link to post Share on other sites
Lasinaatti Posted May 28, 2024 Author Share Posted May 28, 2024 Quick update and a little flex on what I pulled off. Basically got finished with all the decals. There was a little issue though where my reference image of 81-0988 has a word, I think "Champs," written where the crew chief's, pilot's etc. names are usually written. Don't quote me on that, but if anyone has info on what the word is, please do share. Anyways, the decals have either an empty frame with the bulldog or one full of text that isn't for my tail-number. You might notice the decal is a little cut-up and see where I'm going with this. I basically cut individual letters from the decal to recreate the text on my source image: There wasn't an M so I used two Ns to deal with that. No Ps either, but a flipped G will deal with that. I'm very happy with the result & you can hardly tell that it's been cut up and hand-made. I did have a few of the Gs disappear on me (they were tiny!) but thankfully I had spare letters. Anyways, this was just to show off a little, almost ready for the weathering now. Just need another thin gloss coat to protect the decals. They were fantastic though, basically melted into the finish, so I could probably just skip the other gloss coat but old habits die hard. Quote Link to post Share on other sites
GeneK Posted August 6, 2024 Share Posted August 6, 2024 Catching up ... great workmanship. I'm particularly impressed with the decal work you did on the cockpit -- are those kit decals, and did you apply them one small section at a time? Gene K Quote Link to post Share on other sites
jonwinn Posted August 6, 2024 Share Posted August 6, 2024 Nice! I love the detail in your cockpit. I lived a few miles from the Warthogs base in the 80s and 90s near Westfield MA. Loved watching them buzz over the mountains. Quote Link to post Share on other sites
BastianD Posted August 8, 2024 Share Posted August 8, 2024 Very nice beast! Quote Link to post Share on other sites

Recommended Posts
Join the conversation
You can post now and register later. If you have an account, sign in now to post with your account.