Floyd S. Werner, Jr. Posted January 9, 2014 Author Share Posted January 9, 2014 (edited) Loving what you're doing here Floyd. The back end is really starting to look like a chook! Does the cobra interior set come with an APU? Are you going to retain the kit soundproofing or do you have another alternative? I love the big square windows at the back, I wish ours had them. It'd certainly make my life easier :)/>/>/> keep up the great work, Craig p.s. Not that it matters, but that big cylindrical object next to the aft transmission access panels (the bomb) actually sits inside the aft transmission area and so is not visible when the doors are closed except for a pressure gauge on the other side. Still, it adds some more interest to a very busy area. I've got plenty of photos of this area. It's from a D model, but most of the stuff is pretty much the same down the back as far as hydraulic installation goes I believe, so if you need any for reference let me know. I would love to get photos up in that area on both sides of the transmission. I didn't know where that cylinder went. Best guess. I'll pull it off. I just need to find out the wiring and hydraulic lines where they go and where they come from. That upper area is a tough pace to find photos. The Cobra Company does have the APU and the mount. I just won't put it in until after the fuselage halves are joined. I was going to use the kit soundproofing but I do have some wine/ champagne wrappers that have the pattern. Where should I put it? You can email me at fwernerjr@comcast.net Floyd Edited January 9, 2014 by Floyd S. Werner, Jr. Quote Link to post Share on other sites
Twig Posted January 9, 2014 Share Posted January 9, 2014 Yep I'll have to go into work and get some of specifically what you're after. No matter how many photos you have, you never have the one you need! Craig Quote Link to post Share on other sites
MH-47E/G_Graduate Posted January 17, 2014 Share Posted January 17, 2014 Twig, all that stuff back on the ramp is exactly the same as the D Model. It is still a Chinook. There are a couple different "black boxes" back there and the FRIES bars but all the plumbing is the same. So, any pictures you get Floyd will help the project. Quote Link to post Share on other sites
Floyd S. Werner, Jr. Posted January 18, 2014 Author Share Posted January 18, 2014 More updates coming. Floyd Quote Link to post Share on other sites
otis252 Posted January 20, 2014 Share Posted January 20, 2014 Does anybody have the Wings & Wheels CH-47 book? Just wondered what your opinions were, I've never seen one of their books. Thanks. Chuck Quote Link to post Share on other sites
mark31 Posted January 20, 2014 Share Posted January 20, 2014 Does anybody have the Wings & Wheels CH-47 book? Just wondered what your opinions were, I've never seen one of their books. Thanks. Chuck Yes i have the book and its great for a D model. Mark Quote Link to post Share on other sites
Ishthe47guy Posted January 23, 2014 Share Posted January 23, 2014 I should have decent shots of that area in my files. Let me get some breakfast (oatmeal... isnt middle age great...), and take a gander before I head to work. Quote Link to post Share on other sites
Floyd S. Werner, Jr. Posted January 24, 2014 Author Share Posted January 24, 2014 Update 10-The interior After cleaning up the roof to remove the molded on detail it was time to add the Cobra Company framing set. I don’t think this set is available anymore. I did this process without the aft portion attached to the fuselage. It just made it easier to handle. I just followed the instructions to get the vertical parts in place. I elected to cut the parts in half as it would be easier to deal with. This required me to fill the small gap between the cuts. Here is what it looks like with the parts installed. I used styrene plugs to cover the joins. Most are from the backside but the first two are on both the front and backside as they are seen both ways. Before I installed the horizontal supports for the seats and anything else I thought it was time to add the aft pylon to the fuselage. This wasn’t difficult as long as you take your time and make sure the fit is good. I flat sanded the ends to make sure they fit well. Then it was a matter of clamping and gluing the parts together. There was very little need for filler. Here are the frames after the front and back have been joined. And just to make sure that it all fits properly and to motivate me I taped the fuselage halves together. Now I thought was a good time to add the external fuel tanks. I knew I had to support the weight of them and the model. The tanks are unfortunately heavy because of the shape and casting. Test fitting them revealed a slight problem. The tanks are slightly short. It is important to align the tanks properly at the front and at the rear round window. Here is what I mean. If you align the front the window is off. I’m not going to say it is blank mm short as your mileage may vary do to the sanding of the fuselage halves. Either way, I came up with a relatively easy fix. I cut the fuel tank in half. Aft of the pump assembly, which while I’m thinking about it, I’m sorry there is a bubble there. It is on everyone’s copy. Mine included. It is a limitation in the molding process. You will have to repair it. Sorry. Anyhow back to the cut. I used a saw and separated the pieces. Once the tank was in two pieces I simply added styrene to get it to the proper length. I used some clamps and a BAF (big a* file). My BAF is very straight so I simply clamped it to file. This made sure that there was no twist in the tank and that they were aligned along the bottom, which in theory should align everything. While the tank was attached to the file I put a horizontal support on the backside of the tank. There is plenty of room and you’ll never see it so you don’t have to be especially neat. I then drilled four holes for wire support, two in front and two aft of the cut. This held everything in place. Then it was as any other seam, filler, sand and repeat. If you do it properly it should look like this. Then it is just a matter of checking the size against the model. Getting the tank to attach to the fuselage is pretty easy. I drilled four holes in inconspicuous spots, two below the floor line and then some mid fuselage that you probably won’t be able to see. You’ll note the aft most ones are near the bulkheads. This will hide it from the back and will allow me to add stuff (seats or gear) to cover the holes. I attached the wire through the holes and attached the studs with epoxy. I let it dry overnight and then I’ll go back in with super glue and Apoxy Sculpt and fair the tank in. Repeat for the other side. It is starting to look like a behemoth that it is. This ain’t your father’s Chinook anymore. Quote Link to post Share on other sites
Intruder_bass Posted January 25, 2014 Share Posted January 25, 2014 Hmmm... Floyd, I suspect this is due to shrinkage of the mold and therefore the castings... The original master was a much better fit. thats unfortunate, but not the end of the world. Your fix looks fairly simple and effective! Quote Link to post Share on other sites
Winnie Posted January 25, 2014 Share Posted January 25, 2014 Looking good so far. Too bad the internal ribs are no longer available... Wonder if Chris Miller/Cobra Company may allow the drawings to be published?? could possibly be made out of Sheet Styrene? Cheers Quote Link to post Share on other sites
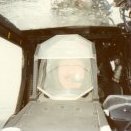
Ishthe47guy Posted January 25, 2014 Share Posted January 25, 2014 Had these rear end shots in my files: Still looking to see if I have any clear shots of the left side of the ramp. Quote Link to post Share on other sites
Intruder_bass Posted January 25, 2014 Share Posted January 25, 2014 Looking good so far. Too bad the internal ribs are no longer available... could possibly be made out of Sheet Styrene? Cheers anything can be made out of Styrene! just takes time... a lot of time! the rest of the inside walls could be covered with soundproof material. No really need to make all the frames exposed. Good luck! Quote Link to post Share on other sites
Floyd S. Werner, Jr. Posted January 25, 2014 Author Share Posted January 25, 2014 anything can be made out of Styrene! just takes time... a lot of time! the rest of the inside walls could be covered with soundproof material. No really need to make all the frames exposed. Good luck! Andriy I love your work. I need to send you a check. Maybe we should have done the ramp area. LOL Floyd Quote Link to post Share on other sites
Youngtiger1 Posted January 26, 2014 Share Posted January 26, 2014 Nice progress Floyd. Sorry to see the shrinkage on the tanks but you did great fixing it ;)/> Mike Quote Link to post Share on other sites
Check Six Posted January 26, 2014 Share Posted January 26, 2014 anything can be made out of Styrene! just takes time... a lot of time! Good luck! That's some serious structural detail! Quote Link to post Share on other sites
Floyd S. Werner, Jr. Posted February 9, 2014 Author Share Posted February 9, 2014 Update 11- Sit down but still not happy I had the framework in and now it was time to put some seats down. I had the Cobra Company resin seats and the Eduard photo etch ones. I liked them both but finally decided on the Eduard ones. Folding them was easy enough with a Small Tool Company Folding Tool. Here are some photos of the seats. Test fitting the seats to the floor There are more sets coming but I wanted to get a ‘feel’ of how they would look Well after getting the interior framing in there and talking with some Night Stalkers they informed me that there was always insulation in the cabin. So now what to do? So I took to drinking. Then after literally dreaming about how to accomplish this for two nights, the drinking hit me. Martini & Rossi Asti Spumante has foil around their bottles and it looks like a quilt pattern on it. BINGO! In a drunken and sleep deprived state of mind I concocted how to make this happen, but I better test it before I screw the model up. I was never real happy with the avionics shelf as had been pointed out on ARC, that is normally covered with insulation blankets. I tore out the shelves as they would no longer be used and covered the area with plastic card and foil. I figured if it worked on the plastic card it would work the other way. Just in case I screwed up too bad I could always get another one from my other kit. Thank God, I liked it. I did find out after gluing it in place that I should have left the shelves in and rolled the insulation down to reveal the avionics. Oh well live and learn. It is staying like this, but you can do whatever you like. Now it was time to see if the ceiling and side walls could be covered in insulation. The framework would work to my advantage and provide the mounts for the insulation. Since I would now have relief in the cabin I needed to make up the area where the first aid kits and the ramp controls would be positioned. The insulation attaches to them so they needed to be thicker than normal. I scratch built a couple of rectangular boxes out of .030 x .100 plastic strip. Then just attached and glued them in place. Here you can see the resulting areas. The insulation itself is easy enough. First use tracing paper and measure and cut to the shape that you need between the frames. I broke it down into an upper and a lower insulation blankets. It looked right to me. Once the shape is good on the paper then double sided tape was added to it and on top of that the bottle foil was added. Make sure to orient the pattern the same on all the blankets. Attach them the blankets with super glue. VIOLA! I tried to not use an area with the name or stamp on it but there are some places where I said f it. It is in the middle and damn near impossible to tell. My liver can only do so much work. Another benefit of the insulation was that any holes I made for the fuel cell mounts were now covered with no additional filling. Now that I had a sandwich it was time to fit the first pieces. Here they are installed with a first aid kit just sitting in position to see if it would look right. I'm very happy that it does, at least to me anyhow. Another essential part would be that the insulation fits around the windows. You will have to glue in the windows now. Make sure you use the correct windows for the aircraft you are building. Normally, and I hate to use that with TF160th aircraft, the first two windows are flat, then the aft round window is the bulged type, followed by the rectangular one. I cut a piece of the foil and did not do the sandwich, maybe I should have, but with just the foil rolled around something of suitable size (15mm). I placed it in place and when I was happy with the set up I used white glue to hold it in place. Perfect. Well perfect to my mind’s eye. The rectangular widow presented the most unique challenge as the insulation blanket flares out to meet the framework on the kit tail. Nothing too bad. I used four pieces and cut them tapered then bent to fit. I was really happy. Now it was just a matter of doing the entire side. Here is the right side as I still have to do the left one. You get the idea though. Any stuff that was longer on the bottom I trimmed with a brand new blade. It is now time to do the left side the same way. Once I’m done with the left side, I will add .010 plastic ‘dots’ that are used to attach the blankets. I’ll also add some removable panels of insulation. Those are just scabbed on the existing blankets. The Live Resin pieces should be here by the time I finish the insulation and then things will be progressing quickly. I’ll have to prime and paint the interior shortly after working with the Live Resin gun mounts. Don’t forget to mask the windows first, that could be disastrous. We’ll start dealing with more of the MH-47 conversion soon. Things like the weather radar boom and the in-flight refueling boom will cause me some more sleepless nights. Stay tuned. Quote Link to post Share on other sites
norbert Posted February 9, 2014 Share Posted February 9, 2014 wow, that will be expensive... Chief, 3 crates of Martini please... :D more seriously, good work inside Norbert Quote Link to post Share on other sites
Floyd S. Werner, Jr. Posted February 9, 2014 Author Share Posted February 9, 2014 (edited) For some reason I didn't see the interior shot that Intruder Bass posted. He is obviously a much better scratchbuilder than me. LOL I wish I had seen it to make mine like his or at least something close to it. His work is impeccible and flawless. My work looks toylike in comparison. LOL My hat is off to the master. Floyd Edited February 9, 2014 by Floyd S. Werner, Jr. Quote Link to post Share on other sites
doupnik Posted February 10, 2014 Share Posted February 10, 2014 (edited) Nice recovery Floyd! Looks real nice, I have been collecting various foils forever. Maybe I need to start my MH-47 so that I can use them. mason Edited February 10, 2014 by doupnik Quote Link to post Share on other sites
MH-47E/G_Graduate Posted February 11, 2014 Share Posted February 11, 2014 For some reason I didn't see the interior shot that Intruder Bass posted. He is obviously a much better scratchbuilder than me. LOL I wish I had seen it to make mine like his or at least something close to it. His work is impeccible and flawless. My work looks toylike in comparison. LOL My hat is off to the master. Floyd Well, mine will look childish compared to yours and not even close to being in the same league as Andy's. And, since I don't drink, I'll have to get one of you lushes to send me some bottle foil. Or I could buy the bottles and send them on to you guys without the foil on them. Quote Link to post Share on other sites
Floyd S. Werner, Jr. Posted February 12, 2014 Author Share Posted February 12, 2014 Well, mine will look childish compared to yours and not even close to being in the same league as Andy's. And, since I don't drink, I'll have to get one of you lushes to send me some bottle foil. Or I could buy the bottles and send them on to you guys without the foil on them. I'll gladly drink them for you. LOL Floyd Quote Link to post Share on other sites
Intruder_bass Posted February 12, 2014 Share Posted February 12, 2014 Here is another trick you can use to make the soundproofing yourself. Aluminium foil from K&S (or any other supplier) was used as a base. Metal ruler and pin vise with needle is all you need! Cheers! Andy Quote Link to post Share on other sites
rotorwash Posted February 12, 2014 Share Posted February 12, 2014 Here is another trick you can use to make the soundproofing yourself. Aluminium foil from K&S (or any other supplier) was used as a base. Metal ruler and pin vise with needle is all you need! Cheers! Andy Andy, I only wish I could manage 1/10 of your level of patience! Ray Quote Link to post Share on other sites
Floyd S. Werner, Jr. Posted February 12, 2014 Author Share Posted February 12, 2014 Andy, I only wish I could manage 1/10 of your level of patience! Ray Exactly. Patience is a virtue that I need to work on. My way of doing it is much more 'relaxing'. LOL Floyd Quote Link to post Share on other sites
salvador001 Posted February 13, 2014 Share Posted February 13, 2014 Oh wow, thats some beautiful scratchbuilt, you surely know how to use styrene. Rod. Quote Link to post Share on other sites

Recommended Posts
Join the conversation
You can post now and register later. If you have an account, sign in now to post with your account.