

f5guy
-
Content Count
1,993 -
Joined
-
Last visited
2 Followers

About f5guy
-
Rank
Full Blown Model Geek

Recent Profile Visitors
14,104 profile views


.thumb.jpg.2ee415cfc0e513722117dbaa7f808542.jpg)


-
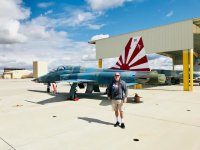
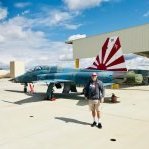
Looks great! I did this jet in 72nd scale using the Academy kit, and some Wolfpack resin wings with the drooped flaps. Unfortunately, I really goofed the wings up, so I'll probably redo it at some point. It should look awesome in 32nd scale if you can find the kit. Just FYI, if you can't find the Academy D version in 32nd scale, the Kinetic kit in the pic attached is the Academy kit with all of the parts necessary to build an A/B/C or D. During my build of the green Hornet I dropped the canopy and put a nice big crack in it. I contacted Academy for a replacement, but after a year a
-
I had two sets of the Aires exhaust cans and neither fit. To be sure that it wasn't just me, I tried them on a second kit, and had the same issue. I'm glad that they worked for you. Your Hornet looks great! Love the tiger scheme 👍 Fred.
-
Hi! I did mine as an F-18B some ten years ago. I used the rubber tires and SAC metal gear, and have had no problems with either. I also used resin intakes as others have suggested, and exhausts as well. However, I would definitely NOT recommend that you get the AIRES exhaust set. Its too small, and you will have a step between the end of the aircraft and the exhaust. Ask me how I know! I ended up using the kit exhaust with the AIRES interior exhaust tube and that worked fine. I'm currently working on an NSAWC A model now, and have bought the Reskit exhausts, which are much better and
-
Also, how about some wheels, and maybe even landing gear legs and/or engines for the Mach 2 1/72nd DC-8. The kit parts are awful. Fred K.
-
I second this one 👍 Fred K.
-
 Nice! I've been waiting for these 👍 Thanks! Fred K.
 -
A very nice selection of subjects! I'm in 👍 Fred K.
-
Hi Tracy, I currently have Titan's 757-200 under construction now, though I'm not doing any work on it at the moment. I've thought about getting the 777 as well. I too will likely pass on the A380, although the thought of building one is intriguing. I will definitely be picking up the C-5 when it becomes available! Where I'd put it is anyone's guess 🤣 Fred.
-
I'm tempted just for the sheer size of it, but will probably just wait for their forthcoming C-5 instead. Fred.
-
It would be a handful for sure 🤣 Fred.
-
https://www.titanmodelkits.com/store/p4/1%3A72_A380.html It should be rather large 😂 Fred K.
-
Wanted: 1/72 AGM-123 Skipper
f5guy replied to f5guy's topic in The Spares Box - add scale to your title
No worries..... the A-6s are still under construction. Thanks Dutch! Fred. -
Wanted: 1/72 AGM-123 Skipper
f5guy replied to f5guy's topic in The Spares Box - add scale to your title
Indeed he has Glynn, but thanks for checking in 😉 Fred. -
Hi guys, the title says it all. It's the Cylons/VFA-127 jet in the brown and tan desert scheme that I'm after. I'm in the US. Thanks, Fred.
-
Hi Kursad, Did you say that this sheet was going to be available seprately? Thanks, Fred.