

caudleryan
-
Content Count
2,068 -
Joined
-
Last visited
1 Follower

About caudleryan
-
Rank
not so opinionated member

- Birthday 03/08/1988
Recent Profile Visitors
20,750 profile views


-
Most gloss coats will affect the shine of NMF. But, I have had decent results using Tamiya x-22 spraying light coats without affecting the natural metal look too much.
-
Amodel 1:144 scale Antonov An-71 "Madcap"
caudleryan replied to marcopreto's topic in Critique Corner
I could have easily mistaken this for 1/72 scale! Very nice! -
Looks to be the start of another outstanding project! Can't wait to see more!
-
I believe Flying Leathernecks is/will be doing a sheet with the bat markings.
-
Jeez, Shawn! You could open up your own miniature museum with all of the outstanding builds of yours!
-
Civilian F-16 what if idea. Need your input/suggestions
caudleryan replied to caudleryan's topic in Jet Modeling
So, got the kit today. I'm going with the Kinetic block 25/42 kit as it was the only one Spruebrothers had in stock. I'm hoping to get started on it this weekend. I'm going to go mostly box stock, but with the addition of the quinta cockpit set. -
Civilian F-16 what if idea. Need your input/suggestions
caudleryan replied to caudleryan's topic in Jet Modeling
I was kinda going along the lines of people having more money than brains type of thinking. A fun boys toy for the super rich. -
Civilian F-16 what if idea. Need your input/suggestions
caudleryan replied to caudleryan's topic in Jet Modeling
That is so wrong on so many levels! I love it! -
Civilian F-16 what if idea. Need your input/suggestions
caudleryan replied to caudleryan's topic in Jet Modeling
-
Civilian F-16 what if idea. Need your input/suggestions
caudleryan replied to caudleryan's topic in Jet Modeling
Just thought about something. I might need to keep the wing tip rails as I believe without them, the wings would have vibration issues due to flutter. I would have to scratch build some mass balancers or something like that in place of missles. -
Civilian F-16 what if idea. Need your input/suggestions
caudleryan replied to caudleryan's topic in Jet Modeling
Ahh, the family model! -
So, a rather unusual idea just popped into my head. Sitting at my modelling desk working on the Kinetic F-16(great kit, by the way!), I got to wondering what a civilian built F-16 would look like. Like, what if Lockheed Martin did to the F-16 as they did with the C-130 and made a completely new airframe for civilians with a lot of money, not demiliterized or bought second hand from some foreign country, but completely new without the weapons specific hardware. So, no chaff or flare dispensers, no RWR's, no hardpoints that can carry weapons. Although, I am considering leaving the centerline har
-
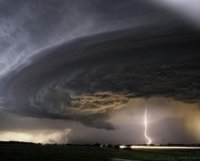
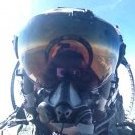
Some recent pics from the airshow at Maxwell AFB.
-
Regarding your first issue, it may be that the needle isn't properly seated in the nozzle or you may have a cracked nozzle.
-
Quite well done! And a striking livery to go with it!