haneto Posted May 1, 2018 Author Share Posted May 1, 2018 It cost me a whole day to add details/piping the landing gears yesterday, from 9:00 AM to 23:00 PM. It remineded me of my age...did not have such suffered experience when I made the 1/72 Su-27 about 10 years ago. The Flankre gear detailing is always a pain: too much complicated piping work! Although Su-35 piping is simplified compared with Su-27 or Su-30, thanks to the technology improvement I guess, it's still time consuming... Well another reason is too many references now. Very "negative" for serious modellers mental health I have to admit (just joking)! I used 2 diameter brass lines for piping, 0.1mm 0.2mm and 0.3mm All are very easy to bend and no nasty resilience. Quote Link to post Share on other sites
haneto Posted May 1, 2018 Author Share Posted May 1, 2018 And these are the final result. Quote Link to post Share on other sites
haneto Posted May 1, 2018 Author Share Posted May 1, 2018 Now that all the hard/boring (in my personal opinion) work is finished, finally I can start my beloved painting job! To be continued... Quote Link to post Share on other sites
Aigore Posted May 1, 2018 Share Posted May 1, 2018 Wow, impressive pipeing and tubeing! Really nice reference pictures too, so going to use them even if my work would never match yours. Quote Link to post Share on other sites
The Madhatter Posted May 1, 2018 Share Posted May 1, 2018 agreed - that is some nice wiring you've achieved there. It'll look awesome with paint on it Quote Link to post Share on other sites
keen Posted May 1, 2018 Share Posted May 1, 2018 Fantastic!美妙绝伦啊! Quote Link to post Share on other sites
CaptainObvious Posted May 1, 2018 Share Posted May 1, 2018 Great job Yufei! Incredible detail. Looks exactly like the reference pictures. Quote Link to post Share on other sites
haneto Posted May 1, 2018 Author Share Posted May 1, 2018 Thanks mates! I forgot several pics here. I replaced the plastic dischargers with Master metal ones. Those are definitely recommended! Actually the plastic dischargers on T1 sprues were only half diameter compared with current ones(mass production ver), but unfortunately they were too fragile to deal with so tool factory had to make them fatter. I also recommend you to deepen the rivets on radome part sides by 0.3mm drill. You can only find very shallow trace of the rivets there but you can use them as guide. The reason why those rivets are so shallow is due to injection mold technical limitation (the direction of pulling part out of mold). To be continued... Quote Link to post Share on other sites
The Dude Posted May 1, 2018 Share Posted May 1, 2018 (edited) Looks great so far! I like the magnet idea I might have to borrow that... My first one i almost done, all I have left is the seat, canopy, weapons and landing gear doors and its finished. A little over 6 weeks build time. I really like this kit and I credit it for getting me back into build mode after a long burn out spell. I now have four of these kits total. Thanks GWH! Edited May 1, 2018 by The Dude Quote Link to post Share on other sites
haneto Posted May 1, 2018 Author Share Posted May 1, 2018 6 minutes ago, The Dude said: Looks great so far! I like the magnet idea I might have to borrow that... My first one i almost done, all I have left is the seat, canopy, weapons and landing gear doors and its finished. A little over 6 weeks build time. I really like this kit and I credit it for getting me back into build mode after a long burn out spell. I now have four of these kits total. Thanks GWH! Thanks Dude! Look forward to your finished work! Must be so brilliant I'm sure! Yufei Quote Link to post Share on other sites
kurnass77 Posted May 1, 2018 Share Posted May 1, 2018 Brilliant work Yufei,but you missed a pipeline...just joke! Indeed,very impressive work! Gianni Quote Link to post Share on other sites
haneto Posted May 6, 2018 Author Share Posted May 6, 2018 Thanks for checking and from this weekend finally I can start painting this beast. I will paint most of the parts BEFORE assembling, and that's the purpose we made the parts arrangement. Most of parts have at least one gate which will be invisible after gluing, so you can keep that gate/sprue on the part for easier removing parting lines, painting and weathering. And that's why I tried to solve all the assembling issues before painting, for smoother assembling experience going forward. So as always I sprayed Gunze Creos #1500 surfacer on all parts, to check if the parting line has been removed thoroughly. And just as I said above, you can see I leave some sprue/one gate on some small parts especially those fragile pipes for easy handling and also sort of protection. To be continued... Quote Link to post Share on other sites
Berkut Posted May 6, 2018 Share Posted May 6, 2018 Been too long since a Haneto thread - and as usual this is just a pleasure to watch and follow. Awesome work as usual. 👍 I do hope you havent completely abandoned OneTrueScale™ and we will see a 1/72 project at some point in the future. 😃 And in danger of being terribly picky, export Su-35S' are actually called simply Su-35. Su-35SK would be the most logical name, but apparently it is simply Su-35. Quote Link to post Share on other sites
Mstor Posted May 6, 2018 Share Posted May 6, 2018 Really great to hear about the one sprue gate that can be left till after painting. That is an idea I wish more kit makers would adopt. Your wiring on the landing gear is really well done. One thing I never could do well and, as I get older, the old eye/hand coordination has decided to go on permanent vacation. But, always great to see it done really well. Quote Link to post Share on other sites
Froggy Posted May 6, 2018 Share Posted May 6, 2018 On 5/1/2018 at 6:24 AM, haneto said: This time I also tried mini magnet to enjoy more weapon configuration in the future. The Su-35S is a multi role fighter so most adaptors have same install structure to fit any missile pylons. Another reason is that I'd lik to enjoy the well researchd and fine details on belly, especially on central pylon mounting points. In order to assur enough holding strength, I added 4 magnetc per pylon. There is no need to add magnets on weapons since almost every Russian missile has its own pylon so you cannot exchange different missiles on different pylons. And you can make your weapon configuration freely at any time going forward! Wow impressive work, thanks for all your tips ! It may have already been mentioned in the forum but where can we get such small magnets? Best regards nicolas Quote Link to post Share on other sites
a4s4eva Posted May 7, 2018 Share Posted May 7, 2018 Fantastic work on that landing gear. I think you've nailed the piping there. And great idea on using the magnets, very innovative Quote Link to post Share on other sites
kike Posted May 8, 2018 Share Posted May 8, 2018 All you work is ridiculous! damn! it's a real joy to see your progresses at the same time that one feels so inapropriate! great thread! thanks Quote Link to post Share on other sites
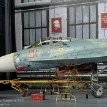
Deino Posted May 15, 2018 Share Posted May 15, 2018 New images ... Quote Link to post Share on other sites
Flankerman Posted May 15, 2018 Share Posted May 15, 2018 Interesting that the PLAAF Su-35 has the 'standard' Russian-style wingtip missile rails - not the 'drooped' rails needed to carry the Chinese PL-12 missile. I wonder if they will be replaced ?? Ken Quote Link to post Share on other sites
Falconxlvi Posted May 17, 2018 Share Posted May 17, 2018 On 5/15/2018 at 2:23 AM, Flankerman said: Interesting that the PLAAF Su-35 has the 'standard' Russian-style wingtip missile rails - not the 'drooped' rails needed to carry the Chinese PL-12 missile. I wonder if they will be replaced ?? Ken I didn’t know the PL-12 could be mounted on the wingtips- do you have any pictures of that? Steve Quote Link to post Share on other sites
Deino Posted May 17, 2018 Share Posted May 17, 2018 On 5/15/2018 at 10:23 AM, Flankerman said: Interesting that the PLAAF Su-35 has the 'standard' Russian-style wingtip missile rails - not the 'drooped' rails needed to carry the Chinese PL-12 missile. I wonder if they will be replaced ?? Ken As far as I know they are only armed with Russian AAMs.... 4 hours ago, Falconxlvi said: I didn’t know the PL-12 could be mounted on the wingtips- do you have any pictures of that? Steve Yes, the PL-12 is not able to be carried on the wt-stations on any J-11 (AFAIK). Quote Link to post Share on other sites
Flankerman Posted May 18, 2018 Share Posted May 18, 2018 Sorry guys - I meant the PL-8 missile. Senior moment....... Ken Quote Link to post Share on other sites
Falconxlvi Posted May 19, 2018 Share Posted May 19, 2018 On 5/17/2018 at 3:56 PM, Deino said: As far as I know they are only armed with Russian AAMs.... Yes, the PL-12 is not able to be carried on the wt-stations on any J-11 (AFAIK). Copy, thanks. No worries Ken! Quote Link to post Share on other sites
haneto Posted May 21, 2018 Author Share Posted May 21, 2018 On 5/6/2018 at 6:27 PM, Berkut said: Been too long since a Haneto thread - and as usual this is just a pleasure to watch and follow. Awesome work as usual. 👍 I do hope you havent completely abandoned OneTrueScale™ and we will see a 1/72 project at some point in the future. 😃 And in danger of being terribly picky, export Su-35S' are actually called simply Su-35. Su-35SK would be the most logical name, but apparently it is simply Su-35. Thanks Berkut, yes the 1/72 scale version is under desgin stage. Shall hit the market say within this year? On 5/7/2018 at 2:00 AM, Froggy said: Wow impressive work, thanks for all your tips ! It may have already been mentioned in the forum but where can we get such small magnets? Best regards nicolas Nicolas I bought these tiny magnets in China and they are really cheap (3 bucks for 50 pieces). Maybe you can buy some if you have a chance to visit China... On 5/15/2018 at 12:28 PM, Deino said: New images ... Thanks Deino. Yes I saw those images taken by Russian friends online. There is rumour that this A/C flied back to Russia for repair. Interesting Russian dark blue camo on the vertical fins, maybe the factory guy just used up the Chinese blue so grad the Russian one? ;) Thanks all for your encouragement! Yufei Quote Link to post Share on other sites
haneto Posted May 21, 2018 Author Share Posted May 21, 2018 After my visit to Shizuoka last weekend, I finally finished painting the first part, cockpit and rador. Since many colors on details were not added in the instruction sheet which was finished in just about 3 days, I added the color by studying real life pictures for your references. The color I used are all Gunze GSI Creos Mr Color lacquer paints. Quote Link to post Share on other sites

Recommended Posts
Join the conversation
You can post now and register later. If you have an account, sign in now to post with your account.